Are you ready to take your fall treats to the next level? These Pumpkin Pie Cake Pops blend the classic flavors of pumpkin pie with a fun, portable twist. Perfect for parties or cozy nights in, I’ll guide you through easy steps to make these tasty and festive bites. With simple ingredients and fun decorating tips, these cake pops will impress everyone! Let’s dive into this delicious recipe!
Ingredients
Essential Ingredients
To make these delightful pumpkin pie cake pops, gather these essential ingredients:
– 1 box yellow cake mix
– 1 cup canned pumpkin puree
– 3 large eggs
– 1/2 cup vegetable oil
These ingredients create a moist and flavorful base for your cake pops. The yellow cake mix pairs perfectly with pumpkin, giving it that classic fall taste.
Spices for Flavor
Next, let’s add some warm spices to bring out the pumpkin flavor. You will need:
– 1 teaspoon ground cinnamon
– 1/2 teaspoon ground nutmeg
– 1/2 teaspoon ground ginger
– 1/4 teaspoon ground allspice
These spices provide that cozy feeling. They make your cake pops taste like a slice of pumpkin pie.
Filling and Coating
Now, for the filling and coating, you will need:
– 1/2 cup cream cheese, softened
– 1 cup powdered sugar
– 1-2 tablespoons milk (adjust for desired consistency)
– 1 cup white chocolate chips
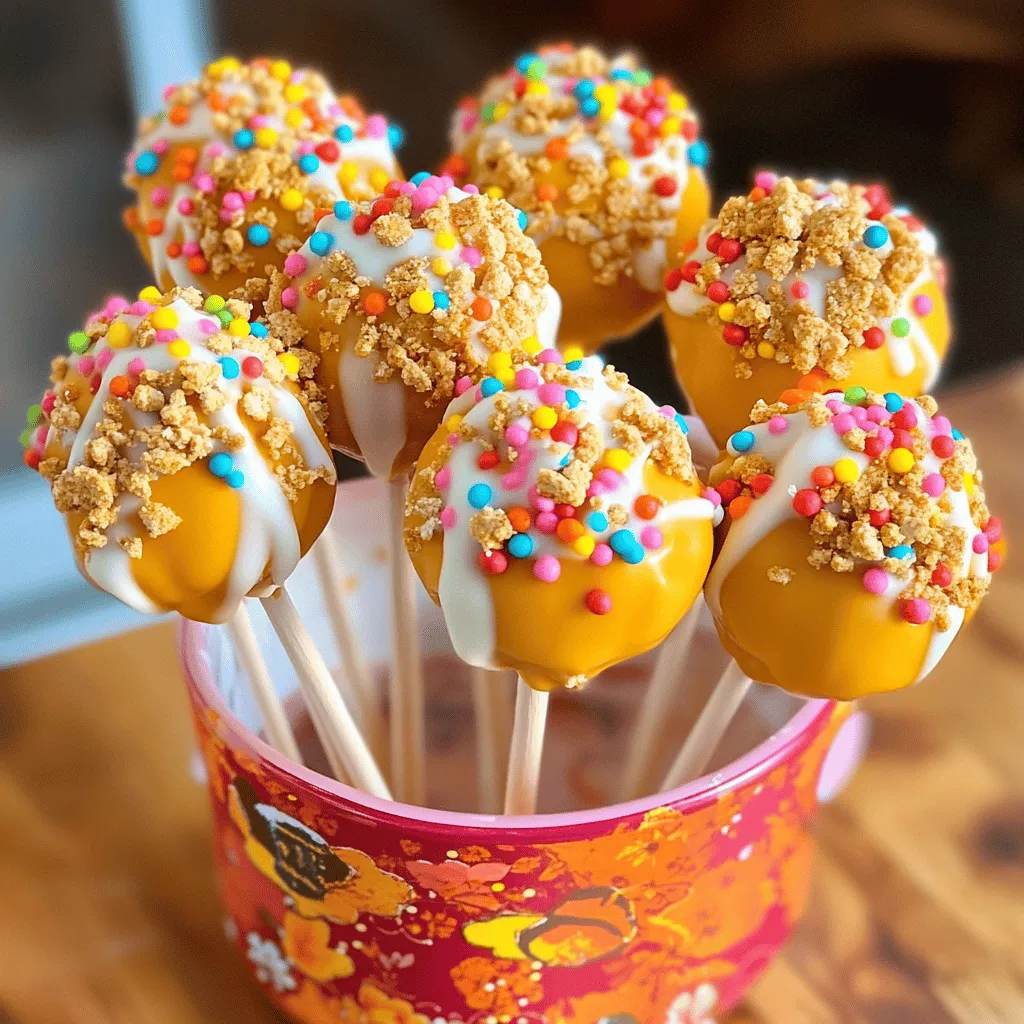
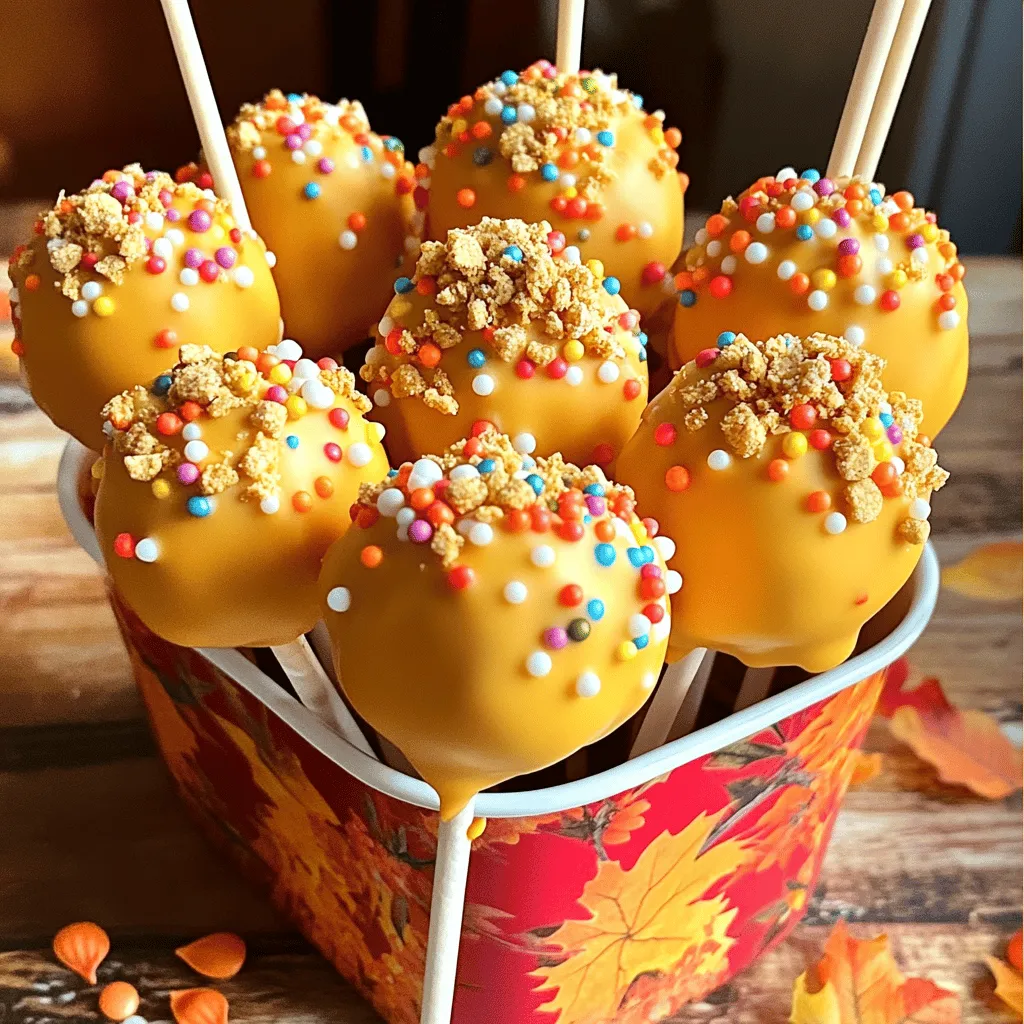
– Assorted sprinkles or crushed graham crackers
– Lollipop sticks
The cream cheese filling adds a rich taste. The white chocolate coating makes these pops sweet and fun. Use your favorite sprinkles or graham crackers for a festive touch. For the full recipe, check out the details to make these tasty treats!
Step-by-Step Instructions
Preparing the Cake
– Preheat oven to 350°F (175°C).
– Grease or line a 9×13 inch baking pan.
Mixing the Cake Batter
– Combine cake mix, pumpkin puree, eggs, oil, and spices.
– Mix until smooth and well blended.
Baking and Cooling
– Pour batter into prepared pan.
– Bake for 25-30 minutes.
– Check with a toothpick; it should come out clean.
– Cool the cake completely in the pan.
Making pumpkin pie cake pops starts with a simple cake. You want to ensure that your oven is preheated to 350°F first. This step is key to getting that perfect bake. Greasing or lining your pan helps the cake pop out easily later.
Next, blending the ingredients is important. You combine the yellow cake mix with the pumpkin puree, eggs, oil, and spices. I always mix until everything is smooth. If the batter is lumpy, it won’t bake well.
After mixing, pour the batter into your prepared pan. Bake for 25-30 minutes. I like to set a timer and check at 25 minutes. When a toothpick comes out clean, the cake is ready. Let it cool completely before moving on. This cooling time is crucial for the next steps.
You can find the full recipe at the end for all the details!
Tips & Tricks
Achieving the Perfect Texture
To get the best texture in your cake pops, use room temperature ingredients. This helps them mix better and creates a smooth batter. Make sure the cake is fully cooled before you crumble it. If the cake is warm, it can make the mixture too wet. This can lead to messy pops that do not hold their shape.
Melting White Chocolate
Melting white chocolate can be tricky. To avoid lumps, heat it slowly. You can use the microwave or a double boiler. If you choose the microwave, heat it in 30-second bursts. Stir after each burst. This prevents overheating. If you use a double boiler, keep the water simmering, but not boiling. Stir the chocolate until it is smooth and shiny.
Decorating Ideas
Make your cake pops look festive with fun toppings. You can use colorful sprinkles, crushed graham crackers, or even chopped nuts. For a more seasonal touch, try using small candy pumpkins or fall-themed sprinkles. Presentation can make a big difference. Display your cake pops in a cute fall container or a mini pumpkin. This adds charm to any event or gathering.
Variations
Flavor Variations
You can change the flavor of your cake pops easily. Instead of yellow cake mix, try chocolate or spice cake. Each option offers a unique taste. You can also add extracts for more flavor. A dash of vanilla or almond gives a nice twist.
Dietary Adaptations
If you need gluten-free treats, look for gluten-free cake mixes. Many brands offer options that taste great. For dairy-free cake pops, swap cream cheese with a dairy-free alternative. Coconut cream or cashew cream works well. These changes keep the cake pops delicious for everyone.
Seasonal Themes
You can adapt these cake pops for any holiday. For Christmas, use red and green sprinkles. For Halloween, add orange and black toppings. Each season brings a chance to get creative with colors and flavors. Have fun with your decorations to match the theme!
Storage Info
Best Practices for Storage
To keep your Pumpkin Pie Cake Pops fresh, store them in an airtight container. This helps prevent them from drying out. Place parchment paper between layers of cake pops if you stack them. This avoids sticking and makes for easy access. A simple plastic or glass container works well for storage.
Freezing Instructions
You can freeze cake pops for later use. First, let them cool completely after decorating. Then, arrange them on a baking sheet lined with parchment paper. Freeze them for about two hours until solid. Once frozen, transfer the cake pops to a zip-top freezer bag. Be sure to remove as much air as possible. To thaw, place them in the fridge overnight. This keeps their texture from getting soggy.
Shelf Life
In the fridge, cake pops last about one week. If stored in the freezer, they can last for up to three months. The texture stays better when you freeze them. Always check for any signs of freezer burn before using. Enjoy these tasty treats at your next gathering!
FAQs
Can I make these pumpkin pie cake pops ahead of time?
Yes, you can make pumpkin pie cake pops ahead of time! I suggest making them up to three days in advance. Store them in an airtight container in the fridge. This keeps them fresh and tasty. You can also freeze them for longer storage. Just wrap each one in plastic wrap, then place them in a freezer bag. You can freeze them for up to two months. When ready to eat, let them thaw in the fridge overnight.
How do I know when my cake pops are ready to dip?
Your cake pops are ready when they are firm to the touch. After chilling for 30 minutes, they should hold their shape well. If they feel too soft or mushy, give them more time in the fridge. When they are cool, the texture will help the coating stick better. This ensures a smooth dip without any melting.
What can I use instead of white chocolate for coating?
If you don’t want to use white chocolate, try candy melts or dark chocolate. Candy melts come in many colors and flavors. They give your cake pops a fun look. Dark chocolate adds a rich, bold flavor that pairs well with pumpkin. Just melt them the same way as white chocolate. You can even use milk chocolate for a sweeter taste.
How do I prevent the cake pops from falling off the sticks?
To keep your cake pops from falling off the sticks, dip the stick in melted chocolate first. This helps the stick stick to the cake ball. Once you insert the stick, let it set for a minute before dipping the whole pop. Make sure your cake balls are firm and chilled. This gives them the support they need during coating and serving.
This post covered how to make delicious pumpkin pie cake pops. With easy steps, you learned about essential ingredients, mixing, and baking. We also shared tips for perfect texture and unique decorations. You can create fun variations too, catering to different diets and seasons.
These cake pops are a tasty treat for any gathering. Whether you follow our steps or add your spin, enjoy every bite!
