TOSSED FLAVORS
Where flavors are fresh, vibrant, and ready to toss! 🥗
BEST CATEGORIES
TRENDING
![To make garlic honey butter green beans, gather these fresh ingredients: - 1 lb (450g) fresh green beans, trimmed - 3 tablespoons unsalted butter - 3 cloves garlic, finely minced - 2 tablespoons honey - 1 tablespoon soy sauce - Salt and freshly ground black pepper to taste - 1/4 teaspoon red pepper flakes (optional for a spicy kick) - Chopped fresh parsley for a vibrant garnish Fresh ingredients make a big difference in flavor. Fresh green beans are crunchy and bright. When you pick them, look for beans that snap easily. They should be a deep green color and free from blemishes. Fresh garlic adds a strong aroma and rich taste. Always choose local and seasonal produce when possible. This ensures you will get the best flavors and nutrients. If you need to substitute honey, maple syrup works well. It gives a sweet touch without losing flavor. For soy sauce, tamari is a great choice. It has a similar taste and is gluten-free. You can also try coconut aminos for a lighter, sweeter option. These swaps keep your dish tasty while fitting your needs. To make garlic honey butter green beans, we start with fresh green beans. First, bring a pot of salted water to a boil. Once boiling, add the green beans and blanch them for about 3-4 minutes. This makes them bright and tender. Next, drain them and plunge them into ice water. This step stops the cooking and keeps the beans crisp. Then, melt butter in a skillet over medium heat. When it bubbles, add minced garlic and sauté for 1-2 minutes. Stir constantly to prevent burning. If it turns brown, it will taste bitter. After the garlic becomes fragrant, add honey and soy sauce. Mix well to create a smooth sauce. Now, toss in the blanched green beans. Coat them well with the garlic honey butter sauce. Season with salt, pepper, and optional red pepper flakes for heat. Cook for another 2-3 minutes to heat through. Finally, garnish with chopped parsley for color before serving. Blanching green beans is simple if you follow these steps: - Always use a large pot for boiling water. - Add salt to the water for flavor. - Monitor the time closely. Overcooking can lead to mushy beans. - Use ice water right after boiling. This keeps the beans crunchy and bright green. - Drain well before cooking them in the skillet. Sautéing garlic is easy with these tips: - Keep the heat at medium. High heat can burn garlic quickly. - Stir constantly while cooking. This helps it cook evenly. - Use fresh, minced garlic for the best flavor. - If you see it start to brown, lower the heat immediately. - Remove it from the pan if you finish cooking before adding other ingredients. For the full recipe, refer to the section above. To boost the taste of garlic honey butter green beans, use fresh ingredients. Fresh beans have a crisp texture and bright flavor. Add a squeeze of lemon juice for a tangy twist. You can also sprinkle some lemon zest on top for extra zing. If you love herbs, try adding thyme or rosemary while cooking. They pair well with garlic and honey. For a unique touch, consider a splash of balsamic vinegar at the end. It adds depth and complexity to the dish. Cooking time is key for the perfect texture. If you like your green beans firm, blanch them for just 3 minutes. For softer beans, increase the time to 4 minutes. Keep an eye on them while cooking. You want them bright green and tender but not mushy. After blanching, quickly shock them in ice water. This will stop the cooking process and help keep their color. When you sauté them later, adjust the cooking time based on your preference. Garlic honey butter green beans are great for meal prep. You can blanch the beans a day before serving. Store them in the fridge in an airtight container. When you're ready to cook, simply sauté them in the garlic butter sauce. This method saves time and keeps the flavors fresh. You can also make the sauce ahead of time. Just reheat it while you cook the beans. This way, you’ll have a quick and tasty side dish ready to enjoy. For the full recipe, check the earlier section. {{image_4}} You can mix in other veggies to enhance your garlic honey butter green beans. Carrots, bell peppers, or snap peas work great. Just chop them into small pieces. Blanch them with the green beans for a few minutes. This adds color and flavor to your dish. You can also try adding mushrooms for an earthy taste. The mix of textures makes every bite exciting. If you like heat, try the spicy version! Start with the red pepper flakes in the recipe. For more spice, add sliced jalapeños or sriracha sauce. Just a little will do! The heat pairs well with the sweetness of honey. It creates a tasty contrast. This spicy twist will impress anyone at your dinner table. You can switch the honey for other sweeteners if you prefer. Maple syrup is a great option. It adds a different flavor but still keeps the sweetness. Agave nectar is another choice. It blends well with the garlic and butter. If you want a sugar-free option, try stevia or monk fruit sweetener. Just adjust the amount to your taste. Each sweetener brings a unique twist to the dish. For the full recipe, check out the details above. To keep your garlic honey butter green beans fresh, store them in an airtight container. Let the beans cool to room temperature before sealing them. This prevents steam from building up inside the container, which can lead to sogginess. Place the container in the fridge where they will stay good for about 3 days. When you’re ready to eat your leftovers, reheating them correctly is key. I suggest using a skillet over medium heat. Add a splash of water to help steam the beans. This method keeps them crisp and bright. Stir them gently for about 5 minutes, until they are heated through. Avoid microwaving them, as this can make them mushy. If you want to store the green beans for a longer time, freezing is a great option. First, blanch the beans as you do in the recipe. After cooling them in ice water, drain and dry them well. Then, spread them out on a baking sheet in a single layer and freeze until solid. Once frozen, transfer the beans to a freezer bag, removing as much air as possible. They can last up to 3 months in the freezer. To use, thaw them in the fridge overnight before reheating. For the full recipe, feel free to check this link: [Full Recipe]. Yes, you can use frozen green beans. They work well in this dish. Just remember, frozen beans are already blanched. You can skip the blanching step. Garlic honey butter green beans pair nicely with many dishes. They go great with grilled chicken or fish. You can also serve them with rice or quinoa. These beans add a tasty and colorful touch to any plate. To adjust for larger servings, simply increase the amount of green beans and other ingredients. For every extra pound of beans, use more butter, garlic, honey, and soy sauce. Keep the same cooking method for the best flavor. You can find the full recipe above for easy reference. This blog post explored making garlic honey butter green beans. We covered ingredient freshness, cooking tips, and variations to try. Always use fresh ingredients for the best taste. Blanch your beans just right for the perfect crunch. You can switch ingredients if needed. Remember, meal prep and storage matter too! Enjoy experimenting with different flavors and techniques. These beans can complement many dishes. Your cooking can shine with these tips! Now go and create a delightful dish that everyone will love.](https://tossedflavors.com/wp-content/uploads/2025/07/f57230b6-ad12-450e-9bf7-d9b276287f25.webp)


![- 1 cup strong brewed coffee, cooled - 4 ounces semi-sweet chocolate, finely chopped - 3 tablespoons granulated sugar - 1 teaspoon pure vanilla extract - 1 ½ cups heavy whipping cream - 3 large egg whites, at room temperature - Pinch of sea salt - Cocoa powder or chocolate shavings, for garnish When I create a velvety coffee mousse, I start with strong brewed coffee. You want it robust, rich, and cooled to let the flavors meld perfectly. Next, I chop semi-sweet chocolate finely. This helps it melt evenly, ensuring a smooth texture. Granulated sugar adds just the right amount of sweetness. Pure vanilla extract brings in a warm, aromatic note. I love using heavy whipping cream for its luscious mouthfeel. It whips up beautifully to create that fluffy base. The egg whites, beaten to stiff peaks, add airiness to the mousse. A pinch of sea salt balances the sweetness and enhances flavor. Finally, I garnish with cocoa powder or chocolate shavings for a beautiful finish. Using fresh ingredients matters. I always recommend high-quality chocolate and fresh eggs. You can find the full recipe in the article to help you create this delightful dessert. Enjoy the process as much as the treat! Start by brewing a cup of strong coffee. Let it cool at room temperature. In a small saucepan, melt the semi-sweet chocolate over low heat. Stir it until it is smooth. Once melted, add the cooled coffee and sugar. Mix well until combined. Set this mixture aside to cool slightly. In a large bowl, whip the heavy cream. Beat it until you see soft peaks. Be careful not to overwhip, or it will get grainy. In another bowl, add the egg whites and a pinch of salt. Beat these until you get soft peaks. Gradually add sugar while you continue beating until stiff peaks form. Now, gently fold the chocolate-coffee mixture into the whipped cream. Use a spatula and move lightly to keep it fluffy. After that, fold in the beaten egg whites in three additions. This step is key to keeping your mousse airy. Spoon the mousse into serving cups, filling them about three-quarters full. Cover each cup and place them in the fridge. Let the mousse set for at least two hours before serving. For the full recipe, make sure to check the details above. Enjoy your rich, creamy dessert delight! To make your coffee mousse smooth, focus on your cream. Whip the cream until it forms soft peaks. Be careful not to overwhip. Overwhipped cream can turn grainy and ruin your dessert. When you fold the mixtures, do it gently. Use a spatula and fold from the bottom up. This way, you keep all the air inside. When serving your mousse, think about toppings. A dollop of whipped cream adds creaminess. You can also use chocolate shavings for extra flavor. A light dusting of cocoa powder elevates the look. These toppings make your dessert even more tempting. This mousse is rich and high in calories. If you want lighter options, consider substitutes. Use low-fat cream or sugar alternatives. These swaps help make the dessert fit different diets. Always check for allergies when making substitutions. Enjoy your Velvety Coffee Mousse with care! For the full recipe, check out the recipe section above. {{image_4}} You can elevate your coffee mousse with some tasty liqueurs. Adding Kahlúa or Baileys gives the dessert a nice kick. Just a splash will make your mousse richer and more exciting. You can also try flavored chocolates. Think about using dark chocolate with hints of orange or mint. This twist adds depth and surprises to each bite. If you prefer a deeper taste, switch to dark chocolate. It brings out the coffee flavor in a bold way. For those who want a vegan mousse, use non-dairy cream. Coconut cream works well and keeps the mousse creamy. You can also use aquafaba, the liquid from chickpeas, in place of egg whites. It whips up light and fluffy, just like eggs. This way, everyone can enjoy this rich treat. For the full recipe, check out [Full Recipe]. Store leftover mousse in an airtight container. This keeps it fresh and safe to eat. Place parchment paper between the mousse and the lid. This prevents condensation and keeps the texture smooth. Try to eat it within three days for the best taste and texture. You can freeze mousse, but it may change a bit. To freeze, scoop the mousse into a freezer-safe container. Leave some space at the top for expansion. Seal it tightly and label it with the date. To defrost, move it to the fridge the night before you want to serve it. This helps keep the best texture. Avoid microwaving, as it can ruin the mousse. Enjoy your creamy treat! For the Full Recipe, check out the detailed instructions above. Velvety Coffee Mousse can last up to 3 days in the fridge. Store it in an airtight container. This keeps it fresh and prevents it from absorbing other odors. Yes, you can make this mousse ahead of time. Prepare it a day before serving. Just remember to cover it well and chill it. This allows the flavors to blend beautifully. Using raw egg whites does carry some risk. They may contain bacteria. To reduce this risk, use pasteurized egg whites. They are safe and still give you great texture. Yes, you can use instant coffee. Just dissolve it in hot water. Aim for a strong flavor to maintain the mousse's richness. This makes it easier if you don’t have brewed coffee on hand. Your mousse is set when it feels firm to the touch. It should hold its shape when spooned out. If it jiggles like jelly, it needs more time in the fridge. In this post, we explored making velvety coffee mousse with simple, delicious ingredients. We detailed each step, from brewing coffee to folding the mixtures. Perfecting the texture is key, and we offered tips for serving and storing. Remember, variations can add fun twists, like flavored liqueurs or chocolate types. This mousse is rich, so enjoy it wisely. Try it out, and share your creations with friends!](https://tossedflavors.com/wp-content/uploads/2025/07/7591a3fe-0797-49f2-b105-04c805c6ecf1.webp)
NEW RECIPES
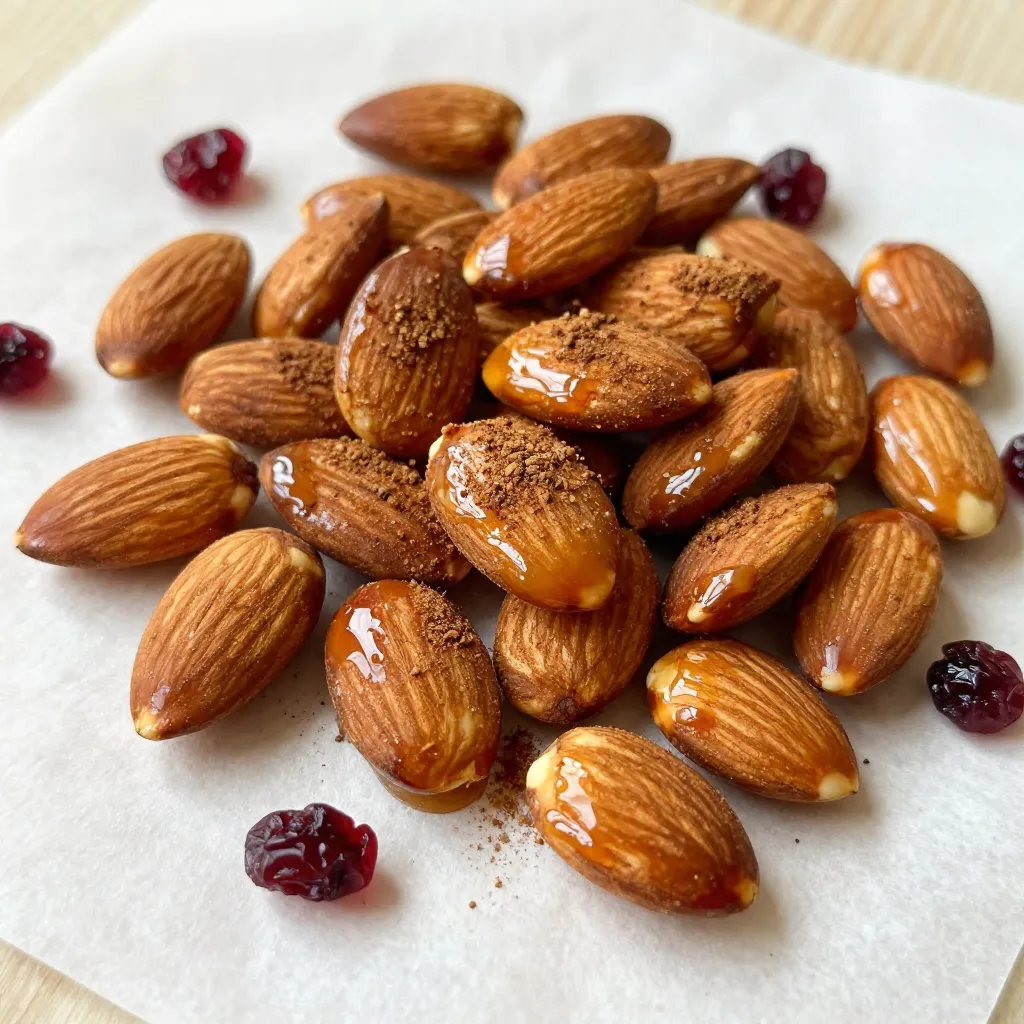
Maple Cinnamon Roasted Almonds Tasty and Healthy Snack
Looking for a tasty and healthy snack? Try making Maple Cinnamon Roasted Almonds! This easy recipe combines creamy almonds with warm maple and cinnamon flavors.

Spinach Artichoke Stuffed Chicken Flavorful Delight
Are you ready to impress at your next dinner? Spinach Artichoke Stuffed Chicken is a tasty dish that combines creamy flavors and a juicy chicken
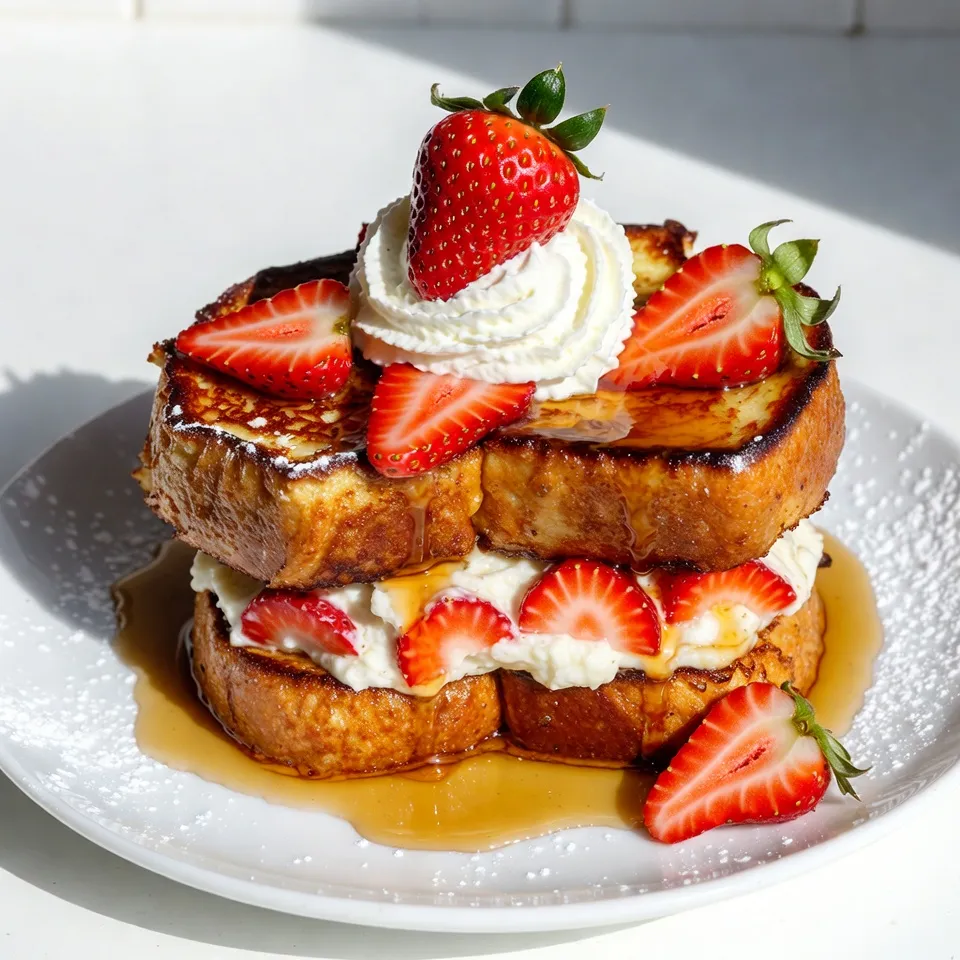
Strawberry Cheesecake Stuffed French Toast Delight
Welcome to a breakfast dream that will delight your taste buds! Today, we’re diving into Strawberry Cheesecake Stuffed French Toast. This sweet twist on a
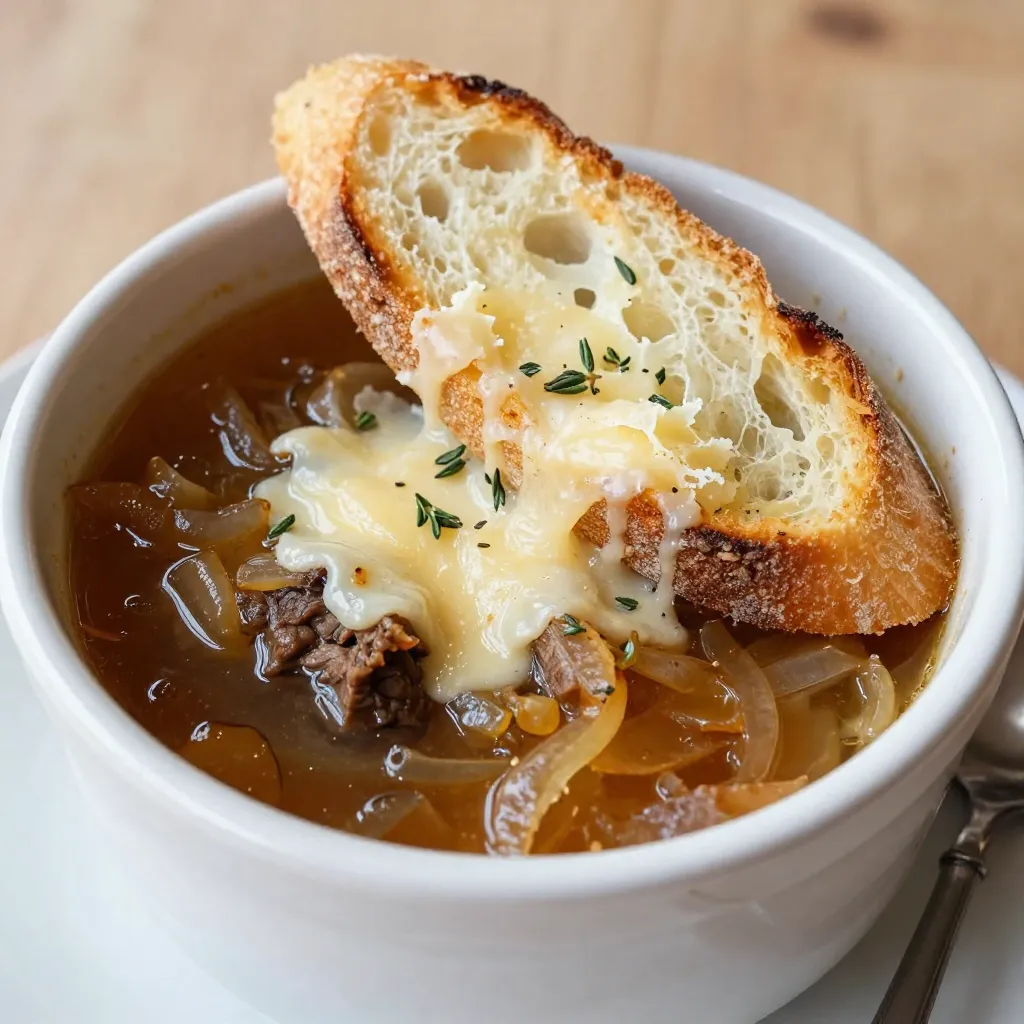
Classic French Onion Soup Irresistible Flavor Delight
Are you ready to savor the delightful taste of Classic French Onion Soup? This rich, warm dish combines sweet caramelized onions with savory broth and
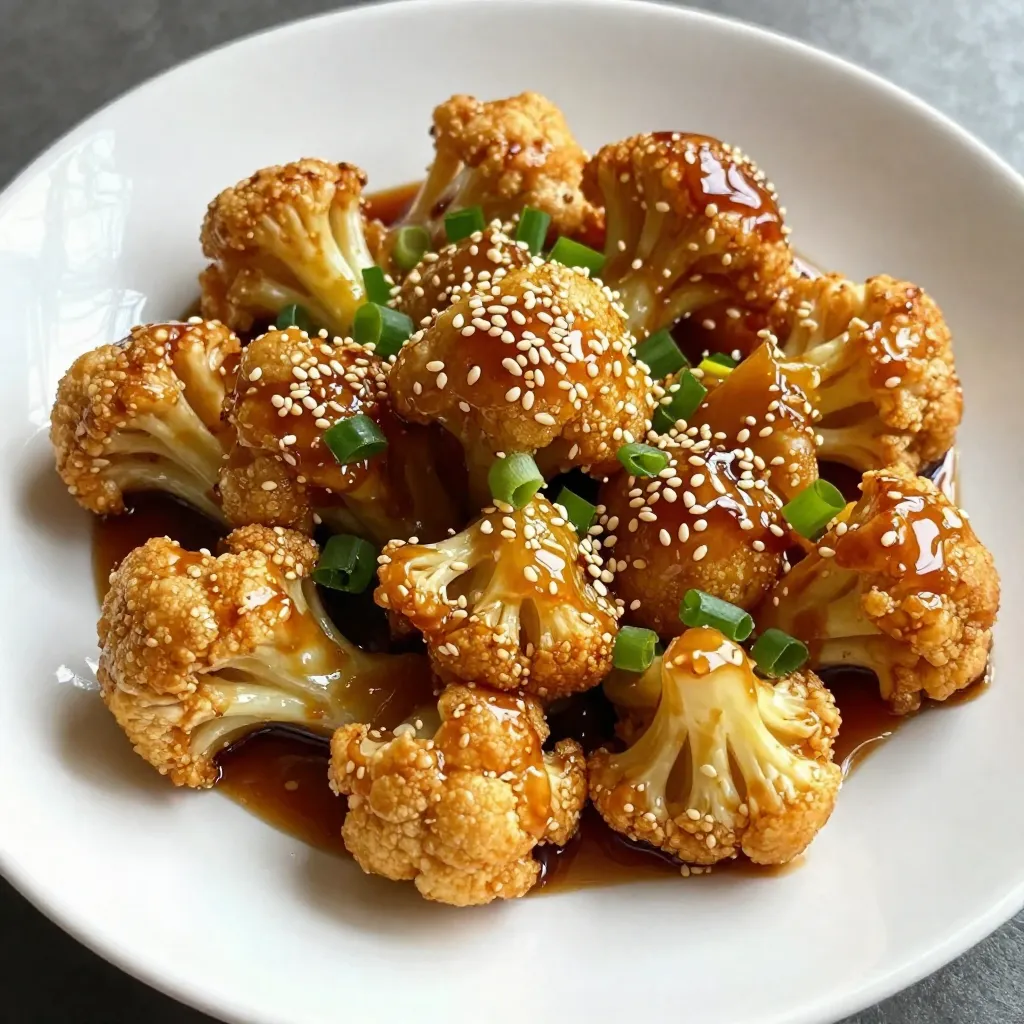
Sticky Sesame Cauliflower Crispy and Flavorful Dish
If you crave a dish that’s both crispy and packed with flavor, you’re in for a treat! My Sticky Sesame Cauliflower is your new go-to

Greek Chicken Gyro Bowls Flavorful Meal Idea
Are you ready to spice up your dinner routine? Greek Chicken Gyro Bowls are a flavorful meal idea that packs a punch! With juicy chicken,
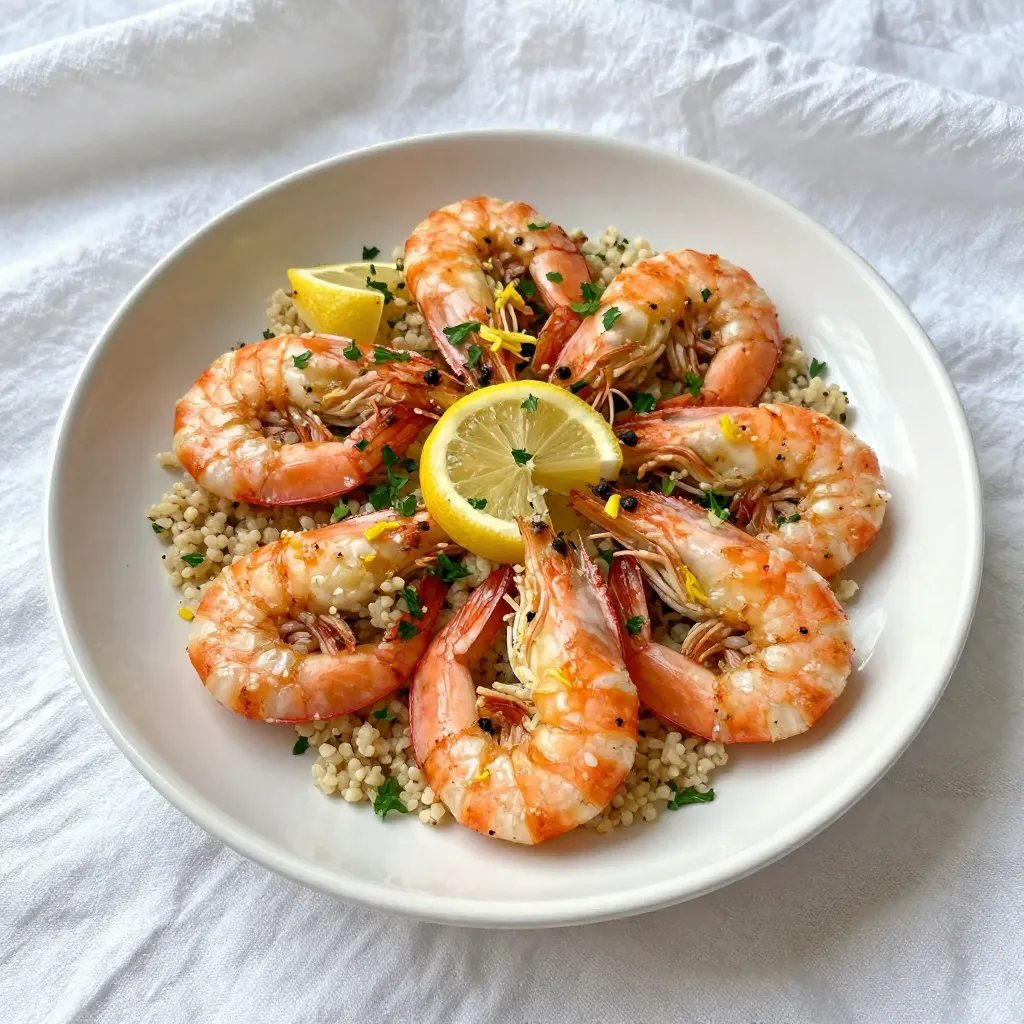
Lemon Garlic Roasted Shrimp Simple and Flavorful Dish
If you’re looking for a quick and tasty meal, Lemon Garlic Roasted Shrimp is the answer. This dish combines fresh shrimp with bright flavors, making

Chocolate Dipped Coconut Macaroons Irresistible Treat
Welcome to the world of Chocolate Dipped Coconut Macaroons—an irresistible treat! If you love sweet, chewy coconut surrounded by rich chocolate, then this recipe is