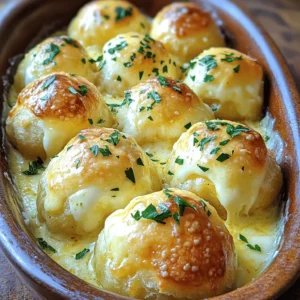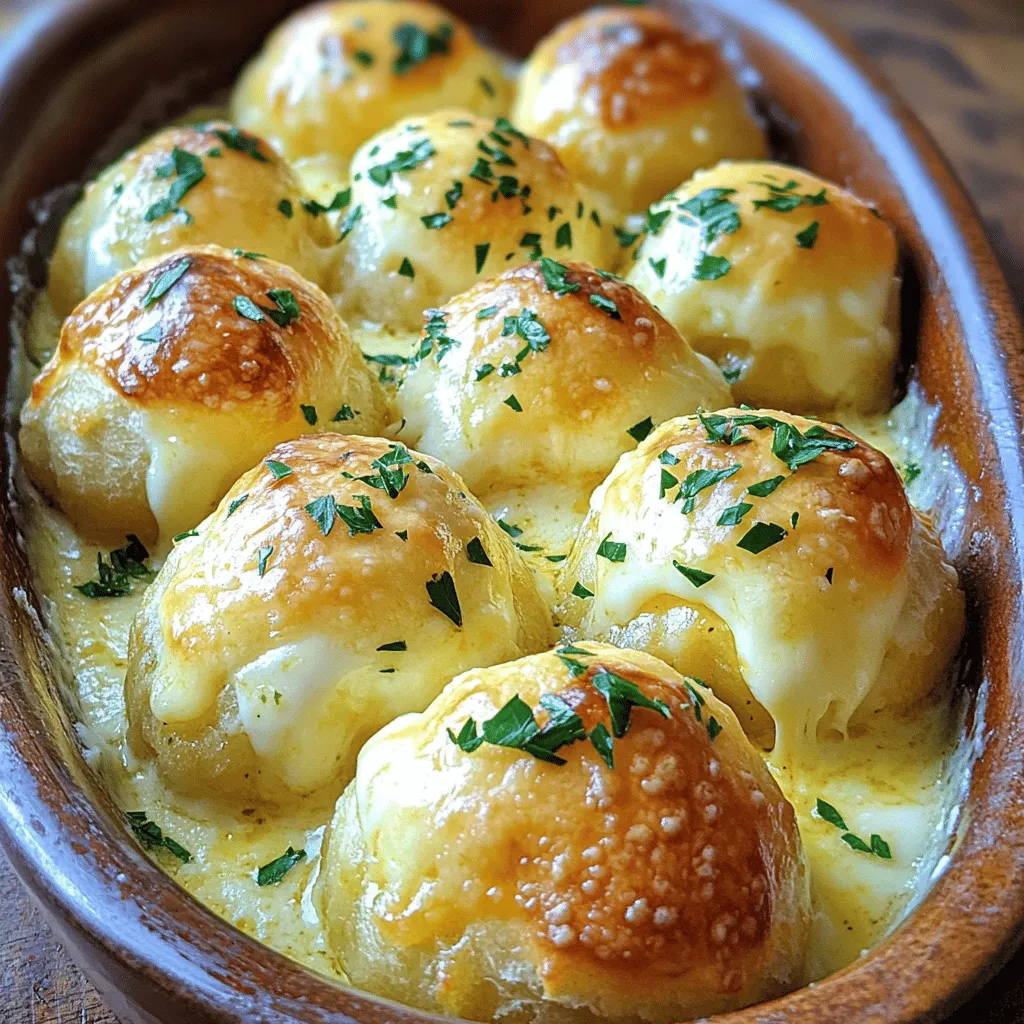
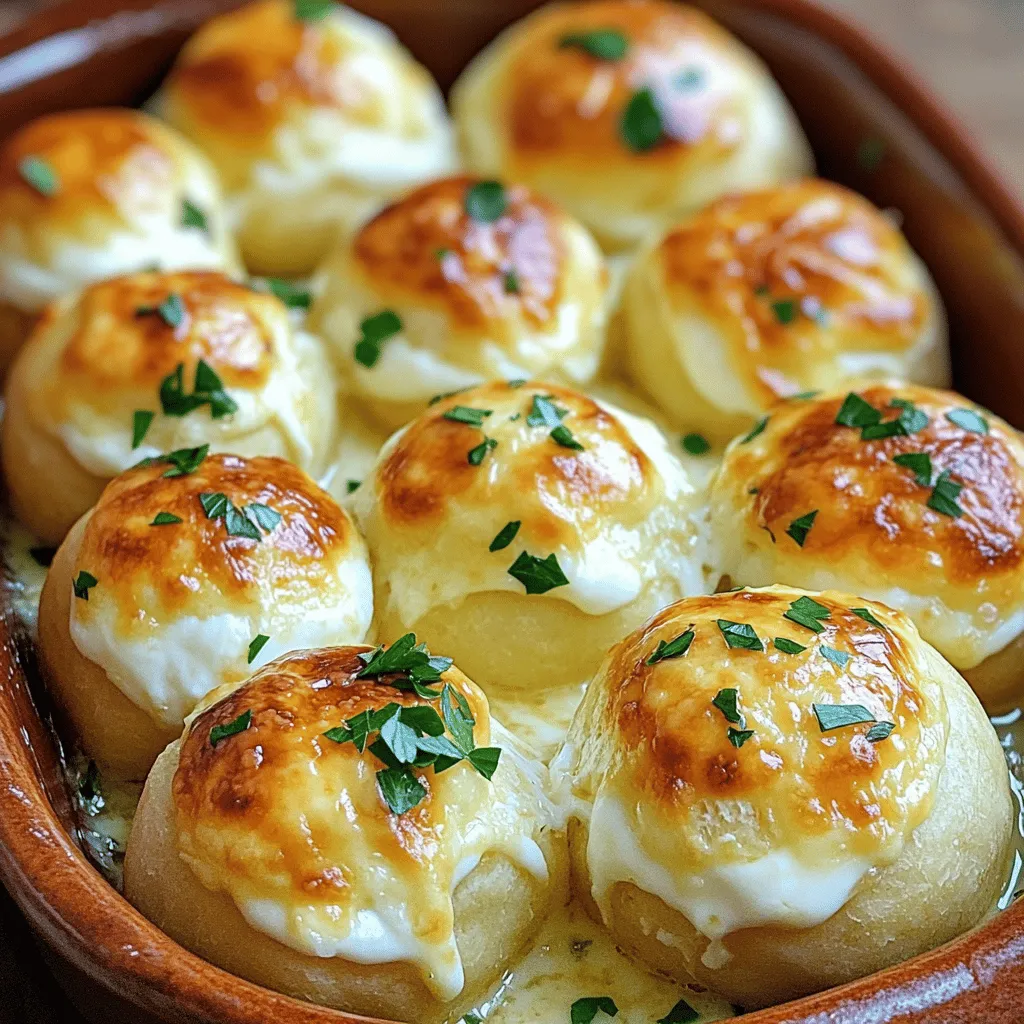
Are you ready to elevate your snack game? These Garlic Butter Cheese Bombs are packed with gooey cheese and rich garlic flavor that will make your taste buds sing. Perfect for parties or cozy nights in, they’re easy to whip up using simple ingredients. In this post, I’ll guide you through each step, from prep to bake, ensuring you create flaky, flavorful bites every time. Let’s dive into the deliciousness!
Ingredients
List of Ingredients
– 1 can (16.5 oz) refrigerated biscuit dough
– 1 cup shredded mozzarella cheese
– 1/2 cup cream cheese, softened to room temperature
– 4 cloves fresh garlic, finely minced
– 1/4 cup unsalted butter, melted
– 2 tablespoons fresh parsley, finely chopped
– 1 teaspoon Italian seasoning
– 1/2 teaspoon salt
– 1/4 teaspoon freshly ground black pepper
Important Notes on Ingredients
Selecting fresh garlic over pre-minced options gives a better flavor. Fresh garlic has a strong, zesty taste that can elevate your dish. If fresh garlic is hard to find, look for jars with garlic in oil.
For cheese, mozzarella is the go-to choice for its meltiness. However, you can mix in cheddar for a sharper flavor or provolone for a unique twist. These options add depth to your cheese bombs.
Feel free to switch herbs too. Basil or chives can add a fresh kick. Experiment with your favorite herbs to make this dish truly yours.
For the full recipe, check out the details provided above.
Step-by-Step Instructions
Prepping for Baking
– Preheat the oven to 375°F (190°C).
– Line the baking sheet with parchment paper.
Start by getting your oven hot. This helps the cheese bombs cook evenly. While the oven warms, lay down parchment paper. This keeps your cheese bombs from sticking to the pan.
Mixing the Filling
– Combine mozzarella, cream cheese, garlic, and spices.
– Achieve the right consistency for easy filling.
In a medium bowl, mix the mozzarella and cream cheese. Add the minced garlic, Italian seasoning, salt, and pepper. Stir until everything blends well. You want a creamy mix that holds together but is easy to scoop.
Shaping and Filling the Biscuits
– How to flatten the biscuit dough correctly.
– Tips for sealing the cheese bombs tight.
Open the biscuit dough can and take out each biscuit. Gently press each one flat with your hands. Aim for a small disk. Place a spoonful of the cheese mix in the center. Fold the dough over the filling and pinch it tightly. Make sure no cheese leaks out. Roll it into a ball shape.
Baking and Final Touches
– Baking time and temperature details.
– Applying garlic butter post-baking for extra flavor.
Put the cheese bombs seam side down on the baking sheet. Bake them for 15 to 20 minutes. They should puff up and turn golden brown. After baking, mix melted butter with parsley in a bowl. Brush this garlic butter on top of the cheese bombs. This adds a rich flavor. Let them cool for a few minutes before serving. Enjoy the gooey goodness! For the complete recipe, check out the Full Recipe section.
Tips & Tricks
Achieving the Right Texture
Using room temperature cream cheese is key. It blends easily with the other cheeses. If the cream cheese is cold, the filling may not mix well. This can lead to lumps in your cheese bombs. So, take the cream cheese out of the fridge ahead of time. Let it sit for about 30 minutes.
To check if the cheese bombs are fully cooked, look for a golden brown color. They should puff up nicely. If they are still pale, give them a few more minutes in the oven. You want that perfect crispy outside and gooey inside.
Serving Suggestions
Some dips work great with garlic butter cheese bombs. Marinara sauce adds a nice tang. Ranch dressing gives a creamy contrast. For a simple touch, try a garlic aioli. It pairs well with the buttery flavor.
Pairing drinks can enhance your meal. A light white wine, like Sauvignon Blanc, complements the cheese bombs. If you prefer non-alcoholic drinks, try a sparkling water with lemon. It cuts through the richness.
Preventing Sticking and Mess
Using parchment paper is a game changer. It keeps the cheese bombs from sticking to the baking sheet. Make sure to line the sheet before placing the bombs on it. This saves time during cleanup.
For cleaning up after baking, wait for the sheet to cool down. This makes it easier to remove any leftover cheese. Wipe the sheet with a damp cloth. If your baking sheet is very sticky, soak it in warm soapy water for a bit.
Variations
Flavor Variations
You can spice up your garlic butter cheese bombs in many ways. First, try adding red pepper flakes for a kick. Smoked paprika also gives a nice smoky flavor. Both can really change the taste of the dish.
For cheese lovers, mixing different cheeses can be fun. Cheddar adds a sharp taste, while provolone gives a creamy feel. Experiment with your favorite cheeses to create a bomb that suits your mood.
Healthier Alternatives
Want a lighter option? Use low-fat cream cheese instead of regular. This swap cuts calories but keeps the creamy texture. You can enjoy your cheese bombs without as much guilt.
If you prefer whole grain, try whole wheat biscuit dough. It offers more fiber and nutrients. For gluten-free diets, look for gluten-free biscuit options. You can still enjoy these delicious bites.
Creative Serving Ideas
Think outside the box with your cheese bombs. You can turn them into sliders! Just use mini biscuits and add your favorite toppings. They make a fun and tasty bite-sized meal.
You can also serve cheese bombs as a stuffed appetizer. Try different fillings like cooked sausage or veggies. This gives your guests a surprise with each bite.
For the full recipe, check the link and get cooking!
Storage Info
Storing Leftovers
To store garlic butter cheese bombs, place them in an airtight container. Make sure they cool completely first. You can keep them in the fridge for up to three days. If you want to enjoy them later, freezing is a great option.
Freezing Instructions
You can freeze garlic butter cheese bombs before or after baking. To freeze them before baking, shape the bombs and place them on a tray. Make sure they do not touch each other. Once they are frozen, transfer them to a freezer bag. If you freeze them after baking, let them cool first. Then, wrap them tightly in plastic wrap before placing them in a freezer bag. They can last for about three months in the freezer.
Reheating Suggestions
To reheat, the best methods are the oven or air fryer. Preheat your oven to 350°F (175°C). Place the cheese bombs on a baking sheet. Heat for about 10-15 minutes until warm. Avoid using the microwave, as it can make them soggy. If using an air fryer, heat it to 350°F (175°C) and cook for about 5-7 minutes. This method keeps them crispy and delicious.
For a tasty treat, brush a bit of garlic butter on top before serving. Enjoy the warm, cheesy goodness!
FAQs
Common Questions
Can I make garlic butter cheese bombs ahead of time?
Yes, you can prepare the cheese bombs ahead. Make them up to the baking step and store them in the fridge. Just bake them fresh when you are ready to eat.
What can I substitute if I don’t have biscuit dough?
If you lack biscuit dough, use puff pastry or crescent roll dough. Both options work well and give a nice, flaky texture.
How can I make these cheese bombs spicier or milder?
To spice them up, add red pepper flakes or jalapeños to the filling. For a milder taste, skip the garlic or use less seasoning.
Storage and Serving Questions
How to store leftovers correctly?
Store leftovers in an airtight container in the fridge. They will stay fresh for about three days.
Can these cheese bombs be served cold?
While they taste best warm, you can eat them cold. They still hold great flavor, but the cheese won’t be gooey.
Troubleshooting
Why are my cheese bombs leaking cheese?
Leaking cheese often happens if the biscuits are not sealed tightly. Make sure to pinch the edges well after filling.
What to do if the biscuits are too doughy?
If the biscuits are too doughy, try baking them a few minutes longer. Ensure the oven is preheated to the right temperature for best results.
Garlic butter cheese bombs are simple to make and full of flavor. This blog covered essential ingredients, provided clear instructions, and offered helpful tips. You learned how to mix and shape the filling, bake them perfectly, and serve them well.
These cheese bombs are not just a tasty treat; they are also customizable. Try different cheeses or herbs to find your favorite mix. Enjoy making these delightful bites and impress friends with your cooking skills!