Breakfast

Savory Cheddar Zucchini Muffins Flavorful and Easy Recipe
If you’re looking for a simple, tasty snack, let me introduce you to Savory Cheddar Zucchini Muffins. These muffins pack a punch with rich cheese

Apple Cinnamon Muffins Simple and Tasty Delight
Are you ready to enjoy the warm, comforting scent of freshly baked Apple Cinnamon Muffins? This simple recipe offers a delightful mix of sweet and

Zucchini Bread Breakfast Cookies Flavorful and Easy Recipe
Are you ready to transform your mornings with a delicious, nutritious twist? This Zucchini Bread Breakfast Cookies recipe combines the goodness of grated zucchini with
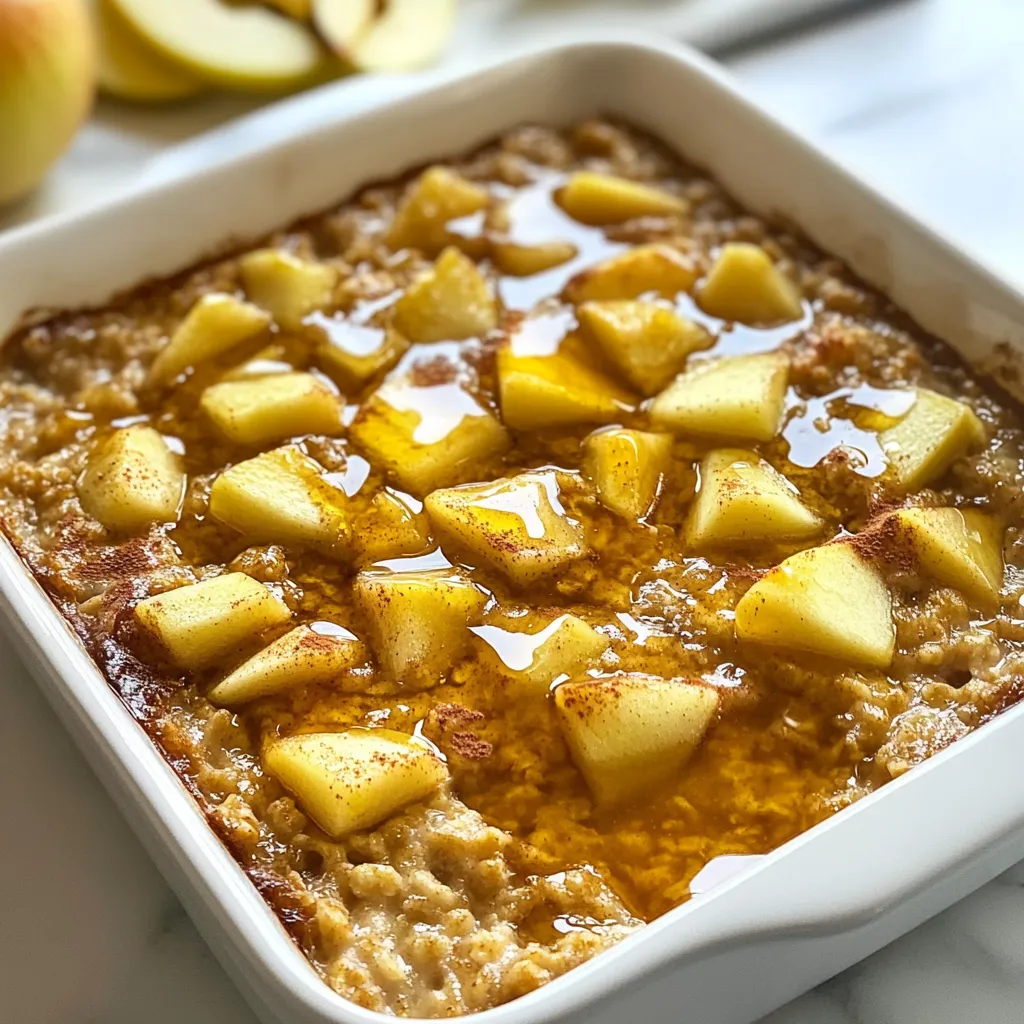
Apple Cinnamon Baked Oatmeal Flavorful Morning Treat
Nothing beats the cozy aroma of Apple Cinnamon Baked Oatmeal waking you up in the morning. This warm dish is not just tasty; it’s packed
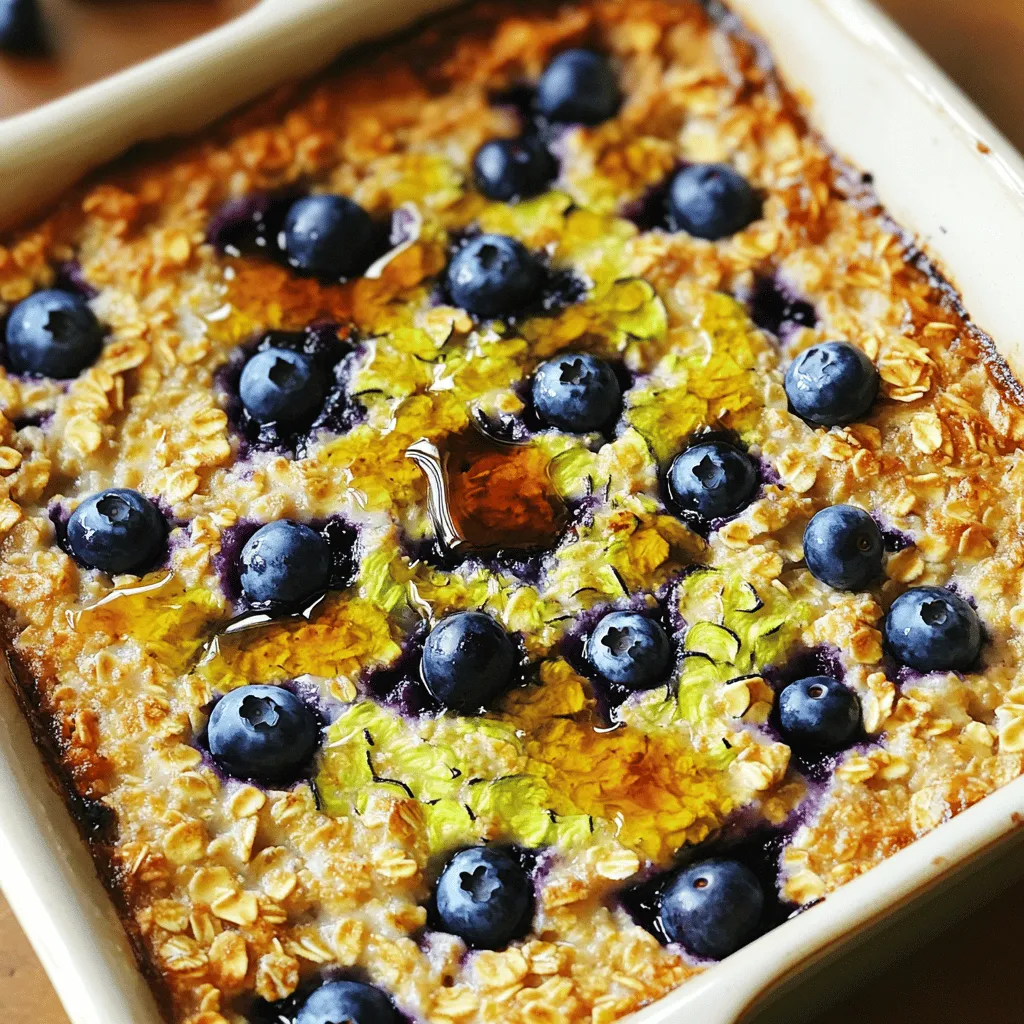
Zucchini Blueberry Baked Oatmeal Flavorful Morning Dish
Start your day right with Zucchini Blueberry Baked Oatmeal, a warm and tasty dish! Packed with rolled oats, fresh blueberries, and the sneaky goodness of

Easy Cheesy Roasted Vegetable Frittata Delight
Are you ready to whip up a dish that’s both tasty and easy? Introducing the Easy Cheesy Roasted Vegetable Frittata Delight! Packed with vibrant veggies
![To make a delicious spinach frittata, you need fresh and simple ingredients. Here’s what you will need: - 6 large eggs - 1 cup fresh spinach, chopped - 1/2 cup cherry tomatoes, halved - 1/2 cup feta cheese, crumbled - 1/4 cup onion, finely chopped - 2 cloves garlic, minced - 2 tablespoons olive oil - Salt and pepper to taste - Fresh basil leaves for garnish (optional) These ingredients blend well to create a tasty dish. I love how the eggs create a fluffy texture while the spinach adds a vibrant green color. The feta cheese gives it a nice salty kick. You can find all these ingredients at your local market. For the full recipe, check out the Spinach Frittata Delight. First, gather all your ingredients. You will need eggs, spinach, cherry tomatoes, feta cheese, onion, garlic, olive oil, salt, and pepper. Having everything ready makes cooking easy. 1. Preheat your oven to 375°F (190°C). 2. Crack the eggs into a large bowl. Whisk them well until they blend nicely. Add salt and pepper to taste. 3. Heat olive oil in an oven-safe skillet over medium heat. 4. Add the chopped onion and sauté for 2-3 minutes until it becomes soft. 5. Mix in the minced garlic and cook for 1 more minute. 6. Add the chopped spinach and stir until it wilts, about 2 minutes. 7. Fold in the halved cherry tomatoes. 8. Pour the whisked eggs over the veggies, covering them evenly. 9. Sprinkle crumbled feta cheese on top. 10. Cook on the stovetop for 4-5 minutes until the edges are firm but the center is still jiggly. 11. Move the skillet to the oven and bake for 12-15 minutes until set and lightly browned. 12. Remove the skillet from the oven and let it cool for a few minutes before slicing. 13. Garnish with fresh basil leaves if you like. - Use a non-stick skillet to prevent sticking. - Keep the heat medium to avoid burning the bottom. - Let the frittata cool slightly before cutting to keep its shape. - Experiment with different veggies or cheeses for variety. For the complete recipe, click on [Full Recipe]. Enjoy your cooking! To make a great spinach frittata, follow these tips: - Use fresh eggs for the best flavor. - Whisk the eggs well to add air. This helps the frittata rise. - Preheat your oven to 375°F (190°C) before cooking. This ensures even baking. - Sauté vegetables until soft but not brown. This keeps their flavors fresh. - Pour the egg mixture slowly over the veggies to cover them evenly. - Cook on the stovetop until the edges are firm and the center is slightly jiggly. Avoid these common pitfalls: - Don’t overbeat the eggs. This can make the frittata tough. - Avoid cooking on high heat. It can burn the bottom before the center sets. - Do not skip the baking step. This step helps the frittata set evenly. - Don’t overcrowd the skillet with veggies. This can lead to uneven cooking. To boost the flavor of your frittata, try these ideas: - Add herbs like parsley or chives for freshness. - Use different cheeses like cheddar or goat cheese for a twist. - Mix in cooked meats like ham or bacon for extra protein. - Incorporate spices like paprika or chili flakes for a kick. - Serve with a side of salsa or hot sauce for added zest. For the full recipe, check out the Spinach Frittata Delight. Enjoy your cooking! {{image_4}} You can change ingredients to make your frittata unique. Try using kale or Swiss chard instead of spinach. You can also add bell peppers, mushrooms, or zucchini for extra flavor. For a protein boost, mix in cooked bacon, sausage, or ham. These swaps keep your dish fresh and exciting. Cheese adds creaminess and flavor to your frittata. While feta is great, you can use other cheeses too. Goat cheese gives a tangy taste, while cheddar adds sharpness. Mozzarella melts well and creates a lovely texture. Experiment with your favorite cheeses for a personal touch. Serve your frittata warm or at room temperature. You can dress it up with a sauce. A dollop of sour cream or yogurt adds creaminess. A drizzle of hot sauce can give it a kick. Pair your frittata with a light salad for a healthy meal. Check the Full Recipe for more ideas on how to enjoy this dish. Store leftover spinach frittata in an airtight container. Make sure it cools first. Place it in the fridge. It will stay fresh for 3 to 4 days. If you want to keep it longer, consider freezing it. To reheat, preheat your oven to 350°F (175°C). Place the frittata on a baking tray. Cover it with foil to keep it moist. Bake for about 10 to 15 minutes. You can also reheat in the microwave. Heat it on medium for about 1 to 2 minutes. To freeze, slice the frittata first. Wrap each slice tightly in plastic wrap. Then, place the slices in a freezer bag. This way, you can take out only what you need. It will last for 2 to 3 months in the freezer. When ready to eat, thaw overnight in the fridge before reheating. For more detailed instructions, check the Full Recipe. You can tell the frittata is cooked when the edges look firm and the center is set. A good test is to gently shake the pan. If the center jiggles a little, give it more time. The top should also be lightly browned. Use a toothpick to check; it should come out clean when inserted in the middle. Yes, you can make a spinach frittata ahead of time. Just cook it, let it cool, and then store it in the fridge. Cover it well with plastic wrap or foil. It will stay fresh for up to three days. You can reheat it in the oven or microwave when you are ready to eat. Frittatas pair well with many side dishes. Fresh fruit salad adds brightness. A green salad offers a nice crunch. Whole grain toast provides good texture and flavor. If you like, serve it with a dollop of yogurt or a light sauce for extra taste. For more ideas, check the Full Recipe! A spinach frittata is easy and tasty. We covered the key ingredients, cooking steps, and storage tips. I shared best practices to avoid mistakes and explore flavor options. Frittatas are great for meals any time of day. You can customize them with your favorite veggies and cheeses. Enjoy making this healthy dish that can be shared or stored for later. It's simple and rewarding to create. Now, grab your ingredients and start cooking!](https://tossedflavors.com/wp-content/uploads/2025/06/adbc0031-2a1d-44d0-bf41-713572b9322e.webp)
Spinach Frittata Tasty and Easy Breakfast Recipe
Looking for a quick, healthy breakfast that’s full of flavor? This Spinach Frittata is both tasty and easy to whip up. With just a few

Vegetable Sheet Pan Frittata Simple and Tasty Recipe
Looking for a quick and healthy meal that satisfies your taste buds? This Vegetable Sheet Pan Frittata is your answer! Packed with fresh veggies and

Vegetable Frittata Simple and Tasty Meal Idea
Looking for a simple and tasty meal idea? Let me introduce you to the vegetable frittata! This dish is packed with fresh veggies, eggs, and

Garden Frittata with Goat Cheese & Potatoes Delight
Looking for a flavorful and easy dish? My Garden Frittata with Goat Cheese & Potatoes Delight is the answer! Packed with fresh veggies and creamy