Quick and Easy Oreo Balls Irresistible No-Bake Treat

WANT TO SAVE THIS RECIPE?

Love chocolate and Oreos? Then you’re in for a treat! My Quick and Easy Oreo Balls are the perfect no-bake delight that anyone can make. With just a few simple ingredients, you can create these indulgent bites that are always a crowd-pleaser. Whether you need a quick dessert for a party or a sweet snack for yourself, I’ve got you covered. Let’s dive in and make some irresistible Oreo magic!

Ingredients

List of Ingredients Needed

– 1 package (14.3 oz) Oreo cookies

– 8 oz cream cheese, softened

– 1 cup semi-sweet chocolate chips

– 1 tablespoon vegetable oil

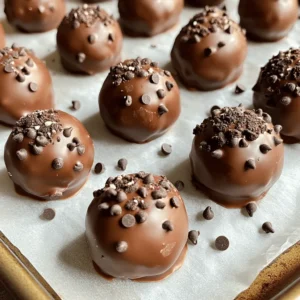
– Optional toppings: crushed Oreos, mini chocolate chips, or colorful sprinkles

For these Oreo balls, you need just a few simple items. First, grab a package of Oreo cookies; they give the sweet flavor. Next, cream cheese adds a rich, creamy texture. You’ll also need semi-sweet chocolate chips for the coating. A bit of vegetable oil helps to make the chocolate shiny. Lastly, you can pick some optional toppings, like crushed Oreos or colorful sprinkles, to add fun and flair.

Using quality ingredients really makes a difference. I always recommend using fresh cream cheese for the best taste. Now, once you have all your ingredients ready, you’re on your way to making these delightful no-bake treats. If you want to see the complete process, check out the Full Recipe.

Step-by-Step Instructions

Preparation of Oreo Mixture

Start by crushing the Oreo cookies in a food processor. Place the whole package in and pulse until you get fine crumbs. This only takes a minute or two. Make sure there are no big chunks left.

Next, transfer the crushed cookies to a large bowl. Add in the softened cream cheese. Use a spatula or your hands to mix them together. Keep mixing until the mixture is smooth and well combined. It should feel like a dough.

Forming and Chilling Oreo Balls

Now it’s time to form the Oreo balls. Take small portions of the mixture and roll them into 1-inch balls. Aim for uniform size so they look great. Place each ball on a parchment-lined baking sheet.

Once you have rolled all the balls, put the baking sheet in the refrigerator. Let them chill for about 30 minutes. This helps them hold their shape when you coat them in chocolate.

Melting Chocolate Coating

While the Oreo balls chill, prepare the chocolate coating. In a microwave-safe bowl, add the semi-sweet chocolate chips. Heat them in the microwave in 30-second intervals. Stir well between each interval until the chocolate is melted and smooth.

To give the chocolate a nice shine, mix in the vegetable oil. This will make your coating look glossy and appealing.

When the Oreo balls are firm, take them out of the fridge. Dip each ball into the melted chocolate, making sure it is fully coated. Use a fork to lift the balls, letting excess chocolate drip off. Place them back on the lined sheet.

Feel free to get creative! While the chocolate is still wet, sprinkle your choice of toppings on each ball. This adds fun and flavor.

After coating is done, return the baking sheet to the fridge. Let the chocolate set for about 15 minutes. The result will be a delicious, no-bake treat that’s sure to impress!

For the full recipe, check out the details above.

Tips & Tricks

Perfecting the Texture

To make your Oreo balls just right, focus on the texture. Start by crushing the Oreo cookies finely. This helps the balls hold together well. You want a powdery base for easy mixing with the cream cheese.

When you mix the crushed Oreos with softened cream cheese, aim for a dough-like consistency. If it feels too dry, add a tiny bit more cream cheese. This will help you roll them into perfect balls.

For the chocolate coating, ensure it’s smooth and glossy. Melt the chocolate chips slowly in the microwave, stirring often. This way, the chocolate won’t burn. Mixing in a bit of vegetable oil gives it a nice shine.

Decorating Ideas

Get creative with toppings! After coating the Oreo balls in chocolate, sprinkle crushed Oreos, mini chocolate chips, or colorful sprinkles on top. This adds fun colors and flavors.

For serving, consider using mini cupcake liners. They make your treats look fancy and are easy to grab. You can also drizzle extra melted chocolate over the truffles for an eye-catching finish.

These simple tips will help you create delicious, beautiful Oreo balls that everyone will love. For the full recipe, check out the earlier section!

Variations

Flavor Variations

You can change the flavor of your Oreo balls by using different cookies. Try peanut butter or mint Oreos for a twist. Each cookie brings a new taste that can surprise your friends and family. You can also try using graham crackers for a more classic dessert flavor.

For the coating, consider using white chocolate or colored chocolate. This adds a fun and festive touch. Simply melt the chocolate of your choice, and dip the chilled Oreo balls as you would with semi-sweet chocolate. You can even mix flavors, like dark chocolate and white chocolate swirls, for a stunning look.

Dietary Modifications

If you need gluten-free options, use gluten-free Oreos. They taste just as good and work perfectly in this recipe. For a vegan version, replace cream cheese with a plant-based cream cheese. You can use dairy-free chocolate chips too.

These modifications make it easy for everyone to enjoy Oreo balls. No matter your diet, you can still create this tasty treat.

Storage Info

Best Practices for Storage

To keep your Oreo balls fresh, store them in the refrigerator. Place them in an airtight container. This will help them hold their taste and texture. They can last up to one week in the fridge.

If you want to keep them longer, freezing is a great option. Place the Oreo balls in a single layer on a baking sheet. Freeze them for about two hours. Once they are solid, move them to a freezer-safe bag. They can stay fresh in the freezer for about three months.

How to Keep Them Fresh

To maintain flavor and texture, don’t leave the Oreo balls out too long. Always return them to the fridge after serving. If they become too soft, chill them for a bit before serving again.

Avoid stacking them too tightly. This can cause them to lose shape or stick together. If you notice any moisture, dry the container before adding the Oreo balls back in. For best results, enjoy them within a week for optimal taste and texture.

For the full recipe, check out the detailed instructions above.

FAQs

How long do Oreo balls last in the fridge?

Oreo balls stay fresh for about one week in the fridge. To store them, place the truffles in an airtight container. This keeps them moist and tasty. If you want to keep them longer, consider freezing them. They can last up to three months in the freezer. Just make sure to wrap them well. When you’re ready to eat them, thaw them in the fridge for a few hours.

Can I make Oreo balls ahead of time?

Yes, you can make Oreo balls ahead of time. They are perfect for parties or special events. You can prepare them a day or two in advance. Just follow the Full Recipe steps, then chill them until serving time. This makes your event stress-free. Plus, the flavors can meld together for an even tastier treat!

What other ingredients can I add to Oreo balls?

There are many fun ingredients to mix into your Oreo balls. Here are some ideas:

Peanut butter: Swirl in some peanut butter for a nutty taste.

Mint extract: Add a few drops for a fresh minty flavor.

Crushed nuts: Mix in chopped almonds or walnuts for crunch.

Coconut flakes: Stir in shredded coconut for a tropical twist.

Flavor extracts: Try vanilla or almond for added depth.

Feel free to experiment and find your favorite combinations!

In this post, we explored how to make delicious Oreo balls. You learned about the key ingredients and the simple steps needed for perfect treats. We discussed tips for texture, decoration ideas, and fun variations.

In my experience, these treats are easy to customize and great for sharing. Whether you make them gluten-free or vegan, they remain a hit. Store them correctly, and they stay fresh for days. Enjoy making your own Oreo balls!

- 1 package (14.3 oz) Oreo cookies - 8 oz cream cheese, softened - 1 cup semi-sweet chocolate chips - 1 tablespoon vegetable oil - Optional toppings: crushed Oreos, mini chocolate chips, or colorful sprinkles For these Oreo balls, you need just a few simple items. First, grab a package of Oreo cookies; they give the sweet flavor. Next, cream cheese adds a rich, creamy texture. You'll also need semi-sweet chocolate chips for the coating. A bit of vegetable oil helps to make the chocolate shiny. Lastly, you can pick some optional toppings, like crushed Oreos or colorful sprinkles, to add fun and flair. Using quality ingredients really makes a difference. I always recommend using fresh cream cheese for the best taste. Now, once you have all your ingredients ready, you’re on your way to making these delightful no-bake treats. If you want to see the complete process, check out the Full Recipe. Start by crushing the Oreo cookies in a food processor. Place the whole package in and pulse until you get fine crumbs. This only takes a minute or two. Make sure there are no big chunks left. Next, transfer the crushed cookies to a large bowl. Add in the softened cream cheese. Use a spatula or your hands to mix them together. Keep mixing until the mixture is smooth and well combined. It should feel like a dough. Now it's time to form the Oreo balls. Take small portions of the mixture and roll them into 1-inch balls. Aim for uniform size so they look great. Place each ball on a parchment-lined baking sheet. Once you have rolled all the balls, put the baking sheet in the refrigerator. Let them chill for about 30 minutes. This helps them hold their shape when you coat them in chocolate. While the Oreo balls chill, prepare the chocolate coating. In a microwave-safe bowl, add the semi-sweet chocolate chips. Heat them in the microwave in 30-second intervals. Stir well between each interval until the chocolate is melted and smooth. To give the chocolate a nice shine, mix in the vegetable oil. This will make your coating look glossy and appealing. When the Oreo balls are firm, take them out of the fridge. Dip each ball into the melted chocolate, making sure it is fully coated. Use a fork to lift the balls, letting excess chocolate drip off. Place them back on the lined sheet. Feel free to get creative! While the chocolate is still wet, sprinkle your choice of toppings on each ball. This adds fun and flavor. After coating is done, return the baking sheet to the fridge. Let the chocolate set for about 15 minutes. The result will be a delicious, no-bake treat that's sure to impress! For the full recipe, check out the details above. To make your Oreo balls just right, focus on the texture. Start by crushing the Oreo cookies finely. This helps the balls hold together well. You want a powdery base for easy mixing with the cream cheese. When you mix the crushed Oreos with softened cream cheese, aim for a dough-like consistency. If it feels too dry, add a tiny bit more cream cheese. This will help you roll them into perfect balls. For the chocolate coating, ensure it’s smooth and glossy. Melt the chocolate chips slowly in the microwave, stirring often. This way, the chocolate won’t burn. Mixing in a bit of vegetable oil gives it a nice shine. Get creative with toppings! After coating the Oreo balls in chocolate, sprinkle crushed Oreos, mini chocolate chips, or colorful sprinkles on top. This adds fun colors and flavors. For serving, consider using mini cupcake liners. They make your treats look fancy and are easy to grab. You can also drizzle extra melted chocolate over the truffles for an eye-catching finish. These simple tips will help you create delicious, beautiful Oreo balls that everyone will love. For the full recipe, check out the earlier section! {{image_4}} You can change the flavor of your Oreo balls by using different cookies. Try peanut butter or mint Oreos for a twist. Each cookie brings a new taste that can surprise your friends and family. You can also try using graham crackers for a more classic dessert flavor. For the coating, consider using white chocolate or colored chocolate. This adds a fun and festive touch. Simply melt the chocolate of your choice, and dip the chilled Oreo balls as you would with semi-sweet chocolate. You can even mix flavors, like dark chocolate and white chocolate swirls, for a stunning look. If you need gluten-free options, use gluten-free Oreos. They taste just as good and work perfectly in this recipe. For a vegan version, replace cream cheese with a plant-based cream cheese. You can use dairy-free chocolate chips too. These modifications make it easy for everyone to enjoy Oreo balls. No matter your diet, you can still create this tasty treat. To keep your Oreo balls fresh, store them in the refrigerator. Place them in an airtight container. This will help them hold their taste and texture. They can last up to one week in the fridge. If you want to keep them longer, freezing is a great option. Place the Oreo balls in a single layer on a baking sheet. Freeze them for about two hours. Once they are solid, move them to a freezer-safe bag. They can stay fresh in the freezer for about three months. To maintain flavor and texture, don’t leave the Oreo balls out too long. Always return them to the fridge after serving. If they become too soft, chill them for a bit before serving again. Avoid stacking them too tightly. This can cause them to lose shape or stick together. If you notice any moisture, dry the container before adding the Oreo balls back in. For best results, enjoy them within a week for optimal taste and texture. For the full recipe, check out the detailed instructions above. Oreo balls stay fresh for about one week in the fridge. To store them, place the truffles in an airtight container. This keeps them moist and tasty. If you want to keep them longer, consider freezing them. They can last up to three months in the freezer. Just make sure to wrap them well. When you're ready to eat them, thaw them in the fridge for a few hours. Yes, you can make Oreo balls ahead of time. They are perfect for parties or special events. You can prepare them a day or two in advance. Just follow the Full Recipe steps, then chill them until serving time. This makes your event stress-free. Plus, the flavors can meld together for an even tastier treat! There are many fun ingredients to mix into your Oreo balls. Here are some ideas: - Peanut butter: Swirl in some peanut butter for a nutty taste. - Mint extract: Add a few drops for a fresh minty flavor. - Crushed nuts: Mix in chopped almonds or walnuts for crunch. - Coconut flakes: Stir in shredded coconut for a tropical twist. - Flavor extracts: Try vanilla or almond for added depth. Feel free to experiment and find your favorite combinations! In this post, we explored how to make delicious Oreo balls. You learned about the key ingredients and the simple steps needed for perfect treats. We discussed tips for texture, decoration ideas, and fun variations. In my experience, these treats are easy to customize and great for sharing. Whether you make them gluten-free or vegan, they remain a hit. Store them correctly, and they stay fresh for days. Enjoy making your own Oreo balls!

Quick and Easy Oreo Balls

Satisfy your sweet cravings with these Quick and Easy Oreo Balls! This no-bake treat is incredibly simple to make with just a handful of ingredients. Whether you're hosting a party or just want a tasty snack for yourself, these delightful bites are always a hit. Follow the easy steps to create these rich, chocolatey delights, and discover fun variations to suit your taste. Click through to explore the full recipe and make your own irresistible Oreo magic!

Ingredients
  

1 package (14.3 oz) Oreo cookies

8 oz cream cheese, softened at room temperature

1 cup semi-sweet chocolate chips

1 tablespoon vegetable oil

Optional toppings: crushed Oreos, mini chocolate chips, or colorful sprinkles

Instructions
 

Begin by placing the Oreo cookies into a food processor. Pulse them until they achieve a fine, powdery consistency—this will serve as the foundation of your truffles.

    In a large mixing bowl, blend the finely crushed Oreos with the softened cream cheese. Mix thoroughly until the ingredients meld together, forming a cohesive dough-like mixture. This should take a few minutes of mixing.

      Take small portions of the Oreo mixture and, using your hands, roll them into uniform 1-inch balls. Arrange these on a baking sheet that you've lined with parchment paper—this will prevent sticking.

        Transfer the baking sheet with the rolled Oreo balls into the refrigerator. Let them chill for approximately 30 minutes, which will help them firm up and maintain their shape.

          Meanwhile, prepare the chocolate coating. In a microwave-safe bowl, add the semi-sweet chocolate chips and heat in 30-second intervals, stirring well between each interval, until the chocolate is completely melted and smooth. Stir in the vegetable oil to enhance the glossy finish.

            Once the Oreo balls have chilled, take them out of the refrigerator. Dip each ball into the smooth melted chocolate, ensuring they are fully coated. To avoid excess chocolate, use a fork to lift the balls from the chocolate, allowing any extra to drip off before placing them back on the parchment-lined baking sheet.

              While the chocolate coating is still wet, get creative by sprinkling your choice of optional toppings—like crushed Oreos, mini chocolate chips, or colorful sprinkles—over each chocolate-covered truffle. This step adds both flavor and a festive touch!

                After all truffles are coated and decorated, return them to the refrigerator for about 15 minutes, allowing the chocolate coating to set properly.

                  Prep Time: 15 min | Total Time: 1 hr | Servings: 24 delightful truffles

                    - Presentation Tips: For an elegant display, arrange the chilled truffles on a decorative plate or in mini cupcake liners. Consider drizzling some additional melted chocolate over the top for added flair!

                      WANT TO SAVE THIS RECIPE?

                      Leave a Comment

                      Recipe Rating