Craving a sweet treat that combines creamy cheesecake and the classic flavor of crème brûlée? Look no further! These Mini Crème Brûlée Cheesecakes are not only delightful but also easy to make. With rich, smooth filling and a perfectly caramelized top, they are perfect for any occasion. Let’s dive into the ingredients and tools you’ll need to create these irresistible bites of heaven!
Ingredients
Main Ingredient List
– 1 cup graham cracker crumbs
– 4 tablespoons unsalted butter, melted
– 2 packages (8 ounces each) cream cheese, softened at room temperature
– 3/4 cup granulated sugar
– 1 teaspoon pure vanilla extract
– 1 teaspoon fresh lemon zest
– 2 large eggs, at room temperature
– 1/2 cup heavy cream
– Additional granulated sugar for caramelizing the tops
When making mini crème brûlée cheesecakes, each ingredient plays a key role. The graham cracker crumbs form a crunchy base. The melted butter helps bind the crumbs together. Cream cheese provides a rich and creamy filling. Granulated sugar gives sweetness and helps with caramelizing. Vanilla extract and lemon zest add a lovely flavor boost. Eggs bring structure and help the filling set. Heavy cream adds extra richness and smoothness.
Tools Needed
– Mixing bowls
– Hand or stand mixer
– Cupcake pan and liners
– Kitchen torch or broiler
Using the right tools makes this recipe easier. Mixing bowls help you combine ingredients well. A hand or stand mixer ensures the cream cheese becomes smooth. A cupcake pan with liners makes it simple to remove the cheesecakes. A kitchen torch or broiler is needed for that perfect caramelized top.
Measuring Tips
– Importance of accurate measurements
– Using kitchen scales versus measuring cups
Accurate measurements are crucial for great results. Too much or too little of an ingredient can change the taste and texture. Using kitchen scales can help ensure precision. If you use measuring cups, be sure to level off the ingredients. This way, your mini crème brûlée cheesecakes will turn out just right.
Step-by-Step Instructions
Preheating and Preparing
Preheat your oven to 325°F (160°C). This step is key for even baking. Next, get your cupcake pan ready. Line the pan with paper liners. This makes it easy to take out the cheesecakes later.
Now, let’s make the graham cracker crust. In a medium bowl, mix 1 cup of graham cracker crumbs with 4 tablespoons of melted butter. Combine them until it feels like damp sand. Take about one tablespoon of this mix and press it firmly into the bottom of each cupcake liner. This will form your crust. Bake this in the oven for 5 minutes and then take it out. Let it cool down before adding the filling.
Preparing the Filling
Next, we will prepare the cheesecake filling. In a large bowl, beat 2 packages of softened cream cheese with a hand mixer. Keep mixing until it is smooth and creamy. Add in 3/4 cup of granulated sugar and beat until it’s fluffy.
Now, let’s add some flavor. Stir in 1 teaspoon of pure vanilla extract and 1 teaspoon of fresh lemon zest. This will give your filling a bright taste. Then, add 2 large eggs, one at a time. Mix slowly after each egg until it is fully blended. Finally, pour in 1/2 cup of heavy cream and mix until the filling is rich and lump-free.
Baking and Chilling
Now, it’s time to fill the cupcake liners. Carefully pour the cheesecake filling over your pre-baked crusts. Fill each liner about three-quarters full. This allows space for the filling to expand while baking.
Place the cupcake pan back in the oven. Bake for about 18-20 minutes. The centers should look set but still jiggle a bit. After baking, let them cool in the pan for 10 minutes. Then, transfer them to a wire rack to cool completely.
Once they’re at room temperature, refrigerate them for at least 4 hours. For the best taste, let them chill overnight. This helps the flavors meld and sets the texture just right.
Before serving, sprinkle a thin layer of granulated sugar on top of each cheesecake. Use a kitchen torch to caramelize the sugar until it turns golden and crunchy. If you don’t have a torch, you can also place them under a broiler for a short time. Just keep an eye on them to avoid burning.
For the full recipe, check out the complete instructions. Enjoy your delicious mini crème brûlée cheesecakes!
Tips & Tricks
Achieving the Perfect Texture
Using room temperature ingredients is key. It helps the cream cheese blend smoothly. Cold cream cheese can create lumps. To avoid lumps, mix the cream cheese well before adding other ingredients. Beat it until creamy and fluffy. This step makes the filling rich and smooth.
Caramelizing Sugar
You can use a kitchen torch or a broiler to caramelize the sugar on top. A kitchen torch gives you better control. Hold it about 2 inches away from the sugar. Move it slowly for even caramelization. If you use a broiler, keep a close eye. The sugar can burn fast under high heat. Aim for a golden color, creating a crunchy crust.
Presentation Advice
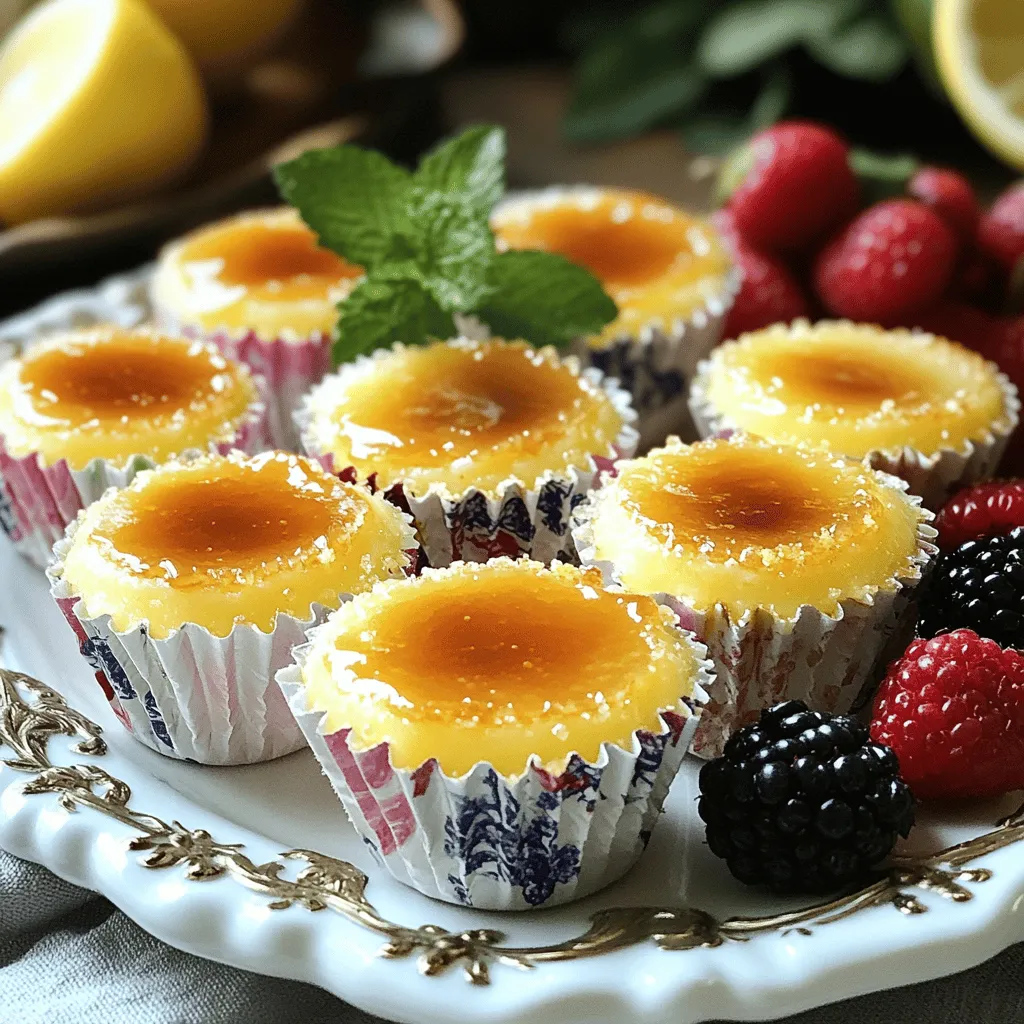
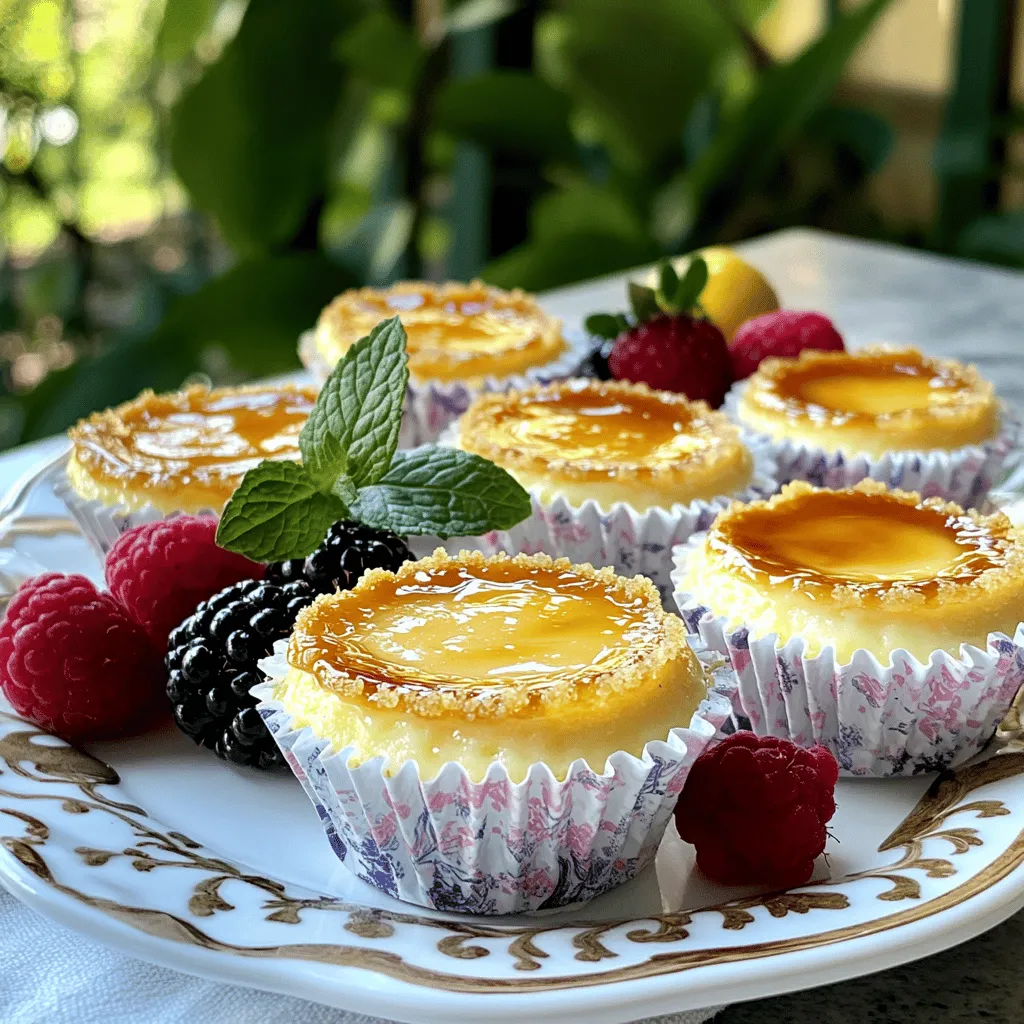
Garnishing makes your mini cheesecakes look fancy. Fresh berries or a sprig of mint adds color. Arrange them on a beautiful plate for a stunning display. Serve them with coffee or dessert wine for an elegant touch. Your guests will love this delightful treat. For the full recipe, check the link above.
Variations
Flavor Variations
You can make mini crème brûlée cheesecakes even more delicious by trying new flavors. Adding different extracts, like almond or coconut, can change the taste. A touch of citrus zest, such as lime or orange, brightens the dessert. You can also mix in chocolate or fruit puree into the filling. Swirling in raspberry or strawberry puree creates a fun pop of color and flavor.
Dietary Variations
For those with special diets, you can still enjoy these treats. Use alternative crusts made from nuts, oats, or gluten-free cookies for a gluten-free version. For a vegan adaptation, replace cream cheese with cashew cream or tofu. Use flax eggs or applesauce instead of regular eggs. Coconut cream can stand in for heavy cream, keeping the richness intact.
Serving Alternatives
Mini cheesecakes shine at parties. They are easy to grab and eat, making them a hit with guests. You can also transform them into a layered dessert. Add layers of chocolate mousse or fresh fruit on top for a fun twist. This adds texture and makes each bite exciting.
Storage Info
Refrigeration Guidelines
Store your mini cheesecakes in an airtight container in the fridge. This keeps them fresh and tasty. They will stay good for about 4 to 5 days. For best quality, enjoy them within this time frame.
Freezing Tips
Freezing mini cheesecakes is easy. First, let them cool completely. Then, wrap each cheesecake in plastic wrap. Place them in a freezer-safe bag or container. They can freeze well for up to 2 months. To thaw, just move them to the fridge overnight. Serve them cold or let them sit at room temperature for a few minutes before enjoying.
Shelf Life
The ingredients in your mini cheesecakes have different shelf lives. Cream cheese lasts about 1 to 2 weeks in the fridge. Check for signs of spoilage, like a sour smell or mold. If your cheesecakes look dry or cracked, it’s time to toss them. Always trust your senses when it comes to food safety.
For the full recipe, check out the details above.
FAQs
How do I know when mini cheesecakes are done?
To check if your mini cheesecakes are done, use the jiggle test. Gently shake the pan. The center should jiggle a bit but not wobble. If it only moves slightly, it’s ready. The edges will look set while the center remains soft. This means it will firm up as it cools.
Can I make these cheesecakes ahead of time?
Yes, you can make these mini cheesecakes ahead of time. After baking, let them cool to room temperature. Place them in the fridge for at least four hours or overnight. This chilling time helps them set and enhances the flavor. They store well for up to a week in the fridge. Just cover them to keep them fresh.
What can I substitute for cream cheese?
You have several options if you need a cream cheese substitute. For a lighter version, use Greek yogurt or ricotta cheese. If you want a dairy-free option, try cashew cream or coconut cream. These alternatives work well in the recipe, keeping the texture creamy and rich.
How to prevent cracking in the cheesecakes?
To prevent cracking, avoid overmixing the batter. Mix just until smooth. Also, let your ingredients come to room temperature before mixing. This helps create a nice texture. Finally, don’t bake them too long. Remove them when they are just set in the center. Follow these tips for a smooth and perfect bake.
In this guide, we explored how to create delicious mini cheesecakes. You learned about the key ingredients and tools, plus the steps for preparation and baking. We shared tips for achieving perfect texture and presentation, along with variations that cater to different diets and tastes.
Embrace your creativity with these recipes. Enjoy making and sharing these treats with others. Your mini cheesecakes will impress everyone. Happy baking!
