![- 4 large Granny Smith apples - 2 cups granulated sugar - 1/2 cup corn syrup - 1 cup water - 1 teaspoon pure vanilla extract - Green food coloring (optional) - Edible glitter or black sprinkles - Lollipop sticks or wooden skewers You can swap Granny Smith apples for other tart apples like Fuji or Honeycrisp. These will still give you a nice balance of sweet and tart. If you want to use a different sweetener, you can try using coconut sugar or brown sugar instead of granulated sugar. For corn syrup, you can use agave syrup or honey, but keep in mind that these will change the flavor a bit. Just make sure that whatever you choose is thick enough to coat the apples well. These substitutions can help you tailor the recipe to your taste or dietary needs. You can still make great poison apples with these swaps! Start by washing and drying the apples. This step is key to a good candy coat. You want to remove dirt and wax. Use a clean cloth to ensure they are dry. Next, insert a lollipop stick into the top of each apple. Push it in about halfway. This gives you a sturdy handle for dipping. In a medium-sized saucepan, combine the sugar, corn syrup, and water. Stir the mixture over medium heat. Keep stirring until the sugar fully dissolves. This step is very important. If the sugar does not dissolve, your candy will not coat well. Once the sugar dissolves, turn up the heat. Let the mixture boil without stirring. Use a candy thermometer to check the temperature. You need it to reach the hard crack stage, which is 300°F. This takes focus, so stay nearby and watch closely. When the candy reaches the right temperature, quickly remove it from heat. Dip each apple into the hot candy coating. Tilt the saucepan if needed to coat fully. Rotate the apple to let any extra candy drip off. While the coating is still warm, add edible glitter or black sprinkles. This gives a spooky look perfect for Halloween! For the complete recipe, refer to the [Full Recipe]. To have a smooth and shiny finish on your poison apples, it’s key to work fast. Once you dip the apples, let the excess drip off. Don’t shake them too much; a gentle turn works best. To avoid crystallization, make sure your pan is clean. Any leftover sugar can cause issues. Always use fresh sugar and stir only until dissolved. When you handle hot sugar syrup, always be careful. It can cause burns. Use thick oven mitts when touching the pot. Keep kids away from the cooking area. For candy thermometers, clip them to your pot. This helps keep them in place. Make sure the bulb is in the syrup, but not touching the pot. For a fun display, arrange your candy apples on a spooky platter. Add fake spider webs or plastic bugs for extra flair. You can also serve them with Halloween-themed snacks. Try some ghost-shaped cookies or pumpkin cupcakes. This makes your table look festive and inviting. Your guests will love the creepy, yet tasty, treats! {{image_4}} You can make your Halloween poison apples even more fun by adding flavors. Try using different extracts like almond or peppermint. A few drops will change the taste in a fun way. You can also add spices like cinnamon for a warm twist. This adds a cozy feel to your spooky treat. Just remember to balance flavors so each bite is tasty! Color is key for Halloween fun. You can use food coloring to create different looks. A few drops of red or purple can make the apples extra spooky. Don’t stop there! Experiment with different sprinkles or toppings. Black sprinkles add a gothic feel, while colorful ones can bring a playful side. Mix and match to find your favorite look! If you want to switch things up, try using other fruits. Pears or strawberries work great for candy coating. Smaller fruits can make cute, bite-sized treats. This way, kids can enjoy a sweet snack that fits their hands. Just remember to adjust the candy coating time as needed. Each fruit has its own moisture level, so keep an eye on it! Store your candy apples in a cool, dry place. Use a cake box or a container to keep them safe. Make sure they are not touching each other, so the candy coating stays nice. If it’s warm or humid, put them in the fridge. This helps keep the candy coating firm. You can keep candy apples for about 2 to 3 days. After that, they may not taste as good. Watch for signs of spoilage. If the apples look slimy or the candy coating feels sticky, it’s best to throw them away. Always check before eating! You can freeze candy apples, but they might not be as good later. To freeze, wrap each apple in plastic wrap. Then, place them in a freezer bag. When you want to eat them, take them out and let them thaw in the fridge overnight. This helps keep them from getting too mushy. Can I use a different type of apple? Yes, you can use other apples. Red delicious or Fuji apples work well. Granny Smith apples are tart, which makes them great for this recipe. Choose what you like best! Why is my candy coating not hardening? If the candy coating is not hardening, it might be due to a low temperature. The candy needs to reach 300°F for the hard crack stage. Ensure you use a candy thermometer to check the temperature accurately. How do I know when the candy reaches hard crack stage? You know the candy is at hard crack stage when it reaches 300°F. At this point, the candy should look clear and shiny. A simple test is to drop a bit into cold water. If it forms hard, brittle threads, it’s ready! What if I don’t have a candy thermometer? If you don’t have a candy thermometer, you can use the cold water test. Boil the sugar mixture and drop a bit into cold water. If it forms a hard ball that breaks when you touch it, you’ve reached the right stage! How to incorporate poison apples into a Halloween party? Set up a spooky dessert table with poison apples as the main attraction. Use black tablecloths and add creepy decorations like fake spiders. You can even label them with fun names like "Witch's Treats." Suggestions for themes or pairings for serving guests Pair poison apples with other fun treats, like ghost cupcakes or bat-shaped cookies. You can create a haunted theme with dark colors and eerie sounds. This will make your party memorable and fun! To wrap up, we covered everything you need to create great candy apples. You learned about essential ingredients, tips for preparation, and even fun variations. Remember, the key is to monitor your candy's temperature and enjoy the process. Get creative with colors and toppings to make your treats extra special. With these handy tips, you can impress everyone at your next Halloween party. Enjoy making your spooky candy apples!](https://tossedflavors.com/wp-content/uploads/2025/07/7e1c62c8-34e3-47f8-883f-8e6c825dde42.webp)
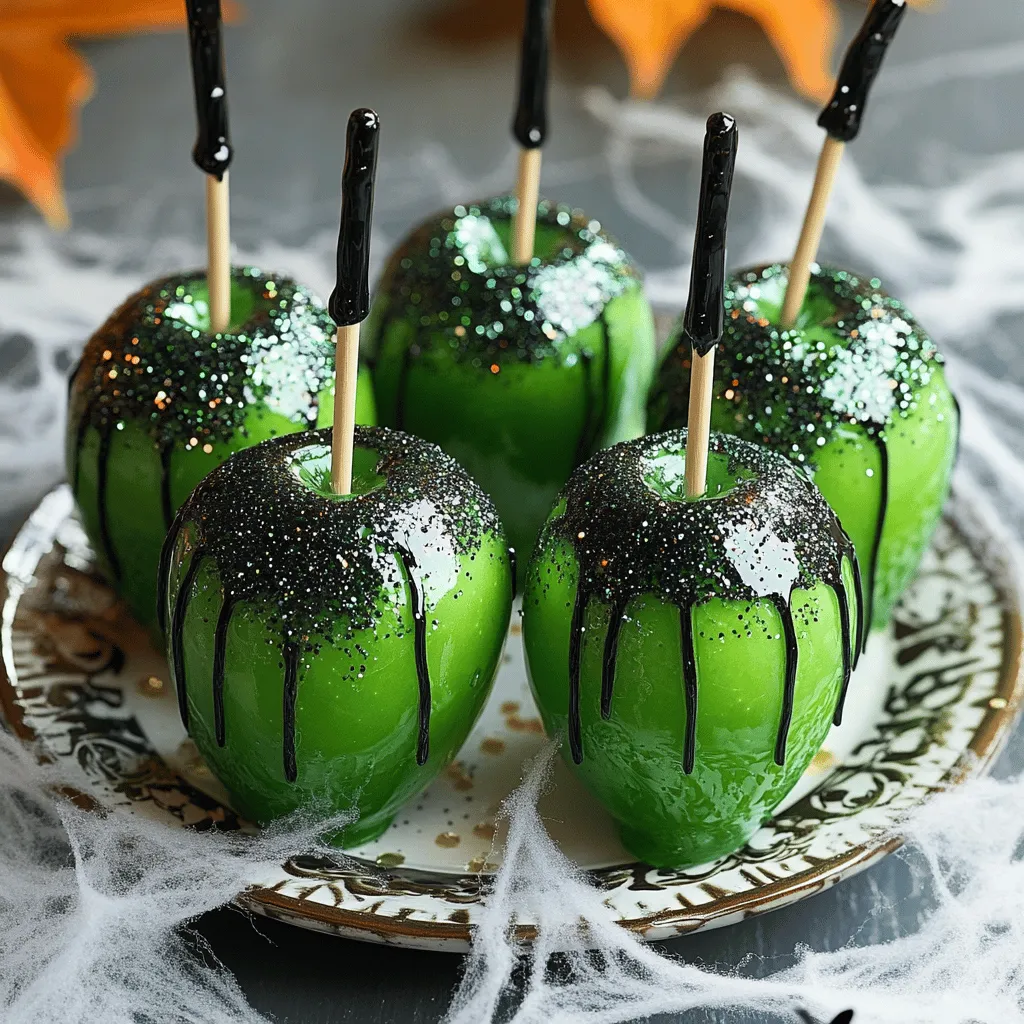
Get ready to treat your taste buds with a spooky twist! My Halloween Poison Apples Recipe is not just a snack; it’s a showstopper for your Halloween party. Using simple ingredients, you’ll create a fun and eerie treat that delights both kids and adults. Follow me as we dive into step-by-step instructions and tips that will make your candy apples the highlight of the night!
Ingredients
List of Necessary Ingredients
– 4 large Granny Smith apples
– 2 cups granulated sugar
– 1/2 cup corn syrup
– 1 cup water
– 1 teaspoon pure vanilla extract
– Green food coloring (optional)
– Edible glitter or black sprinkles
– Lollipop sticks or wooden skewers
Ingredient Substitutions
You can swap Granny Smith apples for other tart apples like Fuji or Honeycrisp. These will still give you a nice balance of sweet and tart. If you want to use a different sweetener, you can try using coconut sugar or brown sugar instead of granulated sugar. For corn syrup, you can use agave syrup or honey, but keep in mind that these will change the flavor a bit. Just make sure that whatever you choose is thick enough to coat the apples well.
These substitutions can help you tailor the recipe to your taste or dietary needs. You can still make great poison apples with these swaps!
Step-by-Step Instructions
Preparation of Apples
Start by washing and drying the apples. This step is key to a good candy coat. You want to remove dirt and wax. Use a clean cloth to ensure they are dry. Next, insert a lollipop stick into the top of each apple. Push it in about halfway. This gives you a sturdy handle for dipping.
Making the Candy Coating
In a medium-sized saucepan, combine the sugar, corn syrup, and water. Stir the mixture over medium heat. Keep stirring until the sugar fully dissolves. This step is very important. If the sugar does not dissolve, your candy will not coat well.
Boiling the Mixture
Once the sugar dissolves, turn up the heat. Let the mixture boil without stirring. Use a candy thermometer to check the temperature. You need it to reach the hard crack stage, which is 300°F. This takes focus, so stay nearby and watch closely.
Coating and Decorating the Apples
When the candy reaches the right temperature, quickly remove it from heat. Dip each apple into the hot candy coating. Tilt the saucepan if needed to coat fully. Rotate the apple to let any extra candy drip off. While the coating is still warm, add edible glitter or black sprinkles. This gives a spooky look perfect for Halloween!
For the complete recipe, refer to the [Full Recipe].
Tips & Tricks
Achieving the Perfect Candy Coating
To have a smooth and shiny finish on your poison apples, it’s key to work fast. Once you dip the apples, let the excess drip off. Don’t shake them too much; a gentle turn works best. To avoid crystallization, make sure your pan is clean. Any leftover sugar can cause issues. Always use fresh sugar and stir only until dissolved.
Safety Precautions
When you handle hot sugar syrup, always be careful. It can cause burns. Use thick oven mitts when touching the pot. Keep kids away from the cooking area. For candy thermometers, clip them to your pot. This helps keep them in place. Make sure the bulb is in the syrup, but not touching the pot.
Presentation and Serving Suggestions
For a fun display, arrange your candy apples on a spooky platter. Add fake spider webs or plastic bugs for extra flair. You can also serve them with Halloween-themed snacks. Try some ghost-shaped cookies or pumpkin cupcakes. This makes your table look festive and inviting. Your guests will love the creepy, yet tasty, treats!
Variations
Flavor Additions
You can make your Halloween poison apples even more fun by adding flavors. Try using different extracts like almond or peppermint. A few drops will change the taste in a fun way. You can also add spices like cinnamon for a warm twist. This adds a cozy feel to your spooky treat. Just remember to balance flavors so each bite is tasty!
Color Options
Color is key for Halloween fun. You can use food coloring to create different looks. A few drops of red or purple can make the apples extra spooky. Don’t stop there! Experiment with different sprinkles or toppings. Black sprinkles add a gothic feel, while colorful ones can bring a playful side. Mix and match to find your favorite look!
Alternate Fruits
If you want to switch things up, try using other fruits. Pears or strawberries work great for candy coating. Smaller fruits can make cute, bite-sized treats. This way, kids can enjoy a sweet snack that fits their hands. Just remember to adjust the candy coating time as needed. Each fruit has its own moisture level, so keep an eye on it!
Storage Info
Best Practices for Storing Candy Apples
Store your candy apples in a cool, dry place. Use a cake box or a container to keep them safe. Make sure they are not touching each other, so the candy coating stays nice. If it’s warm or humid, put them in the fridge. This helps keep the candy coating firm.
Shelf Life
You can keep candy apples for about 2 to 3 days. After that, they may not taste as good. Watch for signs of spoilage. If the apples look slimy or the candy coating feels sticky, it’s best to throw them away. Always check before eating!
Freezing Options
You can freeze candy apples, but they might not be as good later. To freeze, wrap each apple in plastic wrap. Then, place them in a freezer bag. When you want to eat them, take them out and let them thaw in the fridge overnight. This helps keep them from getting too mushy.
FAQs
Common Questions Regarding the Recipe
Can I use a different type of apple?
Yes, you can use other apples. Red delicious or Fuji apples work well. Granny Smith apples are tart, which makes them great for this recipe. Choose what you like best!
Why is my candy coating not hardening?
If the candy coating is not hardening, it might be due to a low temperature. The candy needs to reach 300°F for the hard crack stage. Ensure you use a candy thermometer to check the temperature accurately.
Cooking Tips and Techniques
How do I know when the candy reaches hard crack stage?
You know the candy is at hard crack stage when it reaches 300°F. At this point, the candy should look clear and shiny. A simple test is to drop a bit into cold water. If it forms hard, brittle threads, it’s ready!
What if I don’t have a candy thermometer?
If you don’t have a candy thermometer, you can use the cold water test. Boil the sugar mixture and drop a bit into cold water. If it forms a hard ball that breaks when you touch it, you’ve reached the right stage!
Halloween Party Ideas
How to incorporate poison apples into a Halloween party?
Set up a spooky dessert table with poison apples as the main attraction. Use black tablecloths and add creepy decorations like fake spiders. You can even label them with fun names like “Witch’s Treats.”
Suggestions for themes or pairings for serving guests
Pair poison apples with other fun treats, like ghost cupcakes or bat-shaped cookies. You can create a haunted theme with dark colors and eerie sounds. This will make your party memorable and fun!
To wrap up, we covered everything you need to create great candy apples. You learned about essential ingredients, tips for preparation, and even fun variations. Remember, the key is to monitor your candy’s temperature and enjoy the process. Get creative with colors and toppings to make your treats extra special. With these handy tips, you can impress everyone at your next Halloween party. Enjoy making your spooky candy apples!
![- 4 large Granny Smith apples - 2 cups granulated sugar - 1/2 cup corn syrup - 1 cup water - 1 teaspoon pure vanilla extract - Green food coloring (optional) - Edible glitter or black sprinkles - Lollipop sticks or wooden skewers You can swap Granny Smith apples for other tart apples like Fuji or Honeycrisp. These will still give you a nice balance of sweet and tart. If you want to use a different sweetener, you can try using coconut sugar or brown sugar instead of granulated sugar. For corn syrup, you can use agave syrup or honey, but keep in mind that these will change the flavor a bit. Just make sure that whatever you choose is thick enough to coat the apples well. These substitutions can help you tailor the recipe to your taste or dietary needs. You can still make great poison apples with these swaps! Start by washing and drying the apples. This step is key to a good candy coat. You want to remove dirt and wax. Use a clean cloth to ensure they are dry. Next, insert a lollipop stick into the top of each apple. Push it in about halfway. This gives you a sturdy handle for dipping. In a medium-sized saucepan, combine the sugar, corn syrup, and water. Stir the mixture over medium heat. Keep stirring until the sugar fully dissolves. This step is very important. If the sugar does not dissolve, your candy will not coat well. Once the sugar dissolves, turn up the heat. Let the mixture boil without stirring. Use a candy thermometer to check the temperature. You need it to reach the hard crack stage, which is 300°F. This takes focus, so stay nearby and watch closely. When the candy reaches the right temperature, quickly remove it from heat. Dip each apple into the hot candy coating. Tilt the saucepan if needed to coat fully. Rotate the apple to let any extra candy drip off. While the coating is still warm, add edible glitter or black sprinkles. This gives a spooky look perfect for Halloween! For the complete recipe, refer to the [Full Recipe]. To have a smooth and shiny finish on your poison apples, it’s key to work fast. Once you dip the apples, let the excess drip off. Don’t shake them too much; a gentle turn works best. To avoid crystallization, make sure your pan is clean. Any leftover sugar can cause issues. Always use fresh sugar and stir only until dissolved. When you handle hot sugar syrup, always be careful. It can cause burns. Use thick oven mitts when touching the pot. Keep kids away from the cooking area. For candy thermometers, clip them to your pot. This helps keep them in place. Make sure the bulb is in the syrup, but not touching the pot. For a fun display, arrange your candy apples on a spooky platter. Add fake spider webs or plastic bugs for extra flair. You can also serve them with Halloween-themed snacks. Try some ghost-shaped cookies or pumpkin cupcakes. This makes your table look festive and inviting. Your guests will love the creepy, yet tasty, treats! {{image_4}} You can make your Halloween poison apples even more fun by adding flavors. Try using different extracts like almond or peppermint. A few drops will change the taste in a fun way. You can also add spices like cinnamon for a warm twist. This adds a cozy feel to your spooky treat. Just remember to balance flavors so each bite is tasty! Color is key for Halloween fun. You can use food coloring to create different looks. A few drops of red or purple can make the apples extra spooky. Don’t stop there! Experiment with different sprinkles or toppings. Black sprinkles add a gothic feel, while colorful ones can bring a playful side. Mix and match to find your favorite look! If you want to switch things up, try using other fruits. Pears or strawberries work great for candy coating. Smaller fruits can make cute, bite-sized treats. This way, kids can enjoy a sweet snack that fits their hands. Just remember to adjust the candy coating time as needed. Each fruit has its own moisture level, so keep an eye on it! Store your candy apples in a cool, dry place. Use a cake box or a container to keep them safe. Make sure they are not touching each other, so the candy coating stays nice. If it’s warm or humid, put them in the fridge. This helps keep the candy coating firm. You can keep candy apples for about 2 to 3 days. After that, they may not taste as good. Watch for signs of spoilage. If the apples look slimy or the candy coating feels sticky, it’s best to throw them away. Always check before eating! You can freeze candy apples, but they might not be as good later. To freeze, wrap each apple in plastic wrap. Then, place them in a freezer bag. When you want to eat them, take them out and let them thaw in the fridge overnight. This helps keep them from getting too mushy. Can I use a different type of apple? Yes, you can use other apples. Red delicious or Fuji apples work well. Granny Smith apples are tart, which makes them great for this recipe. Choose what you like best! Why is my candy coating not hardening? If the candy coating is not hardening, it might be due to a low temperature. The candy needs to reach 300°F for the hard crack stage. Ensure you use a candy thermometer to check the temperature accurately. How do I know when the candy reaches hard crack stage? You know the candy is at hard crack stage when it reaches 300°F. At this point, the candy should look clear and shiny. A simple test is to drop a bit into cold water. If it forms hard, brittle threads, it’s ready! What if I don’t have a candy thermometer? If you don’t have a candy thermometer, you can use the cold water test. Boil the sugar mixture and drop a bit into cold water. If it forms a hard ball that breaks when you touch it, you’ve reached the right stage! How to incorporate poison apples into a Halloween party? Set up a spooky dessert table with poison apples as the main attraction. Use black tablecloths and add creepy decorations like fake spiders. You can even label them with fun names like "Witch's Treats." Suggestions for themes or pairings for serving guests Pair poison apples with other fun treats, like ghost cupcakes or bat-shaped cookies. You can create a haunted theme with dark colors and eerie sounds. This will make your party memorable and fun! To wrap up, we covered everything you need to create great candy apples. You learned about essential ingredients, tips for preparation, and even fun variations. Remember, the key is to monitor your candy's temperature and enjoy the process. Get creative with colors and toppings to make your treats extra special. With these handy tips, you can impress everyone at your next Halloween party. Enjoy making your spooky candy apples!](https://tossedflavors.com/wp-content/uploads/2025/07/7e1c62c8-34e3-47f8-883f-8e6c825dde42-300x300.webp)