. To get tender-crisp green beans, start by blanching them. Boil water and add the trimmed beans. After 2-3 minutes, the beans should look bright green. Transfer them to an ice bath right away. This step stops cooking. It keeps them firm and bright. Avoid overcooking by timing it well. The key is to cook them just enough. You can add extra spices to boost flavor. Try a bit of cumin for warmth or lemon zest for brightness. If you want umami-rich additions, consider mushrooms or a splash of fish sauce. Both options add depth to your dish. You can also add a pinch of sugar to balance the flavors. Garlic ginger green beans pair well with many main dishes. They go great with grilled chicken or fish. You can also serve them with rice or quinoa for a complete meal. If you meal prep, these beans store well. They stay fresh and tasty in the fridge. Enjoy them as a side for your lunch or dinner. For the full recipe, check out the section above. {{image_4}} For those needing gluten-free options, use tamari instead of soy sauce. Tamari has a similar taste but no gluten. It keeps the dish tasty while meeting dietary needs. If you're vegan, simply check that the soy sauce is vegan. This dish is already plant-based. It packs flavor without any animal products. You can swap green beans for other veggies. Try snap peas, broccoli, or asparagus. Each veggie brings its own taste and texture. Adjust cooking times as needed for different vegetables. For oils, extra virgin olive oil works great, but you can use avocado oil too. Avocado oil has a mild taste. It can change the flavor slightly, making it unique. To give this dish an Asian flair, add hoisin sauce or rice vinegar. These ingredients boost the flavor profile and add depth. You can also incorporate local herbs. Add fresh basil or mint for a twist. These herbs brighten the dish and add a fresh touch. For the full recipe, check out the complete details. To keep your Garlic Ginger Green Beans fresh, refrigerate them right away. Use an airtight container to avoid moisture loss. Make sure to cool them before sealing. This keeps them crunchy and tasty for up to three days. When it’s time to enjoy leftovers, avoid microwaving them. This can make the beans soggy. Instead, use a skillet to reheat. Warm them over medium heat for a few minutes, stirring gently. This helps maintain their texture and flavor. You can freeze Garlic Ginger Green Beans, but they are best fresh. If you want to freeze, do it right after cooking. Place them in a freezer-safe bag and push out the air. They can last for up to three months. When you’re ready to enjoy, thaw them in the fridge overnight. Sauté in a skillet to warm them up and regain that delightful crunch. You can pair Garlic Ginger Green Beans with many delicious main dishes. Here are some great options: - Grilled chicken or tofu - Stir-fried shrimp or beef - Baked salmon or white fish - Quinoa or rice bowls For sides, consider these complementary dishes: - Steamed jasmine rice - Roasted sweet potatoes - A fresh garden salad - Creamy mashed potatoes Yes, you can make Garlic Ginger Green Beans ahead of time. Here are tips for meal prep: - Blanch and sauté the green beans a day in advance. - Store them in an airtight container in the fridge. For the best taste, reheat them just before serving. Here’s how: - Use a skillet over medium heat. - Add a splash of water to prevent sticking. - Heat until warm, stirring gently. Garlic and ginger are not just tasty; they offer many health benefits. Here are their key nutritional highlights: - Garlic can help boost your immune system. - Ginger aids digestion and can reduce nausea. Both ingredients may also have anti-inflammatory effects. They can help with blood circulation and support overall wellness. Enjoying Garlic Ginger Green Beans not only delights your taste buds but also supports your health. For the full recipe, check out [Full Recipe]. Garlic Ginger Green Beans are simple to make and full of flavor. We covered the main ingredients, step-by-step cooking, and tips for the perfect texture. You can easily modify the recipe for dietary needs or enjoy different variations. Don’t forget the storage tips to keep your leftovers fresh. This dish pairs well with many meals and offers health benefits too. Enjoy making this tasty side dish that brightens any table. It's quick, easy, and delicious!](https://tossedflavors.com/wp-content/uploads/2025/07/4c2c7d0a-5ff6-4521-a217-69b1c6b4c062.webp)
Looking for a quick and tasty side dish? Garlic Ginger Green Beans are your answer. This vibrant dish takes fresh green beans and elevates them with fragrant garlic and ginger. It’s simple to prepare, perfect for busy nights, and adds a punch to any meal. In this article, I’ll guide you through easy steps and tips, ensuring you create a flavorful plate everyone will love. Let’s get cooking!
Ingredients
List of Ingredients
– 1 pound fresh green beans, trimmed
– 3 tablespoons extra virgin olive oil
– 4 cloves garlic, finely minced
– 1 tablespoon fresh ginger, thoughtfully minced
– 1 tablespoon soy sauce (or tamari for a gluten-free option)
– 1 teaspoon toasted sesame oil
– 1 teaspoon red pepper flakes (adjust according to your heat preference)
– Sea salt and freshly cracked black pepper to taste
– 2 tablespoons toasted sesame seeds (for a delightful garnish)
– Fresh cilantro leaves or finely sliced green onions (for an eye-catching garnish)
For this recipe, I love using fresh green beans. They add a nice crunch and vibrant color. You can find them at any grocery store. Remember to trim the ends for a clean look. The garlic and ginger bring a warm, spicy flavor to the dish. I always mince them finely to release their full taste.
The soy sauce adds a savory depth. If you’re avoiding gluten, tamari works just as well. The toasted sesame oil gives a lovely nutty aroma. Adjust the red pepper flakes to suit your heat level.
Don’t forget the sea salt and black pepper. They enhance all the flavors. Toasted sesame seeds add a delightful crunch on top. Finally, fresh cilantro or green onions provide a bright garnish.
Check out the Full Recipe for detailed steps and tips!
Step-by-Step Instructions
Preparation of Green Beans
To start, we need to blanch the green beans. Fill a large pot with water and add a pinch of salt. Bring it to a rolling boil. Once boiling, carefully add your trimmed green beans. Let them cook for about 2-3 minutes. You want them bright green and still crisp.
After blanching, it’s time for an ice bath. Fill a bowl with ice and water. Drain the green beans and quickly put them in the ice bath. This stops the cooking. After a few minutes, drain them again and set aside.
Cooking Instructions
Now, let’s heat the olive oil. Grab a spacious skillet or wok. Pour in the extra virgin olive oil and warm it over medium-high heat until it shimmers. This step adds flavor and helps cook the beans well.
Next, add the minced garlic and ginger to the skillet. Sauté them for about 30 seconds to 1 minute. Stir often to keep them from burning. You want the kitchen to smell amazing at this point!
Once fragrant, toss in the blanched green beans. Stir-fry them for about 3-5 minutes. This warms them up and helps them absorb all that garlic and ginger goodness.
Final Touches
Now, it’s time to season the beans. Drizzle soy sauce and toasted sesame oil over them. Sprinkle in the red pepper flakes to add a bit of heat. Season with sea salt and cracked black pepper. Toss everything well to mix the flavors.
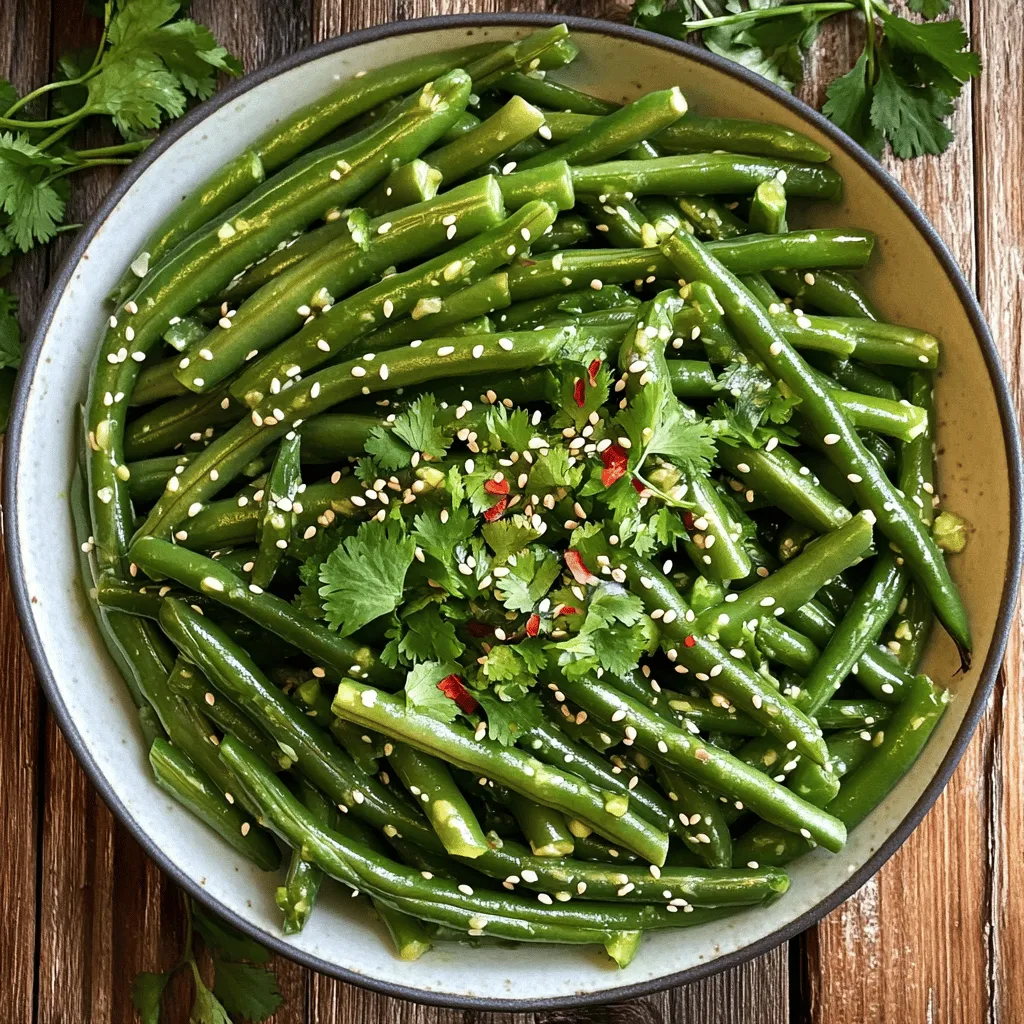
Finally, remove the skillet from heat. Transfer the green beans to a serving dish. Sprinkle toasted sesame seeds on top for crunch. You can also add fresh cilantro leaves or sliced green onions for a pop of color. Enjoy your Garlic Ginger Green Beans as a tasty side! For the full recipe, check it out [here](Full Recipe).
Tips & Tricks
Perfecting the Texture
To get tender-crisp green beans, start by blanching them. Boil water and add the trimmed beans. After 2-3 minutes, the beans should look bright green. Transfer them to an ice bath right away. This step stops cooking. It keeps them firm and bright. Avoid overcooking by timing it well. The key is to cook them just enough.
Flavor Enhancements
You can add extra spices to boost flavor. Try a bit of cumin for warmth or lemon zest for brightness. If you want umami-rich additions, consider mushrooms or a splash of fish sauce. Both options add depth to your dish. You can also add a pinch of sugar to balance the flavors.
Serving Ideas
Garlic ginger green beans pair well with many main dishes. They go great with grilled chicken or fish. You can also serve them with rice or quinoa for a complete meal. If you meal prep, these beans store well. They stay fresh and tasty in the fridge. Enjoy them as a side for your lunch or dinner. For the full recipe, check out the section above.
Variations
Dietary Adjustments
For those needing gluten-free options, use tamari instead of soy sauce. Tamari has a similar taste but no gluten. It keeps the dish tasty while meeting dietary needs.
If you’re vegan, simply check that the soy sauce is vegan. This dish is already plant-based. It packs flavor without any animal products.
Ingredient Swaps
You can swap green beans for other veggies. Try snap peas, broccoli, or asparagus. Each veggie brings its own taste and texture. Adjust cooking times as needed for different vegetables.
For oils, extra virgin olive oil works great, but you can use avocado oil too. Avocado oil has a mild taste. It can change the flavor slightly, making it unique.
Regional Influences
To give this dish an Asian flair, add hoisin sauce or rice vinegar. These ingredients boost the flavor profile and add depth.
You can also incorporate local herbs. Add fresh basil or mint for a twist. These herbs brighten the dish and add a fresh touch.
For the full recipe, check out the complete details.
Storage Info
Storing Leftovers
To keep your Garlic Ginger Green Beans fresh, refrigerate them right away. Use an airtight container to avoid moisture loss. Make sure to cool them before sealing. This keeps them crunchy and tasty for up to three days.
Reheating Suggestions
When it’s time to enjoy leftovers, avoid microwaving them. This can make the beans soggy. Instead, use a skillet to reheat. Warm them over medium heat for a few minutes, stirring gently. This helps maintain their texture and flavor.
Freezing for Later
You can freeze Garlic Ginger Green Beans, but they are best fresh. If you want to freeze, do it right after cooking. Place them in a freezer-safe bag and push out the air. They can last for up to three months. When you’re ready to enjoy, thaw them in the fridge overnight. Sauté in a skillet to warm them up and regain that delightful crunch.
FAQs
What can I serve with Garlic Ginger Green Beans?
You can pair Garlic Ginger Green Beans with many delicious main dishes. Here are some great options:
– Grilled chicken or tofu
– Stir-fried shrimp or beef
– Baked salmon or white fish
– Quinoa or rice bowls
For sides, consider these complementary dishes:
– Steamed jasmine rice
– Roasted sweet potatoes
– A fresh garden salad
– Creamy mashed potatoes
Can I make Garlic Ginger Green Beans ahead of time?
Yes, you can make Garlic Ginger Green Beans ahead of time. Here are tips for meal prep:
– Blanch and sauté the green beans a day in advance.
– Store them in an airtight container in the fridge.
For the best taste, reheat them just before serving. Here’s how:
– Use a skillet over medium heat.
– Add a splash of water to prevent sticking.
– Heat until warm, stirring gently.
What are the health benefits of garlic and ginger?
Garlic and ginger are not just tasty; they offer many health benefits. Here are their key nutritional highlights:
– Garlic can help boost your immune system.
– Ginger aids digestion and can reduce nausea.
Both ingredients may also have anti-inflammatory effects. They can help with blood circulation and support overall wellness. Enjoying Garlic Ginger Green Beans not only delights your taste buds but also supports your health. For the full recipe, check out [Full Recipe].
Garlic Ginger Green Beans are simple to make and full of flavor. We covered the main ingredients, step-by-step cooking, and tips for the perfect texture. You can easily modify the recipe for dietary needs or enjoy different variations. Don’t forget the storage tips to keep your leftovers fresh. This dish pairs well with many meals and offers health benefits too. Enjoy making this tasty side dish that brightens any table. It’s quick, easy, and delicious!
. To get tender-crisp green beans, start by blanching them. Boil water and add the trimmed beans. After 2-3 minutes, the beans should look bright green. Transfer them to an ice bath right away. This step stops cooking. It keeps them firm and bright. Avoid overcooking by timing it well. The key is to cook them just enough. You can add extra spices to boost flavor. Try a bit of cumin for warmth or lemon zest for brightness. If you want umami-rich additions, consider mushrooms or a splash of fish sauce. Both options add depth to your dish. You can also add a pinch of sugar to balance the flavors. Garlic ginger green beans pair well with many main dishes. They go great with grilled chicken or fish. You can also serve them with rice or quinoa for a complete meal. If you meal prep, these beans store well. They stay fresh and tasty in the fridge. Enjoy them as a side for your lunch or dinner. For the full recipe, check out the section above. {{image_4}} For those needing gluten-free options, use tamari instead of soy sauce. Tamari has a similar taste but no gluten. It keeps the dish tasty while meeting dietary needs. If you're vegan, simply check that the soy sauce is vegan. This dish is already plant-based. It packs flavor without any animal products. You can swap green beans for other veggies. Try snap peas, broccoli, or asparagus. Each veggie brings its own taste and texture. Adjust cooking times as needed for different vegetables. For oils, extra virgin olive oil works great, but you can use avocado oil too. Avocado oil has a mild taste. It can change the flavor slightly, making it unique. To give this dish an Asian flair, add hoisin sauce or rice vinegar. These ingredients boost the flavor profile and add depth. You can also incorporate local herbs. Add fresh basil or mint for a twist. These herbs brighten the dish and add a fresh touch. For the full recipe, check out the complete details. To keep your Garlic Ginger Green Beans fresh, refrigerate them right away. Use an airtight container to avoid moisture loss. Make sure to cool them before sealing. This keeps them crunchy and tasty for up to three days. When it’s time to enjoy leftovers, avoid microwaving them. This can make the beans soggy. Instead, use a skillet to reheat. Warm them over medium heat for a few minutes, stirring gently. This helps maintain their texture and flavor. You can freeze Garlic Ginger Green Beans, but they are best fresh. If you want to freeze, do it right after cooking. Place them in a freezer-safe bag and push out the air. They can last for up to three months. When you’re ready to enjoy, thaw them in the fridge overnight. Sauté in a skillet to warm them up and regain that delightful crunch. You can pair Garlic Ginger Green Beans with many delicious main dishes. Here are some great options: - Grilled chicken or tofu - Stir-fried shrimp or beef - Baked salmon or white fish - Quinoa or rice bowls For sides, consider these complementary dishes: - Steamed jasmine rice - Roasted sweet potatoes - A fresh garden salad - Creamy mashed potatoes Yes, you can make Garlic Ginger Green Beans ahead of time. Here are tips for meal prep: - Blanch and sauté the green beans a day in advance. - Store them in an airtight container in the fridge. For the best taste, reheat them just before serving. Here’s how: - Use a skillet over medium heat. - Add a splash of water to prevent sticking. - Heat until warm, stirring gently. Garlic and ginger are not just tasty; they offer many health benefits. Here are their key nutritional highlights: - Garlic can help boost your immune system. - Ginger aids digestion and can reduce nausea. Both ingredients may also have anti-inflammatory effects. They can help with blood circulation and support overall wellness. Enjoying Garlic Ginger Green Beans not only delights your taste buds but also supports your health. For the full recipe, check out [Full Recipe]. Garlic Ginger Green Beans are simple to make and full of flavor. We covered the main ingredients, step-by-step cooking, and tips for the perfect texture. You can easily modify the recipe for dietary needs or enjoy different variations. Don’t forget the storage tips to keep your leftovers fresh. This dish pairs well with many meals and offers health benefits too. Enjoy making this tasty side dish that brightens any table. It's quick, easy, and delicious!](https://tossedflavors.com/wp-content/uploads/2025/07/4c2c7d0a-5ff6-4521-a217-69b1c6b4c062-300x300.webp)