Are you ready to turn fresh cucumbers into crunchy garlic dill pickles? This simple recipe guide will help you master the art of pickling with ease. You’ll learn not just the essential ingredients, but also secret tips for extra flavor and crunch. Whether you’re a seasoned cook or a newbie, you can create tasty pickles to enjoy or share. Let’s dive into the flavorful world of garlic dill pickles!
Ingredients
Essential Ingredients for Garlic Dill Pickles
To make tasty garlic dill pickles, you need a few key items. Here’s what you should gather:
– 4 medium cucumbers, thoroughly washed and sliced into spears
– 4 cloves of garlic, peeled and gently crushed
– 1 tablespoon dill seeds
– 1 tablespoon mustard seeds
– 2 cups of fresh water
– 1 cup white vinegar
– 2 tablespoons kosher salt
– 1 tablespoon sugar
These ingredients bring out the best flavors in your pickles.
Optional Ingredients for Added Flavor
If you want to spice things up, you can add some optional ingredients. These are not required but can give your pickles a twist:
– 1/2 teaspoon crushed red pepper flakes (for an extra kick)
– Fresh dill sprigs (for more dill flavor)
– Whole black peppercorns (for a nice bite)
Feel free to mix and match these ingredients for fun flavors.
Cooking Equipment Needed
You don’t need fancy tools to make garlic dill pickles. Here’s what you will need:
– Medium saucepan for heating the brine
– Glass jar or container for storing the pickles
– Wooden spoon for stirring the brine
– Measuring cups and spoons for accuracy
Having these tools ready will make your cooking easier and more fun. For the complete recipe, check out the Full Recipe.
Step-by-Step Instructions
Preparing the Brine
Start by making the brine. In a medium saucepan, mix two cups of fresh water, one cup of white vinegar, two tablespoons of kosher salt, and one tablespoon of sugar. Heat the mixture on medium-high. Stir until the salt and sugar dissolve. This process is key for a tasty pickle. Once it’s all mixed, take the pan off the heat. Let the brine cool to room temperature. This step is very important so the cucumbers stay crisp.
Layering Flavors in the Jar
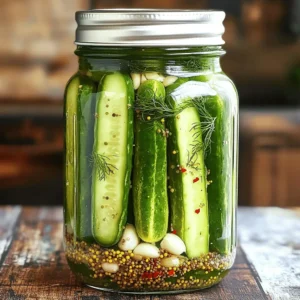
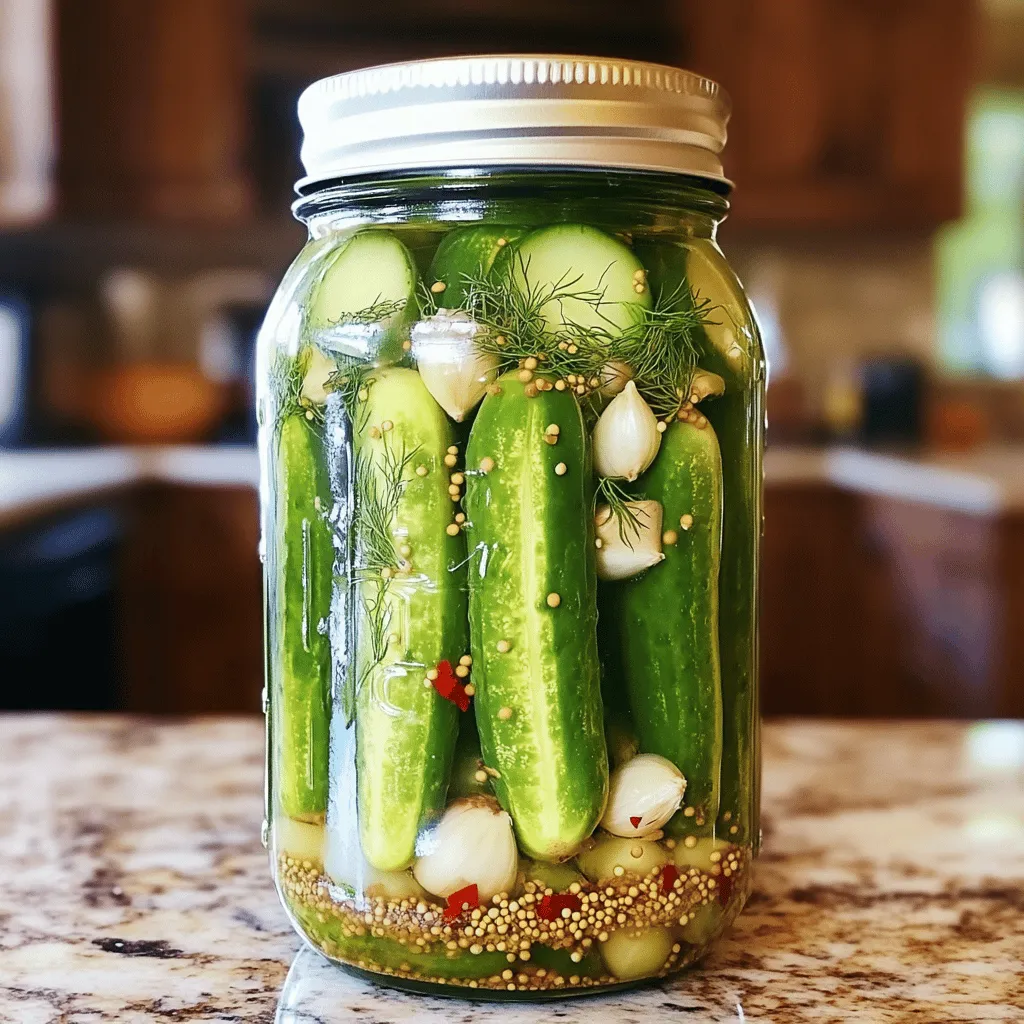
Next, grab a clean glass jar or container. Begin layering your flavors in the bottom. Place four crushed garlic cloves first. Then add one tablespoon of dill seeds and one tablespoon of mustard seeds. If you want some heat, sprinkle in half a teaspoon of crushed red pepper flakes. These spices will make your pickles burst with flavor. Each layer adds depth and makes the pickles even tastier.
Packing and Curing the Cucumbers
Now, it’s time to pack the cucumbers. Take four medium cucumbers and slice them into spears. Place them tightly upright in the jar. Make sure to leave enough space for the brine to flow around them. Once packed, pour the cooled brine into the jar. Ensure that all the cucumbers are fully submerged. This helps them soak in all that delicious flavor. Seal the jar with a lid and pop it in the fridge. Let the pickles cure for at least 24 hours. For the best taste, wait a few days before enjoying them. You can find the full recipe to guide you through this process.
Tips & Tricks
Best Practices for Crispier Pickles
To make your pickles crispier, start with fresh cucumbers. Look for firm ones without soft spots. Soaking cucumbers in ice water for a few hours helps too. It keeps them crunchy in the brine. Also, add some grape leaves or a little extra salt to your brine. This can boost crunchiness.
How to Infuse Extra Flavor
You can add more flavors to your pickles. Try mixing in fresh herbs like thyme or oregano. Whole black peppercorns or bay leaves work well too. If you like heat, toss in some sliced jalapeños. For a sweet note, add a bit of dill pickle relish. Experimenting is the key to creating your perfect brine.
Serving Suggestions and Pairing Ideas
Garlic dill pickles make great snacks. Serve them with sandwiches or burgers for a zesty crunch. They pair nicely with cheese platters too. For a fun twist, chop them up and mix into potato salad. You can even add them to tacos for a flavorful kick. These pickles brighten up any dish! For the full recipe, check out the Garlic-Dill Delight Pickles.
Variations
Spicy Garlic Dill Pickles
If you love heat, make spicy garlic dill pickles. Just add crushed red pepper flakes. You can add more or less, depending on your taste. Start with a half teaspoon. If you want it spicier, add more! The heat mixes well with the garlic and dill. It adds a nice kick. Try these on burgers or sandwiches for a new twist.
Sweet Garlic Dill Pickles
For a sweet twist, use sugar in your brine. Increase the sugar to 1/4 cup for a more pronounced sweetness. You can also add some sliced onions or bell peppers. This gives a nice crunch and extra flavor. Sweet garlic dill pickles work great as a snack. They taste yummy with cheese and crackers too.
Quick Pickle Method
If you need pickles fast, use the quick pickle method. Slice the cucumbers thinly and soak them in the brine for just an hour. This method creates a tangy flavor quickly. They won’t be as crunchy, but they are still tasty! Use this method when you want a quick snack. You can also try it with other veggies like carrots or radishes.
For the full recipe, check out the Garlic-Dill Delight Pickles. Enjoy creating your own versions!
Storage Info
How to Store Homemade Garlic Dill Pickles
To store your garlic dill pickles, keep them in a clean glass jar. Make sure the jar has a tight lid. Place the jar in the refrigerator. The cool air helps keep the pickles crisp and fresh. Avoid leaving them at room temperature to prevent spoilage.
Shelf Life and Usage Recommendations
Homemade garlic dill pickles last about 2 to 4 weeks in the fridge. After that, they may lose flavor and crunch. For the best taste, use them within the first two weeks. Always check the pickles for freshness before using.
Signs of Spoilage
Watch for signs of spoilage. If the pickles look cloudy or have a strange smell, toss them out. Also, if you see mold, it’s time to say goodbye. Always trust your senses; if something feels off, don’t eat it. Enjoy your garlic dill pickles while they are fresh! For the full recipe, check the link.
FAQs
How long do homemade garlic dill pickles last?
Homemade garlic dill pickles last about 2 to 4 weeks in the fridge. Their flavor improves as they sit. After a week, the pickles become more tangy and flavorful. Always check for signs of spoilage, like a bad smell or mold.
Can I use different types of cucumbers for pickling?
Yes, you can use different cucumbers for pickling. Try Kirby or Persian cucumbers for crunch. They hold up well in brine and stay crisp. Avoid using soft cucumbers, as they won’t pickle well.
What are the health benefits of garlic dill pickles?
Garlic dill pickles offer several health benefits. They are low in calories and high in flavor. The garlic adds antioxidants, which help boost your immune system. Dill may aid digestion and freshen your breath. Plus, they can be a great way to enjoy veggies!
You’ve learned how to make delicious garlic dill pickles from scratch. We covered essential and optional ingredients, cooking tools, and step-by-step instructions. You now know tips for crispier pickles and fun variations like spicy or sweet. Proper storage and spoilage signs are important.
Homemade pickles add flavor and crunch to meals. Enjoy your pickling journey and share your tasty results!