![- 1 cup crushed chocolate wafers - 1/2 cup unsalted butter, melted - 1 cup fresh strawberries, hulled and sliced - 2 cups heavy whipping cream - 1 cup powdered sugar - 1 teaspoon vanilla extract - 1 cup semi-sweet chocolate chips, melted - 1/2 cup strawberry puree (made from blended strawberries) - Fresh strawberries and chocolate shavings for garnish When I create a dessert, I focus on quality ingredients. For this Frozen Chocolate Strawberry Cake, each component plays a key role in making the treat delicious. The crust starts with crushed chocolate wafers mixed with melted butter. This mix gives the cake a firm base. I use fresh strawberries because they bring a bright flavor. The whipped cream is crucial for that light texture. I whip heavy cream until it forms soft peaks. Then, I add powdered sugar and vanilla extract. This makes the cream sweet and fragrant. The chocolate and strawberry layers are where the magic happens. I melt semi-sweet chocolate chips. Folding this into half of the whipped cream creates a rich chocolate layer. For the other half, I blend strawberry puree into the whipped cream for a fruity taste. Finally, I garnish the cake with fresh strawberries and chocolate shavings. This not only adds flavor but also makes the cake look stunning. You can find the complete recipe in [Full Recipe]. Enjoy creating this delightful dessert! To start, you will need to mix the chocolate wafers and melted butter. In a medium bowl, combine 1 cup of crushed chocolate wafers with 1/2 cup of melted unsalted butter. Mix this well until it looks like wet sand. This mixture must stick together. Next, press the chocolate wafer mixture into a 9-inch springform pan. Use your fingers or the back of a spoon to pack it tightly. Make sure the crust is even and smooth. Once done, place the crust in the freezer to set while you make the filling. For the whipped cream, grab a large bowl. Pour in 2 cups of heavy whipping cream. Using an electric mixer, beat the cream until you see soft peaks. This means the cream is light and fluffy. Now, slowly add in 1 cup of powdered sugar and 1 teaspoon of vanilla extract. Keep mixing until you see stiff peaks form. This cream should hold its shape well, making it perfect for the cake. In another bowl, take half of the whipped cream. Gently fold in 1 cup of melted semi-sweet chocolate. Be careful not to deflate the cream. This creates a rich chocolate mixture. In a new bowl, fold 1/2 cup of strawberry puree into the remaining whipped cream. Mix until smooth. This gives you a fresh strawberry flavor, perfect for layering. Now, it’s time to layer! Start by spreading the chocolate whipped cream over the frozen crust. Use a spatula to make it even. Next, arrange the sliced strawberries on top of the chocolate layer. You can use as many or as few as you like. Finally, spread the strawberry whipped cream over the strawberries. Smooth the top for a nice finish. Cover the springform pan tightly with plastic wrap. Place it in the freezer for at least 4 hours. This helps the cake set properly. After freezing, the cake should feel firm and solid. When you are ready to serve, carefully remove the springform pan. To slice, dip a sharp knife in warm water, then wipe it dry. This helps make clean cuts. Cut into wedges and enjoy this delightful dessert treat! For a fancy touch, garnish with extra strawberries and chocolate shavings. For the full recipe, check the [Full Recipe]. To ensure smooth layers, use a spatula to spread the cream evenly. Apply gentle pressure. This helps avoid air pockets. For the best texture in whipped cream, beat it until you see soft peaks. Soft peaks hold their shape but still look fluffy. One common mistake is overbeating the cream. If you beat it too much, the cream can turn grainy. Stop as soon as you see stiff peaks. Another mistake is not freezing long enough. The cake needs at least four hours to set perfectly. A firm cake is key to easy slicing. Pairing this cake with sauces or garnishes can elevate the dish. Consider drizzling chocolate sauce or adding a scoop of strawberry puree. Fresh mint leaves can also add a nice touch. For the best sides, serve with a scoop of vanilla ice cream or a dollop of whipped cream. This adds extra creaminess and flavor. {{image_4}} You can boost the chocolate flavor with a few easy changes. First, use dark chocolate instead of semi-sweet. Dark chocolate gives a rich taste. It adds depth and makes the cake more intense. Next, consider adding flavor extracts. You can try almond or espresso extract. Just a small amount creates a lovely twist in flavor. These enhancements will surprise anyone who takes a bite. While strawberries are delightful, other fruits work well too. Raspberries and blueberries can add a fresh twist. You can even mix different berries for a fun mixed berry version. Simply swap out the strawberry puree with a berry blend. This change makes the cake colorful and tasty. If you need gluten-free options, use gluten-free chocolate wafers for the crust. They work just as well and keep everything delicious. For dairy-free alternatives, choose coconut cream instead of heavy whipping cream. This option gives the cake a lovely coconut flavor. You can also use dairy-free butter in the crust. These adjustments make the cake suitable for more diets, so everyone can enjoy it. Feel free to explore these variations to create your own special Frozen Chocolate Strawberry Cake. For the full recipe, check [Full Recipe]. To keep your Frozen Chocolate Strawberry Cake fresh, wrap it tightly. Use plastic wrap or aluminum foil. Make sure no air can enter. This will help prevent freezer burn. A springform pan works well for freezing. You can also use an airtight container. Both options keep your cake safe from strong odors. Thaw the cake slowly in the fridge. This helps it keep its texture. Allow it to thaw for about 4 hours. If you need it faster, leave it at room temperature for 30 minutes. Avoid using a microwave, as it can melt the cake unevenly. Serve it chilled for the best taste. Your cake stays fresh in the freezer for about 2 months. After that, it may lose flavor. Look for signs of freezer burn, like white spots. If the cake smells off or has an unusual texture, it’s best to throw it away. Enjoy your cake while it’s still at its best! Yes, you can use frozen strawberries in this cake. They work well, especially when fresh strawberries are not in season. To incorporate frozen fruit, simply thaw them first. Drain any excess liquid before using them in the recipe. This helps keep your cake from getting too watery. It takes about 4 hours for the cake to freeze properly. For the best results, I recommend freezing it overnight. This ensures that the layers set well and the flavors meld together perfectly. Absolutely! Making the cake a day in advance is a great idea. Once you layer the cake, wrap it in plastic wrap and store it in the freezer. Just remember to let it sit for a few minutes at room temperature before cutting. This makes slicing much easier. Garnishing the cake can be fun and creative. You can top it with fresh strawberries and chocolate shavings. Another idea is to drizzle some melted chocolate or even a berry sauce over the top. These touches make the cake look even more appealing. Yes, this recipe can cater to various dietary needs. To make it gluten-free, use gluten-free chocolate wafers. For a vegan option, substitute the heavy cream with coconut cream and use vegan chocolate chips. These swaps maintain the cake's delicious flavor and texture. This blog post detailed a delicious chocolate strawberry cake. We began with the key ingredients, including chocolate wafers and fresh strawberries. I provided step-by-step instructions for making the crust, whipped cream, and layering. Tips and tricks helped avoid common mistakes and added options for variety. Finally, we discussed storage practices and answered common questions. Creating this cake is fun and rewarding. Enjoy making it your own and sharing it with others!](https://tossedflavors.com/wp-content/uploads/2025/07/686c6beb-4a8f-4f86-8e97-35a58dd3a00d.webp)
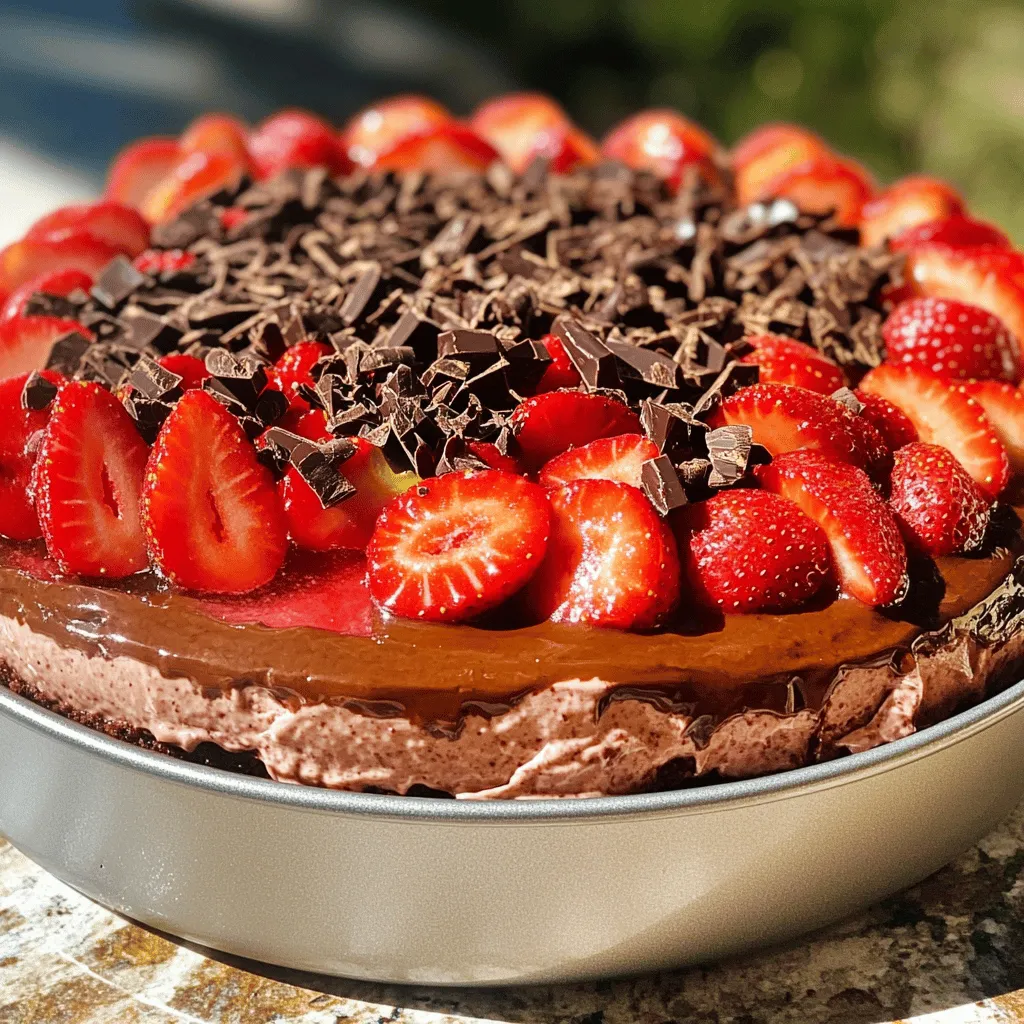
Craving a dessert that dazzles? Meet the Frozen Chocolate Strawberry Cake, your new go-to treat! With a blend of creamy chocolate and fresh strawberries, every slice is pure joy. In this blog, I’ll guide you through easy steps for creating this layered delight. Follow my tips to dodge common mistakes and enhance flavors. Ready to impress yourself and your guests? Let’s dive in and whip up some magic!
Ingredients
List of Ingredients
– 1 cup crushed chocolate wafers
– 1/2 cup unsalted butter, melted
– 1 cup fresh strawberries, hulled and sliced
Additional Ingredients for Whipped Cream
– 2 cups heavy whipping cream
– 1 cup powdered sugar
– 1 teaspoon vanilla extract
Chocolate and Strawberry Components
– 1 cup semi-sweet chocolate chips, melted
– 1/2 cup strawberry puree (made from blended strawberries)
– Fresh strawberries and chocolate shavings for garnish
When I create a dessert, I focus on quality ingredients. For this Frozen Chocolate Strawberry Cake, each component plays a key role in making the treat delicious.
The crust starts with crushed chocolate wafers mixed with melted butter. This mix gives the cake a firm base. I use fresh strawberries because they bring a bright flavor.
The whipped cream is crucial for that light texture. I whip heavy cream until it forms soft peaks. Then, I add powdered sugar and vanilla extract. This makes the cream sweet and fragrant.
The chocolate and strawberry layers are where the magic happens. I melt semi-sweet chocolate chips. Folding this into half of the whipped cream creates a rich chocolate layer. For the other half, I blend strawberry puree into the whipped cream for a fruity taste.
Finally, I garnish the cake with fresh strawberries and chocolate shavings. This not only adds flavor but also makes the cake look stunning.
You can find the complete recipe in [Full Recipe]. Enjoy creating this delightful dessert!
Step-by-Step Instructions
Preparing the Crust
To start, you will need to mix the chocolate wafers and melted butter. In a medium bowl, combine 1 cup of crushed chocolate wafers with 1/2 cup of melted unsalted butter. Mix this well until it looks like wet sand. This mixture must stick together.
Next, press the chocolate wafer mixture into a 9-inch springform pan. Use your fingers or the back of a spoon to pack it tightly. Make sure the crust is even and smooth. Once done, place the crust in the freezer to set while you make the filling.
Making the Whipped Cream
For the whipped cream, grab a large bowl. Pour in 2 cups of heavy whipping cream. Using an electric mixer, beat the cream until you see soft peaks. This means the cream is light and fluffy.
Now, slowly add in 1 cup of powdered sugar and 1 teaspoon of vanilla extract. Keep mixing until you see stiff peaks form. This cream should hold its shape well, making it perfect for the cake.
Combining Chocolate and Strawberries
In another bowl, take half of the whipped cream. Gently fold in 1 cup of melted semi-sweet chocolate. Be careful not to deflate the cream. This creates a rich chocolate mixture.
In a new bowl, fold 1/2 cup of strawberry puree into the remaining whipped cream. Mix until smooth. This gives you a fresh strawberry flavor, perfect for layering.
Layering the Cake
Now, it’s time to layer! Start by spreading the chocolate whipped cream over the frozen crust. Use a spatula to make it even.
Next, arrange the sliced strawberries on top of the chocolate layer. You can use as many or as few as you like. Finally, spread the strawberry whipped cream over the strawberries. Smooth the top for a nice finish.
Freezing the Cake
Cover the springform pan tightly with plastic wrap. Place it in the freezer for at least 4 hours. This helps the cake set properly. After freezing, the cake should feel firm and solid.
Serving the Cake
When you are ready to serve, carefully remove the springform pan. To slice, dip a sharp knife in warm water, then wipe it dry. This helps make clean cuts. Cut into wedges and enjoy this delightful dessert treat! For a fancy touch, garnish with extra strawberries and chocolate shavings.
For the full recipe, check the [Full Recipe].
Tips & Tricks
Techniques for Perfect Layers
To ensure smooth layers, use a spatula to spread the cream evenly. Apply gentle pressure. This helps avoid air pockets. For the best texture in whipped cream, beat it until you see soft peaks. Soft peaks hold their shape but still look fluffy.
Common Mistakes to Avoid
One common mistake is overbeating the cream. If you beat it too much, the cream can turn grainy. Stop as soon as you see stiff peaks. Another mistake is not freezing long enough. The cake needs at least four hours to set perfectly. A firm cake is key to easy slicing.
Serving Suggestions
Pairing this cake with sauces or garnishes can elevate the dish. Consider drizzling chocolate sauce or adding a scoop of strawberry puree. Fresh mint leaves can also add a nice touch. For the best sides, serve with a scoop of vanilla ice cream or a dollop of whipped cream. This adds extra creaminess and flavor.
Variations
Chocolate Flavor Enhancements
You can boost the chocolate flavor with a few easy changes. First, use dark chocolate instead of semi-sweet. Dark chocolate gives a rich taste. It adds depth and makes the cake more intense.
Next, consider adding flavor extracts. You can try almond or espresso extract. Just a small amount creates a lovely twist in flavor. These enhancements will surprise anyone who takes a bite.
Strawberry Alternatives
While strawberries are delightful, other fruits work well too. Raspberries and blueberries can add a fresh twist. You can even mix different berries for a fun mixed berry version. Simply swap out the strawberry puree with a berry blend. This change makes the cake colorful and tasty.
Dietary Adjustments
If you need gluten-free options, use gluten-free chocolate wafers for the crust. They work just as well and keep everything delicious.
For dairy-free alternatives, choose coconut cream instead of heavy whipping cream. This option gives the cake a lovely coconut flavor. You can also use dairy-free butter in the crust. These adjustments make the cake suitable for more diets, so everyone can enjoy it.
Feel free to explore these variations to create your own special Frozen Chocolate Strawberry Cake. For the full recipe, check [Full Recipe].
Storage Info
Best Practices for Freezing
To keep your Frozen Chocolate Strawberry Cake fresh, wrap it tightly. Use plastic wrap or aluminum foil. Make sure no air can enter. This will help prevent freezer burn. A springform pan works well for freezing. You can also use an airtight container. Both options keep your cake safe from strong odors.
Thawing Instructions
Thaw the cake slowly in the fridge. This helps it keep its texture. Allow it to thaw for about 4 hours. If you need it faster, leave it at room temperature for 30 minutes. Avoid using a microwave, as it can melt the cake unevenly. Serve it chilled for the best taste.
Shelf Life of the Cake
Your cake stays fresh in the freezer for about 2 months. After that, it may lose flavor. Look for signs of freezer burn, like white spots. If the cake smells off or has an unusual texture, it’s best to throw it away. Enjoy your cake while it’s still at its best!
FAQs
Can I use frozen strawberries?
Yes, you can use frozen strawberries in this cake. They work well, especially when fresh strawberries are not in season. To incorporate frozen fruit, simply thaw them first. Drain any excess liquid before using them in the recipe. This helps keep your cake from getting too watery.
How long does this cake take to freeze?
It takes about 4 hours for the cake to freeze properly. For the best results, I recommend freezing it overnight. This ensures that the layers set well and the flavors meld together perfectly.
Can I make the cake a day ahead?
Absolutely! Making the cake a day in advance is a great idea. Once you layer the cake, wrap it in plastic wrap and store it in the freezer. Just remember to let it sit for a few minutes at room temperature before cutting. This makes slicing much easier.
What is the best way to garnish the cake?
Garnishing the cake can be fun and creative. You can top it with fresh strawberries and chocolate shavings. Another idea is to drizzle some melted chocolate or even a berry sauce over the top. These touches make the cake look even more appealing.
Is this recipe suitable for a specific dietary need?
Yes, this recipe can cater to various dietary needs. To make it gluten-free, use gluten-free chocolate wafers. For a vegan option, substitute the heavy cream with coconut cream and use vegan chocolate chips. These swaps maintain the cake’s delicious flavor and texture.
This blog post detailed a delicious chocolate strawberry cake. We began with the key ingredients, including chocolate wafers and fresh strawberries. I provided step-by-step instructions for making the crust, whipped cream, and layering. Tips and tricks helped avoid common mistakes and added options for variety. Finally, we discussed storage practices and answered common questions.
Creating this cake is fun and rewarding. Enjoy making it your own and sharing it with others!
![- 1 cup crushed chocolate wafers - 1/2 cup unsalted butter, melted - 1 cup fresh strawberries, hulled and sliced - 2 cups heavy whipping cream - 1 cup powdered sugar - 1 teaspoon vanilla extract - 1 cup semi-sweet chocolate chips, melted - 1/2 cup strawberry puree (made from blended strawberries) - Fresh strawberries and chocolate shavings for garnish When I create a dessert, I focus on quality ingredients. For this Frozen Chocolate Strawberry Cake, each component plays a key role in making the treat delicious. The crust starts with crushed chocolate wafers mixed with melted butter. This mix gives the cake a firm base. I use fresh strawberries because they bring a bright flavor. The whipped cream is crucial for that light texture. I whip heavy cream until it forms soft peaks. Then, I add powdered sugar and vanilla extract. This makes the cream sweet and fragrant. The chocolate and strawberry layers are where the magic happens. I melt semi-sweet chocolate chips. Folding this into half of the whipped cream creates a rich chocolate layer. For the other half, I blend strawberry puree into the whipped cream for a fruity taste. Finally, I garnish the cake with fresh strawberries and chocolate shavings. This not only adds flavor but also makes the cake look stunning. You can find the complete recipe in [Full Recipe]. Enjoy creating this delightful dessert! To start, you will need to mix the chocolate wafers and melted butter. In a medium bowl, combine 1 cup of crushed chocolate wafers with 1/2 cup of melted unsalted butter. Mix this well until it looks like wet sand. This mixture must stick together. Next, press the chocolate wafer mixture into a 9-inch springform pan. Use your fingers or the back of a spoon to pack it tightly. Make sure the crust is even and smooth. Once done, place the crust in the freezer to set while you make the filling. For the whipped cream, grab a large bowl. Pour in 2 cups of heavy whipping cream. Using an electric mixer, beat the cream until you see soft peaks. This means the cream is light and fluffy. Now, slowly add in 1 cup of powdered sugar and 1 teaspoon of vanilla extract. Keep mixing until you see stiff peaks form. This cream should hold its shape well, making it perfect for the cake. In another bowl, take half of the whipped cream. Gently fold in 1 cup of melted semi-sweet chocolate. Be careful not to deflate the cream. This creates a rich chocolate mixture. In a new bowl, fold 1/2 cup of strawberry puree into the remaining whipped cream. Mix until smooth. This gives you a fresh strawberry flavor, perfect for layering. Now, it’s time to layer! Start by spreading the chocolate whipped cream over the frozen crust. Use a spatula to make it even. Next, arrange the sliced strawberries on top of the chocolate layer. You can use as many or as few as you like. Finally, spread the strawberry whipped cream over the strawberries. Smooth the top for a nice finish. Cover the springform pan tightly with plastic wrap. Place it in the freezer for at least 4 hours. This helps the cake set properly. After freezing, the cake should feel firm and solid. When you are ready to serve, carefully remove the springform pan. To slice, dip a sharp knife in warm water, then wipe it dry. This helps make clean cuts. Cut into wedges and enjoy this delightful dessert treat! For a fancy touch, garnish with extra strawberries and chocolate shavings. For the full recipe, check the [Full Recipe]. To ensure smooth layers, use a spatula to spread the cream evenly. Apply gentle pressure. This helps avoid air pockets. For the best texture in whipped cream, beat it until you see soft peaks. Soft peaks hold their shape but still look fluffy. One common mistake is overbeating the cream. If you beat it too much, the cream can turn grainy. Stop as soon as you see stiff peaks. Another mistake is not freezing long enough. The cake needs at least four hours to set perfectly. A firm cake is key to easy slicing. Pairing this cake with sauces or garnishes can elevate the dish. Consider drizzling chocolate sauce or adding a scoop of strawberry puree. Fresh mint leaves can also add a nice touch. For the best sides, serve with a scoop of vanilla ice cream or a dollop of whipped cream. This adds extra creaminess and flavor. {{image_4}} You can boost the chocolate flavor with a few easy changes. First, use dark chocolate instead of semi-sweet. Dark chocolate gives a rich taste. It adds depth and makes the cake more intense. Next, consider adding flavor extracts. You can try almond or espresso extract. Just a small amount creates a lovely twist in flavor. These enhancements will surprise anyone who takes a bite. While strawberries are delightful, other fruits work well too. Raspberries and blueberries can add a fresh twist. You can even mix different berries for a fun mixed berry version. Simply swap out the strawberry puree with a berry blend. This change makes the cake colorful and tasty. If you need gluten-free options, use gluten-free chocolate wafers for the crust. They work just as well and keep everything delicious. For dairy-free alternatives, choose coconut cream instead of heavy whipping cream. This option gives the cake a lovely coconut flavor. You can also use dairy-free butter in the crust. These adjustments make the cake suitable for more diets, so everyone can enjoy it. Feel free to explore these variations to create your own special Frozen Chocolate Strawberry Cake. For the full recipe, check [Full Recipe]. To keep your Frozen Chocolate Strawberry Cake fresh, wrap it tightly. Use plastic wrap or aluminum foil. Make sure no air can enter. This will help prevent freezer burn. A springform pan works well for freezing. You can also use an airtight container. Both options keep your cake safe from strong odors. Thaw the cake slowly in the fridge. This helps it keep its texture. Allow it to thaw for about 4 hours. If you need it faster, leave it at room temperature for 30 minutes. Avoid using a microwave, as it can melt the cake unevenly. Serve it chilled for the best taste. Your cake stays fresh in the freezer for about 2 months. After that, it may lose flavor. Look for signs of freezer burn, like white spots. If the cake smells off or has an unusual texture, it’s best to throw it away. Enjoy your cake while it’s still at its best! Yes, you can use frozen strawberries in this cake. They work well, especially when fresh strawberries are not in season. To incorporate frozen fruit, simply thaw them first. Drain any excess liquid before using them in the recipe. This helps keep your cake from getting too watery. It takes about 4 hours for the cake to freeze properly. For the best results, I recommend freezing it overnight. This ensures that the layers set well and the flavors meld together perfectly. Absolutely! Making the cake a day in advance is a great idea. Once you layer the cake, wrap it in plastic wrap and store it in the freezer. Just remember to let it sit for a few minutes at room temperature before cutting. This makes slicing much easier. Garnishing the cake can be fun and creative. You can top it with fresh strawberries and chocolate shavings. Another idea is to drizzle some melted chocolate or even a berry sauce over the top. These touches make the cake look even more appealing. Yes, this recipe can cater to various dietary needs. To make it gluten-free, use gluten-free chocolate wafers. For a vegan option, substitute the heavy cream with coconut cream and use vegan chocolate chips. These swaps maintain the cake's delicious flavor and texture. This blog post detailed a delicious chocolate strawberry cake. We began with the key ingredients, including chocolate wafers and fresh strawberries. I provided step-by-step instructions for making the crust, whipped cream, and layering. Tips and tricks helped avoid common mistakes and added options for variety. Finally, we discussed storage practices and answered common questions. Creating this cake is fun and rewarding. Enjoy making it your own and sharing it with others!](https://tossedflavors.com/wp-content/uploads/2025/07/686c6beb-4a8f-4f86-8e97-35a58dd3a00d-300x300.webp)