Are you ready for a tasty treat that you can easily make at home? These Easy Crispy Rice Balls will become your new favorite snack! With simple ingredients like sushi rice, cheese, and green onions, you can create a dish that is full of flavor and fun to eat. Read on to learn how to make these crispy delights that everyone will love!
Ingredients
List of Ingredients
– 2 cups cooked sushi rice
– 1/2 teaspoon salt
– 1/4 cup freshly grated Parmesan cheese
– 1/4 cup green onions, finely chopped
– 1/2 cup panko breadcrumbs
– 1/2 cup all-purpose flour
– 2 large eggs, beaten
– Vegetable oil for frying
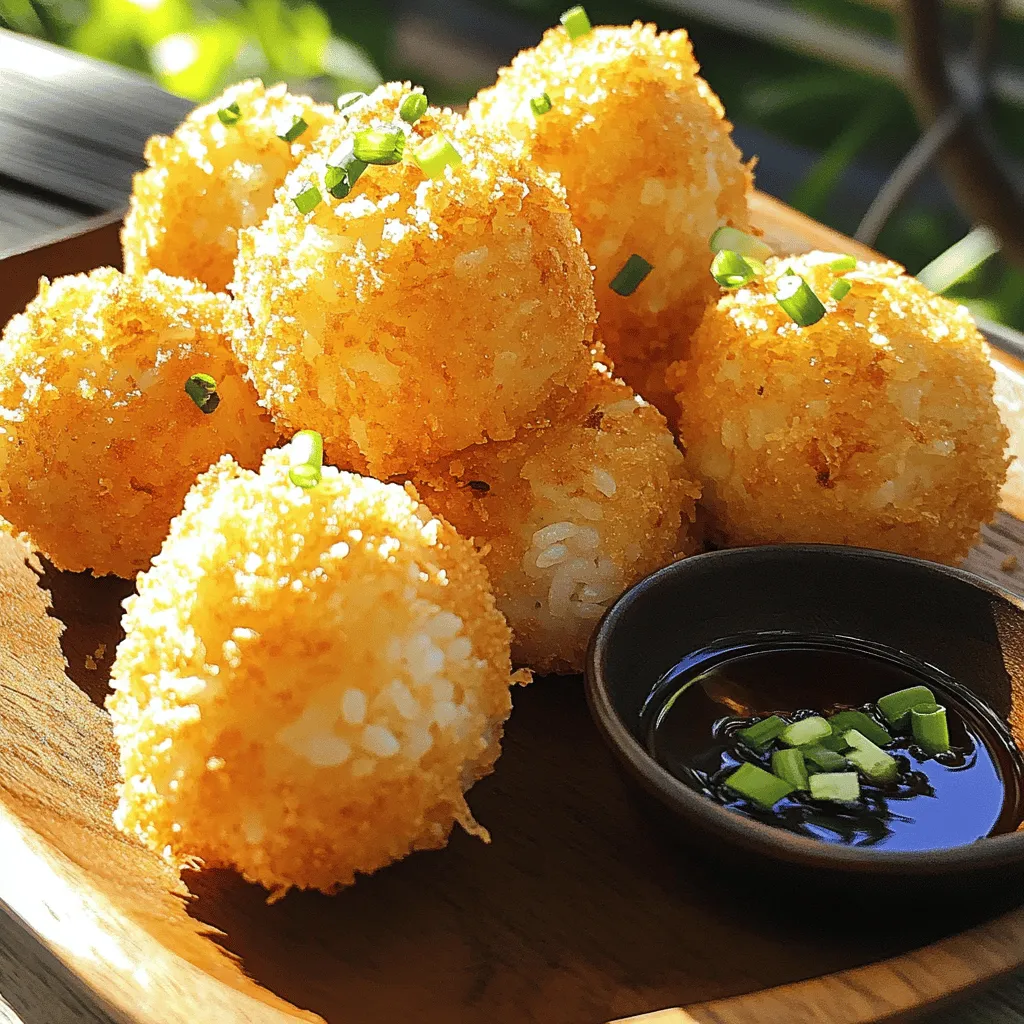
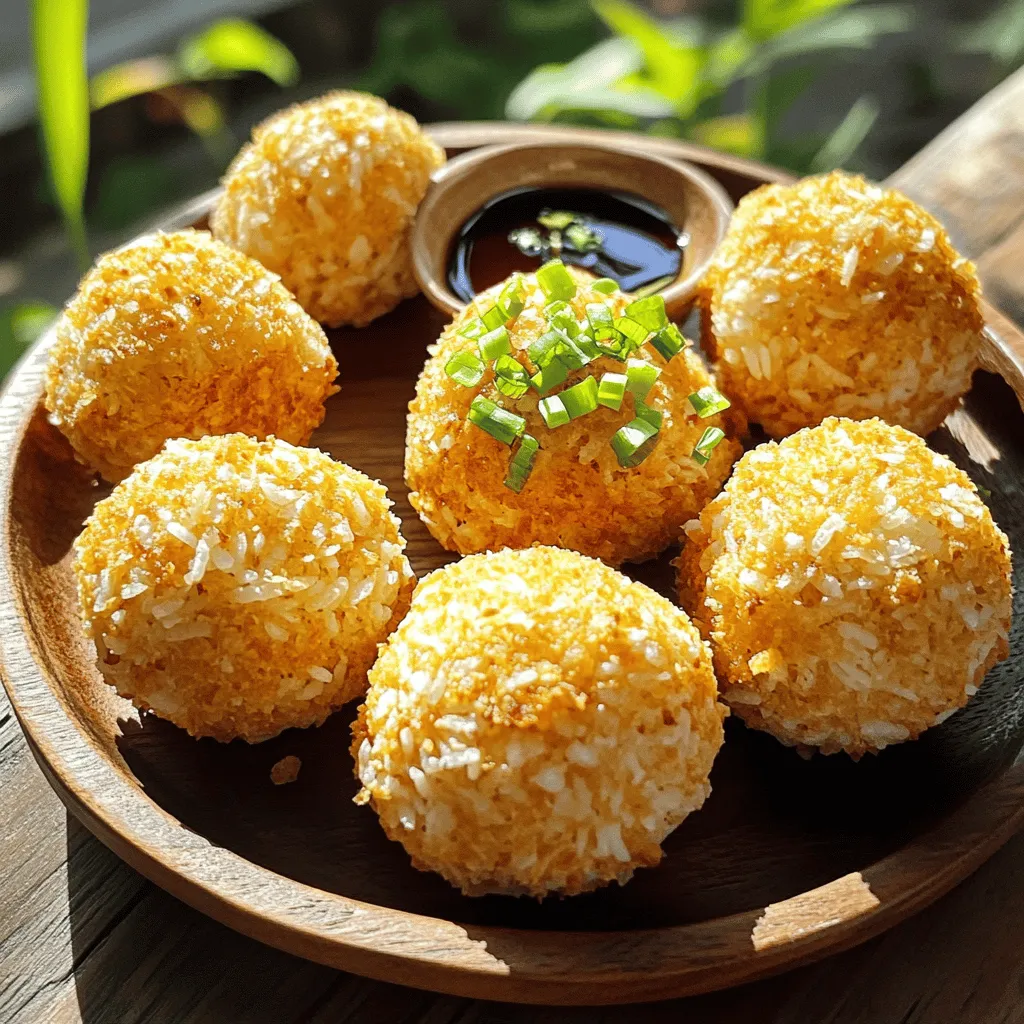
– Soy sauce for dipping
Optional Ingredients for Flavor Variations
You can add ingredients to change the taste. For example:
– Spices: A pinch of garlic powder or chili flakes gives a kick.
– Herbs: Fresh herbs like basil or cilantro add a fresh taste.
– Cheese: Try adding mozzarella or cheddar for a cheesy twist.
Importance of Quality Ingredients
Using good ingredients matters a lot. Fresh sushi rice makes the best base for these rice balls. The rice should be sticky yet firm, which helps keep the balls together. Also, high-quality Parmesan cheese adds depth of flavor. Fresh green onions bring brightness and crunch. Panko breadcrumbs provide that perfect crispy texture. Choosing good ingredients ensures that your rice balls will taste amazing. Each bite should be a mix of soft rice and crunchy coating. When you use quality ingredients, your dish will shine.
Step-by-Step Instructions
Preparation of Rice Mixture
Start by gathering your ingredients. In a large mixing bowl, combine:
– 2 cups cooked sushi rice
– 1/2 teaspoon salt
– 1/4 cup freshly grated Parmesan cheese
– 1/4 cup green onions, finely chopped
Mix these together well. Make sure the cheese and onions are evenly spread. This will give your rice balls a tasty flavor. After mixing, wash your hands and grab about 2 tablespoons of the rice mix. Roll this into a ball shape. Repeat until you have 12 rice balls.
Breading Process
Next, set up your breading station. You will need three bowls:
1. One with 1/2 cup all-purpose flour
2. One with 2 large beaten eggs
3. One with 1/2 cup panko breadcrumbs
Take each rice ball and roll it in the flour first. This helps the egg stick. Then, dip it into the beaten eggs. Let any extra egg drip off. Finally, roll the ball in the panko breadcrumbs. Make sure it is fully coated.
Cooking the Rice Balls
Now, it’s time to fry! In a large frying pan, pour in vegetable oil until it is about 1 inch deep. Heat the oil on medium-high heat. To check if the oil is hot, drop a small piece of breadcrumb in. If it sizzles, it’s ready!
Gently add several rice balls to the oil, but don’t overcrowd the pan. Fry them for about 3-4 minutes. You want them to turn golden brown. Remember to flip them occasionally to cook all sides evenly.
Once they are golden, use a slotted spoon to lift them out. Place the rice balls on a plate lined with paper towels. This will soak up any extra oil.
Serve your crispy rice balls warm with soy sauce for dipping. Each bite will be a tasty treat!
Tips & Tricks
Achieving the Perfect Crispy Texture
To get that perfect crunch, choose high-quality panko breadcrumbs. They are lighter and flakier than regular breadcrumbs. When you fry, use enough oil to cover the rice balls. This helps them cook evenly and get crispy all around. Fry them in batches, so they have space to bubble and brown.
Preventing Sogginess
To prevent sogginess, avoid overcooking your rice. Cook it just until tender. Let the rice cool down before you shape it into balls. Moisture can make the coating soggy, so it’s best to use dry ingredients. Also, drain the fried rice balls on paper towels to soak up any extra oil.
Alternative Cooking Methods
If you want a healthier option, consider air frying or baking. For air frying, preheat the air fryer and set it to 375°F. Spray the rice balls lightly with oil for a better crunch. Cook for about 10-12 minutes, flipping halfway through.
For baking, place the rice balls on a baking sheet lined with parchment paper. Bake at 400°F for 20-25 minutes. Turn them halfway to ensure even crisping. Both methods cut down on oil and still yield tasty results.
For the full recipe, check out the detailed instructions to enjoy these crispy delights!
Variations
Flavor Combinations (spicy, cheesy, herbed)
You can mix it up with flavors! For a spicy kick, add some chopped jalapeños or sriracha to the rice mixture. If you love cheese, try adding mozzarella for a melty center. For a herbed version, mix in fresh herbs like parsley or basil. Each option brings a unique taste, making the rice balls more fun to eat.
Vegetarian and Vegan Options
You can easily make these rice balls vegetarian. Skip the cheese and use nutritional yeast for a cheesy flavor. For a vegan option, replace the eggs with a mixture of ground flaxseed and water. This will help bind the rice balls together. It’s a great way to enjoy a tasty treat without animal products.
Different Dipping Sauces
Dipping sauces can change the game! Soy sauce is a classic choice, but you can try others too. A sweet chili sauce adds a nice touch of heat and sweetness. For a creamy dip, mix mayonnaise with a bit of sesame oil and lime juice. You can also serve them with a tangy ponzu sauce for a refreshing twist.
– Suggestions for side dishes: Pair the rice balls with a fresh salad or some steamed veggies. These sides add color and balance, making your meal complete and delicious.
Storage Info
Best Practices for Storing Leftovers
To keep your crispy rice balls fresh, store them in an airtight container. Place parchment paper between layers to avoid sticking. They stay good in the fridge for up to three days. If you have extra rice balls, let them cool first. This helps prevent moisture buildup, which can make them soggy.
Reheating Techniques
When you’re ready to enjoy your leftover rice balls, reheating is key. For the best results, use an oven. Preheat it to 350°F (175°C). Place the rice balls on a baking sheet and heat for about 10-15 minutes. This method keeps them crispy and warm. If you’re in a hurry, you can use a microwave. Just be aware that the texture may not be as crispy.
Freezing for Future Enjoyment
Freezing rice balls is great for meal prep. To freeze, first, let them cool completely. Then, place them on a baking sheet lined with parchment paper. Freeze them for about an hour until firm. After that, transfer the rice balls to a freezer-safe bag. They can last up to three months. When you’re ready to eat them, bake directly from frozen. This method keeps them tasty and convenient. For more details, check the Full Recipe.
FAQs
How do I make my rice balls stick together?
To make rice balls stick, use warm sushi rice. The warmth helps the rice grains bond. Mix in salt, Parmesan, and green onions well. Wet your hands before shaping the balls. This prevents sticking to your hands.
Can I use different types of rice?
Yes, you can use other rice types! Short-grain rice works well for a sticky texture. Medium-grain rice can also work, but avoid long-grain rice. Long-grain rice does not stick together well.
How do I know when the oil is hot enough for frying?
To check if the oil is hot, drop in a small piece of breadcrumb. If it sizzles, the oil is ready. You can also use a thermometer; aim for 350°F (175°C). Proper oil temperature ensures crispy rice balls.
What can I serve with crispy rice balls?
Crispy rice balls pair well with soy sauce for dipping. You can also serve them with spicy mayo, sweet chili sauce, or a tangy ponzu sauce. For a meal, add a side salad or steamed veggies.
Full Recipe Reference: Crispy Delightful Rice Balls
For the complete recipe, please refer to the Crispy Delightful Rice Balls section above.
In this blog post, you learned how to make delicious crispy rice balls. We covered important ingredients, step-by-step instructions, and tips for achieving the perfect texture. Don’t forget that quality ingredients make a big difference. You can also try different flavors and cooking methods, like air frying. Store leftovers carefully and enjoy them later. These rice balls are fun to make and share. Now, gather your ingredients and start cooking!