Craving something sweet and creamy? You’re in the right place! These Easy Chocolate Mousse Cups are simple to make and taste heavenly. With just a few key ingredients, you’ll whip up a treat that impresses everyone. In this post, I’ll walk you through each step, including tips for perfecting your mousse. Let’s dive into the world of chocolatey delight, where every cup delivers pure joy!
Ingredients
Essential Ingredients for Easy Chocolate Mousse Cups
For my easy chocolate mousse cups, you need just a few key ingredients:
– 1 cup heavy cream, chilled
– 1/2 cup semi-sweet chocolate chips
– 1/4 cup powdered sugar
– 1 teaspoon pure vanilla extract
– A pinch of fine sea salt
These ingredients work together to create a rich and creamy mousse. The heavy cream adds volume, while the chocolate chips bring the deep chocolate flavor. The powdered sugar gives just the right sweetness.
Optional Garnishes and Toppings
To make your mousse cups even more special, consider these garnishes:
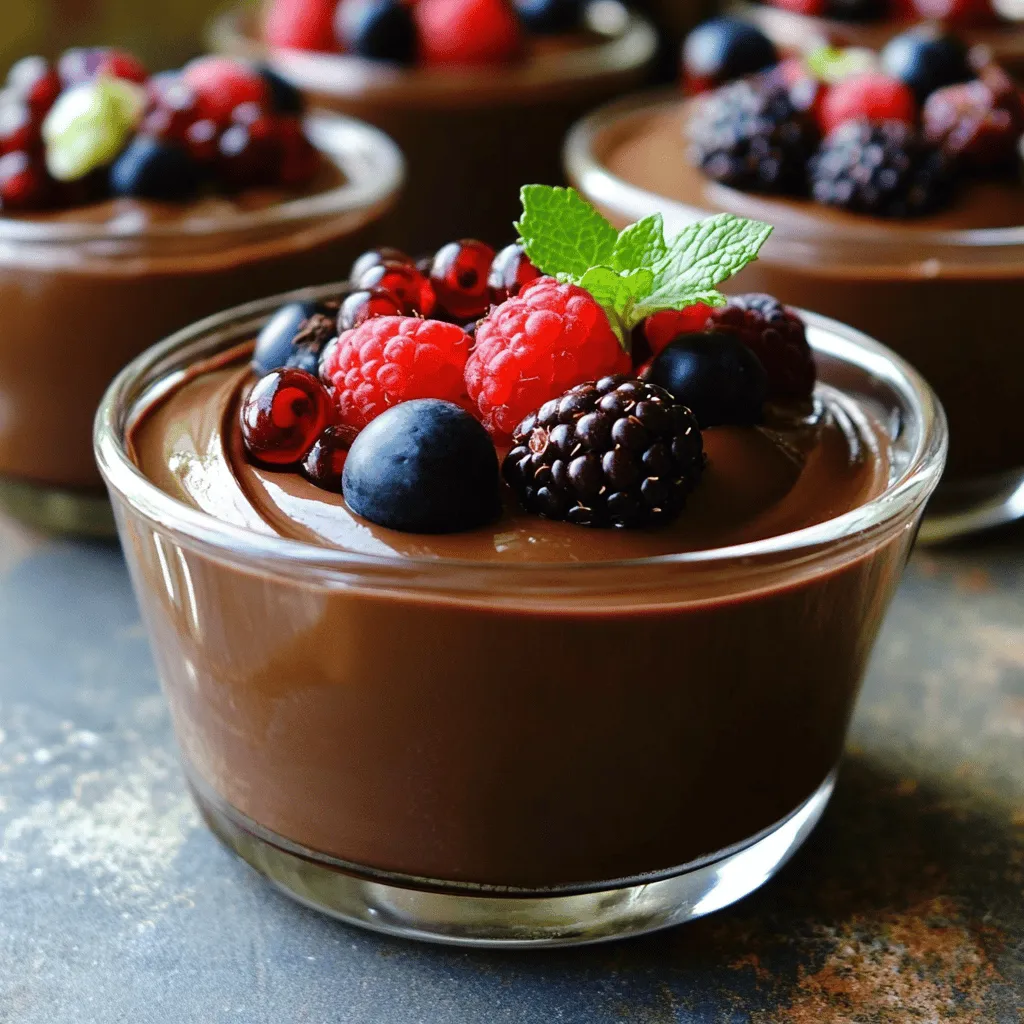
– Fresh mixed berries
– Fresh mint leaves
These toppings not only look great but also add fresh flavors. Berries bring a slight tartness that pairs well with the sweet mousse. Mint adds a refreshing note, making each bite delightful.
Common Substitutions
If you don’t have some ingredients, don’t worry. Here are some easy swaps:
– Use coconut cream instead of heavy cream for a dairy-free option.
– Try dark chocolate chips for a richer flavor.
– If you lack powdered sugar, regular sugar works too, but blend it first to make it finer.
These substitutions allow you to customize the mousse while still keeping it delicious. Feel free to experiment and find what works best for you. For the full recipe, check the section above.
Step-by-Step Instructions
Melting the Chocolate
First, gather your semi-sweet chocolate chips. Place them in a microwave-safe bowl. Heat them in the microwave for 30 seconds. Stir the chocolate after each interval. This keeps the chocolate from burning. Repeat until the chocolate is smooth. Let it cool a bit before using.
Whipping the Cream
Next, grab your chilled heavy cream. Pour it into a mixing bowl. Using a hand mixer, whip the cream on medium speed. In about 2 to 4 minutes, you’ll see soft peaks form. Once they form, add powdered sugar, vanilla extract, and a pinch of sea salt. Keep whisking until you see stiff peaks. Be careful not to overmix. Overmixing can make the cream grainy.
Folding Techniques for Lightness
Now, let’s combine the chocolate and whipped cream. Take a dollop of the whipped cream. Gently fold it into the melted chocolate. This helps lighten the chocolate. Then, slowly fold the chocolate mixture back into the whipped cream. Use soft motions to keep the mixture airy. When it looks fluffy, it’s ready to fill your cups! Use a spoon or piping bag to fill each cup with the mousse.
For the full recipe, check the complete instructions above.
Tips & Tricks
Achieving the Perfect Consistency
To get the right texture, start with cold cream. Cold cream whips better. Whip until soft peaks form, which takes about 2-4 minutes. When you add sugar and salt, keep whipping until stiff peaks form. This step is key for a fluffy mousse.
How to Avoid Overmixing
Overmixing can ruin your mousse. It can make the cream grainy and heavy. When adding chocolate to whipped cream, use gentle folding motions. This keeps air in the mix. Fold slowly until you see no streaks of chocolate. Stop as soon as it looks combined.
Best Practices for Chilling
Chill your mousse cups for at least 1 hour. This helps the mousse set properly. For the best results, cover the cups with plastic wrap. This prevents any smells from the fridge. When ready to serve, add fresh berries and mint. They make the mousse look great and add flavor. For the complete steps, check the Full Recipe.
Variations
Flavor Variants
You can easily change the flavor of your chocolate mousse cups. Add a shot of espresso for a coffee flavor. Mix in peppermint extract for a fresh mint taste. You can also try orange zest for a citrus twist. Each option adds a new layer of flavor that makes your mousse fun and unique.
Different Cup Options
The cup you use can change the whole vibe of your dessert. Try chocolate cups for a double chocolate treat. You can also use fruit shells, like hollowed-out oranges or strawberries, for a fresh touch. These fun options not only look great but also add flavor. You can mix and match to suit your taste.
Dietary Alternatives
If you have dietary needs, you’re in luck! You can make the mousse dairy-free by using coconut cream instead of heavy cream. For a sugar-free version, use a sugar substitute like stevia. These alternatives allow everyone to enjoy this delicious treat without worry. Remember, you can still keep the flavor and texture amazing! Check out the Full Recipe for more ideas on how to customize your mousse.
Storage Info
How to Store Leftover Mousse
To keep your leftover mousse fresh, place it in an airtight container. This will help prevent the mousse from absorbing other smells in the fridge. You can also cover the cups with plastic wrap. Just make sure the wrap does not touch the mousse. This keeps it safe and delicious.
Best Practices for Keeping Mousse Fresh
Store your mousse in the fridge, where it will stay good for 2 to 3 days. The mousse is best enjoyed within the first day for the best taste and texture. If you notice any changes in color or smell, it’s time to toss it. Always check for freshness before eating.
Freezing Options and Tips
You can freeze mousse if you want to save it for later. Use a freezer-safe container and fill it to the top. Leave some space for expansion as it freezes. The mousse can stay good for up to 1 month in the freezer. When you are ready to eat it, move it to the fridge to thaw overnight. Stir it gently after thawing to bring back its creamy texture. For more details, check out the Full Recipe.
FAQs
What can I do if my mousse is too runny?
If your mousse is too runny, don’t worry! You can fix this. First, try chilling it longer in the fridge. Sometimes, a bit more time helps it set. If it’s still runny, you can whip more cream. Use about 1/2 cup of heavy cream. Whip it until stiff peaks form. Then, fold this whipped cream into your mousse. This will add air and help thicken the mixture.
How long does chocolate mousse last in the fridge?
Chocolate mousse can last in the fridge for about three days. It’s best to store it in an airtight container. This keeps it fresh and helps prevent it from absorbing other smells. If you notice any separation or changes in texture, it’s time to toss it. Always check it before serving.
Can I make Easy Chocolate Mousse Cups ahead of time?
Yes, you can make these mousse cups ahead of time! They are great for parties or special occasions. Just prepare them and chill them in the fridge for at least an hour. You can even make them a day before. Just garnish them right before serving to keep them looking fresh. You can find the full recipe for these delightful cups earlier in this article.
This blog post covered how to make easy chocolate mousse cups. We talked about the key ingredients like chocolate and cream, plus fun toppings you can try. I shared step-by-step instructions and tips to help you succeed. We also explored flavor variations and storage tips to keep your mousse fresh.
In the end, this simple dessert can impress anyone. Try it your way and have fun! Happy whisking!