![- 1 cup crushed graham crackers - 1/4 cup unsalted butter, melted - 2 tablespoons granulated sugar - 8 oz cream cheese, softened to room temperature - 1/2 cup granulated sugar - 1/4 cup sour cream - 2 large eggs, at room temperature - Zest of 1 lime - 2 tablespoons fresh lime juice - 1 cup cherry pie filling (canned or homemade) - Fresh cherries and lime slices for garnish (optional) When I bake, I trust certain brands for the best taste. For graham crackers, I recommend Honey Maid. They offer a great crunch and flavor. For cream cheese, Philadelphia is my go-to. It blends smoothly and tastes rich. For cherries, I like Libby’s cherry pie filling. It’s sweet and ready to use. If you need swaps, I have options. For a gluten-free version, use gluten-free graham crackers. If you avoid dairy, try a dairy-free cream cheese like Tofutti or Kite Hill. For a lower sugar option, you can use a sugar substitute, like stevia, in place of granulated sugar. Each option keeps the flavor while meeting your needs. For the full recipe, check out the complete instructions above. First, set your oven to 325°F (163°C) to preheat. This step is crucial. A preheated oven helps the cheesecakes bake evenly. In a medium bowl, mix 1 cup of crushed graham crackers, 1/4 cup of melted butter, and 2 tablespoons of sugar. Stir until it looks like wet sand. Next, line a muffin tin with cupcake liners. Take about 1 tablespoon of this mixture. Press it into the bottom of each liner. Make sure it is packed tightly. Bake the crusts for 5-7 minutes, until golden. Let them cool. In a large bowl, beat 8 oz of softened cream cheese with 1/2 cup of sugar. Mix until smooth and creamy. Add in 1/4 cup of sour cream. Beat in 2 large eggs one at a time. After each egg, mix well. Add the zest of 1 lime and 2 tablespoons of fresh lime juice. Mix until fully combined but don’t overmix. Now, pour the cheesecake filling into each cooled crust. Fill them about 3/4 full. This space lets them rise. Place the muffin tin back in the oven. Bake for 18-20 minutes. The edges should look set, while the centers stay slightly jiggly. Once done, remove them and let cool for about 30 minutes at room temperature. Then, transfer them to the refrigerator. Chill for at least 2 hours to set. After chilling, it’s time for the cherry topping. Spoon cherry pie filling generously over each mini cheesecake. For a nice touch, you can add fresh cherries and a slice of lime on top. This makes them look even more inviting. For the full recipe, you can refer to [Full Recipe]. One mistake is overmixing the batter. This can make the cheesecake too dense. Mix just until smooth. Another mistake is not cooling the cheesecakes properly. Let them cool at room temp before chilling. This helps set the texture just right. Finally, fill each crust only three-quarters full. This allows the cheesecakes to rise without spilling over. To get that creamy texture, use room-temperature cream cheese. Cold cream cheese can create lumps. Beat the cream cheese well until smooth before adding other ingredients. Add the eggs one at a time. This helps blend them well without overmixing. When baking, check for slight jiggle in the center. This signals they are done but still soft. For a beautiful display, use a decorative platter. Place the mini cheesecakes neatly, leaving space between them. Top with cherry filling just before serving. Add fresh cherries and lime slices for color. A sprig of mint can add a nice touch too. For extra flair, sprinkle lime zest on top. This makes the dessert look as good as it tastes. For the full recipe, check the section above. {{image_4}} You can switch up the flavor of these mini cheesecakes easily. Try strawberry lime for a fresh twist. Swap the cherry filling for strawberry filling. Use the same amount, and enjoy the fruity taste. Lemon blueberry is another fun option. Replace the lime juice with lemon juice. Add fresh blueberries to the filling for a burst of flavor. If you need a gluten-free treat, it's simple. Use gluten-free graham cracker crumbs for the crust. Check the label to ensure they are certified gluten-free. The rest of the ingredients are naturally gluten-free. So, you can enjoy these mini cheesecakes without worry. For a dairy-free version, use dairy-free cream cheese. Brands like Tofutti or Kite Hill work well. Substitute sour cream with coconut cream for a rich taste. You can use almond milk instead of regular milk in the filling. These swaps keep the flavor while meeting your dietary needs. Try these variations to keep your mini cheesecakes exciting and delicious! For the full recipe, check the details above. To store leftover mini cheesecakes, place them in an airtight container. Keep them in the fridge for up to five days. Make sure each mini cheesecake is covered to prevent drying out. If you have leftovers, enjoy them chilled for a creamy treat. You can freeze these mini cheesecakes for later. First, let them cool completely. Then, wrap each one in plastic wrap. Place them in a freezer-safe bag or container. They can last up to three months in the freezer. When ready to enjoy, thaw them in the fridge overnight. If you prefer warm cheesecake, reheat them gently. Place the cheesecakes on a microwave-safe plate. Heat them for about 10-15 seconds. Check to ensure they do not get too warm. Enjoy them warm, or top with cherry filling for a sweet treat. For the full recipe, refer back to the recipe section. Yes, you can make these mini cheesecakes ahead of time. They hold up well in the fridge. Just bake and chill them a day before your event. This gives the flavors time to meld. When you're ready, add the cherry topping right before serving. It will taste fresh and delicious. If you want to switch things up, you have options! You can use fresh cherries, blueberries, or strawberries. You can also make a quick fruit compote. Just cook your fruit with a bit of sugar and lemon juice until soft. This adds a lovely twist to your mini cheesecakes. Check for a slight jiggle in the middle of the cheesecakes. The edges should look set while the center remains soft. They will continue to firm up as they cool. If you're unsure, you can insert a toothpick into the edge. If it comes out clean, they are ready! For the full recipe, check the details above and enjoy making these Cherry Lime Mini Cheesecakes! In this blog post, we explored how to make delicious mini cheesecakes. We covered the key ingredients and brands to use, plus substitutions for dietary needs. You learned step-by-step instructions, helpful tips, and tasty variations. I shared how to store leftovers and answered common questions. Now you have all the tools to bake perfect mini cheesecakes. Enjoy experimenting with flavors and sharing them with loved ones. Your cheesecake journey starts here, so get baking!](https://tossedflavors.com/wp-content/uploads/2025/05/69dca0a5-9403-454e-a714-33497c7f6e39.webp)
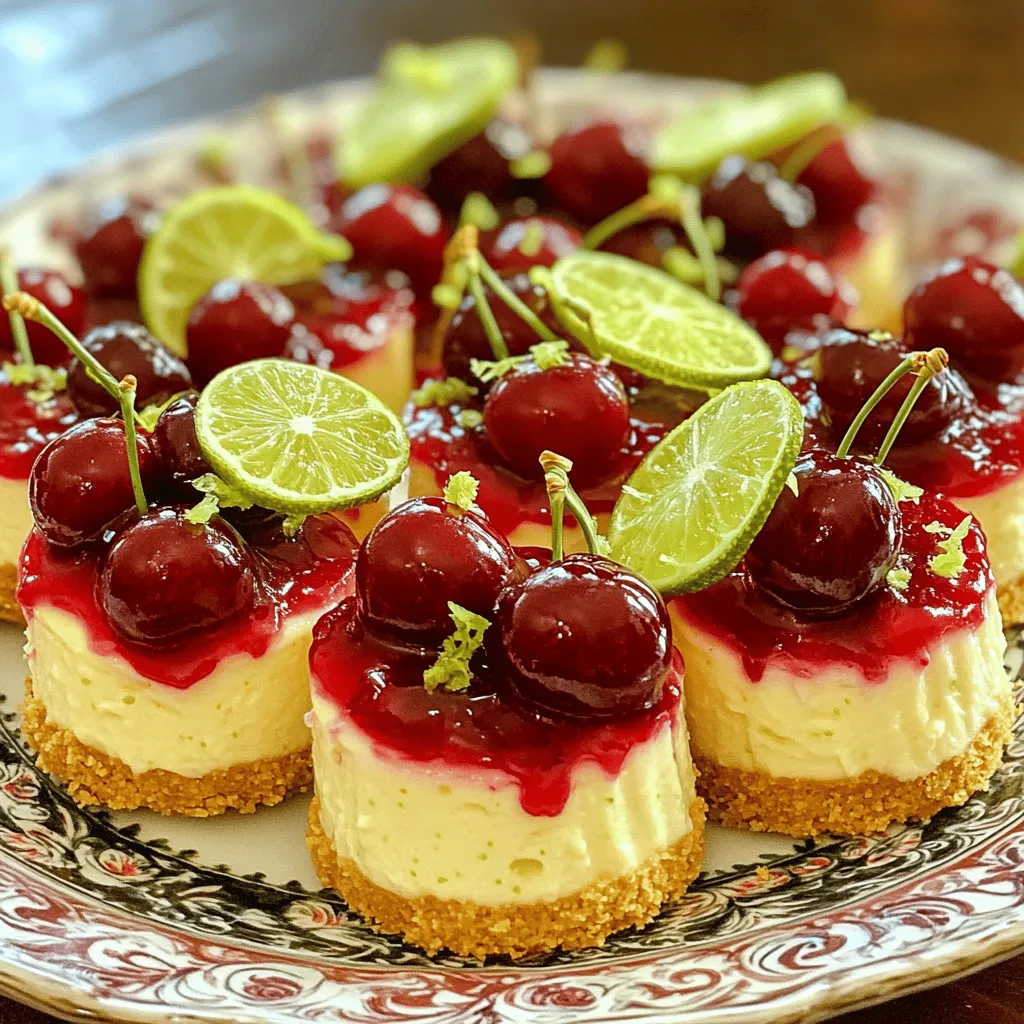
If you’re craving a fun dessert that’s as bright as it is tasty, you’ll love these Cherry Lime Mini Cheesecakes. They pack a punch of flavor in every bite! In this post, I’ll share easy steps for making these delightful treats. You’ll also find tips, variations, and storage tricks to keep them fresh. Let’s dive in and bring a burst of joy to your dessert table!
Ingredients
List of Ingredients
– 1 cup crushed graham crackers
– 1/4 cup unsalted butter, melted
– 2 tablespoons granulated sugar
– 8 oz cream cheese, softened to room temperature
– 1/2 cup granulated sugar
– 1/4 cup sour cream
– 2 large eggs, at room temperature
– Zest of 1 lime
– 2 tablespoons fresh lime juice
– 1 cup cherry pie filling (canned or homemade)
– Fresh cherries and lime slices for garnish (optional)
Suggested Brands for Ingredients
When I bake, I trust certain brands for the best taste. For graham crackers, I recommend Honey Maid. They offer a great crunch and flavor. For cream cheese, Philadelphia is my go-to. It blends smoothly and tastes rich. For cherries, I like Libby’s cherry pie filling. It’s sweet and ready to use.
Substitutions for Dietary Restrictions
If you need swaps, I have options. For a gluten-free version, use gluten-free graham crackers. If you avoid dairy, try a dairy-free cream cheese like Tofutti or Kite Hill. For a lower sugar option, you can use a sugar substitute, like stevia, in place of granulated sugar. Each option keeps the flavor while meeting your needs.
For the full recipe, check out the complete instructions above.
Step-by-Step Instructions
Preheating the Oven
First, set your oven to 325°F (163°C) to preheat. This step is crucial. A preheated oven helps the cheesecakes bake evenly.
Making the Crust
In a medium bowl, mix 1 cup of crushed graham crackers, 1/4 cup of melted butter, and 2 tablespoons of sugar. Stir until it looks like wet sand. Next, line a muffin tin with cupcake liners. Take about 1 tablespoon of this mixture. Press it into the bottom of each liner. Make sure it is packed tightly. Bake the crusts for 5-7 minutes, until golden. Let them cool.
Preparing the Cheesecake Filling
In a large bowl, beat 8 oz of softened cream cheese with 1/2 cup of sugar. Mix until smooth and creamy. Add in 1/4 cup of sour cream. Beat in 2 large eggs one at a time. After each egg, mix well. Add the zest of 1 lime and 2 tablespoons of fresh lime juice. Mix until fully combined but don’t overmix.
Baking and Cooling the Cheesecakes
Now, pour the cheesecake filling into each cooled crust. Fill them about 3/4 full. This space lets them rise. Place the muffin tin back in the oven. Bake for 18-20 minutes. The edges should look set, while the centers stay slightly jiggly. Once done, remove them and let cool for about 30 minutes at room temperature. Then, transfer them to the refrigerator. Chill for at least 2 hours to set.
Topping with Cherry Filling
After chilling, it’s time for the cherry topping. Spoon cherry pie filling generously over each mini cheesecake. For a nice touch, you can add fresh cherries and a slice of lime on top. This makes them look even more inviting. For the full recipe, you can refer to [Full Recipe].
Tips & Tricks
Common Mistakes to Avoid
One mistake is overmixing the batter. This can make the cheesecake too dense. Mix just until smooth. Another mistake is not cooling the cheesecakes properly. Let them cool at room temp before chilling. This helps set the texture just right. Finally, fill each crust only three-quarters full. This allows the cheesecakes to rise without spilling over.
How to Achieve Perfect Texture
To get that creamy texture, use room-temperature cream cheese. Cold cream cheese can create lumps. Beat the cream cheese well until smooth before adding other ingredients. Add the eggs one at a time. This helps blend them well without overmixing. When baking, check for slight jiggle in the center. This signals they are done but still soft.
Presentation Tips for Serving
For a beautiful display, use a decorative platter. Place the mini cheesecakes neatly, leaving space between them. Top with cherry filling just before serving. Add fresh cherries and lime slices for color. A sprig of mint can add a nice touch too. For extra flair, sprinkle lime zest on top. This makes the dessert look as good as it tastes.
For the full recipe, check the section above.
Variations
Flavor Variations
You can switch up the flavor of these mini cheesecakes easily. Try strawberry lime for a fresh twist. Swap the cherry filling for strawberry filling. Use the same amount, and enjoy the fruity taste. Lemon blueberry is another fun option. Replace the lime juice with lemon juice. Add fresh blueberries to the filling for a burst of flavor.
Gluten-Free Options
If you need a gluten-free treat, it’s simple. Use gluten-free graham cracker crumbs for the crust. Check the label to ensure they are certified gluten-free. The rest of the ingredients are naturally gluten-free. So, you can enjoy these mini cheesecakes without worry.
Dairy-Free Alternatives
For a dairy-free version, use dairy-free cream cheese. Brands like Tofutti or Kite Hill work well. Substitute sour cream with coconut cream for a rich taste. You can use almond milk instead of regular milk in the filling. These swaps keep the flavor while meeting your dietary needs.
Try these variations to keep your mini cheesecakes exciting and delicious! For the full recipe, check the details above.
Storage Info
How to Store Leftovers
To store leftover mini cheesecakes, place them in an airtight container. Keep them in the fridge for up to five days. Make sure each mini cheesecake is covered to prevent drying out. If you have leftovers, enjoy them chilled for a creamy treat.
Freezing Tips for Future Enjoyment
You can freeze these mini cheesecakes for later. First, let them cool completely. Then, wrap each one in plastic wrap. Place them in a freezer-safe bag or container. They can last up to three months in the freezer. When ready to enjoy, thaw them in the fridge overnight.
Best Practices for Reheating
If you prefer warm cheesecake, reheat them gently. Place the cheesecakes on a microwave-safe plate. Heat them for about 10-15 seconds. Check to ensure they do not get too warm. Enjoy them warm, or top with cherry filling for a sweet treat. For the full recipe, refer back to the recipe section.
FAQs
Can I make these mini cheesecakes ahead of time?
Yes, you can make these mini cheesecakes ahead of time. They hold up well in the fridge. Just bake and chill them a day before your event. This gives the flavors time to meld. When you’re ready, add the cherry topping right before serving. It will taste fresh and delicious.
What can I use instead of cherry pie filling?
If you want to switch things up, you have options! You can use fresh cherries, blueberries, or strawberries. You can also make a quick fruit compote. Just cook your fruit with a bit of sugar and lemon juice until soft. This adds a lovely twist to your mini cheesecakes.
How do I know when the cheesecakes are done baking?
Check for a slight jiggle in the middle of the cheesecakes. The edges should look set while the center remains soft. They will continue to firm up as they cool. If you’re unsure, you can insert a toothpick into the edge. If it comes out clean, they are ready!
For the full recipe, check the details above and enjoy making these Cherry Lime Mini Cheesecakes!
In this blog post, we explored how to make delicious mini cheesecakes. We covered the key ingredients and brands to use, plus substitutions for dietary needs. You learned step-by-step instructions, helpful tips, and tasty variations. I shared how to store leftovers and answered common questions. Now you have all the tools to bake perfect mini cheesecakes. Enjoy experimenting with flavors and sharing them with loved ones. Your cheesecake journey starts here, so get baking!
![- 1 cup crushed graham crackers - 1/4 cup unsalted butter, melted - 2 tablespoons granulated sugar - 8 oz cream cheese, softened to room temperature - 1/2 cup granulated sugar - 1/4 cup sour cream - 2 large eggs, at room temperature - Zest of 1 lime - 2 tablespoons fresh lime juice - 1 cup cherry pie filling (canned or homemade) - Fresh cherries and lime slices for garnish (optional) When I bake, I trust certain brands for the best taste. For graham crackers, I recommend Honey Maid. They offer a great crunch and flavor. For cream cheese, Philadelphia is my go-to. It blends smoothly and tastes rich. For cherries, I like Libby’s cherry pie filling. It’s sweet and ready to use. If you need swaps, I have options. For a gluten-free version, use gluten-free graham crackers. If you avoid dairy, try a dairy-free cream cheese like Tofutti or Kite Hill. For a lower sugar option, you can use a sugar substitute, like stevia, in place of granulated sugar. Each option keeps the flavor while meeting your needs. For the full recipe, check out the complete instructions above. First, set your oven to 325°F (163°C) to preheat. This step is crucial. A preheated oven helps the cheesecakes bake evenly. In a medium bowl, mix 1 cup of crushed graham crackers, 1/4 cup of melted butter, and 2 tablespoons of sugar. Stir until it looks like wet sand. Next, line a muffin tin with cupcake liners. Take about 1 tablespoon of this mixture. Press it into the bottom of each liner. Make sure it is packed tightly. Bake the crusts for 5-7 minutes, until golden. Let them cool. In a large bowl, beat 8 oz of softened cream cheese with 1/2 cup of sugar. Mix until smooth and creamy. Add in 1/4 cup of sour cream. Beat in 2 large eggs one at a time. After each egg, mix well. Add the zest of 1 lime and 2 tablespoons of fresh lime juice. Mix until fully combined but don’t overmix. Now, pour the cheesecake filling into each cooled crust. Fill them about 3/4 full. This space lets them rise. Place the muffin tin back in the oven. Bake for 18-20 minutes. The edges should look set, while the centers stay slightly jiggly. Once done, remove them and let cool for about 30 minutes at room temperature. Then, transfer them to the refrigerator. Chill for at least 2 hours to set. After chilling, it’s time for the cherry topping. Spoon cherry pie filling generously over each mini cheesecake. For a nice touch, you can add fresh cherries and a slice of lime on top. This makes them look even more inviting. For the full recipe, you can refer to [Full Recipe]. One mistake is overmixing the batter. This can make the cheesecake too dense. Mix just until smooth. Another mistake is not cooling the cheesecakes properly. Let them cool at room temp before chilling. This helps set the texture just right. Finally, fill each crust only three-quarters full. This allows the cheesecakes to rise without spilling over. To get that creamy texture, use room-temperature cream cheese. Cold cream cheese can create lumps. Beat the cream cheese well until smooth before adding other ingredients. Add the eggs one at a time. This helps blend them well without overmixing. When baking, check for slight jiggle in the center. This signals they are done but still soft. For a beautiful display, use a decorative platter. Place the mini cheesecakes neatly, leaving space between them. Top with cherry filling just before serving. Add fresh cherries and lime slices for color. A sprig of mint can add a nice touch too. For extra flair, sprinkle lime zest on top. This makes the dessert look as good as it tastes. For the full recipe, check the section above. {{image_4}} You can switch up the flavor of these mini cheesecakes easily. Try strawberry lime for a fresh twist. Swap the cherry filling for strawberry filling. Use the same amount, and enjoy the fruity taste. Lemon blueberry is another fun option. Replace the lime juice with lemon juice. Add fresh blueberries to the filling for a burst of flavor. If you need a gluten-free treat, it's simple. Use gluten-free graham cracker crumbs for the crust. Check the label to ensure they are certified gluten-free. The rest of the ingredients are naturally gluten-free. So, you can enjoy these mini cheesecakes without worry. For a dairy-free version, use dairy-free cream cheese. Brands like Tofutti or Kite Hill work well. Substitute sour cream with coconut cream for a rich taste. You can use almond milk instead of regular milk in the filling. These swaps keep the flavor while meeting your dietary needs. Try these variations to keep your mini cheesecakes exciting and delicious! For the full recipe, check the details above. To store leftover mini cheesecakes, place them in an airtight container. Keep them in the fridge for up to five days. Make sure each mini cheesecake is covered to prevent drying out. If you have leftovers, enjoy them chilled for a creamy treat. You can freeze these mini cheesecakes for later. First, let them cool completely. Then, wrap each one in plastic wrap. Place them in a freezer-safe bag or container. They can last up to three months in the freezer. When ready to enjoy, thaw them in the fridge overnight. If you prefer warm cheesecake, reheat them gently. Place the cheesecakes on a microwave-safe plate. Heat them for about 10-15 seconds. Check to ensure they do not get too warm. Enjoy them warm, or top with cherry filling for a sweet treat. For the full recipe, refer back to the recipe section. Yes, you can make these mini cheesecakes ahead of time. They hold up well in the fridge. Just bake and chill them a day before your event. This gives the flavors time to meld. When you're ready, add the cherry topping right before serving. It will taste fresh and delicious. If you want to switch things up, you have options! You can use fresh cherries, blueberries, or strawberries. You can also make a quick fruit compote. Just cook your fruit with a bit of sugar and lemon juice until soft. This adds a lovely twist to your mini cheesecakes. Check for a slight jiggle in the middle of the cheesecakes. The edges should look set while the center remains soft. They will continue to firm up as they cool. If you're unsure, you can insert a toothpick into the edge. If it comes out clean, they are ready! For the full recipe, check the details above and enjoy making these Cherry Lime Mini Cheesecakes! In this blog post, we explored how to make delicious mini cheesecakes. We covered the key ingredients and brands to use, plus substitutions for dietary needs. You learned step-by-step instructions, helpful tips, and tasty variations. I shared how to store leftovers and answered common questions. Now you have all the tools to bake perfect mini cheesecakes. Enjoy experimenting with flavors and sharing them with loved ones. Your cheesecake journey starts here, so get baking!](https://tossedflavors.com/wp-content/uploads/2025/05/69dca0a5-9403-454e-a714-33497c7f6e39-300x300.webp)