Salads
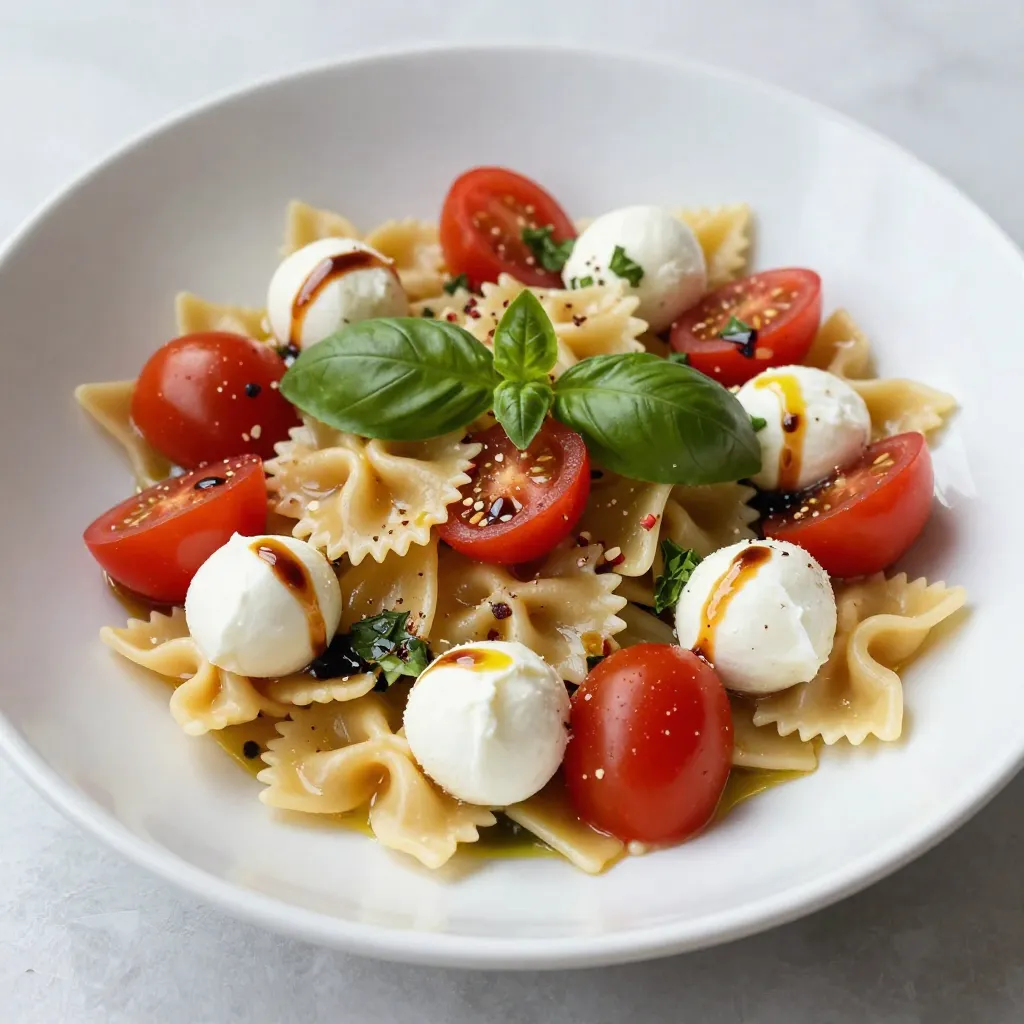
Tomato Basil Caprese Pasta Salad Flavorful Delight
Looking for a dish that dazzles your taste buds? The Tomato Basil Caprese Pasta Salad is a flavorful delight that combines fresh ingredients and easy
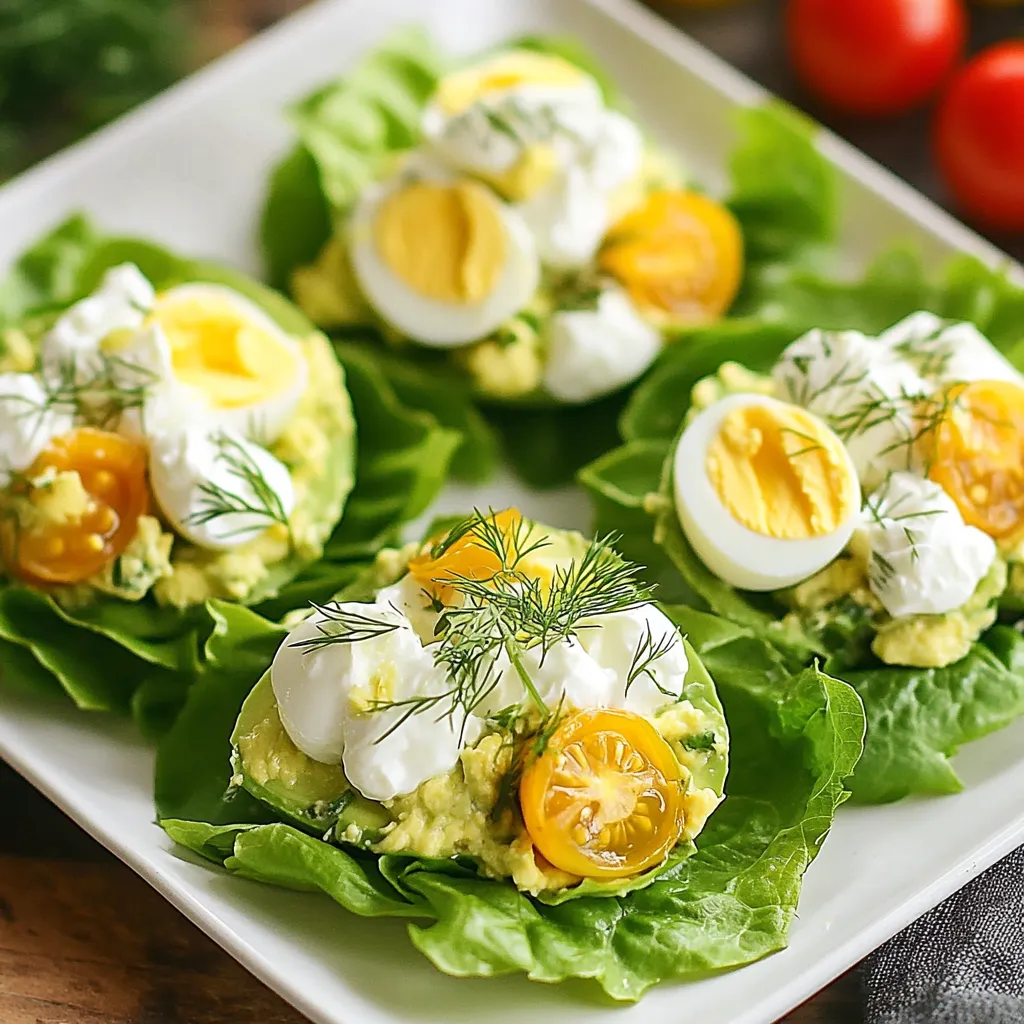
Avocado Egg Salad Lettuce Wraps Easy and Healthy Meal
Looking for a quick and healthy meal idea? Try these Avocado Egg Salad Lettuce Wraps! They combine creamy avocado, protein-rich eggs, and fresh herbs all
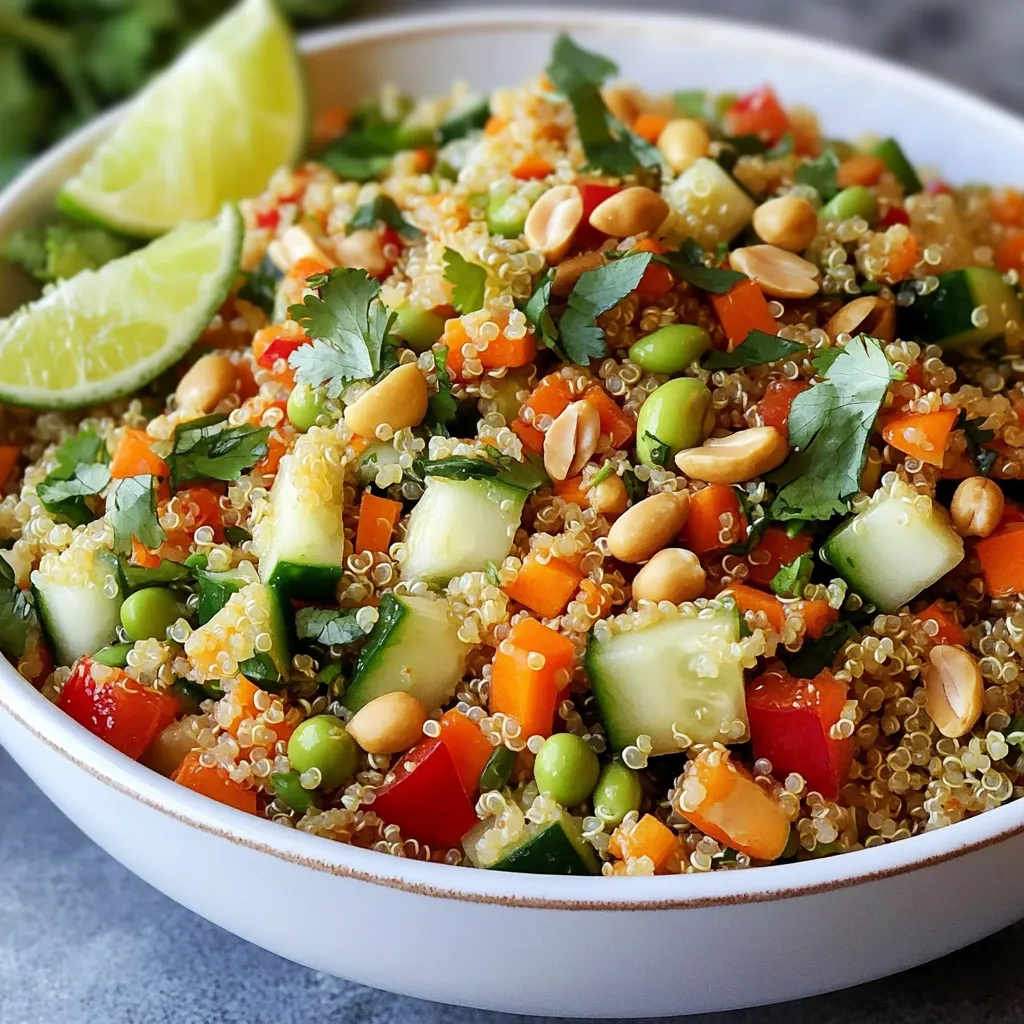
Spicy Thai Peanut Quinoa Salad Tasty and Healthy Choice
Looking for a tasty and healthy meal? You’ll love this Spicy Thai Peanut Quinoa Salad! Packed with flavor and crunch, this salad is simple to
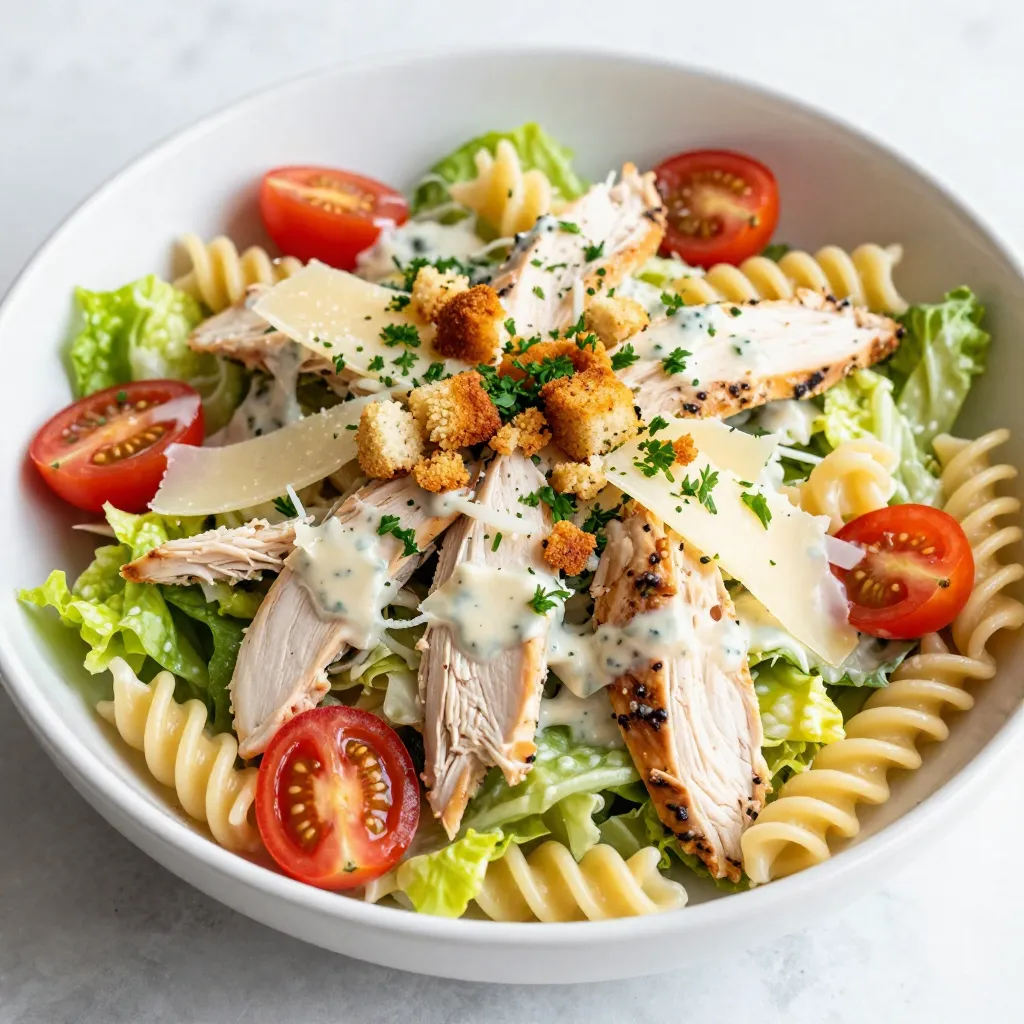
Chicken Caesar Pasta Salad Flavorful Meal Idea
Looking for a quick, delicious meal that packs flavor? You’ve come to the right place! My Chicken Caesar Pasta Salad is perfect for busy days
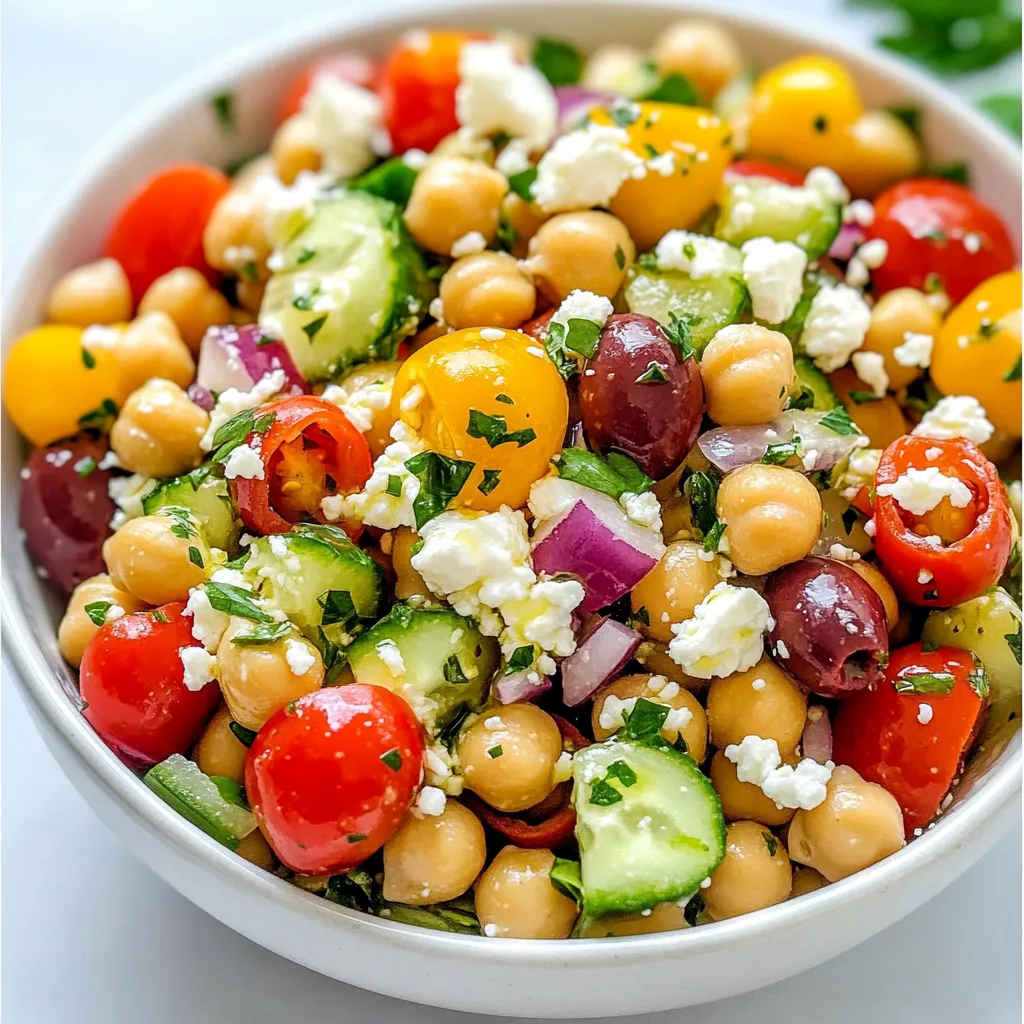
Mediterranean Chickpea Salad Fresh and Healthy Boost
Looking for a fresh and healthy dish that packs a flavorful punch? Try my Mediterranean Chickpea Salad! It’s easy to make and filled with vibrant
, please refer to the ingredients and instructions listed above. Enjoy! In this post, I shared how to make a fresh cucumber chicken salad. We covered key ingredients and the importance of using fresh ones. I detailed steps for prepping, mixing, and serving. You learned tips for keeping it fresh and ideas for variations. I also provided nutritional info and storage techniques. This salad is healthy, easy to make, and versatile. Enjoy creating your twist on this dish!](https://tossedflavors.com/wp-content/uploads/2025/08/43489b1b-c3ba-45ac-9b9d-e6d6dc525c0f.webp)
Fresh Cucumber Chicken Salad Tasty and Light Dish
Looking for a tasty and light dish? Try my Fresh Cucumber Chicken Salad! This vibrant mix of shredded chicken and crisp veggies is perfect for
![To make Easy Mexican Coleslaw, you need the following ingredients: - 4 cups green cabbage, finely shredded - 1 cup red cabbage, finely shredded - 1 medium carrot, grated - 1/2 cup fresh cilantro, chopped - 1 cup corn (fresh, frozen, or canned) - 1 medium jalapeño, finely diced (seeds removed for less heat) - 1/2 cup cherry tomatoes, halved - 1/4 cup red onion, thinly sliced - 1 teaspoon lime zest (freshly grated) - 1/3 cup fresh lime juice - 3 tablespoons extra-virgin olive oil - 1 teaspoon honey or agave syrup (for vegan options) - Salt and cracked pepper to taste You might not always have every ingredient on hand. Here are some easy swaps: - Cabbage: You can use green cabbage only or add kale for a twist. - Corn: Try black beans or chopped bell peppers if you prefer. - Jalapeño: Use bell pepper for no heat or a hotter pepper for more spice. - Honey: Maple syrup works well if you want a vegan option. - Lime Juice: Lemon juice is a good alternative if you run out. To make this coleslaw, gather these helpful tools: - A large mixing bowl for combining ingredients - A sharp knife or box grater for shredding vegetables - A whisk for mixing the dressing - A small mixing bowl for the dressing - A cutting board for easy chopping - A serving bowl to present your coleslaw This setup makes the process smooth and enjoyable. Grab these tools, and let’s create a fresh and flavorful side dish! Start by preparing your vegetables. You need to finely shred 4 cups of green cabbage and 1 cup of red cabbage. Grate 1 medium carrot and chop 1/2 cup of fresh cilantro. In a large mixing bowl, combine the cabbage, carrot, and cilantro. Mix them well to ensure a good blend. Next, add 1 cup of corn, which can be fresh, frozen, or canned. Then, take 1 medium jalapeño and finely dice it. If you want a milder taste, remove the seeds. Add the jalapeño to the bowl. Finally, include 1/2 cup of halved cherry tomatoes and 1/4 cup of thinly sliced red onion. Fold the vegetables together gently. You want to make sure they are evenly distributed. In a separate small bowl, prepare the dressing. Start by whisking together 1 teaspoon of lime zest and 1/3 cup of fresh lime juice. Then, add 3 tablespoons of extra-virgin olive oil. For sweetness, mix in 1 teaspoon of honey or agave syrup. Season with a pinch of salt and cracked pepper. Whisk until the mixture is well combined and smooth. Now it’s time to combine everything. Drizzle the dressing over the vegetable mixture. Toss gently to coat all the ingredients with the dressing. Make sure every bite is tasty. Let the coleslaw sit for at least 15 minutes at room temperature. This time allows the flavors to meld. Stir occasionally during this resting period. Before serving, taste the coleslaw. Adjust the seasoning with more salt, pepper, or lime juice if needed. Enjoy your fresh and flavorful dish! For the full recipe, check out the complete details above. To make your coleslaw pop, use fresh veggies. Fresh ingredients enhance taste. Use lime juice right before serving for the best zing. If you want a kick, add more jalapeño or even a dash of hot sauce. Mix the coleslaw and dressing just before serving. This keeps everything crisp and fresh. Serve your coleslaw in a colorful bowl. Garnish with extra cilantro and lime wedges. This adds a nice touch and invites everyone to try it. You can also serve it chilled for a refreshing bite. Pair it with grilled meats or tacos for the perfect meal. This coleslaw shines with many Mexican dishes. It goes well with tacos, burritos, or even grilled fish. Try it next to spicy enchiladas or quesadillas. The cool, crunchy texture balances well with warm, rich flavors. For a fun twist, serve it alongside a Mexican BBQ or picnic. You’ll find it complements your favorite dishes beautifully, making each meal more exciting. For the full recipe, check out the details above. {{image_4}} You can spice up your coleslaw easily! Add more jalapeños for heat. If you want more flavor, try chipotle powder. It brings a smoky taste. Mixing in some diced serrano peppers adds a nice kick. For a zesty twist, include some hot sauce in the dressing. This gives a burst of flavor and warmth. Adjust these ingredients to match your taste! Making this coleslaw vegan is simple. Just use agave syrup instead of honey. This keeps it sweet without animal products. You can also add avocado for creaminess. It gives a smooth texture and healthy fats. If you want protein, toss in some black beans. They add bulk and flavor while keeping it plant-based. Texture is key in a great coleslaw. For crunch, add nuts like walnuts or almonds. They give a nice bite and extra flavor. You can also mix in sunflower seeds for a little nutty taste. If you like fruit, try adding diced mango or pineapple. They bring sweetness and a juicy contrast to the crisp veggies. These add-ins make the dish more exciting and enjoyable! For the full recipe, check the section above. To store your leftovers, place the coleslaw in an airtight container. This helps keep it fresh. You can keep it in the fridge for up to three days. Make sure to seal the container tightly to avoid moisture loss. Keep the coleslaw and dressing separate until serving. Mixing them ahead of time can make the veggies soggy. If you want to keep it fresh longer, add the dressing right before serving. This way, it stays crunchy and vibrant. I do not recommend freezing coleslaw. Freezing can change the texture of the vegetables. If you freeze it, the cabbage will become limp when thawed. For the best taste, enjoy it fresh! You can make the dressing ahead and freeze it if needed. Just thaw it in the fridge before adding to the fresh veggies. If you don't have lime juice, you can use lemon juice. It works well in this recipe. You could also try vinegar, like apple cider or white wine vinegar. These options add a tangy flavor that brightens the coleslaw. Yes, you can make this coleslaw ahead of time. Just mix the veggies and dressing separately. Store them in the fridge. Combine them right before serving. This keeps the coleslaw crunchy and fresh. To adjust the heat, change the jalapeño amount. For less heat, remove the seeds and ribs. You can also use a milder pepper, like a bell pepper. For more heat, add extra jalapeño or try a spicier pepper. For the complete guide to making Easy Mexican Coleslaw, check out the [Full Recipe]. It includes all the steps and tips to create this tasty side dish. This blog post covered how to make Easy Mexican Coleslaw. We talked about key ingredients, tools, and step-by-step instructions. I shared tips for flavor and serving ideas, plus variations for spice and texture. Lastly, we explored storage methods and answered common questions. Enjoy making this coleslaw as a fresh side for your favorite dishes. Experiment with your own twists to make it truly yours. A simple recipe can spark joy in your cooking!](https://tossedflavors.com/wp-content/uploads/2025/08/bd330b74-ffa2-4dc5-8abc-75f4fc18e7f1.webp)
Easy Mexican Coleslaw Fresh and Flavorful Side Dish
Looking to spice up your meals? My Easy Mexican Coleslaw is the answer! Fresh, colorful, and full of flavor, this dish makes a perfect side
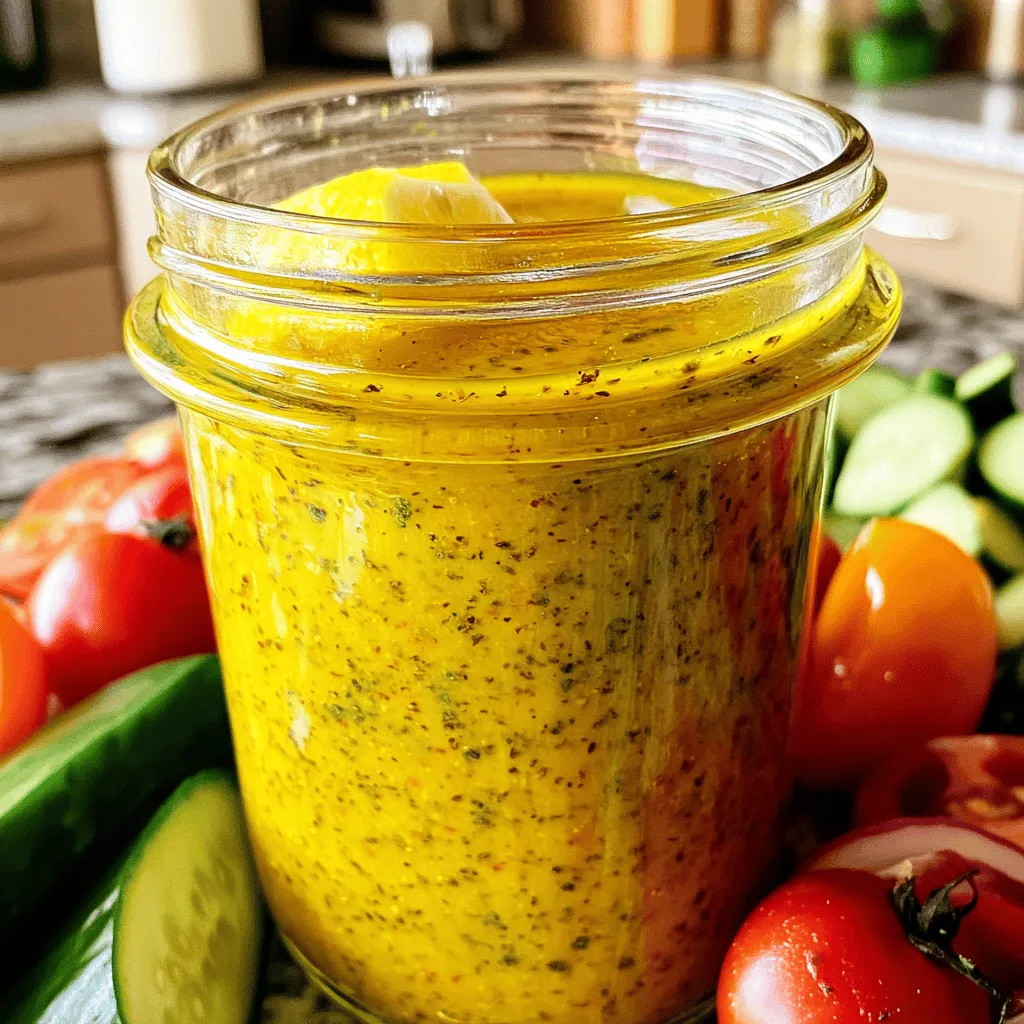
Greek Salad Dressing Fresh and Flavorful Recipe
Making your own Greek salad dressing is easier than you think. With simple ingredients, you can create a fresh, flavorful mix that lifts any salad.
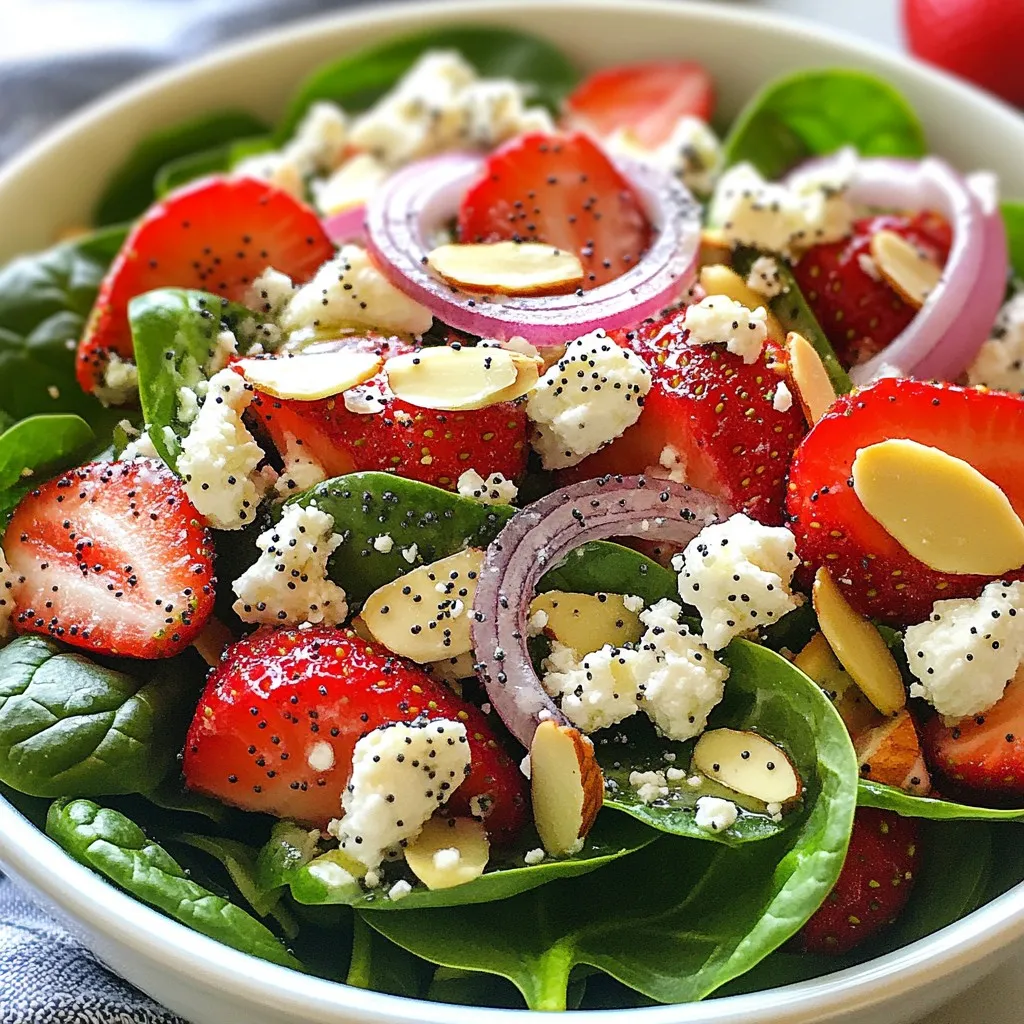
Strawberry Spinach Salad with Poppy Dressing Delight
Are you ready to freshen up your meal routine? This Strawberry Spinach Salad with Poppy Dressing is a delicious choice! It combines sweet strawberries and
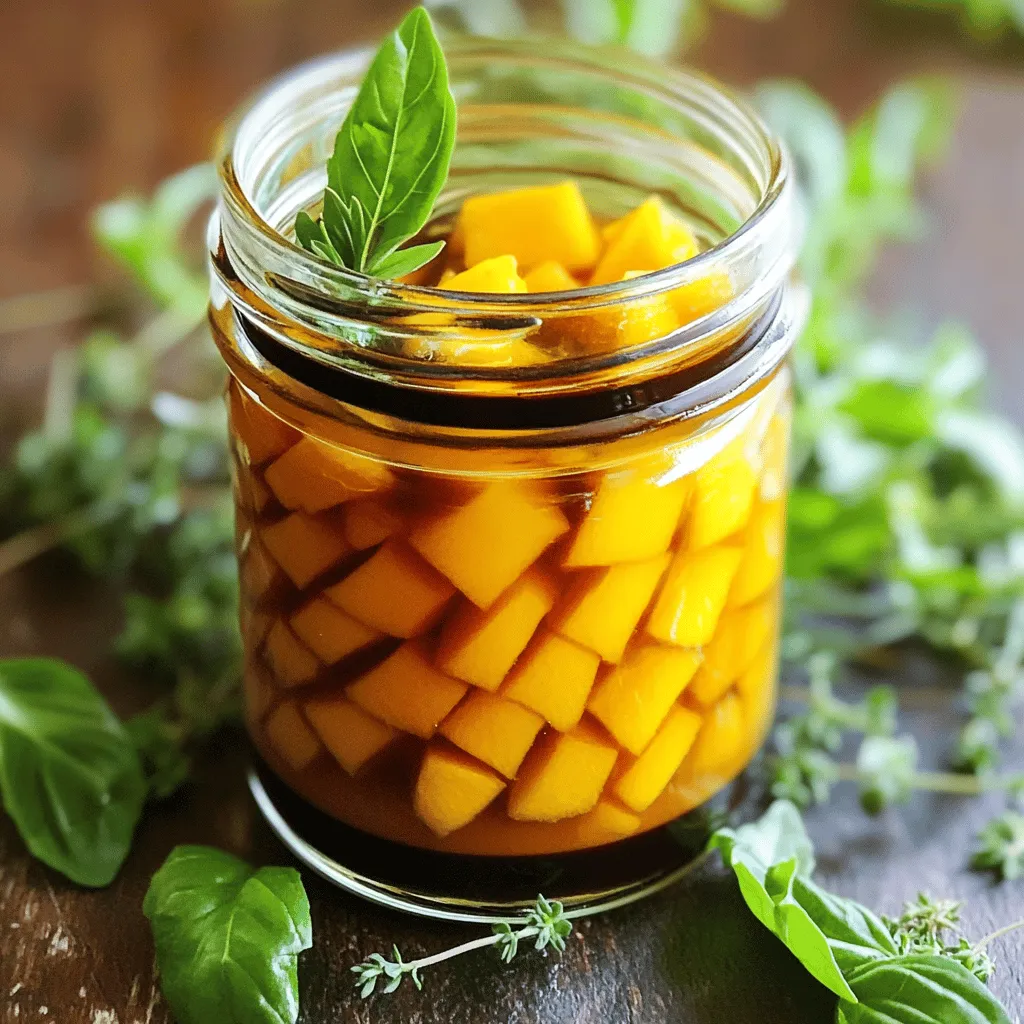
Peach Honey Dijon Balsamic Vinaigrette Flavor Boost
Looking to add a burst of flavor to your meals? Look no further than Peach Honey Dijon Balsamic Vinaigrette! This delicious dressing combines sweet peaches