Dinner
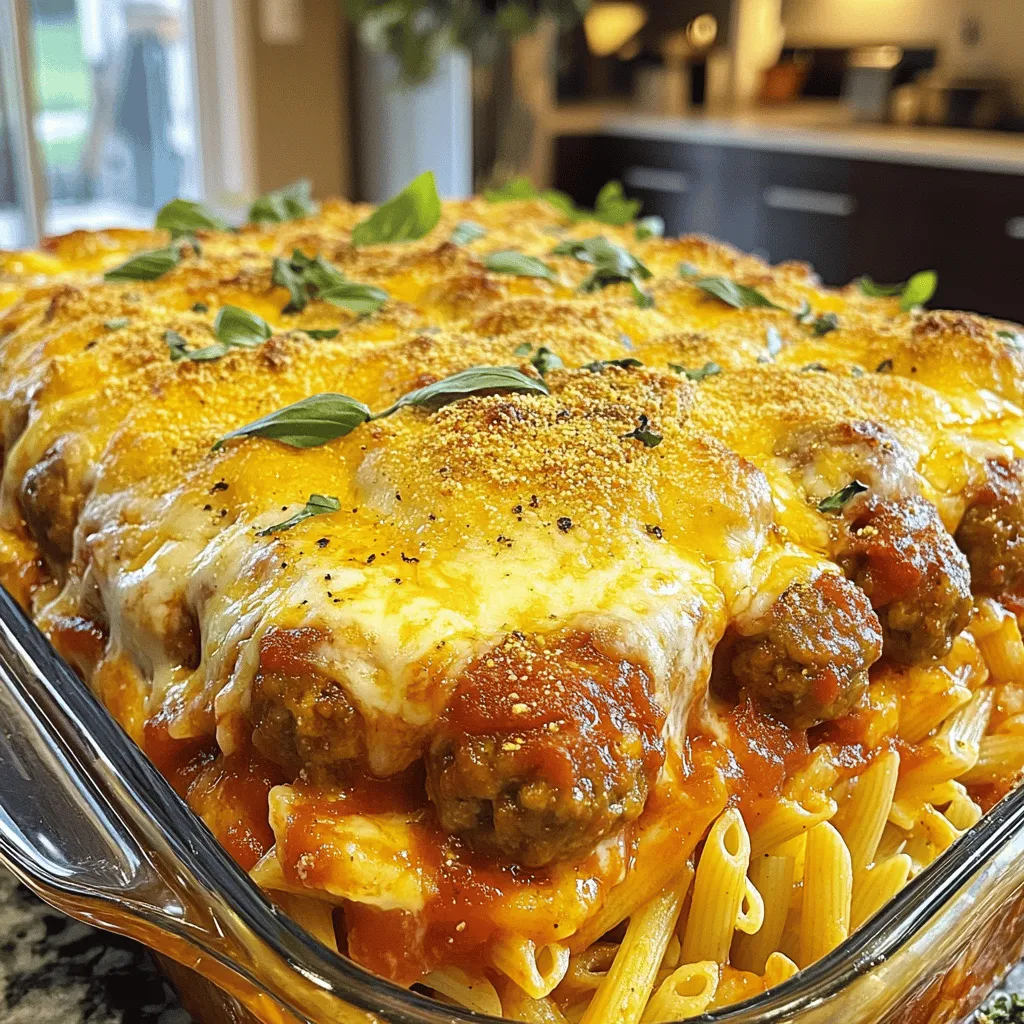
Dump And Bake Meatball Casserole Flavorful Dish
Looking for a delicious, easy meal? The Dump And Bake Meatball Casserole is a lifesaver! With just a few simple ingredients and minimal prep, you
![- 4 large russet potatoes - 1 cup sour cream - ½ cup milk - 1 ½ cups shredded sharp cheddar cheese (divided) - ½ cup cream cheese, softened to room temperature - ¼ cup fresh green onions, finely chopped - 1 teaspoon garlic powder - ½ teaspoon onion powder - Salt and freshly ground black pepper, to taste - ½ cup crispy breadcrumbs (optional for topping) - 2 tablespoons olive oil (for drizzling) Using these simple ingredients makes this dish special. The russet potatoes are creamy and fluffy when baked. Sour cream and cream cheese add a rich taste. Sharp cheddar cheese gives a wonderful flavor that everyone loves. Fresh green onions add color and a bit of crunch. You can mix and match these ingredients. If you love garlic, add more garlic powder. Want a spicier kick? Toss in some pepper flakes. You can find the full recipe with steps to prepare this comforting casserole. - Preheat the oven to 400°F (200°C). - Rinse the russet potatoes under cold water. Make sure to scrub off any dirt. - Poke holes in each potato with a fork. This helps steam escape while baking. - Place the potatoes on a baking sheet lined with parchment paper. Bake for 45-60 minutes until they feel tender. - After baking, let the potatoes cool for about 10 minutes. This makes them easier to handle. - In a large bowl, mix the sour cream, milk, cream cheese, garlic powder, onion powder, salt, and pepper. - Scoop out the insides of the potatoes into the bowl, leaving a thin layer in the skins. - Add 1 cup of shredded sharp cheddar cheese and the chopped green onions. Stir until mixed well. - Transfer the potato mixture back into the potato skins or spread it in a greased baking dish. - If you like, sprinkle crispy breadcrumbs on top for a nice crunch. Drizzle olive oil over everything. - Bake again for 20-25 minutes until the top is golden and bubbly. For the full recipe, check out the details above. Enjoy your cooking! To make the best twice-baked potato casserole, choose large russet potatoes. They are starchy and fluffy, which gives a nice texture. You can adjust the creaminess by changing the milk and sour cream amounts. For a richer taste, add more sour cream. If you like it lighter, reduce the sour cream and use more milk. Spices can take your casserole to the next level. I recommend garlic powder and onion powder for a strong base flavor. Fresh herbs like chives or parsley also add brightness. Always use fresh ingredients when possible. They make a big difference in taste and can boost the dish’s appeal. When reheating, check the casserole often. A good rule is to lower the baking time by a few minutes. Look for a golden top and bubbling sides to know it's done. If the top is not browning enough, you can broil it for a short time. Just keep an eye on it to avoid burning. {{image_4}} You can add meat to your casserole for more flavor and heartiness. Bacon bits are a favorite choice. They add a nice crunch and smoky taste. You can also use diced ham for a savory touch. For those who prefer a meatless option, sautéed vegetables work great. Try bell peppers, mushrooms, or spinach for added color and texture. Cheese brings joy to this dish. While sharp cheddar is classic, you can explore other types. Monterey Jack melts beautifully and adds creaminess. Gouda gives a rich and nutty flavor. You can also try flavored cheeses like pepper jack for a spicy kick. Mixing and matching cheeses can lead to new favorites! For a healthier twist, consider using Greek yogurt instead of sour cream. It gives the same creaminess with less fat. Sweet potatoes are another great swap. They add a natural sweetness and more nutrients. These changes keep the dish tasty while making it a bit lighter. You can enjoy comfort food without the guilt! For the full recipe, check out the [Full Recipe]. To keep your twice baked potato casserole fresh, store it in an airtight container. Make sure to let it cool down first. It stays good in the fridge for about 3 to 5 days. If you want to enjoy it later, this casserole is perfect for storing. Just reheat it in the oven for the best taste. You can freeze the casserole before or after baking. If you freeze it before baking, wrap it tightly in plastic wrap and then foil. This way, it keeps its flavor. For baking first, let it cool fully before freezing. To thaw, place it in the fridge overnight. To reheat, bake it at 350°F (175°C) until it's hot throughout. This usually takes about 30 to 40 minutes. Prepare the ingredients ahead of time to make assembly easy. You can wash and chop the potatoes and onions, and mix the cheese blend. When it’s time to cook, just combine everything and bake. This dish pairs well with a fresh salad or grilled vegetables. It makes a great side for grilled chicken or steak, too. You can tell when the potatoes are done by checking their softness. Use a knife or fork to poke them. If the knife slides in with little resistance, they are ready. The skin should also feel crisp. A good rule is to bake them for 45-60 minutes. The size of the potatoes can change cooking time, so keep an eye on them. Yes, you can make this casserole ahead of time. Prepare the filling and stuff the potatoes, then cover and chill in the fridge. You can make it a day before. When ready to bake, just add a few extra minutes to your cooking time. This way, you save time on busy days. This casserole pairs well with many dishes. You can serve it with a green salad for freshness. Grilled chicken or steak also makes a great match. For a lighter meal, try it with steamed veggies. The creamy potatoes complement many flavors nicely. You can store leftovers in the fridge for about three to four days. Make sure to keep them in an airtight container. If you want to keep them longer, consider freezing them. They can last up to three months in the freezer. Just reheat in the oven or microwave when ready to enjoy. This blog post covered how to make Easy Twice Baked Potato Casserole. We looked at ingredients, step-by-step instructions, tips, variations, and storage info. You can use russet potatoes, sour cream, and cheese for a tasty casserole. Don't forget to experiment with spices, meats, and health options. Enjoy this dish with friends or family. With the right prep, you can make it ahead or store leftovers easily. Try these tips and enjoy a delicious meal that’s simple yet satisfying. Happy cooking!](https://tossedflavors.com/wp-content/uploads/2025/04/0a6e1cfa-f24b-4eb0-b462-5972d12b9ea7.webp)
Easy Twice Baked Potato Casserole Comfort Dish Recipe
Craving comfort food? Try my Easy Twice Baked Potato Casserole! This dish combines fluffy potatoes, creamy cheese, and fresh seasonings all in one flavorful bite.

Cheesy Spinach Meatball And Potato Bake Delight
Indulge in the comforting goodness of Cheesy Spinach Meatball and Potato Bake. This dish combines savory meatballs, fresh spinach, and layers of creamy potatoes. Perfect
![To make Hasselback potatoes, you need a few key ingredients. Here’s what I recommend: - 4 medium-sized russet potatoes - 4 tablespoons extra virgin olive oil - 3 cloves garlic, minced - 1 teaspoon fresh rosemary, finely chopped - 1 teaspoon fresh thyme, finely chopped - 1 teaspoon sea salt - ½ teaspoon freshly ground black pepper - ¼ cup freshly grated Parmesan cheese You can also add some extra touches for flavor and texture: - Fresh herbs like rosemary or thyme bring a nice aroma. - Cheese options like Parmesan or Gruyère add a rich, creamy taste. - Additional seasonings such as paprika or garlic powder can enhance the dish. For a delightful serving, you might want to add some chopped parsley on top. These ingredients make Hasselback potatoes a simple and flavorful delight. Check out the [Full Recipe] for more details! 1. Preheat the oven and prepare potatoes Start by preheating your oven to 425°F (220°C). This heat makes the potatoes crispy. Next, rinse the russet potatoes under cold water. This step removes dirt. After rinsing, dry them well with a towel. 2. How to slice potatoes correctly Place one potato on a cutting board. Use a sharp knife to make thin slices. Space the cuts about ¼ inch apart. Be careful to stop cutting about ¼ inch from the bottom. This keeps the potato whole and gives it the right shape. 3. Making the herb-infused oil mixture In a bowl, mix together 4 tablespoons of olive oil, 3 minced garlic cloves, 1 teaspoon each of chopped rosemary and thyme, 1 teaspoon sea salt, and ½ teaspoon black pepper. Stir it well. This mix will add great flavor to the potatoes. 1. Applying the oil mixture Use a pastry brush or spoon to apply the oil mix over each potato. Make sure the oil gets into the cuts. This helps infuse flavor. 2. Cheese application tips After the oil, sprinkle ¼ cup of grated Parmesan cheese on top. Let some cheese fall into the slices. This adds even more taste as they bake. 3. Baking instructions and timing Place the potatoes on a baking sheet with parchment paper. Bake them for 45 to 50 minutes. You want them golden brown outside and tender inside. 1. Presentation tips for Hasselback potatoes When done, arrange your crispy potatoes on a nice platter. Drizzle some olive oil on top for shine. You can add fresh parsley on top for color. 2. Accompaniments Serve these potatoes with a side of sour cream or yogurt. These creamy dips bring out the flavors and make the dish more fun. Enjoy this crispy, flavorful delight! Proper slicing technique When you slice your potatoes, be careful. Use a sharp knife and cut about ¼ inch apart. Make sure to stop just before you reach the bottom. This keeps the potato whole. If you cut all the way through, you lose that lovely Hasselback look. Overbaking or underbaking issues Watch your baking time closely. If you bake too long, the potatoes can get dry. If not long enough, they will be hard and not cooked through. Aim for a golden-brown crust on the outside and tender inside. Check them at 45 minutes. Marinating ideas To boost flavor, try marinating your potatoes. You can soak them in the herb-infused oil for 30 minutes before baking. This adds a punch of flavor deep into each slice. Creative seasoning blends Don’t just stick to salt and pepper. Consider adding smoked paprika, garlic powder, or even chili flakes. These spices will give your potatoes a unique taste. Experiment with different blends to find your favorite. Recommended knives and cutting boards A sharp chef’s knife is key for slicing. Use a sturdy cutting board to keep it stable. Plastic boards are easy to clean, but wooden boards can be nicer on your knife. Baking sheet and parchment paper tips Use a baking sheet lined with parchment paper. This makes cleanup easy and helps prevent sticking. Make sure the potatoes have enough space between them for even cooking. {{image_4}} You can use many types of cheese on your Hasselback potatoes. Each cheese gives a new taste. Classic choices include Parmesan and Gruyère. For a richer flavor, try aged cheddar. If you want to keep it plant-based, there are vegan cheese options. Look for brands that melt well. They can add creaminess without dairy. Nutritional yeast is another tasty choice. It gives a cheesy flavor without any cheese at all. Mixing herbs can change the whole dish. Classic herbs like rosemary and thyme work great. You can also try dill or parsley for a fresh twist. For kick, add spicy herbs. Consider using crushed red pepper or cayenne. These can give your potatoes a nice heat. Don’t be afraid to experiment and find your perfect mix! Adding extras can make your Hasselback potatoes even better! You can mix in bacon bits for crunch and flavor. Chopped chives or caramelized onions add a nice touch too. If you want to keep it vegetarian, go for sautéed mushrooms or bell peppers. These options keep your dish light while adding great taste. It’s all about making your meal unique! For the full recipe, check out the details above. Once you've enjoyed your Hasselback potatoes, store any leftovers in the fridge. First, let them cool down to room temperature. Then, wrap them in plastic wrap or place them in an airtight container. This keeps them fresh and tasty. Properly stored, they can last up to three days in the fridge. Just remember, the sooner you eat them, the better they taste! When you're ready to enjoy your leftovers, reheating properly is key. The oven is the best method for keeping that crispy texture. Preheat your oven to 350°F (175°C). Place the potatoes on a baking sheet and heat for about 15-20 minutes. This way, they warm up without turning mushy. If you’re in a hurry, you can use the microwave. However, this method may make the potatoes soft. Heat them in short bursts, checking often to avoid overcooking. Can you freeze Hasselback potatoes? Yes, but it's not the best choice for taste. If you want to freeze them, let them cool completely first. Wrap each potato tightly in plastic wrap, then place them in a freezer bag. They can stay frozen for up to two months. To reheat, let them thaw overnight in the fridge. Then, use the oven method to warm them back up. This will help keep some of that delicious texture. For a detailed guide on making these flavorful potatoes, refer to the Full Recipe. Hasselback potatoes are a fun way to serve baked potatoes. They originated in Sweden. The dish is named after a restaurant called Hasselbacken, where it first appeared. The potatoes are sliced thinly but not all the way through. This technique creates a beautiful fan shape. The slices cook evenly and soak up flavor well. You can add herbs, cheese, or spices to each slice. The result is crispy on the outside and soft on the inside. Yes, you can prepare Hasselback potatoes ahead of time. Slice the potatoes and store them in cold water. This keeps them from turning brown. You can also apply the oil and seasonings in advance. Cover them tightly with plastic wrap and place them in the fridge. When you are ready, bake them directly from the fridge. This makes meal prep easier and still gives you that fresh taste. Keeping the potatoes intact is key for cooking. The Hasselback cut allows heat to reach each slice. This means they cook evenly and get crispy. If you cut all the way through, they won’t hold their shape. Presentation is also important. The fan shape looks great on a plate. It makes your meal more appealing and fun to eat. Hasselback potatoes go well with many dishes. Here are some tasty ideas: - Grilled chicken or steak for protein - Roasted vegetables for color and flavor - Creamy coleslaw for crunch - A fresh salad for balance - Sour cream or yogurt for dipping These sides enhance the meal and make it more complete. You can mix and match based on your taste. For the full recipe, check out the Crispy Herb-Infused Hasselback Potatoes. Hasselback potatoes are fun and tasty. We explored ingredients, prep, and cooking tips. You learned how to avoid common mistakes and enhance flavors. You can also try different cheese and herb combos for a twist. Remember, proper storage keeps your leftover potatoes fresh. Serve with your favorite sides for a great meal. With these tips, you’ll make perfect Hasselback potatoes every time. Enjoy the process and get creative in the kitchen!](https://tossedflavors.com/wp-content/uploads/2025/04/b52dae65-945f-45e2-8ccb-e53fdfbf5e3a.webp)
Hasselback Potatoes Simple and Flavorful Delight
Hasselback potatoes are a simple yet flavorful delight you can whip up easily. With their crispy edges and tender centers, they make a stunning side
![- 4 slices of hearty sourdough bread - 2 tablespoons unsalted butter, softened - 1 cup sharp cheddar cheese, grated - 1/2 cup mozzarella cheese, grated - 1 tablespoon fresh basil, finely chopped - 1/4 cup sun-dried tomatoes, chopped - 1/2 teaspoon garlic powder - Salt and pepper to taste A grilled cheese sandwich starts with simple, quality ingredients. I love using hearty sourdough bread. It gives a great texture and taste. The butter adds richness and helps the bread crisp up nicely. Cheddar and mozzarella create a perfect melt. Cheddar brings sharpness and flavor. Mozzarella adds that gooey, stretchy quality we all love. For a twist, I often add fresh basil. It brings a bright flavor that pairs well with cheese. Sun-dried tomatoes add a hint of sweetness and tang. Garlic powder gives depth to each bite. Salt and pepper are key. They enhance the flavors and really bring the sandwich to life. Adjust these to fit your taste. Together, these ingredients make a grilled cheese that is both savory and satisfying. For the full recipe, refer to the details shared earlier. - Preheat the skillet over medium heat. - Butter one side of each slice of bread. Start by heating your skillet. This step is key. A warm skillet helps create a crisp crust. While it heats, butter the bread. Use softened butter for easy spreading. Make sure to cover one side of each slice with butter. This will be the side that sizzles in the skillet. - Layer cheeses and optional ingredients on the bread. - Top with the second slice of buttered bread. Once your skillet is ready, place two slices of bread in it. Buttered side should face down. Now it's time to add your cheese. Start with a layer of sharp cheddar. Follow that with mozzarella for extra creaminess. If you want, add fresh basil and sun-dried tomatoes. Sprinkle in garlic powder, salt, and pepper for more flavor. Top with the other slice of bread, making sure the buttered side is up. - Cook for 4-5 minutes until golden brown before flipping. - Grill the other side for an additional 4-5 minutes. Let the sandwich cook for 4-5 minutes. Keep an eye on the bread. It should turn a lovely golden brown. When it's ready, gently flip the sandwich. Use a spatula to avoid spills. Grill the other side for another 4-5 minutes. Check to see if the cheese is melting nicely. When both sides are crisp and golden, your grilled cheese is ready to enjoy! Don't forget to check the [Full Recipe] for more tips and tricks on serving this delightful dish! For a great grilled cheese, fresh cheese is key. Use sharp cheddar and mozzarella that you grate yourself. This gives the best melt and flavor. Adjust your heat to medium. Too high, and you burn the bread before the cheese melts. Too low, and the bread may not crisp up. To add flavor, season the cheese with a touch of salt and pepper. You can also mix in garlic powder for a nice kick. Try combining different cheeses like gouda or fontina for a new taste. Each cheese brings its own twist, making your sandwich unique. Pair your grilled cheese with tasty dips. A warm bowl of marinara sauce is perfect. It adds a nice, tangy flavor. For a pretty plate, cut the sandwich diagonally. Garnish with fresh basil leaves. This makes your dish pop and look inviting. For the full recipe, check out the Cheesy Delight Grilled Sandwich section. {{image_4}} You can use many types of bread for your grilled cheese. Each type adds a unique taste and texture. Here are some great options: - Whole wheat: This bread gives a nutty flavor and a hearty bite. - Rye: Rye adds a rich taste and pairs well with strong cheeses. - Gluten-free: If you need gluten-free, many options work. Look for bread made from rice or almond flour. Cheese is the star of the grilled cheese sandwich. You can mix and match different types for a unique flavor. Here are some great combos: - Sharp cheddar: This is a classic choice. It melts well and has a bold flavor. - Mozzarella: This cheese is creamy and stretchy. It gives that gooey texture we love. - Gruyère: This Swiss cheese has a nutty taste and melts beautifully. - Pepper jack: If you like a kick, this cheese adds spice and flavor. Adding toppings can take your grilled cheese to the next level. Here are some tasty ideas: - Vegetables: Spinach, tomatoes, or avocado add freshness. - Meats: Bacon or ham adds richness and heartiness. - Spices and herbs: Try fresh basil or a sprinkle of garlic powder to boost flavor. For a delicious twist, check the Full Recipe for more ideas on how to make your grilled cheese special! To keep your grilled cheese fresh, wrap it in plastic wrap or foil. Store it in the fridge. This helps retain moisture and flavor. - Best practices for refrigeration: Place the wrapped sandwich in an airtight container. This prevents it from drying out. Use it within three days for the best taste. - Reheating methods to maintain crispiness: To reheat, use a skillet over medium heat. Add a little butter to the pan. This gives the bread a nice crunch. Heat each side for about 2-3 minutes until warm and crispy. Freezing grilled cheese is a great way to save extra sandwiches. - Instructions for freezing grilled cheese sandwiches: Allow the sandwiches to cool completely. Wrap each one tightly in plastic wrap, then place them in a freezer bag. This keeps out air and moisture. - Thawing and reheating for best results: When ready to eat, take the sandwich out and thaw it in the fridge overnight. Reheat in a skillet or toaster oven for the best texture. Grilled cheese sandwiches have a decent shelf life when stored properly. - Expected timeframes for freshness: In the fridge, they last about three days. If frozen, they can keep for up to three months. Always check for changes in smell or texture before eating. To make a grilled cheese sandwich, follow these steps: 1. Preheat your skillet over medium heat. 2. Butter one side of each slice of sourdough bread. 3. Place two buttered slices in the skillet, butter-side down. 4. Add sharp cheddar and mozzarella cheese on top. 5. Sprinkle on optional ingredients like basil and garlic powder. 6. Place the other two slices on top, butter-side up. 7. Grill for 4-5 minutes until golden brown. 8. Flip and grill the other side for 4-5 more minutes. 9. Remove from heat and let rest before slicing. The best cheese for a grilled cheese sandwich has great melting properties. I love using: - Sharp cheddar: It melts well and has a strong flavor. - Mozzarella: It adds creaminess and stretchiness. - Gouda or fontina: These cheeses melt smoothly and taste rich. Mixing different cheeses can create a more complex flavor. To make your grilled cheese sandwich healthier, try these tips: - Use whole grain bread instead of white bread. - Choose low-fat cheese options or reduce the amount. - Add veggies like spinach, tomatoes, or avocados for more nutrients. - Use less butter or switch to olive oil for grilling. These changes keep the taste while cutting calories. Yes, you can make grilled cheese in a toaster. Here’s how: 1. Assemble your sandwich as usual, but leave the butter off the bread. 2. Place the sandwich in a toaster bag to prevent mess. 3. Toast it on a low setting to avoid burning. 4. Check it often to ensure even browning. Using a toaster is a quick and easy method! Using butter or mayonnaise both works well, but they give different results: - Butter: It provides a classic flavor and helps achieve a golden, crispy crust. - Mayonnaise: It has a higher smoke point and can create a crunchier texture. I prefer butter for that rich taste, but you can try both to find your favorite! In this article, we covered the essential ingredients and steps to make a perfect grilled cheese sandwich. You learned how to pick the right cheeses, flavors, and even storage tips. Remember, this classic dish can be fun to customize with different breads and add-ons. Enjoy experimenting with new tastes. With these simple tricks, you can create tasty grilled cheese sandwiches that everyone will love. Happy grilling!](https://tossedflavors.com/wp-content/uploads/2025/04/9b0d2064-eb1c-4624-a92e-7986327c47a4.webp)
Grilled Cheese Sandwich Savory and Simple Delight
Craving a comforting meal that delivers pure joy? Look no further than the classic grilled cheese sandwich. With its gooey cheese and crispy bread, it’s

Savory Sesame Orange Tofu Stir Fry Recipe
Are you ready to spice up your dinner routine? This Savory Sesame Orange Tofu Stir Fry is a quick and tasty dish that everyone will

Baked Stuffed Shrimp Casserole Easy Family Delight
Craving a simple yet delicious meal? You’ll love this Baked Stuffed Shrimp Casserole! With juicy shrimp, creamy stuffing, and gooey mozzarella, it’s an easy dish
![- 2 pounds boneless, skinless chicken breasts - 1 packet ranch seasoning mix - 8 ounces cream cheese, softened - 1 cup pepper jack cheese, shredded - 1 cup cooked, shredded chicken (optional) - 1/2 cup green onions, finely chopped - 1/2 cup crispy fried onions - Salt and pepper, to taste - Slow cooker - Mixing bowls - Measuring cups and spoons - Forks for shredding When I make Easy Pepper Jack Crack Chicken, I always start by gathering my ingredients. The main star is the chicken, which is tender and juicy. I choose boneless, skinless chicken breasts for a lean option. Next, I grab a packet of ranch seasoning mix. This adds a burst of flavor that pairs well with the creamy cheese. Speaking of cheese, I use 8 ounces of softened cream cheese to create a rich base. For a spicy kick, I choose 1 cup of shredded pepper jack cheese. Sometimes, I add 1 cup of cooked, shredded chicken for extra texture. Green onions give a nice crunch, so I chop 1/2 cup finely. I also sprinkle 1/2 cup of crispy fried onions on top for added flavor and texture. Lastly, I season with salt and pepper to taste. To cook all of this, I need a slow cooker. It works wonders to make the chicken tender. Mixing bowls help me combine ingredients. I also use measuring cups and spoons for precise amounts. Finally, I keep forks handy for shredding the chicken after cooking. For the full recipe, check out [Full Recipe]. 1. Start by placing the chicken breasts in your slow cooker. 2. Sprinkle the ranch seasoning mix over the chicken. Make sure to cover it well. 3. Next, add the softened cream cheese on top of the chicken. This will melt and add creaminess. 4. If you want more texture, layer in the cooked, shredded chicken now. 1. Cover the slow cooker with its lid. Set it to low for 6-8 hours or high for 4-5 hours. 2. Check the chicken for doneness as it cooks. It should be fork-tender and fully cooked. 3. Once done, shred the chicken right in the pot using two forks. Mix it well with the cream cheese and seasoning. 1. Gradually add the shredded pepper jack cheese to the chicken mixture. Stir until it melts and combines. 2. Taste your crack chicken. Adjust seasoning with salt and pepper if needed. 3. Just before serving, sprinkle green onions and crispy fried onions on top for added crunch. This dish is creamy, cheesy, and packed with flavor. For the full recipe, check out [Full Recipe]. To achieve perfectly tender chicken, use boneless, skinless breasts. Cooking them low and slow in your slow cooker is key. This method keeps the chicken moist and flavorful. Always check that the chicken is fork-tender before shredding. You can switch up the cheese varieties to add unique flavors. Cream cheese gives a rich base, but you might try gouda or cheddar for a twist. Each cheese brings its own taste and melts differently. Adjusting spice levels is easy. If you love heat, add more pepper jack cheese. For milder flavors, reduce the amount of cheese or use a different variety. You can also add chopped jalapeños for an extra kick. The best sides to serve with Crack Chicken are rice or mashed potatoes. They soak up the creamy sauce well. Fresh veggies like steamed broccoli or a simple salad also pair nicely. For parties, presentation matters. Serve Crack Chicken on a large platter. Garnish with green onions for a pop of color. Offer soft tortillas or slider buns so guests can make their own wraps. You can also use Crack Chicken in sandwiches or wraps. Spread some on bread or a tortilla, add veggies, and roll it up. This makes for a fun, easy meal that everyone will love. If you don’t have a slow cooker, try an Instant Pot. It cooks the chicken quickly while keeping it tender. Set it to high pressure for about 15 minutes, then shred as usual. For stovetop cooking, use a large pot. Add the chicken and seasoning, cover with a lid, and simmer on low. Stir often to prevent sticking and ensure even cooking. If you want to scale the recipe, simply adjust the ingredients. For example, if feeding a crowd, double the chicken and cheese. Just make sure your pot can hold it all! {{image_4}} You can mix things up with flavor variations for your Easy Pepper Jack Crack Chicken. Here are a few ideas: - Spicy Pepper Jack Crack Chicken: Add diced jalapeños or hot sauce for some heat. This version packs a punch and is perfect for spice lovers. - Herb-infused Crack Chicken: Mix in fresh herbs like rosemary or thyme. They add a nice touch and enhance the dish's aroma. - BBQ Crack Chicken alternative: Swap ranch seasoning for your favorite BBQ sauce. This gives a sweet and smoky flavor that many enjoy. If you have dietary needs, you can still enjoy this dish with a few tweaks: - Making it gluten-free: Use a gluten-free ranch seasoning mix. Check the label to ensure it is safe for your diet. - Dairy-free modifications using plant-based cheeses: Substitute cream cheese and pepper jack cheese with dairy-free options. Brands now offer great taste without the dairy. - Low-carb variations for keto diets: Skip the added sugar in sauces and stick with chicken and cheese. This keeps carbs low while being filling. You can serve Easy Pepper Jack Crack Chicken in various ways to suit your mood: - Crack Chicken as a dip: Serve it warm with tortilla chips or veggies. It makes a great appetizer for parties. - Using it in a casserole: Layer it with vegetables and cheese in a baking dish. Bake until golden for a hearty meal. - Presentation as sliders or tacos: Serve the crack chicken on slider buns or in soft tortillas. Add toppings like lettuce, tomatoes, and more cheese for a fun twist. Feel free to explore these variations and find what you love most about this dish. You can even check the Full Recipe for more inspiration. To store leftover Crack Chicken, let it cool first. Place it in an airtight container. This keeps it fresh. You can enjoy it for up to four days in the fridge. Always check for any strange smells or colors before eating. Want to save some for later? You can freeze portions of Crack Chicken. Use freezer-safe bags or containers. Leave space at the top for expansion. It lasts up to three months in the freezer. To reheat, thaw it overnight in the fridge. Heat on low in the microwave or stovetop until warm. If you have busy nights ahead, prepare Crack Chicken in advance. Cook it on the weekend, then store it. Use glass containers for easy reheating. Label them with the date to keep track. This makes dinner smooth and easy on busy days. Yes, you can use frozen chicken. Just make sure to add some extra cooking time. Place the frozen chicken in the slow cooker first. The ranch seasoning mix will still coat the chicken well. Cooking frozen chicken may take about 8-10 hours on low or 6-7 hours on high. Always check that the chicken is well cooked before serving. To check if the chicken is done, look for a few signs. The chicken should shred easily with a fork. If it is still firm, it needs more time. The color should be white or light pink, not red. You can also cut a piece open to check the center. If it’s hot and not pink, it’s ready. Yes, you can prepare this dish ahead of time. Cook the chicken and shred it as usual. Once it’s ready, let it cool. Store it in a sealed container in the fridge for up to three days. When you’re ready to eat, just reheat it on the stove or in the microwave. This dish pairs well with many sides. Consider serving it with: - Soft flour tortillas for wraps - Crispy potato chips for crunch - A fresh green salad for balance - Steamed veggies for a healthy touch - Rice or mashed potatoes to soak up the sauce Explore these options to make your meal even better! For the full recipe, check the details above. In this blog post, we explored how to make Easy Pepper Jack Crack Chicken. We covered the ingredients, cooking steps, tips, variations, and storage methods. You learned how to achieve tender chicken and enhance flavors with different cheeses and spices. Remember, this dish is versatile for any meal. You can serve it in many ways, from dips to casseroles. Enjoy creating your own version of this crowd-pleasing recipe!](https://tossedflavors.com/wp-content/uploads/2025/04/6661797e-f27d-4434-a797-43ace13d7392.webp)
Easy Pepper Jack Crack Chicken Flavorful Comfort Meal
Are you ready to elevate your dinner game? This Easy Pepper Jack Crack Chicken is a flavorful comfort meal that will impress your family and
![- 1 lb ground turkey - 1/2 cup whole wheat breadcrumbs - 1/4 cup grated Parmesan cheese - 1/4 cup fresh parsley, finely chopped - 1 large egg, beaten - 3 cloves garlic, minced - 1 teaspoon onion powder - 1/2 teaspoon salt - 1/2 teaspoon freshly ground black pepper - 1/2 cup honey - 1/4 cup low-sodium soy sauce - 1 tablespoon apple cider vinegar - 1 teaspoon fresh ginger, minced (or ginger paste) - Optional garnishes: sesame seeds and chopped green onions When making honey garlic turkey meatballs, each ingredient plays a key role. The ground turkey offers a lean base. It keeps the meatballs moist and tender. Whole wheat breadcrumbs help bind the mixture. They add texture without being too heavy. Grated Parmesan cheese adds a rich, nutty flavor. Fresh parsley brings brightness and color. Don’t forget the garlic! It gives a punchy taste. The onion powder adds another layer of flavor. Salt and black pepper season the mixture, making it well-rounded. For the sauce, honey is the star. It sweetens and balances the soy sauce's saltiness. Apple cider vinegar adds tang, while fresh ginger brings warmth. You can garnish with sesame seeds and green onions. These add a lovely touch and extra crunch. If you want to dive deeper into the cooking process, find the full recipe [here]. First, I preheat the oven to 400°F (200°C). I line a baking sheet with parchment paper. This makes cleanup easy. In a large bowl, I add the ground turkey, breadcrumbs, Parmesan cheese, parsley, beaten egg, minced garlic, onion powder, salt, and black pepper. I mix the ingredients together gently. It’s key not to overmix. Then, I shape the turkey mixture into meatballs about 1 inch wide. I place the meatballs on the baking sheet, leaving space between them. Next, I bake the meatballs for about 20 minutes. I watch for them to turn golden brown. This tells me they are cooked through and ready for the next step. While the meatballs bake, I prepare the glaze. In a medium saucepan over medium heat, I mix the honey, soy sauce, apple cider vinegar, and minced ginger. I stir the mixture well and bring it to a gentle simmer. This step is important. It allows all the flavors to meld together nicely. Once the meatballs are done, I take them out of the oven. I carefully transfer them to the saucepan with the warm glaze. I gently toss the meatballs in the sauce to coat them well. Then, I let them simmer for an extra 3-5 minutes. This helps the flavors deepen and stick to the meatballs. When I serve them, I often garnish with sesame seeds and chopped green onions for a nice touch. For the full recipe, check it out! To make great meatballs, start with the right ground turkey. Choose a blend with some fat. This adds flavor and keeps them moist. Lean turkey can dry out. For texture, combine the turkey with other ingredients gently. If you mix too much, the meatballs can turn tough. Use your hands or a spatula to blend just until combined. Adding herbs and spices can make these meatballs shine. Try fresh basil or cilantro for a twist. A pinch of smoked paprika adds depth. Taste the sauce as you cook it. If it’s too sweet, add a splash of soy sauce. If it’s too salty, a bit more honey can balance it out. Adjust to suit your taste. Arranging your meatballs can wow your guests. Place them on a serving platter. Drizzle some honey garlic sauce over the top. This adds flavor and looks great. Garnish with sesame seeds and chopped green onions. They pop with color! Serve alongside fluffy rice or noodles for a complete meal. You can also use toothpicks for a fun appetizer. For the full recipe, click [here](#). {{image_4}} You can swap out ground turkey for other meats. Chicken works well. Beef adds a richer flavor. For a plant-based option, try using lentils or chickpeas. They give a nice texture too. Binding agents help hold meatballs together. If you want something different, use oats or gluten-free breadcrumbs. These options work well for various diets. They also add unique flavors to the meatballs. To spice things up, add sriracha or chili flakes. A little heat can make the dish exciting. You can also create a teriyaki version. Use pineapple juice instead of honey in the glaze. This gives a sweet and tangy twist that many enjoy. You can cook these meatballs in different ways. Baking is easy and keeps them juicy. For stovetop cooking, pan-fry them in a skillet for a nice crust. If you want a hands-off approach, use a slow cooker. Just place the meatballs and glaze inside. Set it on low and let it cook for a few hours. The flavors will blend beautifully, creating a delightful meal. For the Full Recipe, check out the main sections above. After a tasty meal, you will want to keep those honey garlic turkey meatballs fresh. Here are some tips: - Refrigeration Tips: Place the meatballs in an airtight container. They can last up to four days in the fridge. Always store the meatballs with the glaze, as it keeps them moist and flavorful. - Recommended Storage Containers: Use glass or BPA-free plastic containers. Make sure they have a tight seal to prevent air from getting in. If you have extra meatballs, freezing is a great option. Here’s how: - How to Properly Freeze Cooked Meatballs and Glaze: Let the meatballs cool completely first. Then, place them in a single layer on a baking sheet. Freeze until solid. After that, you can transfer them to a freezer-safe bag or container. Don’t forget to add the glaze for the best flavor! - Thawing and Reheating Instructions for Optimal Taste: To thaw, place the meatballs in the fridge overnight. For reheating, use the microwave or oven. If using the oven, heat at 350°F (175°C) until warm. This keeps the meatballs juicy and tasty. By following these steps, you’ll enjoy your honey garlic turkey meatballs later with the same great flavor as when you first made them! If you want to see how to make these meatballs, check out the Full Recipe. You can store cooked honey garlic turkey meatballs in the fridge for up to four days. Make sure to keep them in an airtight container. For longer storage, freeze them for up to three months. Just remember to thaw them in the fridge before reheating. Yes, you can prepare the glaze ahead of time. Mix the honey, soy sauce, apple cider vinegar, and ginger. Store it in the fridge for up to one week. This makes it easy to toss on your meatballs when you are ready to serve. These meatballs go great with many sides. You can serve them with fluffy steamed rice or noodles. Roasted vegetables or a fresh salad also work well. For a fun twist, try them in a wrap or on a sub with extra sauce. Absolutely! These meatballs are perfect for meal prep. You can make a big batch on the weekend and store them. Just divide them into portions and keep them in the fridge or freezer. This makes weeknight dinners quick and easy. If you want a kick, add crushed red pepper or sriracha to the meat mixture. You can also mix in some chopped jalapeños. For a smoky flavor, try adding chipotle powder. Adjust the heat to match your taste! For the full recipe, check out the section above. In this post, we explored how to make delicious honey garlic turkey meatballs. We covered key ingredients, step-by-step instructions, and tips for the perfect texture and flavor. I shared ideas for variations and storage methods to keep your meatballs fresh. Remember, cooking is all about creativity and fun. Experiment with flavors and make this dish your own. Whether for a cozy dinner or meal prep, these meatballs are sure to please. Enjoy cooking, sharing, and tasting your tasty creations!](https://tossedflavors.com/wp-content/uploads/2025/04/6fdc1405-3686-482c-a0e4-bb6df6ea8736.webp)
Honey Garlic Turkey Meatballs Flavorful and Simple Meal
Looking to impress your family with a simple yet tasty meal? Honey Garlic Turkey Meatballs combine lean turkey, garlic, and a sticky-sweet glaze that everyone
![For this tasty dish, gather these main ingredients: - 4 boneless, skinless chicken breasts - 4 tablespoons unsalted butter, divided - 6 cloves garlic, minced - 1 cup heavy cream - 1 cup chicken broth - 1 teaspoon dried Italian herbs - Salt and freshly ground black pepper to taste - 1 tablespoon olive oil These ingredients work together to create a rich and creamy sauce that complements the chicken perfectly. Seasoning adds depth to your dish. Here are some good choices: - Dried Italian herbs (like oregano, basil, and thyme) - Salt to enhance flavor - Freshly ground black pepper for a bit of heat These seasonings balance the richness of the cream and butter. Garnishes can elevate your dish's presentation. Try these: - Fresh parsley, chopped - Lemon wedges for a fresh touch - Grated Parmesan cheese for extra flavor Adding these garnishes gives a pop of color and taste to your creamy garlic butter chicken. For the complete recipe, check the [Full Recipe]. First, gather your ingredients. You need chicken breasts, butter, garlic, heavy cream, chicken broth, herbs, salt, pepper, olive oil, and parsley. Next, season both sides of the chicken breasts with salt and pepper. This step is key for flavor. In a large skillet, heat olive oil over medium-high heat. Add two tablespoons of butter and let it melt. When the butter foams, place the chicken breasts in the skillet. Cook them for 6-7 minutes on each side. Look for a golden brown color and a safe temperature of 165°F. After cooking, remove the chicken and cover it with foil to keep warm. Next, reduce the heat. Add the remaining butter to the skillet. Once it melts, stir in the minced garlic. Cook the garlic for 1-2 minutes while stirring. It should smell great and turn golden. Pour in the chicken broth, scraping the bottom of the skillet to mix in all the tasty bits. Now, lower the heat to medium-low. Stir in the heavy cream and Italian herbs. Mix well and let it simmer for 3-5 minutes. This helps the sauce thicken and become smooth. Return the chicken to the skillet, coating it in the creamy sauce. Let it simmer for another 2-3 minutes to heat through. Taste the sauce and adjust the salt and pepper as needed. For a nice presentation, place the chicken on a serving plate. Drizzle the creamy garlic sauce over the top. Add a sprinkle of fresh parsley for color. This dish is perfect with steamed veggies or creamy mashed potatoes. For the full recipe, check the details above. To cook chicken breasts just right, start with even pieces. This helps them cook evenly. Before cooking, season both sides with salt and pepper. Heat your skillet over medium-high heat. Add olive oil and butter until it bubbles. Place the chicken in the skillet and cook for 6-7 minutes on each side. Use a meat thermometer to check for 165°F (75°C). This ensures the chicken is safe to eat and stays juicy. To thicken your sauce, let it simmer gently after adding cream. The heat helps the sauce reduce and gain a rich texture. Stir the sauce often to prevent it from burning. If it’s too thin, let it cook longer. You can also mix a little cornstarch with water and add it to the sauce. This trick works well to achieve that perfect creamy consistency. When serving Creamy Garlic Butter Chicken, presentation matters. Arrange the chicken on a plate and pour the sauce over it. A sprinkle of fresh parsley adds color and freshness. This dish tastes great with sides like steamed veggies or creamy mashed potatoes. You can even serve it over pasta for a hearty meal. Don’t forget to check out the Full Recipe for more details! {{image_4}} You can boost this dish with veggies. Try adding spinach, mushrooms, or broccoli. These flavors mix well with garlic butter. You can toss the veggies into the skillet after the garlic. Sauté them for a few minutes before adding the broth and cream. This adds color and nutrients to your meal. It also makes it more filling. If you want more heat, add red pepper flakes or a dash of hot sauce. Stir them in with the garlic for a spicy kick. For a creamier sauce, add more heavy cream. You can also use cream cheese or sour cream. This creates a rich, velvety texture that makes every bite delightful. Heavy cream is great, but you can switch it up. Use half-and-half for a lighter option. Coconut cream is a good dairy-free choice. If you want a low-calorie option, use Greek yogurt. Just add it last and heat gently to avoid curdling. Each option changes the flavor, so feel free to experiment! You can find the Full Recipe [here]. After enjoying your creamy garlic butter chicken, let it cool. Place the chicken in an airtight container. Store it in the fridge for up to four days. Ensure the sauce covers the chicken to keep it moist. You can also separate the chicken and sauce if you prefer. To reheat, use a skillet on low heat. Add a splash of chicken broth or water to keep the chicken moist. Stir gently to heat the sauce without burning it. You can also use a microwave. Cover the dish to avoid drying out the chicken. Heat in short intervals, stirring in between. You can freeze creamy garlic butter chicken for up to three months. Place it in a freezer-safe container. Make sure to leave space for expansion. Thaw in the fridge overnight before reheating. This keeps the chicken tender and the sauce creamy. For the full recipe, check out the [Full Recipe]. Yes, you can use skin-on chicken. It adds a nice crispy texture. Just remember to adjust the cooking time. Skin-on chicken may need a few extra minutes to cook through. The flavor will be richer, thanks to the fat in the skin. You can serve this dish with many sides. Here are some great options: - Steamed vegetables: Broccoli or green beans work well. - Mashed potatoes: Creamy potatoes soak up the sauce nicely. - Rice: White or brown rice is a great choice. - Pasta: Toss in some cooked pasta for a complete meal. Pairing the chicken with these sides makes for a balanced dinner. You can make this dish dairy-free easily. Use coconut cream instead of heavy cream. Choose a dairy-free butter substitute for the recipe. You can also use vegetable broth in place of chicken broth. This will keep the flavors rich while being dairy-free. For more tips, check the Full Recipe. This article covered everything you need for a delicious creamy garlic butter chicken. We explored the key ingredients, steps for cooking, and tips for perfecting the dish. Variations let you customize, while storage info helps keep leftovers tasty. Remember, cooking is about fun and exploration. Don't hesitate to try new flavors or methods. Enjoy your meal and share this easy recipe with others!](https://tossedflavors.com/wp-content/uploads/2025/04/bee7a129-2f6b-4d7b-a8f1-9c19eb65131c.webp)
Creamy Garlic Butter Chicken Savory Dinner Recipe
Get ready to impress with this Creamy Garlic Butter Chicken recipe! This dish is rich, savory, and perfect for any dinner. You will love how