Dinner
![To make the best pan fried beef tacos, gather these fresh ingredients: - 1 lb ground beef - 1 small onion, finely chopped - 2 garlic cloves, minced - 1 teaspoon cumin - 1 teaspoon chili powder - 1/2 teaspoon smoked paprika - Salt and freshly ground black pepper to taste - 8 small corn tortillas - 1 cup shredded iceberg or romaine lettuce - 1 cup ripe tomatoes, diced - 1/2 cup shredded cheese (either sharp cheddar or crumbled queso fresco) - 1 ripe avocado, sliced - Fresh cilantro leaves, for garnish - Lime wedges, for serving These ingredients blend well to create a tasty taco experience. The ground beef provides a rich flavor. Onions and garlic add depth. Spices like cumin and chili powder give warmth. Fresh toppings bring crunch and brightness. You can find the full recipe in the cooking section. Enjoy customizing your tacos with your favorite toppings! 1. Start by heating a large skillet over medium heat. 2. Add 1 lb of ground beef to the skillet. Cook it until it is brown. This takes about 5-7 minutes. 3. Break the meat apart with a spatula as it cooks. This helps it brown evenly. 4. Once the beef is brown, add 1 finely chopped onion and 2 minced garlic cloves. 5. Sauté the onion and garlic for 3-4 minutes. You want the onion to be soft and clear. 6. Next, add 1 teaspoon of cumin, 1 teaspoon of chili powder, and 1/2 teaspoon of smoked paprika. 7. Season with salt and black pepper to taste. Stir well and cook for 2 more minutes. This lets the spices mix in. 1. In another non-stick skillet, heat it over medium-high heat. 2. Place one small corn tortilla in the hot skillet. 3. Warm it for about 30 seconds on each side. The tortilla should feel soft. 4. Repeat this with the other tortillas. Keep them warm by covering them with a clean towel. 1. Take a warm tortilla and scoop a generous amount of the beef mixture onto it. 2. Add a handful of shredded lettuce and a dollop of diced tomatoes on top. 3. Sprinkle some shredded cheese over the beef. You can use sharp cheddar or queso fresco. 4. Place a few slices of ripe avocado on top for creaminess. 5. Garnish with fresh cilantro leaves for a pop of color. 6. Serve the tacos right away with lime wedges on the side. Squeeze the lime for extra flavor. For more details, check the Full Recipe. - Use a heavy skillet, like cast iron. It heats evenly and keeps the beef warm. - Start with medium heat. This helps brown the beef without burning it. - Season the beef with cumin, chili powder, and smoked paprika. These spices add depth. - Use fresh onions and garlic for a bright flavor. Fresh herbs like cilantro boost taste too. - Arrange tacos on a large platter. This makes them look inviting and easy to grab. - Serve with lime wedges and a side of salsa. This adds color and extra flavor to the meal. For a full recipe, check out the [Full Recipe]. {{image_4}} You can switch the ground beef for ground turkey or chicken. These meats are leaner and still tasty. Just make sure to cook them until they reach a safe temperature. If you want a vegetarian option, try using beans. Black beans or pinto beans work great. They add protein and fiber, making your tacos hearty. Toppings can make your tacos exciting. You can add fresh salsa for a zesty kick, jalapeños for heat, or sour cream for creaminess. If you need dairy-free options, use avocado or a vegan yogurt instead. You can also try adding roasted corn or pickled onions for extra flavor. The choice of tortilla matters. Corn tortillas are traditional and gluten-free. They have a nice texture and flavor. Flour tortillas are soft and chewy, perfect for those who like a little more bite. If you need gluten-free options, look for corn or almond flour tortillas. They hold the filling well and taste great. For the full recipe, refer to the section above. To keep your pan fried beef tacos fresh, follow these tips. First, let the tacos cool down to room temperature. Then, place them in an airtight container. This helps prevent moisture loss. Store them in the fridge. Your tacos will stay good for about 3 to 4 days. When it's time to enjoy leftovers, reheat them well. You can use a skillet over medium heat. This method warms them evenly. Flip the tacos gently to avoid breaking them. To keep tortillas from getting soggy, avoid using the microwave. Instead, heat them on the skillet for a minute or two. This keeps them crisp and tasty. If you want to save tacos for later, freezing works well. You can freeze them assembled or unassembled. For assembled tacos, wrap them tightly in foil or plastic wrap. If you choose to freeze them unassembled, pack the beef and toppings separately. To thaw, place them in the fridge overnight. When ready, reheat in the oven or skillet. This method ensures the best taste and texture. Enjoy your delicious pan fried beef tacos later! To make pan fried beef tacos, follow these simple steps: 1. Start by cooking 1 lb of ground beef in a large skillet. 2. Break it apart with a spatula until it’s fully browned. 3. Add 1 small chopped onion and 2 minced garlic cloves. 4. Sauté for 3-4 minutes until the onion is soft. 5. Mix in 1 teaspoon of cumin, 1 teaspoon of chili powder, and 1/2 teaspoon of smoked paprika. 6. Season with salt and black pepper. Cook for 2 more minutes. 7. Warm 8 small corn tortillas in a separate skillet. 8. Fill each tortilla with the beef mix and top with your favorites. I recommend checking the Full Recipe for more details. Yes, you can use other meats! Ground turkey or chicken are great options. You can also use shredded beef or pork. If you want a meatless option, try black beans or lentils, which are tasty and filling. For tasty toppings, I suggest: - Shredded lettuce - Diced tomatoes - Shredded cheese (like cheddar or queso fresco) - Sliced avocado - Fresh cilantro - Squeeze of lime You can also add jalapeños or salsa for extra flavor. To spice things up, add chopped jalapeños to your beef mix. You can also sprinkle in cayenne pepper or hot sauce. For a smoky flavor, try using chipotle peppers. Adjust the heat to match your taste! Yes, you can prep ahead! Cook the beef mix and store it in the fridge. Warm it up when you’re ready to eat. You can also chop your toppings ahead of time. Just keep them fresh and cold until serving. You can now enjoy making tasty tacos at home. The ingredients and steps are simple. Start with the beef and spices, then heat your tortillas. Don’t forget to add fresh toppings like lettuce and avocado. Use the tips for flavor and presentation to impress your family. Feel free to get creative with proteins and toppings. Store extras properly for later meals. With the right methods, your tacos can be a hit every time. Enjoy your cooking and savor the delicious rewards!](https://tossedflavors.com/wp-content/uploads/2025/05/31d9781c-e43d-40b9-8934-cc29040e178e.webp)
Pan Fried Beef Tacos Flavorful and Easy Recipe
Craving a quick and delicious meal? Look no further than pan-fried beef tacos! This tasty dish combines juicy ground beef with fresh toppings to create
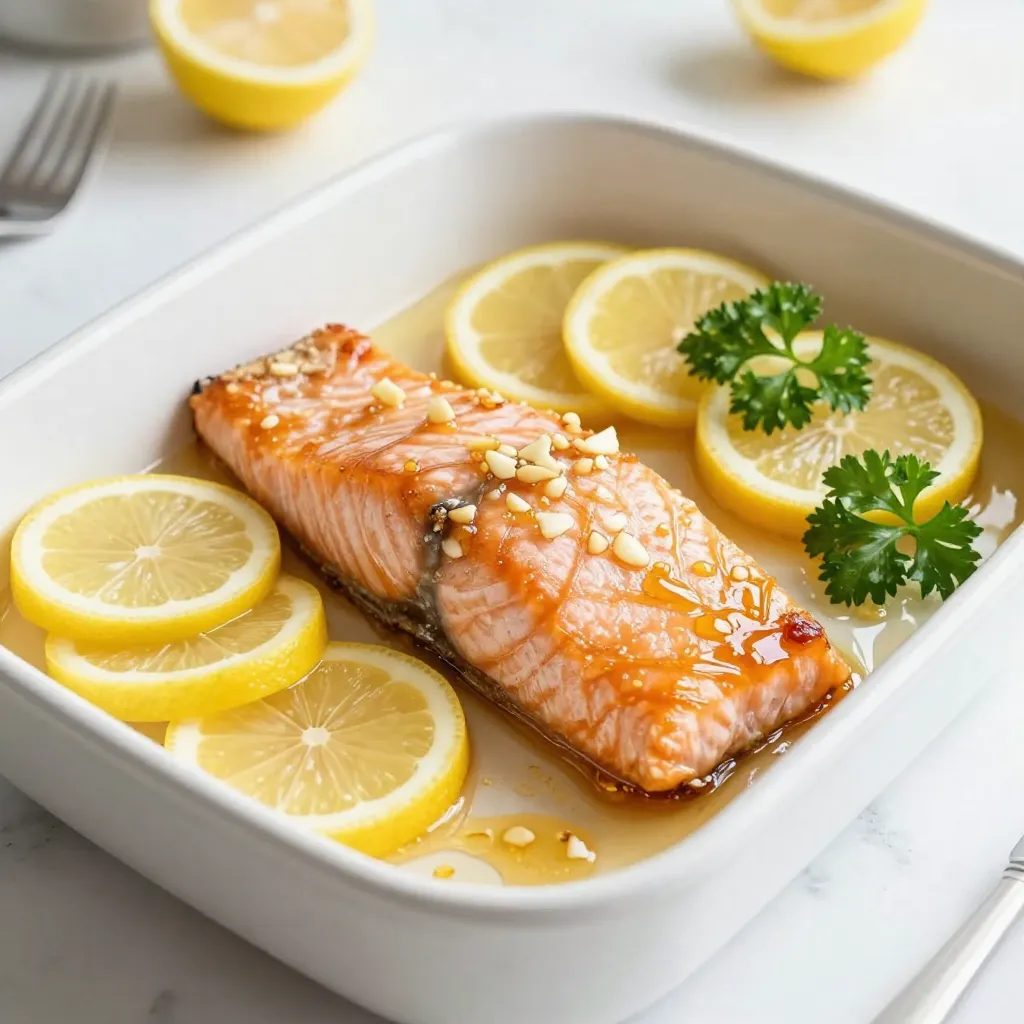
Honey Lemon Garlic Salmon Delightful and Simple Meal
Craving a quick and tasty dinner option? Look no further than Honey Lemon Garlic Salmon! This easy dish bursts with fresh flavors and is made
![To make these tasty sliders, you need: - 1 pound ground chicken - 1/4 cup green onion, finely chopped - 1/4 cup breadcrumbs - 1 egg, beaten - 1 teaspoon garlic powder - 1 teaspoon onion powder - 1 teaspoon paprika - Salt and freshly ground black pepper to taste - 1/2 cup mayonnaise - 2 tablespoons sweet chili sauce - 1 tablespoon sriracha (adjust according to your heat preference) - Slider buns - Crisp lettuce leaves for topping - Pickled jalapeños for garnish (optional) These ingredients blend well. They create a juicy patty and a rich sauce. Each bite will burst with flavor and delight. You can add more to your sliders! Here are some great options: - Sliced tomatoes - Avocado slices - Shredded carrots - Fresh cilantro - Extra Bang Bang sauce on top These toppings add freshness and crunch. They can also add colors to your plate. If you have allergies or preferences, here are some swaps: - Use turkey instead of chicken for a leaner option. - Substitute gluten-free breadcrumbs for a gluten-free option. - Swap mayonnaise for Greek yogurt for a lighter sauce. - Use lettuce wraps instead of buns for a low-carb meal. These swaps keep the dish delicious. You can still enjoy your Bang Bang Chicken Sliders while meeting your needs. For the full recipe, check out the detailed instructions. Start by gathering your ingredients in a large bowl. Combine 1 pound of ground chicken with 1/4 cup of finely chopped green onion and 1/4 cup of breadcrumbs. Add 1 beaten egg, 1 teaspoon of garlic powder, 1 teaspoon of onion powder, and 1 teaspoon of paprika. Season with salt and freshly ground black pepper to taste. Mix everything well with your hands or a spoon until it's evenly combined. Next, shape the mixture into small patties. Aim for about 8 patties, each about 2 inches wide. Heat a non-stick skillet over medium heat. Drizzle in a bit of oil to prevent sticking. Place the patties in the skillet, cooking each side for 4-5 minutes. They should turn golden brown and reach an internal temperature of 165°F (75°C). While the patties cook, whip up the Bang Bang sauce. In a small bowl, mix together 1/2 cup of mayonnaise, 2 tablespoons of sweet chili sauce, and 1 tablespoon of sriracha. Adjust the sriracha for your spice level. Once the patties are cooked, take slider buns and spread the Bang Bang sauce on the bottom half. Add a warm chicken patty and a crisp lettuce leaf. If you like heat, top with pickled jalapeños. Place the top half of the bun on and press gently. Serve warm for the best taste! To cook chicken patties just right, use a non-stick skillet. Preheat the skillet on medium heat. Add a little oil to keep the patties from sticking. Place the shaped patties in the skillet without crowding them. Cook for 4-5 minutes on each side. Look for a golden-brown crust and check the internal temperature. It should reach 165°F (75°C). This step ensures juicy and tasty patties. Making Bang Bang sauce is simple and fun. In a small bowl, mix 1/2 cup mayonnaise, 2 tablespoons sweet chili sauce, and 1 tablespoon sriracha. Adjust the sriracha to fit your heat level. Whisk it all together until smooth. This sauce adds a creamy and spicy kick to your sliders. You can store any extra sauce in the fridge for later use. Seasoning is vital for great taste. Use garlic powder, onion powder, and paprika in the chicken mix. These spices give depth to the flavor. You can also add a pinch of cayenne for some heat. Don’t forget salt and freshly ground black pepper to taste. These little touches make a big difference. Experiment with your favorite spices to create your unique twist. For the full recipe, refer to the [Full Recipe]. {{image_4}} You can make a tasty vegetarian version of Bang Bang sliders. Use chickpeas or black beans instead of chicken. Mash them up and mix with breadcrumbs, green onions, and spices. For a vegan alternative, swap the egg for a flaxseed meal or a commercial egg replacer. Both options keep the sliders hearty and full of flavor. Bang Bang sauce is the star of this dish. You can change its taste easily. Try adding more sriracha for a hotter kick. Or, mix in lime juice for a zesty twist. Want it sweeter? Add honey or agave syrup. You can even switch the mayo for Greek yogurt for a lighter touch. Slider size can change your meal. For smaller bites, make mini sliders about 1 inch wide. They are perfect for parties! Serve them with toothpicks for easy eating. If you want a bigger meal, opt for regular-sized patties. Pair your sliders with crispy fries or a fresh salad for a complete feast. For a fun touch, serve sliders on a platter with dipping sauces. This makes it a fun sharing experience. I love sharing my Bang Bang Chicken Sliders at gatherings. You can find the Full Recipe and make this delicious meal today! To keep your leftover sliders fresh, place them in an airtight container. Store them in the fridge. They will last for about 2-3 days. Make sure each slider is cool before packing. This helps prevent sogginess. When you are ready to eat the leftovers, reheat them in the oven. Preheat your oven to 350°F (175°C). Place the sliders on a baking sheet and cover with foil. Heat for about 10-15 minutes. This keeps the buns soft and the chicken warm. You can also microwave them. Heat for 30 seconds, check, then heat in 15-second bursts until warm. If you want to save time, freeze the chicken patties. After cooking and cooling, place them in a single layer on a baking sheet. Freeze for 1-2 hours until firm. Then, transfer them to a freezer bag. They can last up to 3 months. When ready to use, thaw in the fridge overnight. Cook as directed in the Full Recipe for a quick meal. Bang Bang Chicken Sliders are mini sandwiches filled with tasty chicken patties. They burst with flavor from spices and a creamy sauce. The sliders combine ground chicken, herbs, and seasoning for a juicy bite. You serve them on soft buns, topped with crunchy lettuce and a zesty sauce. These sliders are perfect for parties or casual dinners. To add more heat, increase the sriracha in the sauce. You can also mix in red pepper flakes or cayenne pepper into the chicken mixture. If you like, add pickled jalapeños on top for a spicy crunch. Adjust the spice level to match your taste. Yes, you can make the chicken patties ahead of time. Shape them and store them in the fridge for up to a day. You can also freeze them for later. Just thaw them before cooking. This makes meal prep easy and quick. Great sides for Bang Bang Chicken Sliders include crispy fries or sweet potato wedges. You can also serve a fresh green salad or coleslaw for a crunchy contrast. For something different, try serving them with veggie sticks and dip. To make more sliders, simply double or triple the ingredients. Use a larger bowl to mix everything well. Keep an eye on the cooking time, as you may need to cook in batches. This way, everyone can enjoy delicious Bang Bang Chicken Sliders. For the full recipe, check the detailed instructions above. Bang Bang Chicken Sliders are easy and fun to make. We’ve covered the main ingredients, cooking steps, and tasty variations. You can add toppings or try vegan options. Storing and reheating leftovers keeps your sliders fresh. Experiment with different sauces and serving ideas to find your favorite. Enjoy creating these sliders with family or friends. You will impress everyone with your cooking skills!](https://tossedflavors.com/wp-content/uploads/2025/05/11229477-21b5-446f-afba-558082ffe81a.webp)
Bang Bang Chicken Sliders Flavorful and Simple Recipe
Are you ready to spice up your next meal? If you love flavorful, easy-to-make sliders, you’ll want to try my Bang Bang Chicken Sliders! This
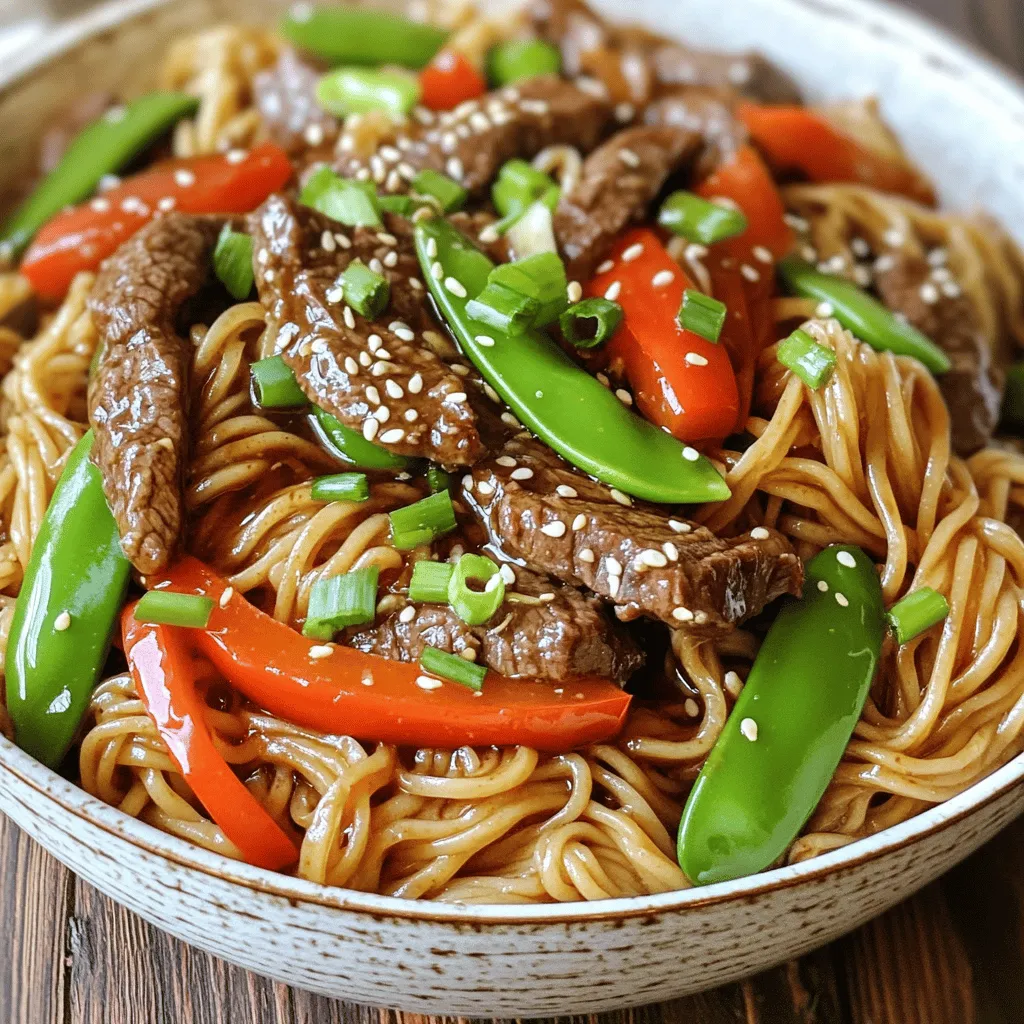
Sticky Beef Noodles Flavorful and Easy Dish to Make
Are you ready to elevate your dinner game? Sticky Beef Noodles are not only packed with flavor but also quick to make. In this guide,
![- 2 cups cooked rice (white or brown) - 1 lb boneless chicken breast, diced - 1 can (15 oz) sweet corn, drained and rinsed - 1 large red bell pepper, diced - 1/4 cup fresh cilantro, chopped - Juice of 1 lime (about 1 tablespoon) - 1/4 cup crumbled cotija cheese (or feta cheese) - 2 tablespoons mayonnaise - 1 tablespoon sour cream for tanginess - 1 teaspoon chili powder - 1 teaspoon ground cumin - Salt and pepper to taste When you make the Street Corn Chicken Rice Bowl, use good quality rice as your base. You can choose either white or brown rice. The rice adds heartiness to the bowl. Next, use boneless chicken breast for a lean protein. Dice it into bite-sized pieces for quick cooking. Sweet corn gives a pop of flavor and color. It balances well with the spices. For the veggies, red bell pepper adds crunch and sweetness. Fresh cilantro brings a burst of freshness. Don't forget the lime juice; it adds zing and brightens the dish. Now for the creamy part. Cotija cheese gives a salty punch. If you can't find it, feta works just as well. Mayonnaise and sour cream add creaminess. Together, they make the corn mixture rich and delicious. For spices, chili powder gives heat, while ground cumin enhances the flavor. Salt and pepper bring everything together. This mix of ingredients makes the Street Corn Chicken Rice Bowl a lively and tasty meal. If you're ready to make it, check out the Full Recipe for all the steps! - Heat 2 tablespoons of olive oil in a skillet over medium heat. - Season 1 pound of diced chicken breast with salt, pepper, chili powder, and ground cumin. - Once the oil is hot, add the chicken to the skillet. - Cook the chicken for about 7 to 10 minutes. Stir often until it is golden brown and cooked through. - The chicken is done when it reaches 165°F (75°C). - Remove from heat and set aside to rest. - In a mixing bowl, combine 1 can of drained sweet corn, 1 diced red bell pepper, and 1/4 cup of finely chopped cilantro. - Add 1/4 cup of crumbled cotija cheese, 2 tablespoons of mayonnaise, 1 tablespoon of sour cream, and the juice of 1 lime. - Mix well until all ingredients are blended. Ensure a creamy, flavorful mixture. - Scoop 2 cups of cooked rice into individual bowls as the base. - Layer the cooked chicken on top of the rice. - Spoon the vibrant corn mixture generously over the chicken. - Sprinkle each bowl with extra cilantro for color and flavor. - Serve with lime wedges on the side for an added burst of freshness. Mix all the components together for a delightful bite! For a full recipe, check [Full Recipe]. To keep your chicken tender, you must not overcook it. Cook the chicken until it reaches 165°F. I find that cooking it for 7-10 minutes works best. The chicken should be golden brown and juicy. Remember to let it rest after cooking. This helps the juices stay inside. For the corn mixture, use fresh lime juice. It adds a bright taste. Mix in salt and pepper to boost the flavors. If you like a kick, try adding a pinch of cayenne pepper or smoked paprika. These spices give your dish a new twist. You can also add garlic powder or onion powder for extra flavor. Pair your rice bowl with a light salad. A fresh green salad or coleslaw works well. For drinks, iced tea or a light beer complements the dish nicely. You can also serve it with a refreshing lemonade for a citrusy touch. Enjoy your meal with friends or family for a fun dinner! {{image_4}} If you want a vegetarian twist, you can easily swap the chicken for black beans or grilled veggies. Both options add great texture and flavor. For cheese, you can use queso fresco or omit it completely for a lighter dish. The creamy sauce can still shine through with just mayo and sour cream. Mix things up with spices or sauces! Try taco seasoning or smoked paprika for a new taste. You can also switch to a spicy sauce like sriracha or a sweet sauce like teriyaki. For toppings, think avocado slices, pickled jalapeños, or even crumbled tortilla chips for crunch. These small changes can make a big impact. Don't just stick to bowls! You can turn this meal into a wrap. Use a large tortilla and fill it with all your ingredients. It makes for a fun, portable meal. For meal prep, make each component ahead of time. Store rice, chicken, and corn mix in separate containers. This way, you can mix and match throughout the week. For the full recipe, check out the Street Corn Chicken Rice Bowl recipe! To store leftovers safely, let the dish cool. Place it in an airtight container. This keeps moisture in and germs out. I recommend using glass or BPA-free plastic containers. They are durable and easy to clean. If you want to freeze, separate the components first. Freeze the chicken, corn mixture, and rice in different bags. This way, you can reheat just what you need later. When reheating, use the microwave or stovetop. Add a splash of water to keep it from drying out. In the fridge, this dish lasts about 3-4 days. Always check for signs of spoilage before eating. If it smells off or looks strange, throw it away. Keeping your food safe is key! A Street Corn Chicken Rice Bowl is a fun dish with bold flavors. It combines cooked rice, juicy chicken, and sweet corn. You also get fresh veggies, cheese, and a creamy sauce. The dish has a nice crunch from the corn and a kick from the spices. Yes, you can make this dish gluten-free! Use gluten-free rice and check your mayonnaise for gluten. You can also swap cotija cheese with a gluten-free cheese. This way, you can enjoy the same great taste without the gluten. To make the dish milder, use less chili powder. You can also add more sour cream or mayonnaise for creaminess. If you want it spicier, add more chili powder or some hot sauce. Taste as you go to find your perfect level of heat. In this blog post, we explored the tasty Street Corn Chicken Rice Bowl. We covered the main ingredients like chicken and sweet corn, how to cook them, and tips for great flavor. We also shared variations, storage info, and FAQs for your questions. This dish offers flexibility and can fit many diets. Whether you want a hearty meal or a light bite, this bowl fits the bill. Enjoy creating your version and share it with others. Great food can bring people together.](https://tossedflavors.com/wp-content/uploads/2025/05/ab460f1c-388b-4e2e-860f-67a945599781.webp)
Street Corn Chicken Rice Bowl Easy Weeknight Meal
Looking for a quick dinner that’s packed with flavor? The Street Corn Chicken Rice Bowl is here to make your weeknight meals exciting! With tender

Cheesy Garlic Chicken Wraps Quick and Flavorful Meal
Are you craving a quick and tasty meal? Look no further than Cheesy Garlic Chicken Wraps! Packed with tender chicken, creamy cheese, and zesty garlic,

Easy Stuffed Shells Comforting Family Dinner Delight
Are you looking for a warm and tasty meal that the whole family will love? Try my Easy Stuffed Shells! This recipe layers jumbo pasta
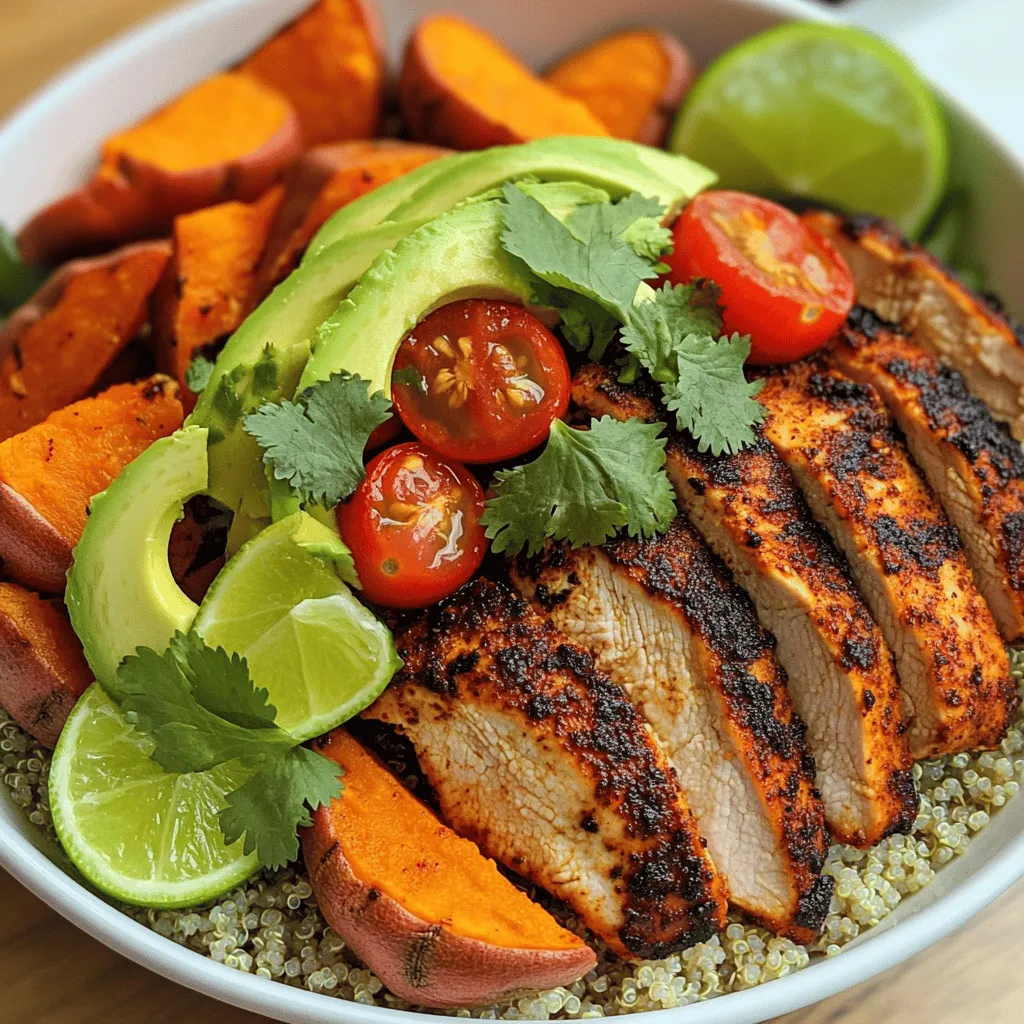
Blackened Chicken and Sweet Potato Bowls Delight
If you’re craving a dish that’s both tasty and healthy, you’ve hit the jackpot! My Blackened Chicken and Sweet Potato Bowls are a delightful mix
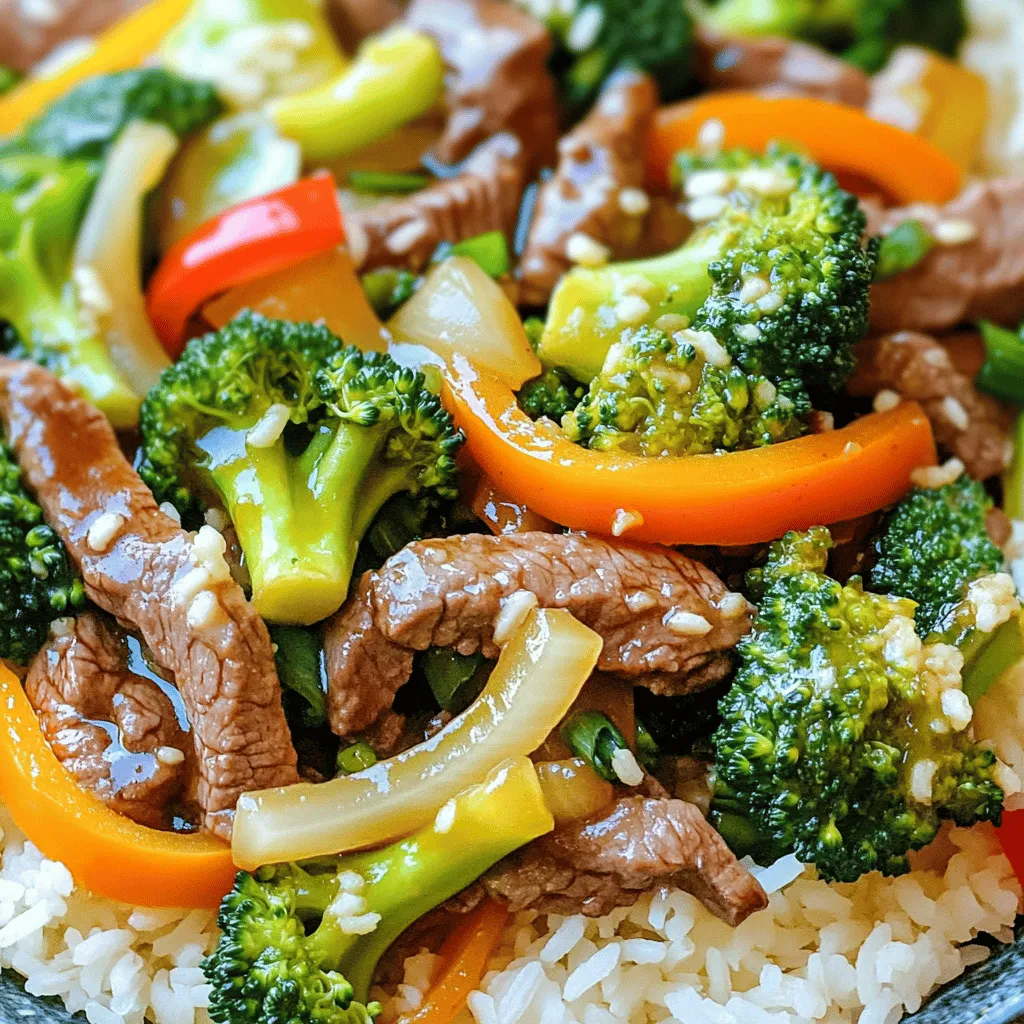
Chinese Beef and Broccoli One Pan Take-Out Delight
Craving a quick and tasty meal? Discover the charm of my Chinese Beef and Broccoli One Pan Take-Out Delight. In just one pan, you can
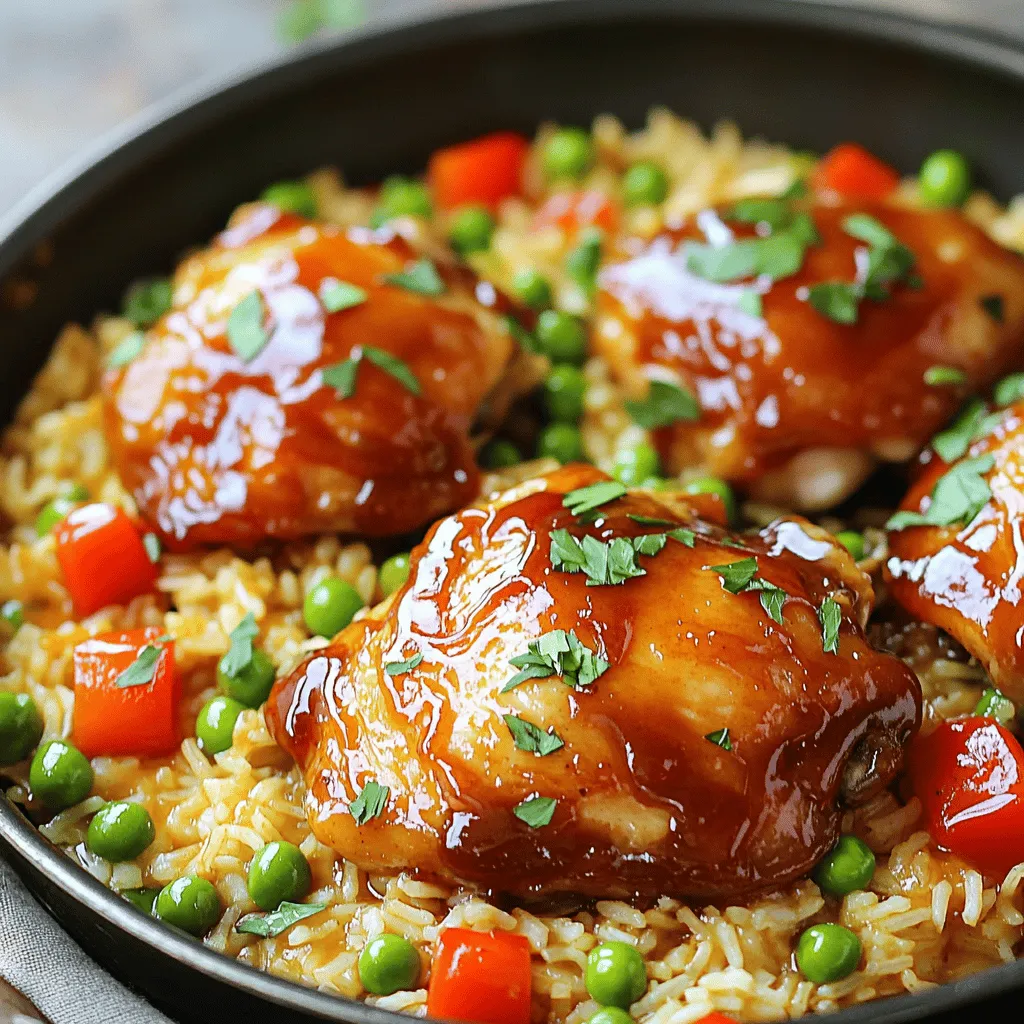
One-Pan Honey BBQ Chicken Rice Easy Family Meal
Looking for a simple yet delicious family meal? This One-Pan Honey BBQ Chicken Rice is your answer! With juicy chicken thighs, fragrant rice, and a