Dinner

Savory Slow Cooker Birria Tacos Easy Recipe Guide
Get ready to impress your taste buds with my Savory Slow Cooker Birria Tacos! This easy recipe guide will show you how to make tender,
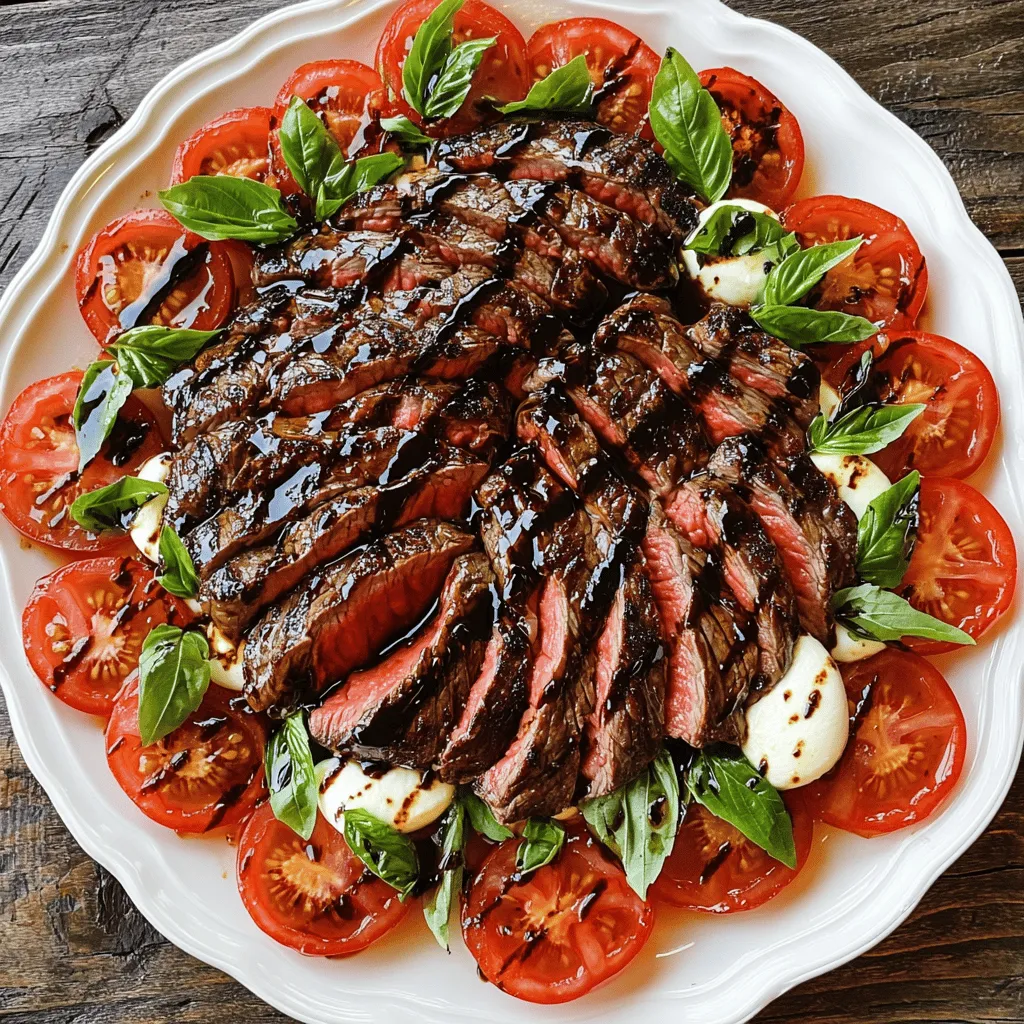
Balsamic Grilled Flank Steak Caprese Delight Recipe
Looking for a fresh, savory dish that impresses? Meet your new favorite: Balsamic Grilled Flank Steak Caprese. This recipe blends juicy flank steak with ripe
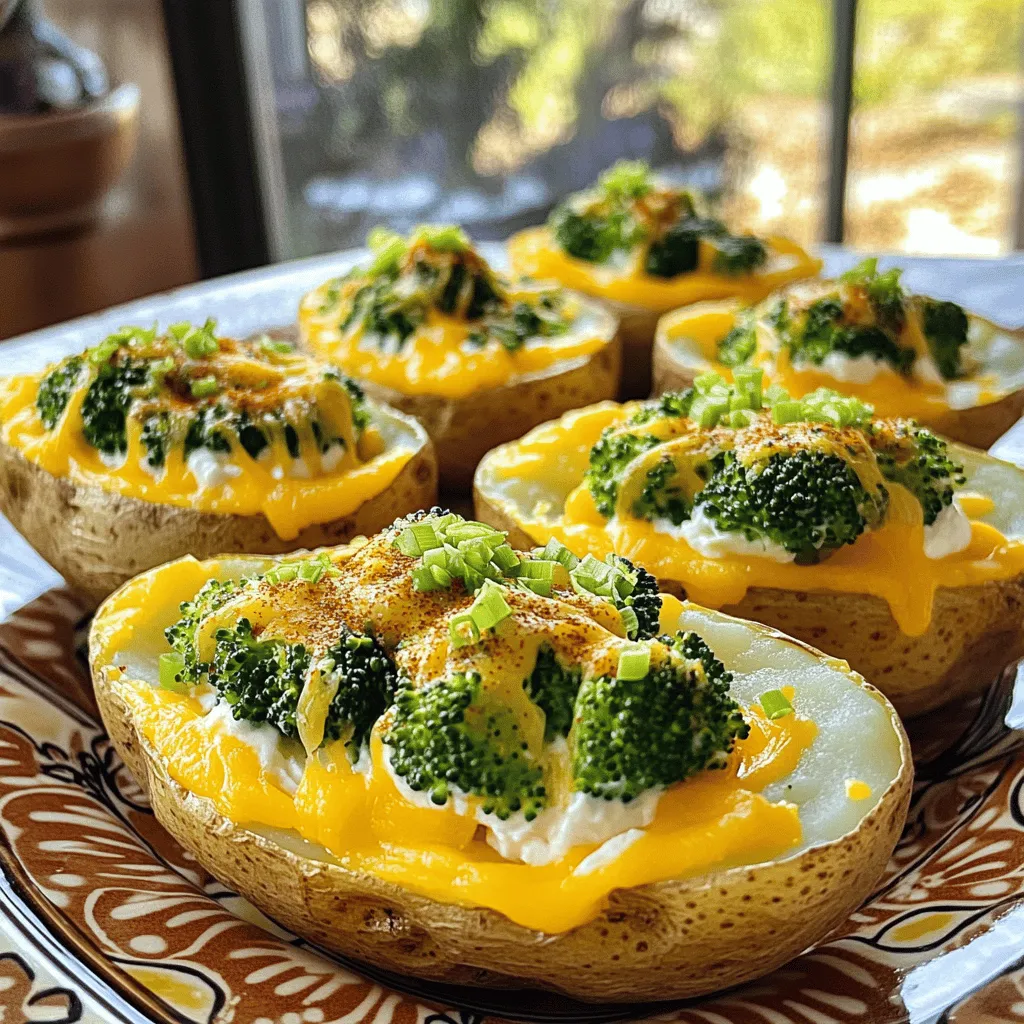
Broccoli and Cheddar Twice-Baked Potatoes Delight
Are you ready to elevate your potato game? Broccoli and Cheddar Twice-Baked Potatoes Delight is the perfect dish for any meal. With creamy cheese, fresh
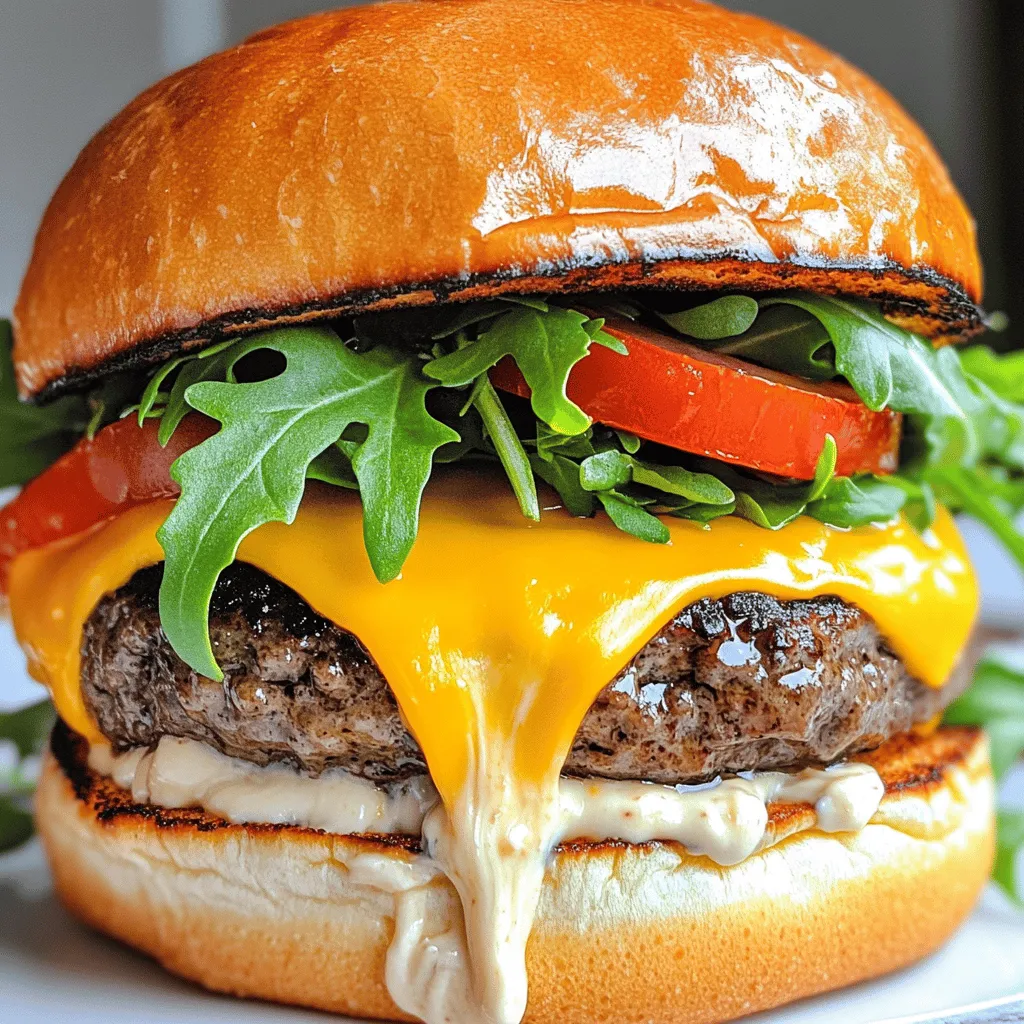
Garlic Parmesan Cheeseburger Flavorful and Juicy Recipe
If you love bold flavors, you’re in for a treat! This Garlic Parmesan Cheeseburger recipe fuses juicy beef with rich garlic and savory parmesan for

Western Ranch Pasta Delight Simple and Tasty Meal
Are you ready to whip up a quick and tasty meal? In this post, I’ll show you how to make Western Ranch Pasta Delight. It’s
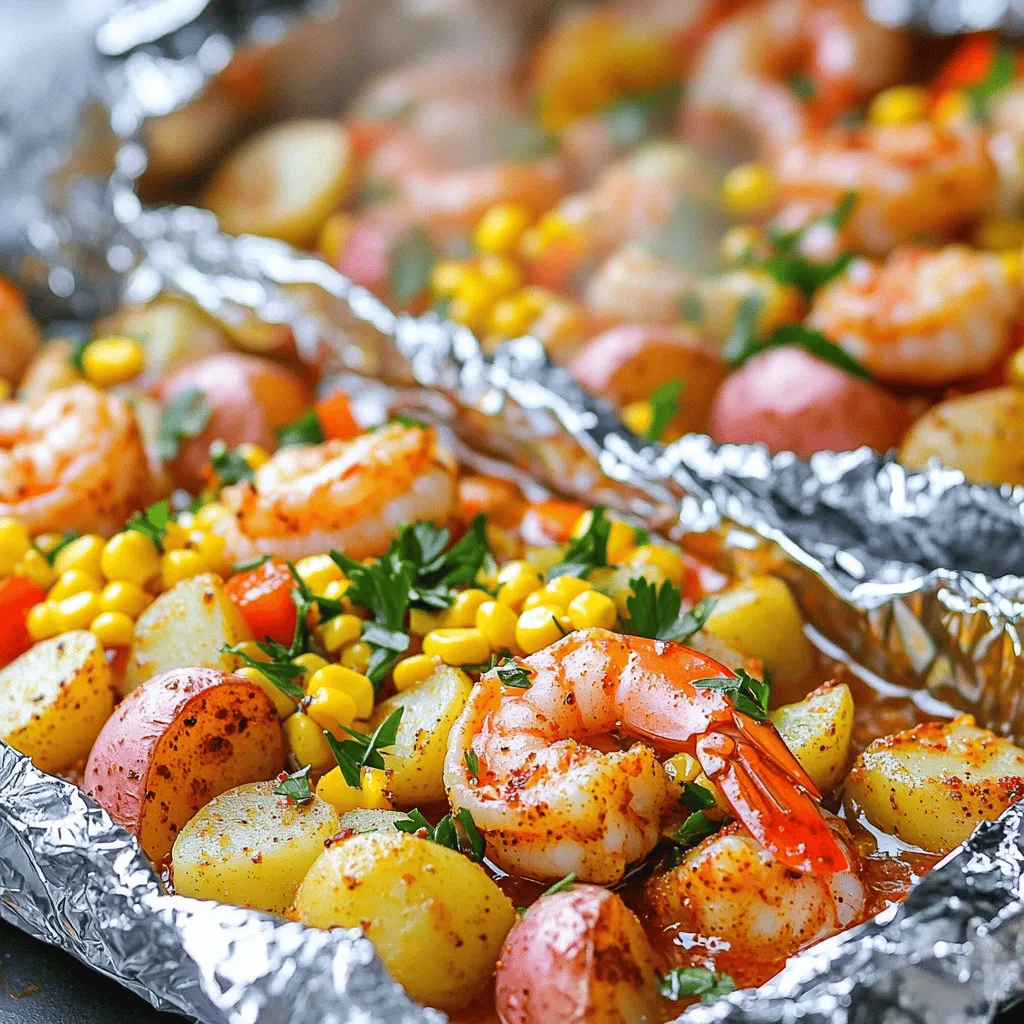
Easy Cajun Shrimp Boil Foil Packs for Quick Dinner
If you’re looking for a fast and tasty dinner, you’ve found it! My Easy Cajun Shrimp Boil Foil Packs bring you all the flavors of
![- 1 lb large shrimp, peeled and deveined - 2 cups broccoli florets - 4 tablespoons unsalted butter - 5 cloves garlic, minced - 1 tablespoon fresh lemon juice - 1 teaspoon lemon zest - 1 teaspoon red pepper flakes - Salt and pepper to taste - Fresh parsley for garnish For this Garlic Butter Shrimp and Broccoli dish, you need a few key items. First, the shrimp must be large, peeled, and deveined. This is vital for great taste and texture. The broccoli florets add color and crunch, making the meal not just tasty but also visually appealing. You will also need unsalted butter. This ingredient gives the dish its rich, buttery flavor. Next, garlic is a must. It adds an aromatic quality and pairs well with the shrimp. Fresh lemon juice and zest brighten the dish, balancing the rich butter. For those who love a little heat, red pepper flakes are optional. They add a fiery kick that can elevate the dish. Salt and pepper are essential for flavoring. Finally, fresh parsley gives a nice pop of color and freshness when you serve the dish. Finding fresh ingredients makes a big difference. I recommend visiting local markets or trusted suppliers for the best quality. You can find the complete cooking steps in the Full Recipe. Enjoy cooking! - Blanching the Broccoli Start by filling a large pot with water. Bring the water to a rolling boil. Add a generous pinch of salt to season the water. Once boiling, add the broccoli florets. Cook for 2-3 minutes until they turn bright green and slightly tender. Use a slotted spoon to take out the broccoli. Place it in a colander to drain. Set the blanched broccoli aside. - Sautéing the Garlic Take a spacious skillet and melt 2 tablespoons of unsalted butter over medium-high heat. Wait for the butter to foam a bit. Once it starts sizzling, add the minced garlic. Sauté for about 30 seconds until it smells good and turns lightly golden. Watch it closely so it doesn’t burn. - Adding Seasoning Now, add the prepared shrimp to the skillet. Sprinkle in the optional red pepper flakes, salt, and black pepper for taste. Stir the shrimp gently. This will help them cook evenly. - Cooking Time and Techniques Cook the shrimp for 3-4 minutes. They should turn pink and opaque when done. Stir occasionally to ensure they cook well. Remove the skillet from heat once they are fully cooked. - Incorporating Broccoli Gently add the blanched broccoli back into the skillet with the shrimp. Use a spatula to stir carefully. You want to mix everything without breaking the broccoli florets. - Flavor Enhancements Pour in the remaining 2 tablespoons of butter. Add the fresh lemon juice and zest. Stir everything together for another 1-2 minutes. The butter should melt and coat the shrimp and broccoli well. This step brings all the flavors together. For the full recipe, refer to the [Full Recipe]. - Ensuring Perfectly Cooked Shrimp Cook shrimp for 3-4 minutes. Look for a bright pink color. They should be firm, not rubbery. If you overcook them, they can turn tough. Keep an eye on them as they cook. - Tips for Blanching Broccoli Use boiling water with salt for blanching. This keeps the color bright. Cook for just 2-3 minutes. Then, quickly cool the broccoli in ice water. This stops cooking and keeps it crunchy. - Alternatives for Shrimp You can use chicken or tofu instead of shrimp. Chicken should be cut into small pieces. Cook until it reaches 165°F. Tofu should be firm and cubed. Sauté until golden brown. - Vegetable Options for Broccoli If you want variety, try asparagus or green beans. You can also use snap peas or bell peppers. These will add nice color and flavor to your dish. - Best Side Dishes Garlic bread pairs well with this meal. It helps soak up the garlic butter. A fresh salad is also a great choice. It adds a nice crunch and freshness. - Pairing with Rice or Noodles Serve this dish with white rice or noodles. They complement the rich flavors of the shrimp and broccoli. You can also use brown rice for a healthier option. Check out the Full Recipe for more details on how to create this delightful meal. {{image_4}} You can switch the shrimp for chicken or tofu. Chicken works well with garlic butter too. Cut the chicken into bite-sized pieces and cook it for about 5-6 minutes. Tofu is great for a plant-based choice. Use firm tofu, cut into cubes, and sauté it until golden. Seafood variations are fun. Try scallops or crab instead of shrimp. Both add a nice twist. Cook scallops for about 2-3 minutes each side until golden. For crab, use pre-cooked meat and just heat it through. Experimenting with herbs can brighten this dish. Fresh basil or cilantro can add a unique touch. Chop them fine and stir them in at the end. You can also try fresh thyme or dill for a different flavor profile. Spice combinations can elevate your meal. Consider adding smoked paprika for warmth. A dash of cayenne pepper can bring heat. Mix these into the garlic butter for a bold flavor boost. For gluten-free options, this dish is naturally safe. Ensure any added sauces are gluten-free. You can also serve it over rice or quinoa for a hearty meal. Low-calorie modifications are easy too. Use less butter or substitute with olive oil. You can also load up on broccoli for extra fiber and vitamins without the calories. Enjoy this tasty meal while sticking to your dietary goals. Don't forget to check the Full Recipe for more details! To keep your Garlic Butter Shrimp and Broccoli fresh, use these tips: - Refrigeration Tips: Let the dish cool to room temperature. Place it in the fridge within two hours of cooking. - Best Storage Containers: Use airtight containers to prevent spills and keep flavors intact. Glass containers work well for this dish. If you want to save your meal for later, follow these instructions: - Freezing Instructions: Place the cooled dish in a freezer-safe container. It’s best to eat it within three months for optimal taste. - Reheating Guidelines: Thaw overnight in the fridge. Reheat in a skillet over low heat, stirring gently. You can also use a microwave, but be careful not to overcook the shrimp. Knowing how long it lasts is key: - How Long It Lasts in the Fridge: Garlic Butter Shrimp and Broccoli lasts up to three days in the fridge. - Signs of Spoilage: Look for changes in color or texture. If it smells off, it’s best to throw it away. Enjoy the delightful flavors of this meal while it's fresh! Check the [Full Recipe] for more details. You can make Garlic Butter Shrimp and Broccoli healthier by using less butter. Try reducing the butter to just two tablespoons. You can also swap out regular butter for olive oil. This choice adds healthy fats. To boost nutrition, add more veggies. Bell peppers, snap peas, or carrots work well. These options bring extra color and vitamins. You can also serve this dish over brown rice or quinoa for more fiber. Yes, you can use frozen shrimp! Just remember to thaw them first. Place the shrimp in a bowl of cold water for about 15 minutes. This method is quick and easy. When cooking, add a minute or two to the cooking time. Frozen shrimp may take longer to cook. Always check that they are pink and opaque before serving. This dish pairs well with many sides. Here are a few ideas: - Rice (white or brown) - Noodles (like spaghetti or rice noodles) - Quinoa for a healthy twist - A fresh green salad adds crunch These sides balance the meal and add flavors. You can also try garlic bread for a tasty addition. For more details on how to create this dish, check the Full Recipe. This blog post guided you through making garlic butter shrimp and broccoli. We covered main ingredients, preparation steps, cooking tips, and storage info. I also shared ideas for variations and serving suggestions. You can enjoy this dish in many ways, making it perfect for any meal. Remember, you can always adjust flavors to fit your taste. Happy cooking!](https://tossedflavors.com/wp-content/uploads/2025/06/10f95d9e-c746-4b56-b853-fa1cfc97d7e5.webp)
Garlic Butter Shrimp and Broccoli Flavorful Meal Delight
Are you ready to whip up a dish that’s both tasty and quick? Garlic Butter Shrimp and Broccoli is your next meal solution! With just
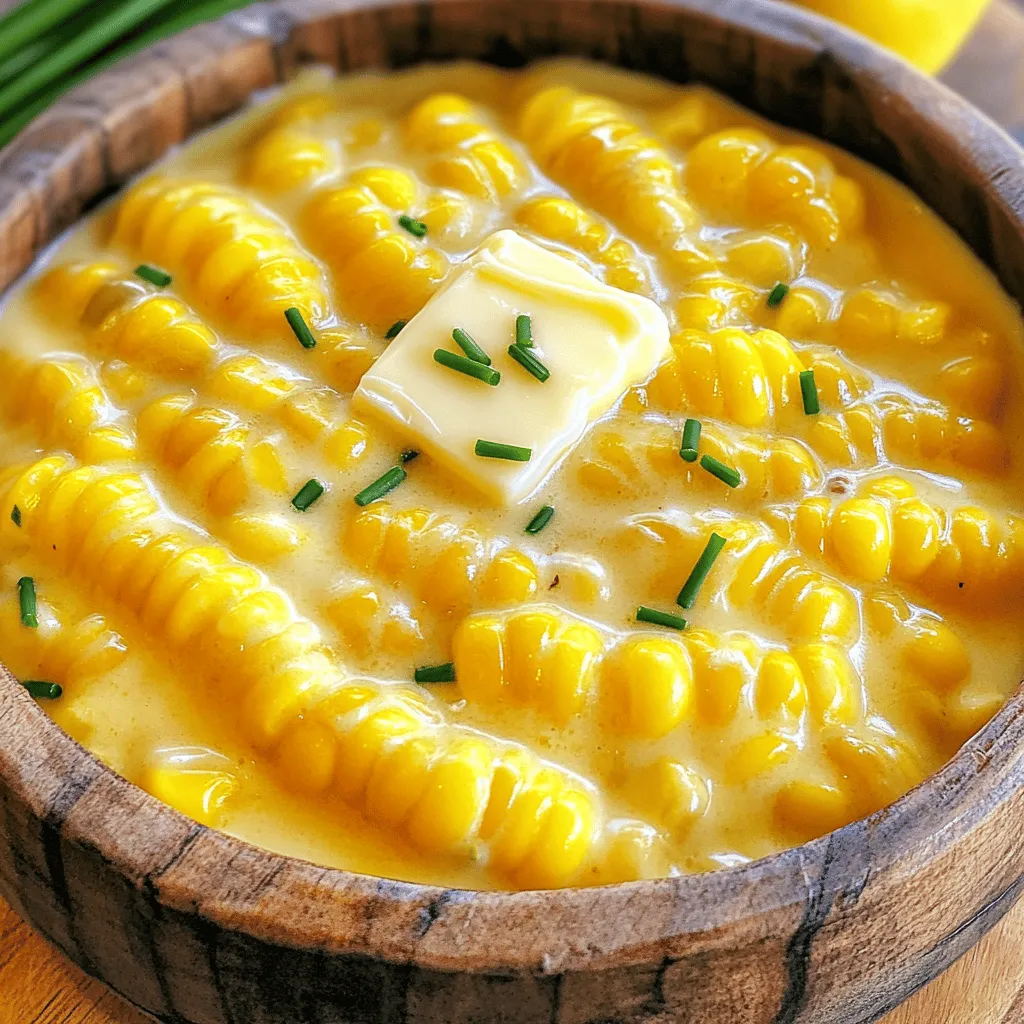
Cowboy Butter Creamed Corn Delightful and Creamy Dish
Are you ready to elevate your corn game? Cowboy Butter Creamed Corn is a rich and creamy dish perfect for any table. Made with simple
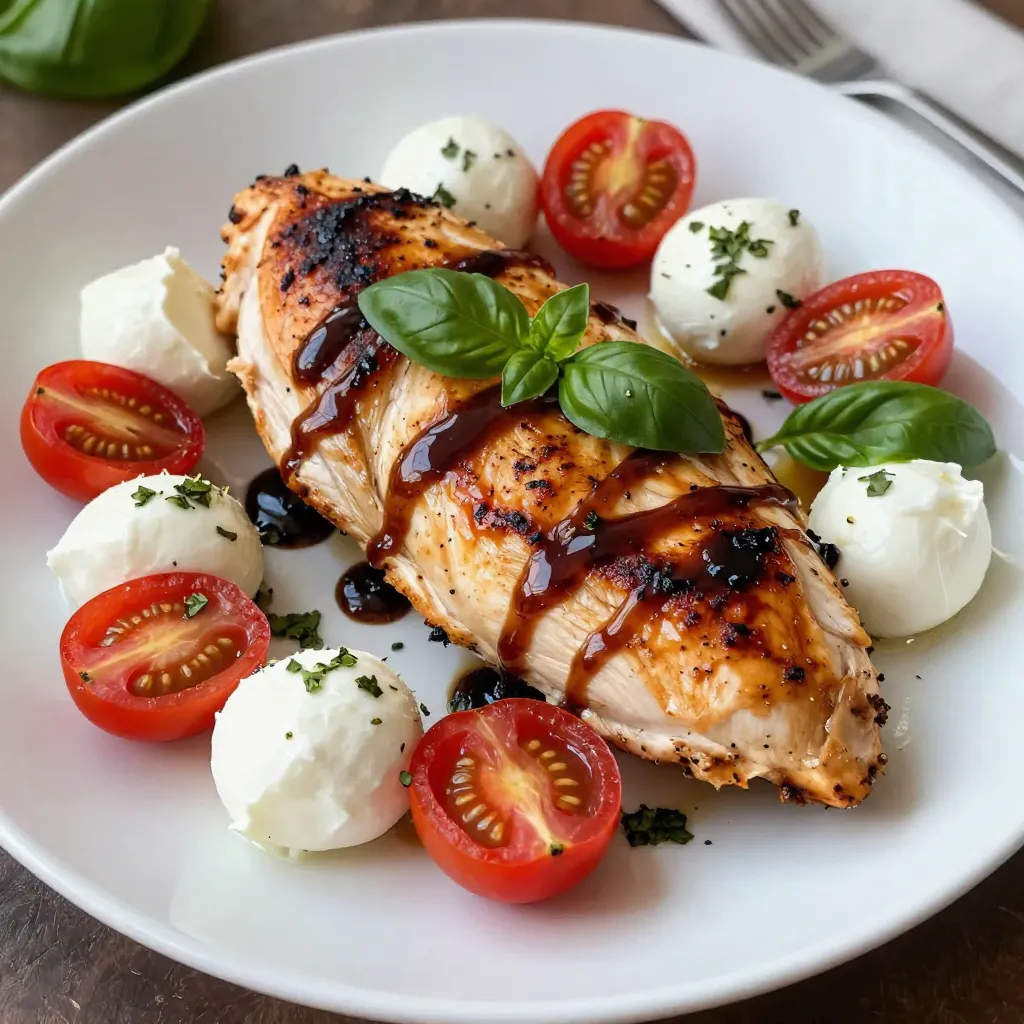
Balsamic Glazed Caprese Chicken Quick and Tasty Meal
Looking for a quick and tasty meal? Balsamic Glazed Caprese Chicken is the answer! This dish combines juicy chicken, fresh mozzarella, and ripe tomatoes, all
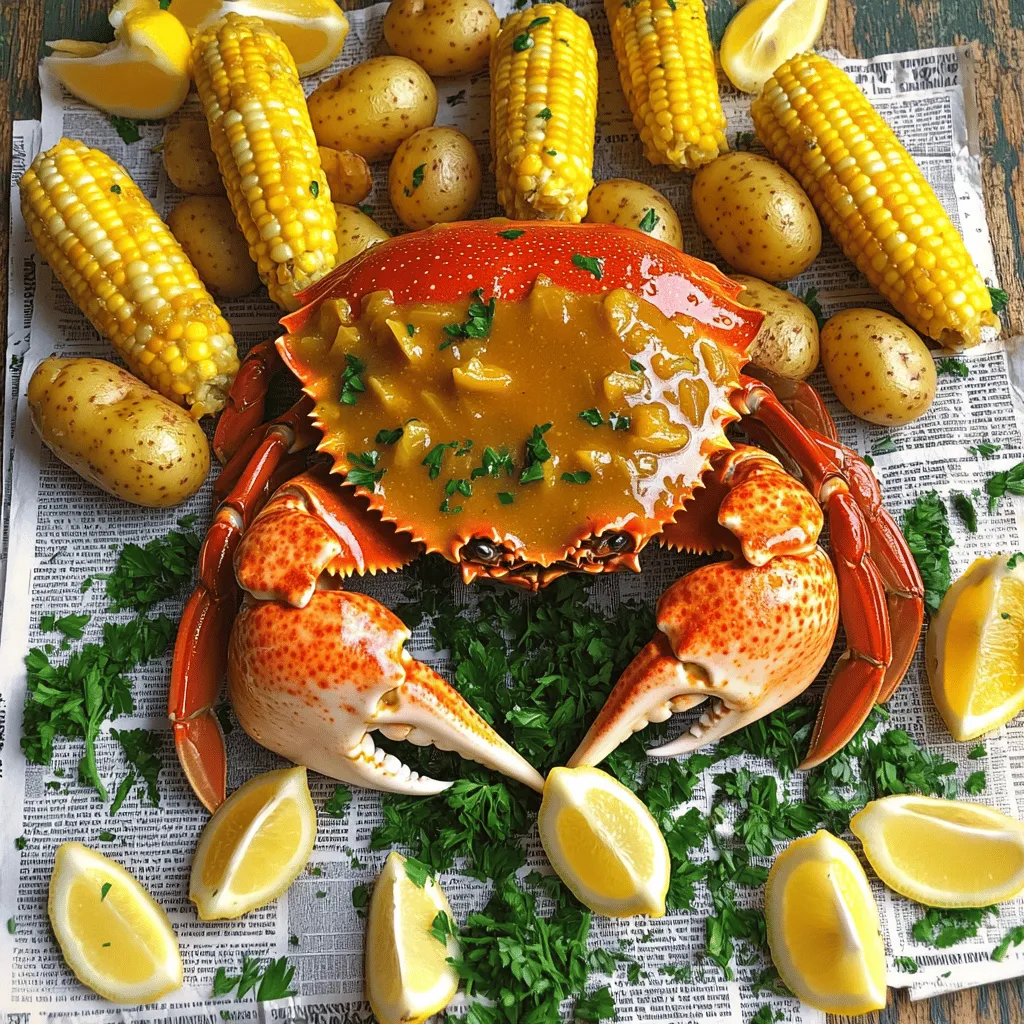
Garlic Honey Butter Crab Boil Simple and Flavorful Dish
Crab boils are a fun way to gather with friends and family while enjoying a delicious meal. Today, I’m excited to share my simple and