Dinner

Garlic Butter Steak Bites and Potatoes Delight
Welcome to Garlic Butter Steak Bites and Potatoes Delight! If you love tasty meals that are quick and easy, you’re in for a treat. Imagine
. To make the best stuffed peppers, you want them to cook evenly. Here are some easy tips: - Choose firm peppers: Look for bell peppers that feel heavy and have smooth skin. Avoid any that are soft or have blemishes. - Cut the tops off: When you prepare peppers, make a clean cut at the top. This helps them hold the filling better. - Cook at the right temperature: Bake your stuffed peppers at 375°F (190°C). This heat allows the peppers to soften without burning. Want to make your stuffed peppers even better? Here are some ideas: - Add spices: Try adding oregano or chili powder for an extra kick. A dash of cayenne pepper can bring some heat. - Mix in veggies: Chop up some zucchini or mushrooms and add them to your filling. They add moisture and taste. - Experiment with proteins: Swap ground turkey for chicken or sausage. Each choice gives a different flavor. - Top with fresh herbs: Sprinkle cilantro or parsley on top before serving. This fresh touch brightens the whole dish. Use these tips to create your perfect stuffed peppers. For a full recipe, check out the Classic Stuffed Peppers Delight! {{image_4}} You can customize stuffed peppers to fit your taste. If you want a vegetarian option, try using beans or lentils. They add protein and fiber. For meat lovers, you can swap ground turkey for chicken. Sausage also works well for a spicy kick. Each choice can change the flavor, making it fun to experiment. If you want to cut carbs, consider using cauliflower rice. It gives a nice texture without the carbs. You can also use different types of rice. Brown rice adds more fiber, while wild rice gives a nutty flavor. Each grain brings its own twist to the dish. Want to spice things up? Create Southwest-inspired stuffed peppers. Add corn, black beans, and taco seasoning. For a Mediterranean flair, use feta cheese, olives, and oregano. These twists make each meal unique and exciting. Check out the Full Recipe for more ideas. To keep your leftover stuffed peppers fresh, place them in an airtight container. Store them in the fridge for up to four days. If you want to save them for longer, freezing is a great option. Wrap each pepper tightly in plastic wrap or foil and place them in a freezer-safe bag. They will last up to three months in the freezer. Just remember to label your bags with the date! When you're ready to enjoy your stuffed peppers again, reheating is easy. For the best flavor and texture, I recommend using the oven. Preheat your oven to 350°F (175°C). Place the stuffed peppers in a baking dish, cover them with foil, and heat for about 20 minutes. This method warms them evenly. If you're in a hurry, you can use the microwave. Heat them on a microwave-safe plate for about 2-3 minutes. Just make sure to check that they are heated all the way through. Enjoy your flavorful meal again! Can stuffed peppers be made ahead of time? Yes, you can prepare stuffed peppers in advance. Just stuff the peppers and place them in the fridge. Bake them when you are ready to eat. What can I use instead of cheese? If you want to skip cheese, try using avocado or a dairy-free cheese. Nutritional yeast also adds a cheesy flavor. How do I know when stuffed peppers are done? Stuffed peppers are done when the peppers are soft and the filling is hot. You can check the filling with a fork. Can I use different types of peppers? Absolutely! You can use any bell pepper. Try red, yellow, or green for fun colors and flavors. You can also use poblano or jalapeño for a spicy kick. What's the best way to modify the recipe for picky eaters? For picky eaters, keep it simple. Use plain rice and ground meat. You can add their favorite veggies or skip the spices. How can I make the recipe gluten-free? To make it gluten-free, choose gluten-free grains like quinoa or rice. Check all canned goods for gluten-free labels. Stuffed peppers offer a fun way to enjoy a healthy meal. We explored key ingredients like bell peppers, proteins, and grains. You learned preparation steps, cooking tips, and variations to match your taste. With proper storage, these meals can last, making dinner easy for busy nights. Remember, you can customize flavors to fit your preferences. Enjoy your cooking journey with stuffed peppers!](https://tossedflavors.com/wp-content/uploads/2025/06/ccedfecf-b11a-44ef-848b-a74ceaa90dbd.webp)
Best Classic Stuffed Peppers Flavorful and Easy Recipe
Stuffed peppers are a classic dish that never gets old. With their vibrant colors and savory filling, they’re both fun and easy to make. This

Philly Cheesesteak Sloppy Joes Flavorful and Easy Meal
If you love the rich flavors of a Philly cheesesteak, you’ll adore this twist: Philly Cheesesteak Sloppy Joes! This easy meal combines ground beef, fresh
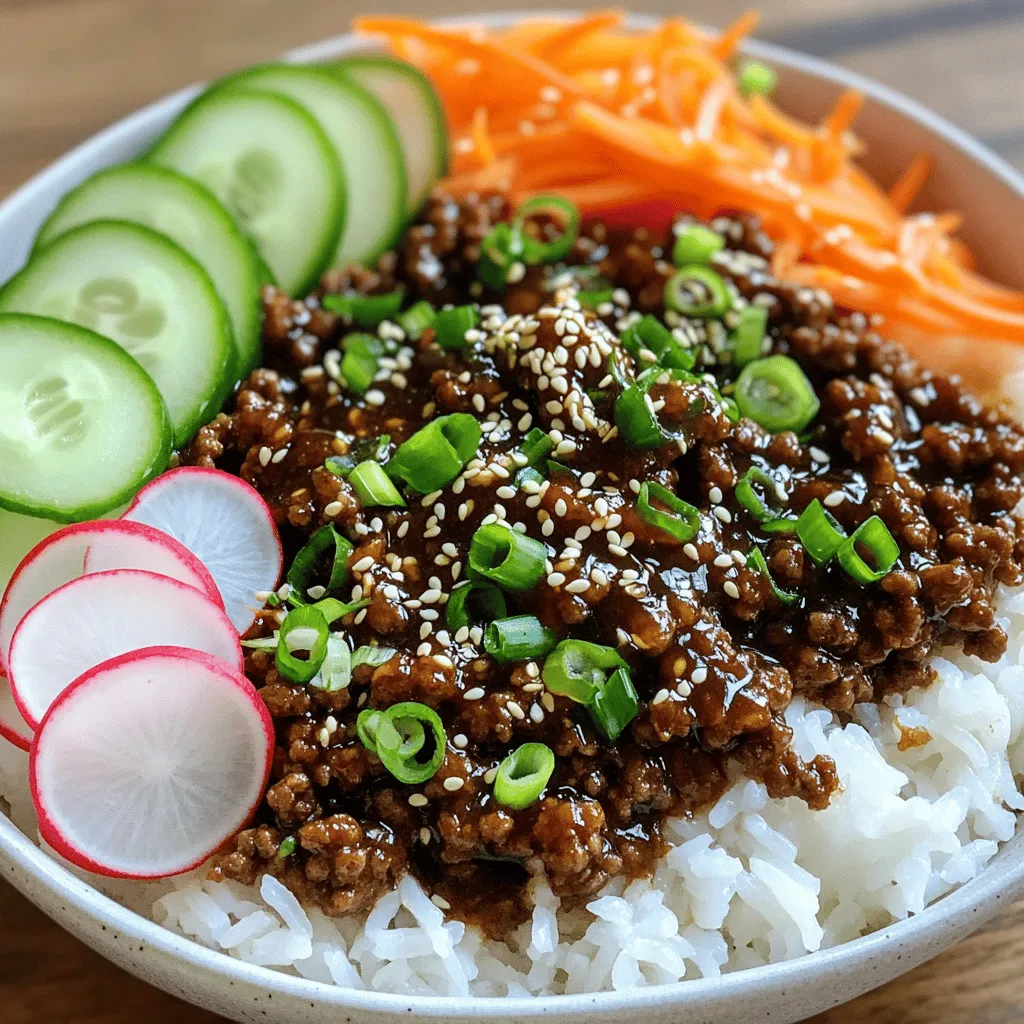
Korean Ground Beef Bowl Flavorful and Easy Dinner
If you’re looking for a quick and tasty dinner idea, you’re in the right place! The Korean Ground Beef Bowl is not only flavorful but
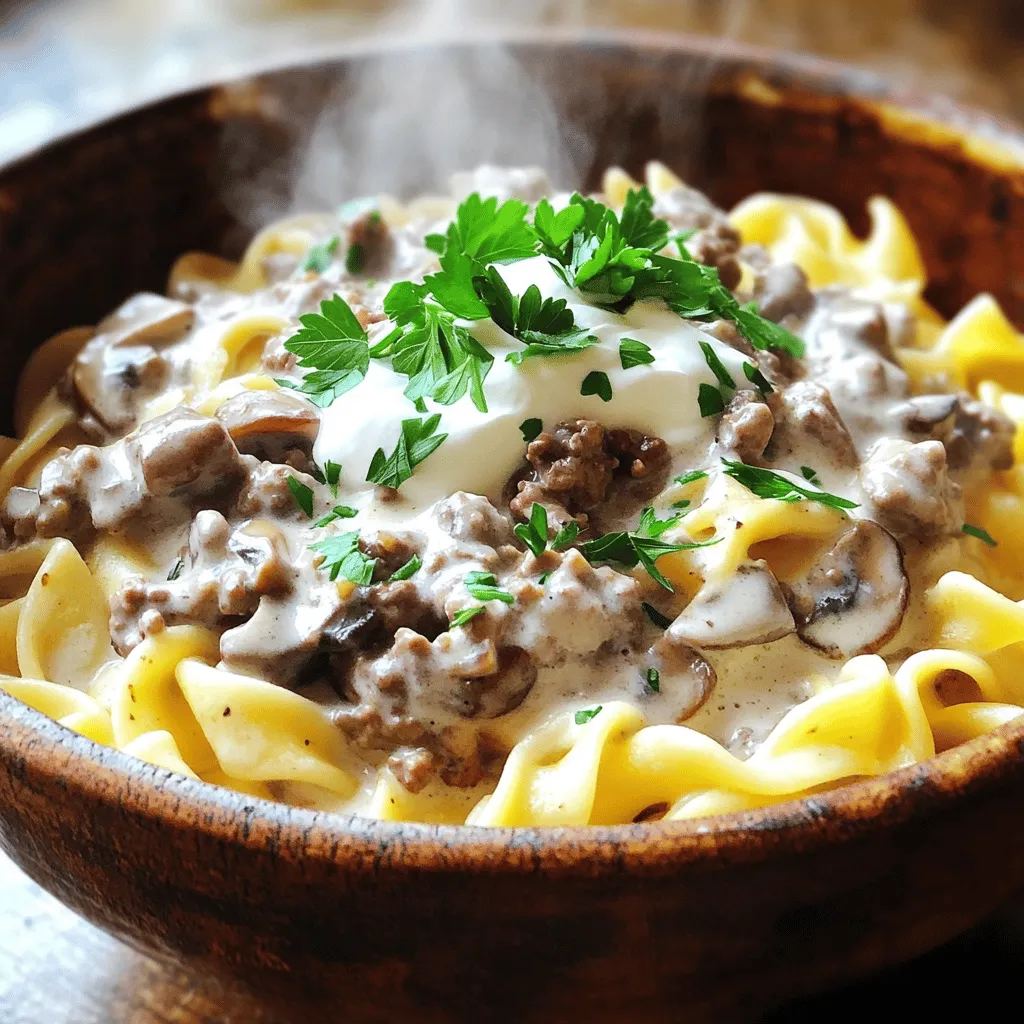
Ground Beef Stroganoff Easy and Flavorful Recipe
Are you ready to whip up a meal that’s both easy and packed with flavor? Ground Beef Stroganoff is the perfect dish for busy days
. It has all the details you need to make these tasty burritos right at home! You learned how to make a tasty burrito with simple steps. First, cook the beef, then layer your favorite ingredients in a tortilla. Don’t forget the tips for perfecting your rolls and adding flavors. You can also try vegetarian options or different cheeses. For storage, remember to refrigerate or freeze properly to enjoy later. Try customizing each burrito to fit your taste. Have fun making this dish, and enjoy every bite!](https://tossedflavors.com/wp-content/uploads/2025/06/6ca22f8a-0d5f-46bf-8459-ca7fa3d7b08c.webp)
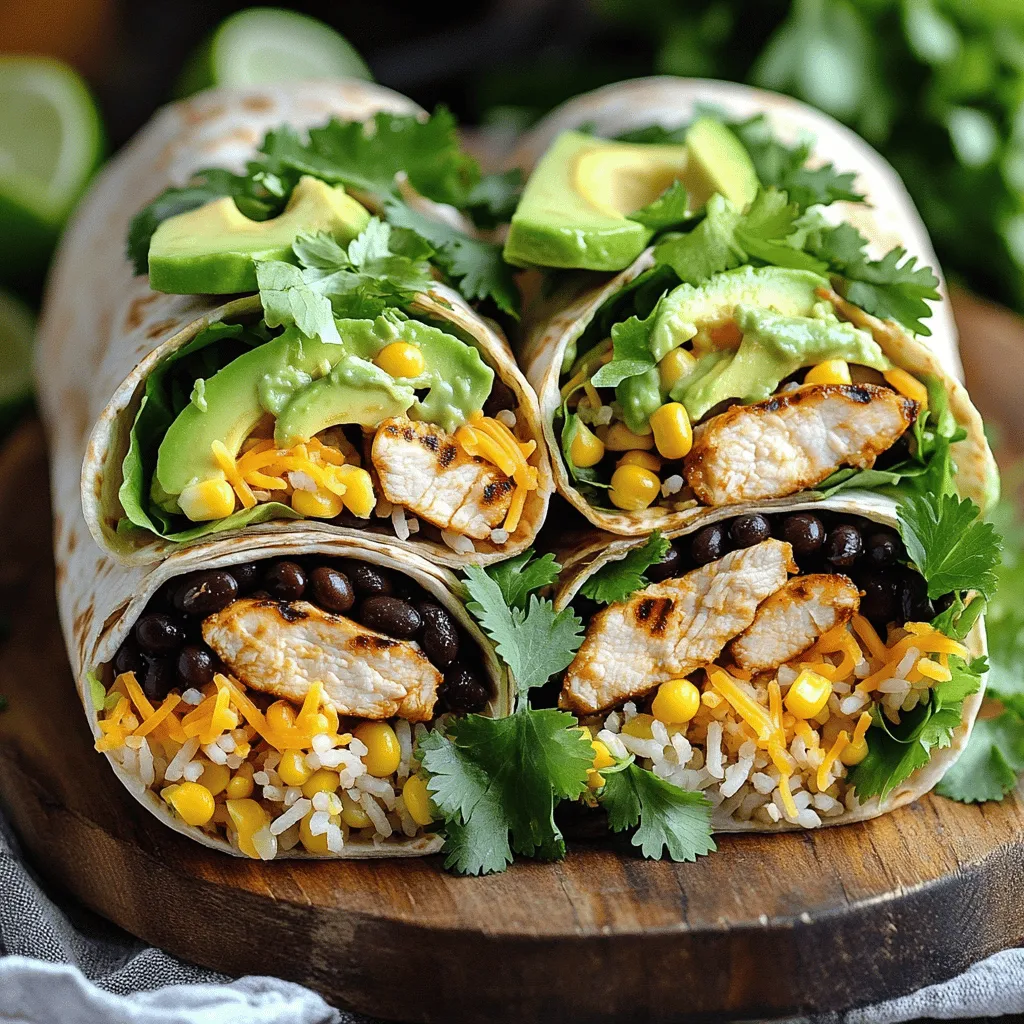
Taco Bell Beefy Melt Burrito Tasty and Satisfying Meal
Are you craving a meal that’s both tasty and satisfying? The Taco Bell Beefy Melt Burrito hits the spot with layers of seasoned beef, cheese,
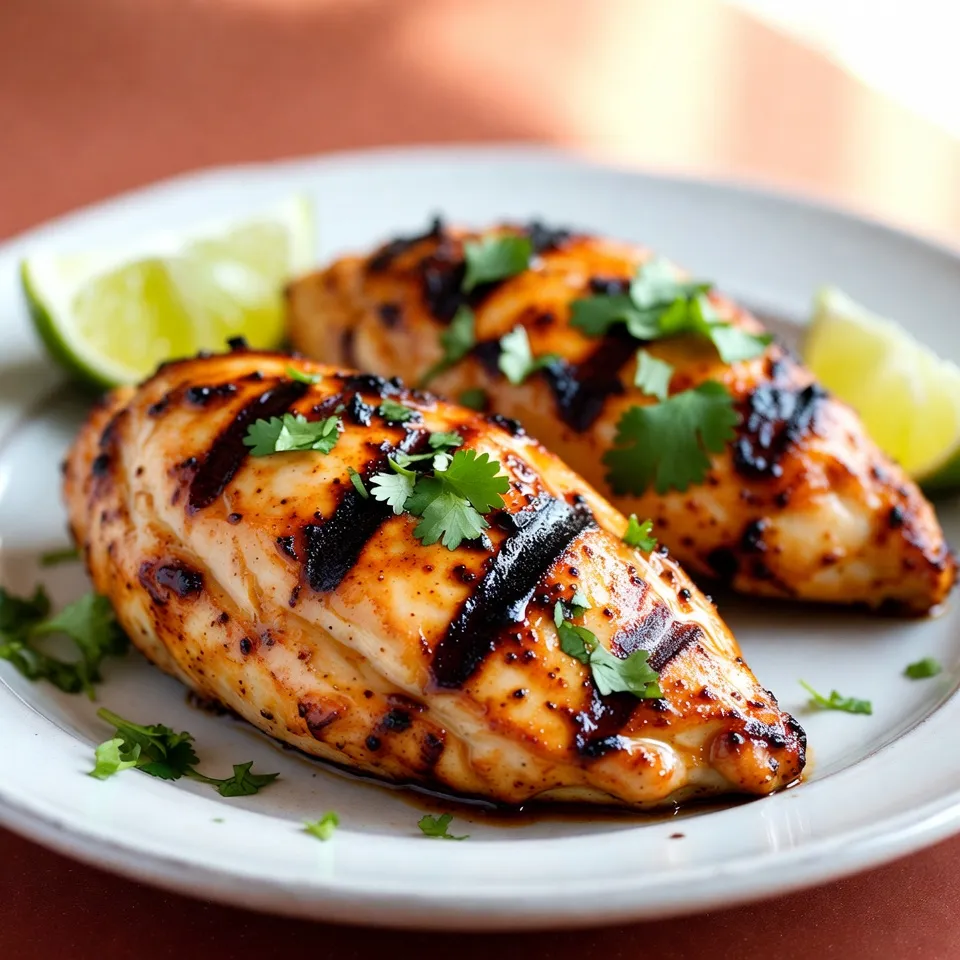
Sweet Chili Lime Grilled Chicken Flavorful and Tender
Get ready to elevate your dinner game with Sweet Chili Lime Grilled Chicken! This dish combines the perfect mix of sweet and tangy flavors, making
Copycat Chipotle Ranch Grilled Chicken Burrito Delight
Are you craving the bold flavors of a Chipotle burrito but want to whip it up at home? You’re in the right place! In this
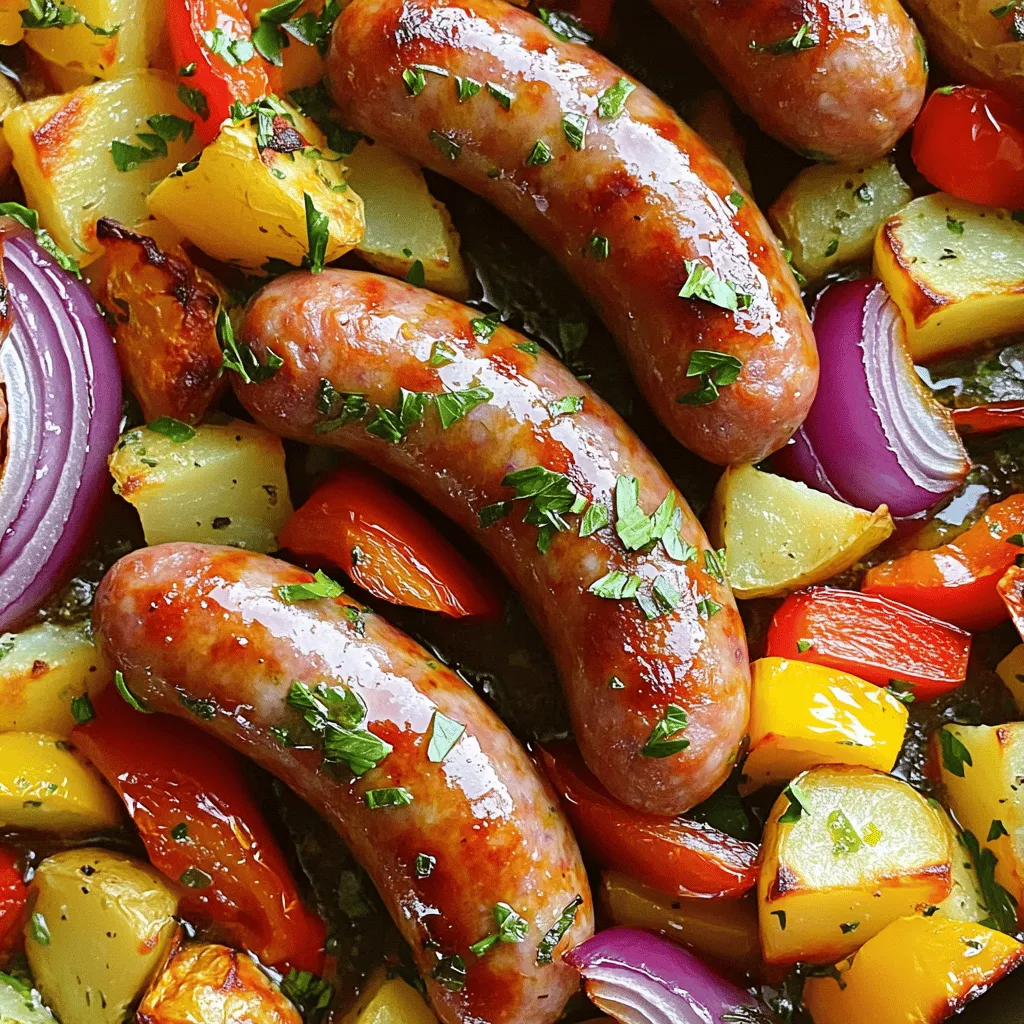
One-Pan Roasted Sausage, Peppers and Potatoes Delight
Are you ready for a meal that’s tasty and easy to make? One-Pan Roasted Sausage, Peppers, and Potatoes Delight is the perfect dish for busy
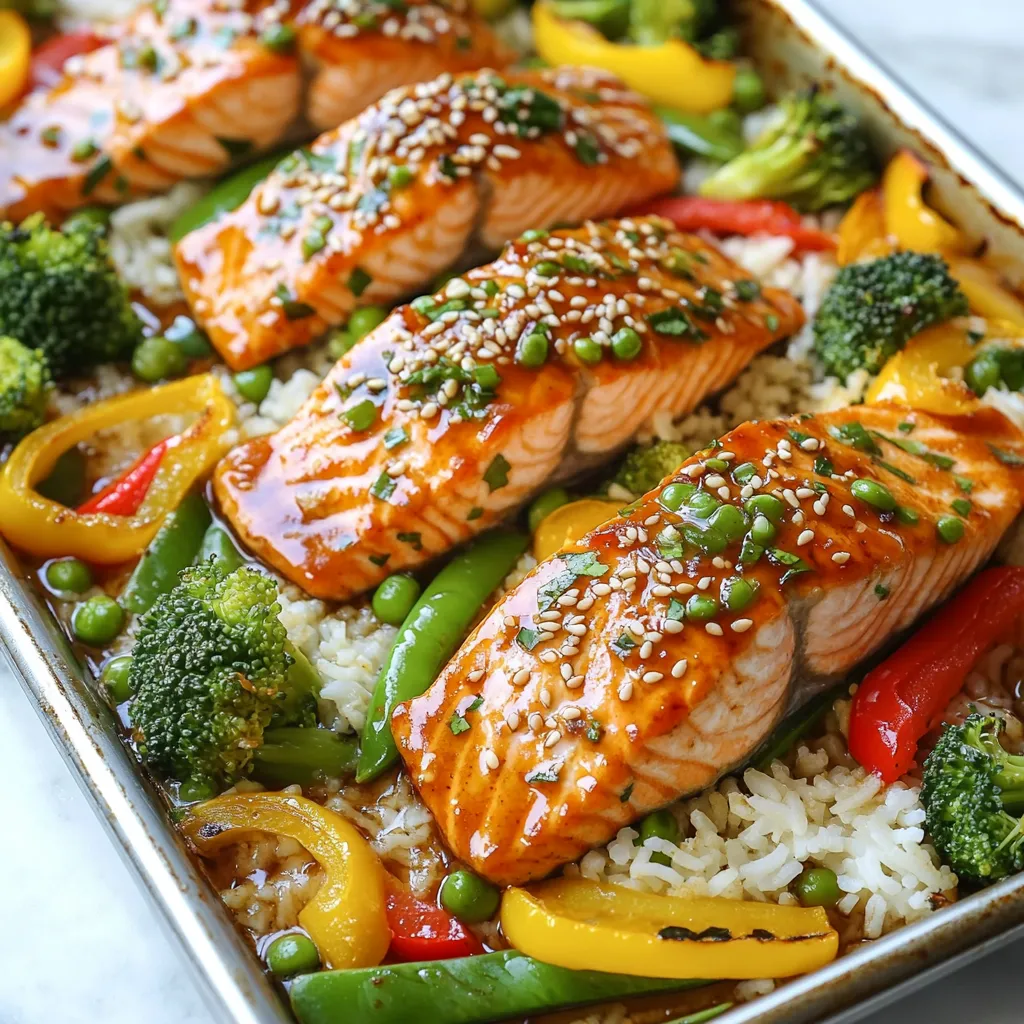
Sheet Pan Teriyaki Salmon Quick and Flavorful Meal
Looking for a quick and tasty dinner idea? You’re in for a treat! My Sheet Pan Teriyaki Salmon uses fresh salmon and colorful veggies, all