Dinner
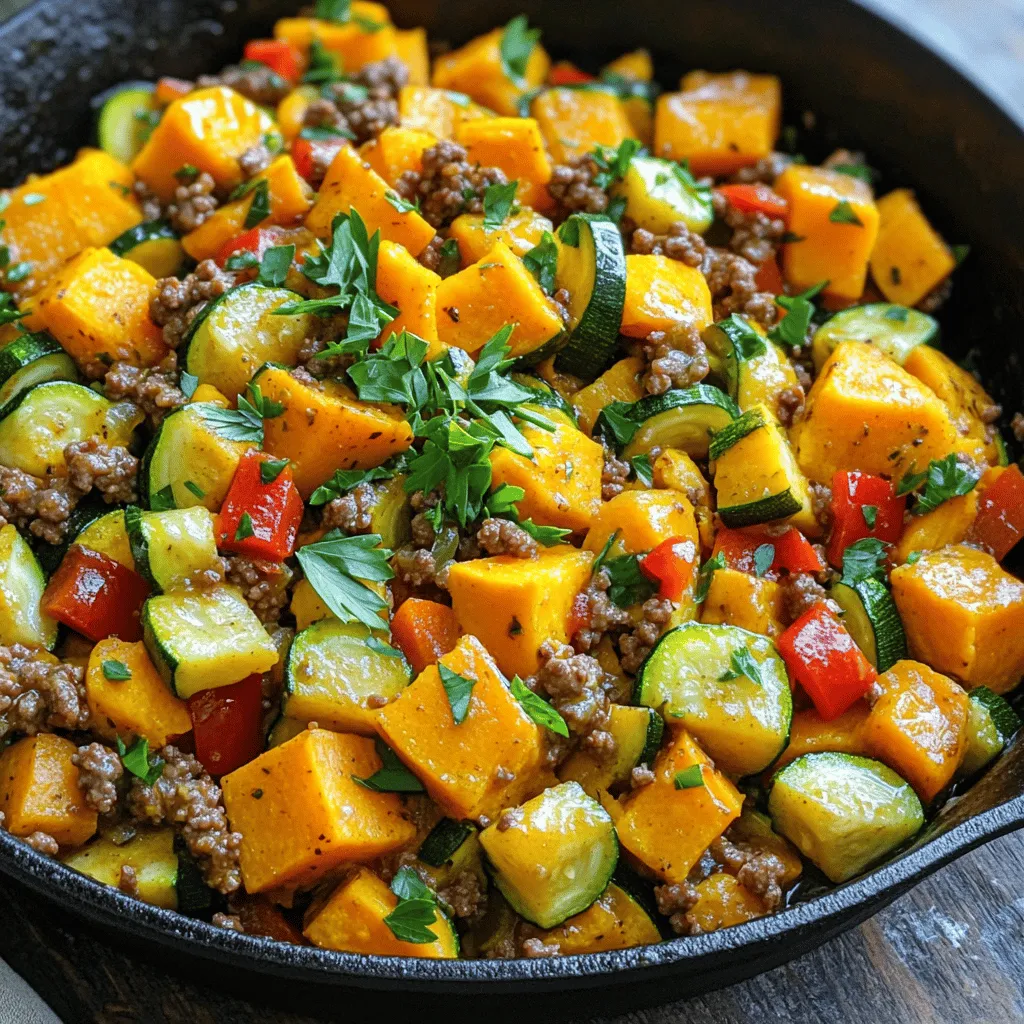
Ground Beef Zucchini Sweet Potato Skillet Delight
Are you ready to whip up a delicious meal in one pan? The Ground Beef Zucchini Sweet Potato Skillet Delight is your answer! This colorful
![Here’s everything you need to make One Pan Cajun Dirty Orzo. Gather these simple items: - 1 cup orzo pasta - 2 tablespoons olive oil - 1 medium onion, finely diced - 3 cloves garlic, minced - 1 red bell pepper, finely diced - 1 green bell pepper, finely diced - 1 stalk celery, finely diced - 1 teaspoon Cajun seasoning - 1/2 teaspoon smoked paprika - 1 can (14 oz) diced tomatoes, with juice - 3 cups vegetable broth - 1 cup frozen okra, sliced - 1 1/2 cups cooked chicken, shredded (or a plant-based alternative) - Salt and pepper to taste - Fresh parsley, chopped, for garnish Using fresh and quality ingredients makes a big difference. The orzo pasta serves as the base and soaks up all the flavors. The Cajun seasoning and smoked paprika add warmth and depth. You can easily swap the chicken for a plant-based option, keeping the dish friendly for everyone. For the best taste, use fresh vegetables. Fresh parsley adds a bright pop at the end. Check out the [Full Recipe] for step-by-step cooking details. - Heat olive oil in a large skillet. - Sauté diced onions until translucent. - Add minced garlic and sauté until fragrant. First, I heat the olive oil in a large skillet over medium heat. This helps the oil become nice and hot. Next, I add the finely diced onion to the skillet. I sauté it for about 3-4 minutes. I wait until the onion turns translucent. This means it looks clear and shiny. Then, I add the minced garlic. I stir it for another minute. The garlic should smell great by now. - Incorporate diced bell peppers and celery. - Stir in Cajun seasoning and smoked paprika. After the garlic is fragrant, I toss in the diced red and green bell peppers along with the celery. I sauté the mixture for about 5 minutes. I want the veggies to soften a bit. Then, I sprinkle in the Cajun seasoning and smoked paprika. I stir well to mix everything. Let the spices bloom for a minute. This makes the flavors pop. - Add orzo and toast for 2 minutes. - Mix in diced tomatoes and vegetable broth. - Simmer until orzo is tender. Now, I add the orzo pasta to the skillet. I mix it with the veggies and toast it for about 2 minutes. This step adds a nice nutty flavor. Then, I pour in the diced tomatoes along with their juice and the vegetable broth. I stir everything to combine it well. I bring the mixture to a gentle simmer. I cover the skillet and cook for about 10-12 minutes. I stir occasionally until the orzo is tender and has absorbed most of the liquid. - Incorporate okra and chicken or plant-based alternative. - Season with salt and pepper. - Garnish with parsley before serving. Once the orzo is cooked, I add the sliced okra and shredded chicken. If I want a plant-based dish, I can use a plant-based protein instead. I mix everything thoroughly. I continue to cook for another 5 minutes until everything is heated through. Then, I season the dish with salt and pepper to taste. Finally, I remove the skillet from heat. I garnish with freshly chopped parsley before serving warm. For the full recipe, check out the details. Toasting orzo is easy and adds a great taste. Heat a little olive oil in your pan. Add the orzo and stir for about 2 minutes. You want it to get a light golden color. This step brings out the nutty flavor. To enhance flavor with spices, always bloom your seasonings first. When you add spices like Cajun seasoning and smoked paprika, make sure to stir them in with the veggies. Let them cook for a minute. This helps the spices release their full flavor. Serve your One Pan Cajun Dirty Orzo in shallow bowls. This makes it look nice and lets the colors shine. For a fun twist, add a few slices of fresh bell pepper on top. Pair this dish with a crisp salad or some garlic bread. These sides balance the rich flavors and add freshness. You can also serve it with a light vegetable dish for more variety. One common mistake is overcooking the orzo. Keep an eye on the cooking time. Stir it often to prevent it from sticking. You want it tender, not mushy. Another mistake is skipping the seasoning bloom. This step is key for a tasty dish. Without it, the spices won’t reach their full potential. Always take that moment to let your spices shine before mixing in the orzo and other ingredients. For more details, check out the Full Recipe! {{image_4}} You can switch proteins easily in this dish. Chicken works great, but plant-based proteins shine just as well. Try using shredded jackfruit or tofu for a tasty twist. If you're feeling adventurous, add shrimp or spicy sausage. Both options bring a great flavor boost. Feel free to mix in other vegetables. Zucchini, corn, or spinach fit nicely in the dish. You can also swap in seasonal veggies. In summer, fresh tomatoes or bell peppers shine. In fall, try butternut squash for a warm touch. The goal is to use what you have on hand. You can adjust the spice to suit your taste. If you prefer a milder dish, reduce the Cajun seasoning. Adding a touch of honey can help balance the heat. For more spice, try adding cayenne pepper or hot sauce. These small changes can make a big difference in flavor. For the Full Recipe, you can find all the details needed to create this delicious meal. To keep your One Pan Cajun Dirty Orzo fresh, store it in an airtight container. This helps to keep out air and moisture. Let the dish cool to room temperature before sealing it up. You can keep leftovers in the fridge for about 3 to 4 days. For best results, use glass or BPA-free plastic containers. They are sturdy and help keep the flavors intact. To reheat your orzo, use a microwave or stovetop. If using a microwave, place the orzo in a bowl and add a splash of water. This will help keep it moist. Heat in short bursts, stirring in between. If using the stovetop, add a little broth or water to a pan. Heat gently, stirring until warm. This keeps the texture nice and creamy. Yes, you can freeze Cajun dirty orzo. To do this, let it cool completely first. Then, scoop it into freezer-safe bags or containers. Remove as much air as possible before sealing. This helps prevent freezer burn. When you're ready to eat it, thaw in the fridge overnight. Then, reheat using the tips above to enjoy your meal again! Cajun dirty orzo is a one-pan dish with bold flavors. It combines orzo pasta with spices, vegetables, and protein. The term "dirty" refers to the mix of ingredients that create a rich and hearty meal. You get a taste of Cajun spice from the seasoning, which adds warmth and depth. The dish often features smoky notes from paprika and savory richness from tomatoes. It’s colorful, filling, and perfect for any meal. Yes, you can easily make Cajun dirty orzo vegetarian. Simply swap the chicken for a plant-based protein, like chickpeas or tofu. You can also add more veggies. Try zucchini, mushrooms, or spinach for extra texture and flavor. Use vegetable broth instead of chicken broth to keep it vegetarian. This dish is quick to prepare. The total time is about 30 minutes. Prep time takes around 10 minutes, while cooking takes 20 minutes. You can have a delicious meal ready in no time, perfect for busy days or weeknight dinners. Absolutely! You can adjust the spice level to fit your taste. If you like it mild, use less Cajun seasoning. For more heat, add cayenne pepper or hot sauce. Start with a small amount and taste as you go. This way, you can find the perfect balance for your palate. Yes, Cajun dirty orzo can be made gluten-free. Look for gluten-free orzo made from rice or corn. You can also use other gluten-free pasta shapes like quinoa or rice. Just make sure to check the labels to ensure they meet your dietary needs. Enjoy this tasty dish without worry! In this article, we explored the ingredients and steps for making Cajun dirty orzo. You learned about the key components, like orzo, veggies, and spices, that bring flavor. I shared tips on storage and reheating to keep your dish fresh. Remember, you can customize this meal with different proteins and veggies to suit your taste. Enjoy creating your own version, and don’t forget to share your results. Cooking should be fun and delicious, so dive in!](https://tossedflavors.com/wp-content/uploads/2025/06/dfc295f4-2e67-4e2c-8656-f337c1fcfd1a.webp)
One Pan Cajun Dirty Orzo Flavorful Meal Made Easy
Craving a bold and easy meal? Dive into my One Pan Cajun Dirty Orzo! This dish bursts with flavor, mixing tender orzo, spices, and your
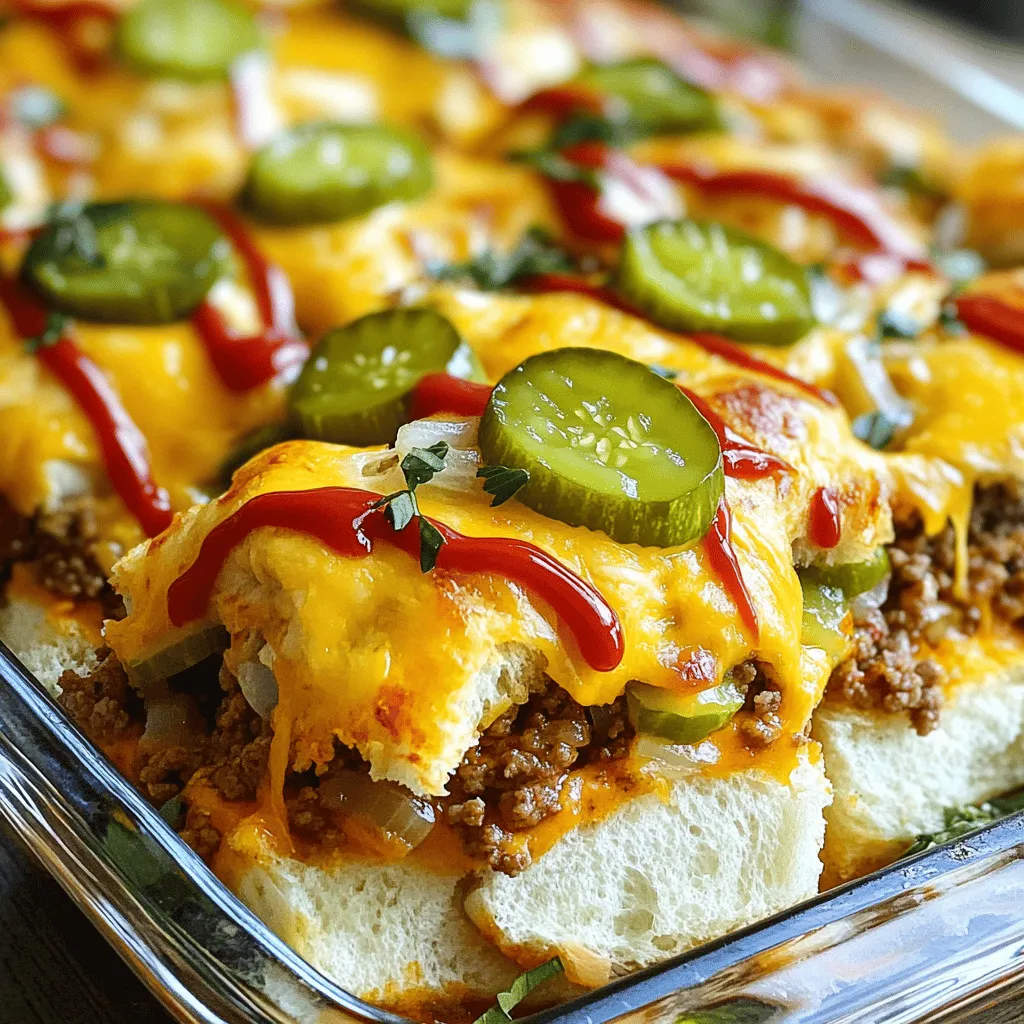
Big Mac Casserole Tasty and Simple Dinner Recipe
Looking for a fun twist on a classic? My Big Mac Casserole combines all the flavors you love in a Big Mac, but in an
![Here’s what you need for your Taco Rice Bowl with Doritos. Each ingredient adds a burst of flavor. - 1 cup jasmine rice - 2 cups vegetable broth - 1 pound ground beef or plant-based ground meat - 1 packet taco seasoning - 1 can (15 oz) black beans, drained and rinsed - 1 cup corn kernels (fresh or frozen) - 1 cup diced tomatoes with green chilies - 1 cup shredded lettuce - 1 cup shredded cheddar cheese - 1 avocado, sliced - 1 bag Doritos (your flavor choice) - Sour cream or Greek yogurt, for topping - Fresh cilantro, chopped, for garnish - Lime wedges, for serving This list gives you all the tasty building blocks for your bowl. The jasmine rice adds a nice base. The ground meat brings protein and heartiness. Taco seasoning packs flavor, while beans and corn add texture. Fresh toppings like lettuce and avocado keep it bright. Lastly, the Doritos bring a fun crunch! You can find the full recipe in the next section to guide you through every step. - Rinse jasmine rice under cold water. This step cleans the rice and helps keep it fluffy. - Cook in vegetable broth. Use a medium saucepan and bring the broth to a boil. Add the rinsed rice and stir gently. Cover and let it simmer on low for 15-20 minutes. The rice will soak up the broth and become tender. Fluff it with a fork when done. - Brown ground beef or plant-based meat in a large skillet over medium heat. Cook for about 5-7 minutes until it is no longer pink. Drain any excess fat if you used beef. - Mix in taco seasoning, black beans, corn, and diced tomatoes. Stir everything well and let it cook for another 5 minutes. This allows the flavors to blend. - Layer rice at the bottom of each bowl. This serves as a base for the rest of the toppings. - Next, add the meat mixture on top of the rice. - Then, sprinkle on shredded lettuce, cheddar cheese, and avocado slices. - Finish with crushed Doritos for a crunchy texture. Add a dollop of sour cream or Greek yogurt. Top it all with chopped cilantro for a fresh touch. Serve with lime wedges on the side for added zing. For the full recipe, check the [Full Recipe]. Common mistakes to avoid while cooking rice Cooking rice may seem simple, but it can be tricky. Here are key mistakes to avoid: - Not rinsing the rice: Rinsing removes extra starch. This keeps the rice from being sticky. - Using too much water: Stick to the right water-to-rice ratio. Too much water makes it mushy. - Not letting it rest: After cooking, let the rice sit covered for a few minutes. This helps it fluff up. How to achieve the perfect taco meat seasoning Seasoning taco meat well is key. Follow these steps for the best flavor: - Use fresh seasoning: If you can, use fresh herbs or spices. They add great depth. - Brown the meat first: Get a nice brown on the meat before adding seasoning. This brings out rich flavors. - Mix well: Stir the seasoning into the meat evenly. Make sure every bite is tasty. Pairings with sides and drinks To make your taco rice bowl complete, consider these pairings: - Chips and salsa: A crunchy side adds texture. - Guacamole: Creamy guac matches well with the spice. - Cold drinks: Try a light beer or a citrus soda. They balance the heat. Creative ways to present your taco rice bowl Presentation matters! Here are fun ideas: - Layer colors: Use colorful bowls to show off fresh ingredients. - Garnish smartly: A sprinkle of cilantro or lime wedges adds brightness. - Use fun toppings: Serve toppings on the side. Let guests customize their bowls. Adding spice or heat to the dish If you love heat, here are ways to spice it up: - Add jalapeños: Fresh or pickled, they add great flavor and heat. - Hot sauce: Drizzle your favorite hot sauce for an extra kick. - Spicy seasoning: Try a spicy taco seasoning mix to amp up the flavor. Using different toppings for personalization Make your taco rice bowl your own with these topping ideas: - Sliced radishes: They add crunch and a peppery taste. - Pico de gallo: Fresh salsa brightens the bowl. - Different cheeses: Swap cheddar for pepper jack or queso fresco for a twist. For the full recipe, check out the details shared above. Enjoy crafting your unique taco rice bowl! {{image_4}} For a meat-free bowl, you can use plant-based ground meat. Options like lentils or quinoa work well too. They add protein and texture. For toppings, skip the cheese and use dairy-free cheese or avocado instead. You can also try cashew cream for a rich, creamy taste. Spice up your taco rice bowl with different seasonings. Try chili powder, cumin, or smoked paprika for extra kick. You can also mix in salsa verde or chipotle sauce for a smoky taste. Swap out black beans for pinto beans or kidney beans to change the flavor. Add roasted veggies like bell peppers or zucchini for more color and taste. To cut calories, you can use lean ground turkey or chicken instead of beef. You can also reduce cheese or skip it altogether. Add more veggies like spinach or kale for a nutrition boost. Toss in some legumes, like chickpeas or kidney beans, to add fiber and protein. These changes keep the flavor high while making it healthier. For the full recipe, check out the Taco Rice Bowl with Doritos. To keep your taco rice bowl fresh, store leftovers in an airtight container. Let it cool first, then cover it. You can keep it in the fridge for up to three days. When you're ready to eat, reheat in the microwave. Heat for about one to two minutes. Stir halfway to warm evenly. If you prefer, you can heat it on the stove too. Just add a splash of broth or water to keep it moist. Yes, you can freeze this meal. To do it, pack the taco rice bowl in freezer-safe bags or containers. Remove as much air as possible before sealing. It stays good for about three months in the freezer. When you want to eat it, thaw it overnight in the fridge. For reheating, use the microwave or stove. If using the microwave, heat in short bursts and stir often to avoid cold spots. To make the best Taco Rice Bowl, start with quality ingredients. Rinse the rice to keep it fluffy. Use vegetable broth instead of water for more flavor. Brown the meat well to develop a rich taste. Don't skip the taco seasoning; it packs a punch. Mix in black beans, corn, and tomatoes for added texture. Serve it in colorful bowls for a fun look. Top it off with crushed Doritos for crunch. A squeeze of lime adds zest and brightens the dish. Yes, you can use different rice types. Here are some great options: - Brown rice: It adds a nutty flavor and more fiber. - Quinoa: A protein-rich alternative that cooks fast. - Cauliflower rice: A low-carb option for a lighter meal. Experiment with these to find your favorite! Toppings add fun and flavor to your bowl. Here are popular choices: - Shredded lettuce: Adds crunch and freshness. - Shredded cheddar cheese: Provides a creamy, rich taste. - Sliced avocado: Offers creaminess and healthy fats. - Sour cream or Greek yogurt: Adds a tangy note. - Fresh cilantro: Brings brightness and a fresh finish. Feel free to mix and match for your perfect bowl! This blog post covered how to make a delicious Taco Rice Bowl with Doritos. We discussed the key ingredients, easy step-by-step instructions, and helpful tips for perfecting the dish. You can tweak the recipe to fit your taste, from vegetarian options to various toppings. Remember, these bowls are versatile and perfect for any occasion. Try this recipe today and enjoy a fun, flavorful meal that pleases everyone. Dive in and get creative with your own twists!](https://tossedflavors.com/wp-content/uploads/2025/06/edf537a2-dbcb-4803-b336-d414c328a240.webp)
Taco Rice Bowl with Doritos Easy Flavorful Meal
Are you ready to enjoy a meal that’s both simple and full of flavor? The Taco Rice Bowl with Doritos is your answer! This quick
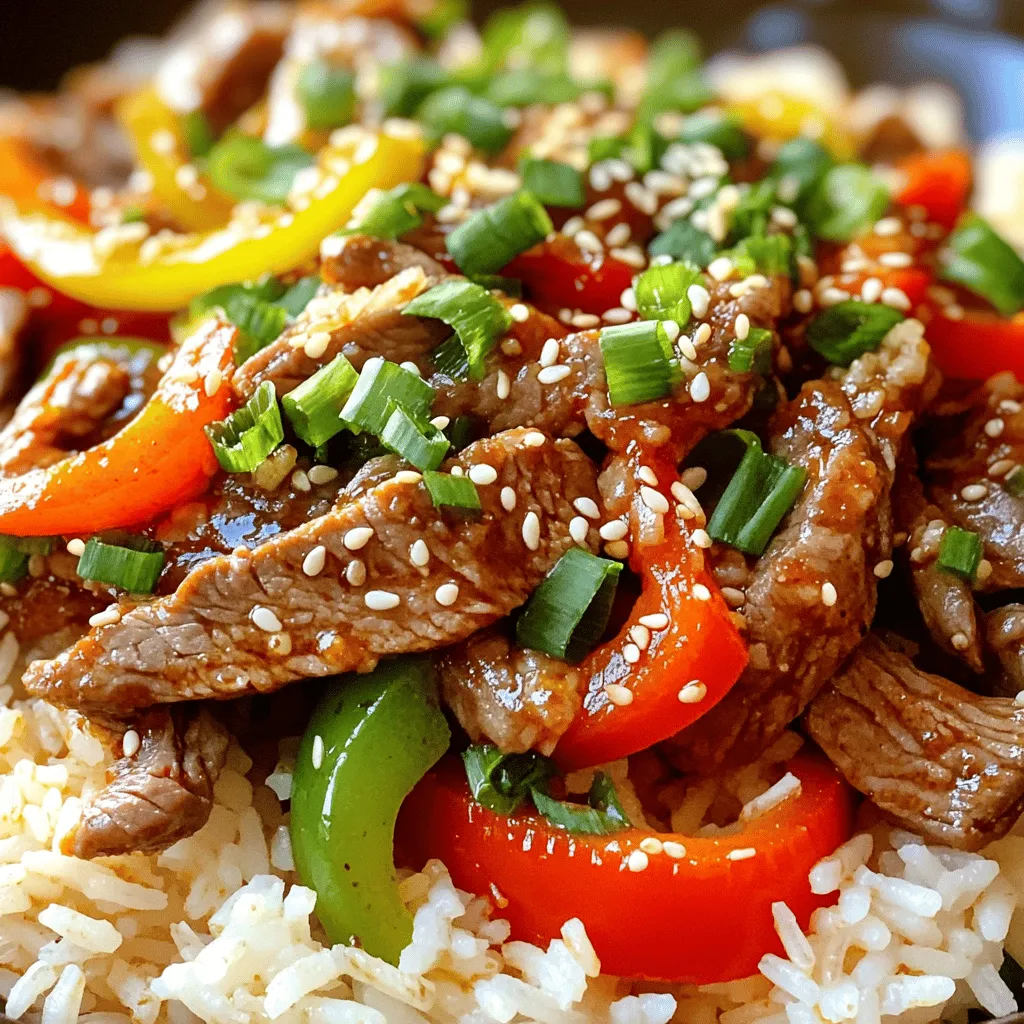
Crispy Chilli Beef Rice Savory and Quick Meal Recipe
Looking for a quick and tasty meal that packs a punch? Try my Crispy Chilli Beef Rice! This dish combines tender beef, colorful peppers, and

Savory Ground Beef Orzo Hearty and Flavorful Dish
Welcome to your next favorite comfort dish: Savory Ground Beef Orzo! With hearty beef, tender orzo, and fresh veggies, this meal is packed with flavor.
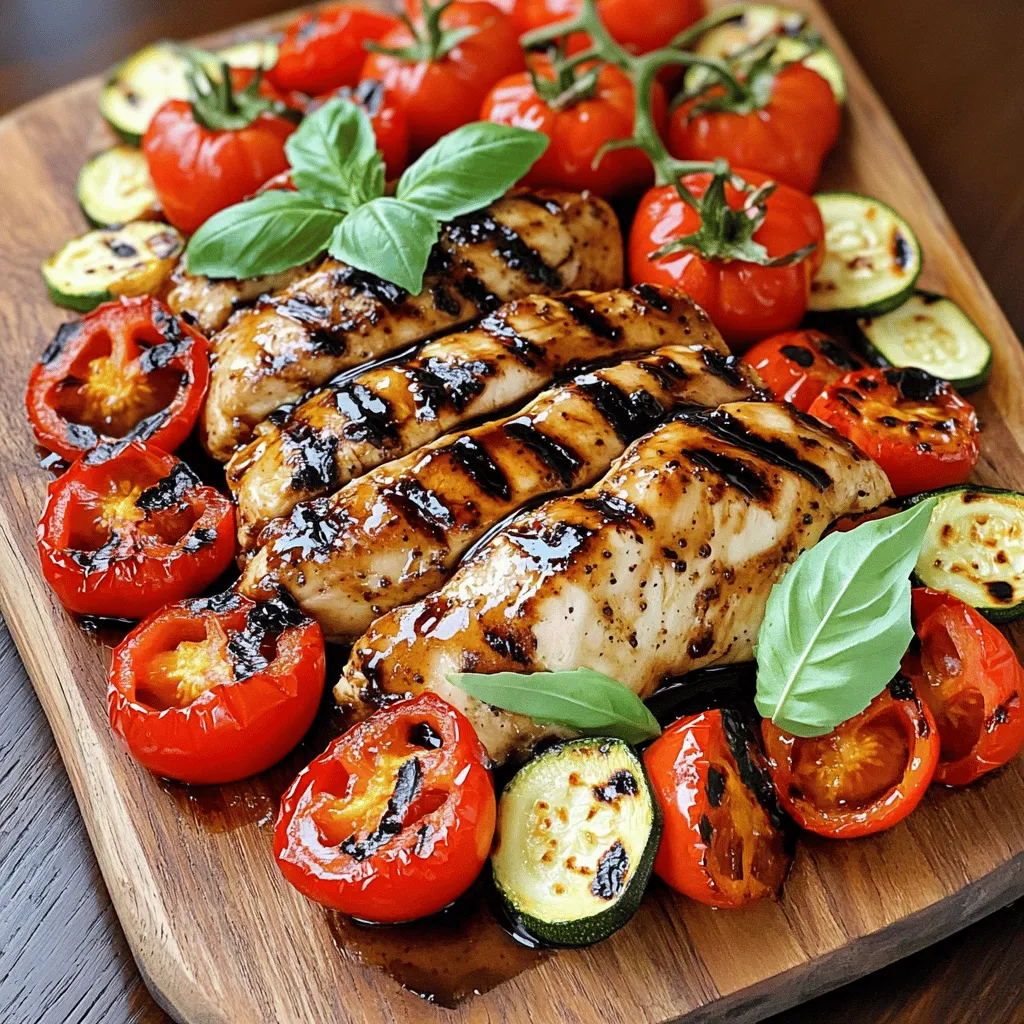
Balsamic Glazed Chicken and Veggies Tasty Recipe
Looking for a quick, tasty meal? My Balsamic Glazed Chicken and Veggies recipe is just what you need! This dish is packed with flavor, thanks
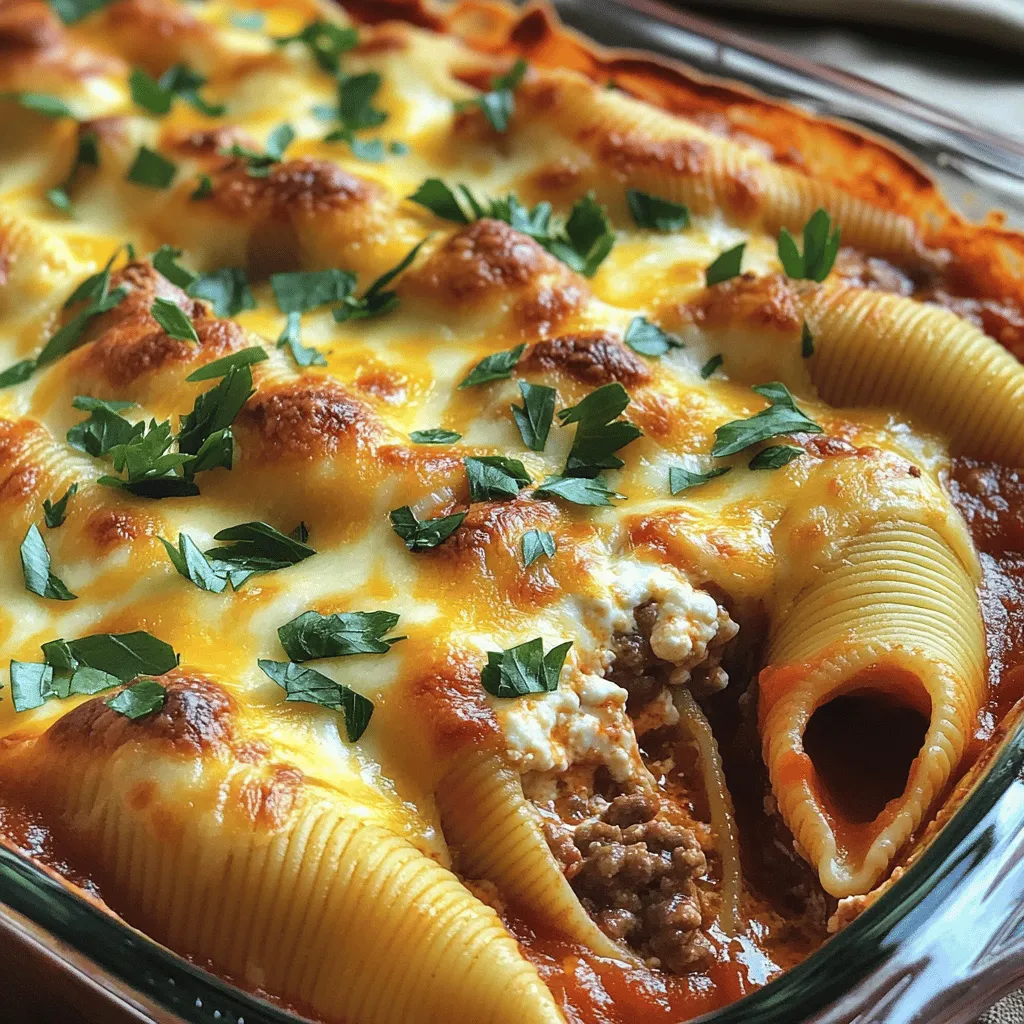
Rich and Comforting Creamy Beef Shells Casserole Delight
Welcome to a cozy world of flavor with my Rich and Comforting Creamy Beef Shells Casserole! If you’re craving a hearty dish that warms your
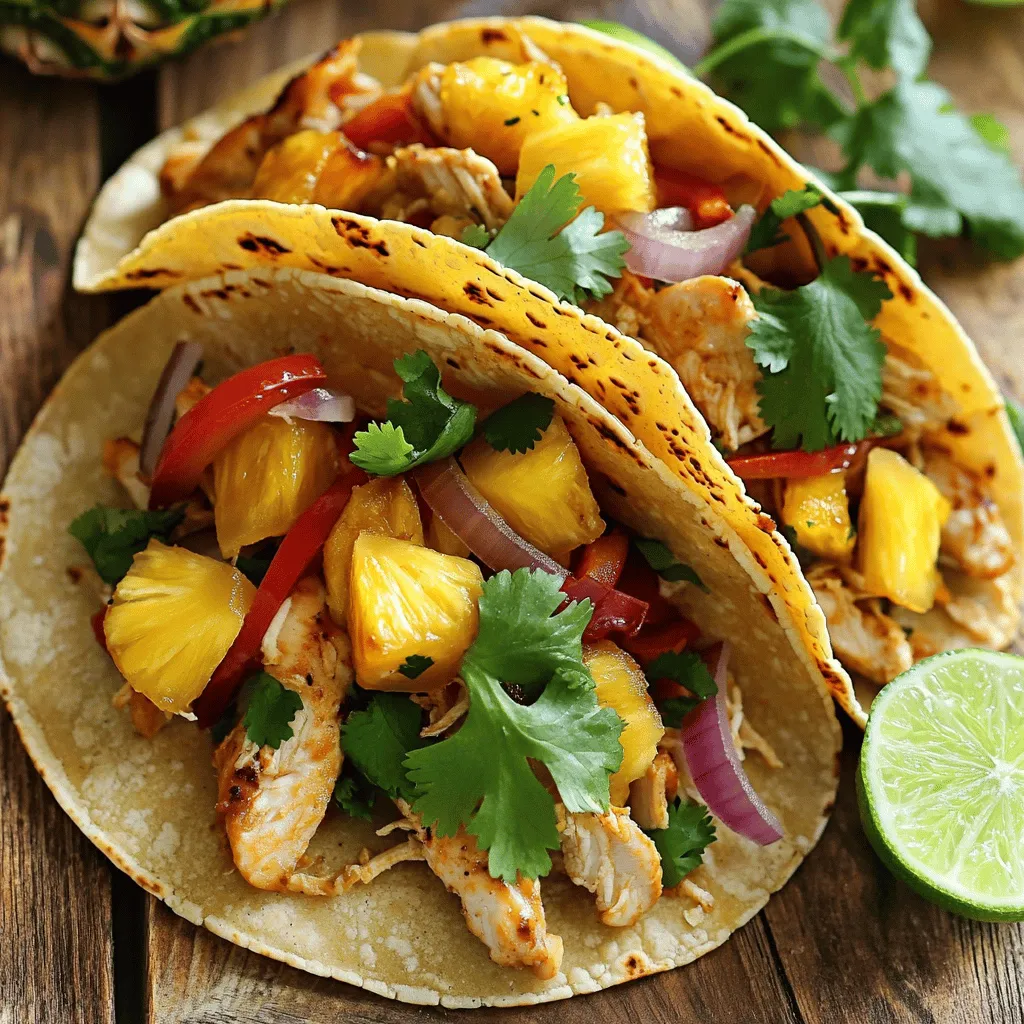
One-Pan Chicken and Pineapple Tacos Simple Delight
Welcome to a burst of flavor with my One-Pan Chicken and Pineapple Tacos! In just a few steps, you can create a fun meal that
![- 4 large russet potatoes - 1 cup broccoli florets, steamed until tender - 1 cup sharp cheddar cheese, freshly grated - 1/2 cup sour cream - 1/4 cup milk (whole or 2%) - 2 tablespoons unsalted butter - 1 teaspoon garlic powder - Salt and freshly ground black pepper to taste - 2 tablespoons green onions, finely chopped (for garnish) To make Broccoli and Cheddar Twice-Baked Potatoes, focus on quality ingredients. The russet potatoes should be large and firm. This makes for a better texture when baked. Fresh broccoli florets add a bright color and a nutritious touch. I always choose sharp cheddar cheese for its strong flavor. It really makes the dish pop. When it comes to the additional ingredients, sour cream adds creaminess. Milk helps to keep the filling smooth. Butter gives richness and flavor. Garlic powder provides a warm taste without being overpowering. Don't forget the salt and pepper; they enhance all the flavors in this dish. Finally, green onions bring a fresh crunch as a garnish. Using these ingredients will ensure your potatoes are a tasty delight. For the complete cooking method, check the Full Recipe. 1. Preheat your oven to 400°F (200°C). 2. Wash the large russet potatoes well. Use a fork to pierce them several times. This lets steam escape. 3. Place the potatoes on a baking sheet and bake for 45-60 minutes. They should be fork-tender when done. 1. While the potatoes bake, get ready to steam the broccoli florets. 2. Steam the florets until they are tender, which takes about 5-7 minutes. 3. Once done, chop the broccoli into small pieces and set them aside. 1. After the potatoes are baked, let them cool for about 10 minutes. This makes them easier to handle. 2. Cut each potato in half lengthwise. Scoop out the insides into a bowl, leaving about 1/4 inch of potato in the skin. 3. In the bowl, mix the scooped potatoes with sour cream, butter, milk, garlic powder, and half of the grated cheddar cheese. 4. Use a potato masher or fork to blend everything. The mix should be smooth and creamy. 5. Gently fold in the chopped broccoli. Season with salt and freshly ground pepper to taste. 1. Spoon the creamy filling back into the potato skins. Mound it generously. 2. Sprinkle the remaining cheddar cheese on top of each filled potato. 1. Put the filled potatoes back in the oven. Bake for an additional 15-20 minutes. 2. The cheese should be melted, bubbly, and lightly golden. 3. When done, sprinkle with chopped green onions before serving. For the full recipe, check out the main article. - Use freshly grated cheese for better melting. Pre-grated cheese often has anti-caking agents, which can affect how it melts. - Avoid over-steaming the broccoli. Steaming for 5-7 minutes keeps the broccoli tender but firm. Overcooking makes it mushy and less flavorful. - Serve with a side salad or grilled protein. This adds balance and makes the meal more filling. - Pair with a creamy dressing or sour cream. A drizzle of sour cream enhances the dish's richness and adds creaminess. - Experiment with different cheese varieties or spices. Try gouda, pepper jack, or even feta for a fun twist. - Add crispy bacon bits or cooked sausage to the filling. This boosts flavor and adds texture, making each bite more exciting. For more details on how to craft these delightful potatoes, check the Full Recipe. {{image_4}} You can easily make this dish vegetarian. Just swap the cheddar for vegan cheese or use nutritional yeast. Nutritional yeast adds a cheesy flavor without dairy. You still get that creamy feel while keeping it plant-based. This change makes the dish friendly for everyone. Looking for healthier choices? Replace sour cream with Greek yogurt. Greek yogurt adds creaminess and protein. It also cuts down on fat. You can also switch out russet potatoes for sweet potatoes. Sweet potatoes bring a sweet taste and more nutrients. They add a unique flavor twist that surprises your taste buds. Want to take the flavor up a notch? Add sautéed onions, peppers, or mushrooms to your filling. These veggies bring extra taste and texture. You can also mix in some herbs like thyme or chives. Fresh herbs brighten the dish and enhance the overall flavor. Each bite will be a tasty delight! For the complete recipe, check out the [Full Recipe]. Store any leftovers in an airtight container. They will stay fresh in the fridge for up to 3 days. This helps maintain flavor and texture, so you enjoy every bite later. For the best results, reheat in the oven at 350°F (175°C). This method warms your potatoes evenly, keeping them soft and cheesy. Avoid using the microwave, as it can make them soggy. You can freeze prepared filled potatoes for up to 2 months. To do this, wrap each potato in plastic wrap and then place them in a freezer bag. Thaw in the fridge before reheating to keep them tasty. Yes, other vegetables like spinach, carrots, or cauliflower work well too. You can mix and match based on your taste. For a fun twist, try adding some sautéed bell peppers or even kale. Each veggie brings its own flavor and texture, making the dish unique. The initial baking takes 45-60 minutes, plus an additional 15-20 minutes after filling. Make sure to check the potatoes by piercing them with a fork. They should feel soft. This ensures a fluffy texture for the filling. Greek yogurt or cottage cheese can be good substitutes for a lighter option. Both add creaminess without the extra fat. Greek yogurt gives a nice tang, while cottage cheese adds a rich texture. You can even mix them for a unique taste. Ensure all ingredients, including cheese and sour cream, are gluten-free. Check labels carefully, as some brands may include gluten. Using gluten-free cheese and sour cream keeps the dish safe for those with gluten sensitivities. Enjoying this tasty delight without worry is key! In this article, we explored how to make delicious stuffed baked potatoes. We covered the key ingredients, from russet potatoes and broccoli to sharp cheddar cheese. The step-by-step instructions made it easy to prepare, fill, and bake your potatoes perfectly. You also learned helpful tips for texture and serving ideas. Lastly, we looked at tasty variations and storage options. Now, you have the tools to create satisfying meals that delight. Enjoy cooking and experimenting with your favorite flavors!](https://tossedflavors.com/wp-content/uploads/2025/06/2df16bc8-7e8e-4a31-8f78-c3663dee0ca7.webp)
Broccoli and Cheddar Twice-Baked Potatoes Tasty Delight
Craving a comforting dish that’s both tasty and healthy? Look no further! Broccoli and Cheddar Twice-Baked Potatoes are your perfect choice. Packed with tender broccoli