Dinner
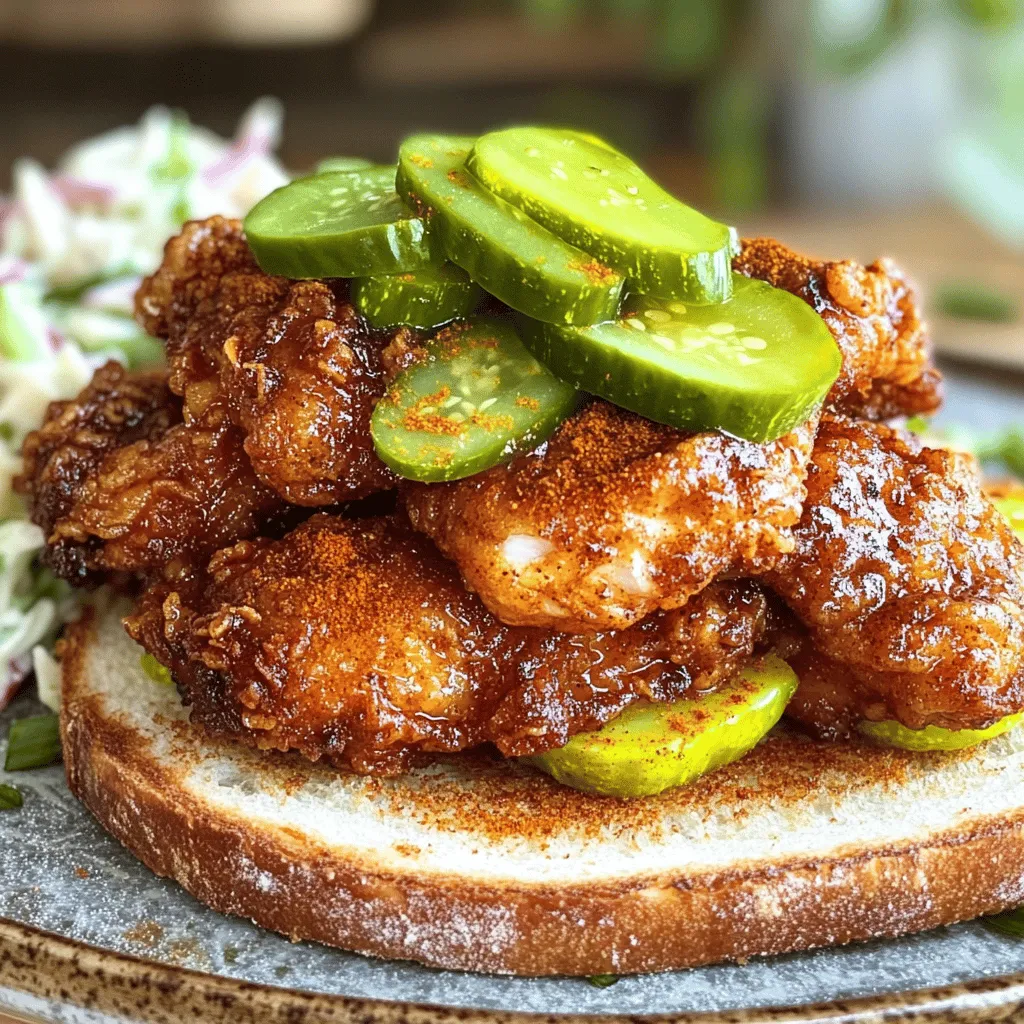
Nashville Hot Chicken Recipe Simple and Delicious
Nashville Hot Chicken is a spicy, crispy delight that brings heat and flavor to your plate. In this simple and delicious recipe, I will guide

Cheesy Tomato Pie Simple and Flavorful Comfort Food
Craving comfort food that bursts with flavor? Look no further than a cheesy tomato pie! This dish combines fresh tomatoes, creamy cheeses, and herbs for
. To get that creamy sauce, start with the right amount of liquid. Use the full cup of heavy cream. This will give your sauce a rich, thick feel. If you like it thinner, add more chicken broth. For a thicker sauce, reduce the broth by half a cup. Stir well when mixing in the cheese. This helps it melt smoothly into the sauce. Boost the flavor with extra spices. Try adding a pinch of red pepper flakes for some heat. Fresh herbs like basil or thyme can add freshness. For a richer taste, consider adding a tablespoon of butter to the sauce. You can even add a splash of white wine for depth. Cooking times may change depending on your slow cooker. If it runs hot, check the chicken after 4 hours. For cooler cookers, it may need the full 6 hours. Always ensure the chicken reaches 165°F. You can test this by cutting into the thickest part. If the chicken shreds easily, it's done! For the full recipe, please refer to the earlier section. {{image_4}} You can switch up the protein in this dish. Turkey works great if you want leaner meat. Just use the same amount as chicken. Shrimp is another tasty option. Add it during the last hour of cooking. This way, it stays juicy. If you're plant-based, try tofu. Use firm tofu for the best texture. Simply cube it and add it with the pasta. Want a low-carb option? Use zucchini noodles or spaghetti squash instead of pasta. These choices keep it light. For those avoiding gluten, choose gluten-free pasta. Many brands offer great options. You can also make a dairy-free Alfredo sauce. Use cashews or coconut milk for creaminess without dairy. Just blend until smooth for the sauce. Adding fresh vegetables can boost flavor and nutrition. Spinach or broccoli are great choices. Toss them in the slow cooker during the last hour. This helps them stay bright and crisp. Sun-dried tomatoes add a sweet, tangy taste. They can really enhance the dish. Mushrooms also add a nice earthiness. Just slice them and mix them in before serving. For the full recipe, check out the detailed instructions above. After enjoying your Crock Pot Chicken Alfredo, store any leftovers quickly. Use airtight containers to keep your meal fresh. I recommend glass containers since they don’t stain and seal well. Let the dish cool to room temperature before sealing. This helps prevent moisture buildup. Store it in the fridge for up to three days for best quality. You can freeze Chicken Alfredo for later enjoyment. To do this, cool the dish completely first. Then, place it in freezer-safe containers or bags. Remove as much air as possible to avoid freezer burn. Label the containers with the date. You can freeze it for up to three months. When you’re ready to eat, thaw it in the fridge overnight. Reheat it gently on the stove. Add a splash of cream to revive the sauce. Chicken Alfredo stays good in the fridge for about three days. After that, it may not be safe to eat. Look for signs of spoilage like an off smell or mold. If the sauce separates or changes color, it’s best to toss it. Always use your best judgment when it comes to food safety. To make Chicken Alfredo creamy, focus on using rich ingredients. Start with heavy cream. It makes the sauce thick and smooth. Adding grated Parmesan cheese enhances the flavor and texture. Stir these into the slow cooker after shredding the chicken. This method ensures a creamy base that sticks to the pasta well. Yes, you can prep ingredients ahead of time. Chop the garlic and mix the spices early. You can also slice the chicken breasts. Store these in the fridge until you're ready to cook. This saves time when you want to make the dish later. Several sides pair nicely with this dish. Garlic bread is a classic choice. A fresh garden salad adds crunch and balance. Roasted vegetables also complement the creamy pasta well. Try steamed broccoli, zucchini, or asparagus for extra flavor. You can cook this recipe on high heat. Set your slow cooker to high and cook for about 2 to 3 hours. Keep an eye on the chicken to ensure it doesn’t dry out. Adding a little more broth can help keep it moist. Fettuccine is the traditional choice for Alfredo sauce. Its flat shape holds the creamy sauce well. However, you can use other pasta types too. Penne, rotini, or even gluten-free options work great. Choose what you like best for a tasty meal. For the Full Recipe, check the earlier sections for all the details! In this post, we explored a tasty Chicken Alfredo recipe using a slow cooker. We listed essential ingredients, step-by-step instructions, and helpful tips. I shared ways to make it creamy and adjustments you can try. You can even spice it up with alternative proteins or seasonal veggies. Lastly, I highlighted storage tips to keep leftovers fresh. With this guide, you can create a delicious meal that’s easy and fun to make. Enjoy your cooking!](https://tossedflavors.com/wp-content/uploads/2025/06/a3ab8028-a561-474f-86d6-4553a3d4fc86.webp)
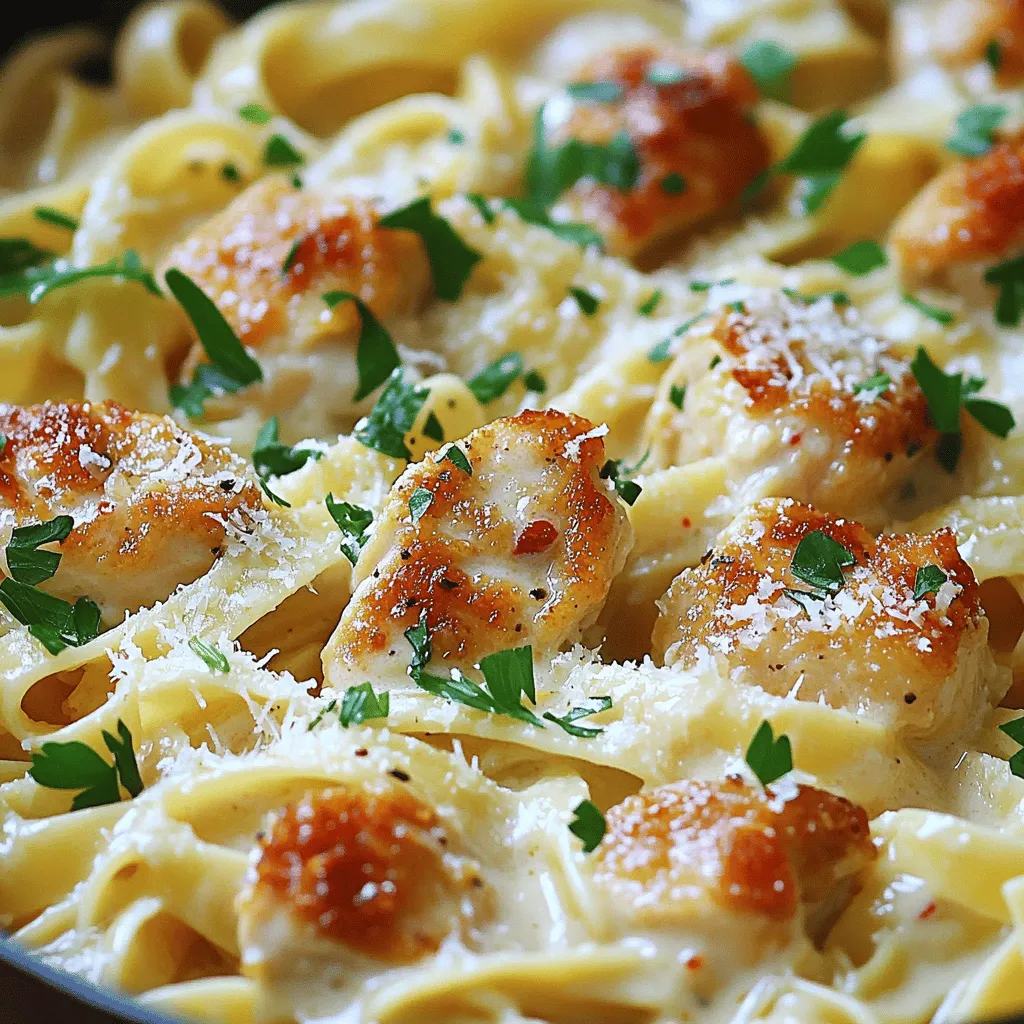
Crock Pot Chicken Alfredo Creamy Dinner Delight
Are you ready to impress with a creamy and comforting Crock Pot Chicken Alfredo? This dish is simple and perfect for busy days when you
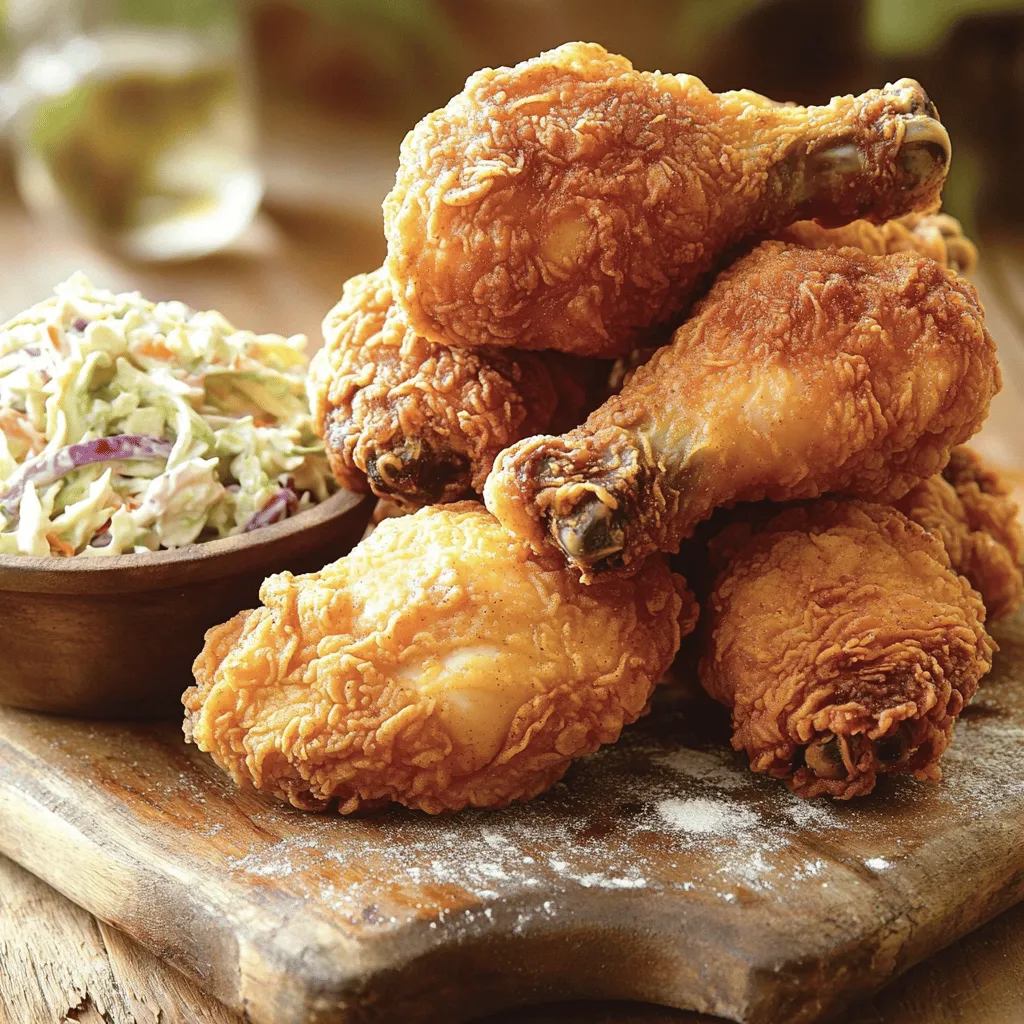
Ultimate Southern Fried Chicken Crispy and Flavorful
Get ready to master the art of Ultimate Southern Fried Chicken! In this post, I’ll guide you through each step, from choosing fresh ingredients to
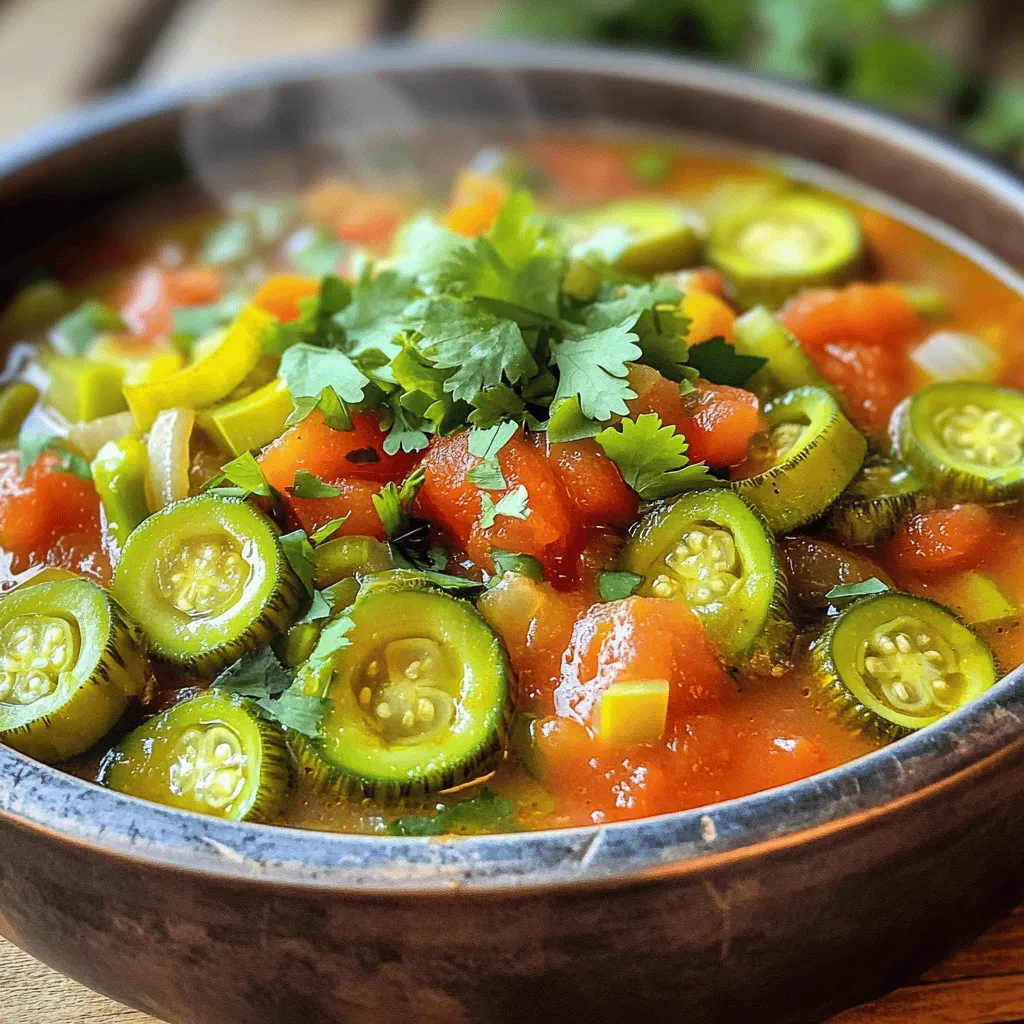
Okra Stew Flavorful Delight for Every Meal
Are you ready to discover a dish that will elevate every meal? Okra stew is a flavorful delight that packs a punch. It’s not only
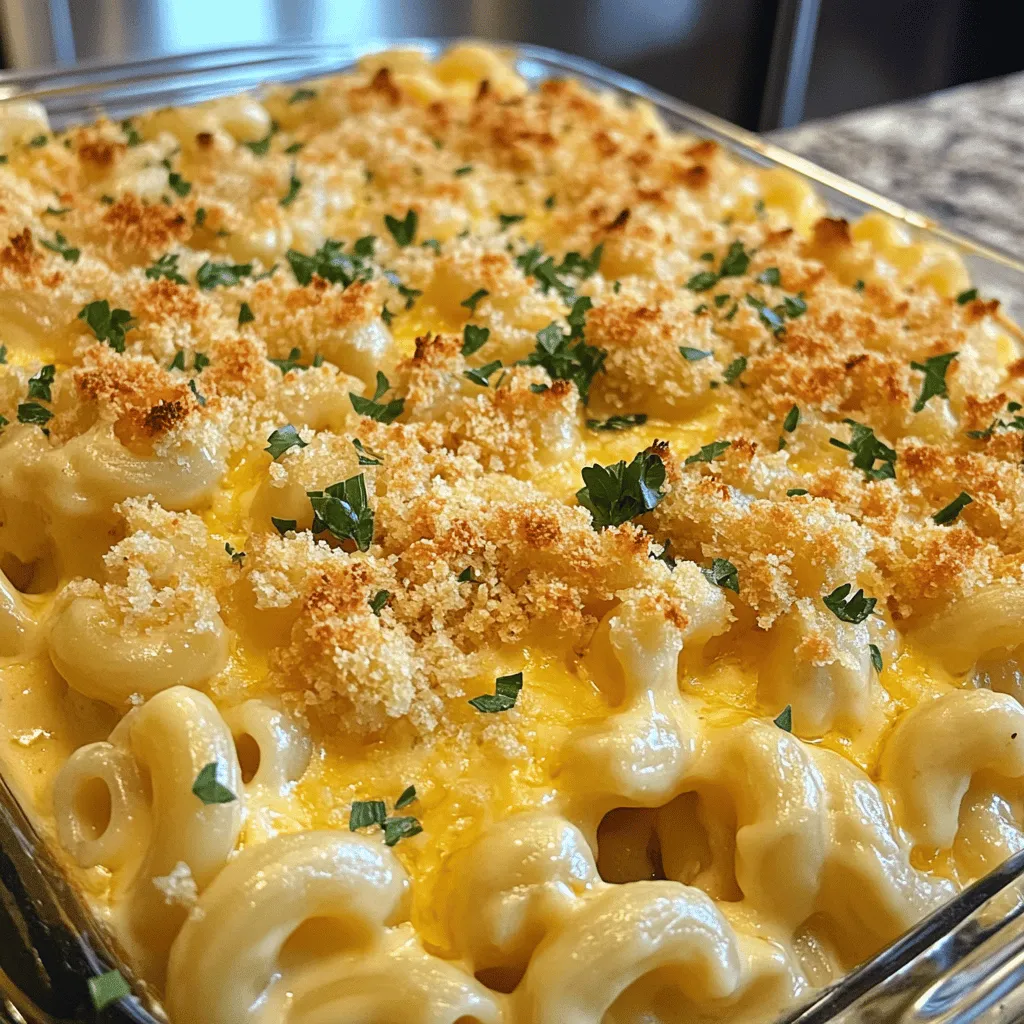
The BEST Baked Mac and Cheese Creamy Comfort Dish
If you’re a mac and cheese lover like I am, you know this dish can be both simple and fancy. My recipe for the BEST
Garlic Butter Chicken Pasta Simple and Tasty Meal
If you’re looking for a quick and tasty dinner, you’ve found it! Garlic Butter Chicken Pasta is easy to make and packed with flavor. Imagine
![This dish shines because of its simple yet tasty ingredients. You will need: - 4 boneless, skinless chicken breasts - 1/4 cup unsalted butter, melted - 2 tablespoons honey - 1 tablespoon Cajun seasoning - 1 teaspoon garlic powder - 1 teaspoon smoked paprika - 1/2 teaspoon cayenne pepper (adjust according to your spice preference) - Salt and freshly ground black pepper to taste - Fresh parsley, finely chopped (for garnish) These ingredients work together to create a rich and flavorful meal. The chicken breasts are tender and juicy, while the honey butter adds a sweet kick. The spice blend is the heart of this dish. Cajun seasoning brings warmth and depth, while garlic powder and smoked paprika add layers of flavor. The cayenne pepper gives it a nice kick, but you can adjust the amount to suit your taste. The honey balances the spices with a touch of sweetness. This mix creates a dish that is both spicy and savory. It’s perfect for those who love bold flavors. For a finishing touch, you can use fresh parsley. It adds a pop of color and a hint of freshness. You can also add lemon wedges for a zesty twist. This simple garnish elevates the dish's look and taste. You might even consider serving it with a side of steamed vegetables or fluffy rice. These additions create a well-rounded meal that everyone will enjoy. For the complete recipe, check out the Full Recipe. Start by preheating your oven to 400°F (200°C). This step is key for even cooking. Take your chicken breasts and pat them dry with paper towels. Drying the chicken helps it sear better. Place the chicken in a large baking dish, leaving some space between each piece. This helps the heat circulate, ensuring they cook evenly. In a small bowl, combine the melted butter, honey, Cajun seasoning, garlic powder, smoked paprika, and cayenne pepper. Add a pinch of salt and pepper for taste. Whisk everything together until the mixture is smooth and creamy. This sauce is where the magic happens. It brings flavor and moisture to the chicken. Pour the honey butter mixture over the chicken, ensuring each piece is well-coated. Turn the chicken as needed to cover all sides. Now, cover the baking dish tightly with aluminum foil and place it in your preheated oven. Bake for 20 minutes. After that, carefully remove the foil. Return the dish to the oven and bake for another 15-20 minutes. The chicken should reach an internal temperature of 165°F (74°C) and have a lovely golden-brown color. Once done, take the chicken out of the oven and let it rest for about 5 minutes. This resting time allows the juices to settle. Drizzle any leftover honey butter sauce from the dish over the chicken before serving. For a nice touch, sprinkle freshly chopped parsley on top for brightness and flavor. Enjoy your Spicy Cajun Honey Butter Chicken! For the complete recipe, check out the Full Recipe. To make your Spicy Cajun Honey Butter Chicken shine, focus on temperature control. Preheat your oven to 400°F (200°C) to ensure even cooking. This heat helps the chicken brown nicely while keeping it juicy. Always pat the chicken dry before cooking. This simple step helps achieve a great sear. Juicy chicken depends on how you cook it. Bake the chicken covered for the first part. This traps steam and keeps moisture in. After 20 minutes, remove the foil. Let the chicken get that nice golden color. Always check the internal temperature. It should reach 165°F (74°C) for safe eating. Avoid overcooking your chicken. This can make it dry and tough. Use a meat thermometer to check for doneness. Another mistake is skipping the resting time after baking. Letting the chicken rest for 5 minutes helps the juices settle. Lastly, don’t rush the honey butter mixture. Mix it well to blend all those wonderful flavors. For more details, refer to the Full Recipe. {{image_4}} You can easily change the taste of your Spicy Cajun Honey Butter Chicken. Try using different types of meats. Chicken thighs add richness and moisture. You can also swap the honey with maple syrup for a unique twist. If you want a different flavor, go for brown sugar instead. This dish shines when served with tasty sides. I love pairing it with garlic mashed potatoes or sweet corn. You can also serve it with a fresh salad for a light touch. Another great option is fluffy rice or quinoa, which soak up the sauce well. Adjusting the spice level is easy. If you love heat, add more cayenne pepper to the mix. You can also try adding diced jalapeños for extra kick. For less spice, reduce the cayenne or leave it out. Remember, spice can be personal, so feel free to make it your own! For the complete recipe, check the [Full Recipe]. To keep your spicy Cajun honey butter chicken fresh, place leftovers in an airtight container. Make sure the chicken cools down before sealing the container. Store it in the fridge for up to three days. This way, you can enjoy the flavors later without losing quality. When you want to reheat your chicken, use the oven or stovetop. For the oven, preheat it to 350°F (175°C). Place the chicken on a baking dish and cover it with foil. Heat for about 15 minutes or until warm. This keeps the chicken juicy. If using the stovetop, add a splash of water in a pan. Heat over medium-low and cover it. Stir it gently until warm. If you want to save some chicken for later, freezing is a great option. Wrap each piece in plastic wrap, then place them in a freezer bag. Remove as much air as possible to prevent freezer burn. You can freeze the chicken for up to three months. When you're ready to eat it, thaw it in the fridge overnight before reheating. This method helps maintain its flavor. For the full recipe, check out the Spicy Cajun Honey Butter Chicken Delight. Cajun seasoning is a blend of spices from Louisiana. It often includes paprika, garlic powder, onion powder, black pepper, and cayenne pepper. This mix adds a bold, spicy flavor to dishes. It is perfect for meats and seafood. Using Cajun seasoning in your cooking brings warmth and depth to meals. You can find it in stores or make your own at home. Yes, you can use chicken thighs instead of breasts. Thighs have more fat, which makes them juicy and tender. They absorb flavors well, too. Cooking time might be slightly longer, so check the internal temperature. Aim for 165°F (74°C) for safe eating. Using thighs can add richness to your spicy Cajun honey butter chicken. To make the dish spicier, add more cayenne pepper or a dash of hot sauce. You can also mix in some chopped jalapeños. If you prefer a milder flavor, reduce the cayenne or leave it out completely. You can also use less Cajun seasoning. Adjusting these elements lets you tailor the dish to your taste. Enjoy exploring flavors with this spicy Cajun honey butter chicken! For the full recipe, check out the cooking instructions above. In this article, I covered the key ingredients for Spicy Cajun Honey Butter Chicken and how to prepare it step-by-step. We looked at tips to get juicy chicken and avoid common mistakes. I also shared variations and storage tips to maximize your dish's flavors. This dish is simple and full of flavor. Dive in, try the recipe, and enjoy a delicious meal!](https://tossedflavors.com/wp-content/uploads/2025/06/a597867f-5ad2-4112-9503-a1975b5b732d.webp)
Spicy Cajun Honey Butter Chicken Easy Flavorful Dish
If you’re craving a dish that combines sweet and spicy, you’ve come to the right place! Today, I’m sharing my recipe for Spicy Cajun Honey

Crispy Hot Honey Feta Chicken Flavorful Dinner Delight
Craving a dinner that’s both crispy and packed with flavor? Let me introduce you to Crispy Hot Honey Feta Chicken. This dish combines tender chicken,
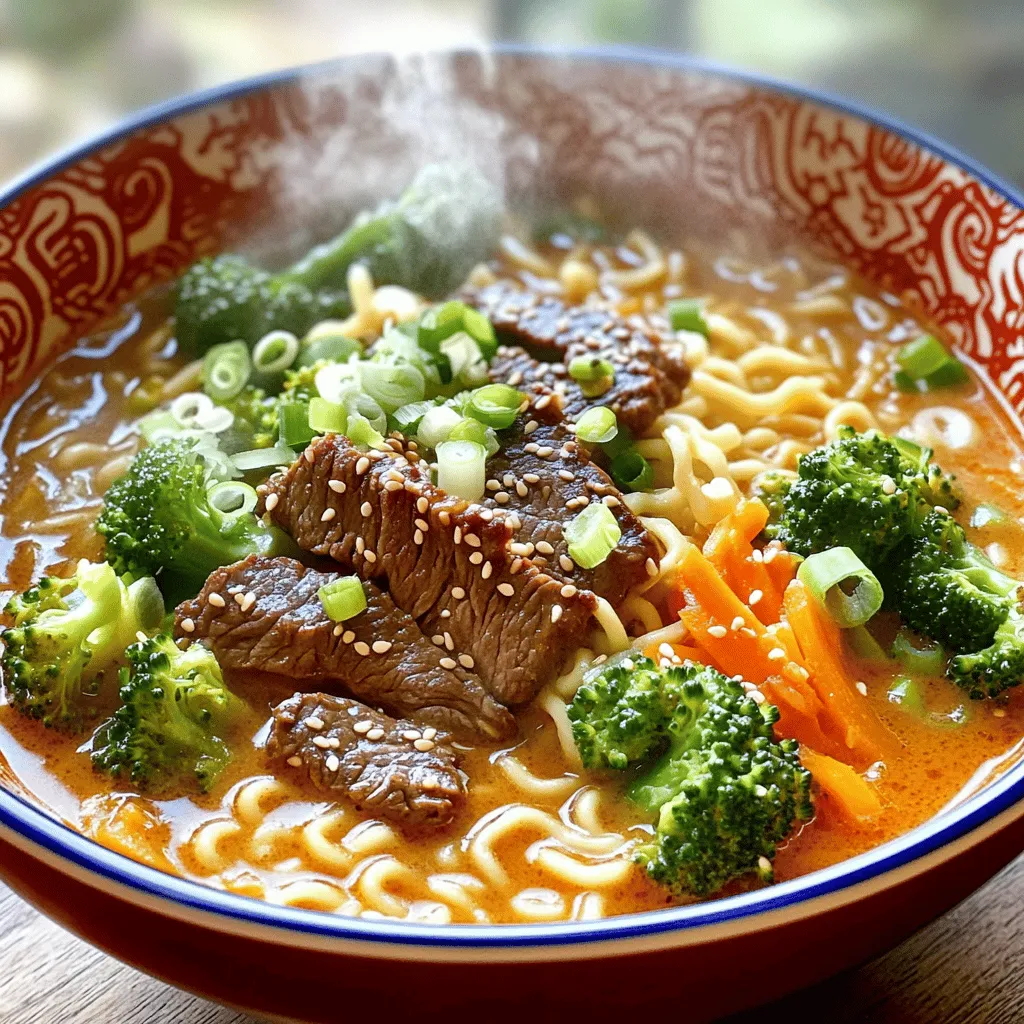
Spicy Korean Ramen with Grilled Beef & Creamy Sauce Delight
Are you ready to spice up your dinner? In this blog post, I’ll walk you through making Spicy Korean Ramen with Grilled Beef and Creamy