Dinner

Brown Sugar Garlic Chicken Legs Savory and Simple Dish
Looking for a mouthwatering recipe that’s both simple and satisfying? You’ve come to the right place! My Brown Sugar Garlic Chicken Legs will take your

Easy Cheesy Zucchini Casserole Quick and Tasty Meal
Looking for a simple yet delicious meal? I’ve got you covered with my Easy Cheesy Zucchini Casserole. This dish is quick, tasty, and perfect for

Homemade Honey Garlic Chicken Simple and Satisfying Meal
Are you looking for a quick and tasty dinner idea? Homemade Honey Garlic Chicken is your answer! With its sweet and savory glaze, this dish
![- 4 medium zucchinis, chopped into bite-sized pieces - 1 large onion, finely diced - 2 cloves garlic, minced - 2 medium potatoes, peeled and diced into small cubes - 4 cups vegetable broth (preferably low-sodium) - 1 cup coconut milk (canned) The main players in this soup are zucchini, onion, garlic, and potatoes. Zucchini gives a soft texture and a mild taste. Onion adds sweetness, while garlic brings a lovely aroma. Potatoes make the soup hearty and creamy. I love using vegetable broth for a rich flavor. - 1 teaspoon dried thyme - 1 teaspoon fresh lemon zest (about half a lemon) - Salt and freshly cracked black pepper to taste For seasoning, dried thyme adds a warm, earthy taste. Fresh lemon zest brightens the soup, making it taste fresh. Salt and pepper enhance all the flavors. I recommend tasting as you season to get it just right. - Large pot - Immersion blender (or countertop blender) - Knife and chopping board To make this soup, you will need a large pot to cook everything. An immersion blender helps create a smooth texture right in the pot. If you don’t have one, a countertop blender works too; just be careful with hot soup. A good knife and chopping board are a must for prepping your ingredients. For the full recipe, check out Creamy Zucchini Soup Delight. 1. Start by heating 2 tablespoons of olive oil in a large pot over medium heat. 2. Once the oil is hot, add 1 diced onion. Sauté for about 5 minutes. 3. Stir the onion often until it turns soft and clear. 4. Next, add 2 minced garlic cloves. Cook for 1 more minute. 5. Stir constantly to avoid burning the garlic. You want it just fragrant. 1. Now it’s time to add the good stuff. Stir in 4 chopped zucchinis and 2 diced potatoes. 2. Mix them well with the onion and garlic. 3. Pour in 4 cups of vegetable broth and sprinkle in 1 teaspoon of dried thyme. 4. Bring the mixture to a boil. 5. Once boiling, reduce the heat to low. Let it simmer uncovered for 15-20 minutes. 6. The zucchini and potatoes should be tender enough to poke with a fork. 1. Grab your immersion blender. Carefully blend the soup in the pot. 2. You want a smooth and creamy texture. 3. If you don’t have an immersion blender, transfer the soup in small batches to a countertop blender. 4. After blending, return the soup to the pot if needed. 5. Stir in 1 cup of coconut milk and 1 teaspoon of lemon zest. 6. Season with salt and pepper to your taste. 7. Warm the soup over low heat for a few minutes. Do not let it boil. Now, you have a warm and creamy zucchini soup ready to enjoy! For the complete recipe, check the Full Recipe section. To achieve a creamy consistency, blend the soup well. I use an immersion blender for this. It makes it easy to get a smooth texture right in the pot. If you don't have one, pour the soup into a blender in batches. Just be careful with the hot liquid. If you want a thicker soup, let it simmer a bit longer. This helps the vegetables break down and blend well. If it’s too thick, add more vegetable broth or coconut milk to adjust it. For ideal garnishes, try fresh basil leaves on top. They add a nice touch of color and flavor. A drizzle of coconut milk can also enhance the look. To make it a full meal, pair the soup with crusty bread or a fresh salad. A side of grilled cheese can be a hit too. These options complement the creamy zucchini soup perfectly. One common mistake is overcooking the vegetables. This can lead to a mushy texture. Cook them just until they are tender. Another mistake is not seasoning properly. Always taste the soup before serving. Adjust the salt and pepper to your liking. A little lemon zest adds brightness, so don’t skip it! For the full recipe, check the section above. {{image_4}} For a creamy base, you can swap coconut milk with other options. Almond milk or cashew cream give a nice touch. You can also use dairy milk or plain yogurt for a traditional taste. Want to add protein? Consider adding cooked chicken or beans. They blend well and make the soup heartier. Tofu is a great choice for a vegetarian option too. To boost the soup's taste, think about herbs and spices. Fresh basil, dill, or parsley can elevate your dish. For a kick, try adding red pepper flakes or smoked paprika. You can also play with toppings. A drizzle of olive oil adds richness, while croutons give crunch. A dollop of yogurt or sour cream adds creaminess and tang. Adjust your creamy zucchini soup for each season. In spring, add fresh peas or asparagus for a light touch. In the fall, consider adding roasted squash for a warm flavor. Using fresh vegetables makes a big difference. Farmers' markets often have local produce that enhances your soup’s taste. Try swapping zucchini for seasonal veggies like carrots or sweet potatoes. For the full recipe, check out the [Full Recipe]. To store leftover creamy zucchini soup, let it cool first. Pour it into an airtight container. This soup stays fresh in the fridge for up to 4 days. Remember to label the container with the date. This way, you’ll know when to eat it next! If you want to save the soup for later, freezing is a great option. First, let the soup cool completely. Then, transfer it to freezer-safe bags or containers. Make sure to leave some space for expansion. Creamy zucchini soup can last in the freezer for up to 3 months. When it’s time to eat, thaw it overnight in the fridge. To reheat the soup, you can use either the microwave or stovetop. If using the microwave, heat in short bursts, stirring in between. This helps the soup heat evenly. For stovetop, pour the soup into a pot and warm it over low heat. Stir often to keep it from sticking. This way, the soup stays smooth and tasty. Enjoy your delicious creamy zucchini soup again! To make creamy zucchini soup vegan, swap out the coconut milk for a plant-based cream. You can use almond, soy, or oat milk. Using a non-dairy yogurt can also add creaminess. These choices keep the flavor rich without any dairy. You may want to check the labels to ensure they are unsweetened. Yes, you can make this soup ahead of time. It stores well in the fridge for about three days. Just let it cool completely before you store it. For meal prep, make a big batch and divide it into portions. This way, you have tasty soup ready when you need it. You can also freeze it for up to three months. Creamy zucchini soup pairs well with many side dishes. You might enjoy it with a fresh salad or crusty bread. Grilled cheese sandwiches also make a great match. For something lighter, try a side of roasted veggies. Each option adds a nice touch to your meal. To make more servings, simply double or triple the ingredients. Keep the same ratios of zucchini, potatoes, and broth. If you increase the amount, you may need a larger pot. You can also scale down for fewer servings. Just cut the ingredient amounts in half. Yes, creamy zucchini soup is quite healthy. Zucchini is low in calories and high in vitamins. Potatoes add fiber and help make the soup filling. Coconut milk provides healthy fats. This soup is also rich in nutrients. Each ingredient contributes to a balanced dish. Enjoy knowing you are eating something good for you! In this post, we explored the delicious world of creamy zucchini soup. You learned about the key ingredients, spices, and tools needed to create this dish. We also shared easy steps, tips for perfect texture, and storage info. It's a simple recipe, perfect for any meal. Now, you can enjoy a tasty soup that warms the heart. Try different flavors and variations to make it your own. Your creamy zucchini soup journey is just beginning—have fun with it!](https://tossedflavors.com/wp-content/uploads/2025/06/6f882bb5-10df-426b-9942-b9d5300365fa.webp)
Creamy Zucchini Soup Simple and Flavorful Recipe
Looking for a cozy and tasty dish? This creamy zucchini soup is bright, simple, and full of flavor. With fresh zucchini, garlic, and hints of

The Best Tomato Galette Savory and Flavorful Recipe
Are you ready to enjoy a delicious Tomato Galette that bursts with flavor? This savory dish combines ripe tomatoes, fresh mozzarella, and a flaky crust

Chicken Potato Bake Simple and Delicious Comfort Meal
Looking for a warm and filling dish to please your family? My Chicken Potato Bake is just what you need. It’s simple to make, packed
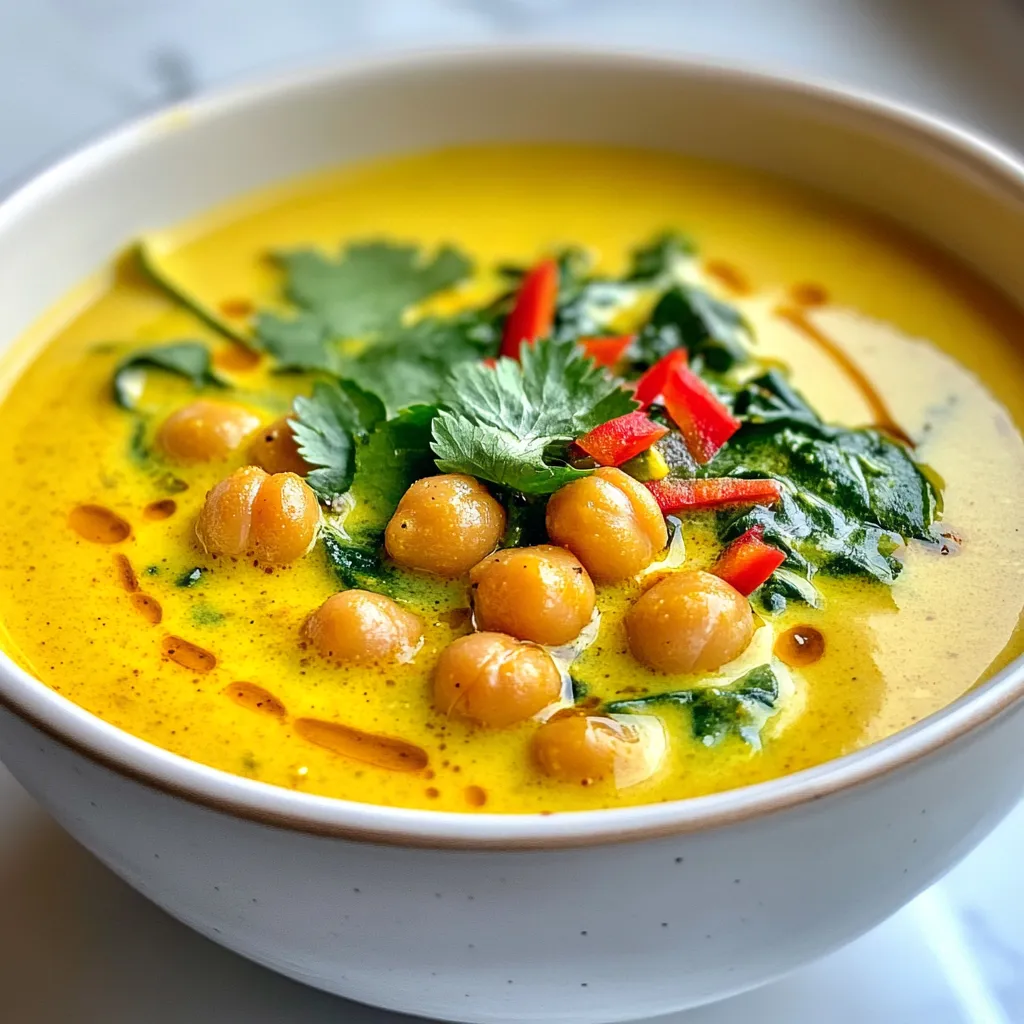
Coconut Curry Chickpea Soup Simple and Flavorful Recipe
Are you ready to warm up with a bowl of Coconut Curry Chickpea Soup? This simple yet flavorful recipe combines creamy coconut milk and hearty
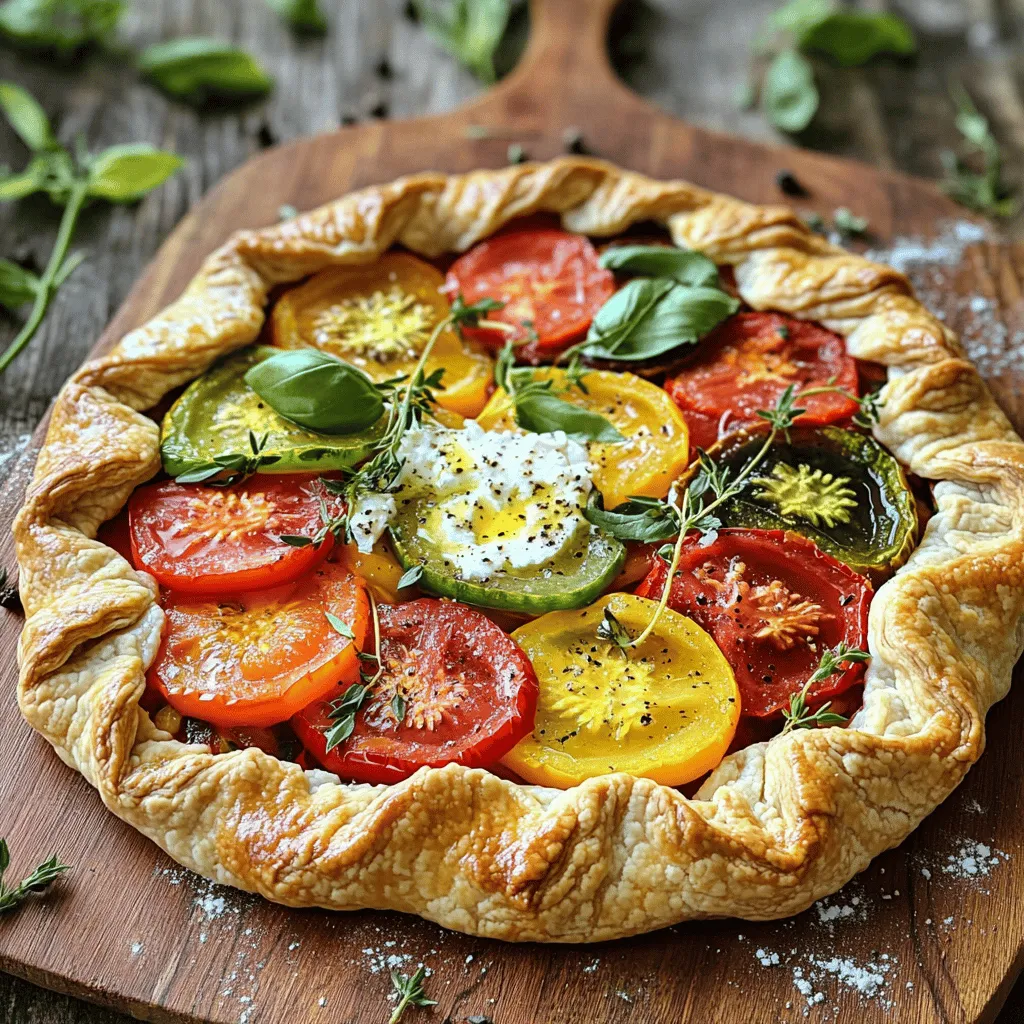
Delicious Heirloom Tomato Galette Simple and Easy Treat
Are you ready to delight your taste buds? This Delicious Heirloom Tomato Galette is a simple and easy treat you can whip up at home.

Sweet and Sour Chicken Flavorful and Easy Recipe
Craving a balance of sweet and tangy in your meals? You’re in luck! This Sweet and Sour Chicken recipe is not only flavorful, but it’s
![To make my buttermilk fried chicken, gather these simple ingredients. Each one plays a key role in giving your chicken that crispy and flavorful delight. - 4 chicken thighs (bone-in and skin-on) - 2 chicken breasts (boneless and skinless) - 2 cups buttermilk - 1 tablespoon of your favorite hot sauce (optional for heat) - 1 cup all-purpose flour - 1 teaspoon paprika - 1 teaspoon garlic powder - 1 teaspoon onion powder - 1 teaspoon cayenne pepper (adjust for spice preference) - Salt and black pepper to taste - Vegetable or canola oil, for frying Each ingredient has a purpose. The buttermilk tenderizes the chicken. The hot sauce adds a nice kick, but you can skip it if you want mild flavor. The flour and spices create a crunchy, tasty crust. The oil makes frying easy and gives that golden color. For the full recipe, check out the details above! Start by mixing the buttermilk and hot sauce in a bowl. The buttermilk gives the chicken a tender bite. The hot sauce adds a kick. Submerge the chicken pieces in the mix. Make sure every piece is well-coated. Cover the bowl with plastic wrap. Place it in the fridge for at least four hours. For best results, marinate overnight. This helps the flavors soak in deep. When you are ready to cook, take the chicken out of the fridge. Let the excess buttermilk drip off. This ensures the coating will be crispy. Next, prepare the flour mix. In a shallow dish, whisk together the flour and seasonings. Use paprika, garlic powder, onion powder, and cayenne pepper. Add salt and black pepper to taste. This mix creates a flavorful crust for the chicken. Now, it's time to heat the oil. Pour enough oil into a pot to cover the chicken by about two inches. Heat the oil over medium-high heat. You want it to reach 350°F (175°C). Use a thermometer for accuracy. Once the oil is hot, carefully add the chicken pieces. Do not overcrowd the pot; fry in batches if needed. Cook each side for about 12-15 minutes. The coating should turn golden brown and crunchy. The internal temperature of the chicken should reach 165°F (75°C). After frying, let the chicken drain on a wire rack or paper towels. This step helps keep it crispy. For the full recipe, check the complete instructions above. - Flour coating techniques: For a crunchy bite, use a dry flour mix. Dredge each chicken piece well. Press lightly, so the flour sticks. Shake off extra flour. This helps avoid clumps and gives a nice crisp. - Temperature control for frying: Heat the oil to 350°F (175°C). Use a thermometer for accuracy. If the oil is too cold, the chicken will absorb oil and get soggy. If it's too hot, the outside may burn before the inside cooks. - Adjusting spice levels: You can change the spice level to fit your taste. Add more cayenne for heat or skip it for mild chicken. Taste the flour mix before coating the chicken. This helps ensure it's just right. - Additional marinade options: Want more flavor? Try adding herbs like thyme or rosemary to the buttermilk. You can also use garlic cloves or shallots for a richer taste. Let your creativity shine here! - Recommended side dishes: Buttermilk fried chicken pairs well with creamy coleslaw, buttery mashed potatoes, or cornbread. These sides complement the chicken's crunch and flavor. - Best sauces to pair with fried chicken: A tangy barbecue sauce or classic ranch dressing works great. You can also serve hot sauce for those who like a spicy kick. Each dip adds a fun twist to the meal. For the full recipe and detailed instructions, check out the [Full Recipe]. {{image_4}} Want to add some heat? Spice up your buttermilk fried chicken with sauces. You can use hot sauce in the marinade. I like to add a tablespoon of my favorite hot sauce. This gives the chicken a nice kick. You can also mix cayenne pepper into the flour. Adjust the amount to how spicy you want it. If you want more heat, try a chili powder or Sriracha. Each of these options adds a new layer of flavor. Fresh herbs can give your fried chicken a unique twist. Try adding rosemary, thyme, or parsley to the marinade. It brings a fresh taste to the chicken. Just chop the herbs finely and mix them with the buttermilk. Let the chicken soak in that herby goodness. You will enjoy a fragrant and tasty dish. This variation is perfect if you love garden flavors. If you want a healthier option, try oven-baked buttermilk chicken. This method cuts down on oil. First, marinate the chicken like in the original recipe. Then, preheat your oven to 425°F (220°C). Place the coated chicken on a baking sheet. Use parchment paper for easy cleanup. Bake for about 25-30 minutes. Make sure the chicken reaches 165°F (75°C) inside. This method gives you crispy skin without frying. It's a great way to enjoy the same flavors with less fat. For the full recipe, check the section above. To keep your leftover buttermilk fried chicken fresh, store it in an airtight container. This keeps the chicken from drying out. Place paper towels at the bottom of the container to absorb moisture. This will help keep the skin crispy. How long does it last in the fridge? Properly stored, it lasts about three to four days. Make sure to eat it within this time for the best taste and safety. If you want to save some for later, freezing cooked chicken is a great idea. Let the chicken cool down to room temperature first. Wrap each piece tightly in plastic wrap or aluminum foil. Then, place the wrapped chicken in a freezer-safe bag. This helps prevent freezer burn. When you're ready to eat it, you can reheat it straight from the freezer. Just place the chicken on a baking sheet and heat in the oven at 375°F (190°C) for about 20-25 minutes. This method keeps the chicken juicy and the coating crispy. Enjoy your delicious meal again! I suggest marinating your chicken for at least 4 hours. For the best flavor, try to marinate overnight. This helps the chicken soak in the tangy buttermilk and spices, making it juicy and tender. Yes, you can use boneless chicken. It cooks faster but may not be as juicy as bone-in options. Keep an eye on the cooking time. Boneless pieces will need about 8-10 minutes per side. Buttermilk fried chicken pairs well with various sides. Popular options include creamy coleslaw, buttery mashed potatoes, and cornbread. You can also add some pickles or a fresh salad for a nice crunch. If you don’t have buttermilk, you can make a quick substitute. Mix 1 cup of milk with 1 tablespoon of vinegar or lemon juice. Let it sit for about 5-10 minutes. This will give you a similar tangy flavor. You can check if your chicken is done by using a meat thermometer. The internal temperature should reach 165°F (75°C). You can also look for a golden brown color on the outside. If the juices run clear, it’s ready to eat. For the full recipe, check out the previous sections! In this post, we explored how to make buttermilk fried chicken. We discussed key ingredients like the chicken and the marinade. You learned easy step-by-step instructions, tips for perfect crunch, and varied cooking methods. Remember, adjusting spices can enhance flavor. Proper storage also keeps leftovers fresh. Fried chicken is fun to make and eat. Using these tips, you can impress your friends and family! Enjoy the cooking process and all the delicious meals ahead.](https://tossedflavors.com/wp-content/uploads/2025/06/e2950360-46ff-4304-b864-453b84437bcc.webp)
Buttermilk Fried Chicken Crispy and Flavorful Delight
If you crave juicy, crispy fried chicken, you’re in the right place! My recipe for Buttermilk Fried Chicken combines tender meat with a crunchy coating,