Dinner
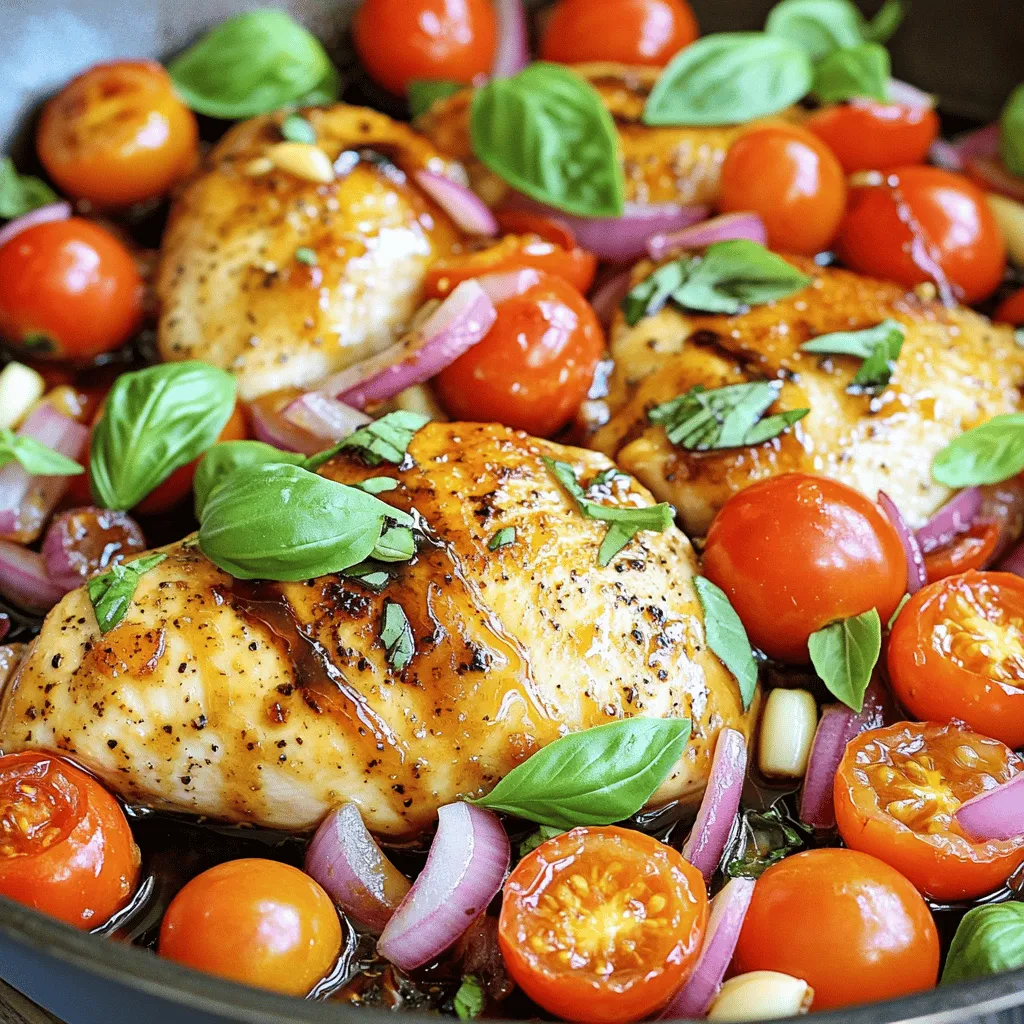
One Pan Balsamic Chicken Quick and Flavorful Meal
Looking for a quick, tasty meal? One Pan Balsamic Chicken is your answer! In just a few steps, you’ll have a juicy chicken dish that

Cajun Garlic Butter Chicken Flavorful Dinner Delight
Looking for a dinner that packs a punch of flavor? Cajun Garlic Butter Chicken is your answer! This dish combines tender chicken breasts with zesty
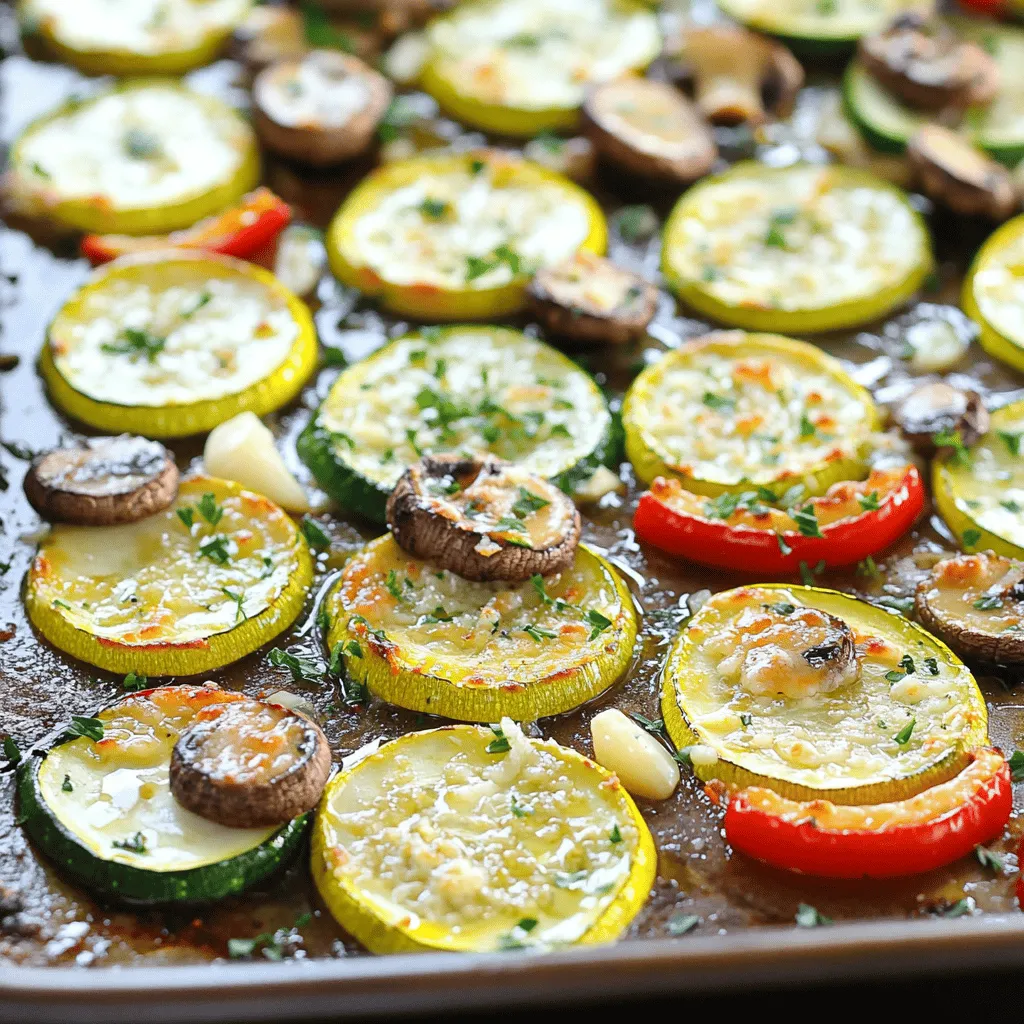
Easy Baked Zucchini and Mushrooms Flavorful Delight
If you’re looking for a simple yet delicious dish, you’ve come to the right place! My Easy Baked Zucchini and Mushrooms are a colorful, flavorful
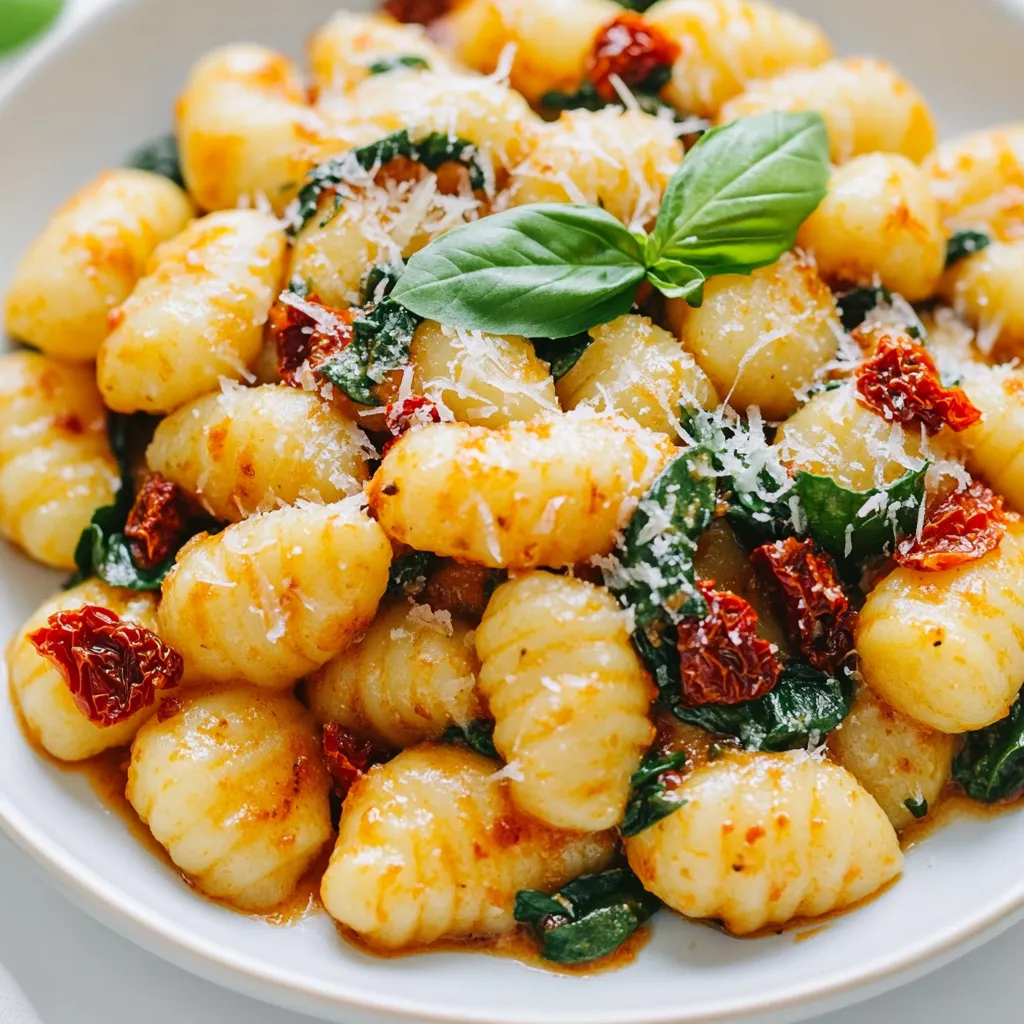
Creamy Sun-Dried Tomato Gnocchi Flavorful Delight
Are you ready to take your pasta night to a whole new level? This creamy sun-dried tomato gnocchi will wow your taste buds and impress
![- 4 boneless, skinless chicken breasts - 1 can (10.5 oz) cream of chicken soup - 1 cup sour cream - 1 cup shredded cheddar cheese - 1 cup fresh or frozen broccoli florets - 1 teaspoon garlic powder - 1 teaspoon onion powder - 1 tablespoon olive oil - Salt and pepper to taste - 1 cup seasoned breadcrumbs - If you want to switch the cream of chicken soup, use mushroom or vegetable soup. - For a lighter dish, choose low-fat sour cream or Greek yogurt. - You can swap cheddar cheese for mozzarella or pepper jack for a kick. - A 9x13-inch baking dish is perfect for this recipe. - Use measuring cups and spoons for accuracy. - Mixing bowls help combine your ingredients well. This dish is simple yet tasty. You will love how easy it is to prepare. Check out the Full Recipe for more details. - Preheat your oven to 375°F (190°C). This ensures even cooking. - Grease a 9x13-inch baking dish with cooking spray or olive oil. This helps prevent sticking. - In a large bowl, mix one can of cream of chicken soup and one cup of sour cream. Stir until smooth. - Add one teaspoon of garlic powder and one teaspoon of onion powder. Season with salt and pepper to taste. Mix well to blend all flavors. - Place the four boneless, skinless chicken breasts in a single layer in the greased dish. Drizzle one tablespoon of olive oil over the chicken. - Season the chicken with salt and pepper on both sides for great flavor. - Pour the creamy soup mixture over the chicken. Make sure each piece is well-coated. - Spread one cup of broccoli florets evenly on top of the creamy layer. - Add one cup of shredded cheddar cheese on top of the broccoli. Then, sprinkle one cup of seasoned breadcrumbs for a crispy finish. - Cover the dish tightly with aluminum foil to keep moisture in. Bake for 30 minutes. - After 30 minutes, remove the foil. Bake for an additional 15-20 minutes. Check that the chicken reaches 165°F for safety. - Once done, let the dish rest for 5 minutes before serving. This helps keep the chicken juicy. For the full recipe, check the section above. To check for doneness, use a meat thermometer. Insert it into the thickest part of the chicken. The safe internal temperature is 165°F. If you don’t have a thermometer, cut the chicken open. The meat should be white and the juices clear. To avoid dryness, coat the chicken well with the creamy soup. This keeps the meat moist while it bakes. Also, cover the dish with aluminum foil for the first 30 minutes. This traps steam and helps the chicken cook evenly. You can enhance the flavor with herbs and spices. Try adding dried thyme or rosemary for a nice touch. Fresh herbs work well too, like parsley or basil. A dash of paprika can add warmth and depth. Incorporating vegetables boosts taste and nutrition. Sliced carrots or bell peppers mix well with broccoli. You can also add mushrooms for earthiness. This adds color and makes the dish even more appealing. For serving, you can dish it straight from the baking dish. This gives a homey feel. Pair it with steamed rice or fresh bread to soak up the sauce. Garnishing adds visual appeal. Sprinkle chopped parsley on top for a pop of color. You can also add a slice of lemon for brightness. This makes the dish look fresh and inviting. For the full recipe, check [Full Recipe]. {{image_4}} You can easily change the flavor of baked chicken. For a Mexican twist, add taco seasoning and diced green chilies to the cream of chicken soup. Top it with pepper jack cheese for a spicy kick. Serve it with warm tortillas or rice for a complete meal. For an Italian twist, swap the cream of chicken soup with marinara sauce. Layer fresh basil leaves and sliced tomatoes on top before baking. This adds a fresh taste that pairs well with mozzarella cheese. If you want a meat-free option, use plant-based meat. Substitute chicken with products like Beyond Meat or Impossible Chicken. These options taste great and keep the creamy texture. You can also use tofu or seitan. Press the tofu to remove excess water, then cut it into cubes. Marinate it in your favorite sauce before mixing it with the creamy soup. This method adds flavor and keeps the dish satisfying. For gluten-free options, look for certified gluten-free breadcrumbs. You can also make your own by blending gluten-free bread. This keeps the crispy topping while making it suitable for gluten-sensitive diets. If you need a dairy-free version, use coconut cream instead of sour cream. There are many dairy-free cheese options available, too. They melt well and still give you that cheesy flavor you love. To keep your baked chicken fresh, follow these tips: - Refrigeration: Place leftover chicken in an airtight container. This helps avoid drying out. Store it in the fridge for up to three days. - Freezing: For longer storage, freeze the chicken. Use a freezer-safe container or bag. Make sure to remove as much air as possible. This helps prevent freezer burn. To enjoy your chicken again, you can reheat it in a few ways: - Oven method: Preheat your oven to 350°F (175°C). Place the chicken in a baking dish, cover it with foil, and heat for about 20 minutes. This keeps the moisture in. - Microwave method: Place a piece of chicken on a microwave-safe plate. Cover it with a damp paper towel. Heat for 1-2 minutes, checking often to avoid drying it out. Wondering how long your chicken lasts? - Fridge: Baked chicken can stay good for three days. After that, it may not taste as fresh. - Freezer: If you freeze it, the chicken lasts for up to three months. For best flavor, enjoy it sooner rather than later. You can pair baked chicken with many tasty sides. Here are some great options: - Steamed rice - Mashed potatoes - Roasted vegetables - Green salad - Garlic bread Each of these sides adds flavor and texture. They also soak up the creamy sauce well, making every bite more enjoyable. Yes, you can prep this dish ahead of time. Here are some tips for meal prepping: - Prepare the dish up to the point of baking. - Cover it tightly with plastic wrap or foil and store it in the fridge. - You can also freeze it if you won’t bake it within two days. - For frozen dishes, allow it to thaw overnight in the fridge before baking. This way, you can enjoy a delicious meal with less hassle on busy days. To keep your chicken juicy, follow these techniques: - Start with high-quality chicken breasts. - Don’t overbake; use a meat thermometer to check for 165°F. - Cover the dish with foil for the first half of baking. - Let the chicken rest for a few minutes after baking. These steps help lock in moisture and flavor, giving you a succulent meal every time. This blog post guides you through cooking a delicious baked chicken dish. We covered ingredients, cooking tools, and step-by-step instructions. You learned about flavoring, variations, and how to store leftovers. To make this meal even more enjoyable, explore the many flavors and substitutes. Cooking is all about creativity. So, don’t hesitate to try new ideas. You can impress anyone with this simple yet tasty recipe! Happy cooking!](https://tossedflavors.com/wp-content/uploads/2025/07/cc364195-a51b-44d2-99bd-2a3a17f43e40.webp)
Best Baked Chicken with Cream of Chicken Soup Dish
Are you ready to elevate your dinner game? This Best Baked Chicken with Cream of Chicken Soup dish is a game-changer. Imagine juicy chicken breasts
![To make Cheesy Garlicky Zucchini Steaks, you need a few simple ingredients. These will create a flavorful dish that you will love. Here’s what you need: - 2 medium zucchinis - 4 cloves of garlic, minced - 1 cup shredded mozzarella cheese - ½ cup grated Parmesan cheese - 2 tablespoons olive oil - 1 teaspoon Italian seasoning - Salt and black pepper to taste - Fresh parsley, finely chopped (for garnish) Using fresh ingredients is key. Zucchinis should feel firm and look bright. Garlic adds a nice kick, while the cheeses bring creaminess and flavor. The Italian seasoning gives your dish an aromatic touch. A sprinkle of fresh parsley at the end brightens the meal. This is a great recipe for anyone looking to impress friends or family. You can find the full recipe in the section above. Enjoy your cooking! 1. Preheat the oven and prepare zucchini Start by preheating your oven to 400°F (200°C). This heat will make your zucchini steaks cook just right. Next, wash the zucchinis under cold water. Cut each zucchini lengthwise into thick steaks. Aim for about ½ inch thick. This thickness helps them cook evenly. 2. Make the garlic marinade In a big bowl, mix 4 minced garlic cloves, 2 tablespoons of olive oil, 1 teaspoon of Italian seasoning, salt, and black pepper. Stir until it is well combined. This garlic marinade gives the zucchini a great flavor. 3. Coat the zucchini steaks Now, add the zucchini steaks to the bowl. Make sure each steak gets coated in that tasty garlic mix. You can use a brush or just your hands to cover both sides. Let the zucchini sit in the marinade for about 10 minutes. This step helps the flavors soak in. 1. Arrange zucchini on a baking sheet Line a baking sheet with parchment paper. This makes cleaning up easy. Place the marinated zucchini steaks on the sheet in a single layer. Leave some space between each steak for even baking. 2. Add cheese and bake to perfection Sprinkle 1 cup of shredded mozzarella cheese and ½ cup of grated Parmesan cheese over each zucchini steak. Make sure each piece is well-covered. Then, pop the baking sheet into your preheated oven. Bake for 15-20 minutes. Keep an eye on them until the cheese is bubbly and golden. 3. Cooling down time Once they are cooked, carefully take the baking sheet out of the oven. Let the zucchini steaks cool for a few minutes before serving. This cooling time helps the cheese set a bit. Enjoy your cheesy garlicky zucchini steaks! You can find the Full Recipe for more details. How to maximize garlic flavor To bring out the best garlic taste, use fresh garlic cloves. Mince them finely to release more oils. Let the minced garlic sit for a few minutes before mixing it with the olive oil. This step helps enhance the garlic's aroma and flavor. Cheese selection tips Choose cheeses that melt well. Mozzarella brings gooeyness, while Parmesan adds a salty kick. Mixing these cheeses creates a nice balance. You can also try adding aged Gouda or Fontina for a richer flavor. Baking vs. grilling zucchini steaks Baking is simple and keeps the moisture in. Grilling adds a smoky touch and appealing grill marks. If you grill, use medium heat and watch closely to avoid burning. Both methods yield tasty results, so choose your favorite! Achieving optimal texture Aim for zucchini steaks about ½ inch thick. This thickness keeps them tender while preventing mushiness. When baking, don't overcrowd the pan; give them space to roast properly. If grilling, flip them gently to keep their shape intact. For the full recipe, check out the detailed instructions above. Enjoy your cooking adventure! {{image_4}} You can easily change the cheese in this recipe. If you like a strong flavor, try sharp cheddar or gouda. For a creamy touch, use fontina or goat cheese. Mixing cheeses adds depth to the dish. You can also add spices or herbs for extra flavor. Try red pepper flakes for heat, or smoked paprika for a twist. Fresh basil or thyme can brighten the taste. These swaps let you customize your cheesy garlicky zucchini steaks. Zucchini pairs well with other summer veggies. You can add bell peppers, tomatoes, or eggplant. Slice them thin and roast alongside the zucchini. This mix adds color and flavor. As fall comes, consider using squash. Butternut or acorn squash works great. Slice them thick and follow the same steps. This change gives you a warm, hearty dish that fits the season. For the full recipe, check out the [Full Recipe]. To keep your Cheesy Garlicky Zucchini Steaks fresh, use proper containers. Glass or BPA-free plastic containers work well. Make sure to let the zucchini cool before storing. This helps prevent sogginess. Place a paper towel inside the container to absorb moisture. Seal the container tightly and store it in the fridge. Enjoy your leftovers within three days for the best taste. If you want to freeze the zucchini steaks, it's easy! First, let them cool completely. Then, wrap each steak in plastic wrap. Place them in a freezer-safe bag or container. This helps prevent freezer burn. You can freeze them for up to three months. When reheating, avoid mushy zucchini. Use the oven to keep them crispy. Preheat your oven to 350°F (175°C). Place the zucchini on a baking sheet and heat for about 10 minutes. This way, the cheese melts and the zucchini stays firm. You can also reheat them in a skillet. Heat a little olive oil over medium heat. Add the zucchini steaks and cook for about 3-4 minutes. Flip them to warm evenly. This method helps maintain their crispiness. For more details, check the Full Recipe. - Can I make Cheesy Garlicky Zucchini Steaks ahead of time? Yes, you can prepare the zucchini steaks ahead. Just marinate and store them in the fridge. Bake them when you are ready to serve. - What pairs well with cheesy zucchini steaks? These steaks go well with a light salad, grilled chicken, or rice. You can also serve them with a tangy dipping sauce. - Are there vegan options for this recipe? Absolutely! You can use vegan cheese instead of mozzarella and Parmesan. Make sure to check the labels for dairy-free options. - Why is my zucchini too watery? Zucchini can be watery if it’s overcooked. Ensure you slice them evenly and remove excess moisture with a paper towel before baking. - How to know when the zucchini steaks are done? The zucchini steaks are done when they are tender and the cheese is bubbly and golden. You can test with a fork; it should go in easily. You learned how to make cheesy garlicky zucchini steaks from fresh ingredients. We covered preparation, baking, and tips to enhance flavor. You can adapt the dish with seasonal veggies and different cheeses to suit your taste. Storing and reheating the leftovers plays a big role in keeping them tasty. Enjoy experimenting with this simple recipe, and remember, cooking is about having fun! Your culinary journey starts here, so get cooking and savor every bite!](https://tossedflavors.com/wp-content/uploads/2025/07/32330346-26a0-400b-9155-fc542da97d68.webp)
Cheesy Garlicky Zucchini Steaks Irresistible Recipe
Craving a dish that’s both delicious and easy to make? Let me introduce you to Cheesy Garlicky Zucchini Steaks! These tasty veggie steaks are packed
![To make a delicious corn and zucchini chowder, gather these fresh ingredients: - 2 cups fresh corn kernels (or substitute with frozen corn) - 2 medium zucchinis, diced into bite-sized pieces - 1 medium onion, finely chopped - 2 cloves garlic, minced - 3 medium potatoes, peeled and diced into cubes - 4 cups vegetable broth (homemade or store-bought) - 1 cup coconut milk (adds a rich creaminess) - 2 tablespoons olive oil - 1 teaspoon thyme (can use dried or fresh) - Salt and black pepper, to taste - Fresh parsley, chopped (for garnish) These ingredients create a hearty and tasty chowder that warms your soul. Fresh corn gives the chowder a bright flavor and crisp texture. If fresh corn is not available, frozen corn works well too. It retains the sweet taste and is easy to use. Just add it straight into the pot without thawing. Both options will make your chowder delicious. Personally, I prefer fresh corn when it’s in season for that extra burst of sweetness. You can easily swap out some ingredients based on what you have. Here are a few ideas: - Use yellow squash instead of zucchini for a different flavor. - Swap coconut milk for heavy cream or almond milk if you prefer. - For a protein boost, add cooked chicken or white beans. - If you don’t have thyme, try oregano or basil for a fresh twist. These substitutions can help you tailor the chowder to your taste or what you have at home. The recipe is flexible, so feel free to get creative! First, gather all your ingredients. You will need fresh corn, zucchini, onion, garlic, potatoes, vegetable broth, coconut milk, olive oil, thyme, salt, and pepper. Start by washing and chopping the vegetables. Dice the zucchini and onion, mince the garlic, and peel and cube the potatoes. This prep helps the cooking go smoothly. To cook the chowder, heat olive oil in a large pot over medium heat. Add the chopped onion first. Sauté it for about 5-7 minutes until it softens. Stir regularly to avoid burning. Next, add the minced garlic. Cook it just for a minute. This step builds a strong base for flavor. Then, add the diced potatoes. Pour in the vegetable broth and bring it to a boil. Once boiling, reduce the heat and let it simmer for about 10 minutes. You want the potatoes to be fork-tender. After that, stir in the corn and zucchini. Pour in the creamy coconut milk and add thyme. Season with salt and pepper. Let it simmer for another 10-15 minutes. The zucchini should be tender but still bright. For a creamier chowder, you can blend part of it. Use an immersion blender to blend a portion of the soup. This gives you a nice mix of smooth and chunky textures. If you don’t have an immersion blender, you can transfer a bit to a regular blender. Just be careful with the hot liquid. Stir the blended soup back into the pot. Taste it and adjust the seasoning if needed. Now, your Corn and Zucchini Chowder is ready to serve! For complete details, check out the Full Recipe. To make your Corn and Zucchini Chowder burst with flavor, I recommend a few simple tricks. Use fresh herbs like thyme or basil. Fresh herbs add a bright taste that dried herbs can't match. Adding a squeeze of lemon juice at the end enhances the flavors and adds freshness. A pinch of smoked paprika can give it a subtle warmth. If you enjoy a little heat, a dash of cayenne pepper can spice things up. One common mistake is overcooking the zucchini. Cook it just until it's tender. This keeps it vibrant and crunchy. Another mistake is not seasoning well. Taste as you cook and adjust the salt and pepper. Also, don’t skip blending part of the chowder. Blending adds a creamy texture. However, leave some chunks for a hearty feel. Lastly, use low-sodium broth if you’re watching your salt intake. Serve your chowder hot in warm bowls. Garnish with fresh parsley for color and taste. You can also drizzle a bit of coconut milk on top for extra creaminess. Pair it with crusty bread for a satisfying meal. A simple side salad can add freshness. If you want a fun twist, serve it in hollowed-out bread bowls. This makes for a great presentation and a tasty treat. For the full recipe, check out the [Full Recipe]. {{image_4}} You can easily make this chowder vegetarian or vegan. To do this, simply use vegetable broth instead of chicken broth. You already have coconut milk in the recipe. It adds a creamy texture without dairy. If you want more flavor, add nutritional yeast. This ingredient gives a cheesy taste without the cheese. If you want more protein, chicken, bacon, or tofu are great options. For chicken, use rotisserie chicken for ease. Just shred it and add it to the chowder while it simmers. Bacon adds a smoky flavor. Cook it first, then crumble it in before serving. If you prefer tofu, use firm tofu and sauté it until golden. It absorbs flavors well and adds a nice texture. You can make this chowder your own by adding spices. If you like heat, add red pepper flakes or diced jalapeños. For a more savory taste, try smoked paprika or cumin. Fresh herbs like basil or cilantro can also brighten the flavor. Experiment with these options to find your perfect combination. Each twist makes your chowder unique and exciting. For more ideas, check out the Full Recipe to discover how to make the most of this dish! To store leftover chowder, let it cool first. Use an airtight container for best results. Make sure to seal it tightly. Place it in the fridge. It will stay fresh for up to three days. When you are ready to eat, reheat the chowder on the stove. Use low to medium heat. Stir it often to prevent burning. If it is too thick, add a splash of vegetable broth or water. This keeps the texture creamy. You can also use a microwave. Heat in short bursts, stirring in between. You can freeze corn and zucchini chowder for future meals. First, cool it completely. Then, pour it into freezer-safe bags or containers. Leave some space at the top as it may expand. Label the bags with the date. It will keep for up to three months. When ready, thaw it in the fridge overnight before reheating. For best results, do not freeze garnishes like parsley. Enjoy a warm bowl of chowder anytime! For the full experience, try the Full Recipe. Yes, you can make this chowder ahead of time. It keeps well in the fridge for about three days. Just store it in an airtight container. When you are ready to eat, reheat it on the stove over low heat. Stir it often to keep it from sticking. If it seems too thick, add a bit of broth or water. This will help bring back its creamy texture. This chowder pairs well with many sides. Here are some ideas: - Crusty bread for dipping - A fresh side salad with greens - Grilled cheese sandwiches for a cozy touch - Cornbread for a sweet twist These options add flavor and texture to your meal. To make sure your chowder is creamy, use coconut milk. It adds richness and smoothness to the dish. Another tip is to blend a part of the chowder. Use an immersion blender to puree some of it. This creates a nice texture while keeping some chunky bits. Lastly, avoid cooking it too long after adding the coconut milk. This keeps it creamy and prevents separation. Corn and zucchini chowder is easy and fun to make. We covered all the ingredients, like fresh corn or substitutes. You learned how to prep, cook, and blend the chowder just right. With tips to boost flavor and avoid mistakes, you can serve it perfectly. Remember, you can customize it with proteins or spices. Lastly, proper storage and reheating keep your chowder tasty. Enjoy your chowder adventure!](https://tossedflavors.com/wp-content/uploads/2025/07/5899b623-22a4-4097-b688-5baf71485c96.webp)
Corn and Zucchini Chowder Hearty and Flavorful Recipe
Looking for a warm, hearty meal? My Corn and Zucchini Chowder is both flavorful and easy to make! This tasty recipe combines sweet corn and
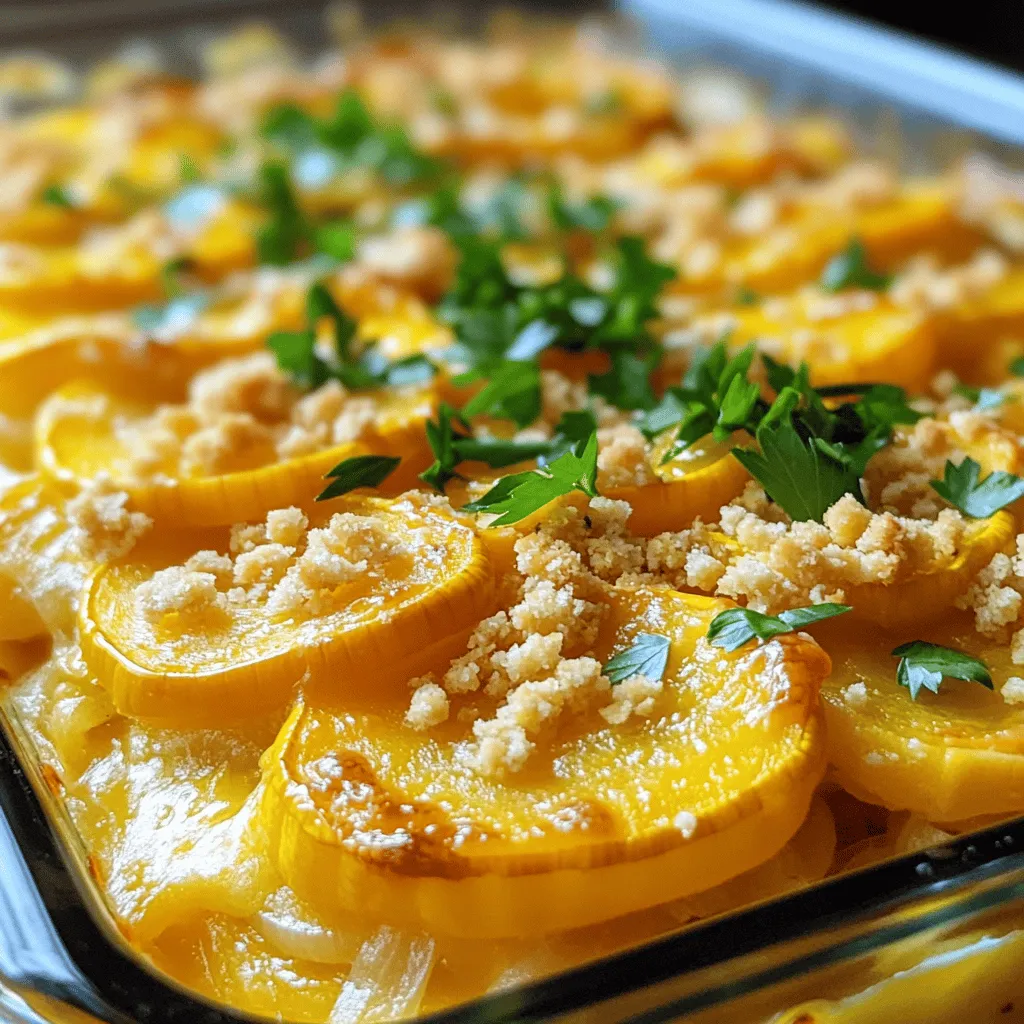
Trisha Yearwood’s Squash Casserole Simple and Flavorful
If you’re looking for a dish that packs a flavor punch without too much fuss, Trisha Yearwood’s Squash Casserole is the perfect choice. This simple

Keto Chicken Alfredo Bake Tasty and Simple Meal
Looking for a tasty meal that fits your keto diet? My Keto Chicken Alfredo Bake is both simple and satisfying. This dish combines tender chicken,
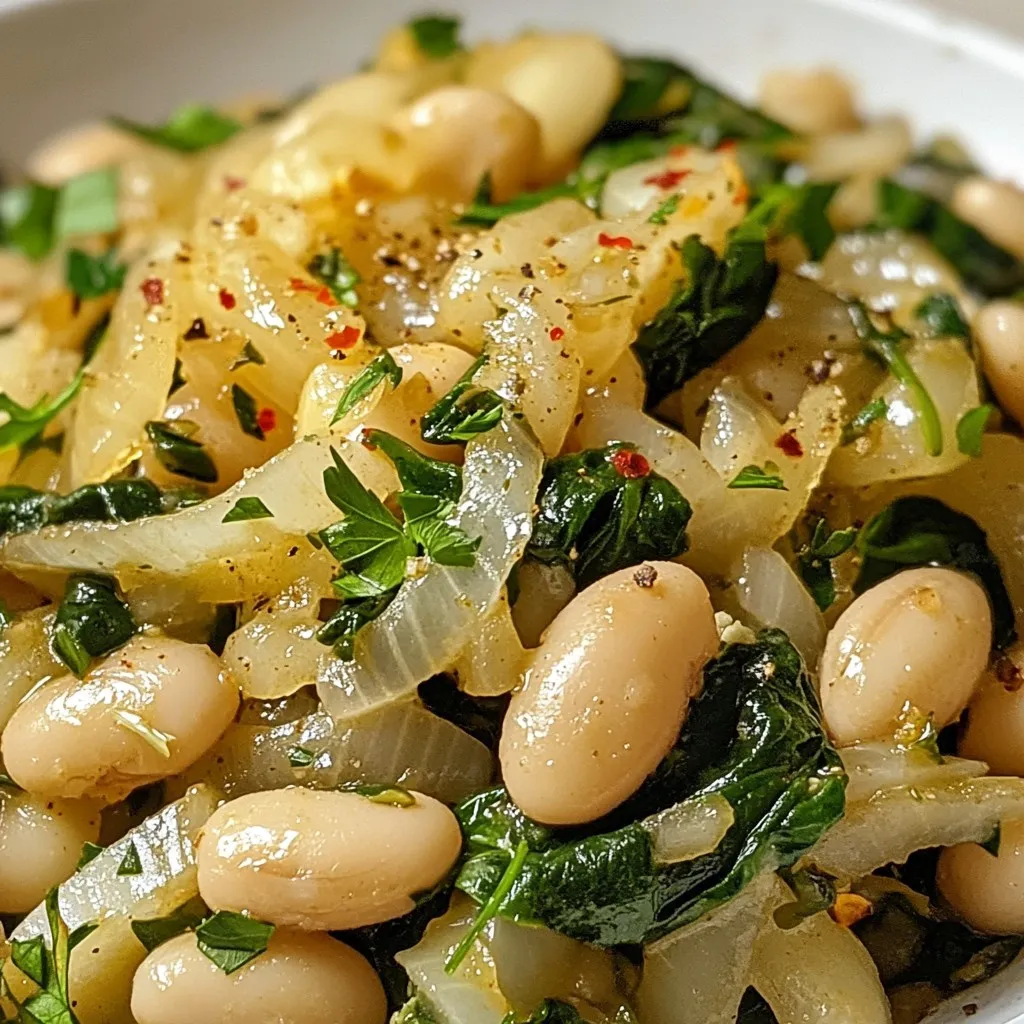
Marry Me White Bean and Spinach Skillet Delight
Looking to impress with a simple, tasty dish? The Marry Me White Bean and Spinach Skillet Delight is your answer! With creamy white beans and