Dinner
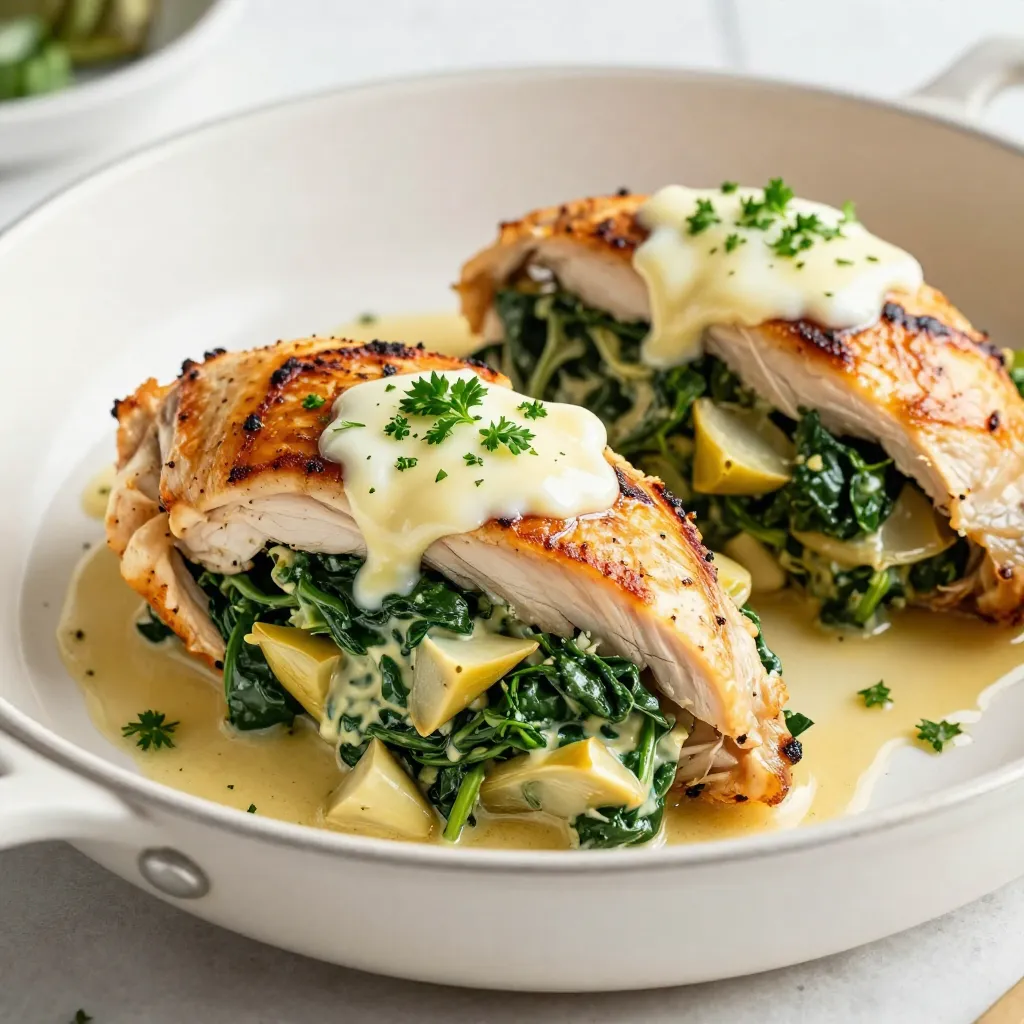
Spinach Artichoke Stuffed Chicken Flavorful Delight
Are you ready to impress at your next dinner? Spinach Artichoke Stuffed Chicken is a tasty dish that combines creamy flavors and a juicy chicken
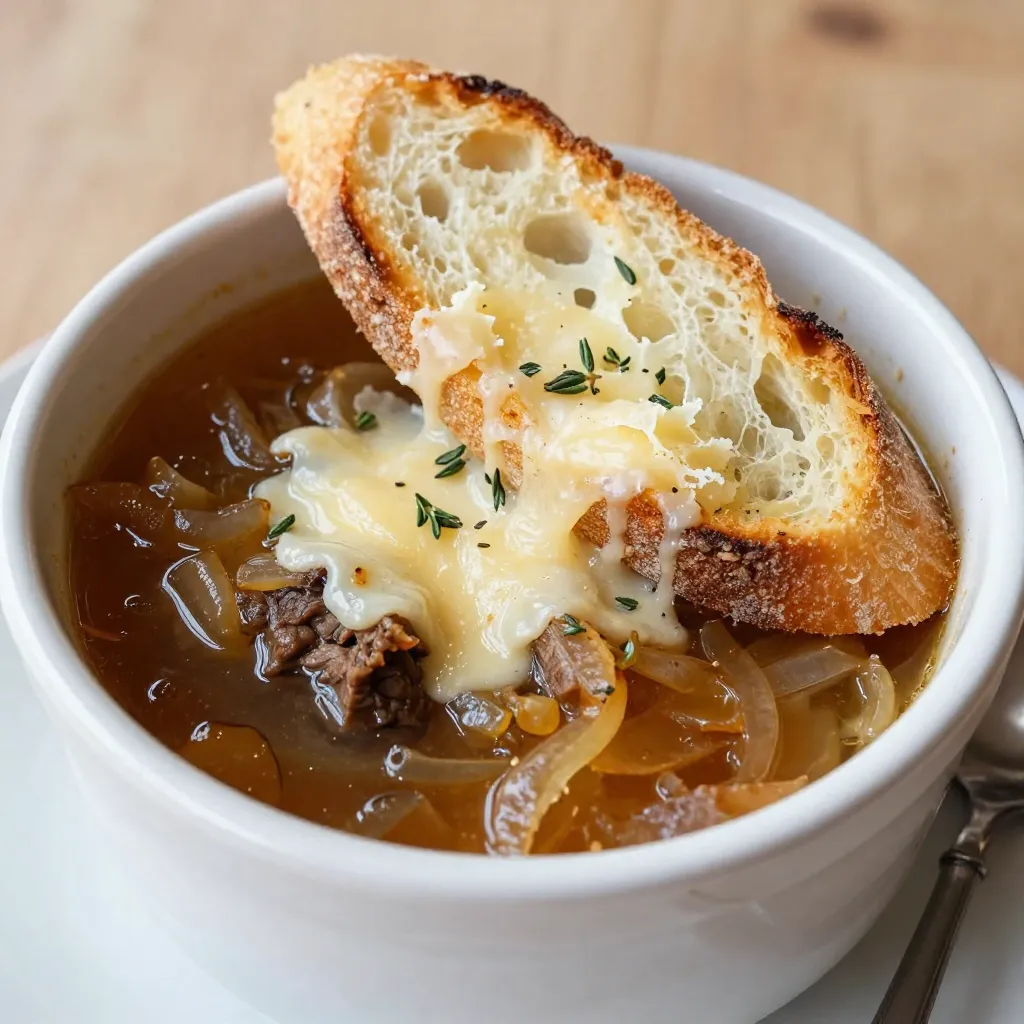
Classic French Onion Soup Irresistible Flavor Delight
Are you ready to savor the delightful taste of Classic French Onion Soup? This rich, warm dish combines sweet caramelized onions with savory broth and
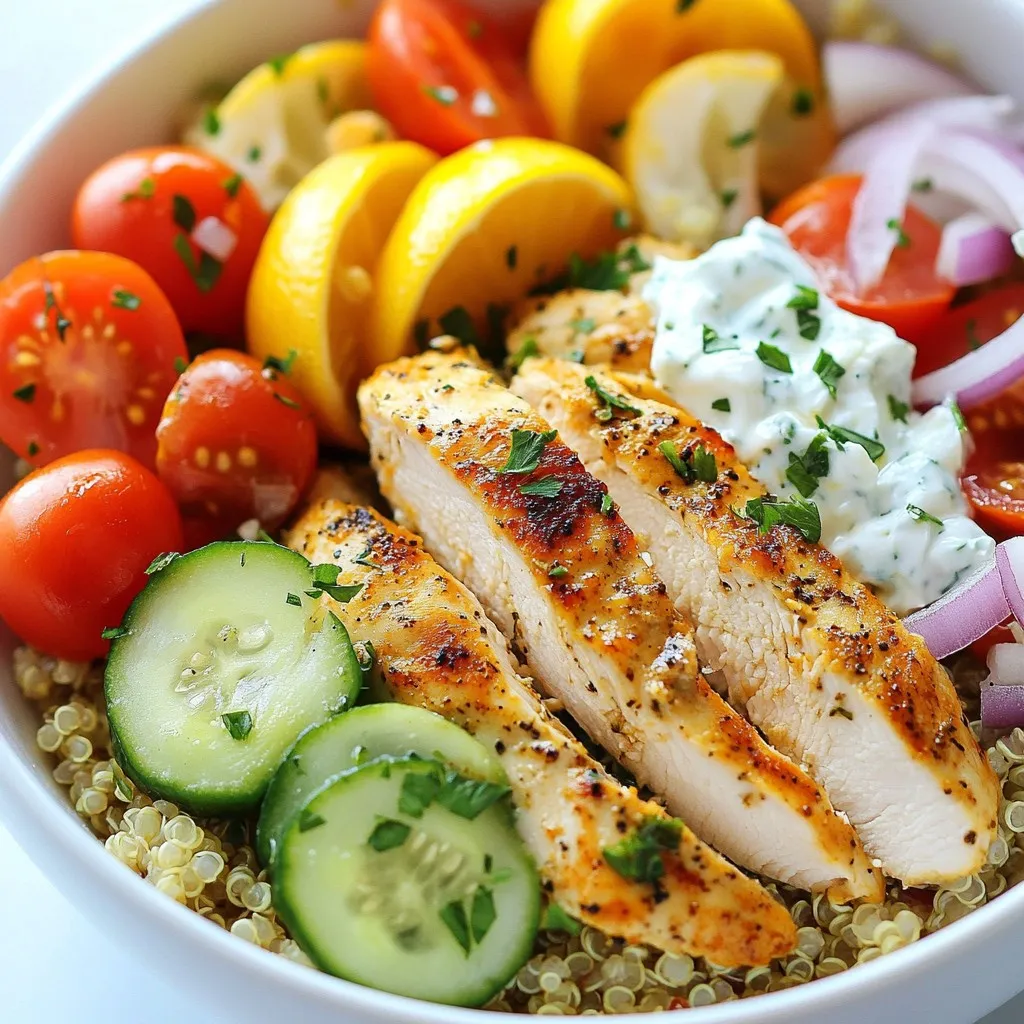
Greek Chicken Gyro Bowls Flavorful Meal Idea
Are you ready to spice up your dinner routine? Greek Chicken Gyro Bowls are a flavorful meal idea that packs a punch! With juicy chicken,
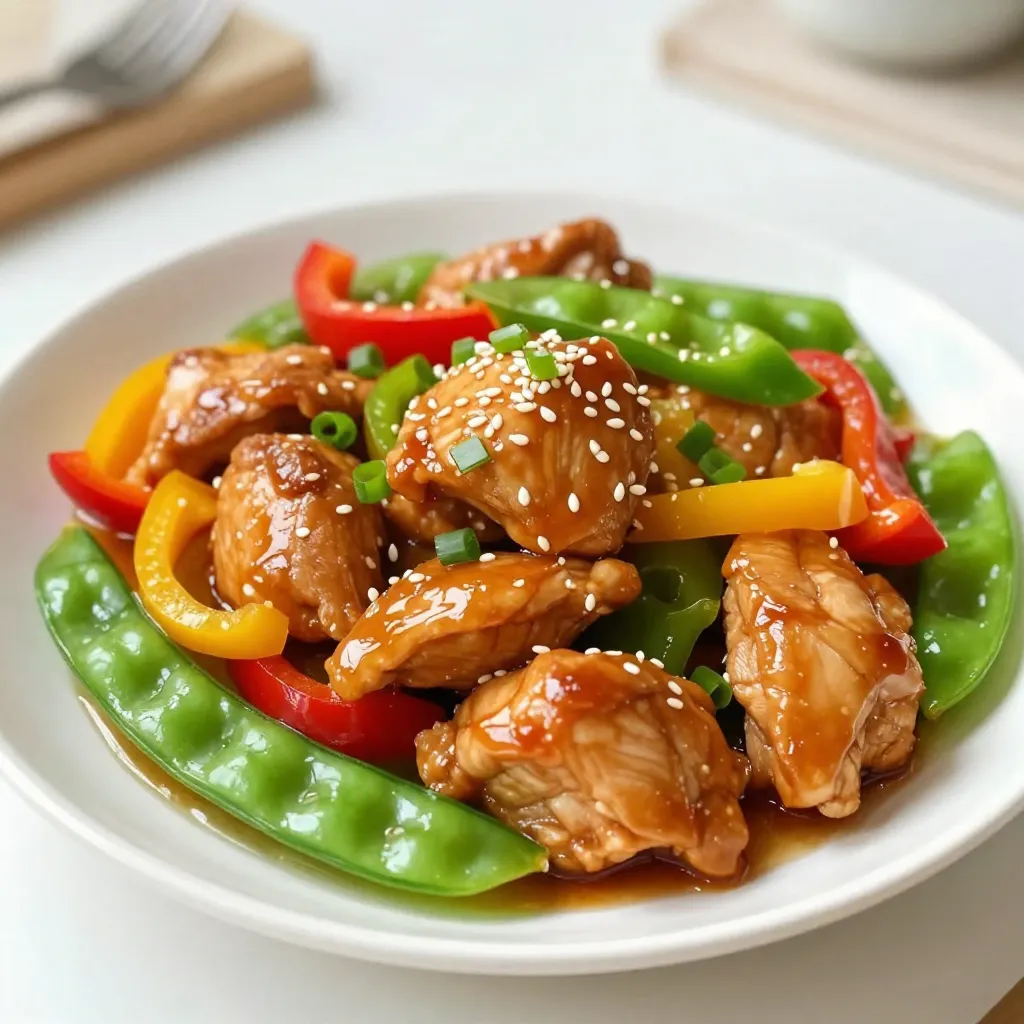
Honey Garlic Chicken Stir Fry Flavor-Packed Delight
Are you ready to elevate your weeknight dinners? This Honey Garlic Chicken Stir Fry is not just any meal—it’s a flavor-packed delight that’s easy to
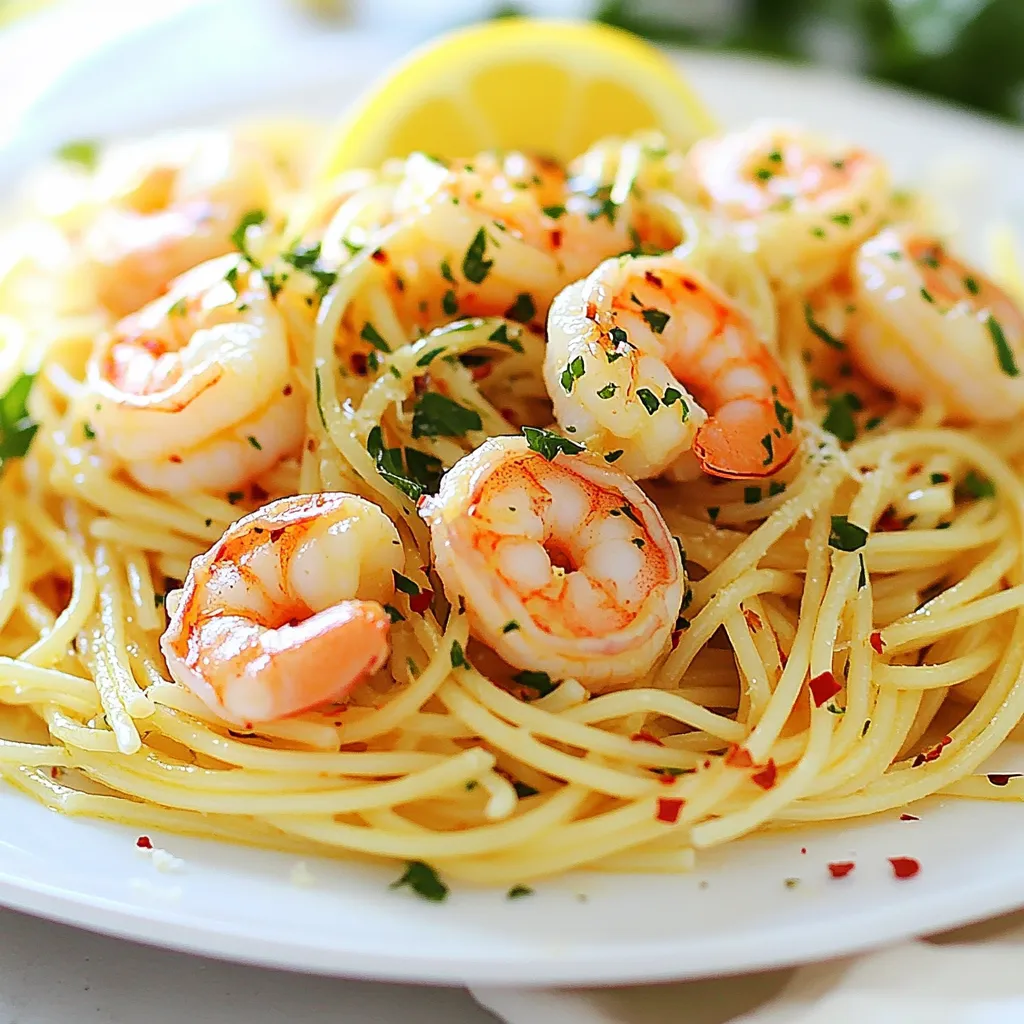
Lemon Garlic Shrimp Pasta Quick and Flavorful Dish
If you’re craving a bright, delicious meal that’s quick to make, you’ve found it! My Lemon Garlic Shrimp Pasta is packed with zesty flavors and
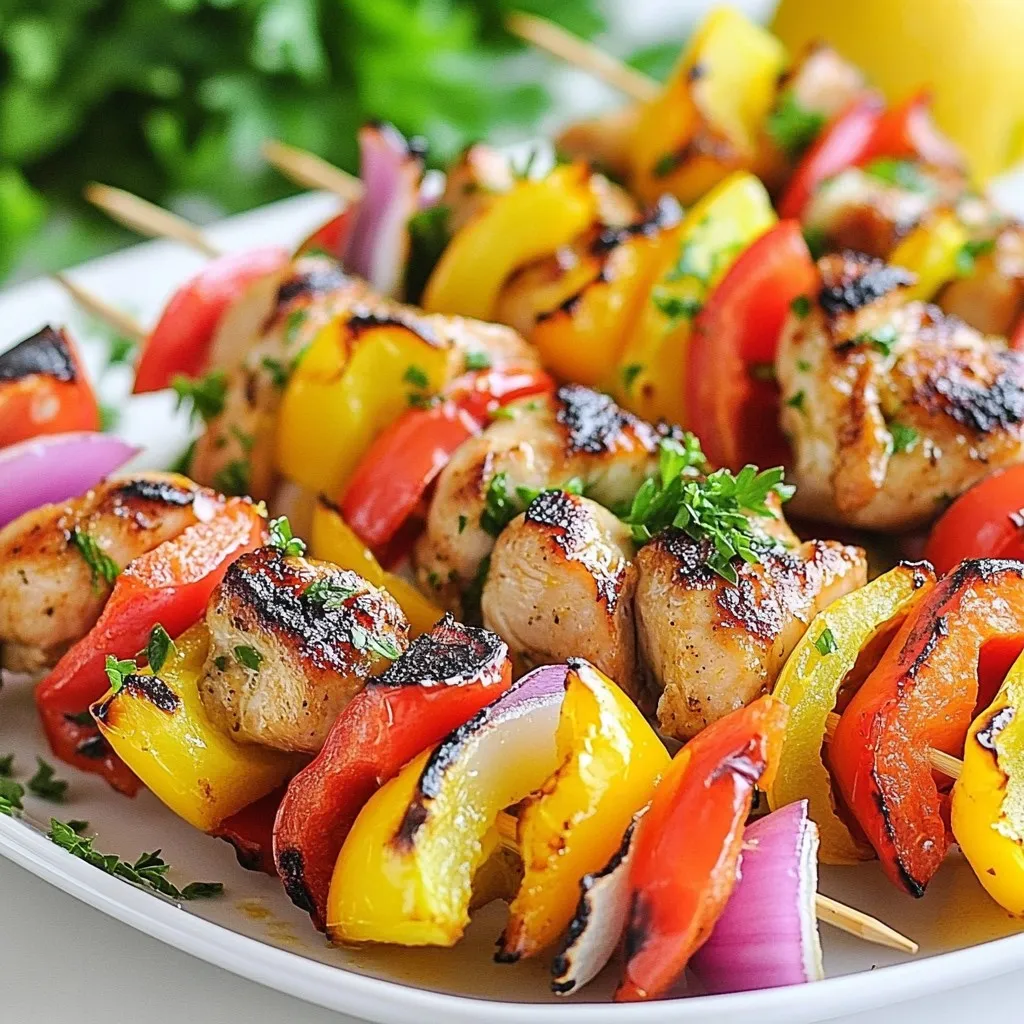
Greek Lemon Chicken Kebabs Tasty and Simple Recipe
Are you ready to take your grilling game to the next level? This Greek Lemon Chicken Kebab recipe is both tasty and simple. With juicy

Blackberry Sage Lemonade Refreshing Summer Drink
Looking for a cool drink to sip on this summer? Let me introduce you to Blackberry Sage Lemonade! This recipe combines tart blackberries and fragrant
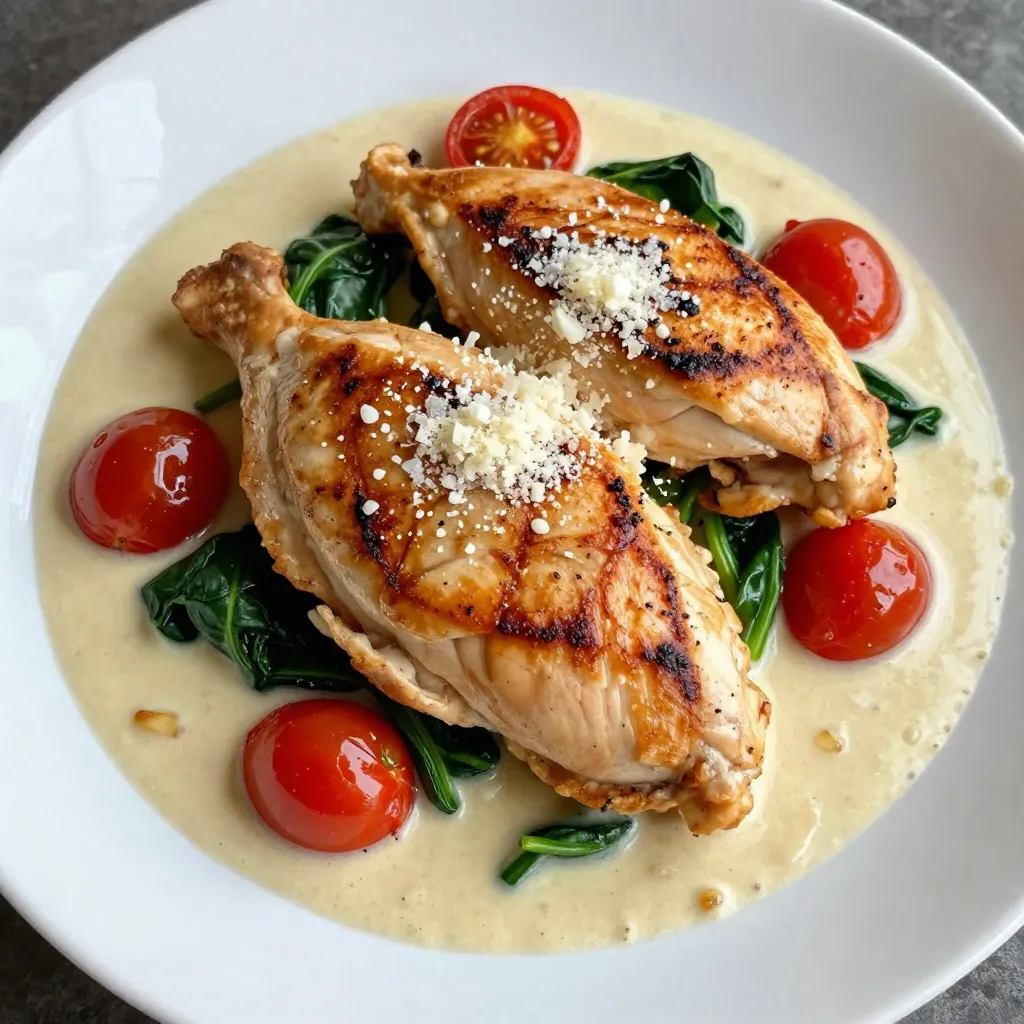
Creamy Garlic Tuscan Chicken Rich and Flavorful Meal
Get ready to savor a dish that’s rich and full of flavor! Creamy Garlic Tuscan Chicken is your new go-to meal. With a lush cream
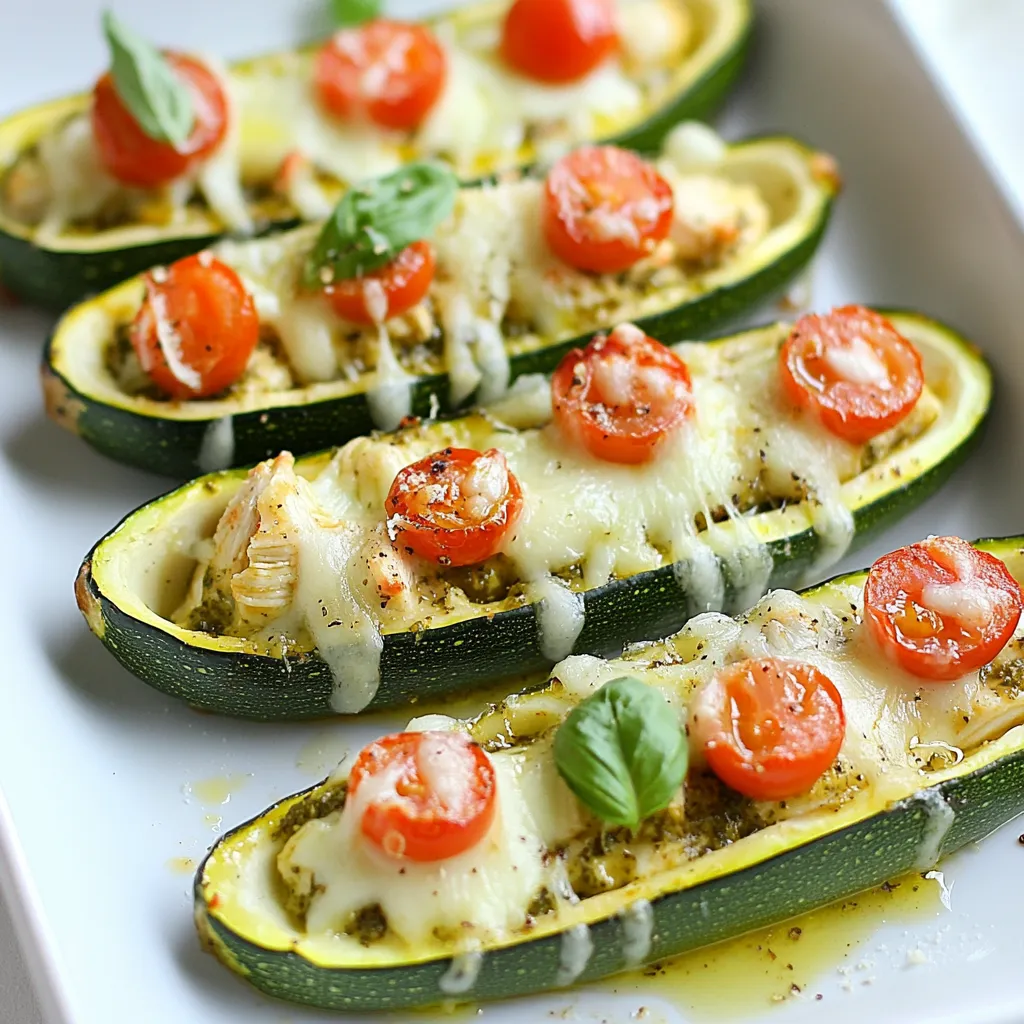
Pesto Chicken Zucchini Boats Flavorful and Easy Recipe
Looking for a fun, tasty meal that’s also healthy? You’ll love these Pesto Chicken Zucchini Boats! They blend fresh flavors and easy prep so you
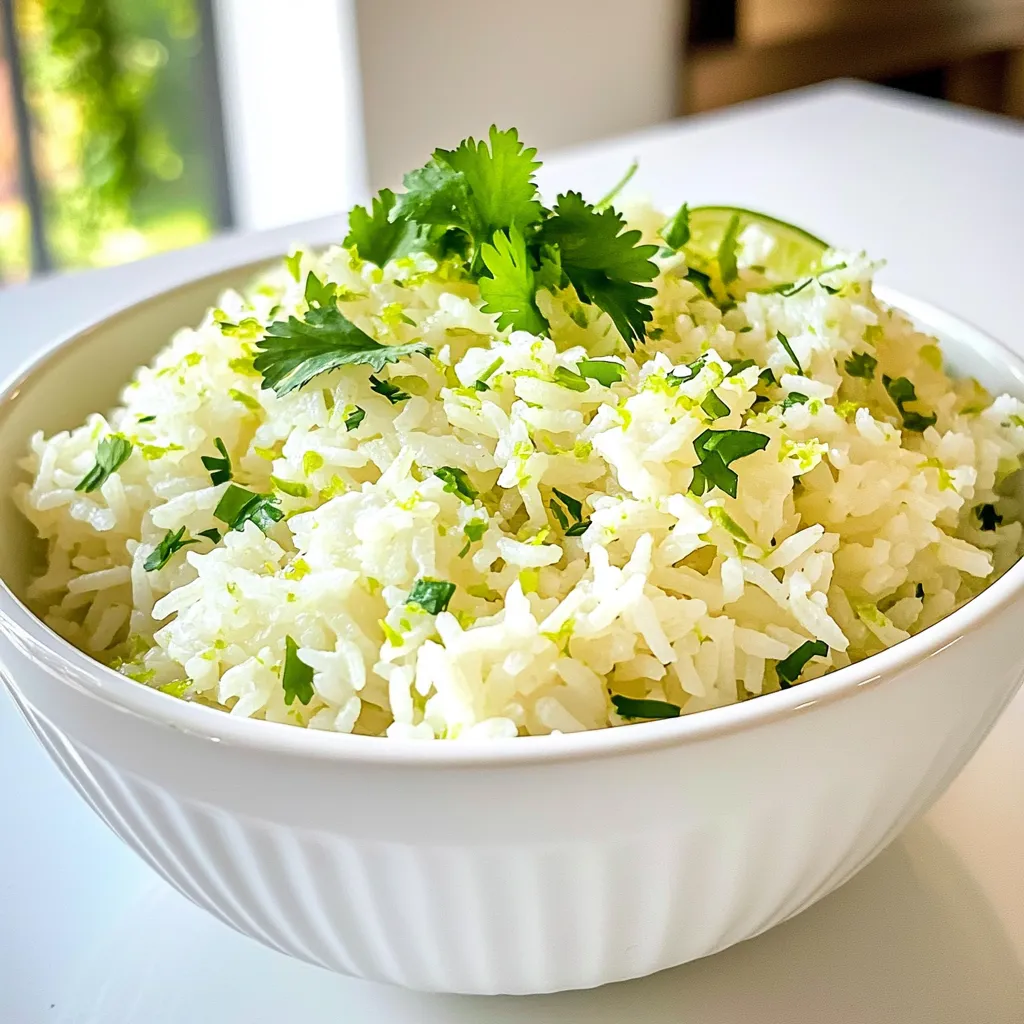
Coconut Lime Rice Simple and Flavorful Side Dish
If you’re looking for a simple yet vibrant side dish, look no further than Coconut Lime Rice. This easy recipe combines creamy coconut milk and