Desserts
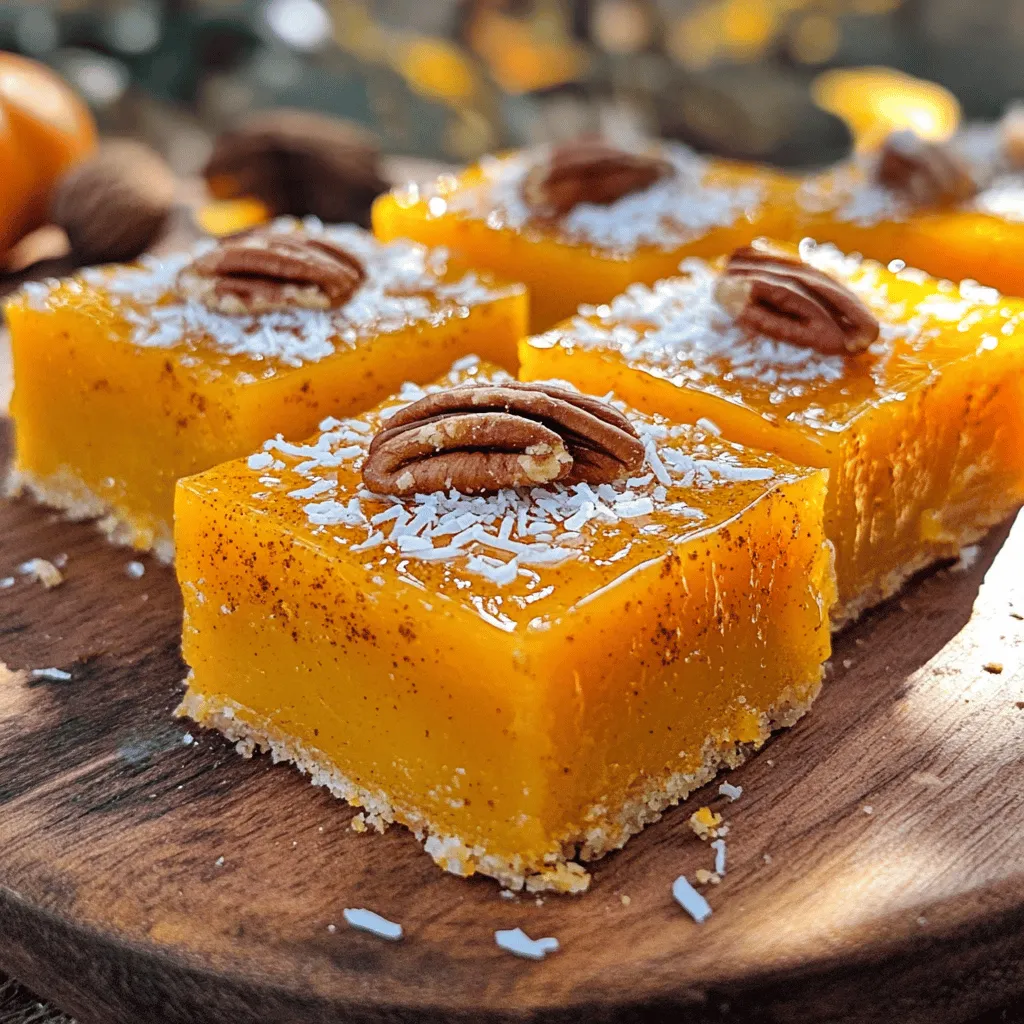
Candied Pumpkin Delight Irresistible Treat Recipe
Are you ready to treat your taste buds? This Candied Pumpkin Delight recipe will make you fall in love with pumpkin like never before. With
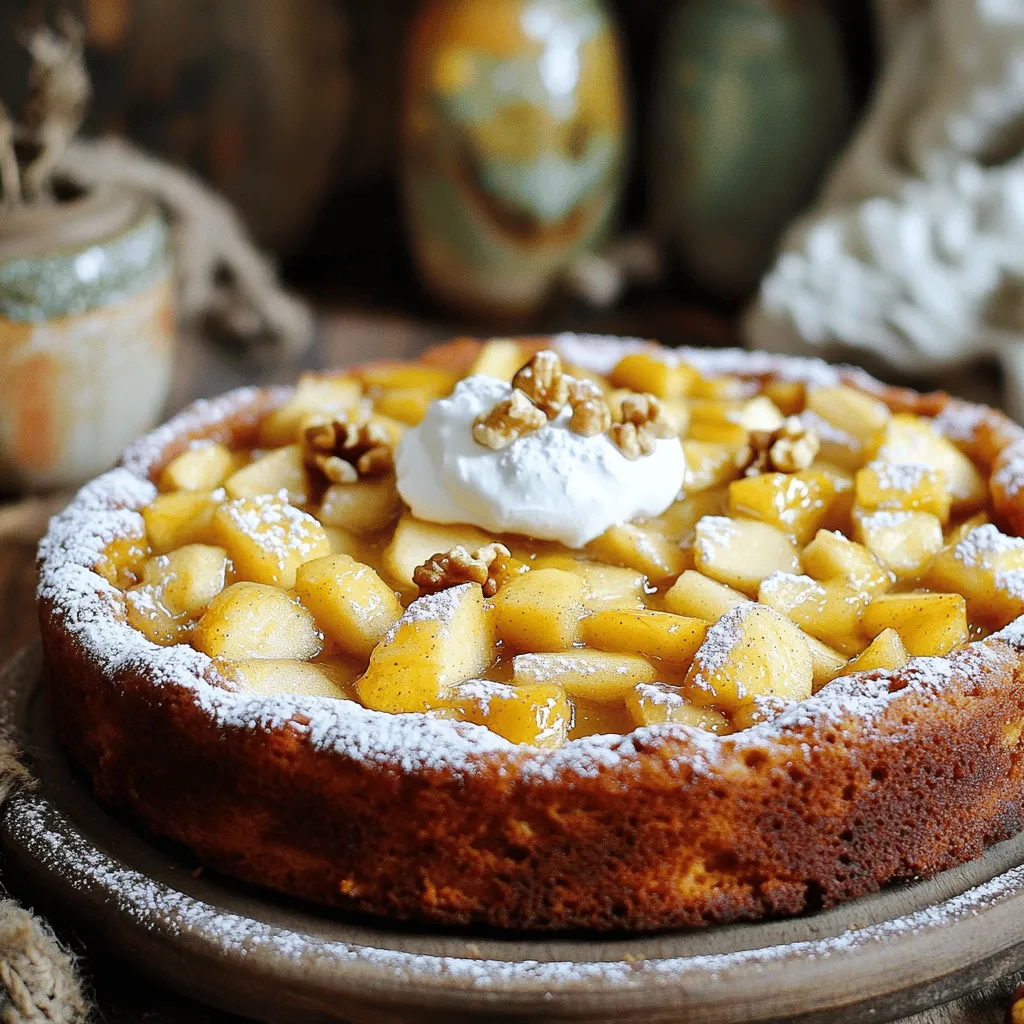
Flourless Apple Cake Flavorful and Easy Recipe
If you think baking a cake needs flour, think again! This Flourless Apple Cake recipe is a game changer. With just a few simple ingredients,
![- 4 large Granny Smith apples - 2 cups granulated sugar - 1/2 cup corn syrup - 1 cup water - 1 teaspoon pure vanilla extract - Green food coloring (optional) - Edible glitter or black sprinkles - Lollipop sticks or wooden skewers You can swap Granny Smith apples for other tart apples like Fuji or Honeycrisp. These will still give you a nice balance of sweet and tart. If you want to use a different sweetener, you can try using coconut sugar or brown sugar instead of granulated sugar. For corn syrup, you can use agave syrup or honey, but keep in mind that these will change the flavor a bit. Just make sure that whatever you choose is thick enough to coat the apples well. These substitutions can help you tailor the recipe to your taste or dietary needs. You can still make great poison apples with these swaps! Start by washing and drying the apples. This step is key to a good candy coat. You want to remove dirt and wax. Use a clean cloth to ensure they are dry. Next, insert a lollipop stick into the top of each apple. Push it in about halfway. This gives you a sturdy handle for dipping. In a medium-sized saucepan, combine the sugar, corn syrup, and water. Stir the mixture over medium heat. Keep stirring until the sugar fully dissolves. This step is very important. If the sugar does not dissolve, your candy will not coat well. Once the sugar dissolves, turn up the heat. Let the mixture boil without stirring. Use a candy thermometer to check the temperature. You need it to reach the hard crack stage, which is 300°F. This takes focus, so stay nearby and watch closely. When the candy reaches the right temperature, quickly remove it from heat. Dip each apple into the hot candy coating. Tilt the saucepan if needed to coat fully. Rotate the apple to let any extra candy drip off. While the coating is still warm, add edible glitter or black sprinkles. This gives a spooky look perfect for Halloween! For the complete recipe, refer to the [Full Recipe]. To have a smooth and shiny finish on your poison apples, it’s key to work fast. Once you dip the apples, let the excess drip off. Don’t shake them too much; a gentle turn works best. To avoid crystallization, make sure your pan is clean. Any leftover sugar can cause issues. Always use fresh sugar and stir only until dissolved. When you handle hot sugar syrup, always be careful. It can cause burns. Use thick oven mitts when touching the pot. Keep kids away from the cooking area. For candy thermometers, clip them to your pot. This helps keep them in place. Make sure the bulb is in the syrup, but not touching the pot. For a fun display, arrange your candy apples on a spooky platter. Add fake spider webs or plastic bugs for extra flair. You can also serve them with Halloween-themed snacks. Try some ghost-shaped cookies or pumpkin cupcakes. This makes your table look festive and inviting. Your guests will love the creepy, yet tasty, treats! {{image_4}} You can make your Halloween poison apples even more fun by adding flavors. Try using different extracts like almond or peppermint. A few drops will change the taste in a fun way. You can also add spices like cinnamon for a warm twist. This adds a cozy feel to your spooky treat. Just remember to balance flavors so each bite is tasty! Color is key for Halloween fun. You can use food coloring to create different looks. A few drops of red or purple can make the apples extra spooky. Don’t stop there! Experiment with different sprinkles or toppings. Black sprinkles add a gothic feel, while colorful ones can bring a playful side. Mix and match to find your favorite look! If you want to switch things up, try using other fruits. Pears or strawberries work great for candy coating. Smaller fruits can make cute, bite-sized treats. This way, kids can enjoy a sweet snack that fits their hands. Just remember to adjust the candy coating time as needed. Each fruit has its own moisture level, so keep an eye on it! Store your candy apples in a cool, dry place. Use a cake box or a container to keep them safe. Make sure they are not touching each other, so the candy coating stays nice. If it’s warm or humid, put them in the fridge. This helps keep the candy coating firm. You can keep candy apples for about 2 to 3 days. After that, they may not taste as good. Watch for signs of spoilage. If the apples look slimy or the candy coating feels sticky, it’s best to throw them away. Always check before eating! You can freeze candy apples, but they might not be as good later. To freeze, wrap each apple in plastic wrap. Then, place them in a freezer bag. When you want to eat them, take them out and let them thaw in the fridge overnight. This helps keep them from getting too mushy. Can I use a different type of apple? Yes, you can use other apples. Red delicious or Fuji apples work well. Granny Smith apples are tart, which makes them great for this recipe. Choose what you like best! Why is my candy coating not hardening? If the candy coating is not hardening, it might be due to a low temperature. The candy needs to reach 300°F for the hard crack stage. Ensure you use a candy thermometer to check the temperature accurately. How do I know when the candy reaches hard crack stage? You know the candy is at hard crack stage when it reaches 300°F. At this point, the candy should look clear and shiny. A simple test is to drop a bit into cold water. If it forms hard, brittle threads, it’s ready! What if I don’t have a candy thermometer? If you don’t have a candy thermometer, you can use the cold water test. Boil the sugar mixture and drop a bit into cold water. If it forms a hard ball that breaks when you touch it, you’ve reached the right stage! How to incorporate poison apples into a Halloween party? Set up a spooky dessert table with poison apples as the main attraction. Use black tablecloths and add creepy decorations like fake spiders. You can even label them with fun names like "Witch's Treats." Suggestions for themes or pairings for serving guests Pair poison apples with other fun treats, like ghost cupcakes or bat-shaped cookies. You can create a haunted theme with dark colors and eerie sounds. This will make your party memorable and fun! To wrap up, we covered everything you need to create great candy apples. You learned about essential ingredients, tips for preparation, and even fun variations. Remember, the key is to monitor your candy's temperature and enjoy the process. Get creative with colors and toppings to make your treats extra special. With these handy tips, you can impress everyone at your next Halloween party. Enjoy making your spooky candy apples!](https://tossedflavors.com/wp-content/uploads/2025/07/7e1c62c8-34e3-47f8-883f-8e6c825dde42.webp)
Halloween Poison Apples Recipe Spooky Treat Delight
Get ready to treat your taste buds with a spooky twist! My Halloween Poison Apples Recipe is not just a snack; it’s a showstopper for

Country Apple Fritter Bread Delightful and Easy Recipe
Are you ready to dive into a deliciously simple treat? My Country Apple Fritter Bread recipe combines soft, fluffy bread with sweet, tender apples. You’ll
![- 2 cups all-purpose flour, plus additional for dusting - 1/2 cup granulated sugar - 1 packet (2 1/4 teaspoons) active dry yeast - 1/2 teaspoon fine sea salt - 1/2 cup whole milk, warmed - 3 tablespoons unsalted butter, melted - 1 large egg, at room temperature - 1 teaspoon pure vanilla extract - 2 medium apples, peeled and diced - 1 tablespoon ground cinnamon - 1/4 cup packed brown sugar - 1/2 cup chopped pecans or walnuts (optional) - 1/4 cup caramel sauce You can use instant yeast instead of active dry yeast. Just mix it with the dry ingredients. If you want a sweeter taste, try using Fuji or Honeycrisp apples. They add a nice flavor! If you need a non-dairy option, almond or oat milk works great in this recipe. Just warm it like you would regular milk. These substitutions keep your sticky buns tasty and fun! For the full recipe, check out the [Full Recipe]. 1. Activating the yeast mixture: Start by combining warm milk and active dry yeast in a small bowl. Stir gently and let it sit for 5-10 minutes. You want it to get frothy. This shows the yeast is active. 2. Creating the dough: In a large bowl, whisk together all-purpose flour, granulated sugar, and sea salt. Make a well in the center. Pour in melted butter, the egg, vanilla extract, and the frothy yeast mixture. 3. Kneading and first rise: Mix until a soft dough forms. Transfer it to a floured surface. Knead the dough for about 5-7 minutes until it feels smooth. Place the dough in a greased bowl. Cover it with a towel and let it rise in a warm place for about 1 hour. It should double in size. 1. Preparing the apple filling: While the dough is rising, prepare the filling. In a bowl, mix diced apples, brown sugar, and ground cinnamon. If you like, add chopped nuts. Stir until all ingredients are well mixed. 2. Spreading the filling on the dough: After the dough has risen, punch it down gently. Roll it out on a floured surface into a rectangle, about 12x18 inches. Evenly spread the apple filling over the dough, covering it completely. 1. Rolling the dough: Starting from the longer side, tightly roll the dough into a log. Pinch the edges to seal it well. 2. Slicing the sticky buns: Using a sharp knife, cut the log into 1-inch thick pieces. You should have around 12 sticky buns. 1. Second rise time and preheating the oven: Grease a baking dish and drizzle caramel sauce at the bottom. Place the sliced buns in the dish with cut sides up. Cover with a towel and let them rise for 30 minutes. Meanwhile, preheat your oven to 350°F (175°C). 2. Baking instructions and checking doneness: Bake the sticky buns for 25-30 minutes. They should be golden brown and puffed. Remove them and drizzle with more caramel sauce while warm. Enjoy the warm, sweet smell filling your kitchen. For the full recipe, refer to the original document. To make the best apple cinnamon sticky buns, focus on the dough. The ideal texture is soft and slightly sticky. You want to knead the dough until it is smooth and elastic. This usually takes about 5 to 7 minutes. If it sticks to your hands, add a little more flour, but don’t overdo it. The apple filling is just as important. Use tart apples like Granny Smith. They balance the sweetness of the sugar and cinnamon. Dice them small so they cook evenly. Mix the apples with brown sugar and cinnamon for a rich flavor. You can add chopped nuts for a nice crunch. A common mistake is over-kneading the dough. This makes it tough. Knead just until smooth and elastic. Watch your time to avoid this pitfall. Another mistake is using the wrong type of apples. Sweet apples can turn mushy during baking. Stick to tart varieties to keep the filling firm and flavorful. For drinks, consider pairing these sticky buns with coffee or hot cider. They both enhance the warm flavors of apple and cinnamon. When serving, place the buns on a decorative platter. Drizzle them with caramel sauce. Sprinkle some chopped nuts on top for flair. For a treat, add whipped cream or vanilla ice cream. This makes every bite a delight! For the full recipe, refer back to the main section. Enjoy your baking! {{image_4}} You can change the taste of your sticky buns by adding spices like nutmeg or ginger. These spices give a warm flavor that pairs well with apples. You might also try adding dried fruits, like raisins or cranberries. Nuts add crunch, too. Pecans or walnuts work great, but feel free to use your favorites. If you need a gluten-free version, use gluten-free flour. Make sure it has xanthan gum for the right texture. For a vegan adaptation, swap the egg with a flaxseed meal. Use plant-based milk and vegan butter too. These changes keep the sticky buns tasty while meeting your diet needs. You can mix in flavors for the seasons. In fall, add pumpkin puree to the dough for a cozy taste. During the holidays, try using spices like cardamom or cloves to make them festive. These twists keep the recipe fresh and exciting all year round. For the full recipe, check out the detailed instructions. To keep your sticky buns fresh, store them in an airtight container. Make sure they cool completely before sealing. This step helps avoid sogginess. You can refrigerate them for up to four days. When ready to enjoy, reheat them in the oven or microwave. For the oven, wrap them in foil and heat at 350°F (175°C) for about 10 minutes. If using a microwave, heat for 20-30 seconds. Check to ensure they are warm throughout. You can freeze your sticky buns for later enjoyment. If you freeze before baking, wrap each bun tightly in plastic wrap. Place them in a freezer-safe bag or container. They can last up to three months in the freezer. For baking, thaw them overnight in the fridge. When ready, let them rise for about 30 minutes before baking. If you choose to freeze baked buns, let them cool first. Then, wrap them well and store them in the freezer. To reheat, thaw them in the fridge overnight. Heat in the oven at 350°F (175°C) for about 15-20 minutes. This method helps keep them fluffy and tasty. For detailed steps, check the Full Recipe. To make Apple Cinnamon Sticky Buns from scratch, follow these steps: 1. Mix warm milk with yeast. Let it sit until frothy. 2. In a bowl, whisk flour, sugar, and salt. 3. Add melted butter, egg, vanilla, and yeast mix. 4. Stir until a soft dough forms. Knead it on a floured surface. 5. Let it rise until it doubles in size. 6. Prepare the apple filling with diced apples, brown sugar, and cinnamon. 7. Roll out the dough, spread the filling, and roll it up. 8. Slice into pieces and place in a greased baking dish. 9. Let them rise again, then bake until golden. 10. Drizzle with caramel sauce before serving. For the complete recipe, check out the Full Recipe. If you want to replace pecans, walnuts are great. They have a nice crunch and flavor. Almonds are another option. They add a different taste and texture. If nuts are not your thing, simply skip them. Your sticky buns will still be tasty without nuts. Sticky buns stay fresh for about 2 to 3 days at room temperature. Keep them in an airtight container. This helps keep them soft. You can also refrigerate them for about a week. Just make sure to reheat them for the best taste. Yes, you can prepare the dough ahead of time! After kneading, place it in a greased bowl and cover it. Let it rise for about an hour, then punch it down. Cover it tightly and refrigerate overnight. The next day, let it rise again before rolling and baking. This makes it easy for busy mornings! In this blog post, we covered the ingredients, preparation, and baking of apple cinnamon sticky buns. We also discussed substitutions, tips for success, and variations to suit your taste. Baking is all about experimenting and enjoying the process. Whether you stick to the classic recipe or try new flavors, homemade sticky buns can be a treat. I hope these insights inspire you to create delicious sticky buns for friends and family. Enjoy your baking journey!](https://tossedflavors.com/wp-content/uploads/2025/07/c0273130-cb0c-48ec-8c46-2ff97edd665a.webp)
Apple Cinnamon Sticky Buns Irresistible and Easy Recipe
Imagine waking up to the sweet aroma of Apple Cinnamon Sticky Buns filling your kitchen. This easy recipe will have you enjoying warm, gooey treats
![- 1 cup strong brewed coffee, cooled - 4 ounces semi-sweet chocolate, finely chopped - 3 tablespoons granulated sugar - 1 teaspoon pure vanilla extract - 1 ½ cups heavy whipping cream - 3 large egg whites, at room temperature - Pinch of sea salt - Cocoa powder or chocolate shavings, for garnish When I create a velvety coffee mousse, I start with strong brewed coffee. You want it robust, rich, and cooled to let the flavors meld perfectly. Next, I chop semi-sweet chocolate finely. This helps it melt evenly, ensuring a smooth texture. Granulated sugar adds just the right amount of sweetness. Pure vanilla extract brings in a warm, aromatic note. I love using heavy whipping cream for its luscious mouthfeel. It whips up beautifully to create that fluffy base. The egg whites, beaten to stiff peaks, add airiness to the mousse. A pinch of sea salt balances the sweetness and enhances flavor. Finally, I garnish with cocoa powder or chocolate shavings for a beautiful finish. Using fresh ingredients matters. I always recommend high-quality chocolate and fresh eggs. You can find the full recipe in the article to help you create this delightful dessert. Enjoy the process as much as the treat! Start by brewing a cup of strong coffee. Let it cool at room temperature. In a small saucepan, melt the semi-sweet chocolate over low heat. Stir it until it is smooth. Once melted, add the cooled coffee and sugar. Mix well until combined. Set this mixture aside to cool slightly. In a large bowl, whip the heavy cream. Beat it until you see soft peaks. Be careful not to overwhip, or it will get grainy. In another bowl, add the egg whites and a pinch of salt. Beat these until you get soft peaks. Gradually add sugar while you continue beating until stiff peaks form. Now, gently fold the chocolate-coffee mixture into the whipped cream. Use a spatula and move lightly to keep it fluffy. After that, fold in the beaten egg whites in three additions. This step is key to keeping your mousse airy. Spoon the mousse into serving cups, filling them about three-quarters full. Cover each cup and place them in the fridge. Let the mousse set for at least two hours before serving. For the full recipe, make sure to check the details above. Enjoy your rich, creamy dessert delight! To make your coffee mousse smooth, focus on your cream. Whip the cream until it forms soft peaks. Be careful not to overwhip. Overwhipped cream can turn grainy and ruin your dessert. When you fold the mixtures, do it gently. Use a spatula and fold from the bottom up. This way, you keep all the air inside. When serving your mousse, think about toppings. A dollop of whipped cream adds creaminess. You can also use chocolate shavings for extra flavor. A light dusting of cocoa powder elevates the look. These toppings make your dessert even more tempting. This mousse is rich and high in calories. If you want lighter options, consider substitutes. Use low-fat cream or sugar alternatives. These swaps help make the dessert fit different diets. Always check for allergies when making substitutions. Enjoy your Velvety Coffee Mousse with care! For the full recipe, check out the recipe section above. {{image_4}} You can elevate your coffee mousse with some tasty liqueurs. Adding Kahlúa or Baileys gives the dessert a nice kick. Just a splash will make your mousse richer and more exciting. You can also try flavored chocolates. Think about using dark chocolate with hints of orange or mint. This twist adds depth and surprises to each bite. If you prefer a deeper taste, switch to dark chocolate. It brings out the coffee flavor in a bold way. For those who want a vegan mousse, use non-dairy cream. Coconut cream works well and keeps the mousse creamy. You can also use aquafaba, the liquid from chickpeas, in place of egg whites. It whips up light and fluffy, just like eggs. This way, everyone can enjoy this rich treat. For the full recipe, check out [Full Recipe]. Store leftover mousse in an airtight container. This keeps it fresh and safe to eat. Place parchment paper between the mousse and the lid. This prevents condensation and keeps the texture smooth. Try to eat it within three days for the best taste and texture. You can freeze mousse, but it may change a bit. To freeze, scoop the mousse into a freezer-safe container. Leave some space at the top for expansion. Seal it tightly and label it with the date. To defrost, move it to the fridge the night before you want to serve it. This helps keep the best texture. Avoid microwaving, as it can ruin the mousse. Enjoy your creamy treat! For the Full Recipe, check out the detailed instructions above. Velvety Coffee Mousse can last up to 3 days in the fridge. Store it in an airtight container. This keeps it fresh and prevents it from absorbing other odors. Yes, you can make this mousse ahead of time. Prepare it a day before serving. Just remember to cover it well and chill it. This allows the flavors to blend beautifully. Using raw egg whites does carry some risk. They may contain bacteria. To reduce this risk, use pasteurized egg whites. They are safe and still give you great texture. Yes, you can use instant coffee. Just dissolve it in hot water. Aim for a strong flavor to maintain the mousse's richness. This makes it easier if you don’t have brewed coffee on hand. Your mousse is set when it feels firm to the touch. It should hold its shape when spooned out. If it jiggles like jelly, it needs more time in the fridge. In this post, we explored making velvety coffee mousse with simple, delicious ingredients. We detailed each step, from brewing coffee to folding the mixtures. Perfecting the texture is key, and we offered tips for serving and storing. Remember, variations can add fun twists, like flavored liqueurs or chocolate types. This mousse is rich, so enjoy it wisely. Try it out, and share your creations with friends!](https://tossedflavors.com/wp-content/uploads/2025/07/7591a3fe-0797-49f2-b105-04c805c6ecf1.webp)
Velvety Coffee Mousse Rich and Creamy Dessert Delight
Indulge your taste buds with my rich and creamy Velvety Coffee Mousse! This delightful dessert combines strong coffee, silky chocolate, and fluffy whipped cream. It’s
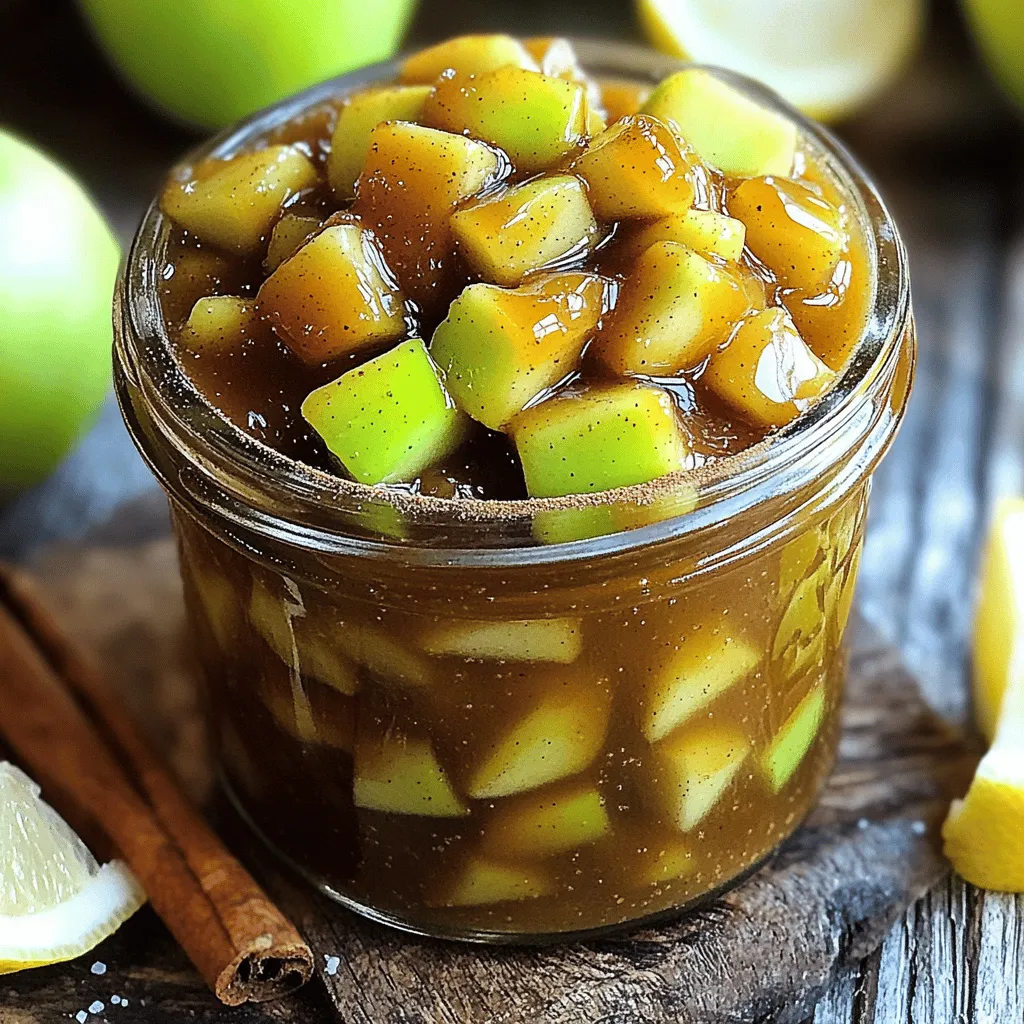
Easy Caramel Apple Jam Delightful Flavorful Spread
Are you ready to make a mouthwatering spread that will elevate your breakfasts? This Easy Caramel Apple Jam combines the sweet taste of apples with
![- 2 cups all-purpose flour - 1 cup granulated sugar - 1 tablespoon baking powder - 1 teaspoon ground cinnamon - 1/2 teaspoon salt - 1/2 cup unsweetened applesauce - 1/2 cup whole milk - 2 large eggs - 1 teaspoon vanilla extract - 1 medium apple, peeled, cored, and finely diced - 1/4 cup melted butter - Extra cinnamon and sugar mixture (for topping) When making baked apple donuts, the ingredients truly matter. Each one plays a role in taste and texture. All-purpose flour gives the base a nice structure. Granulated sugar sweetens the mix just right. Baking powder helps the donuts rise and be fluffy. Ground cinnamon adds a warm spice that makes us think of fall. Salt boosts the flavors, making each bite better. Unsweetened applesauce keeps the donuts moist and adds a hint of apple flavor. Whole milk brings richness, while eggs bind everything together. Vanilla extract gives a lovely aroma and depth. Finally, the diced apple provides juicy bites of flavor. - Approximately 120 calories per donut - 20g carbohydrates, 4g fats, 2g protein These donuts are a light treat compared to fried ones. Each donut has about 120 calories, making them a good snack choice. With 20g of carbs, they give you energy without weighing you down. The low fat content makes them a healthier option. - Lower in fat compared to fried donuts - Nutritional advantages of apples Baked donuts are a win for your health. They have less fat than fried donuts. This means you can enjoy them without the guilt. Apples are packed with fiber, vitamins, and antioxidants. They help keep your heart healthy and your digestion smooth. So, when you enjoy these baked apple donuts, you are treating your taste buds and your body! - Preheat your oven to 350°F (175°C). - Grease the donut pan with non-stick spray or melted butter. - In a large bowl, mix the dry ingredients: - 2 cups all-purpose flour - 1 cup granulated sugar - 1 tablespoon baking powder - 1 teaspoon ground cinnamon - 1/2 teaspoon salt - In another bowl, combine the wet ingredients: - 1/2 cup unsweetened applesauce - 1/2 cup whole milk - 2 large eggs - 1 teaspoon vanilla extract - Whisk until smooth. Pour the wet mix into the dry mix. Stir gently until just combined. - Carefully fold in: - 1 medium apple, peeled, cored, and finely diced - 1/4 cup melted butter - Use a piping bag or a zip-top bag to fill each section of the donut pan. Fill them about three-quarters full. - Bake in the preheated oven for 10-12 minutes. Check for doneness by inserting a toothpick in the center. It should come out clean. - After baking, let the donuts cool in the pan for about 5 minutes. Transfer them to a wire rack to cool completely. - While they are warm, roll each donut in a mix of cinnamon and sugar for added flavor. Enjoy your delicious Baked Apple Donuts! For the complete details, check the Full Recipe. To get the best baked donuts, avoid overmixing the batter. When you mix too much, the donuts can become tough. Mix just until you see no dry flour. This keeps them light and fluffy. Also, use room temperature ingredients. Cold eggs or milk can change the texture. They mix better when they’re warm, so set them out for a bit before you start. When your donuts are ready, arrange them nicely. Place them on a wooden board or a tiered stand. This makes them look fancy and inviting. Consider adding some toppings. A drizzle of icing or glaze can add flavor and style. You can also sprinkle them with nuts or coconut for extra crunch. To keep leftover donuts fresh, store them in an airtight container. This helps them stay soft. You can keep them at room temperature for a couple of days. If you want to enjoy them later, freeze them. Just wrap each donut in plastic wrap. When you want one, reheat it in the microwave for 10 to 15 seconds. This keeps them warm and soft. {{image_4}} You can change the flavor of your donuts easily. If you want to swap applesauce, try mashed bananas or pumpkin puree. These options keep the donuts moist and add unique tastes. You can also mix in spices like nutmeg or ginger to give your donuts a warm kick. Another fun idea is to add chopped nuts, like walnuts or pecans, for a nice crunch. Glazes can take your donuts to the next level. A simple glaze can be made with powdered sugar and milk. Mix them until smooth and drizzle over the warm donuts. For a twist, try a maple glaze using maple syrup and powdered sugar. Topping ideas are endless! Consider using shredded coconut, mini chocolate chips, or even crushed graham crackers for a s'mores vibe. You can make these donuts fit many diets. For gluten-free donuts, use a gluten-free flour blend to replace regular flour. This change keeps the texture light and fluffy. If you want a vegan option, swap the eggs with flaxseed meal mixed with water. Use almond milk instead of whole milk and choose a plant-based butter. These changes make the donuts friendly for everyone. What drinks go well with baked donuts? You can choose hot apple cider. It brings out the apple flavor. Freshly brewed coffee is another great option. The warmth complements the sweetness of the donuts. For a fun twist, try a chai latte. Its spices match the cinnamon in the donuts. You could also serve them with cold milk. Milk balances the sweetness nicely. When should you serve baked apple donuts? They make a great breakfast treat. Pair them with yogurt or fruit for a full meal. They are also a perfect snack. Enjoy them with tea in the afternoon. As a dessert, they shine, especially with ice cream. Kids love them at parties or playdates. These donuts fit any occasion where sweet treats are welcome. How can you use baked apple donuts in desserts? Try cutting them in half and adding ice cream. This makes a fun donut sandwich. You can also use them as a base for a trifle. Layer pieces of the donut with whipped cream and fruit. At gatherings, stack them on a tiered stand for a showy display. Drizzle some caramel or chocolate sauce over them for extra flair. They will impress your guests and look beautiful on the table. Yes, you can use whole wheat flour. It makes the donuts a bit denser. Adjust the liquid slightly, as whole wheat absorbs more moisture. Start with 1/4 cup less milk and add more if needed to get the right batter consistency. Store the donuts in an airtight container. They will stay fresh for up to three days at room temperature. You can also refrigerate them to extend their shelf life. Just remember to let them come to room temperature before serving for the best taste. You can add nuts like walnuts or pecans for crunch. Dried fruits like raisins or cranberries also work well. A bit of nutmeg or ginger adds a warm spice note. Feel free to get creative with flavors! Insert a toothpick into the center of a donut. If it comes out clean, they are done. The edges should be lightly golden. If it’s still wet, bake for another minute or two and check again. Yes, you can freeze baked donuts. Allow them to cool completely, then wrap each one in plastic wrap. Place them in a freezer bag. They will stay fresh for up to three months. Thaw them at room temperature before enjoying. [Full Recipe] To make these tasty baked apple donuts, gather your ingredients: - 2 cups all-purpose flour - 1 cup granulated sugar - 1 tablespoon baking powder - 1 teaspoon ground cinnamon - 1/2 teaspoon salt - 1/2 cup unsweetened applesauce - 1/2 cup whole milk - 2 large eggs - 1 teaspoon vanilla extract - 1 medium apple, peeled, cored, and finely diced - 1/4 cup melted butter - Extra cinnamon and sugar mixture (for topping: 2 tablespoons sugar + 1 teaspoon cinnamon) You can find the full recipe with detailed steps and instructions [here](#). Baked apple donuts are great for breakfast or a snack. They are fluffy and sweet, and they fill your kitchen with a warm apple scent. The best part? You can make them in just 30 minutes! When you mix the flour, sugar, and spices, it creates a base for the donuts. The applesauce keeps them moist and soft. Adding diced apples gives each bite a lovely crunch. While they bake, the donuts rise beautifully. Once they cool, roll them in cinnamon and sugar. This gives them a sweet, tasty finish that everyone loves. These donuts are not just fun to make; they are also fun to eat! Enjoy them fresh, and share them with friends or family. Everyone will ask for the recipe! These baked apple donuts are simple to make and tasty. You learned the key ingredients and their health benefits, like lower fat and apples' nutrition. The step-by-step instructions guide you through prepping and baking. Remember to avoid overmixing for fluffiness and explore fun variations and toppings. These delicious treats fit any occasion and pair well with drinks. Enjoy making and sharing them!](https://tossedflavors.com/wp-content/uploads/2025/07/b9c7ba5c-8b11-4793-a612-afa1f83bc2a9.webp)
Baked Apple Donuts Flavorful and Easy Recipe
If you’re in the mood for a warm, sweet treat, look no further than my baked apple donuts! These donuts are easy to make and

Pumpkin Cookie Recipe that Delights with Flavor
Fall is the perfect time for baking, and nothing captures that cozy vibe like pumpkin cookies! I’m excited to share my favorite pumpkin cookie recipe
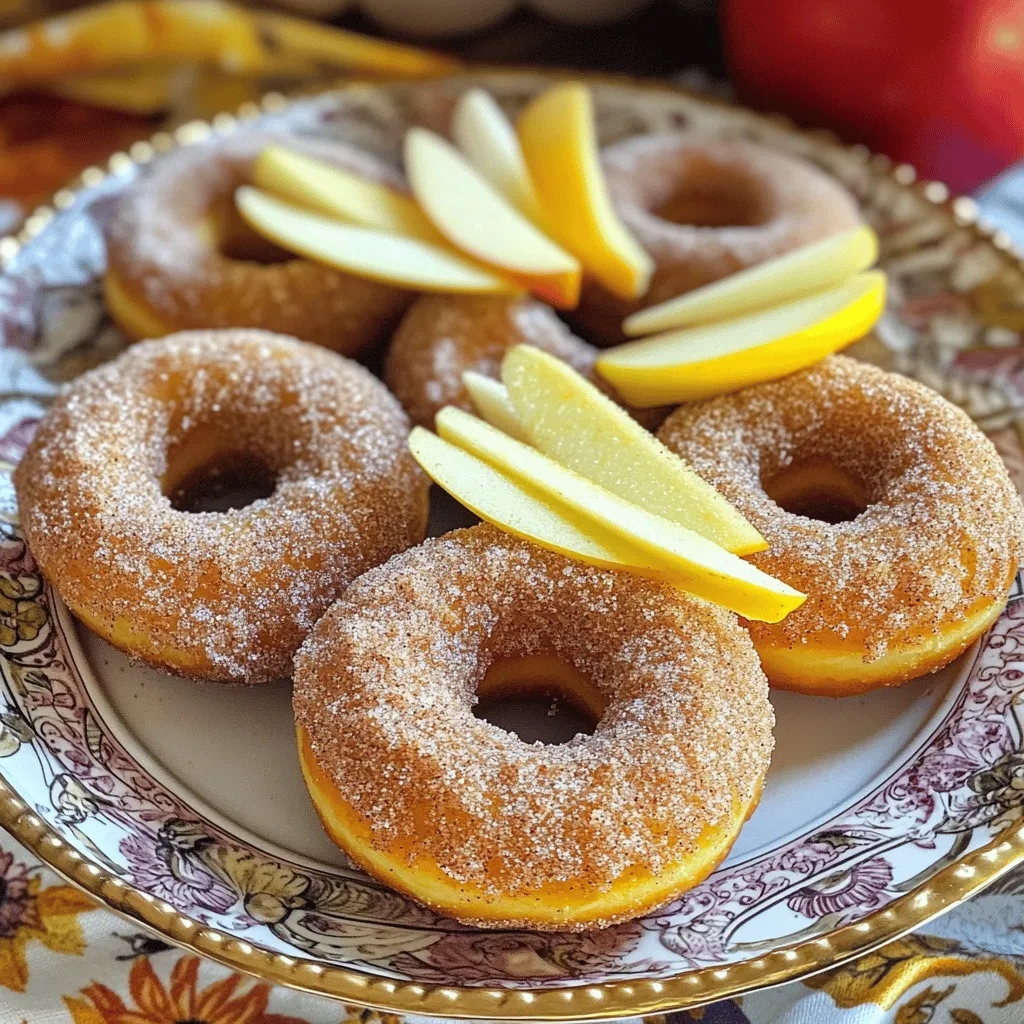
Apple Cider Donuts Delicious Fall Treat for Everyone
As the leaves change and the air gets crisp, nothing hits the spot quite like apple cider donuts. These sweet, spiced treats are perfect for