Desserts

To make these tasty pumpkin pie twists, you need a few key items: - 1 sheet of puff pastry (thawed) - 1 cup pumpkin puree - 1/2 cup packed brown sugar - 1 teaspoon ground cinnamon - 1/2 teaspoon ground nutmeg - 1/4 teaspoon ground ginger - 1/4 teaspoon salt - 1 egg, beaten (for egg wash) - 2 tablespoons granulated sugar (for sprinkling) These ingredients create a sweet and spiced filling that pairs perfectly with the flaky pastry. While the basic recipe is fantastic, you can add more flavor: - A splash of vanilla extract for warmth - A pinch of allspice for extra spice - Chopped nuts for a crunchy texture These extras can elevate your pumpkin pie twists and make them even more delightful. To prepare these twists, you will need some simple tools: - A baking sheet lined with parchment paper - A rolling pin for rolling out the pastry - A mixing bowl for combining the filling - A fork for crimping the edges These tools make the process smooth and fun. You can find the complete recipe details in the Full Recipe section for more guidance. First, gather all your ingredients. You need puff pastry, pumpkin puree, brown sugar, and spices. Preheat your oven to 400°F (200°C). Line a baking sheet with parchment paper. This helps the twists not to stick. Next, on a floured surface, roll out the thawed puff pastry. Make it smooth and flat. Cut it into rectangles about 3 inches by 6 inches. In a bowl, mix the pumpkin puree, brown sugar, cinnamon, nutmeg, ginger, and salt. Stir until it is smooth. Now, take a tablespoon of this filling. Place it in the center of each pastry rectangle. Make sure to leave space around the edges. Fold each pastry over the filling to create a pocket. Press the edges to seal them tight. You can use a fork to crimp the edges for a nice look. This step also helps seal them well. Now, brush the tops of the pastries with the beaten egg. This gives them a golden color. Lightly sprinkle granulated sugar on top for extra sweetness. Carefully place the twists on the lined baking sheet. Bake them in the preheated oven for 15 to 20 minutes. Look for a golden brown color and puffed-up edges. This means they are done. When the twists are baked, let them cool for a few minutes. This helps them set. You can serve them warm with whipped cream if you like. Arrange the twists on a plate. A light dusting of powdered sugar makes them look fancy. Add a mint sprig or a small pumpkin for a fun touch. Enjoy your Easy Pumpkin Pie Twists! For the full recipe, check out the details above. One big mistake is not rolling the pastry enough. You want it thin for a crispy twist. Another error is overfilling the pastry. Keep the filling small to prevent leaks. Be sure to seal the edges tightly. If they open during baking, your filling will ooze out. For the best texture, use cold puff pastry. This helps it puff up and become flaky. When brushing with egg, cover all areas evenly. This creates a beautiful golden color. After baking, let them cool slightly. This helps the filling set and makes it easy to eat. Serve these twists warm as a delightful treat. Pair them with whipped cream for a tasty touch. You can also add a sprinkle of cinnamon on top. For a fun twist, try serving with caramel sauce. It adds a rich flavor that complements the pumpkin well. If you want more ideas, check out the Full Recipe for more serving suggestions. {{image_4}} You can change the flavor quite easily. Add chocolate chips to the filling for a sweet twist. Mix in some caramel for a richer taste. If you like nuts, add chopped pecans or walnuts. For a fun fall taste, try adding a splash of maple syrup. Each option makes the pumpkin pie twists unique! If you’re out of pumpkin puree, use sweet potato puree instead. You can swap brown sugar for regular sugar or coconut sugar. No puff pastry? Try using pie crust or even phyllo dough for a different texture. You can use almond milk instead of eggs for an egg wash if you want a vegan option. Serve these twists warm for the best taste. You can plate them with a scoop of ice cream on the side. Drizzle caramel or chocolate sauce over them for a fun touch. Serve with whipped cream or even a sprinkle of nuts on top. You can also dust them with powdered sugar for a fancy look. For a party, arrange them on a platter and watch everyone enjoy! For the full recipe, check the earlier section! To keep your leftover pumpkin pie twists fresh, place them in an airtight container. You can also wrap them in plastic wrap for extra protection. Store them at room temperature for up to two days. If you want to keep them longer, refrigerate them. They will last in the fridge for about a week. If you want to save some twists for later, freezing is a great option. First, let the twists cool completely. Then, wrap each twist in plastic wrap and place them in a freezer bag. Make sure to remove as much air as possible to avoid freezer burn. You can freeze them for up to three months. When you are ready to enjoy, just thaw them in the fridge overnight. To reheat your pumpkin pie twists, preheat your oven to 350°F (175°C). Place the twists on a baking sheet lined with parchment paper. Heat them in the oven for about 10-15 minutes, until they are warm and crisp again. You can also use a microwave, but this may make the pastry soft. Enjoy them warm for the best taste! For more details, check the Full Recipe. To make pumpkin pie twists from scratch, you need a few steps. First, you roll out thawed puff pastry on a floured surface. Cut the pastry into rectangles about 3 inches by 6 inches. Next, mix pumpkin puree, brown sugar, and spices in a bowl. Place a spoonful of this mixture on each pastry piece. Fold it over and seal the edges. Brush with egg wash and sprinkle sugar on top. Bake at 400°F for 15-20 minutes until golden brown. For the full recipe, check above. Yes, you can use fresh pumpkin instead of canned. Start by cooking the pumpkin until it is soft. Cut it in half, remove seeds, and bake it face down for about 45 minutes at 350°F. Once cool, scoop out the flesh and blend it until smooth. Measure out one cup for your recipe. Fresh pumpkin will give a different, often richer flavor than canned. Here are some tips for baking puff pastry: - Always thaw your puff pastry in the fridge, not at room temperature. - Keep your work surface floured to avoid sticking. - Roll the pastry gently to avoid flattening the layers. - Preheat your oven to ensure a good rise. - Bake on parchment paper to prevent sticking and for easy cleanup. These tips will help you achieve that flaky, delightful texture! The blog post shared how to make easy pumpkin pie twists. We covered the key ingredients and tools. I provided step-by-step instructions for preparation and baking. You learned handy tips to avoid common mistakes and ensure great texture. Variations and storage advice will help you enjoy your treats longer. Now, you’re ready to create a fun and tasty dessert. Enjoy your pumpkin pie twists!
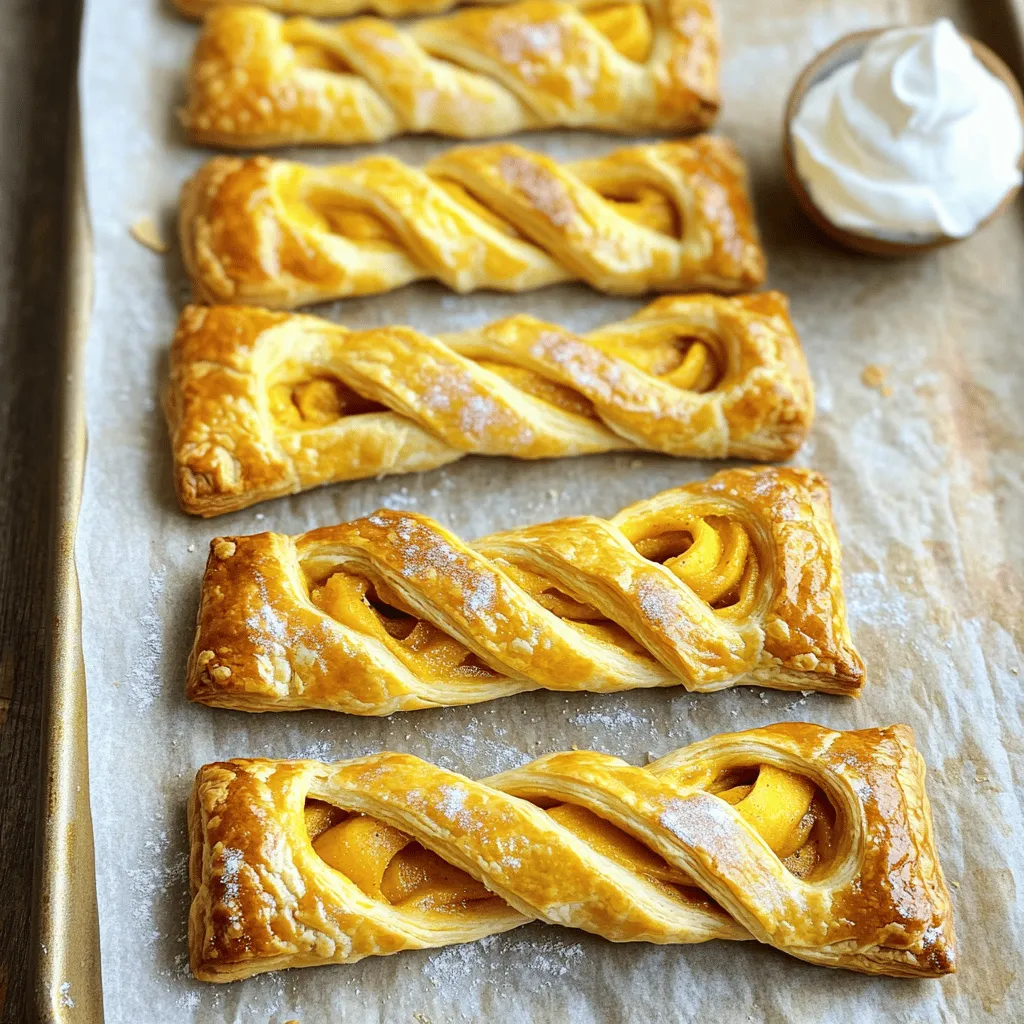
Easy Pumpkin Pie Twists Tasty and Simple Dessert
Are you looking for a fun twist on a fall favorite? These Easy Pumpkin Pie Twists are a simple and delicious dessert that will impress
- 1 ½ cups all-purpose flour - 1 teaspoon baking powder - 1 teaspoon baking soda - ½ teaspoon salt - 1 teaspoon ground cinnamon - ½ teaspoon ground nutmeg - ½ teaspoon ground ginger - 1 cup granulated sugar - ½ cup packed brown sugar - ½ cup vegetable oil - 2 large eggs - 1 cup canned pumpkin puree - ½ cup buttermilk - 1 teaspoon vanilla extract - 8 oz cream cheese, softened - ½ cup unsalted butter, softened - 1 cup powdered sugar - ½ cup caramel sauce - A pinch of salt - 2 9-inch round cake pans - Mixing bowls - Electric mixer or whisk - Spatula or wooden spoon - Measuring cups and spoons When I make this autumn pumpkin cake, I love to gather my ingredients first. It helps me stay organized and ready. The cake is moist and rich with spices. The pumpkin puree is key for this. The frosting adds a creamy sweetness that is hard to resist. For the frosting, I use cream cheese and butter. This makes it fluffy and smooth. Don't skip the caramel sauce; it gives the frosting a wonderful flavor. Also, always remember to soften the cream cheese and butter first. It makes mixing much easier. Using the right tools is important too. I prefer my electric mixer for the frosting. It helps to whip the ingredients quickly. The cake pans should be greased and floured well. This keeps the cake from sticking. You can find the full recipe with all the steps and tips. Enjoy creating this treat that tastes like fall! - Preheat oven to 350°F (175°C). - Grease and flour the cake pans. Start by heating your oven. This step is key for a nice rise. While the oven warms, take two 9-inch round cake pans. Grease them well with butter or cooking spray. Dust them lightly with flour. This helps the cake come out easily after baking. - Whisk together flour, baking powder, baking soda, salt, cinnamon, nutmeg, and ginger. In a medium bowl, add your dry ingredients. Combine flour, baking powder, baking soda, salt, and spices. Whisk them together until mixed. This mix will add flavor and structure to your cake. Set this bowl aside for now. - Combine sugars and oil, then add eggs, pumpkin puree, and buttermilk. In a large bowl, mix granulated sugar and brown sugar with vegetable oil. Use a mixer or whisk to blend these until fluffy. Next, beat in the eggs one at a time. After fully mixing in each egg, add pumpkin puree and buttermilk. Stir until everything is smooth. - Fold dry ingredients into the wet mixture until just combined. Now, gently fold the dry mix into the wet mix. Use a spatula or wooden spoon for this. Mix just until you see no dry flour. You want to be careful not to overmix. This helps keep the cake light and fluffy. - Divide batter into pans and bake for 25-30 minutes. Pour the batter evenly into your prepared pans. Give each pan a light tap on the counter. This helps release air bubbles. Place the pans in the oven and bake. Check them after 25 minutes. They are done when a toothpick comes out clean or with a few crumbs. - Beat cream cheese and butter, then add powdered sugar and caramel sauce. In another bowl, beat softened cream cheese and butter together. Keep mixing until smooth. Gradually add the powdered sugar, mixing until combined. Finally, stir in caramel sauce and a pinch of salt to taste. Your frosting should be light and spreadable. - Layer frosting between cake layers and on top. Once the cakes cool, place one layer on a serving plate. Spread a generous layer of frosting on top. Carefully place the second layer on top. Use the remaining frosting to coat the top and sides evenly. For a fun touch, drizzle extra caramel over the top. For the full recipe, refer to the instructions above. Enjoy the warm flavors of autumn in each bite! To make your cake fluffy, avoid overmixing the batter. Stir gently until the dry and wet ingredients blend. Overmixing can lead to a dense cake, which we don’t want. Another key tip is to ensure all ingredients are at room temperature. This helps them mix together smoothly, creating a light and airy cake. For a beautiful finish, use a spatula for even frosting application. This tool helps spread the frosting smoothly across the cake. Another good trick is to chill the cake before frosting. A cold cake is easier to frost evenly. It keeps the frosting from sliding off during the process. To make your cake even more appealing, consider optional garnishes. A sprinkle of ground cinnamon adds warmth and spice. Crushed pecans provide a nice crunch and contrast. If you want extra indulgence, add a dollop of whipped cream on each slice. This will not only look great but also taste amazing. For the full recipe, check out the complete guide. {{image_4}} To make your autumn pumpkin cake even more fun, consider adding chocolate chips or pecans to the batter. Chocolate chips bring a rich sweetness that pairs well with pumpkin spice. Pecans add crunch and a nice nutty flavor. You can mix in about ½ cup of either for a tasty twist that surprises everyone. If you're in the mood for something different, try swapping the caramel sauce in the frosting for chocolate ganache or maple syrup. Chocolate ganache adds a deep, rich flavor that chocolate lovers will adore. Maple syrup gives a sweet, earthy taste that enhances the autumn vibe. Both options create unique frostings that will impress your guests. For those needing a gluten-free option, simply replace the all-purpose flour with a gluten-free blend. Many blends work well, so choose one that you like. This small change allows everyone to enjoy this delicious cake without worry. Just be sure to check that your other ingredients are also gluten-free. These variations keep your cake fresh and exciting, letting you enjoy new flavors each time you bake. For the detailed recipe, don't forget to check the Full Recipe. Store your Autumn Pumpkin Cake in an airtight container in the fridge. It will stay fresh for up to 5 days. This keeps the cake moist and flavorful. Just remember to let it cool completely before storing. You can freeze this cake too! Wrap individual slices or the whole cake in plastic wrap. Then, place it in a freezer-safe bag. It will stay good for up to 3 months. This is a great way to save some for later. To enjoy your frozen cake, thaw it overnight in the fridge. This helps keep the texture just right. Once thawed, you can frost it or serve it plain. If you want to add that caramel cream cheese frosting, do it after thawing for the best taste. For the full recipe, check the complete section above. Yes, but ensure it's pureed and properly cooked. Fresh pumpkin has great flavor. Just roast it in the oven, then mash or blend until smooth. This gives your cake a homemade touch. A toothpick inserted in the center should come out clean or with a few moist crumbs. If it comes out wet, bake it a little longer. Keep an eye on it from 25 minutes onward. Substitute with milk mixed with vinegar or lemon juice (1 cup milk + 1 tbsp vinegar/lemon juice). This mix will mimic the acidity of buttermilk. It's a quick and easy fix, perfect for your baking needs. This blog post covered how to make a delicious pumpkin cake from scratch. We looked at what ingredients you need, how to mix them, and the best baking tips. Remember to prepare your pans and mix well without overdoing it. Frost your cake with a creamy layer and enjoy! This recipe lets you customize flavors and store leftovers easily. Baking is fun, so try this recipe out. You’ll love sharing it with others. Happy baking!
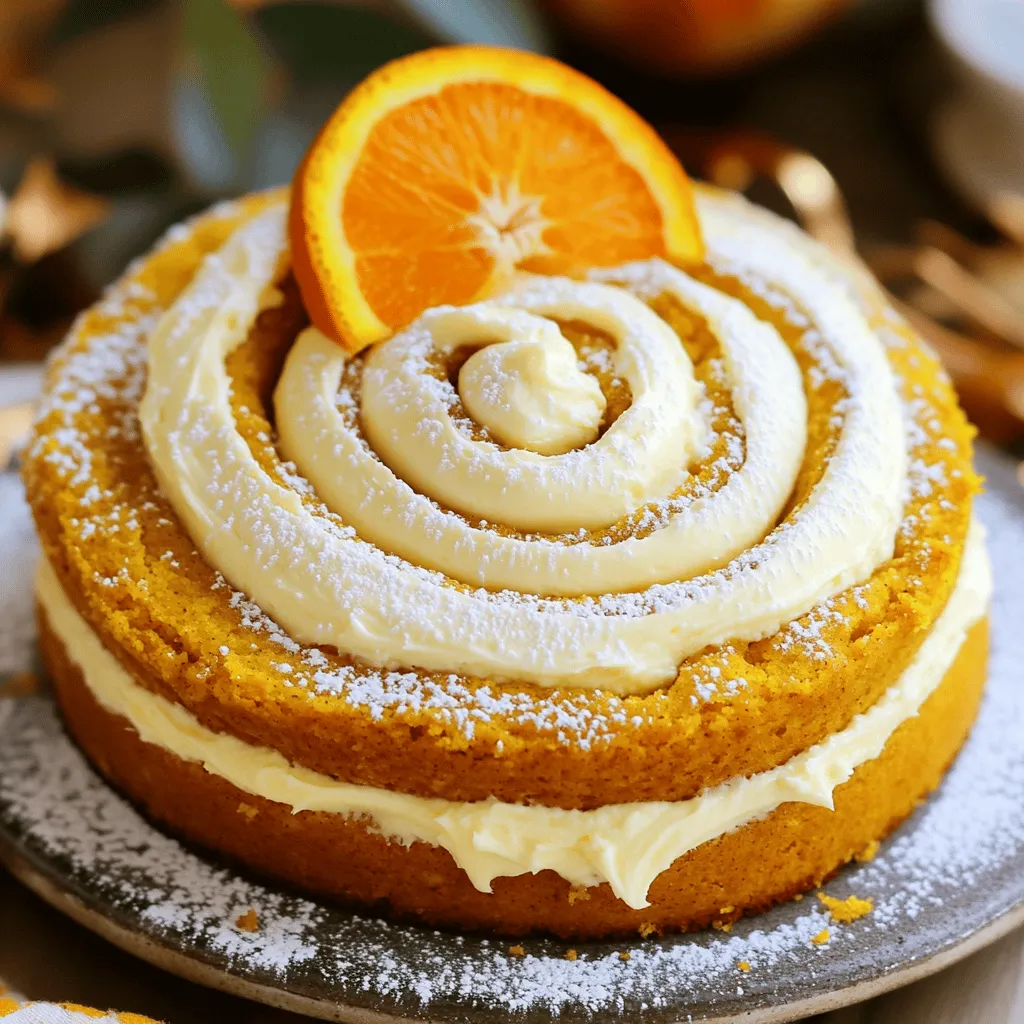
Autumn Pumpkin Cake with Caramel Cream Cheese Frosting
Get ready to dive into the cozy flavors of fall with my Autumn Pumpkin Cake topped with rich caramel cream cheese frosting! This easy recipe
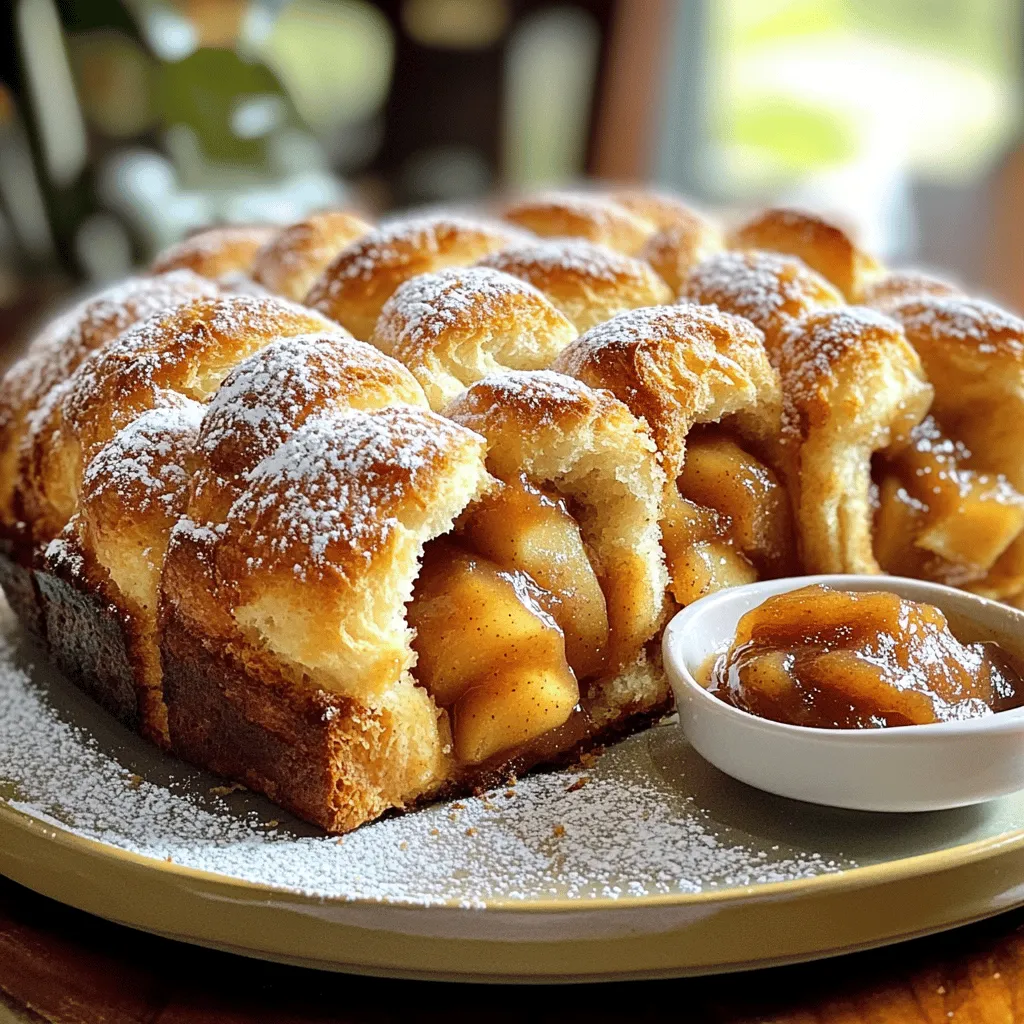
To make this delicious Apple Fritter Monkey Bread, you will need the following ingredients: - 2 cups all-purpose flour - ½ cup granulated sugar - 1 tablespoon baking powder - 1 teaspoon ground cinnamon - ½ teaspoon salt - ⅔ cup whole milk - ¼ cup unsalted butter, melted and slightly cooled - 1 large egg, beaten - 2 cups Granny Smith apples, peeled and diced - 1 teaspoon pure vanilla extract - ½ cup light brown sugar, packed - ½ teaspoon ground nutmeg - 1 tablespoon fresh lemon juice - 1 cup powdered sugar - 2 tablespoons milk (for icing) You can adjust some ingredients based on your needs: - Flour: Use whole wheat flour for a healthier twist. - Sugar: Coconut sugar works well if you want a lower glycemic option. - Milk: Almond or oat milk can replace whole milk for dairy-free versions. - Butter: Use coconut oil for a dairy-free alternative. - Apples: Any tart apple variety works, like Fuji or Honeycrisp. These substitutions keep the integrity of the dish while catering to dietary needs. Choosing fresh, high-quality ingredients is key to great flavor. Fresh apples deliver crispness and sweetness. Quality flour ensures the dough has the right texture. Using pure vanilla extract enhances the overall taste. If you use good ingredients, your monkey bread will taste amazing. You can find the full recipe to guide you through this delightful treat. First, gather all your ingredients. You will need flour, sugar, baking powder, cinnamon, salt, milk, butter, egg, apples, vanilla, brown sugar, nutmeg, lemon juice, powdered sugar, and extra milk for icing. Preheat your oven to 350°F (175°C) and grease a bundt pan well. This helps the monkey bread come out easily after baking. Next, prepare the apples. Take diced Granny Smith apples and toss them with lemon juice, brown sugar, and nutmeg. Let this mix sit for about 10-15 minutes. This waiting time helps the apples soak up flavors, making them taste even better. In a large bowl, mix the dry ingredients: flour, granulated sugar, baking powder, cinnamon, and salt. Stir well with a whisk until everything is combined. In another bowl, whisk together the wet ingredients: milk, melted butter, beaten egg, and vanilla extract. Make sure the butter is cooled so it does not cook the egg. Now, combine the wet and dry mixes. Slowly pour the wet mix into the dry mix. Use a spatula to stir gently. Do not overmix; a few lumps are okay. Once mixed, take small pieces of dough, about the size of a golf ball. Flatten each piece in your hand. Place a spoonful of the apple mixture in the center, then wrap the dough around it and roll it into a ball. Repeat this until all dough and apples are used. Place these balls in the greased bundt pan, layering them evenly. Now, put the pan in the oven and bake for 30-35 minutes. Watch for a golden brown top. To check if it's done, insert a toothpick into the center; it should come out clean. After baking, let the monkey bread cool in the pan for about 10 minutes. This is important to ensure it holds its shape. Carefully invert the pan onto a serving platter. For icing, whisk together powdered sugar and 2 tablespoons of milk until smooth. While the monkey bread is still warm, drizzle the icing on top and let it soak into the cracks. This adds a sweet finish to the dish. Serve the warm apple fritter monkey bread on a large plate. A sprinkle of cinnamon or some diced apples makes it look extra special. Enjoy the warm, sweet flavors! For the full recipe, you can check out the section above. Making monkey bread can be simple, but some mistakes can ruin it. Here are a few to watch out for: - Overmixing the Dough: Mixing too much makes the bread dense. Stir just until combined. - Not Greasing the Pan: A well-greased pan helps the bread come out easily. Don’t skip this step! - Skipping the Apple Soaking: Letting the apples sit in lemon juice and spices is key. It adds flavor and keeps them from browning. You want your monkey bread to be soft and fluffy. Here’s how to get that perfect texture: - Use Room Temperature Ingredients: Make sure your milk and eggs are at room temperature. This helps the batter mix better. - Don’t Overbake: Check the bread at 30 minutes. It should be golden brown but not dry. - Cool It Right: Let the bread cool in the pan for 10 minutes. This helps it hold its shape. Serving monkey bread can be fun and creative. Here are some ideas: - Serve Warm: Warm monkey bread tastes best. It’s soft and gooey, perfect for sharing. - Add Extra Toppings: A sprinkle of cinnamon or nuts on top adds texture and flavor. - Pair with Ice Cream: A scoop of vanilla ice cream makes for a tasty treat. The warm bread and cold ice cream contrast perfectly. For the full recipe, check out the complete guide on how to make this delightful dish! {{image_4}} You can have fun with the classic apple fritter monkey bread. Try adding caramel sauce for a rich flavor. Mix in some chopped pecans for crunch. If you like spice, a dash of cayenne can add warmth. These small changes can really change the taste. Think beyond apples! You can use pears or peaches instead. For a berry twist, mix in blueberries or raspberries. If you crave chocolate, add mini chocolate chips. These fillings can surprise your taste buds and make this dish your own. Use fresh spices for an extra kick. In fall, try adding pumpkin spice or ginger. In winter, mix in some orange zest for brightness. In summer, fresh berries bring a burst of flavor. Each season offers new chances to make this dish special. For the full recipe, check out the [Full Recipe] link. To store leftover apple fritter monkey bread, let it cool first. Place it in an airtight container. This keeps it fresh for up to three days. You can also wrap it tightly in plastic wrap. This method works well if you want to keep it for a longer time. Reheating is key to enjoying your apple fritter monkey bread again. Preheat your oven to 350°F (175°C). Place the monkey bread on a baking sheet. Heat it for about 10-15 minutes. This helps restore its warm, soft texture. You can also use the microwave. Just heat it for 15-20 seconds. It won't be as crispy but will still taste great. If you want to freeze your monkey bread, wrap it tightly in plastic wrap. Then, place it in a freezer-safe bag. Make sure to remove as much air as possible. This keeps it fresh for up to three months. To enjoy it later, thaw it overnight in the fridge. Reheat it in the oven for best results. You’ll love having this treat ready whenever you want! For the full recipe, check out the detailed instructions above. Apple Fritter Monkey Bread can last up to three days when stored properly. Keep it in an airtight container at room temperature. If you want to store it longer, you can refrigerate it. Just remember, the texture may change slightly after a day or two. Yes, you can make this recipe ahead of time! Prepare the dough and apple filling, then assemble the monkey bread in the bundt pan. Cover it with plastic wrap and place it in the fridge for up to 24 hours. When you're ready, bake it straight from the fridge. You might need to add a few extra minutes to the baking time. Apple Fritter Monkey Bread pairs well with various sides. Here are some ideas: - A scoop of vanilla ice cream for a creamy touch. - Fresh whipped cream to add a light sweetness. - A side of coffee or tea for a warm drink. - Extra cinnamon or caramel sauce for drizzling on top. For more details, check the Full Recipe. Enjoy the fun of pulling apart this tasty treat! In this article, we explored the joys of making Apple Fritter Monkey Bread. We covered essential ingredients, tips for baking, and methods to elevate its flavor. Remember, using quality ingredients makes a big difference. Avoid common mistakes for the best texture. You can also add fun variations to keep things interesting. Store leftovers properly to enjoy them later. This recipe is simple and delicious. Enjoy your baking journey and share it with friends for a tasty treat!
Savory Apple Fritter Monkey Bread Recipe to Enjoy
If you love warm, gooey treats, you’re in for a treat! This Savory Apple Fritter Monkey Bread is the perfect blend of sweet apples and
- 2 cups all-purpose flour - 1/3 cup granulated sugar - 1 tablespoon baking powder - 1/2 teaspoon salt - 1/2 cup unsalted butter, cold and cubed - 1/2 cup fresh raspberries - Zest of 1 lemon - 1/2 cup heavy cream - 1 large egg - 1 teaspoon vanilla extract - 1 tablespoon fresh lemon juice Gather these ingredients before you start. Fresh raspberries add a burst of flavor. The lemon zest brightens the scones and lifts the taste. Cold butter makes your scones flaky. Use a good quality heavy cream for the best texture. Make sure your butter is very cold. You can cut it into cubes ahead of time. This ensures that your scones stay light and airy. The egg and cream help bind everything together. Vanilla adds a subtle sweetness. Let’s not forget about the salt. It enhances all the other flavors. Each ingredient plays a role in making these scones delightful. If you follow this list closely, you’ll create a tasty treat. Enjoy the process, and your scones will shine! {{ingredient_image_1}} - Preheat oven to 400°F (200°C) and line a baking sheet. - Gather all ingredients. This makes cooking smoother. - In a large bowl, whisk together flour, sugar, baking powder, and salt. - Make sure they blend well. This is key for even baking. - Cut in the cold butter until coarse crumbs form. - You can use a pastry cutter or your fingers. The mix should look like sand. - Gently fold in raspberries and lemon zest. - Be careful not to crush the berries. They add a burst of flavor. - In a separate bowl, whisk heavy cream, egg, vanilla extract, and lemon juice. - Mix until it's smooth. This gives moisture to the scones. - Pour wet ingredients into dry and combine, then knead and shape. - The dough will be slightly sticky. Knead it a few times on a floured surface. - Cut with wedges or a round cutter and bake. - Place on the prepared baking sheet and brush with cream. - Bake for 15-20 minutes until golden brown. Enjoy the aroma! To make flaky scones, start with cold butter. Cold butter creates layers and keeps the scones light. Cut the butter into the flour until it looks like crumbs. Do not overmix the dough; mix just enough until it holds together. This helps keep the texture airy. I love serving these scones warm. A sprinkle of powdered sugar adds sweetness. Pair them with whipped cream for a treat. Lemon curd also makes a great side. You can even serve them with fresh fruit on the side. If your scones turn out dry, add a little more cream. This will help them stay moist. If the dough feels too wet, add a bit more flour. Remember to knead gently to avoid tough scones. Lastly, always watch the baking time closely for perfect results. Pro Tips Use Cold Ingredients: Ensure your butter and cream are cold to create flaky layers in your scones. Don't Overmix: Mix the dough just until combined to keep the scones tender and light. Chill Before Baking: If time allows, chill the cut scones for 15 minutes before baking for extra fluffiness. Experiment with Flavors: Try adding different fruits or herbs to customize your scones to your taste. {{image_2}} You can mix up the flavors of these scones by using different fruits or extracts. Try blueberries instead of raspberries for a sweet twist. Blackberries can add a bold flavor, while strawberries give a classic taste. You can also add a splash of almond extract for a nutty note. If you want a tropical flair, consider mixing in diced pineapple or mango. Each fruit brings its own charm to the scones. If you need gluten-free scones, swap all-purpose flour for a gluten-free blend. Be sure to check the blend for a good rise. For a dairy-free option, replace the butter with coconut oil or a dairy-free stick. Use almond milk or coconut milk instead of heavy cream. These swaps let everyone enjoy the scones without missing out. Making mini scones is easy and fun! Simply follow the same recipe, but shape the dough into a smaller circle, about ½ inch thick. Use a small round cutter for neat shapes. Bake them for about 10 to 12 minutes, checking for a golden color. These little bites are perfect for brunch or tea time. They are also great for kids’ snacks! You can store raspberry lemon scones at room temperature. Place them in an airtight container. This keeps them fresh for about 2 days. Avoid exposing them to moisture. For best results, place a paper towel inside the container to absorb extra moisture. For long-term storage, freeze the scones. First, let them cool completely. Wrap each scone tightly in plastic wrap. Then, place them in a freezer bag or container. They can stay fresh in the freezer for up to 3 months. To reheat, simply bake them at 350°F (175°C) for about 10 minutes. This brings back their flaky texture. When stored properly, raspberry lemon scones have a shelf life of about 2 days at room temperature. If frozen, they last for about 3 months. Remember, always check for any signs of spoilage before enjoying! You can make scones ahead in a few ways. First, prepare the dough and shape it into wedges. Wrap them in plastic wrap and place them in the fridge. They can stay fresh for up to 24 hours. You can also freeze them. Just freeze the shaped scones on a baking sheet. Once frozen, transfer them to a bag. When ready to bake, add a few extra minutes to the baking time. Yes, you can use frozen raspberries! They work well in scones. Just be careful when mixing them into the dough. Frozen berries can break apart easily. You may want to add them straight from the freezer to avoid excess juice. This will keep your scones from getting too wet. If you need a substitute for heavy cream, you have options. You can use whole milk mixed with melted butter. Use 1/4 cup of butter with 3/4 cup of milk to create a creamy texture. Another option is to use half-and-half. It will still give a rich flavor without being too heavy. To check if your scones are done, look for a golden color on top. They should also feel firm to the touch. If you insert a toothpick into the center, it should come out clean or with a few crumbs. This means they are ready to take out of the oven. Absolutely! You can add other citrus fruits like orange or lime. Just use their zest in place of lemon zest. This will add a different flavor profile to your scones. For a tasty twist, try mixing flavors. A hint of lime with raspberry makes for a refreshing treat! This blog post covered how to make delightful raspberry scones. We explored ingredients, step-by-step instructions, tips for success, and variations to try. You now have a clear path to bake these tasty treats. Remember, practice makes perfect. Adjust recipes as needed. Enjoy your baking adventure and share it with others! Scones can brighten any day with their flavor and warmth. Happy baking!
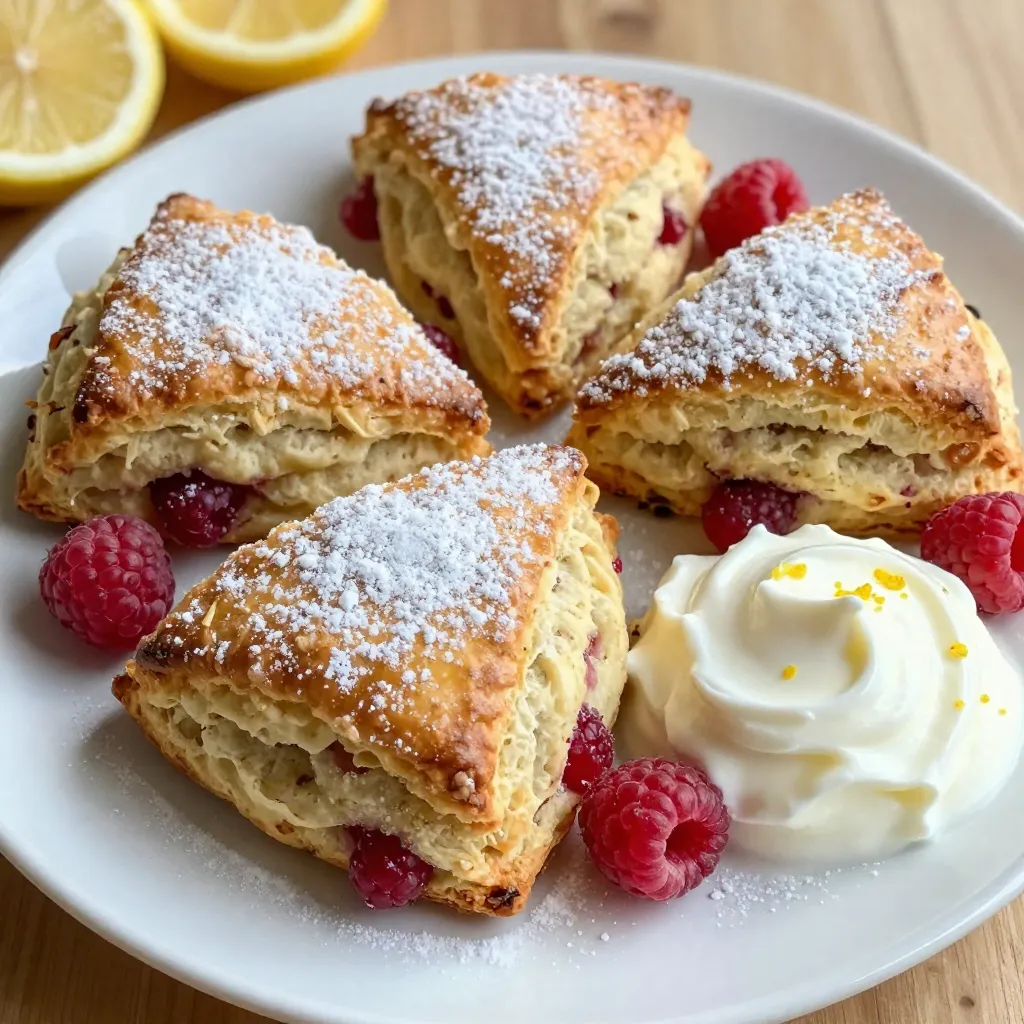
Raspberry Lemon Scones Flaky and Delightful Pastry
Are you ready to indulge in a treat that’s both flaky and fruity? These Raspberry Lemon Scones bring tart flavor and sweet joy in every
- 2 cups rolled oats - 1 cup creamy peanut butter - 1/3 cup honey or maple syrup - 1/2 cup brown sugar, packed - 1 teaspoon vanilla extract - 1/2 teaspoon salt - 1/2 cup mini chocolate chips - 1/4 cup chopped nuts (e.g., almonds or walnuts) - 1/4 cup dried fruit (e.g., cranberries or raisins) To make these granola bars, you need simple and tasty ingredients. First, rolled oats form the base. They give the bars a chewy texture. Next, creamy peanut butter adds richness and flavor. Honey or maple syrup acts as a sweetener and helps bind everything together. Brown sugar brings extra sweetness and depth. Vanilla extract adds a warm note, while salt balances the sweetness. Mini chocolate chips give a delightful burst of chocolate. Finally, chopped nuts and dried fruit add crunch and chewiness. Feel free to get creative with your choices! - Other nuts or seeds: Try walnuts, pecans, or sunflower seeds for added crunch. - Dried fruit alternatives: Use raisins, apricots, or figs to change the flavor. - Healthier sweetener options: Swap honey for agave syrup or use stevia for less sugar. Adding these options can make your granola bars even more fun and nutritious! {{ingredient_image_1}} 1. Preheat your oven to 350°F (175°C). 2. Line an 8x8 inch baking dish with parchment paper. Make sure to leave some overhang. This makes it easy to lift the bars out later. 3. In a large bowl, mix the rolled oats, chopped nuts, and dried fruit. Stir well to combine. 1. In a medium saucepan, combine the peanut butter, honey or maple syrup, brown sugar, vanilla extract, and salt. 2. Heat this mixture over low heat. Stir it for about 2-3 minutes until it is smooth and the sugar dissolves. 3. Pour this smooth peanut butter mixture over the dry ingredients. 4. Use a spatula to mix everything together. Make sure all the dry parts get coated well. 5. Wait a moment for the mixture to cool slightly. Then, stir in the mini chocolate chips. This keeps the chips from melting. 6. Transfer the mixture into the prepared baking dish. Press it down firmly. Make sure it spreads evenly into the corners. 1. Bake in the preheated oven for about 15-20 minutes. Look for golden brown edges. 2. When done, take it out and let it cool in the pan for at least 20 minutes. 3. Use the parchment paper to lift the bars out and place them on a cutting board. 1. Allow the bars to cool completely at room temperature. 2. Once cool, cut them into bars or squares as you like. 3. Store the bars in an airtight container to keep them fresh. - For a fun presentation, wrap each bar in parchment paper. Tie them with string for a cute snack. - Pair these bars with yogurt for breakfast or enjoy them with a smoothie for a quick lunch. - Watch the baking time. If you overbake, the bars may become hard. If you underbake, they can crumble. - Mix the dry ingredients well before adding the wet ones. This helps every bite have the same flavor. - If you need nut-free options, use sun butter or soy nut butter instead of peanut butter. - For a vegan twist, swap honey for agave syrup or maple syrup. Pro Tips Use Natural Sweeteners: For a healthier option, consider using pure maple syrup or agave nectar instead of brown sugar. This will give your bars a delightful flavor while reducing refined sugar content. Customize Your Add-Ins: Feel free to mix and match the nuts and dried fruits according to your taste preferences. Chopped dates, pumpkin seeds, or even shredded coconut can add unique flavors and textures. Don’t Skip the Cooling Time: Allowing the bars to cool completely before cutting is crucial. This helps them firm up and maintain their shape, making them easier to handle. Storage Tips: To keep your granola bars fresh, store them in an airtight container at room temperature for up to a week, or refrigerate for longer shelf life. You can also freeze them for up to three months! {{image_2}} You can switch up the flavor of your granola bars easily. Adding spices like cinnamon or nutmeg can give them a warm and inviting taste. Just a pinch can make a big difference! You can also try using other nut butters like almond or cashew. Each nut butter has its own flavor, so it changes the whole bar. Do you prefer crunchy or chewy granola bars? You can adjust the texture by how long you bake them. For a crunchy bar, bake a bit longer. For a chewier bar, take them out when they are just golden. You can also mix in crispy rice or puffed quinoa. These add a fun crunch and keep the bars light. Seasonal ingredients can keep your bars fresh and exciting. In the fall, try adding pumpkin seeds or dried apples. In the summer, use dried mango or fresh berries if you can. Each season brings new flavors to explore! Mixing in seasonal nuts or fruits can make your granola bars unique and delicious. To keep your peanut butter chocolate chip granola bars fresh, store them in an airtight container. This helps to keep moisture out. For short-term storage, you can leave them at room temperature for up to a week. If you want them to last longer, place them in the fridge. They can stay fresh for about two weeks in the fridge. For long-term storage, you can freeze the bars. Wrap them well in plastic wrap or foil before placing them in a freezer-safe container. This will help prevent freezer burn. These granola bars will stay fresh for about one week at room temperature. In the fridge, they can last up to two weeks. Look for signs that the granola bars have gone bad. If you see mold, an off smell, or a change in texture, it’s best to throw them away. To freeze granola bars properly, wrap each bar tightly in plastic wrap or foil. Place the wrapped bars in a freezer-safe bag or container. This keeps them fresh and prevents freezer burn. When you're ready to eat them, take the bars out of the freezer. Let them thaw in the fridge for a few hours or at room temperature for about 30 minutes. Enjoy them as a quick snack or breakfast! You can replace peanut butter with other nut butters or seed butters. Almond butter or sunflower seed butter work well. Use the same amount for best results. Mix it with honey or maple syrup for sweetness. Yes, you can! Just choose gluten-free oats. Make sure any other ingredients, like nuts and dried fruit, are certified gluten-free. This way, you keep it safe for those with gluten issues. To cut granola bars, use a sharp knife. Let the bars cool fully first. This helps them hold together better. For clean cuts, you can warm the knife slightly. This makes cutting easier. I recommend using rolled oats for texture. Quick oats can make the bars too soft. If you only have quick oats, reduce the baking time. Check for doneness sooner to avoid overbaking. To keep your bars together, press the mixture firmly into the pan. Let them cool completely before cutting. If they still fall apart, try adding more peanut butter or a bit of water to help bind them. In this post, we covered how to make easy and tasty granola bars. We went through the key ingredients, preparation steps, and tips for the best results. Remember, you can customize these bars to fit your tastes with different nuts and fruits. Making granola bars is fun and simple. With a few changes, you can make them just how you like. Enjoy your homemade snacks for lunch or as a quick breakfast! They are a great way to feel good and stay full.
Peanut Butter Chocolate Chip Granola Bars Recipe
Looking for a tasty snack that’s easy to make? These Peanut Butter Chocolate Chip Granola Bars are just what you need! With simple ingredients and
Creating the perfect apple crumble cake starts with the right ingredients. Here’s what you need: - 3 medium Granny Smith apples, peeled, cored, and diced - 2 cups all-purpose flour - 1 cup granulated sugar - 1/2 cup packed brown sugar - 1/2 cup unsalted butter, softened to room temperature - 1 cup rolled oats - 1 teaspoon baking powder - 1/2 teaspoon baking soda - 1 teaspoon ground cinnamon - 1/2 teaspoon salt - 2 large eggs - 1 teaspoon vanilla extract - 1/2 cup buttermilk (or substitute by mixing 1/2 cup milk with 1/2 tablespoon vinegar) 1. Apples: Granny Smith apples work best. They are tart and hold their shape. You can use Honeycrisp or Fuji if you prefer sweeter apples. 2. Flour: All-purpose flour gives a good structure. You can swap for whole wheat flour for a healthier option. 3. Sugars: Granulated sugar adds sweetness, while brown sugar brings moisture and a deep flavor. Coconut sugar is a great substitute for a lower glycemic index. 4. Butter: Unsalted butter is ideal for control over salt. You can use coconut oil for a dairy-free version. 5. Oats: Rolled oats add texture to the crumble. Quick oats can work but will change the texture slightly. 6. Baking powder & baking soda: These help the cake rise. Make sure they are fresh for the best results. 7. Spices: Ground cinnamon gives warmth. You can add nutmeg for extra flavor. 8. Salt: A little salt enhances all the flavors. Make sure to measure it accurately. 9. Eggs: Eggs bind the ingredients. For a vegan option, use flax eggs or applesauce. 10. Vanilla extract: This adds a lovely depth to the cake. You can use almond extract for a different flavor. 11. Buttermilk: It keeps the cake moist. If you don’t have it, mixing milk with vinegar works well. These ingredients come together in a simple, fun way to make the apple crumble cake. You can find the full recipe for more detailed instructions. Each ingredient plays a key role in making this cake delicious and enjoyable! 1. First, preheat your oven to 350°F (175°C). Grease a 9-inch cake pan with butter, then dust it with flour. You can also use parchment paper for easy removal. 2. In a large bowl, cream the softened butter with granulated and brown sugars. Mix until it is light and fluffy. 3. Next, add the eggs one at a time. Mix well after each egg. Stir in the vanilla extract for extra flavor. 1. Toss the diced Granny Smith apples with 1 tablespoon of granulated sugar and a pinch of cinnamon. Let them sit for about 10 minutes. This helps the apples release juice and adds flavor. 2. Gently fold the apple mixture into the cake batter. Make sure to do this carefully so the apples stay intact. 1. For the crumble topping, you need rolled oats, flour, brown sugar, and a pinch of salt. In a small bowl, mix these ingredients together. 2. Melt an additional 1/4 cup of butter and stir it into the oat mixture. Mix until it forms coarse crumbs, which will create a nice texture on top of your cake. 3. Evenly sprinkle the crumble topping over the cake batter. This will add a delicious crunch when baked. Once you’ve followed these steps, your cake will be ready to bake. For the full recipe, you can refer back to the beginning of this article. Enjoy the delightful process and the wonderful smell that fills your kitchen! To get your apple crumble cake just right, avoid overmixing the batter. This keeps the cake soft and fluffy. Mix until the ingredients blend, but don't stir too much. Cutting apples uniformly is key too. Use a sharp knife and a steady hand. Aim for small, even pieces. This helps the apples cook evenly and blend well in the cake. Oven temperatures can vary, so check yours with an oven thermometer. If your oven runs hot, reduce the temperature by 25°F. This prevents burning the edges while keeping the center moist. To check if your cake is done, insert a toothpick into the center. If it comes out clean, the cake is ready. Let it cool in the pan for about 10 minutes, then transfer it to a wire rack. This helps prevent sogginess from steam. For more details on making this delicious cake, check the Full Recipe. {{image_4}} You can make your apple crumble cake even better. Consider adding nuts like walnuts or pecans. They add a nice crunch and rich flavor. You can also mix in spices. Try nutmeg or ginger for extra warmth. Another fun idea is to incorporate other fruits. Pears or berries blend well with apples. They add a twist to the taste and make it colorful. Want a healthier cake? Use whole wheat flour instead of all-purpose flour. It adds fiber and nutrients. You can also try coconut sugar instead of granulated sugar. It has a lower glycemic index. If you're watching your sugar or fat, consider some substitutions. Use unsweetened applesauce in place of butter. It keeps the cake moist and cuts down on calories. You can also reduce the sugar in the recipe. Start with half the amount and see how it tastes. Each small change can lead to a delicious cake that fits your needs. To keep your apple crumble cake fresh, store it in an airtight container. This helps trap moisture and keeps the cake soft. If you have leftovers, let the cake cool down completely. Then, cover it tightly with plastic wrap or place it in a container. You can store the cake at room temperature for up to three days. However, if you live in a warm area, it's better to refrigerate it. Refrigeration can extend its life for about a week. Just remember, cold air can dry it out, so wrap it well. When you want to enjoy your cake again, reheating is key. The best method is to use an oven. Preheat your oven to 350°F (175°C). Place a slice of cake on a baking sheet and warm it for about 10 minutes. This keeps the texture nice. You can also use a microwave for quick reheating. Just place a slice on a microwave-safe plate. Heat it for 15-20 seconds. Be careful not to overheat, as this can make the cake tough. Enjoy your cake warm, and it will taste almost fresh-baked! Can I use other types of apples? Yes, you can use different apples. Try Honeycrisp for sweetness or Fuji for crunch. Each type brings its own flavor. Experiment to find your favorite mix. How do I know when the cake is done baking? Check for doneness by inserting a toothpick into the center. If it comes out clean, the cake is ready. The edges should look golden, and the top should bounce back when touched lightly. Can I freeze the apple crumble cake? Absolutely! Wrap the cooled cake tightly in plastic wrap. Then place it in an airtight container or freezer bag. It stays fresh for about three months. Thaw in the fridge before serving for best results. Serve your apple crumble cake warm or at room temperature. It pairs well with a scoop of vanilla ice cream or a dollop of whipped cream. For drinks, try a cup of hot tea or a glass of sweet cider. They enhance the cake’s flavors perfectly. Want a twist? A splash of caramel sauce adds an indulgent touch. For the full recipe, check the section above. You learned how to make a delicious apple crumble cake. We covered the ingredients, steps, and tips for success. Remember to mix well and check your oven’s temperature. You can even try different fruits or nuts to change the flavor. Proper storage will keep your cake fresh longer. With this guide, you can bake with confidence. Enjoy sharing your tasty results with friends and family!
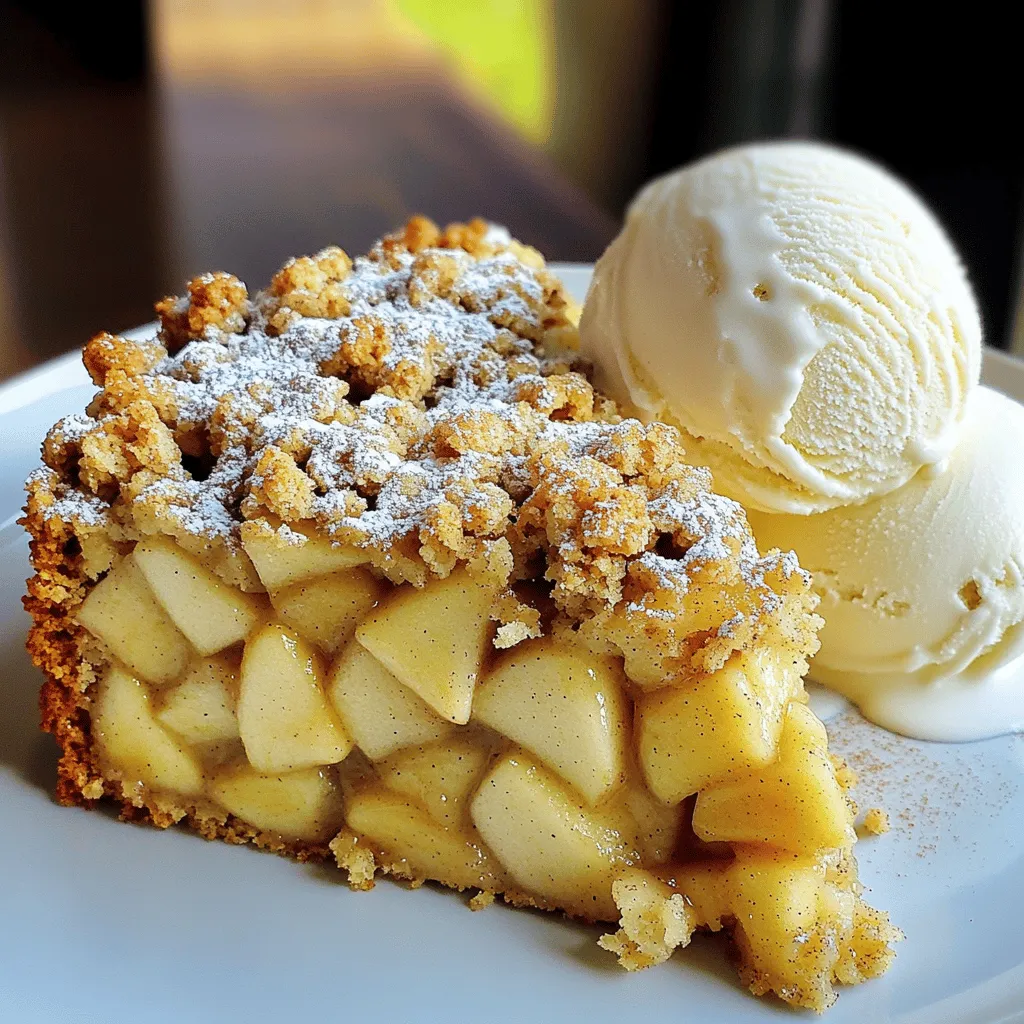
Apple Crumble Cake Easy Recipe You Will Love
Are you ready to dive into a deliciously simple dessert? This Apple Crumble Cake recipe combines the warm flavors of spiced apples with a crunchy
- 4 cups all-purpose flour - 1 packet (2 1/4 teaspoons) instant yeast - 1/4 cup granulated sugar - 1 teaspoon salt - 1 cup whole milk, warmed to 110°F (45°C) - 1/4 cup unsalted butter, melted - 3/4 cup apple butter (store-bought or homemade) - 1 teaspoon ground cinnamon - 1/2 teaspoon ground nutmeg - 1 egg, beaten (for egg wash) - Coarse sugar (optional, for sprinkling on top) Apple butter is the star of this recipe. It adds rich flavor and moisture. You can buy it at the store or make your own. Whole milk helps the dough rise and stay soft. The butter adds richness and flavor. Instant yeast makes the dough rise quickly, so you can enjoy your bread sooner. Ground cinnamon and nutmeg bring warmth and spice, making this bread cozy and inviting. If you don't have all-purpose flour, you can use bread flour. It gives a chewier texture. For milk, any milk alternative like almond milk works too, but it may change the taste. Applesauce can replace apple butter if you're in a pinch, but it won't be as rich. If you want a dairy-free option, use coconut oil instead of butter. For the egg wash, you can brush the dough with non-dairy milk for a similar effect. To start, you need a large mixing bowl. Combine 2 cups of flour, instant yeast, sugar, and salt. Whisk these together well. In another bowl, mix warmed milk and melted butter. Pour this mix into the dry ingredients. Stir until you see a soft dough form. Gradually add the remaining flour, one cup at a time. Mix after each addition until the dough becomes soft and slightly sticky. Next, turn the dough onto a floured surface and knead it for 5-7 minutes. You want it to be smooth and elastic. After kneading, place the dough in a greased bowl. Cover it with a clean kitchen towel. Let it rise in a warm spot for about 1 hour, or until it doubles in size. After the dough has risen, gently punch it down. This step releases any air. Transfer the dough to a lightly floured surface. Roll it into a large rectangle, about 12x18 inches. Use a spatula or knife to spread the apple butter evenly over the dough. Leave a 1-inch border around the edges. Now, sprinkle ground cinnamon and nutmeg over the apple butter. Cut the dough into strips, each about 2 inches wide. Stack the strips on top of each other, then slice them into 2-inch squares. Arrange these squares in a greased loaf pan. Stand them upright on their edges. This shows off the beautiful apple butter filling. Cover the loaf pan with a towel. Let it rise again for about 30 minutes. Preheat your oven to 350°F (175°C) while the dough rises. Once it has risen, brush the top with a beaten egg. This gives it a lovely golden finish. If you want, sprinkle coarse sugar on top for extra sweetness. Bake the bread in the preheated oven for 30-35 minutes. It is done when golden brown and sounds hollow when tapped. After baking, let it cool in the pan for 10 minutes. Then, transfer it to a wire rack to cool completely. Enjoy this soft and flavorful treat! For more details, check the Full Recipe. To get the best rise, keep your dough warm. Yeast loves warmth. I find a cozy spot in my kitchen, away from drafts. Cover the dough with a towel. This keeps the heat in. Let it rise until it doubles in size. This usually takes about one hour. If your kitchen is cool, it may need more time. Kneading is vital. It helps develop gluten, making the bread soft. Place the dough on a floured surface. Use your palms to push and fold the dough. Do this for about 5 to 7 minutes. It should feel smooth and elastic. If it sticks to your hands, sprinkle a bit of flour. Be gentle; too much flour makes it dry. The oven temperature matters. Preheat your oven to 350°F (175°C). This ensures even baking. Bake the bread for 30 to 35 minutes. You’ll know it’s done when the top is golden brown. Tap the bread lightly; it should sound hollow. If you want a crispy crust, bake it a bit longer. Just keep an eye on it! For the best results, follow the Full Recipe closely. {{image_4}} You can easily change the flavor of your Apple Butter Pull-Apart Bread. Replace cinnamon and nutmeg with other spices. Try cardamom for a warm twist or ginger for a spicy kick. You can also add chopped nuts or dried fruits like raisins or cranberries. These additions make each bite exciting and unique. If you need a gluten-free option, use a gluten-free flour blend. Brands like Bob’s Red Mill or King Arthur have great blends that work well. Follow the same steps in the full recipe. Just remember to add a bit more liquid if the dough seems too dry. This way, everyone can enjoy this tasty bread! You can also make this bread savory. Instead of apple butter, try pesto or a cheese spread. Add herbs like rosemary or thyme to the dough. For a sweet touch, mix in chocolate chips or caramel bits. The options are endless! These variations let you create a bread that fits any meal or occasion. To keep your apple butter pull-apart bread fresh, wrap it tightly with plastic wrap or foil. Place the wrapped bread in an airtight container or a resealable bag. Stored this way, it stays fresh for about 2-3 days at room temperature. If you live in a humid area, refrigerate it to prevent mold. For the best taste, reheat your bread before serving. Preheat your oven to 350°F (175°C). Remove the bread from its wrapping and place it on a baking sheet. Heat for about 10-15 minutes until warm. This method keeps the bread soft and revives its lovely texture. You can also use a microwave for quick reheating. Just wrap a slice in a damp paper towel and heat for about 10-15 seconds. To freeze, slice the bread first. Wrap each slice in plastic wrap or foil. Place the wrapped slices in a freezer bag. This helps avoid freezer burn. Your apple butter pull-apart bread can last up to 3 months in the freezer. When you're ready to eat, thaw the slices in the fridge overnight. Reheat them using the tips above for the best results. For the complete recipe, refer to the Full Recipe section. Apple butter is a spread made from cooked apples. It is smooth and thick, similar to jam. It gets its name from the rich, dark color that resembles butter. The cooking process breaks down the apples, enhancing their natural sweetness. Spices like cinnamon and nutmeg often join the mix, adding warmth and flavor. You can use apple butter on toast, pancakes, or in recipes like this pull-apart bread. Yes, you can use homemade apple butter! In fact, I encourage it. Homemade apple butter often tastes fresher and can be tailored to your liking. You can adjust the sweetness and spices to match your taste. Just ensure it is thick enough to spread evenly on the dough. If it's too thin, it might make the bread soggy. Using your own apple butter adds a personal touch to this recipe. To check if the bread is done, tap the top gently. If it sounds hollow, it is ready. You can also use a toothpick. Insert it into the center of the bread. If it comes out clean, your bread is baked through. The top should be golden brown and firm to the touch. Keep an eye on it during the last few minutes of baking to avoid overcooking. Following these tips ensures a perfectly baked apple butter pull-apart bread. For the full recipe, check out the details provided earlier. In this article, we explored how to make apple butter pull-apart bread. We covered key ingredients and their substitutes. I provided step-by-step instructions, tips for the perfect rise, and variations to try. Remember, you can store leftovers and reheat them easily. Experiment with flavors and make this recipe yours. Enjoy the process and the delicious results. Making this bread can be fun and rewarding!
Apple Butter Pull-Apart Bread Soft and Flavorful Treat
If you’re craving a warm, sweet treat that’s soft and easy to share, you’ve found it! Apple Butter Pull-Apart Bread combines sweet flavors with a
To make sweet potato hand pies, you need the following ingredients: - 2 medium sweet potatoes (about 1 lb), peeled and cubed - 1/4 cup brown sugar - 1 teaspoon ground cinnamon - 1/4 teaspoon ground nutmeg - 1 tablespoon unsalted butter, melted - 1 tablespoon pure vanilla extract - 1 package of refrigerated pie crusts (contains 2 crusts) - 1 large egg (for egg wash) - Pinch of salt - Optional: powdered sugar for a finishing touch You can also try these optional ingredients to switch up the flavor: - 1/4 cup chopped pecans for crunch - 1/4 cup raisins or dried cranberries for sweetness - A splash of maple syrup for extra richness Gather these tools to help you make the hand pies: - Large pot for boiling sweet potatoes - Mixing bowl for the filling - Fork or potato masher for mashing - Rolling pin for the pie crust - Pastry cutter or large bowl for cutting dough circles - Baking sheet lined with parchment paper - Pastry brush for the egg wash First, boil water in a pot. Once boiling, add the cubed sweet potatoes. Cook them for 15 to 20 minutes. You want them to be fork-tender. After cooking, drain the water. Let the sweet potatoes cool until you can handle them. In a mixing bowl, mash the cooked sweet potatoes with a fork. Make sure they are smooth. Next, add 1/4 cup of brown sugar, 1 teaspoon of cinnamon, and 1/4 teaspoon of nutmeg. Pour in 1 tablespoon of melted butter and 1 tablespoon of vanilla extract. Don’t forget a pinch of salt. Mix everything until it’s well combined, then set it aside to cool fully. Preheat your oven to 400°F (200°C). Line a baking sheet with parchment paper. This helps with cleanup later. Roll out the refrigerated pie crusts on a floured surface. Cut each crust into circles that are about 5-6 inches wide. Spoon about 1 tablespoon of the sweet potato filling into the center of each circle. Be careful not to overfill them. Fold each circle in half to make a half-moon shape. Use a fork to press the edges together. This keeps the filling from leaking. In a small bowl, beat 1 egg. Brush the tops of the hand pies with this egg wash. This gives them a nice golden color. Place the pies on your baking sheet, leaving space between them. Bake for 20 to 25 minutes until they are puffed and golden brown. After baking, take them out and let them cool on a wire rack. If you want, you can dust them with powdered sugar. Serve these warm for the best taste. They look great on a platter, especially with fresh mint leaves for color. For the full recipe, check the main section. To make the best pie crust, start with cold ingredients. Cold butter and water help create a flaky texture. When rolling out the dough, keep it about 1/8 inch thick. This thickness ensures the crust holds the filling well. Don’t overwork the dough; mix until just combined. For extra flavor, sprinkle a little salt in the dough. One common mistake is overfilling the pies. Too much filling causes them to burst while baking. Another mistake is not sealing the edges well. Make sure to crimp them tightly with a fork. Also, don’t forget the egg wash. Skipping it will result in pale and dull pies. Serve these sweet potato hand pies warm for the best taste. You can dust them with powdered sugar for sweetness. Pair them with a scoop of vanilla ice cream for a treat. A side of whipped cream also makes a nice touch. For a twist, add a drizzle of caramel sauce. These ideas will impress your guests and add to the fun! You can find the full recipe above to get started on these delicious hand pies. {{image_4}} You can change the filling to mix things up. Try using pumpkin puree instead of sweet potato. Apple or cherry fillings work well too. For a savory twist, use cooked ground meat or spinach with feta cheese. Each option creates a new flavor and experience. Feel free to experiment based on what you love. If you need gluten-free hand pies, use gluten-free pie crusts. Many brands offer ready-made options that taste great. You can also make your own crust using almond flour or coconut flour. Just remember, these may need extra care when rolling. The result will still be a tasty treat without the gluten. To make this recipe vegan, swap the butter for coconut oil or vegan butter. Instead of the egg wash, brush the tops with almond milk for a nice shine. Also, make sure your pie crusts do not contain any animal products. These small changes keep the hand pies delicious and friendly for all diets. For the complete recipe, check out the Full Recipe section. To keep your sweet potato hand pies fresh, let them cool completely. Place them in an airtight container. Store them in the fridge for up to three days. If you want to keep them longer, consider freezing. When you're ready to enjoy leftovers, preheat your oven to 350°F (175°C). Place the hand pies on a baking sheet. Heat them for about 10-15 minutes until warm. Avoid using the microwave. This keeps the crust crispy. To freeze hand pies, ensure they are fully cooled. Wrap each pie tightly in plastic wrap. Place wrapped pies in a freezer bag or container. They can last up to three months. When you're ready to eat, thaw them in the fridge overnight before reheating. Enjoy your tasty treat anytime! For the full recipe, check out the delightful sweet potato hand pies section above. Yes, you can use canned sweet potatoes. Drain and mash them well. Canned sweet potatoes save time and still taste great. Just be careful with the liquid; too much can make the filling too runny. Sweet potato hand pies last about three days at room temperature. For longer storage, keep them in the fridge for up to a week. Make sure they are in an airtight container to stay fresh. Yes, you can make the filling ahead of time. Store it in the fridge for up to three days. You can also assemble the pies and freeze them before baking. Just pop them in the oven when you're ready. Hand pies pair well with several sauces. Consider these options: - Maple syrup for a sweet touch - Honey for a light drizzle - Yogurt sauce for a creamy contrast Experiment and find your favorite! Yes, you can make a healthier version. Use whole wheat pie crust for added fiber. You can also reduce sugar or use natural sweeteners like honey or maple syrup. Swap butter for coconut oil for a lighter option. Check out the Full Recipe for more details! You learned about sweet potato hand pies, from ingredients to baking. Remember to use good tools and follow steps closely. Avoid common mistakes for the best pies. Explore variations for more flavor, too. Store leftovers right and reheat for tasty snacks. With these tips, you can make hand pies that everyone will love. I hope you feel ready to try this fun recipe! Enjoy your cooking adventure!
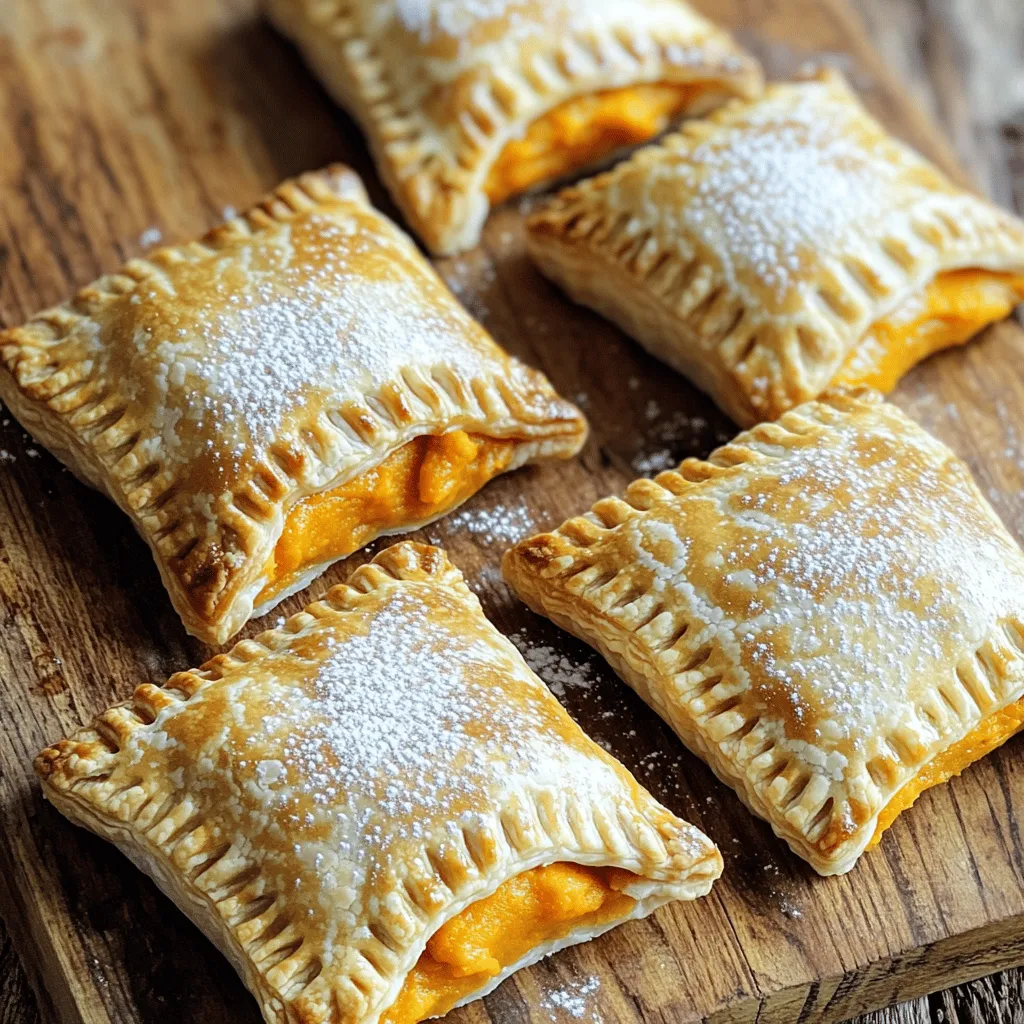
Sweet Potato Hand Pies Easy and Flavorful Treat
If you’re looking for a delicious snack, try my sweet potato hand pies! These treats are easy to make and full of flavor. With a
To make these delightful pumpkin cupcakes, you need a few key items. Here’s what you'll need: - 1 cup canned pumpkin puree - 1 cup granulated sugar - 1/2 cup brown sugar, packed - 1/2 cup vegetable oil - 3 large eggs - 1 teaspoon vanilla extract - 1 1/2 cups all-purpose flour - 1 teaspoon baking powder - 1/2 teaspoon baking soda - 1 teaspoon ground cinnamon - 1/2 teaspoon ground nutmeg - 1/2 teaspoon ground ginger - 1/4 teaspoon salt These ingredients create a moist and flavorful base for your cupcakes. You can enhance your pumpkin cupcakes with some optional ingredients. Consider adding: - 1/4 cup chopped walnuts or pecans Nuts add a nice crunch and depth to the flavor. If you prefer a nut-free version, feel free to skip them. A sweet topping makes your cupcakes even better. For the frosting, I suggest using: - Cream cheese frosting Cream cheese frosting pairs perfectly with pumpkin flavors. You can make it easily at home or buy a ready-made version. Check out the Full Recipe for more details! Start by preheating your oven to 350°F (175°C). This step is key for even baking. Next, line a standard muffin tin with cupcake liners. It makes for easy removal later. In a large bowl, combine the canned pumpkin puree, granulated sugar, brown sugar, vegetable oil, eggs, and vanilla extract. Mix this until it's smooth. A hand mixer works great, but a whisk can do the job too. In another medium bowl, whisk together the all-purpose flour, baking powder, baking soda, ground cinnamon, ground nutmeg, ground ginger, and salt. Mixing these dry ingredients well helps avoid clumps in your batter. Gradually add this dry mix to your wet mix. Stir gently with a spatula or a wooden spoon until just combined. Remember, don’t over-mix! A few lumps are okay and help keep the cupcakes light. If you want some crunch, fold in the chopped walnuts or pecans. Now, it’s time to fill the cupcake liners. Use a measuring cup or spoon to pour the batter evenly into each liner, filling them about two-thirds full. Once your batter is ready, place the muffin tin in your preheated oven. Bake the cupcakes for 18-20 minutes. To check if they're done, insert a toothpick into the center of a cupcake. If it comes out clean, they’re ready! After baking, let the cupcakes cool in the muffin tin for about 5 minutes. This helps them set up. Then, carefully remove each cupcake and transfer them to a wire rack. Let them cool completely before frosting. Once they are cool, top each cupcake with cream cheese frosting. Feel free to decorate them however you like! You can even sprinkle a bit of cinnamon on top. Enjoy your delicious creations! For the complete recipe, check out the Full Recipe. To make your pumpkin cupcakes moist and fluffy, use fresh ingredients. Canned pumpkin puree is key. It adds moisture and flavor. Be sure to mix the wet ingredients well. Combine them until smooth. Then, when you add the dry mix, stir gently. Over-mixing can make your cupcakes dense. Leave some lumps for a lighter texture. One common mistake is not measuring ingredients correctly. Use measuring cups and spoons for precision. Another mistake is not preheating the oven. Always preheat your oven to 350°F (175°C) before baking. This ensures even cooking. Lastly, don’t skip the cooling step. Let your cupcakes cool completely before adding frosting. This helps the frosting stay perfect and not melt. You can easily customize these pumpkin cupcakes. Add chocolate chips for a sweet twist. Try different nuts like pecans or almonds for crunch. You can also swap the cream cheese frosting for chocolate or maple frosting. For a fun touch, decorate with sprinkles or edible flowers. Experiment with spices, too! A pinch of cloves or allspice can add unique flavor notes. Check the Full Recipe for more ideas! {{image_4}} Frosting can change the whole cupcake experience. Here are a few fun options to consider: - Cream cheese frosting: This classic pairs well with pumpkin flavors. It's rich and tangy. - Maple frosting: Use maple syrup to sweeten buttercream. It adds a unique fall taste. - Chocolate ganache: Melt dark chocolate and cream for a luscious topping. It contrasts nicely with pumpkin. - Whipped cream: Light and fluffy, it keeps the cupcake simple and fresh. Feel free to mix and match these frostings based on your mood or occasion! You can still enjoy pumpkin cupcakes if you're gluten-free. Here are some easy swaps: - Almond flour: This nutty flour gives a moist texture. Use it in place of all-purpose flour. - Coconut flour: Use less of this flour. It absorbs more liquid, so adjust your wet ingredients. - Gluten-free baking mix: Many brands offer ready-to-use mixes. Just follow the package instructions. With these options, everyone can enjoy your pumpkin cupcakes! Decorating your cupcakes can add a fun touch. Here are some ideas to inspire your creativity: - Candied pecans: Place one on top for a crunchy bite and a pretty look. - Sprinkles: Use fall-themed colors like orange, yellow, and brown for a festive vibe. - Pumpkin-shaped fondant: Make small pumpkins from fondant for a cute decoration. - Edible flowers: These add elegance and color. Choose safe, edible options. These decorations can make your cupcakes stand out at any gathering. To keep your pumpkin cupcakes fresh, store them in an airtight container. This helps prevent them from drying out. Place parchment paper between layers if stacking. Keep them at room temperature for up to three days. If you want to store them longer, put them in the fridge. This will keep them tasty for about a week. Freezing is a great way to save your pumpkin cupcakes. First, let them cool completely after baking. Then, wrap each cupcake in plastic wrap. This keeps them from getting freezer burn. Place the wrapped cupcakes in a freezer bag or container. They can last for up to three months in the freezer. When you’re ready to eat one, let it thaw at room temperature. Frosting can change if not stored well. Keep it in an airtight container in the fridge. This will keep it fresh for about one week. If you want to frost your cupcakes later, store the cupcakes without frosting. Frost them just before serving. This will keep the frosting looking nice and tasting great. For the best results, use cream cheese frosting. It pairs perfectly with the pumpkin flavor from the full recipe. You can tell when your pumpkin cupcakes are done by using a toothpick. Insert it into the center of a cupcake. If it comes out clean, your cupcakes are ready. The edges should be slightly golden. The tops should spring back when you touch them gently. Yes, you can make these cupcakes ahead of time. Bake them and let them cool completely. Store them in an airtight container at room temperature for up to three days. You can also freeze them for up to three months. Just thaw them in the fridge before serving. If you need an egg substitute, try using unsweetened applesauce. Use 1/4 cup of applesauce for each egg. You can also use mashed bananas or flaxseed meal. For flaxseed, mix 1 tablespoon with 2.5 tablespoons of water. Let it sit for a few minutes until it thickens. These options will keep your cupcakes moist and tasty. This article covered how to make delicious pumpkin cupcakes. We explored key ingredients, baking steps, and tips for a fluffy texture. You learned about variations and how to store cupcakes for freshness. In conclusion, making pumpkin cupcakes is fun and rewarding. Experiment with flavors and decorations for your own twist. Enjoy sharing these treats with others. Happy baking!
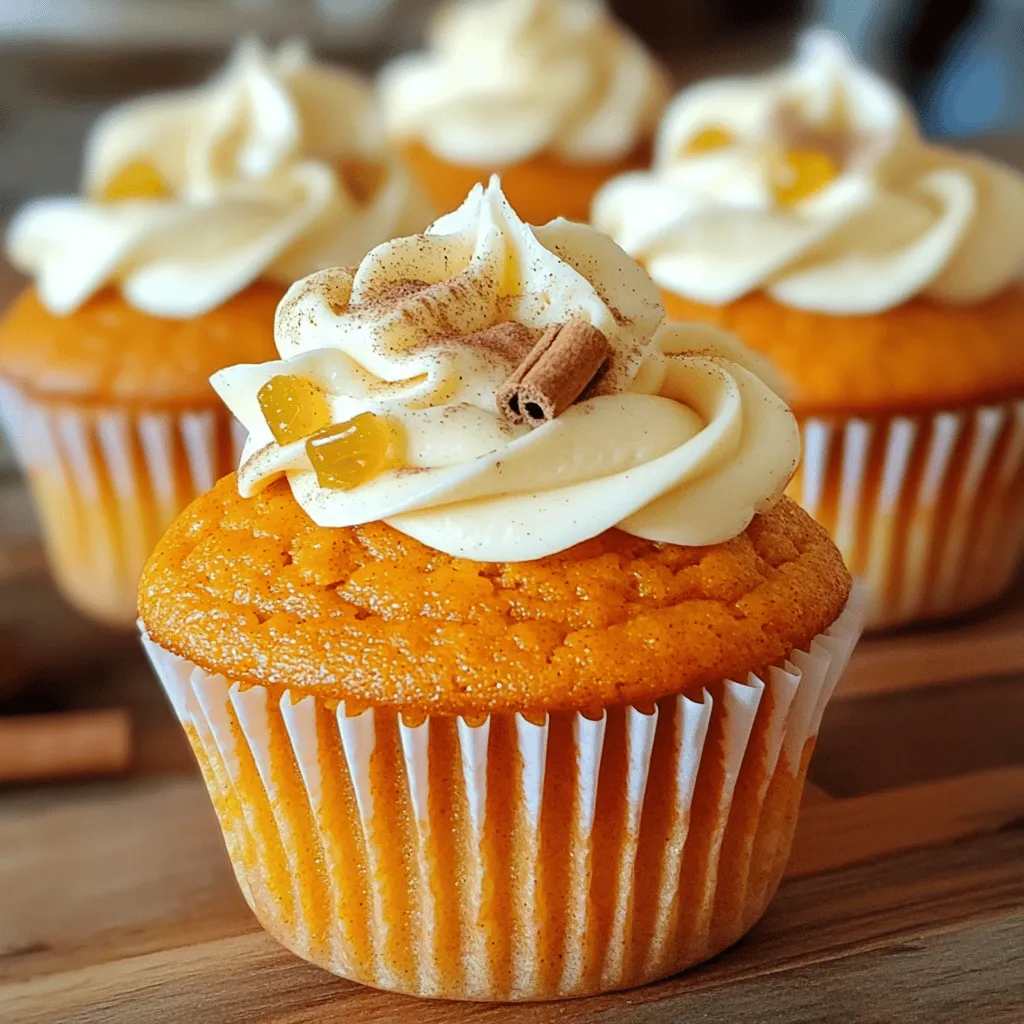
Delicious Pumpkin Cupcakes Easy to Make Treats
If you love fall flavors, you’ll adore these delicious pumpkin cupcakes. They are simple to make and bursting with spice. With easy steps and common
To make Libby’s Pumpkin Roll, you need simple, fresh ingredients. Here’s what to gather: - 3/4 cup all-purpose flour - 1 teaspoon baking powder - 1/2 teaspoon baking soda - 1 teaspoon ground cinnamon - 1/2 teaspoon ground nutmeg - 1/2 teaspoon salt - 3 large eggs - 1 cup granulated sugar - 1 cup canned pumpkin puree - 1 teaspoon vanilla extract - 1 cup cream cheese, softened - 1/4 cup unsalted butter, softened - 1 teaspoon vanilla extract (for frosting) - 1-2 cups powdered sugar (to taste) These ingredients create a moist and flavorful cake. The pumpkin adds a rich taste that pairs well with the spices. While the main ingredients shine, you can enhance your pumpkin roll with these options: - Chopped nuts (like walnuts or pecans) for crunch - Dark chocolate chips for a sweet twist - A touch of ginger for a spicy kick These additions can make your pumpkin roll unique and exciting. Feel free to mix and match according to your taste. If you need alternatives, here are some ideas: - Use whole wheat flour for a healthier option. - Substitute coconut sugar for granulated sugar for a lower glycemic index. - Replace cream cheese with Greek yogurt for a lighter frosting. These substitutes keep the essence of the recipe while catering to different dietary needs. You can still enjoy a delicious pumpkin roll with these changes. For the complete recipe, check out the Full Recipe. First, heat your oven to 350°F (175°C). Grab a 15x10x1 inch jelly roll pan. Line it with parchment paper. This paper helps the cake come out easily later. In a medium bowl, mix the flour, baking powder, baking soda, cinnamon, nutmeg, and salt. Whisk them together well. In a large bowl, beat the eggs and sugar with an electric mixer. Do this for about 2-3 minutes. The mix should look creamy and pale. Now, add the canned pumpkin and vanilla. Stir gently until it's all mixed. Next, fold the dry flour mix into the pumpkin mix. Be careful not to overmix; it can make the cake tough. Pour the batter into your pan. Use a spatula to spread it evenly. Place the pan in the oven and bake for 12-15 minutes. The cake is ready when it springs back to touch or a toothpick comes out clean. While it bakes, prepare a clean dish towel. Dust it with powdered sugar. This step helps the cake not stick when rolling. Once baked, remove the cake and flip it onto the towel. Peel off the parchment paper gently. Start rolling the cake from a short end with the towel. This keeps its shape as it cools. In a new bowl, beat the softened cream cheese and butter together with an electric mixer. Add one teaspoon of vanilla. Mix until it’s all smooth. Gradually add powdered sugar to reach your preferred sweetness. After the cake cools, unroll it carefully. Spread the cream cheese frosting evenly over the cake. Roll it back up without the towel this time. Wrap it in plastic wrap and refrigerate for at least one hour. This step helps the frosting set. Once chilled, slice the roll into 1-inch pieces. Serve them to your guests for a delightful treat. For a lovely touch, dust a bit of powdered sugar on top. You can add a slice of fresh orange or a mint leaf for color. Enjoy your delicious pumpkin roll! A few errors can ruin your pumpkin roll. Here’s how to dodge them: - Overmixing the batter: This can make the cake tough. Mix until just combined. - Not using parchment paper: This helps the cake slide out easily. - Skipping the towel dusting: Without powdered sugar, the cake may stick when rolling. - Letting the cake cool flat: Roll it up while warm to keep its shape. You want your cake to be soft and moist. Here are key tips: - Use fresh ingredients: Fresh eggs and pumpkin puree make a big difference. - Measure flour correctly: Spoon flour into the cup, then level off with a knife. - Don’t skip the cooling step: Cooling the cake rolled helps it stay fluffy. - Check baking time carefully: A toothpick should come out clean, but not dry. Rolling the cake can be tricky. Follow these steps for success: - Use a clean, sugar-dusted towel: This prevents sticking. - Invert the cake quickly: Do this right after it comes out of the oven. - Start rolling from the short end: This helps create a tight roll. - Roll gently but firmly: Avoid tearing the cake as you roll. These tips will help you create a fantastic Libby’s pumpkin roll. For a full recipe, check the easy dessert delight recipe. Enjoy! {{image_4}} You can add some fun flavors to your pumpkin roll. Try mixing in nuts like walnuts or pecans. Chopped chocolate or chocolate chips can add a sweet twist. You can even use spices like ginger or allspice for a unique taste. Each variation gives a new twist to the classic recipe. Your family and friends will love trying different flavors. If you need a gluten-free option, switch the all-purpose flour for a gluten-free blend. Look for one that works well in baking. Make sure it has a good mix of starches and flours for the best texture. The rest of the recipe stays the same. You can enjoy a tasty pumpkin roll without gluten! While cream cheese frosting is great, you can try other frostings too. A whipped cream topping adds lightness. For a fun twist, mix in maple syrup for a fall flavor. You could also use a chocolate ganache for a rich treat. Choose a frosting that fits your taste and mood. The options are endless, and you can customize your pumpkin roll to your liking! To keep your pumpkin roll fresh, wrap it tightly in plastic wrap. This prevents air from drying it out. You can also place it in an airtight container. This will help maintain its moisture and flavor. If you have leftover slices, store them in the same way. When stored properly, the pumpkin roll lasts about 5 to 7 days in the fridge. Keep an eye on it for any signs of spoilage. If you see mold or it smells off, it's best to throw it away. Remember, freshness is key for flavor and safety. If you want to save your pumpkin roll for later, freezing is a great option. First, wrap the whole roll tightly in plastic wrap. Then, place it in a freezer-safe bag or container. It can stay in the freezer for up to 3 months. When you're ready to enjoy it, let it thaw in the fridge overnight. This helps keep the texture nice and moist. For more tips, check out the Full Recipe. Libby’s Pumpkin Roll is a sweet dessert made with pumpkin, spices, and cream cheese. It has a soft, sponge-like cake rolled with a creamy filling. The flavors of pumpkin and warm spices create a cozy vibe. This dessert is perfect for fall gatherings or holiday feasts. You can find the full recipe here. Yes, you can make a pumpkin roll ahead of time. It stays fresh in the fridge for up to three days. If you want to make it even earlier, you can freeze it. Just wrap it well in plastic wrap and foil. Thaw it in the fridge overnight before serving. To prevent a pumpkin roll from cracking, follow these tips: - Roll the cake while it is warm. This helps it maintain its shape. - Use a clean dish towel dusted with powdered sugar when rolling. - Don’t overbake the cake; it should be soft and springy. You can serve Libby’s Pumpkin Roll with a dollop of whipped cream or a scoop of vanilla ice cream. A sprinkle of cinnamon on top adds a nice touch. Fresh fruit, like berries or slices of apple, pairs well, too. They add some color and balance the sweetness. Yes, you can use fresh pumpkin instead of canned. Just roast the pumpkin and mash it well. Make sure it’s not too watery. Drain any excess liquid for the best results. This will give your pumpkin roll a fresh taste. This article covered Libby’s Pumpkin Roll from ingredients to storage. You learned about key and optional ingredients, plus substitutes. I shared clear steps for mixing, baking, and rolling the cake. I offered tips to keep your roll from cracking and ideas for fun variations. Remember, every bite should be delicious! Enjoy your baking and make it your own.
Libby’s Pumpkin Roll Easy Dessert Delight Recipe
Are you ready to impress your family and friends with a simple yet delicious dessert? Libby’s Pumpkin Roll is an easy way to bring festive