Desserts
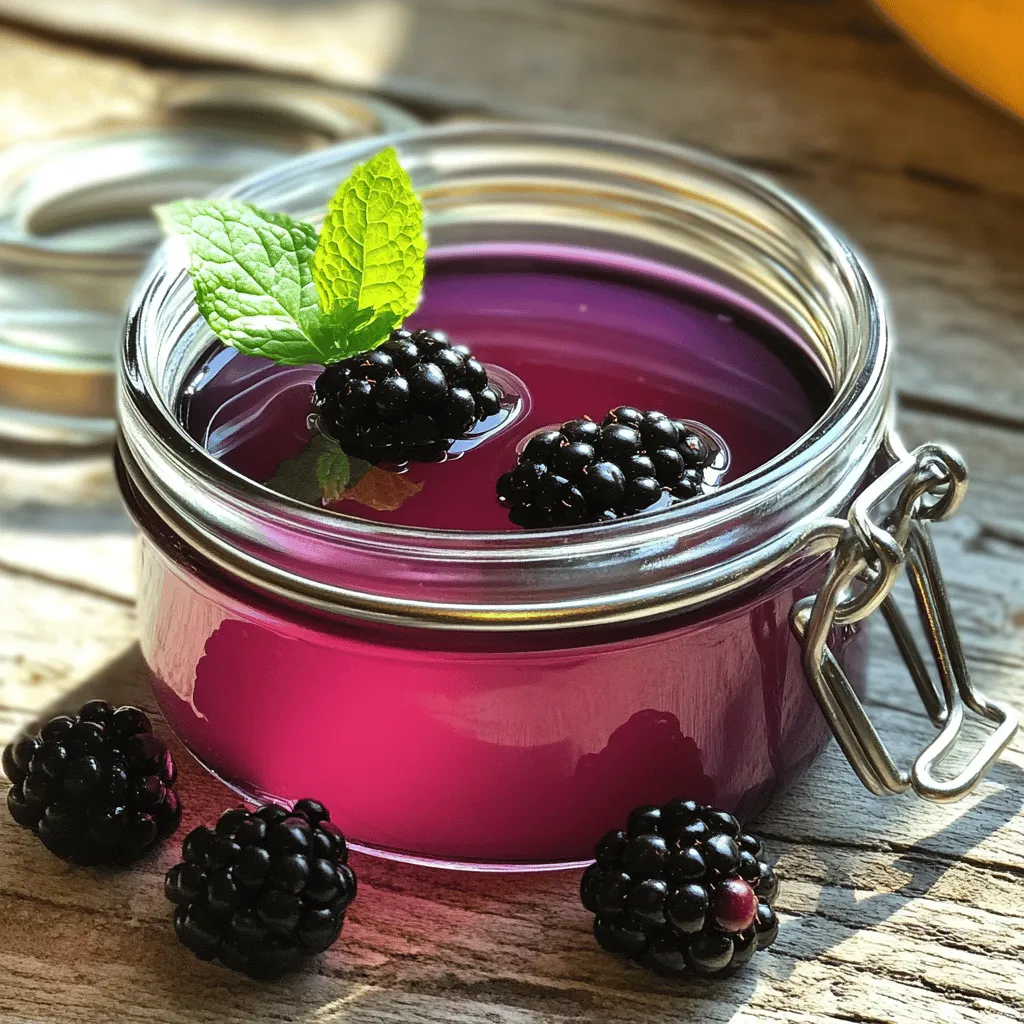
Blackberry Simple Syrup Easy and Flavorful Recipe
Looking to add a burst of berry goodness to your drinks and desserts? This easy blackberry simple syrup recipe is just what you need! With
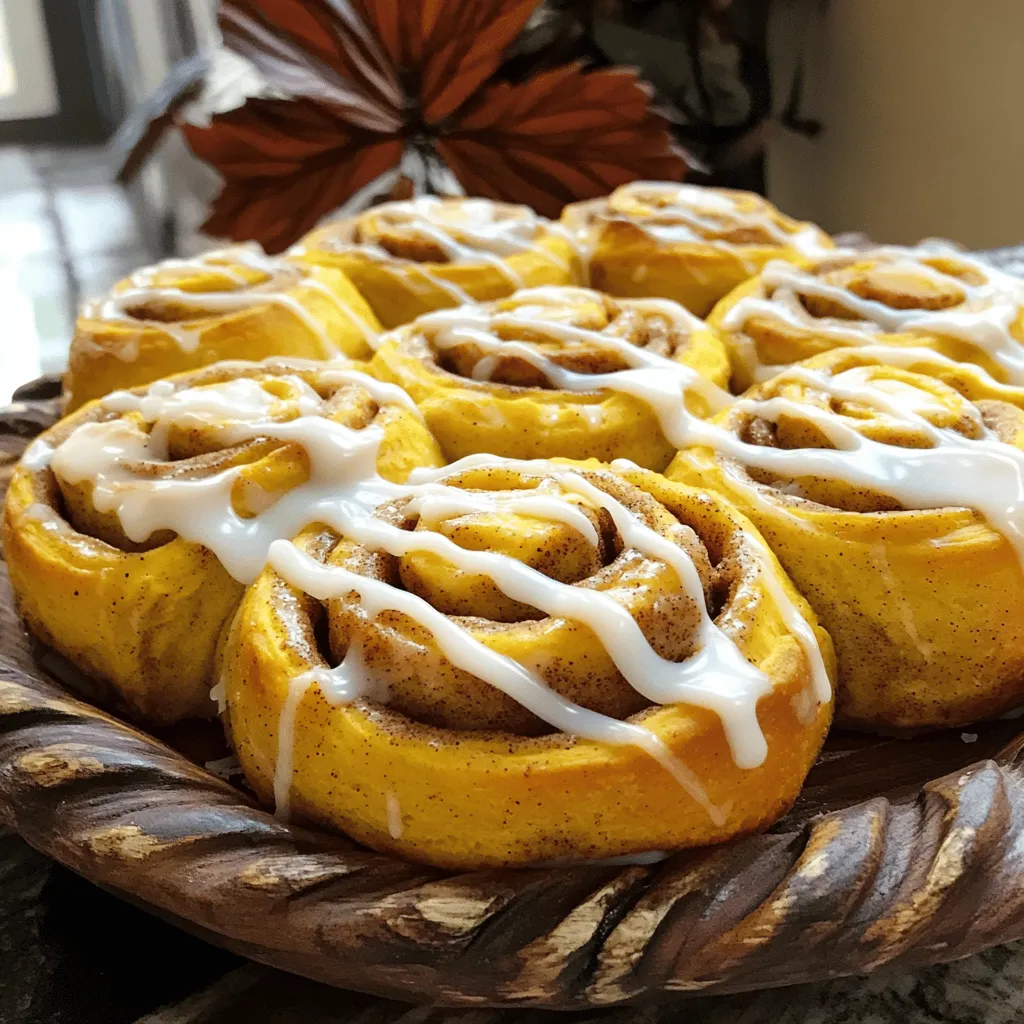
Pumpkin Cinnamon Rolls Cozy and Delicious Treats
Get ready to warm your kitchen with the irresistible scent of pumpkin cinnamon rolls! These cozy and delicious treats mix sweet pumpkin and spicy cinnamon
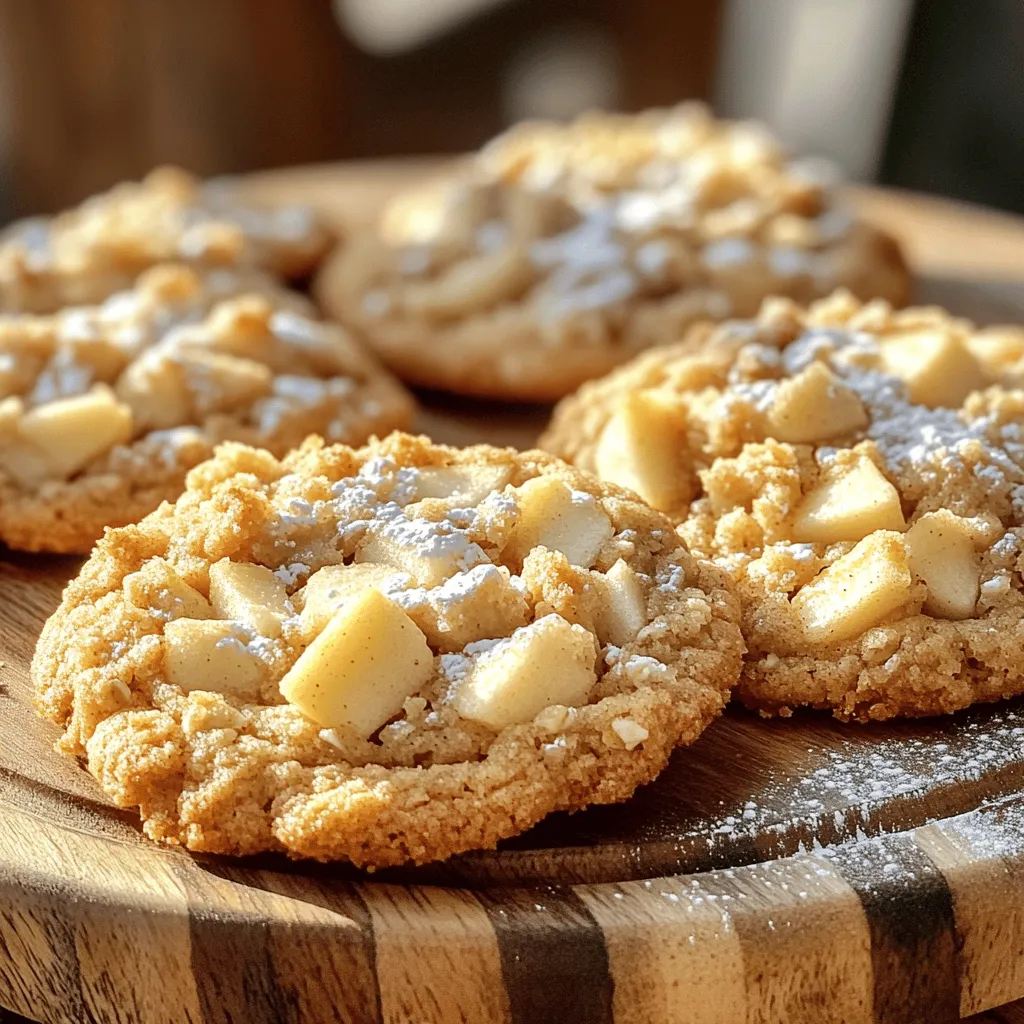
Irresistible Apple Crumb Cookies Easy Homemade Recipe
If you love warm, sweet treats, you’re in for a delight! My Irresistible Apple Crumb Cookies blend the taste of fresh apples and a crispy
![To make these caramel apple turnovers, you need a few key items: - 2 large apples, peeled, cored, and diced - 1/2 cup caramel sauce (store-bought or homemade) - 1 tablespoon freshly squeezed lemon juice - 1 teaspoon ground cinnamon - 1 tablespoon packed brown sugar - 1 package of puff pastry (contains 2 sheets) - 1 egg, beaten (for egg wash) These essentials create that sweet and tangy apple filling, paired perfectly with the flaky pastry. You can add a touch of elegance with powdered sugar for dusting. This gives a nice finish to your turnovers and makes them look extra special when serving. Feel free to play with flavors! You can swap the apples for pears or even berries. If you want a different twist, try using chocolate sauce instead of caramel. These easy swaps help you customize the recipe to your taste. Start by washing the apples. Peel, core, and dice them. I like to use two large apples for this recipe. You can choose your favorite type, like Granny Smith or Fuji. Next, place the diced apples in a medium bowl. Add one tablespoon of lemon juice to keep them fresh. Sprinkle in one teaspoon of ground cinnamon and one tablespoon of packed brown sugar. Finally, pour in half a cup of caramel sauce. Stir until the apples are coated in this sweet mixture. Grab your puff pastry from the fridge. It comes in a package with two sheets. Lightly flour your countertop or a cutting board to prevent sticking. Roll out the pastry sheets until they are thin. Then, cut each sheet into four equal squares. You should have eight squares total. Make sure they are about five inches wide for easy filling. Now it’s time to fill the turnovers. Place about two tablespoons of your apple mixture in the center of each square. Be careful not to overfill! Fold each square in half to form a triangle. Press the edges firmly to seal them. For a fun touch, you can use a fork to crimp the edges. This step also helps keep the filling inside. Next, brush the tops with the beaten egg. This will give them a nice golden-brown color. Preheat your oven to 400°F (200°C). Line a baking sheet with parchment paper for easy cleanup. Before baking, cut a small slit in the top of each turnover. This allows steam to escape while they bake. Place the turnovers on your prepared baking sheet and bake for 18-20 minutes. You want them to puff up and turn golden. Once baked, let them cool for a few minutes. If you want, dust them with powdered sugar for a sweet finish. To achieve the perfect crispiness and flakiness in your caramel apple turnovers, use cold puff pastry. Keep the pastry in the fridge until you are ready to roll it out. This helps maintain its structure while baking. Also, avoid overfilling the turnovers. Too much filling can make them soggy. A good rule is to use about 2 tablespoons of filling per turnover. To store leftover turnovers, place them in an airtight container. They can last in the fridge for up to three days. If you want to keep them longer, freeze them. Wrap each turnover in plastic wrap and place them in a freezer-safe bag. They can last for up to three months in the freezer. When ready to enjoy, preheat your oven to 350°F (175°C) and bake them for about 10-15 minutes. This will help restore their crispiness. For a delightful presentation, arrange the turnovers on a serving platter. Drizzle some extra caramel sauce over the top for added sweetness. You can also dust them lightly with powdered sugar for a touch of elegance. Serve them warm with a scoop of vanilla ice cream or a dollop of whipped cream. This combination will delight your guests and make every bite special. For more ideas, check out the [Full Recipe]. {{image_4}} You can make caramel apple turnovers even better! Try adding nuts like walnuts or pecans. They add a nice crunch. You can also mix in spices like nutmeg or ginger. These spices give a warm flavor that pairs well with apples. Want to be adventurous? Add other fruits like pears or berries. They can bring a fresh twist to the filling. Want a fun twist? Make mini turnovers! Just cut the pastry into smaller squares. They make great snacks or party treats. Another idea is to layer the filling in a dish. Use puff pastry pieces, and create a layered dessert. Top with whipped cream for a fancy touch. These methods change up how you enjoy caramel apple flavors while keeping it fun! If you're looking for healthier choices, try whole grain pastry. It adds fiber and nutrients. You can also reduce the sugar in the filling. Use less brown sugar or caramel sauce. This way, you still enjoy the taste without too much sweetness. These options help you enjoy your treats while being mindful of health. For the full recipe, check out the section above! You can store caramel apple turnovers in the fridge for up to three days. Keep them in an airtight container to prevent them from drying out. If you want to keep them fresh, place a piece of parchment paper between each turnover. This helps avoid sticking. To freeze your caramel apple turnovers, wrap each one tightly in plastic wrap. Then, place them in a freezer bag or container. This way, they stay fresh for up to three months. When you're ready to enjoy them, just take out as many as you need. To reheat frozen turnovers, bake them straight from the freezer. Preheat your oven to 350°F (175°C). Place the turnovers on a baking sheet and heat for about 20-25 minutes. If they are refrigerated, heat them for 10-15 minutes. This method keeps the pastry crispy and the filling warm. To make caramel from scratch, you need just sugar and water. Start by mixing one cup of sugar with a quarter cup of water in a saucepan. Heat over medium heat. Stir until the sugar dissolves. Once it boils, stop stirring and let it cook until it turns a golden brown color. This takes about 8 to 10 minutes. Remove it from heat and let it cool. You can store this caramel sauce for later use or drizzle it over your turnovers. Yes, you can use many fruits for turnovers. Pears, peaches, and berries work well too. Just peel and chop them, like you do with apples. Mix them with lemon juice and spices to enhance their flavor. Each fruit gives a unique taste, so feel free to experiment. This way, you can create new and exciting turnovers based on your favorite fruits. To reheat turnovers, preheat your oven to 350°F (175°C). Place the turnovers on a baking sheet lined with parchment paper. Bake for about 10 to 15 minutes. This keeps them crispy and warm. Avoid using the microwave. It can make the pastry soggy. Enjoy your warm turnovers just like when they were fresh out of the oven! This blog post covered all you need to know about making delicious turnovers. We discussed essential ingredients like apples and puff pastry, plus optional choices for added flair. You learned step-by-step instructions for prepping, assembling, and baking the turnovers. I also shared tips for perfect texture and creative variations. Now you can enjoy fresh turnovers anytime. Explore flavors and find your favorite way to serve them. Happy baking!](https://tossedflavors.com/wp-content/uploads/2025/08/d133770c-a85f-4aa4-abd8-d25cf844199e.webp)
Caramel Apple Turnovers Delightful and Easy Recipe
Are you ready to impress your family with a warm, sweet treat? My recipe for Caramel Apple Turnovers is perfect for any occasion. You’ll enjoy
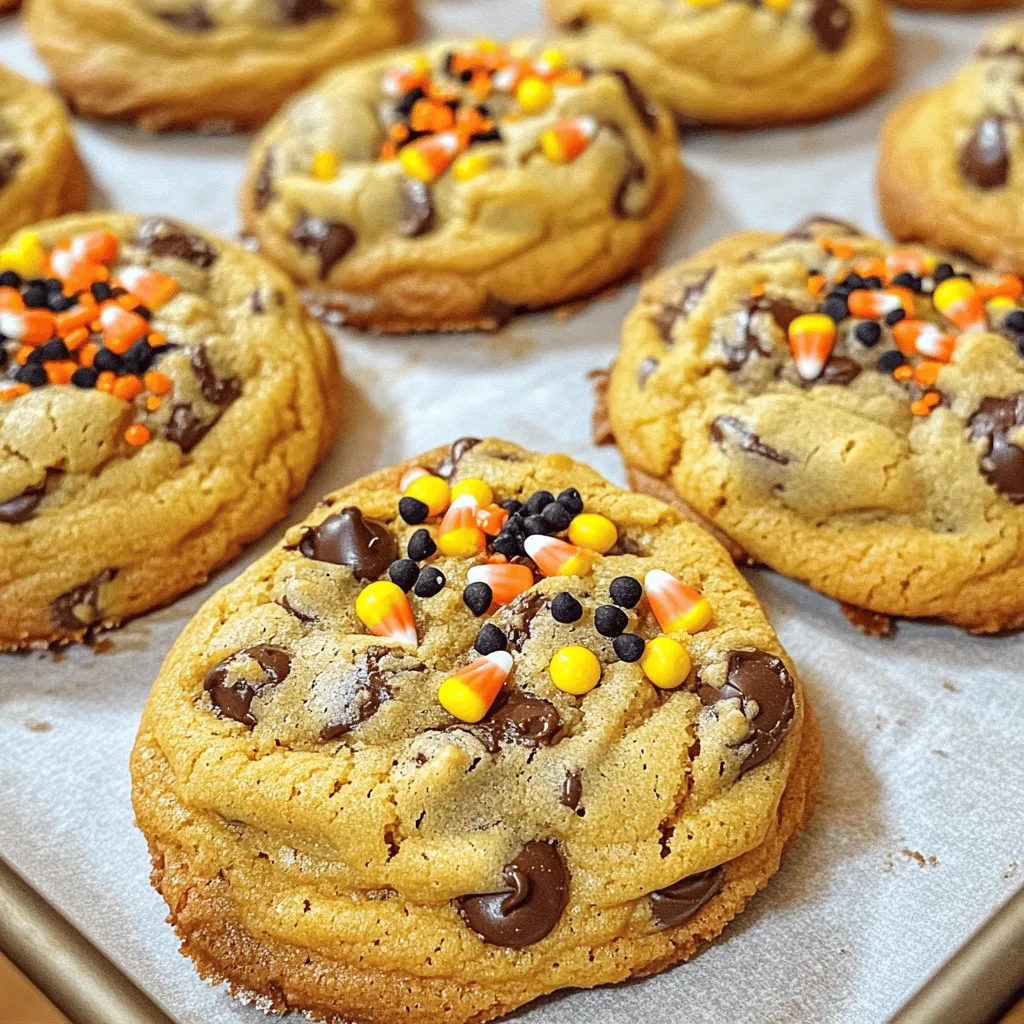
Easy Halloween Chocolate Chip Cookies Simple Treat
Get ready for some spooky fun in the kitchen! In this post, I’ll show you how to make Easy Halloween Chocolate Chip Cookies that are
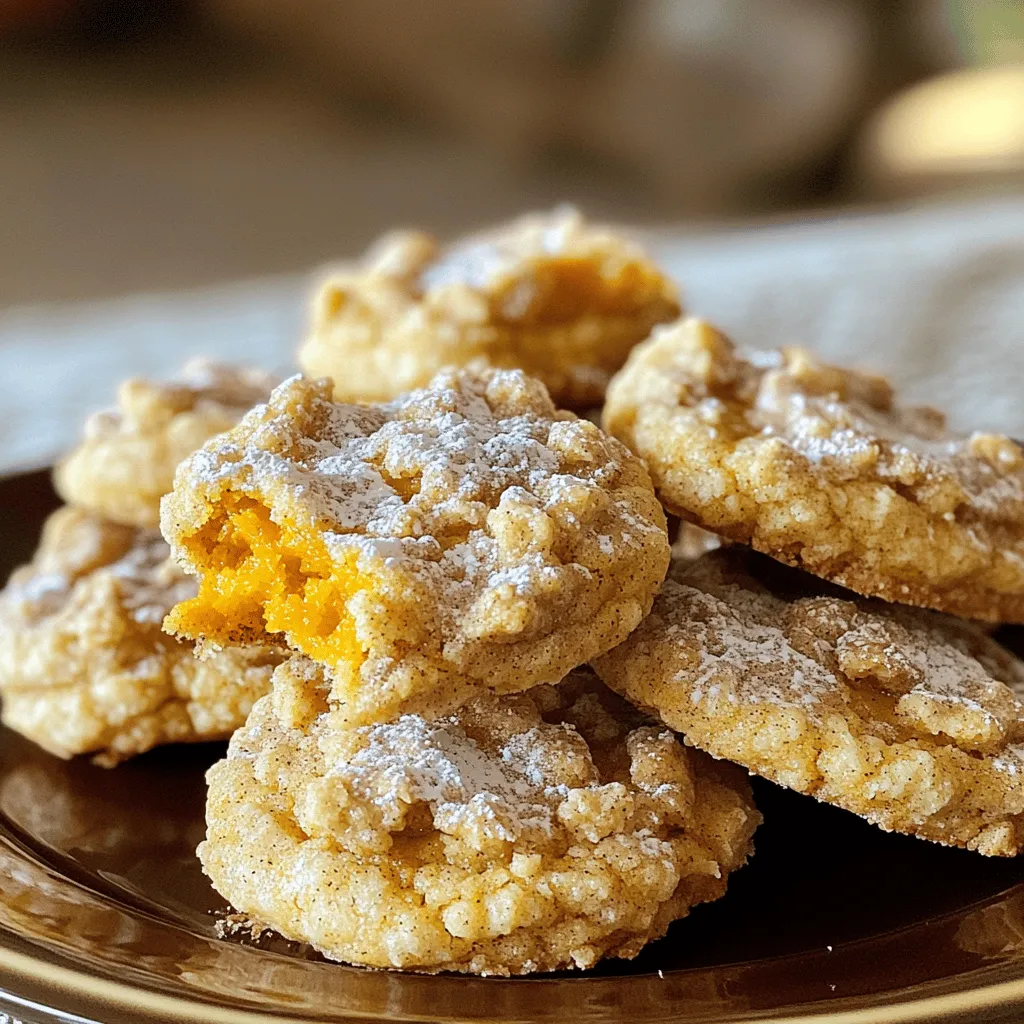
Pumpkin Cinnamon Crumble Cookies Delightful Homemade Treat
Are you ready to spice up your baking with a treat that screams fall? My Pumpkin Cinnamon Crumble Cookies bring together the cozy flavors of
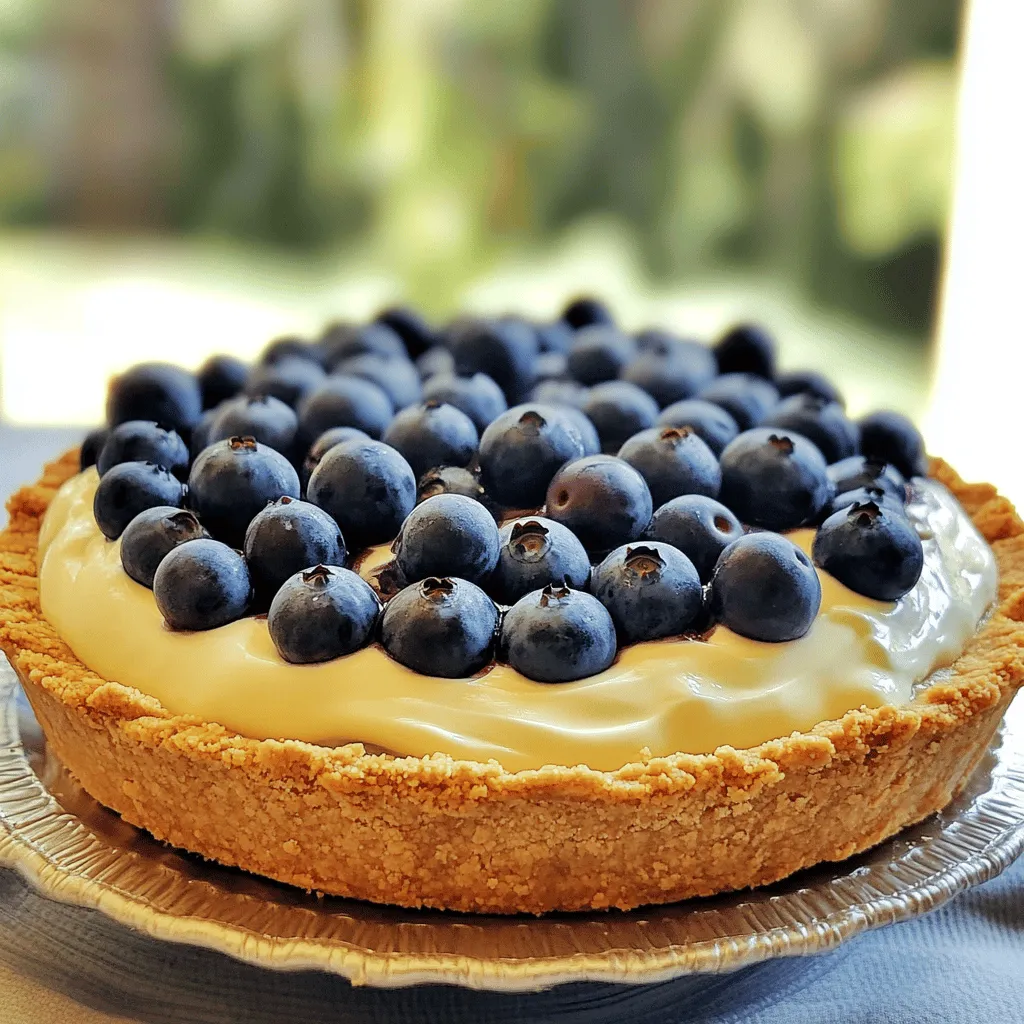
Creamy Blueberry Pie Delightful Summer Dessert Recipe
Looking for a sweet treat to cool you down this summer? My Creamy Blueberry Pie is a delightful dessert that combines fresh blueberries with rich,

Irresistible Boston Cream Pie Cookies You Will Love
If you love Boston cream pie, get ready for a sweet twist! These Boston Cream Pie Cookies are a fun, easy treat you won’t be
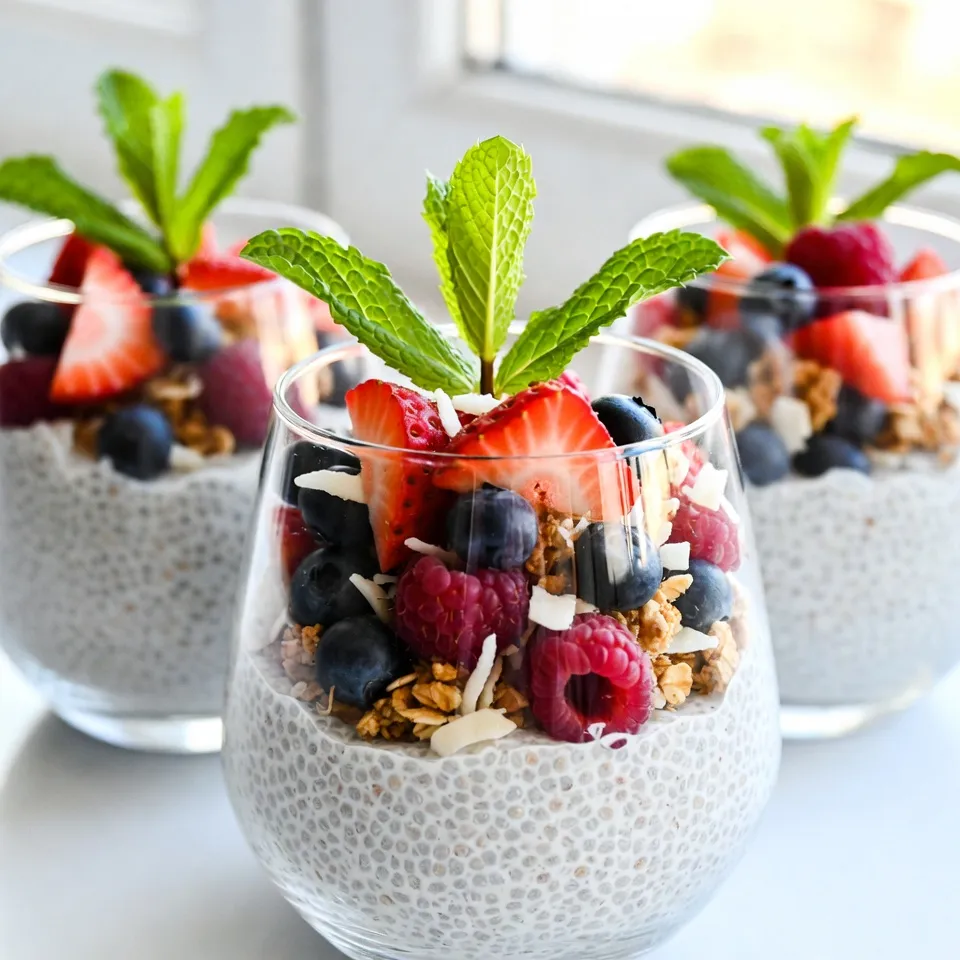
Berry Coconut Chia Parfait Delightful and Simple Recipe
Looking for a delicious and healthy treat? The Berry Coconut Chia Parfait is your answer! This simple recipe combines tasty layers of chia pudding with
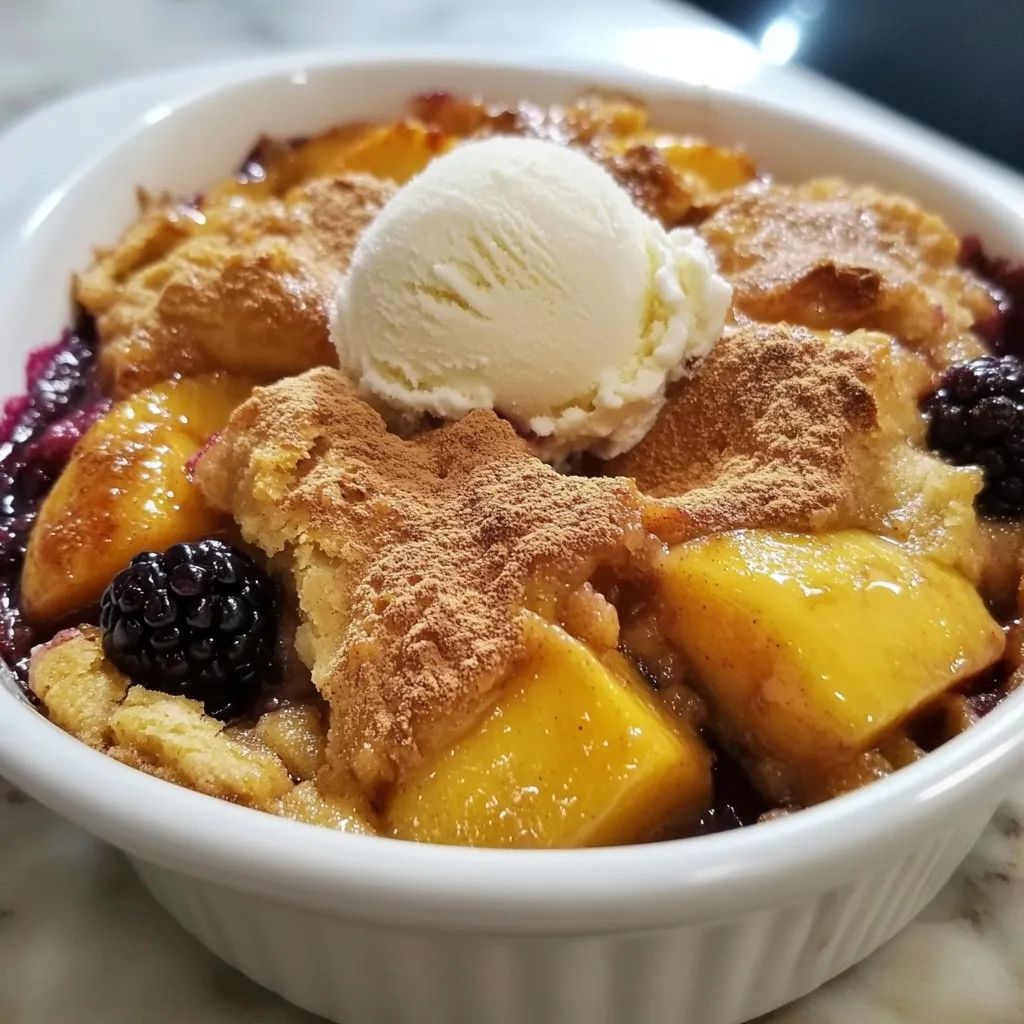
Blackberry Peach Cobbler Delightful and Easy Recipe
Get ready to treat your taste buds with my delightful and easy Blackberry Peach Cobbler recipe! Combining juicy blackberries with sweet peaches creates a perfect