Desserts
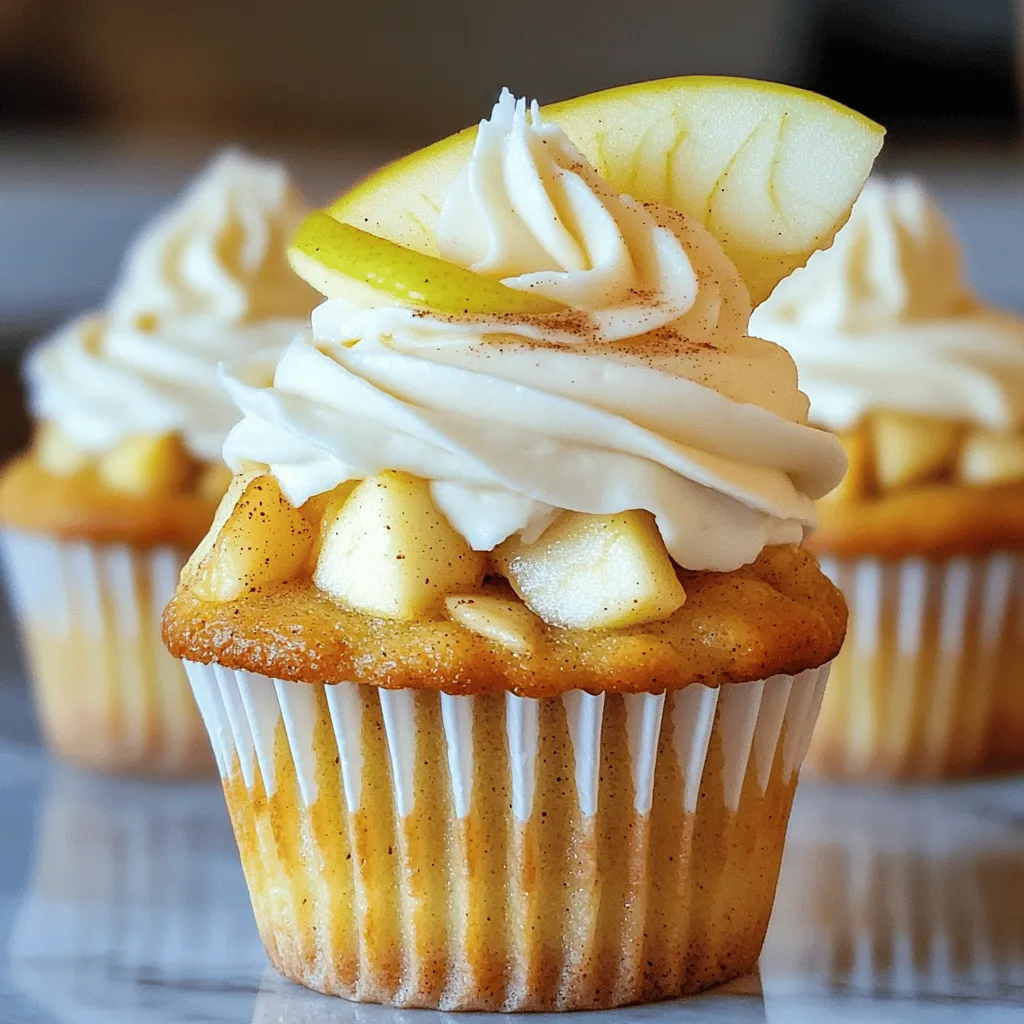
Delicious Apple Pie Cupcakes Simple and Sweet Treat
Fall brings the perfect time for cozy treats, and these Delicious Apple Pie Cupcakes combine the best of both worlds: the flavors of apple pie
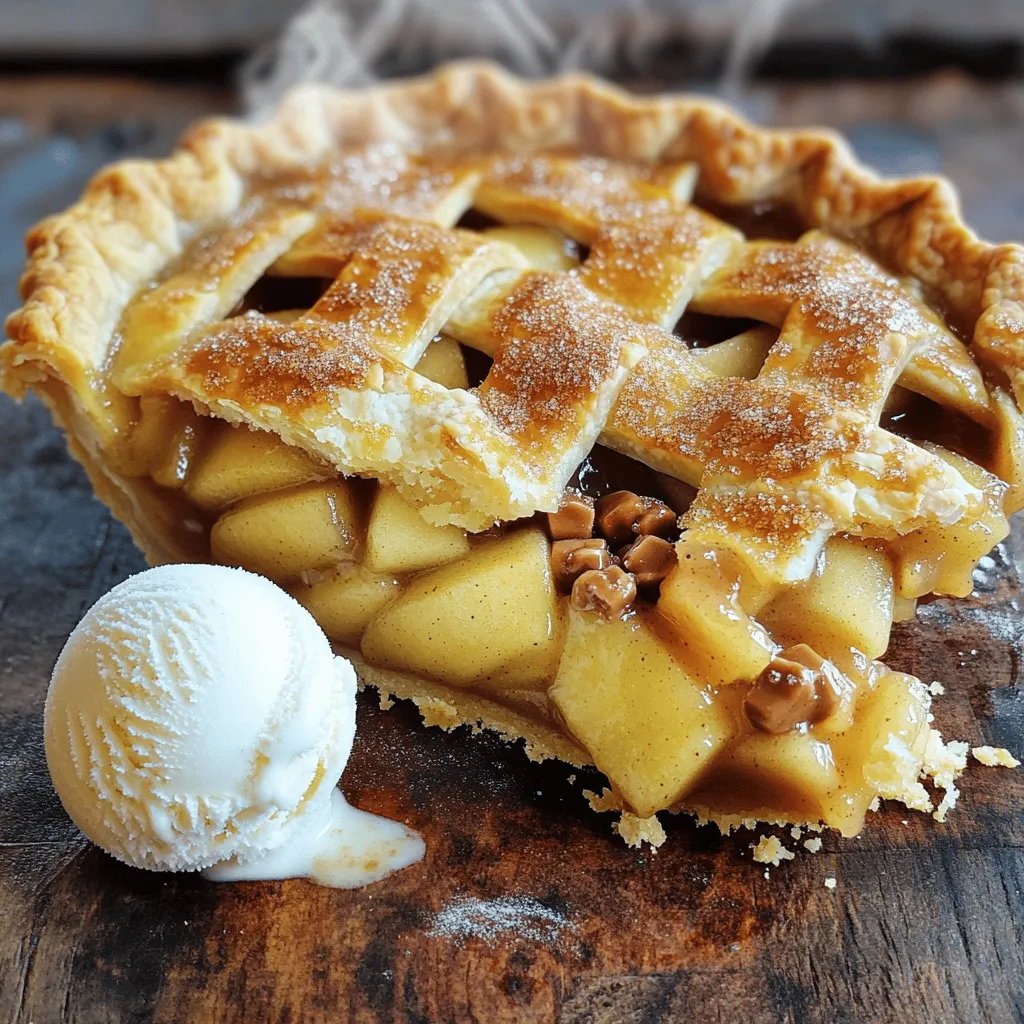
Toffee Apple Pie Delectable and Easy Recipe Guide
Welcome to your new favorite dessert: Toffee Apple Pie! This guide is packed with easy steps and tips, ensuring that anyone can create this delicious
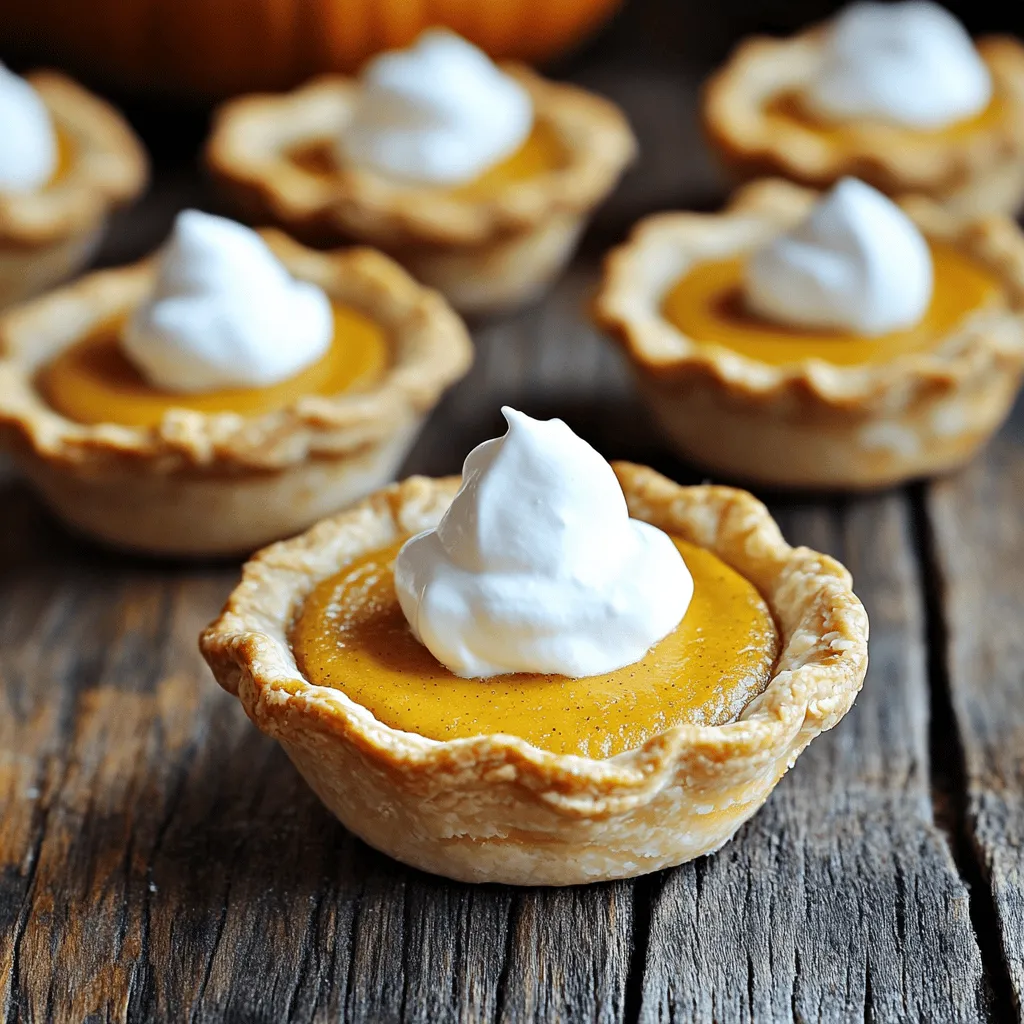
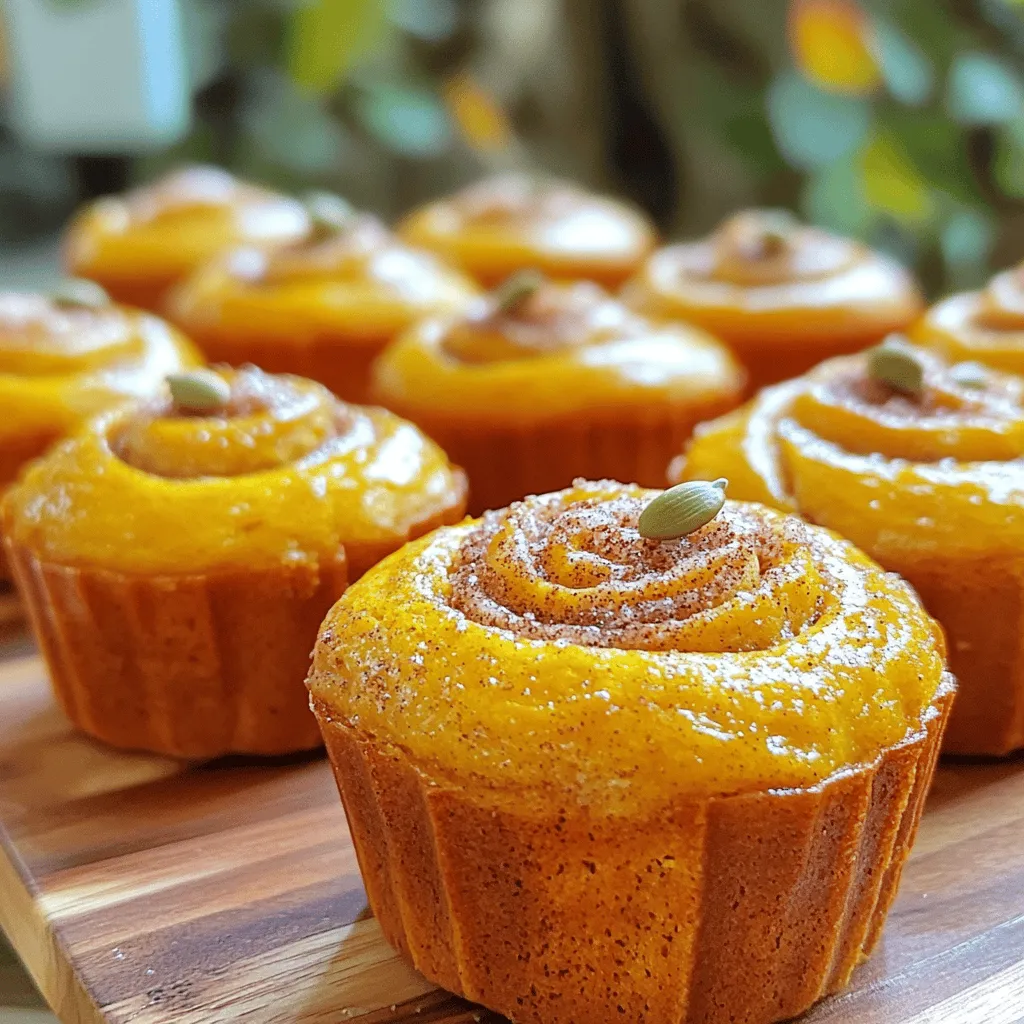
Mini Pumpkin Pies Delightful Fall Dessert Recipe
Fall means cozy flavors, and nothing says autumn like mini pumpkin pies! These delightful desserts capture the essence of the season with their rich, spiced
. It provides detailed instructions and tips for making this delicious dessert. Sticky toffee pudding is a rich dessert made with simple ingredients. You need dates, brown sugar, and butter for the pudding, and brown sugar, butter, and cream for the sauce. Accurate measuring and soaking the dates are key for a moist treat. Consider adding nuts or chocolate for a twist. Serve it hot with ice cream or create a vegan version. Store leftovers in the fridge or freeze for later. This dessert is a must-try, and I hope you enjoy making it as much as I do. Find the full recipe for sticky toffee pudding [here](#).](https://tossedflavors.com/wp-content/uploads/2025/08/b8670450-784b-4dc2-b958-d85b1900a285.webp)
Sticky Toffee Pudding Irresistible Dessert Recipe
Are you ready to dive into the world of Sticky Toffee Pudding? This warm, rich dessert is a classic that will delight your taste buds!
![To make these tasty cookies, you need a few main ingredients. Here’s what you will need: - 1 cup pumpkin puree - 1/2 cup unsalted butter, softened - 1 cup packed brown sugar - 1/2 cup granulated sugar - 1 large egg - 1 teaspoon pure vanilla extract - 2 cups all-purpose flour - 1 teaspoon baking soda - 1 teaspoon pumpkin pie spice - 1/2 teaspoon salt - 1 cup mini marshmallows - 1 cup semi-sweet chocolate chips - 1/2 cup graham cracker crumbs These ingredients give the cookies their soft texture and rich flavor, making them perfect for fall. If you want to boost the flavor, consider adding some extras. Here are some options: - Chopped nuts, like walnuts or pecans - A pinch of sea salt on top - Swirls of peanut butter - White chocolate chips for a twist These additions can add depth to the taste and make the cookies even more enjoyable. If you have allergies, you can substitute some ingredients. Here are some helpful swaps: - Use coconut oil instead of butter for a dairy-free option. - Replace the egg with a flaxseed meal (1 tablespoon flaxseed + 2.5 tablespoons water). - For gluten-free cookies, use a gluten-free flour blend. These substitutes allow everyone to enjoy Pumpkin S'mores Cookies, no matter their dietary needs. For the complete recipe, check the Full Recipe section. First, you need to prepare your oven and baking sheets. Preheat your oven to 350°F (175°C). While that heats up, grab two baking sheets. Line them with parchment paper. This helps the cookies not stick and makes cleanup easy. Next, let’s cream the butters and sugars. In a large bowl, add the softened unsalted butter, brown sugar, and granulated sugar. Use an electric mixer on medium speed. Mix until the mixture is light and fluffy. This usually takes about 2-3 minutes. The fluffiness adds air to the cookies, making them soft. Now it’s time to mix the wet and dry ingredients. First, add the pumpkin puree, large egg, and vanilla extract into the creamed mix. Stir until everything blends well. In another bowl, whisk together the all-purpose flour, baking soda, pumpkin pie spice, and salt. This helps the spices and leavening agents spread evenly. Gradually combine the dry mix with the wet mix. Stir gently until just combined. Don’t overmix; a few flour streaks are okay. Then, fold in the mini marshmallows, chocolate chips, and graham cracker crumbs. You want them mixed evenly throughout the dough. For the full recipe, check out the [Full Recipe]. To bake perfect Pumpkin S'mores Cookies, follow these key tips: - Use room temperature ingredients. This helps create a smooth dough. - Don't overmix the dough. Mix just until combined for soft cookies. - Chill the dough before baking. If you have time, chill the dough for 30 minutes. This helps the cookies hold their shape. - Use a cookie scoop. This gives you even-sized cookies, ensuring consistent baking. You can enhance the flavor and texture of your cookies with a few simple tweaks: - Add nuts. Chopped walnuts or pecans give a nice crunch. - Use different chocolates. Try dark chocolate or white chocolate for variety. - Incorporate spices. A pinch of nutmeg or cinnamon can deepen the flavor. - Add a touch of sea salt. Sprinkling a bit on top before baking adds a nice contrast. Avoid these common mistakes to ensure your cookies turn out great: - Skipping the parchment paper. This can cause sticking and make cleanup hard. - Not measuring flour correctly. Use a scale or spoon and level for accuracy. - Opening the oven too soon. This can cause the cookies to sink. Wait until the timer goes off. - Not letting cookies cool properly. Allow them to cool on a wire rack to avoid sogginess. Follow these tips, and your Pumpkin S'mores Cookies will be a hit! For the complete recipe, check out the Full Recipe section. {{image_4}} You can change the flavor of your cookies by adding nuts or chips. Try using chopped pecans or walnuts for a crunchy twist. If you want more sweetness, consider white chocolate chips or peanut butter chips. Each option adds a unique taste that pairs well with pumpkin. You can easily make gluten-free pumpkin s'mores cookies. Just replace all-purpose flour with a gluten-free blend. Make sure the blend has xanthan gum for the right texture. This simple switch keeps the cookies soft and chewy. Feel free to play with seasonal flavors. You can mix in dried cranberries or chopped apples for a fruity touch. Adding a dash of nutmeg or cinnamon can enhance the warmth of the pumpkin. These add-ins make the cookies perfect for fall gatherings. For the full recipe, check out the detailed steps above. To keep your cookies fresh, store them in an airtight container. Line the container with parchment paper to avoid sticking. This method helps keep the cookies soft for about five days. If you want to keep them longer, consider freezing. Freezing Pumpkin S'mores Cookies is easy. First, let the cookies cool completely. Then, place them in a single layer on a baking sheet. Freeze for about two hours until solid. After that, transfer the cookies to a freezer bag, squeezing out any air. They can stay frozen for up to three months. When you’re ready to enjoy, just thaw them overnight in the fridge. To bring back that fresh-baked taste, reheat your cookies in the oven. Preheat the oven to 350°F (175°C). Place the cookies on a baking sheet and warm them for about 5 minutes. You can also use the microwave for a quick fix. Heat each cookie for about 10-15 seconds. This will make them warm and soft again. Enjoy your Pumpkin S'mores Cookies fresh, just like the first day! You can use butternut squash puree or sweet potato puree. These options give a similar taste and texture. You can also use apple sauce for a different flavor. Just make sure you use an equal amount as the recipe calls for pumpkin puree. Yes, you can make the dough in advance. Just cover it and store it in the fridge for up to three days. When you're ready to bake, scoop the dough onto baking sheets and bake as directed in the Full Recipe. You can also freeze the dough for later use. Just thaw it before baking. The cookies are done when the edges are lightly golden brown. The centers should still look soft and slightly puffy. If you see this, they are ready! They will firm up as they cool. In this post, we explored how to make delicious pumpkin s'mores cookies. We covered key ingredients, tips for baking, and even variations to try. Remember, you can adjust flavors with different nuts or seasonal spices. Also, proper storage helps keep these treats fresh and tasty. Finally, don't hesitate to experiment with substitutions for your needs. Enjoy baking these cookies and share them with friends!](https://tossedflavors.com/wp-content/uploads/2025/08/e8a7ad14-75de-4ea9-b624-8a697f5ef2fa.webp)
Pumpkin S’mores Cookies Irresistible Fall Treat
Fall is the perfect time for cozy treats, and these Pumpkin S’mores Cookies are sure to delight! Combining the rich flavors of pumpkin, chocolate, and

Pumpkin Bars Delightful Fall Flavor Recipe
Fall is here, and it’s time to enjoy the warm, cozy flavors of pumpkin. In this recipe, I’ll show you how to make delicious pumpkin
![- 3 cups all-purpose flour - 1 packet active dry yeast - ½ cup warm milk - ½ cup granulated sugar - 1 large egg - ¼ cup unsalted butter - 1 teaspoon vanilla extract - 1 teaspoon salt - 2 medium apples (Fuji or Honeycrisp recommended) - 1 teaspoon ground cinnamon - ½ teaspoon ground nutmeg - Optional: Chopped walnuts or pecans - Loaf pan - Mixing bowls - Clean kitchen towel Gathering your ingredients is the first step to making this apple cinnamon bread. Start with three cups of all-purpose flour. This is your base. Next, grab a packet of active dry yeast. This helps the bread rise. You will need half a cup of warm milk. Make sure it is not too hot. You also need half a cup of granulated sugar for sweetness. One large egg adds richness. A quarter cup of unsalted butter gives it a nice texture. You will add one teaspoon of vanilla extract for flavor. Lastly, add one teaspoon of salt to enhance all the tastes. Now, for the flavorful additions! You need two medium apples. I recommend Fuji or Honeycrisp. They are sweet and tasty. Add one teaspoon of ground cinnamon for that cozy taste. A half teaspoon of ground nutmeg brings warmth. If you like, you can add a quarter cup of chopped walnuts or pecans for crunch. Make sure you have a loaf pan, mixing bowls, and a clean kitchen towel. These tools will help you every step of the way. Once you have your ingredients ready, you can start your baking adventure. For the full recipe, see the instructions above to guide you through making this delightful bread. - Combine warm milk with sugar and yeast. - Let it froth for 5-10 minutes. To start, take your warm milk and mix it with a bit of sugar and the yeast. This step wakes up the yeast. Look for bubbles and foam after 5-10 minutes. That froth shows your yeast is alive and ready to help your bread rise. - Whisk dry ingredients together. - Add the activated yeast mixture and remaining ingredients. In a large bowl, whisk together the flour, remaining sugar, salt, and spices. This mixture forms the base of your dough. Next, stir in the yeast mixture along with melted butter, egg, and vanilla. Mix until a shaggy dough forms. It’s okay if it looks messy! - Knead the dough on a floured surface. - First rise in a greased bowl for 1 hour. Now, place the dough on a floured surface. Knead it for about 8-10 minutes. You want it smooth and elastic. Once you knead it well, put it in a greased bowl. Cover it with a clean towel and let it rise for one hour in a warm spot. It should double in size. - Toss diced apples with sugar and cinnamon. - Mix in nuts if using. While the dough rises, prepare your apple filling. Chop your apples into small pieces. In a bowl, toss them with sugar and cinnamon. If you like nuts, add them in now. They give the bread a nice crunch. - Roll out the dough and spread the apple mixture. - Roll tightly and seal seams. Once the dough has risen, gently punch it down. Roll it out to a rectangle, about 12x18 inches. Spread the apple mixture evenly on top, leaving a small edge. Then, roll the dough tightly from one side. Pinch the seams to seal it well. - Place in loaf pan and allow to rise again. - Bake at 350°F for 30-35 minutes. Put the rolled dough seam-side down in a greased loaf pan. Cover it again and let it rise for 30-45 minutes. Preheat your oven to 350°F. Bake the bread for 30-35 minutes. It should turn golden brown and sound hollow when tapped. Enjoy the process of making this delightful apple cinnamon bread! You can find the Full Recipe for a detailed overview of ingredients and steps. - Check your dough’s elasticity. The dough should stretch without tearing. If it tears easily, knead it more. - Prevent dough from drying out. Cover it with a clean towel or plastic wrap. This keeps moisture in as it rises. - Oven preheating techniques. Always preheat your oven for at least 15 minutes. This helps the bread rise properly while baking. - How to check if the bread is done. Tap the bottom of the loaf. If it sounds hollow, it is ready. - Dust with powdered sugar. A light dusting adds a sweet touch and looks fancy. - Drizzle honey or serve warm. Warm bread with honey enhances flavor and makes it more inviting. These tips help you create the best apple cinnamon bread. Enjoy your baking journey with the full recipe! {{image_4}} To make your apple cinnamon bread gluten-free, you can use a blend of gluten-free flours. Here are some great substitutes: - 3 cups gluten-free all-purpose flour - 1 teaspoon xanthan gum (if not already in the flour mix) When you use gluten-free flour, the rising times can change. Gluten-free dough may need longer to rise. Allow it to rise for about 1 to 1.5 hours. Keep an eye on it. Look for it to double in size. If you want a vegan version, replace the egg and butter. Here are some choices: - 1 tablespoon ground flaxseed mixed with 3 tablespoons water (this replaces 1 egg) - ¼ cup coconut oil or applesauce instead of butter For a good texture and taste, you might want to add a bit of extra baking powder. This can help the bread rise better. Also, use plant-based milk like almond or oat milk. You can add more flavor to your bread. Here are some fun options: - Toss in ½ cup of dried cranberries or raisins for extra sweetness. - Add a tablespoon of lemon or orange zest to brighten the dish. These small changes can make your apple cinnamon bread even more special! Store your apple cinnamon bread at room temperature. Use a clean kitchen towel to wrap it. This keeps it soft and moist. Avoid placing it in the fridge. Refrigeration can dry out the bread. Instead, find a cool spot in your kitchen. You can freeze apple cinnamon bread for later use. First, let it cool completely. Then, wrap it tightly in plastic wrap. Place it in a freezer-safe bag. This prevents freezer burn. To thaw, take it out a day before use. Leave it in the fridge overnight. For reheating, slice the bread and toast it lightly. This brings back its fresh taste. Homemade apple cinnamon bread lasts about 3 to 5 days. Store it properly to keep it fresh. Watch for signs of spoilage, like mold or an off smell. If it feels dry or crumbly, it’s best to toss it. Always trust your senses when checking freshness. Store your bread right, and enjoy its deliciousness longer! For the complete recipe, check out the [Full Recipe]. Yes, you can! I love using Fuji or Honeycrisp apples. These apples are sweet and hold their shape well. You can also try Granny Smith if you prefer a tart flavor. Other good options include Gala or Golden Delicious. Each type gives a unique taste to the bread. To adjust the sweetness, you can change the sugar amount. Start with less sugar if you like less sweet bread. You can also use natural sweeteners like honey or maple syrup. These options add a nice flavor too. Just keep the total liquid the same. This bread pairs well with many things. You can serve it warm with butter. A drizzle of honey makes it even better. Try a scoop of vanilla ice cream for a treat. It also goes great with coffee or tea. Absolutely! This recipe is simple and fun. Just follow the steps carefully. Kneading the dough may take some practice. Don't worry if it feels sticky at first. Use a floured surface and keep at it. Baking is all about trying new things! Yes, you can! You can prepare the dough a day before. Just let it rise, then cover and chill it in the fridge. The next day, let it warm up before baking. You can also bake the bread ahead and store it. Just wrap it well to keep it fresh. You now have a detailed guide to making delicious apple cinnamon bread. We covered the main ingredients, steps, and tips to ensure success. You can even explore gluten-free and vegan options. Remember to store your bread properly to keep it fresh. With these techniques, you can enjoy a warm slice any time. Baking should be fun and rewarding, so don’t hesitate to try new flavors and variations. Enjoy your baking adventure and share this tasty treat with loved ones!](https://tossedflavors.com/wp-content/uploads/2025/08/f95b6c10-e857-4ec1-b7b1-837c497bdd8f.webp)
Apple Cinnamon Bread Delightful and Easy Recipe
Craving a warm, sweet treat? My Apple Cinnamon Bread recipe is both delightful and easy to make! With simple ingredients and straightforward steps, you’ll enjoy
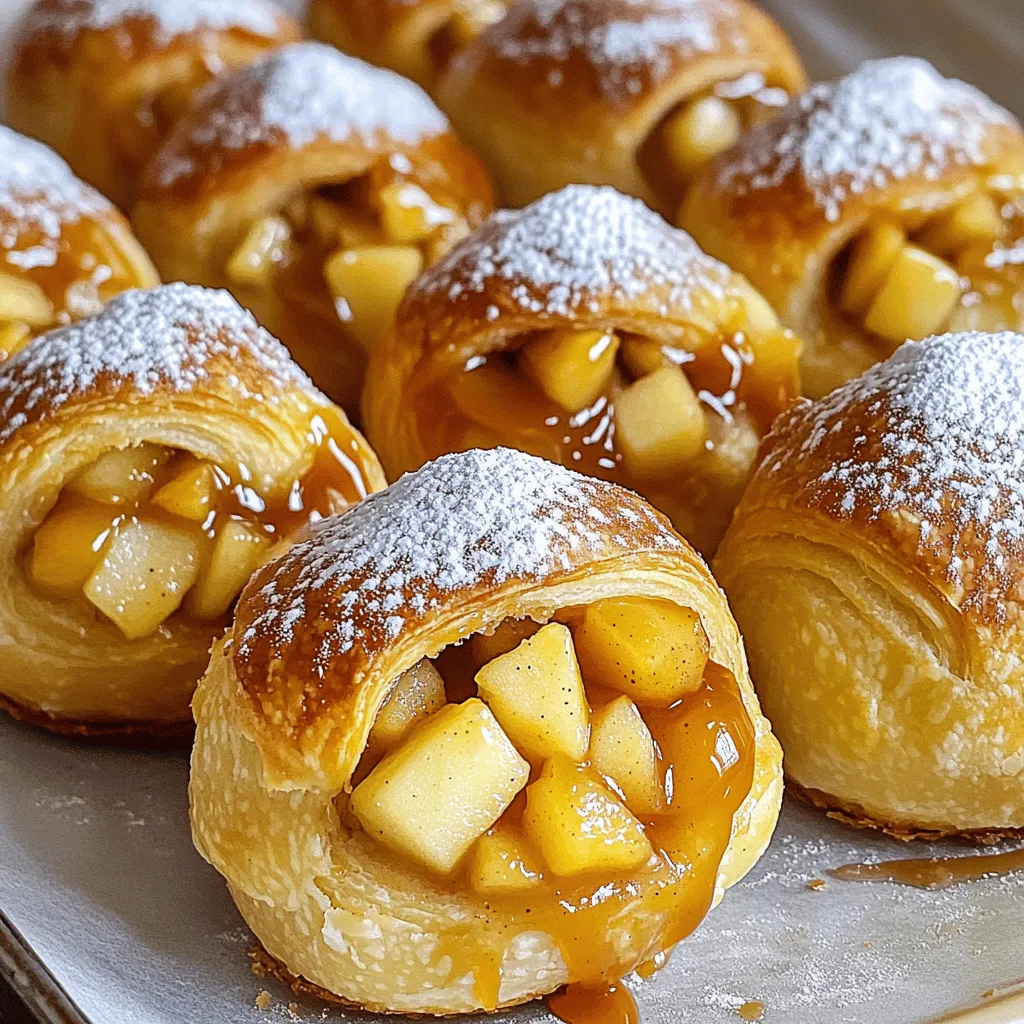
Caramel Apple Pie Bombs Irresistible Sweet Treats
Are you ready for a sweet treat that will wow your taste buds? Caramel Apple Pie Bombs combine flavors you love into a fun, bite-sized
Mini Pumpkin Bread with Cinnamon Swirl Deliciously Easy
Looking for a simple fall treat that brings warmth to any table? You’re in the right spot! My Mini Pumpkin Bread with Cinnamon Swirl is
![- 4 medium apples (Granny Smith or Honeycrisp recommended) - 2 tablespoons brown sugar - 1 teaspoon ground cinnamon - 1 tablespoon fresh lemon juice - 1 tablespoon melted butter or coconut oil - ¼ cup rolled oats - ¼ cup chopped nuts (walnuts or pecans) - 1 tablespoon honey (optional) For this recipe, I like to use Granny Smith or Honeycrisp apples. They give a nice balance of sweet and tart. You’ll need just a few simple ingredients to make these air fryer apples truly delightful. Brown sugar adds sweetness and a light caramel flavor. Ground cinnamon gives a warm spice that pairs perfectly with apples. Fresh lemon juice helps keep the apples bright and fresh. Melted butter or coconut oil adds richness. Rolled oats and chopped nuts bring a crunchy texture. If you want a touch of sweetness, honey is a great option. This mix of flavors creates a healthy treat that everyone will love. You can find the full recipe for making crispy cinnamon air fryer apples below. - Preheat your air fryer to 350°F (175°C). - Core and slice the apples into thin wedges. Start with fresh apples. I love Granny Smith for their tartness, but Honeycrisp works great too. Slicing the apples helps them cook evenly. Make sure to remove the core first; no one wants to bite into that! - Combine apples with lemon juice, brown sugar, and cinnamon. - Stir in melted butter or coconut oil. In a big bowl, toss the apple slices with lemon juice. This keeps them fresh and bright. Add brown sugar and cinnamon for a sweet kick. Mix in melted butter or coconut oil to add richness. This step makes every bite more delicious! - Fold in rolled oats and chopped nuts. - Transfer to air fryer basket and cook. - Shake the basket halfway through cooking. Now, fold in rolled oats and chopped nuts for crunch. Then, place the apple mix into the air fryer basket. Cook for about 10-12 minutes. Make sure to shake the basket halfway to help them cook evenly. You want them tender and slightly caramelized for the best taste! For the full recipe, check [Full Recipe]. To get the best crispy apples, avoid overcrowding the air fryer basket. If you pack them too tight, they won’t cook evenly. Instead, spread the apple slices in a single layer. You may need to cook in batches. Adjust the cooking time based on the apple variety you choose. For sweet apples like Honeycrisp, you may need less time than tart varieties like Granny Smith. To make these apples even tastier, add a pinch of nutmeg for extra flavor. This spice pairs well with cinnamon and gives a warm taste. You can also experiment with different nuts or seeds. Try walnuts, pecans, or even sunflower seeds for added crunch. For a delightful treat, pair your air fryer apples with vanilla ice cream or creamy Greek yogurt. The cold creaminess contrasts wonderfully with the warm apples. For an extra touch, garnish with more cinnamon or a handful of chopped nuts. This adds visual appeal and a nice crunch. {{image_4}} You can swap brown sugar for maple syrup. Maple syrup adds a rich flavor. It works well in the recipe. For a healthier choice, use coconut sugar. Coconut sugar has a lower glycemic index. This makes it a great option for those watching their sugar intake. Try mixing pears or peaches with the apples. This adds extra sweetness and flavor. Dried fruits, like raisins or cranberries, can boost the taste too. They provide a chewy contrast to the crispy apples. To make a vegan version, simply omit the butter. Use coconut oil instead for a great taste. For gluten-free options, pick certified oats. This keeps the dish safe for gluten-sensitive eaters. You can enjoy these air fryer apples with many dietary needs in mind. For the full recipe, check the previous section! Store your leftover apples in an airtight container. Keep them in the refrigerator. They taste best when eaten within 2-3 days. This way, you can enjoy their crispness and flavor. To reheat, use the air fryer. Set it to a low temperature and heat for a few minutes. You can also microwave the apples. Add a splash of water to keep them moist while reheating. If you want to save apples for later, freeze them after cooling. Lay them out in a single layer on a baking sheet. Once frozen, transfer them into a bag. When ready to enjoy, thaw and reheat them. Yes, any firm apple variety works well. I love Granny Smith and Honeycrisp. They add great flavor and texture. They should be tender and slightly caramelized. A fork should slide in easily, showing they are cooked just right. Yes, you can bake them in an oven at the same temperature for a similar result. Just spread them on a baking sheet and watch for that caramelization. Air-frying reduces excess oil while retaining vitamins and antioxidants from the apples. This method keeps your snack light and healthy. Consider adding granola or crushed cereal as a topping before serving. This makes the dish extra fun and crunchy! For the full recipe, check out my detailed instructions above. In summary, this guide showed you how to make flavorful air-fried apples. You learned about the key ingredients, simple steps, and helpful tips. Don't hesitate to try different fruits and sweeteners to make it your own. Remember, you can easily store any leftovers or reheat them later. Air-fried apples are tasty, healthy, and quick to prepare. Enjoy your delicious treat!](https://tossedflavors.com/wp-content/uploads/2025/08/283721c6-30b0-479a-b360-e6de99c249c6.webp)
Air Fryer Apples Delightful Sweet and Healthy Treat
Looking for a sweet, healthy treat that’s easy to make? Try Air Fryer Apples! This simple recipe uses fresh apples and delicious toppings to create