Desserts

To make a Berry Croissant Bake, you will need the following ingredients: - 4 large buttery croissants, torn into bite-sized pieces - 1 cup mixed berries (a delightful mix of strawberries, blueberries, and raspberries) - 3 large eggs, preferably free-range - 1 cup whole milk, for richness - 1/2 cup granulated sugar, to sweeten - 1 teaspoon pure vanilla extract, for flavor - 1/2 teaspoon ground cinnamon, for warmth - 1/4 teaspoon salt, to enhance sweetness - 1 tablespoon unsalted butter, for greasing the baking dish - Powdered sugar, for a sweet dusting - Fresh mint leaves, for a refreshing garnish You can add a few optional ingredients for a unique twist: - A splash of orange juice for brightness - A sprinkle of nutmeg for warmth - Chopped nuts like almonds or walnuts for crunch If you need to swap ingredients, here are some great options: - Use almond milk or oat milk instead of whole milk. - Try using croissants with chocolate for a sweet touch. - Replace mixed berries with any fruit you like, such as peaches or apples. This Berry Croissant Bake recipe is simple and flexible. You can easily adjust it to fit your taste. If you want to explore the full details, check out the Full Recipe. Start by preheating your oven to 350°F (175°C). This ensures even cooking. While the oven heats, use unsalted butter to grease a medium-sized baking dish. This step helps prevent the bake from sticking. In a large bowl, whisk together the eggs, whole milk, and granulated sugar. Add the vanilla extract, ground cinnamon, and salt. Mix until smooth and well combined. Next, tear the buttery croissants into bite-sized pieces and lay them evenly in the greased dish. Scatter the mixed berries on top, creating a colorful layer. Finally, pour the egg mixture over the croissants and berries. Press down gently with a fork to help the croissants soak in the custard. Once you have layered everything in the dish, let it rest for about 10 minutes. This allows the croissants to absorb the custard. After resting, place the dish in your preheated oven. Bake for 30-35 minutes. You will know it is done when the top is golden brown and the custard is set but still creamy. To make sure your custard is just right, watch the baking time closely. Every oven can be different. You can check if the center is set by gently shaking the dish. If it wobbles like jello, it needs more time. Also, let the bake cool for a few minutes after removing it from the oven. This helps the custard firm up a bit more. For a touch of elegance, dust the top with powdered sugar before serving. Mixing the ingredients well is key. Start by whisking eggs and milk together in a bowl. Add sugar, vanilla, cinnamon, and salt. Keep whisking until the mix is smooth. This step ensures every bite is sweet and flavorful. To get that perfect golden brown top, keep an eye on the baking time. Bake at 350°F for 30 to 35 minutes. If the top is browning too fast, cover it with foil. This trick helps cook the center without burning the top. For a lovely presentation, slice the bake into squares. Place each square on a plate and dust with powdered sugar. Add fresh mint leaves for color. You can also serve it with a bowl of extra mixed berries. This adds a fresh touch that everyone will enjoy. For the full recipe, check the complete details above. {{image_4}} You can use various berries in this bake. Strawberries, blueberries, and raspberries are great choices. You can also try blackberries or cherries for a twist. Each berry brings its own flavor and color. This makes your dish even more fun and vibrant. Feel free to mix and match your favorites. Just keep the total amount the same. If you love chocolate, add chocolate chips to the mix. Dark or milk chocolate chips work well. Sprinkle them over the croissant pieces before pouring the egg mixture. This addition adds a rich and creamy layer to your bake. The melted chocolate blends with the berries for a delicious treat. Who can resist a bit of chocolate? You can make a vegan version too! Replace the eggs with flaxseed meal. Mix three tablespoons of flaxseed meal with nine tablespoons of water. Let it sit for a few minutes to thicken. Use almond or oat milk instead of whole milk. Choose vegan croissants or puff pastry to keep it plant-based. This version is just as tasty and allows everyone to enjoy the delight. To keep your Berry Croissant Bake fresh, let it cool first. Once cooled, cover it tightly with plastic wrap or foil. You can also place it in an airtight container. Store it in the fridge for up to three days. This way, you’ll enjoy the flavors later. When you’re ready to enjoy leftovers, preheat your oven to 350°F (175°C). Place the Berry Croissant Bake in an oven-safe dish. Cover it with foil to keep it moist. Heat for about 15-20 minutes. Check if it’s warm throughout before serving. This method keeps it soft and delicious. If you want to save some for later, freezing works well. First, let the bake cool completely. Cut it into portions for easy serving. Wrap each piece tightly in plastic wrap, then place them in a freezer bag. Label the bag with the date. You can freeze it for up to two months. To enjoy, thaw it overnight in the fridge and reheat as described above. For the full recipe, check out the Berry Croissant Bake Delight! Yes, you can prepare it the night before. Just assemble the dish, cover it, and chill it in the fridge. This lets the croissants soak up the custard. In the morning, bake it straight from the fridge. Just add a few extra minutes to the baking time. This saves you time and adds flavor. No worries! You can use any fruit you have. Fresh peaches, apples, or bananas work great. You can also use frozen berries if fresh ones aren’t available. Just thaw and drain them first. This keeps your bake from getting too soggy. Get creative and use what you enjoy! Look for a golden brown top. The center should be set but still creamy. You can gently shake the pan; if it jiggles a bit, it may need more time. Bake for 30-35 minutes as a guideline. Always trust your eyes and a toothpick test can help too. If it comes out clean, it’s ready! In this blog post, I shared how to make a delicious Berry Croissant Bake. We covered the key ingredients, including options to boost flavor. You learned the step-by-step instructions for baking it perfectly. I shared useful tips for mixing and serving. We also discussed fun variations and how to store leftovers. Enjoy creating your own version of this tasty dish. With these tricks and tips, you can impress anyone. Happy baking, and make sure to share your results!
Berry Croissant Bake Simple and Delicious Treat
Are you ready to whip up a simple and delicious treat? Look no further than this Berry Croissant Bake! With just a handful of ingredients
To make soft and chewy white chocolate chip cookies, gather these key ingredients: - 1 cup unsalted butter, softened to room temperature - 3/4 cup granulated sugar - 3/4 cup packed light brown sugar - 2 large eggs, at room temperature - 2 teaspoons pure vanilla extract - 1/4 teaspoon almond extract - 2 1/4 cups all-purpose flour - 1 teaspoon baking soda - 1/2 teaspoon fine sea salt - 1 cup white chocolate chips - 1/2 cup chopped macadamia nuts (optional for added crunch) These ingredients work together to create a cookie that is both soft and chewy. The butter gives richness, while the sugars create a sweet, tender base. Eggs add moisture and help bind the dough. The vanilla and almond extracts enhance the flavor, making each bite special. The flour and baking soda provide structure and lift to the cookies. White chocolate chips melt beautifully, offering a sweet contrast. If you choose to add macadamia nuts, they add a nice crunch that complements the creamy chocolate. You can find the full recipe at the end of this article, so you can easily create these delightful treats at home! - Preheat oven to 350°F (175°C). - Line baking sheets with parchment paper. Start by warming your oven. This helps the cookies bake evenly. The parchment paper makes cleaning easy. It also stops the cookies from sticking. - Combine and cream butter and sugars. - Beat in eggs and extracts. In a bowl, mix softened butter, granulated sugar, and brown sugar. Use an electric mixer and blend until it’s fluffy. This step makes your cookies light. Next, add the eggs one at a time. Beat well after each egg. Then mix in vanilla and almond extracts for extra flavor. - Whisk flour, baking soda, and salt. - Incorporate dry ingredients into wet mixture. In another bowl, whisk the flour, baking soda, and salt. This helps mix the dry parts well. Slowly add this mix to the wet ingredients. Stir gently to combine. Be careful not to overmix. This keeps your cookies soft and chewy. - Fold in white chocolate chips and nuts. - Scoop dough onto baking sheets. Now, fold in the white chocolate chips. If you like, add chopped macadamia nuts too. They give a nice crunch. Use a cookie scoop to drop dough onto the baking sheets. Space them about 2 inches apart for even baking. - Bake for 10-12 minutes. - Cooling instructions. Bake your cookies for 10 to 12 minutes. Look for lightly golden edges. The centers should be a bit soft. This keeps them chewy. After baking, let them cool on the sheets for 5 minutes. Then, move them to a wire rack. This helps them cool completely. For the full recipe, check the earlier section. Enjoy your soft and chewy white chocolate chip cookies! The right temperature of your ingredients is key. Use softened butter at room temperature. Cold butter can make your cookies hard. Room-temperature eggs also help the dough mix well. Mixing the dough too much can ruin the texture. Once you add flour, stir just until combined. This keeps your cookies soft and chewy. For a unique twist, add a bit of almond extract. Just 1/4 teaspoon can elevate the flavor. You might also consider adding some citrus zest. Lemon or orange zest adds a bright note to your cookies. Feel free to experiment with other flavorings to match your taste. Look for cookies that are lightly golden on the edges. The centers should look a bit underbaked. This look means they will stay soft. If you find your cookies too doughy, adjust the bake time. Each oven is different, so check them a minute or two earlier. You want the perfect soft and chewy texture every time. {{image_4}} You can switch up the flavor of your cookies. Try using dark chocolate chips or milk chocolate chips instead of white chocolate. Each type gives a different taste. You can also add nuts like walnuts or pecans for crunch. Dried fruits, like cranberries or raisins, add a nice chew and sweetness. If you need gluten-free cookies, swap the all-purpose flour for a gluten-free blend. Just check that your chocolate chips are also gluten-free. For vegan options, use a plant-based butter and substitute eggs with flax eggs or applesauce. Both swaps keep the cookies soft and chewy. You can get creative by making cookie sandwiches. Use two cookies and fill them with frosting or ice cream. These treats are fun to share and enjoy. You can also crumble cookies on top of ice cream sundaes. This adds great texture and flavor to your dessert. For the complete recipe, check out the [Full Recipe]. To keep your soft and chewy white chocolate chip cookies fresh, store them at room temperature. Place the cookies in an airtight container. This keeps them soft and moist. If you stack them, put parchment paper between layers to avoid sticking. You can freeze cookie dough for later baking. To do this, scoop the dough into balls and place them on a baking sheet. Freeze until solid, then transfer them into a zip-top bag. This way, you can bake fresh cookies anytime! When you're ready, just take out the dough and let it thaw in the fridge. Bake them directly from frozen, adding a minute or two to the bake time. Your cookies will stay fresh for about a week at room temperature. Look for signs of spoilage, like a hard texture or off smell. If they become hard, warm them in the microwave for a few seconds. This will bring back their soft texture. Enjoy your treats from the [Full Recipe] while they last! To make your cookies softer, adjust some ingredients. Use more brown sugar than white sugar. Brown sugar has more moisture, which helps. You can also add an extra egg yolk. This adds richness and moisture to the dough. Bake for a shorter time, too. Pull them out when they still look a bit underbaked. They will continue to cook on the tray. Yes, you can substitute the white chocolate chips. Dark chocolate or milk chocolate chips work great. You can also try butterscotch or peanut butter chips for a twist. Adding nuts, like pecans or walnuts, can add crunch and flavor. Mix and match to find your favorite combo! Cookies can spread too much for a few reasons. If your butter is too warm, it can melt quickly. Make sure to use softened butter, not melted. Also, check your flour measurement. Too little flour can cause spreading. Chill your dough for at least 30 minutes before baking. This helps keep their shape. Yes, you can make the dough ahead of time. Prepare the dough and wrap it well in plastic wrap. You can store it in the fridge for up to 3 days. For longer storage, freeze the dough for up to 3 months. When you’re ready to bake, let it thaw in the fridge overnight. Leftover cookies can become a fun treat! If they go stale, crumble them into a topping for ice cream. You can also use them in a dessert like trifle. Another idea is to blend them into milkshakes for a tasty twist. Get creative and enjoy every bite! These cookies are simple to make, filled with yummy flavors, and fun to bake. You learned the key ingredients, steps, and tips for the perfect texture. Remember, you can adjust flavors or try new add-ins to match your taste. Proper storage will keep them fresh, and you can even freeze dough for later use. Enjoy making these cookies as a treat or gift. Happy baking!
Soft and Chewy White Chocolate Chip Cookies Delight
If you crave a sweet treat, look no further! These Soft and Chewy White Chocolate Chip Cookies are a game changer. With simple ingredients and
- 1/2 cup (1 stick) unsalted butter - 1 cup granulated sugar - 2 large eggs - 1 teaspoon vanilla extract - 1/3 cup unsweetened cocoa powder - 1/2 cup all-purpose flour - 1/4 teaspoon salt - 1/4 teaspoon baking powder - 1/2 cup semi-sweet chocolate chips - 1/2 cup (1 stick) unsalted butter, softened to room temperature - 1/2 cup packed brown sugar - 1/4 cup granulated sugar - 1 large egg - 1 teaspoon vanilla extract - 1 1/4 cups all-purpose flour - 1/2 teaspoon baking soda - 1/4 teaspoon salt - 1/2 cup semi-sweet chocolate chips The perfect brookie starts with the right mix of ingredients. The brownie layer uses rich cocoa powder and chocolate chips, giving it a deep flavor. The cookie layer adds a soft, chewy texture with a hint of sweetness from the brown sugar. When you gather these ingredients, make sure your butter is at room temperature for the cookie layer. This helps create a smooth batter. Use fresh eggs for the best rise and texture. You can find the full recipe for these delicious brookies in "The Ultimate Fudgy Chewy Brookies ." It has all the steps to guide you in making this tasty treat! Preheat your oven to 350°F (175°C). This step is key for even baking. Prepare a 9x9 inch baking pan. You can grease it lightly or line it with parchment paper. This makes it easy to remove the brookies later. Start by melting the unsalted butter in a medium saucepan over low heat. After it melts, remove it from the heat. Stir in the granulated sugar, eggs, and vanilla extract. Mix until smooth. Next, add the unsweetened cocoa powder, all-purpose flour, salt, and baking powder. Stir gently to combine them. Be careful not to overmix! Finally, fold in the semi-sweet chocolate chips. Pour this rich mixture into your prepared pan. Spread it out evenly for a nice base. In a mixing bowl, cream together the softened unsalted butter, packed brown sugar, and granulated sugar. Beat until the mixture is light and fluffy. Then, add in the egg and vanilla extract. Mix until creamy. In another bowl, whisk together the all-purpose flour, baking soda, and salt. Gradually add this dry mix into the wet mix, stirring just until combined. Lastly, fold in the semi-sweet chocolate chips. This dough will add a sweet crunch on top! Now it’s time to layer! Use a spoon to dollop spoonfuls of the cookie dough over the brownie layer. Spread it out gently. Allow some brownie to remain visible. This will give a lovely marbled effect when baked. Place the pan in your preheated oven. Bake for 25-30 minutes. To check for doneness, insert a toothpick into the center. It should come out with a few moist crumbs, but not wet batter. This ensures a fudgy texture. Once baked, let the brookies cool in the pan for about 10-15 minutes. This helps them set. After that, transfer them to a wire rack to cool completely. This cooling step is vital for the best texture. Enjoy the delightful smell while they cool! To get that fudgy and chewy texture, do not overmix your batter. When you combine the dry and wet ingredients, mix just until you see no flour. This keeps your brookies soft. Checking for doneness is key. Insert a toothpick into the center. It should come out with a few moist crumbs but no wet batter. This means they are ready! You can adjust the sugar levels to fit your taste. If you like it sweeter, add more sugar. If you prefer a less sweet treat, reduce the sugar slightly. Keep in mind that too much sugar can make the texture a bit different. It's all about finding your perfect balance in sweetness. Serve your brookies warm or at room temperature. They taste best fresh out of the oven. For a fun twist, pair them with a scoop of vanilla ice cream. The warm brookies and cold ice cream create a great mix. You can also dust them lightly with powdered sugar for a lovely touch. Enjoy! {{image_4}} You can make your brookies even better with some fun add-ins. Here are a few ideas: - Chopped Nuts: Walnuts or pecans add a nice crunch. - Peanut Butter Chips: These give a creamy twist to the flavor. - Toffee Bits: They add a sweet, buttery crunch that is hard to resist. Mix and match to find your favorite combo! If you need to change the recipe, you can make it gluten-free or vegan. To make it gluten-free, use a gluten-free flour blend. For a vegan option, swap out the eggs for flaxseed meal or applesauce. Use coconut oil instead of butter for the fat. Both options will still give you that fudgy, chewy goodness. You can also change brookies with the seasons. In fall, add pumpkin spice for a cozy flavor. In winter, use peppermint extract or crushed candy canes. This keeps your treats fresh and fun all year round. To keep your brookies fresh, place them in an airtight container. This method helps maintain their soft, chewy texture. Store them at room temperature for up to three days. If you want to save some for later, I recommend freezing them. To freeze brookies, let them cool completely first. Then, cut them into squares. Wrap each square in plastic wrap. Place the wrapped brookies in a freezer-safe bag or container. Label the bag with the date, and they will stay fresh for up to three months. When you’re ready to enjoy your frozen brookies, take them out and let them thaw at room temperature for about 30 minutes. For best results, reheat them in the oven. Preheat the oven to 350°F (175°C) and warm the brookies for about 5-7 minutes. This method helps restore their warm, fudgy goodness. Yes, you can use oil. However, it may change the texture. Butter gives brookies a rich, creamy taste. Oil makes them softer and less chewy. If you want to try oil, use the same amount. Grapeseed or canola oil works well. Just remember, your brookies might not taste as rich. No problem! You can use other pan sizes. If you use a larger pan, the brookies may bake faster. Check them at 20 minutes to avoid overbaking. If you use a smaller pan, they may take longer. Add 5 to 10 extra minutes. Always use a toothpick to check for doneness. To make brookies extra fudgy, add more chocolate chips. You can also melt some chocolate and mix it in. Another tip is to bake them for a shorter time. Check them at 25 minutes. If the toothpick has some moist crumbs, they're perfect! You can find the full recipe in "The Ultimate Fudgy Chewy Brookies ." This will give you all the details you need to make these treats. In this post, we explored making delicious brookies, combining brownies and cookies. We covered ingredient lists, step-by-step instructions, and tips for perfect results. You can personalize your brookies with various add-ins or dietary options. Storing leftovers properly keeps them fresh. Remember to check the FAQs for helpful answers. Enjoy creating your brookies, and let your taste buds celebrate this delightful treat!
The BEST Fudgy Chewy Brookies Irresistible Treat
Craving a dessert that combines the best of brownies and cookies? You’re in for a treat! These fudgy chewy brookies are the ultimate indulgence, blending
To start, gather these dry ingredients: - 1 ½ cups all-purpose flour - 1 cup granulated sugar - 1 teaspoon baking powder - ½ teaspoon baking soda - ¼ teaspoon salt These ingredients form the base of your cupcakes. The flour provides structure, while sugar adds sweetness. Baking powder and baking soda act as leavening agents, helping the cupcakes rise. Salt enhances the flavors and balances the sweetness. Next, you'll need these wet ingredients: - ½ cup unsweetened pineapple juice - ½ cup vegetable oil - 2 large eggs - 1 teaspoon vanilla extract The pineapple juice brings that tropical flavor. Vegetable oil keeps the cupcakes moist. Eggs add richness and help bind everything together. Vanilla extract rounds out the taste with warmth and depth. Now for the fun part! Gather these add-ins and garnishes: - ½ cup unsweetened shredded coconut - ¼ cup crushed pineapple, drained - Toasted coconut flakes - Maraschino cherries The shredded coconut adds texture and flavor. Crushed pineapple boosts the tropical vibe. Toasted coconut flakes on top create a lovely crunch. Maraschino cherries make for a cute and tasty garnish. These elements transform your cupcakes into a gorgeous treat that looks and tastes amazing! {{ingredient_image_1}} First, preheat your oven to 350°F (175°C). This step makes sure your cupcakes bake evenly. While the oven warms up, line a muffin tin with cupcake liners. This helps with easy removal after baking. In a large mixing bowl, combine 1 ½ cups of all-purpose flour, 1 cup of granulated sugar, 1 teaspoon of baking powder, ½ teaspoon of baking soda, and ¼ teaspoon of salt. Mixing these dry ingredients well helps evenly distribute the leavening agents. Accurate measurements matter. They ensure your cupcakes rise and taste great. In another bowl, whisk together ½ cup of unsweetened shredded coconut, ½ cup of pineapple juice, ½ cup of vegetable oil, 2 large eggs, and 1 teaspoon of vanilla extract. Whisking helps blend the ingredients smoothly. Make sure everything is well combined to get a consistent batter. Now, gradually add the wet mixture to the dry ingredients. Stir gently until just combined. Avoid overmixing here; you want a light and fluffy cupcake. After that, gently fold in ¼ cup of drained crushed pineapple. This adds wonderful flavor and moisture. Divide the batter evenly among the cupcake liners. Fill each about 2/3 full to allow room for rising. Bake for 18 to 20 minutes. To check doneness, insert a toothpick into the center of a cupcake. It should come out clean when they are ready. While the cupcakes cool, prepare the frosting. In a mixing bowl, beat 1 cup of softened unsalted butter until smooth. Gradually add 4 cups of powdered sugar, mixing on low speed. Once incorporated, add 2 tablespoons of coconut cream and 1 teaspoon of vanilla extract. Beat on medium speed until fluffy. Adjust the consistency with more coconut cream or powdered sugar if needed. To get the best texture for your Pina Colada cupcakes, avoid common baking mistakes. Here are a few tips: - Measure accurately: Use measuring cups and spoons. Too much flour can make cupcakes dry. - Don't overmix: Mix until just combined. Overmixing can make your cupcakes dense. - Oven temperature: Preheat your oven properly. An oven that is too hot can burn the edges. To ensure moisture and fluffiness, follow these steps: - Use fresh ingredients: Fresh eggs and coconut help keep cupcakes soft. - Add pineapple juice: The juice adds moisture and a fruity flavor. - Cool properly: Let cupcakes cool in the pan for a short time, then on a rack. This helps maintain their texture. For creative frosting techniques, try these methods: - Pipe with a bag: Use a piping bag for neat and fun designs. Swirls look great! - Mix flavors: Blend different extracts into your frosting for a unique twist. For alternate toppings that add visual appeal: - Toasted coconut flakes: Sprinkle these on top for a crunchy texture. - Maraschino cherries: They not only look nice but add a sweet burst of flavor. When pairing with beverages, consider these options: - Piña colada drinks: A classic match that enhances the tropical vibe. - Coconut water: A refreshing, light choice that complements the flavors. For presentation ideas at events: - Use fun liners: Bright, tropical cupcake liners can make your treats pop. - Serve on a pretty platter: Arrange cupcakes on a colorful plate for a stunning display. Pro Tips Use Fresh Ingredients: For the best flavor, use fresh pineapple juice and shredded coconut. This will enhance the tropical taste of your cupcakes. Don’t Overmix: When combining wet and dry ingredients, mix just until combined. Overmixing can lead to dense cupcakes. Room Temperature Butter: Ensure your butter is at room temperature before making the frosting. This will help achieve a smooth and creamy texture. Garnish with Care: For a stunning presentation, toast your coconut flakes before using them as a garnish. This adds flavor and a beautiful golden color. {{image_2}} To make vegan pina colada cupcakes, substitute the eggs and butter. Use flaxseed meal or applesauce in place of eggs. For butter, coconut oil works great. For the milk, coconut milk or almond milk are excellent choices. They bring extra flavor and moisture. Make sure to check if your sugar is vegan, as some sugars are processed with bone char. If you need a gluten-free version, use a gluten-free flour blend. Look for blends that include xanthan gum for better texture. It will help your cupcakes rise nicely. You might need to adjust baking time slightly. Check for doneness with a toothpick. The cupcakes might bake a bit faster or slower, so keep an eye on them. You can easily infuse different tropical flavors into your cupcakes. Add mango or passion fruit puree to the batter for a twist. Using extracts like coconut or banana can also enhance the flavor. Be careful not to overdo it—start with a teaspoon and adjust to taste. These small changes make your pina colada cupcakes even more fun and exciting! To keep your Pina Colada cupcakes fresh, store them in an airtight container. This helps seal in moisture. At room temperature, these cupcakes stay fresh for about three days. If you made the cupcakes ahead of time, refrigerate them. Place them in an airtight container to avoid drying out. You can freeze them too! Wrap each cupcake tightly in plastic wrap. Then, place them in a freezer-safe bag. They last up to three months in the freezer. When ready to eat, thaw them overnight in the fridge. For the best taste, let them sit at room temperature for about 30 minutes before serving. Frosted cupcakes last about two to three days at room temperature. Unfrosted ones can last up to five days. Always check for signs of spoilage. If the cupcakes smell off or look dry, it’s best to discard them. Keeping an eye on freshness helps you enjoy these tropical treats at their best! To make Pina Colada cupcakes gluten-free, you can use a gluten-free flour blend. Look for blends that contain a mix of rice flour, tapioca flour, and potato starch. This mix mimics the texture of regular flour well. - Recommended flour substitutes: - Almond flour - Coconut flour - Oat flour (ensure it's certified gluten-free) When using these flours, you might need to adjust the liquid in your recipe. Gluten-free flours often absorb more moisture. - Additional tips for gluten-free baking: - Add a binding agent like xanthan gum or ground flaxseed. - Let the batter rest for about 30 minutes. This helps improve texture. Yes, you can use fresh pineapple in your Pina Colada cupcakes. Just make sure to chop it finely. - Guidelines for substitution: - Use the same amount of fresh pineapple as crushed. - Drain any excess juice to avoid soggy cupcakes. - Adjusting moisture content: - If using fresh pineapple, reduce the pineapple juice slightly. Aim for a balance so the batter isn't too wet. Frosting cupcakes can elevate them to a new level. Use a piping bag for a professional look. - Tools and techniques for a professional finish: - Use a star tip for swirls and peaks. - Keep the frosting at room temperature to make it easy to spread. - Recommended frosting spreading tips and tricks: - Start from the center and work your way out. - Use an offset spatula to create smooth edges. You learned how to make delicious Pina Colada cupcakes. We covered ingredients, tips, and step-by-step baking. Remember to mix your dry and wet ingredients carefully for the best texture. Decorating can unleash your creativity and make them shine. Don't forget the variations, like vegan or gluten-free options, to suit all tastes. Store your cupcakes properly to keep them fresh. Enjoy your baking journey and impress friends with your tasty creations!
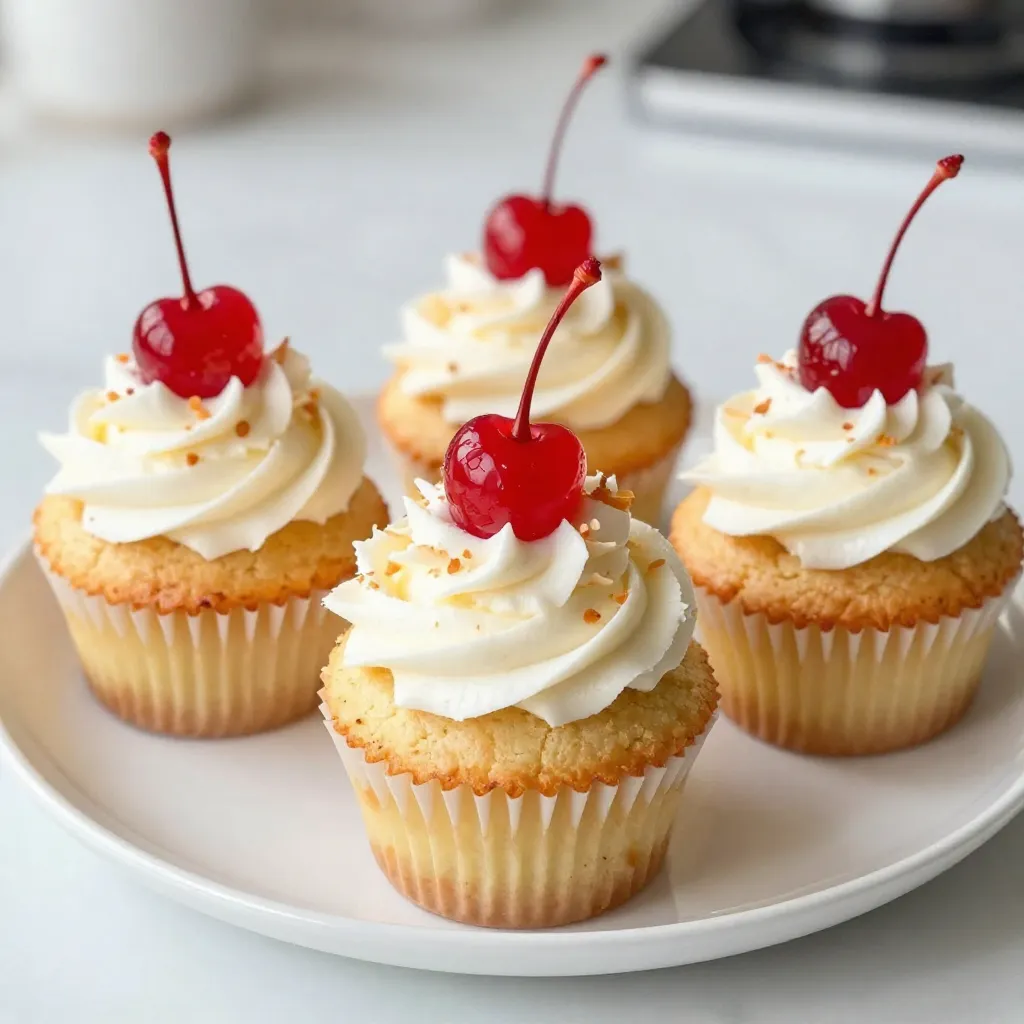
Pina Colada Cupcakes Irresistible Tropical Treat
If you’re craving a tropical escape, my Pina Colada Cupcakes are your ticket to paradise! These fluffy, flavorful delights blend sweet pineapple, coconut, and a
- Key Ingredients for Crust - 1 ½ cups graham cracker crumbs - ½ cup unsalted butter, melted - 1 tablespoon granulated sugar The crust gives your cheesecake a nice crunch. The graham crackers bring a sweet flavor. The butter helps hold everything together. - Essential Ingredients for Cheesecake Filling - 2 cups cream cheese, softened to room temperature - 1 cup granulated sugar - 1 teaspoon pure vanilla extract - 3 large eggs, at room temperature - 1 cup sour cream - 1 ½ cups all-purpose flour - 1 tablespoon unsweetened cocoa powder - 1 tablespoon red food coloring - ½ teaspoon baking soda - ½ teaspoon fine salt The cream cheese is the star of this dish. It gives the cheesecake its smooth texture and rich flavor. The red food coloring makes it pop, while the cocoa powder adds a touch of chocolate. - Optional Garnishes and Toppings - Whipped cream, for topping - Fresh raspberries or strawberries, for garnish Garnishes add a fun touch to your cheesecake. Whipped cream adds creaminess, while fresh berries bring a burst of fruity flavor. You can mix and match to suit your taste. For the full list of ingredients, check the Full Recipe. 1. Preheat the Oven: First, preheat your oven to 325°F (163°C). This step is key for even baking. 2. Prepare and Bake the Crust: In a large bowl, mix the graham cracker crumbs, melted butter, and sugar. This will give you a tasty base. Press this mixture into a 9-inch springform pan. Bake the crust for 10 minutes, then let it cool. 3. Create the Cheesecake Filling: In another bowl, beat the softened cream cheese until it is smooth. Gradually add the sugar and vanilla extract, mixing well. Then, add the eggs one by one, mixing after each. Now, fold in the sour cream, flour, cocoa powder, red food coloring, baking soda, and salt. Blend until it is lump-free and creamy. 4. Transfer to the Pan and Bake: Pour the cheesecake mix over the cooled crust. Tap the pan gently on the counter to get rid of air bubbles. Put the pan back in the oven for 55-60 minutes. The edges should be firm, and the middle should jiggle a little. 1. Proper Cooling Techniques: Once it’s baked, turn off the oven and crack the door. Let the cheesecake cool slowly for 1 hour. Then, move it to the fridge to chill for at least 4 hours, or ideally overnight. This helps the flavors come together. 2. How to Serve Effectively: When ready to serve, gently remove the cheesecake from the springform pan. Top with whipped cream and fresh berries for a pop of color. 3. Presentation Tips: To make it look fancy, place slices on individual plates. Drizzle with raspberry coulis or chocolate sauce before adding berries. This makes each slice a showstopper while tasting divine. For a complete guide, check out the Full Recipe. Enjoy your delicious Red Velvet Cheesecake! Ensuring a Smooth Batter To get a smooth batter, start with room-temperature cream cheese. Cold cream cheese will create lumps. Beat the cream cheese until it's creamy before adding sugar. Mix well after each egg to keep it smooth. Achieving the Right Bake Bake your cheesecake at 325°F (163°C). This lower temperature helps it cook evenly. Look for a slight jiggle in the center when you remove it from the oven. It will firm up as it cools. Avoiding Common Mistakes Avoid overmixing the batter. This can add too much air, causing cracks. Also, do not open the oven door while baking. A sudden temperature change may cause your cheesecake to sink. Creative Toppings Top your cheesecake with whipped cream and fresh berries. You can also drizzle chocolate or caramel sauce on top for extra flavor. For a fun twist, add crushed cookies or candy on top. Seasonal Variations In the fall, try adding a layer of spiced pumpkin puree. In the summer, a layer of lemon curd can brighten the flavor. Seasonal fruits like peaches or cherries are also great choices. Unique Serving Suggestions Serve individual slices on plates with a drizzle of raspberry coulis. Place fresh mint leaves beside each slice for a pop of color. You can even layer small pieces in a glass for a fun parfait style. For the full recipe, be sure to check the detailed instructions above! {{image_4}} Chocolate Red Velvet Cheesecake You can add chocolate to your red velvet cheesecake. Use cocoa powder in the filling. This gives it a rich, deep flavor. Mix it well to ensure even taste. Swirled Cheesecake Options Swirling different flavors into the cheesecake is fun. Try adding a layer of cream cheese or chocolate ganache on top. Use a knife to create a beautiful effect. This adds visual flair and different tastes. Adding Nuts or Fruits Adding nuts or fruits can change the texture and taste. Pecans or walnuts give a nice crunch. Fresh raspberries or strawberries add a fruity twist. Just mix them into the batter or place them on top. Mini Cheesecakes Mini cheesecakes are great for parties. Use a muffin tin instead of a springform pan. Bake them for less time, about 20-25 minutes. They are cute and easy to serve. No-Bake Option If you want to skip baking, try a no-bake version. Use cream cheese, sugar, and whipped cream. Mix and set it in the fridge. This makes a light and creamy dessert. Cheesecake Cupcakes Cheesecake cupcakes are another fun idea. They are portable and perfect for gatherings. Simply pour the batter into cupcake liners. Bake as you would mini cheesecakes. Each bite is a delightful treat. For the full recipe, check out [Full Recipe]. Long-Term Storage Tips After enjoying your red velvet cheesecake, you may have some left. To keep it fresh, wrap the cheesecake tightly in plastic wrap. This helps prevent it from drying out. Store it in the fridge for up to five days. Best Practices for Refrigeration Always place your cheesecake in an airtight container. This keeps out odors from other foods. If you want to save some for later, cut it into slices for easy access. How to Freeze Cheesecake To freeze the cheesecake, wrap each slice in plastic wrap, then place them in a freezer bag. Make sure to remove as much air as possible. You can freeze the slices for up to three months. When you're ready to eat, thaw them in the fridge overnight before serving. Best Method for Reheating If you want to warm your cheesecake, the oven is the best choice. Preheat it to 300°F (150°C). Place the cheesecake on a baking sheet for about 10 minutes. This warms it without making it too hot. Preserving Texture and Flavor Keep the cheesecake covered while reheating. This helps keep it moist and tasty. Avoid the microwave, as it may make the cheesecake too soft or rubbery. Enjoy your slice warm for a delightful treat! What makes red velvet cheesecake different from regular cheesecake? Red velvet cheesecake has a rich red color and cocoa flavor. This sets it apart from regular cheesecake, which is often plain or uses vanilla. The red food coloring gives it a unique look, while the cocoa adds a subtle depth. Can I use a different crust for this recipe? Yes, you can! Feel free to switch the graham cracker crust. You could use an Oreo crust or even a nut-based crust. Each type adds its own taste and texture to the cheesecake. How do I know when my cheesecake is done baking? Check for a slight jiggle in the center. The edges should look set. If the center still wobbles too much, it needs more time. Remember, it will firm up as it cools. Is it possible to make this recipe gluten-free? Absolutely! Replace all-purpose flour with a gluten-free blend. You can also use gluten-free graham crackers for the crust. This way, everyone can enjoy your cheesecake. What can I use instead of cream cheese? You can use mascarpone cheese or a vegan cream cheese. They both give a similar creamy texture and taste, making them great substitutes. Can I substitute Greek yogurt for sour cream? Yes, Greek yogurt works well as a substitute. Use the same amount. It adds creaminess and a tangy flavor, just like sour cream. How to replace eggs in this recipe? For each egg, use 1/4 cup of unsweetened applesauce or 1/4 cup of silken tofu. These alternatives keep your cheesecake moist and help it set. What drinks pair well with red velvet cheesecake? Coffee or a rich red wine complement the flavors of the cheesecake. You can also serve it with a cold glass of milk for a classic choice. Is red velvet cheesecake appropriate for special occasions? Definitely! Its vibrant color and creamy texture make it a showstopper at parties and holidays. It adds a festive touch to any gathering. Can I make this dessert ahead of time? Yes, you can! Make it a day or two before your event. Just store it in the fridge. This allows the flavors to meld for an even tastier treat. For the full recipe, check out the main article. This article covers all you need for the perfect red velvet cheesecake. You learned about key ingredients and step-by-step baking instructions. I shared tips to avoid common mistakes and ideas to personalize your cheesecake. Don't forget about storage and reheating options. You can customize flavors or serve mini versions too. Enjoy creating a delicious dessert that impresses everyone. Now you have the tools to ensure your cheesecake is a hit every time. Happy baking!
Red Velvet Cheesecake Divine and Delicious Delight
Get ready to indulge in a dessert like no other: Red Velvet Cheesecake! This perfect blend of rich, creamy cheesecake and classic red velvet cake
- 1 cup powdered sugar - 2 tablespoons freshly squeezed orange juice - 1 tablespoon cranberry juice - Zest of 1 medium orange - 1 tablespoon unsalted butter, melted - Pinch of fine sea salt Using fresh orange juice gives your glaze a bright flavor. The zest from the orange adds even more aroma and taste. Cranberry juice brings a nice tang that balances the sweetness. Powdered sugar is the base, making the glaze smooth and easy to drizzle. Unsalted butter adds a rich texture, while salt enhances all the flavors. Each ingredient plays a part in the final taste. If you don't have orange juice, try lemon juice for a different taste. You can use apple juice instead of cranberry juice if you prefer a milder flavor. For a dairy-free option, swap unsalted butter with coconut oil. If you want a different sweetness, you can use agave syrup in place of powdered sugar, but the glaze may be less thick. These substitutes can help you adjust the glaze to your own taste. To start, gather your ingredients. You need: - 1 cup powdered sugar - 2 tablespoons freshly squeezed orange juice - 1 tablespoon cranberry juice - Zest of 1 medium orange - 1 tablespoon unsalted butter, melted - Pinch of fine sea salt Make sure your butter is melted and your juices are freshly squeezed. Fresh ingredients make a big difference in flavor. Zesting the orange adds a bright touch. Now, let’s mix everything together. Begin by sifting the powdered sugar into a medium bowl. This helps make your glaze smooth. Next, pour in the orange juice and cranberry juice. Stir well to combine. Add the orange zest and melted butter. These ingredients bring flavor and richness. Use a whisk or fork to blend until smooth. If it seems too thick, add a few drops of water or orange juice. Once mixed, add a pinch of fine sea salt. This balances the sweetness and enhances the taste. Let the glaze rest for about 5 minutes. This resting time helps it thicken up, making it perfect for drizzling. Drizzle this gorgeous glaze over your cooled orange cranberry bread. Watch it cascade down the sides! For a fun twist, sprinkle some extra orange zest or whole cranberries on top. Enjoy your delicious creation! To change the sweetness or tartness of your glaze, you can play with the juices. If you want more sweetness, add extra powdered sugar. For more tartness, squeeze in more cranberry juice. Taste as you mix. This helps you find the perfect balance for your palate. Getting the right glaze consistency is key for a great look. Start with the basic recipe. If it feels too thick, add a few drops of water or more orange juice. If it’s too thin, mix in more powdered sugar. Aim for a smooth but thick glaze that drips nicely off a spoon. For a stunning presentation, drizzle the glaze over your cooled orange cranberry bread. Let it flow down the sides for a lovely look. You can also top it with extra orange zest or whole cranberries for color and fun. This makes your dish pop and adds a festive touch. {{image_4}} You can add more flavor to the orange cranberry bread glaze. Try adding a dash of vanilla extract. This brings a warm, sweet note. You can also add spices like cinnamon or nutmeg for a cozy touch. They pair well with the tart cranberries and sweet oranges. This glaze is not just for orange cranberry bread! It works great on muffins, scones, and even pancakes. The bright flavor lifts these treats. Imagine a warm scone topped with this tangy glaze. Each bite bursts with citrus goodness. You can also drizzle it over cakes for a delightful finish. You can make this glaze festive for special occasions. During the winter holidays, add a splash of peppermint extract. This gives a refreshing twist. For Thanksgiving, you might include a bit of apple cider for warmth. These small changes can make your glaze unique and perfect for celebrations. Explore the Full Recipe to try out these variations and find your favorite! To keep your orange cranberry glaze fresh, store it in an airtight container. Glass jars work great. Place a piece of plastic wrap directly on the glaze before sealing the lid. This step helps prevent a crust from forming. Always let the glaze cool completely before storing it. When stored properly, this glaze lasts up to one week in the fridge. Check for any changes in color or texture before using it. If it looks fine, give it a good stir. You can use this glaze on muffins, scones, or even pancakes. You can freeze this orange cranberry glaze for future use. Pour it into an ice cube tray or small containers. Cover them tightly and freeze. When you need the glaze, thaw it in the fridge overnight. Stir well before serving. This method keeps the glaze tasty and ready to use! Yes, you can use frozen cranberries for the glaze. Just thaw them first. This helps release their juice for a strong flavor. Frozen cranberries work well in recipes when fresh ones are not available. Just remember, they might need a little extra time to break down. To make your glaze thicker, add more powdered sugar. Mix it in slowly until you reach your desired thickness. If it’s too thick, you can make it thinner by adding a few drops of water or more orange juice. Stir well after each addition, so it blends smoothly. This glaze is versatile. You can use it on many baked goods. It pairs well with muffins, cakes, or scones. Drizzle it over pancakes or waffles for a sweet twist. The bright flavors add a nice touch to any breakfast or dessert. You can find the full recipe linked above for more ideas! This blog post covered key points to create the perfect glaze. We explored ingredients, their benefits, and substitutions. I shared step-by-step instructions for mixing and adding final touches. You learned tips for adjusting flavor and improving presentation. We also examined variations and storage practices to extend shelf life. In conclusion, making a glaze can be easy and fun. With the right tips and techniques, you can enhance any baked good. Enjoy experimenting and personalizing your glaze creations!
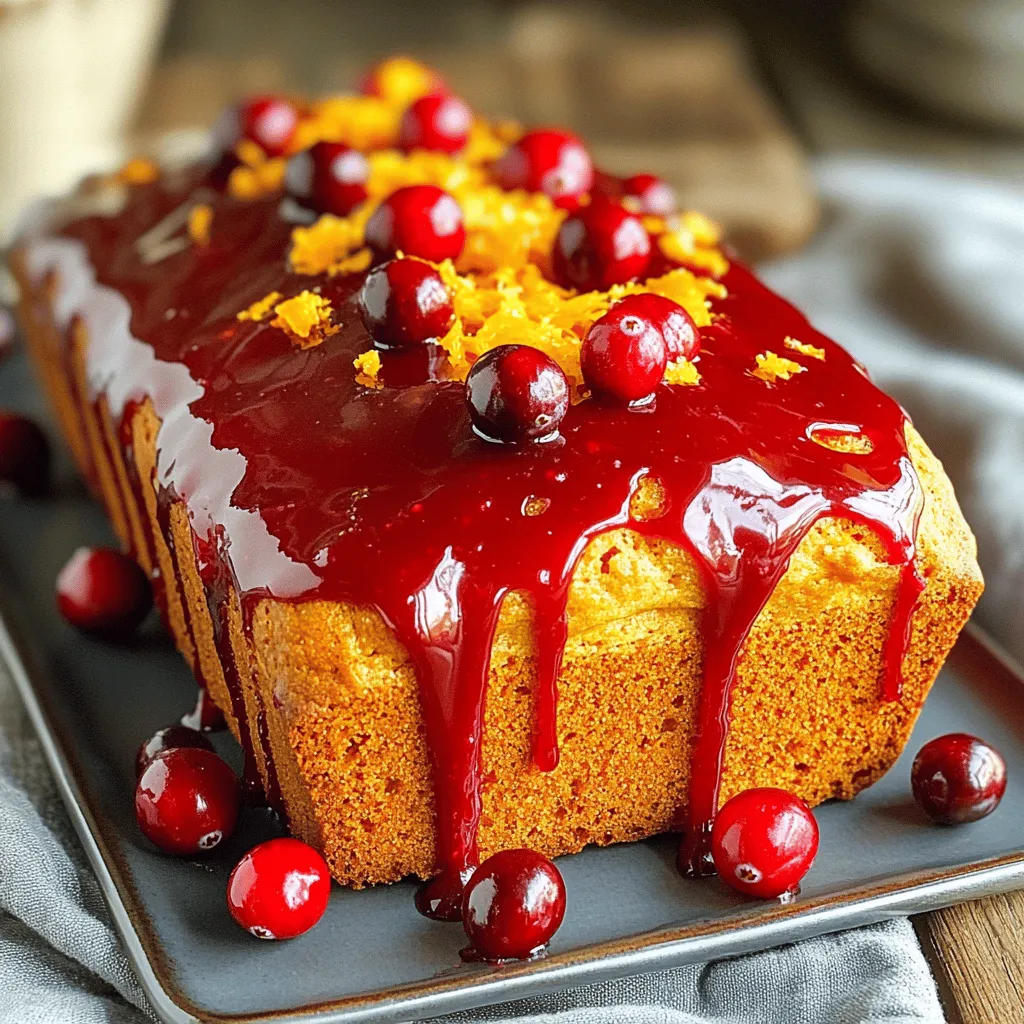
Orange Cranberry Bread Glaze Quick and Easy Recipe
Are you ready to uplift your baking with a burst of flavor? This Orange Cranberry Bread Glaze is quick, easy, and perfect for any occasion.
To make Strawberry Oatmeal Bars, gather these simple ingredients: - 2 cups rolled oats - 1 cup almond flour - 1/2 cup brown sugar (or coconut sugar for a healthier twist) - 1/2 teaspoon baking powder - 1/4 teaspoon salt - 1/2 cup unsalted butter, melted (or coconut oil for a dairy-free alternative) - 1/4 cup honey (or maple syrup for a vegan option) - 1 teaspoon vanilla extract - 2 cups fresh strawberries, hulled and sliced - 1 tablespoon cornstarch - 1 tablespoon lemon juice Using healthier alternatives can make these bars even better. Swap out brown sugar for coconut sugar to reduce your refined sugar intake. Instead of unsalted butter, use coconut oil for a dairy-free option. For sweetness, you can use maple syrup instead of honey, making them vegan-friendly. Almond flour is great, but you could also use whole wheat flour for a different flavor and texture. The quality of your ingredients matters a lot. Fresh strawberries will give the best flavor and sweetness. Choose organic strawberries when you can. The oats should be rolled oats, as they hold their shape well during baking. Good-quality almond flour will make the bars nutty and rich. The better your ingredients, the tastier your Strawberry Oatmeal Bars will be. To start, gather all your ingredients. You need rolled oats, almond flour, brown sugar, baking powder, salt, butter, honey, vanilla extract, fresh strawberries, cornstarch, and lemon juice. Preheat your oven to 350°F (175°C). Grease a 9x9 inch baking pan or line it with parchment paper. This step helps with easy removal later. In a big bowl, mix the rolled oats, almond flour, brown sugar, baking powder, and salt. Stir these dry ingredients well. In a separate bowl, whisk the melted butter, honey, and vanilla extract. Blend them until smooth. Pour the wet mix into the dry mix. Stir it until crumbly and cohesive. Set aside one cup of this oat mix for the topping. Pour the rest into the prepared pan. Press it down firmly to create an even base layer. Bake this base for 10 minutes to set. While it bakes, prepare the strawberry filling. Toss the sliced strawberries with cornstarch and lemon juice in another bowl. This step thickens the filling. After 10 minutes, take the pan out of the oven. Spread the strawberry mix over the baked oat base. Crumble the reserved oat mixture on top. This creates a nice topping. Bake the bars for another 25-30 minutes. The topping should turn golden brown, and the strawberries should bubble. Let the bars cool in the pan for at least 15 minutes. This helps them firm up. Then move them to a wire rack to cool completely. Slice the bars into squares for serving. For a lovely touch, serve them on a wooden platter with powdered sugar on top and fresh strawberry slices. This makes them look even more inviting! You can serve your strawberry oatmeal bars warm or chilled. I like to pair them with a scoop of vanilla ice cream. This adds a creamy touch. You can also serve them with a dollop of yogurt. It makes for a great breakfast or snack. Try cutting them into fun shapes for kids. They will love the colorful presentation. To amp up flavor, add a sprinkle of cinnamon to the oat mixture. This gives a warm, cozy taste. You can also mix in chopped nuts like walnuts or almonds. This adds a nice crunch. For a fruity twist, try adding other berries. Blueberries or raspberries work great too. You might want to drizzle some melted chocolate on top for a sweet finish. To avoid soggy bars, do not skip the cornstarch with strawberries. It helps keep the filling thick. Make sure to press the oat base firmly in the pan. This creates a strong layer. If your bars fall apart, let them cool completely before cutting. This helps them set up nicely. Always check your oven temperature with a thermometer. Ovens can be off, affecting your bake time. For full instructions, check the Full Recipe. {{image_4}} You can make these strawberry oatmeal bars fit many diets. For a gluten-free option, swap regular oats for certified gluten-free oats. If you need a nut-free recipe, use oat flour instead of almond flour. You can replace butter with coconut oil for a dairy-free choice. These small changes keep the bars tasty while meeting different needs. You can easily change the flavor of your bars. Adding nuts like walnuts or pecans gives a nice crunch. You might also try spices like cinnamon or nutmeg for warmth. A pinch of sea salt on top enhances the sweetness of the strawberries. Try mixing in chocolate chips for a sweet twist. The options are endless, making each batch unique. While strawberries shine in this recipe, feel free to switch fruits with the seasons. Fresh blueberries, raspberries, or peaches work well. You can also mix fruits for a colorful treat. Each fruit brings its own flavor, making your bars exciting all year round. Enjoy experimenting with what you have on hand to create your perfect treat! To keep your strawberry oatmeal bars fresh, store them in an airtight container. Use parchment paper between layers to prevent sticking. This method helps keep the bars soft and tasty. Place the container in a cool, dry place. Avoid direct sunlight and heat. If you want them to last longer, consider refrigeration. You can freeze these bars for up to three months. Cut them into squares before freezing. Wrap each piece tightly in plastic wrap. Then, place them in a freezer-safe bag. When ready to eat, thaw them in the fridge overnight. You can also reheat them in the oven at 350°F for about 10 minutes. This warms them up nicely and brings back their fresh taste. These bars stay fresh for about five days at room temperature. If stored in the fridge, they last up to a week. Check for any signs of spoilage, like a sour smell or mold. If they look or smell off, it’s best to throw them away. Keeping an eye on freshness ensures you enjoy every bite of your delicious strawberry oatmeal bars. To make these bars vegan, swap the butter for coconut oil. Use maple syrup instead of honey. These changes keep the taste great and make the recipe plant-based. Yes, you can use frozen strawberries. Just thaw them before mixing. Drain any extra juice to avoid a soggy bar. Fresh or frozen, both work well in this recipe. Let the bars cool completely before cutting. Use a sharp knife for clean edges. You can also line the pan with parchment paper. This makes it easier to lift the bars out and cut them. These bars last about three days at room temperature. Keep them in an airtight container. For longer storage, try refrigerating them. They can stay fresh for up to a week that way. You can find the Full Recipe above for more details! This blog post covers essential details about Strawberry Oatmeal Bars. We explored key ingredients and highlighted healthier options. I shared step-by-step instructions to help you bake them perfectly. You learned tips, tricks, and tasty variations to fit different diets. We've also discussed the best ways to store your bars for freshness. In summary, these bars are easy to make and very customizable. Enjoy experimenting with flavors and share with family! Your kitchen adventures start now.
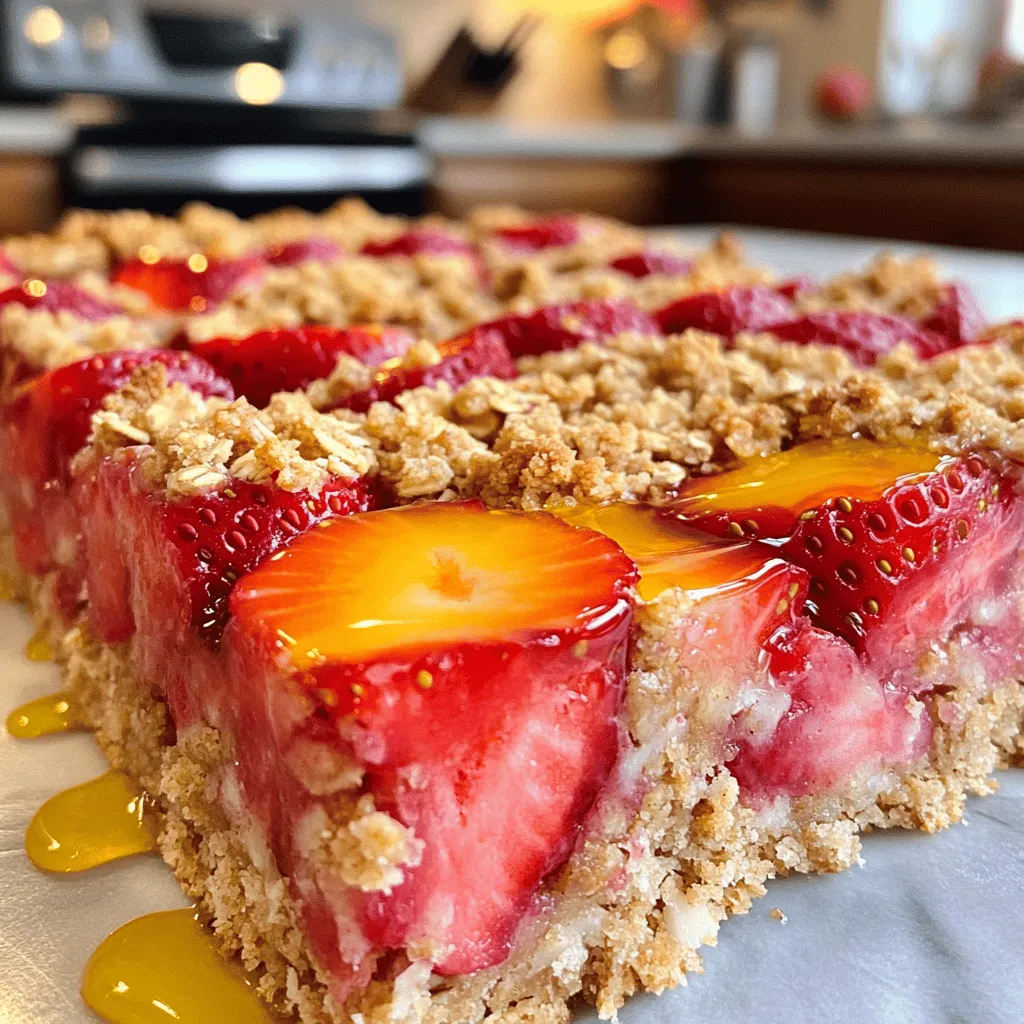
Strawberry Oatmeal Bars Tasty and Simple Treats
Are you ready to whip up a treat that’s both tasty and simple? Strawberry Oatmeal Bars blend the sweet flavor of fresh strawberries with wholesome
To make a delightful German Chocolate Sheet Cake, gather these ingredients: - 2 cups all-purpose flour - 2 cups granulated sugar - 1 cup unsweetened cocoa powder - 1 ½ teaspoons baking powder - 1 teaspoon baking soda - 1 teaspoon salt - 4 large eggs - 1 cup buttermilk - 1 cup vegetable oil - 2 teaspoons vanilla extract - 1 cup boiling water - 1 cup shredded coconut - 1 cup chopped pecans - 1 cup sweetened condensed milk - ½ cup unsalted butter - 2 cups powdered sugar Measuring ingredients accurately is key to success. Use dry measuring cups for flour and sugar. Use liquid measuring cups for buttermilk and oil. If you don’t have buttermilk, mix one tablespoon of vinegar with one cup of milk. Let it sit for a few minutes. This creates a similar flavor and texture. You can also swap granulated sugar for brown sugar for a deeper flavor. If you want a lighter cake, use a mixture of unsweetened applesauce and oil. Choose fresh ingredients for the best taste. Look for flour that feels soft and fine. Check the expiration date on your baking powder and baking soda. Freshness matters! For cocoa powder, pick a brand you trust for rich flavor. Use high-quality chocolate for the frosting. When selecting nuts, choose pecans that are whole and not broken. Fresh coconut adds a wonderful texture, so look for unsweetened shredded coconut. These choices make your cake shine. For the best results, follow the Full Recipe closely. First, gather your ingredients. You will need flour, sugar, cocoa, and some eggs. In a big bowl, sift the flour, sugar, cocoa powder, baking powder, baking soda, and salt. Make sure there are no lumps. Next, add the eggs, buttermilk, oil, and vanilla extract to your dry mix. Use an electric mixer to blend them for about two minutes. Your batter should look smooth. Slowly stir in the boiling water at the end. It may look thin; that's okay! Now it’s time to bake! Pour the batter into your greased sheet pan. Make sure it spreads evenly. Place it in the oven set to 350°F (175°C). Bake for 30 to 35 minutes. To check if it’s done, insert a toothpick in the center. If it comes out clean, your cake is ready! Once baked, let it cool in the pan for about 10 minutes. While your cake cools, prepare the frosting. In a medium saucepan, mix sweetened condensed milk, unsalted butter, and egg yolks. Heat this over medium heat. Stir it for about 10 minutes until it thickens like custard. After it thickens, take it off the heat. Now fold in shredded coconut and chopped pecans. Mix well. Let this frosting cool slightly. Finally, spread the frosting over the warm cake. Enjoy! You can find the full recipe [here](#)
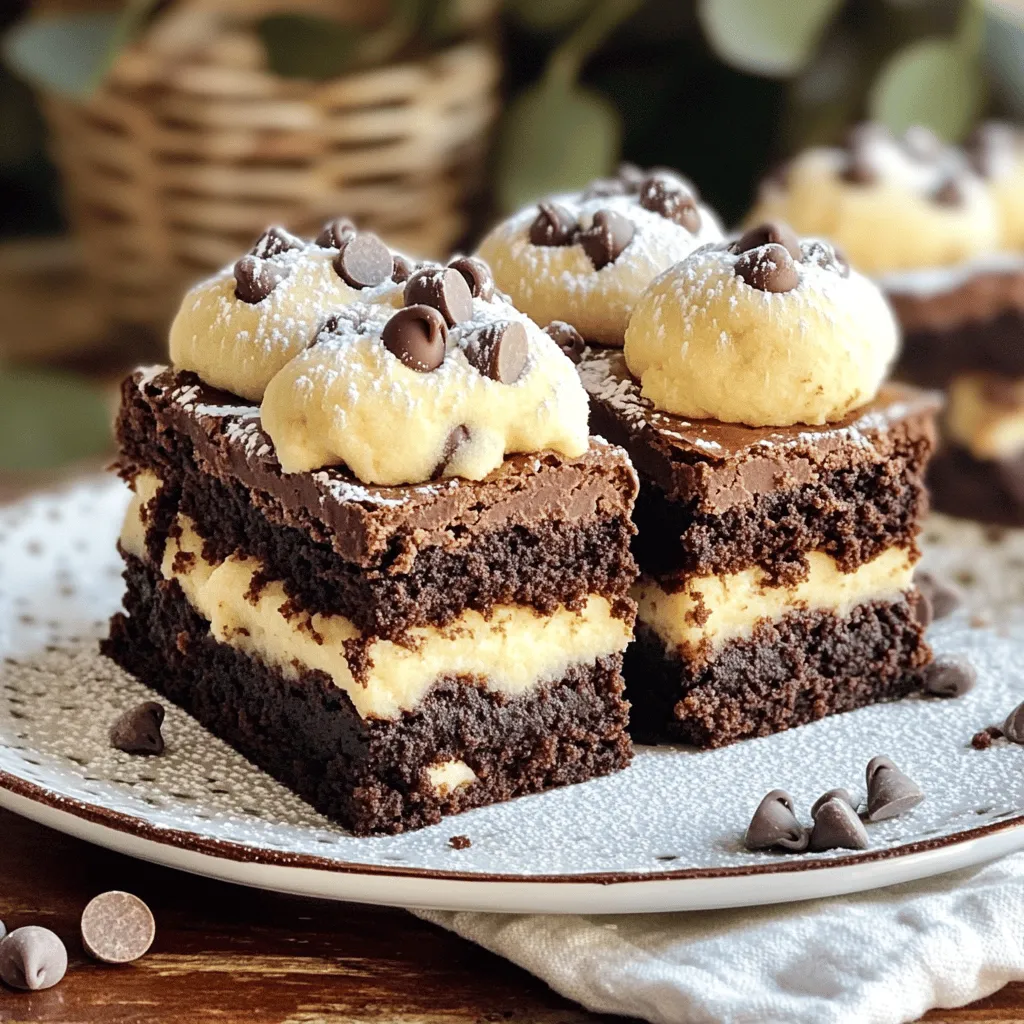
. Baking can be tricky, especially when making German chocolate sheet cake. Here are some common mistakes to avoid: - Not measuring ingredients accurately: Use measuring cups and spoons for precision. - Skipping the sifting step: Sift flour and cocoa to avoid lumps. - Underbaking or overbaking: Keep an eye on the timer and test with a toothpick. - Not cooling the cake properly: Let it cool in the pan for at least 10 minutes. These simple tips can save your cake from being too dry or dense. To get that soft and moist texture, follow these tips: - Use room temperature ingredients: Eggs and buttermilk mix better when they are not cold. - Mix just enough: Overmixing can lead to a tough cake. Mix until just combined. - Add boiling water: This step helps to create a light batter. It might seem odd, but it works! - Don’t skip the eggs: They add structure and moisture to the cake. Perfect texture comes from the right balance in mixing and baking. Frosting can elevate your cake to the next level. Here are some best practices: - Frost when warm: Apply the coconut-pecan frosting while the cake is still warm. It helps the frosting stick better. - Use an offset spatula: This tool makes spreading the frosting easy and smooth. - Cool the frosting: Let it cool slightly before applying, so it spreads evenly. - Be generous: Don’t be shy with the frosting! A thick layer makes it extra delicious. These steps ensure your cake looks as good as it tastes. For the full recipe, you can refer back to the main article. {{image_4}} You can boost the flavor of your German chocolate sheet cake. Here are some ideas: - Espresso Powder: Add 1 tablespoon of espresso powder to the batter for a rich flavor. - Chocolate Chips: Mix in 1 cup of chocolate chips for extra chocolatey goodness. - Fruit: Chopped cherries or raspberries can add a fruity twist. These small changes can make a big difference. They can turn a classic dish into something new and exciting. You can easily adapt this recipe for different diets. To make it gluten-free: - Replace the all-purpose flour with a gluten-free blend. For a low-sugar version, use these swaps: - Substitute granulated sugar with a sweetener like erythritol or stevia. - Use unsweetened cocoa powder to cut down on sugar. These adjustments allow more people to enjoy this treat without worry. Serving your German chocolate sheet cake can be fun! Here are some ideas: - Ice Cream: A scoop of vanilla ice cream pairs well with the rich cake. - Fresh Berries: Serve with fresh strawberries or blueberries for a refreshing contrast. - Whipped Cream: A dollop of whipped cream adds a light touch. These pairings enhance the taste and make your cake even more enjoyable. For the full recipe, check out the detailed steps above. To keep your German chocolate sheet cake fresh, store it in an airtight container. This will help keep the moisture in and prevent it from drying out. You can also cover the cake with plastic wrap. Make sure it is at room temperature before covering it. This way, you avoid any condensation that might make the cake soggy. You can freeze this cake for future enjoyment. First, let the cake cool completely. Then, cut it into squares. Wrap each square tightly in plastic wrap and place them in a freezer-safe bag. Label the bag with the date. Your cake can stay fresh in the freezer for up to three months. When you want to enjoy a piece, thaw it in the fridge overnight. When stored properly, your German chocolate sheet cake lasts about 4 to 5 days at room temperature. If you store it in the fridge, it can last up to a week. To reheat, place a slice in the microwave for about 10-15 seconds. This warms it up without making it dry. Enjoy your delicious treat any time! For the full recipe, check the earlier sections. German Chocolate Cake is not from Germany. It started in the U.S. in the 1850s. A man named Samuel German made a dark-baking chocolate. The cake became popular when a newspaper shared a recipe in 1957. People loved its rich chocolate flavor and unique frosting with coconut and pecans. Yes, you can use other nuts in the frosting. Walnuts and hazelnuts work well. Just make sure to chop them finely. This adds a nice crunch and flavor. Experiment with what you like best. Each nut brings a new taste to the cake. To check if the cake is done, use a toothpick. Insert it in the center of the cake. If it comes out clean, the cake is ready. If it has wet batter on it, bake for a few more minutes. The edges will pull away from the pan when it is fully cooked. Enjoy that warm cake with its special frosting! For the full recipe, check the details above. This post covered key steps to make a great German Chocolate Cake. We looked at ingredients, baking tips, and frosting ideas. You learned how to avoid common mistakes and achieve perfect texture. I also shared ways to customize the cake for different diets. In conclusion, using quality ingredients and following these steps will lead to success. Enjoy baking, and make your cake special!
German Chocolate Sheet Cake Simple and Delicious Treat
If you’re craving a sweet treat that’s simple yet satisfying, look no further! My German Chocolate Sheet Cake combines rich chocolate with a coconut-pecan frosting
To create these tasty bars, you need a few key ingredients. Here’s what you’ll need: - 2 cups rolled oats - 1 cup almond flour - 1/2 cup coconut sugar (or substitute with brown sugar) - 1/2 teaspoon baking soda - 1/4 teaspoon salt - 1/2 cup melted coconut oil - 1/4 cup pure maple syrup - 1 teaspoon vanilla extract - 1 cup semi-sweet or dark chocolate chips - 1/2 cup chopped walnuts (optional) - 1/4 cup almond butter or peanut butter These ingredients blend together to create a chewy, rich base with a chocolatey top. While the main ingredients shine, you can add a few extras for even more flavor. Here are some ideas: - A pinch of cinnamon for warmth - Dried fruits like cranberries or apricots for sweetness - A splash of espresso for a coffee kick - Sea salt flakes on top for contrast These options let you customize the bars to your taste. If you have dietary needs, don't worry! You can easily swap some ingredients for alternatives. Here are some suggestions: - Use gluten-free oats if you need a gluten-free option. - Substitute almond flour with oat flour or all-purpose flour. - Replace coconut oil with vegetable or canola oil. - Use sunflower seed butter if you want a nut-free version. These swaps keep the spirit of the recipe while meeting your needs. For the full recipe, check out the earlier section! Start by preheating your oven to 350°F (175°C). Next, take an 8x8 inch baking dish. Line it with parchment paper. Leave some overhang on the sides. This makes it easy to lift the bars out later. In a large bowl, mix the dry ingredients. Combine 2 cups of rolled oats, 1 cup of almond flour, 1/2 cup of coconut sugar, 1/2 teaspoon of baking soda, and 1/4 teaspoon of salt. Stir well. Make sure there are no clumps. In another bowl, whisk together the wet ingredients. Use 1/2 cup of melted coconut oil, 1/4 cup of pure maple syrup, and 1 teaspoon of vanilla extract. Mix until smooth and well blended. Now, pour the wet mixture into the dry ingredients. Stir everything together. You want a uniform mix. Make sure no dry ingredients remain visible. Gently fold in the fun stuff! Add 1 cup of semi-sweet chocolate chips. If you like nuts, add 1/2 cup of chopped walnuts too. Mix until they're evenly spread throughout the batter. Take about two-thirds of the oat mixture. Press it firmly into the bottom of your prepared baking dish. This forms an even base layer. For the topping, mix the remaining oat mixture with 1/4 cup of almond butter. Spoon dollops over the base layer. Use a knife to swirl it in for a marbled look. Place your dish in the oven and bake for 20-25 minutes. Look for golden brown edges. The center should be set but still soft. Once done, let it cool for 10 minutes. Use the parchment paper to lift the bars out. Allow them to cool completely on a wire rack. Now you’re ready to slice and enjoy your decadent oatmeal fudge bars! For the full recipe, refer back to the ingredients section. To get the best texture in your oatmeal fudge bars, follow a few simple rules: - Use rolled oats, not instant oats. Rolled oats give the bars a chewy bite. - Make sure to measure ingredients accurately. Too much flour can make the bars dry. - Press the base layer firmly into the dish. This helps it hold together. Each of these steps will help you achieve a great texture that everyone will love. When it comes to serving these treats, have fun with it! Here are some ideas: - Stack the bars and drizzle with melted chocolate. This makes them look fancy! - Serve them warm with a scoop of vanilla ice cream. The hot fudge melts into the ice cream for a tasty treat. - Top with fresh fruit, like sliced strawberries or bananas, for a fresh twist. These options will impress your friends and family. If you want your bars to be even more fudgy, try these tips: - Increase the amount of chocolate chips to 1 1/2 cups. More chocolate equals more fudginess. - Add an extra spoonful of almond butter to the mixture. This will add richness. - Bake them for a shorter time. Pull them out when the center is just slightly soft. These tricks will take your oatmeal fudge bars to the next level. For the full recipe, check out the details above! {{image_4}} You can change the flavor of your oatmeal fudge bars easily. Here are some ideas: - Peanut Butter Swirl: Replace almond butter with peanut butter for a nutty twist. - Chocolate Mint: Add a few drops of mint extract to give a fresh taste. - Coconut Bliss: Mix in shredded coconut for a tropical vibe. Experiment with these flavors to make them your own! You can make these bars gluten-free and vegan. Here’s how: - Gluten-Free: Use certified gluten-free oats and almond flour. - Vegan: Choose maple syrup and dark chocolate chips without dairy. These swaps keep the bars tasty while meeting your dietary needs. Want to get creative? Here are some fun add-ins: - Dried Fruit: Raisins, cranberries, or chopped dates add sweetness. - Seeds: Chia seeds or flaxseeds boost nutrition and texture. - Spices: Cinnamon or nutmeg can add warmth and flavor. Mix and match these extras to create a unique treat every time! To keep your decadent oatmeal fudge bars fresh, store them in an airtight container. Place a piece of parchment paper between layers to prevent sticking. They will stay good for about five days at room temperature. If you want them to last longer, keep them in the fridge. The cool air will help maintain their taste and texture. Freezing is a great option for longer storage. First, let the bars cool completely. Next, wrap each bar in plastic wrap. After that, place the wrapped bars in a freezer-safe bag or container. They can last up to three months in the freezer. When you’re ready to enjoy them, just thaw them in the fridge overnight. To refresh your bars, simply reheat them in the oven. Preheat the oven to 350°F (175°C). Place the bars on a baking sheet and warm them for about 5-10 minutes. This will make them soft and gooey again. If you prefer a quick option, you can microwave a single bar for about 15-20 seconds. Enjoy the warmth and rich taste! Decadent oatmeal fudge bars last about one week when you store them in an airtight container. Keep them at room temperature for best taste. If you want to keep them longer, you can freeze them. In the freezer, they can last for up to three months. Just wrap them well to avoid freezer burn. You can use instant oats, but the texture will change. Instant oats are finer and will make the bars softer. Rolled oats provide a chewier texture, which I recommend for these bars. If you want to use instant oats, reduce the baking time slightly to avoid overbaking. You can substitute almond flour with other nut flours or all-purpose flour. If you need a nut-free option, use oat flour or whole wheat flour. Each flour has a different taste and texture, so choose based on your preference and dietary needs. Check for golden brown edges and a center that is set but still soft. A toothpick inserted in the center should come out with a few moist crumbs, not wet batter. If it comes out clean, the bars may be overbaked and dry. Keep an eye on them during the last few minutes. In this blog post, I covered how to make decadent oatmeal fudge bars. We explored necessary and optional ingredients, along with substitutions for diets. I provided step-by-step instructions for the perfect bake, tips for the best texture, and fun variations to try. Lastly, I shared storage info and answered common questions. Try to make these bars your own. They are a delicious treat for everyone! Enjoy baking and sharing these yummy desserts.
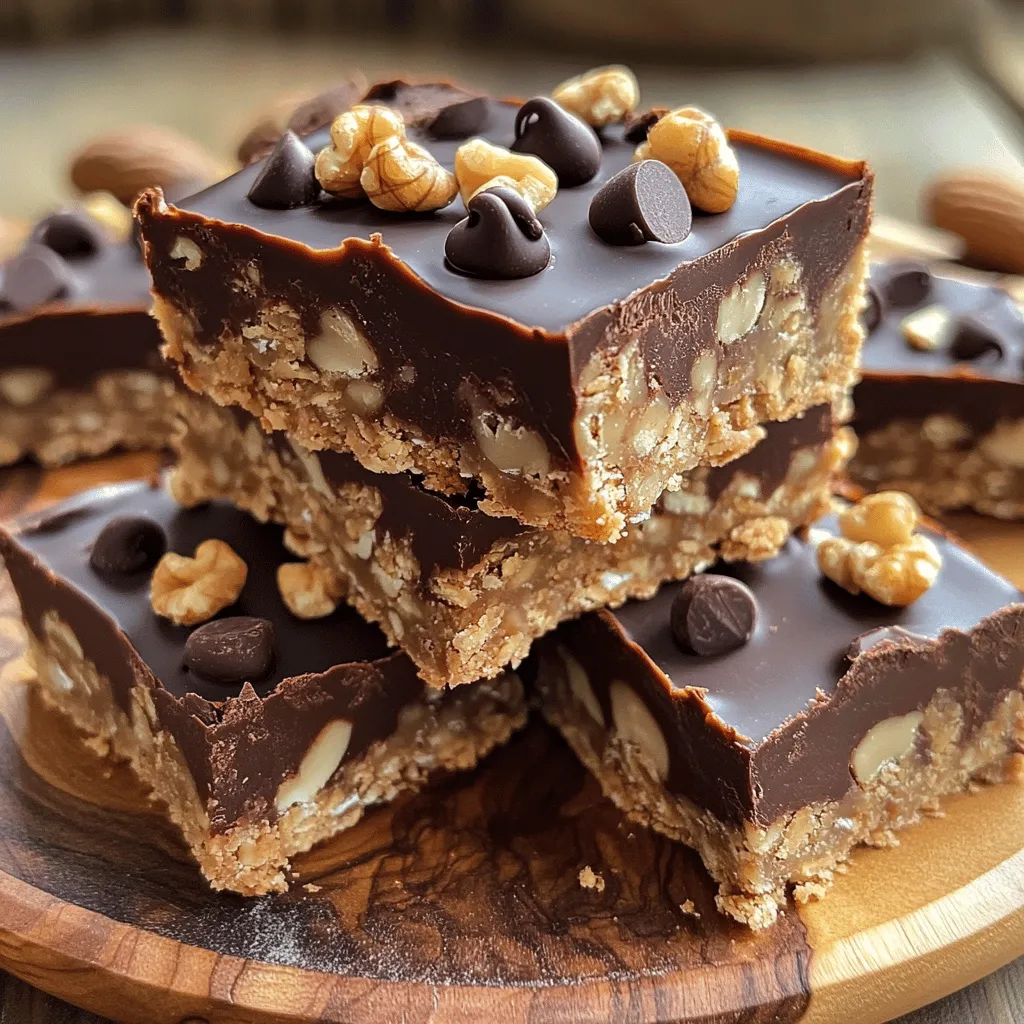
Decadent Oatmeal Fudge Bars Recipe for Easy Treats
Are you ready to indulge in a scrumptious treat? My Decadent Oatmeal Fudge Bars are your answer! With rich chocolate, hearty oats, and a chewy
- 1 cup all-purpose flour - 1/2 teaspoon baking soda - 1/4 teaspoon salt - 1/2 cup unsalted butter - 1/2 cup brown sugar - 1/4 cup granulated sugar - 1 large egg - 1 teaspoon vanilla extract To make the best cheesecake stuffed chocolate chip cookies, you need some key ingredients. The main ones are flour, butter, and sugar. Flour gives the cookies their structure. Butter adds richness and flavor. Sugar sweetens the dough and helps with texture. - 8 oz cream cheese - 1/4 cup granulated sugar - 1/2 teaspoon vanilla extract - 1 tablespoon fresh lemon juice - 1 egg yolk For the cheesecake filling, cream cheese is vital. It creates that smooth, creamy texture. The granulated sugar balances the tangy cream cheese. Lemon juice adds brightness. The egg yolk helps bind it all together. - Semi-sweet chocolate chips - Chopped nuts You can customize these cookies with optional mix-ins. Semi-sweet chocolate chips enhance the chocolate flavor. Chopped nuts add crunch and depth. Both options make the cookies even more delightful. Check out the Full Recipe for detailed instructions and tips on how to make these tasty treats. - Preheat your oven to 350°F (175°C). Line a baking sheet with parchment paper. - In a small bowl, mix together 1 cup of flour, 1/2 teaspoon of baking soda, and 1/4 teaspoon of salt. Set this aside. - In a large bowl, cream 1/2 cup of softened butter, 1/2 cup of brown sugar, and 1/4 cup of granulated sugar. Beat until light and creamy. - Add in 1 large egg and 1 teaspoon of vanilla extract. Mix until smooth. - Gradually stir in the dry ingredients. Be gentle to keep the dough soft. Fold in chocolate chips at the end. - In a separate bowl, beat 8 oz of softened cream cheese until smooth. - Add 1/4 cup of granulated sugar, 1/2 teaspoon of vanilla extract, 1 tablespoon of lemon juice, and 1 egg yolk. Mix until creamy and lump-free. - Take about 1 tablespoon of cookie dough. Flatten it in your palm. - Place about 1 teaspoon of cheesecake filling in the center. - Fold the edges of the dough around the filling. Pinch and roll into a ball. Ensure the filling is fully enclosed. - Space the stuffed cookie balls on your baking sheet, about 2 inches apart. - Bake for 12-15 minutes, until the edges are golden and the centers are soft. - Let the cookies cool on the baking sheet for 5 minutes. Then, transfer them to a wire rack to cool completely. For detailed steps, please refer to the Full Recipe. To make the best dough, avoid overmixing. Overmixing can make your cookies tough. Instead, mix just until you see no flour. This keeps the cookies soft and chewy. Next, ensure your butter is at room temperature. Soft butter helps to create a creamy mixture with the sugars. If butter is too cold, it won’t blend well. For baking, adjust the time and temperature if needed. Every oven is different. Start by following the recipe’s time, but keep an eye on your cookies. Check for doneness by looking for lightly golden edges. The centers should still look soft. They will firm up as they cool. For a lovely finish, dust your cookies with powdered sugar. It adds a sweet touch and makes them look fancy. Serve them with fresh berries for a burst of color. The berries contrast nicely with the chocolate and cheesecake. This makes a great treat for guests! For the Full Recipe, refer to the earlier section. {{image_4}} You can make these cookies even more fun. Adding zest from lemons or oranges gives a bright, fresh taste. The zest adds a nice kick to the cheesecake filling. You can also try different kinds of chocolate. Use dark chocolate, white chocolate, or even milk chocolate chips. Each type will change the cookie's flavor and make it special. If you need gluten-free options, use gluten-free flour for the dough. This keeps the cookie tasty while catering to dietary needs. For those who follow a vegan diet, substitute cream cheese with a vegan version. Use plant-based butter to make the dough too. These swaps let everyone enjoy the cookies. Spices can create a seasonal vibe. In fall, add cinnamon or nutmeg to the dough for warmth. For the holidays, top the cookies with crushed candy canes or festive sprinkles. These seasonal touches make your cookie treats even more inviting and fun for gatherings. To keep your cheesecake stuffed chocolate chip cookies fresh, let them cool completely. Place them in an airtight container. This helps to lock in moisture and flavor. You can also separate layers with parchment paper to prevent sticking. For the best results, store them at room temperature for up to a week. You can freeze unbaked cookie dough for later use. To do this, scoop the dough into balls and place them on a baking sheet. Freeze them for about 1-2 hours until solid. Then, transfer them to a freezer-safe bag. When you're ready to bake, simply take them out and let them thaw for about 30 minutes. Bake as directed in the Full Recipe. These cookies can maintain their amazing flavor and texture for about one week at room temperature. If frozen, they can last for up to three months. When you’re ready to enjoy them, just thaw and bake! Yes, you can make these cookies ahead. Prepare the dough and the cheesecake filling. Store both separately in the fridge for up to two days. When you are ready to bake, just assemble the cookies. This method saves time and lets you enjoy freshly baked cookies anytime. If your dough feels too sticky, add a little more flour. Start with one tablespoon. Mix well and check the texture. You want it to be soft but not tacky. If it is still sticky, add another tablespoon. Remember, less is more. Yes, you can use ricotta cheese or mascarpone. These options give a different taste and texture. Ricotta is lighter, while mascarpone is richer and creamier. Each choice adds a unique twist to the filling, making it fun to explore. These cookies offer a delightful mix of flavors and textures. You learned about the key ingredients for both the cookie dough and the cheesecake filling. Following easy steps can help you create these treats with confidence. Tips and tricks ensure your cookies come out perfect every time. Don't forget to explore variations and storage options to keep them fresh. Enjoy baking these cookies for any occasion, and share them with friends and family!
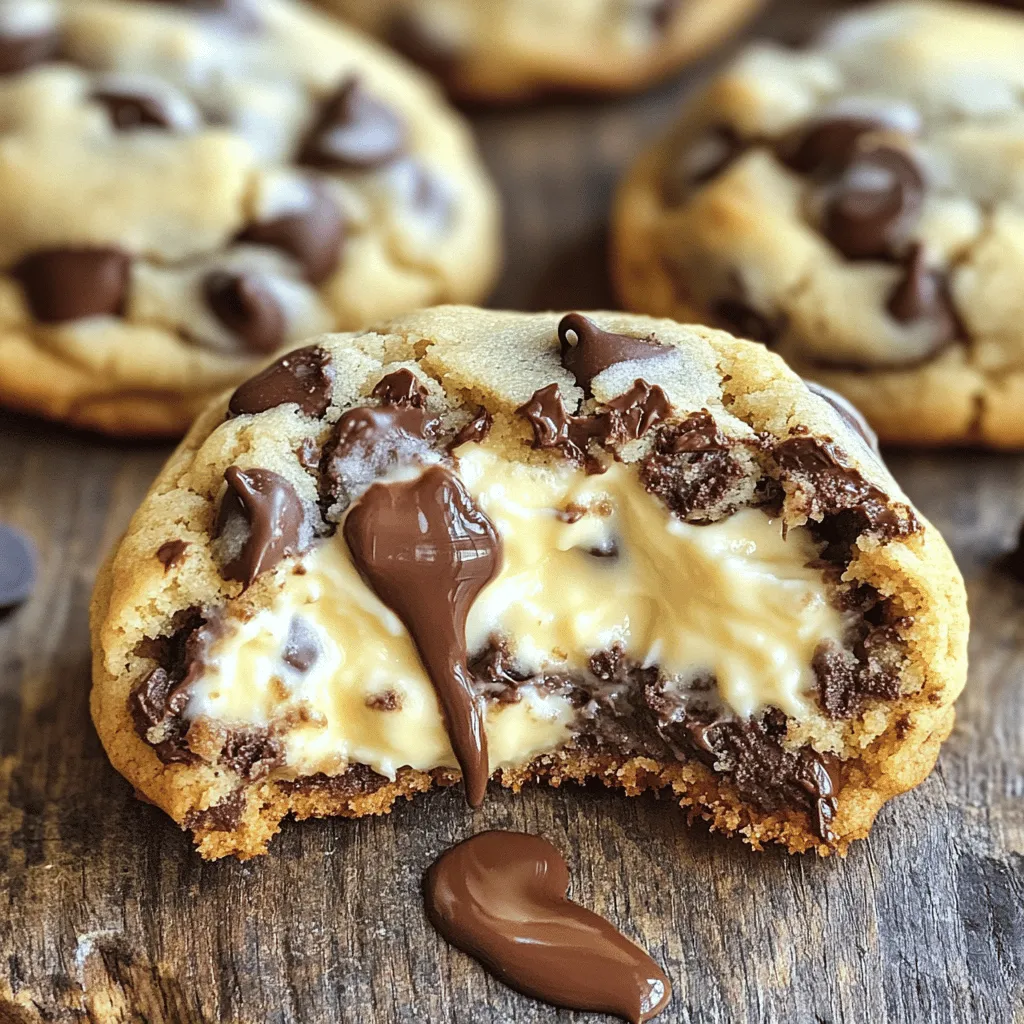
Cheesecake Stuffed Chocolate Chip Cookies Delight
Are you ready to take your cookie game to the next level? Imagine sinking your teeth into a warm, chewy chocolate chip cookie, only to