Desserts
. To get those marshmallows just right, watch them closely while baking. You want them golden brown, not burnt. Bake for 10 to 15 minutes. The marshmallows should puff up and become gooey. If you like extra char, broil them for a minute at the end. This gives a nice crisp outside and a soft inside. S'mores dip is fun to share. Serve it warm with extra graham crackers for dipping. You can also use pretzels for a salty twist. Apples or strawberries add a fruity touch. The mix of flavors makes each bite exciting! Don’t skip preheating the oven. This ensures even baking and perfect marshmallow toasting. Avoid using too many mini marshmallows; they can overpower the dish. Also, press the crust firmly to keep it from crumbling. Lastly, let the dip cool slightly before serving. It helps with dipping and keeps your fingers safe from hot chocolate! For the complete recipe, check out the Full Recipe section above. {{image_4}} You can make your s'mores dip even better by adding flavored chocolate. Try using dark chocolate or milk chocolate for a twist. You can also add fun candies like peanut butter cups or caramel bits. They melt well and mix nicely with the chocolate and marshmallows. This extra flavor makes each bite special and exciting. If you want a gluten-free option, swap graham crackers with almond flour. Mix about 1 cup of almond flour with melted butter and vanilla extract. This gives you a tasty crust that is safe for those avoiding gluten. It’s just as crunchy and delicious as the classic version. You can change the flavors of your s'mores dip for different seasons. During fall, add pumpkin spice or cinnamon for a warm taste. In winter, use peppermint extract for a fresh flavor. You can even sprinkle crushed candy canes on top for a festive look. For summer, try adding fresh berries on top for a fruity twist. These seasonal changes keep your s'mores dip fun and fresh throughout the year! To store leftover s'mores dip, let it cool completely. Then, transfer it to an airtight container. This keeps the dip fresh and prevents it from drying out. Place it in the fridge where it can last for up to three days. When you want a snack, you can just take it out! Reheating s'mores dip is easy. You can use the oven or microwave. For the oven, preheat it to 350°F (175°C). Place the dip in an oven-safe dish and cover it with foil. Bake for about 10 minutes. If using a microwave, heat it in short bursts of 20 seconds. Stir in between until it’s warm. This helps keep the marshmallows soft and gooey. You can freeze s'mores dip for longer storage. Use a freezer-safe container. Make sure to leave some space at the top, as it will expand. The dip can last up to two months in the freezer. When you're ready to enjoy it, thaw it overnight in the fridge. Then, reheat it as mentioned above. Enjoy your tasty treat any time! Yes, you can use regular marshmallows. Just cut them into smaller pieces. This helps them melt better and cover more area. Mini marshmallows spread out more evenly, but regular ones work just fine. You can make s'mores dip on the stovetop. Use a heavy skillet on low heat. Layer chocolate and marshmallows just like in the oven. Cover the skillet to help the marshmallows melt. Stir gently until everything is gooey. If your marshmallows don't brown, you can use a kitchen torch. A torch helps to brown the tops nicely. If you don’t have a torch, just bake a little longer. Keep a close eye so they don’t burn. You can keep s'mores dip in the fridge for about three days. Store it in an airtight container. Reheat it in the oven or microwave before serving. It may not be as gooey, but it will still taste great. Making S'mores Dip is fun and easy. We covered key ingredients, their quality, and swaps. Step-by-step instructions guide you from prep to serving. I shared tips for perfect marshmallows and common mistakes to avoid. We explored fun variations and storage ideas, so you can enjoy it longer. Remember, a little creativity can enhance your dip. I hope these insights inspire you to create your perfect S'mores Dip moment!](https://tossedflavors.com/wp-content/uploads/2025/05/d7792483-93cb-4513-9846-6d8eee263f45.webp)
S’mores Dip in the Oven Delightfully Easy Recipe
Craving a sweet treat that’s easy and fun? Let me show you how to make S’mores Dip in the Oven. This recipe is simple, uses
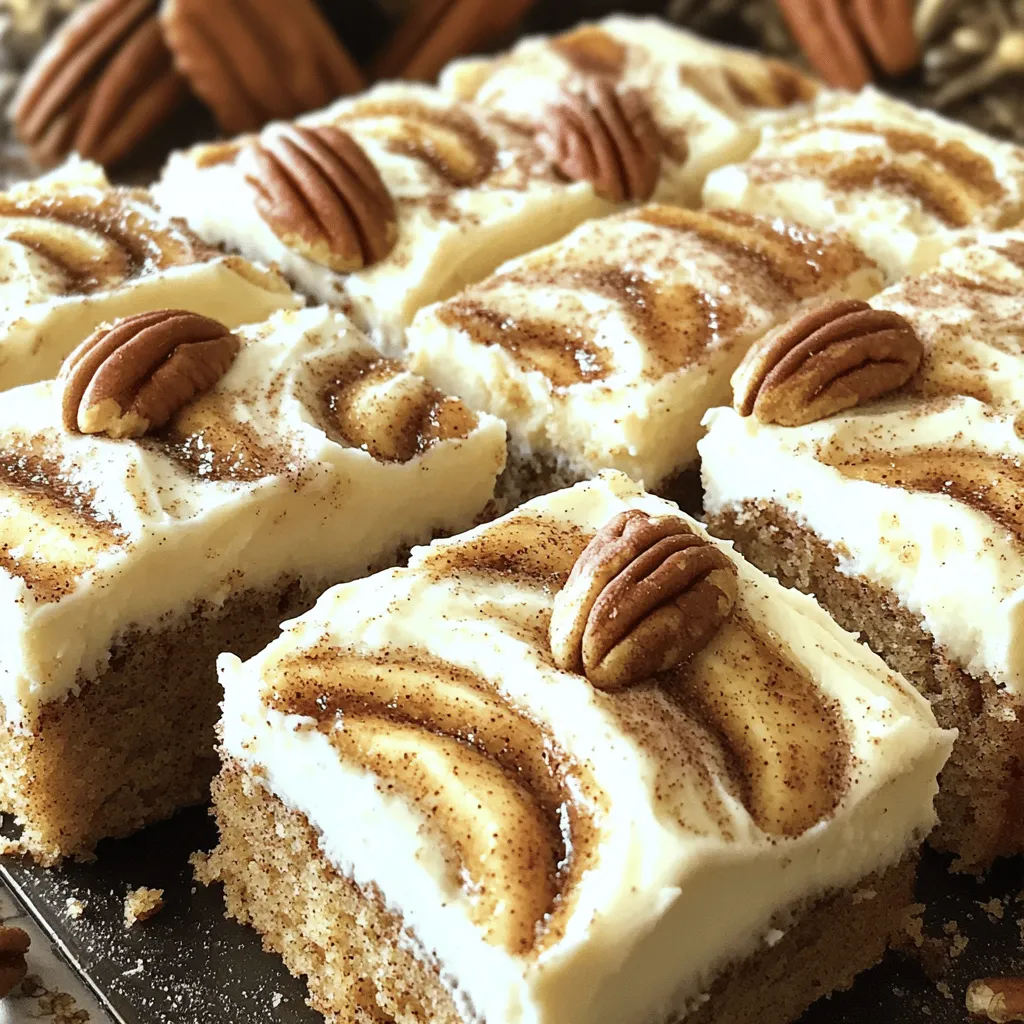
Cinnamon Roll Cake with Cream Cheese Frosting Delight
Are you ready for a warm, gooey treat that combines classic flavors with a twist? My Cinnamon Roll Cake with Cream Cheese Frosting Delight is
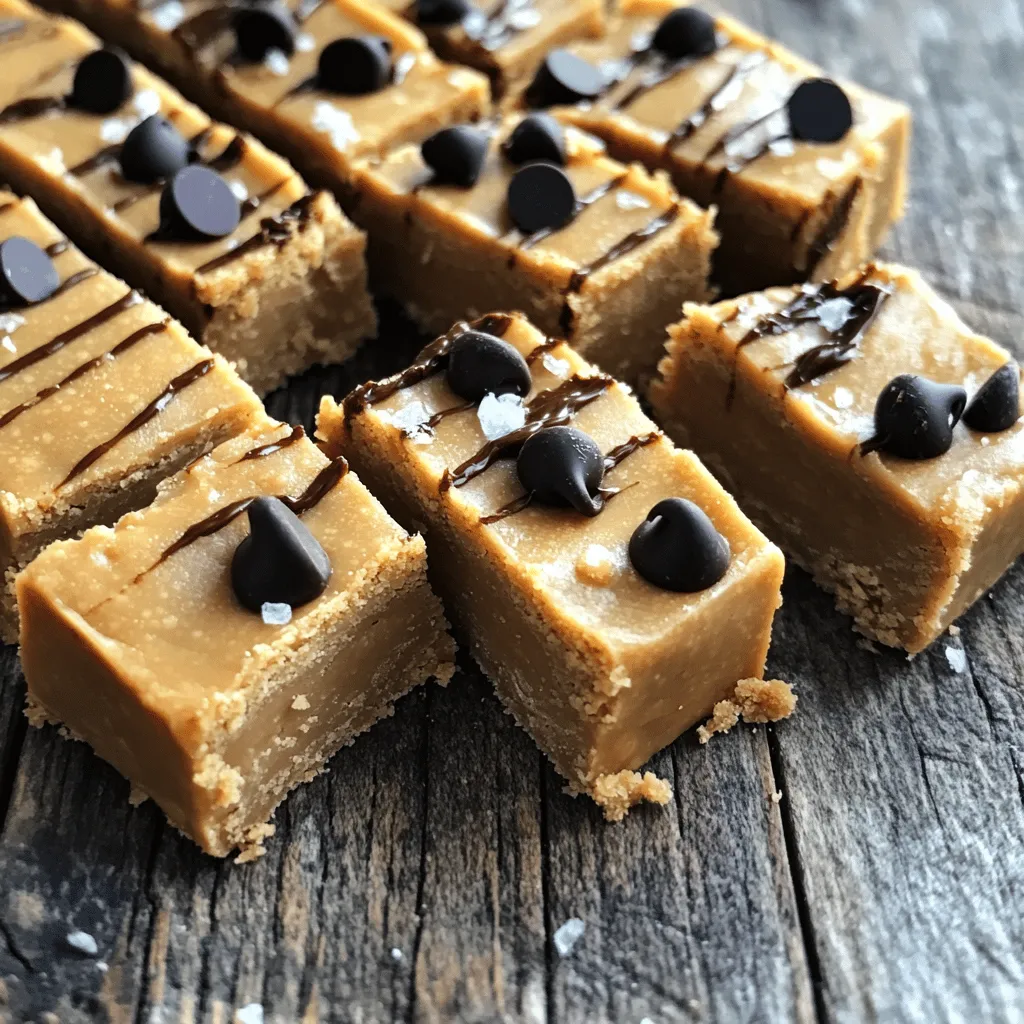
No-Bake Peanut Butter Bars Easy and Delicious Treat
Looking for a quick and tasty treat? You’re in the right place! These No-Bake Peanut Butter Bars are easy to make and full of flavor.
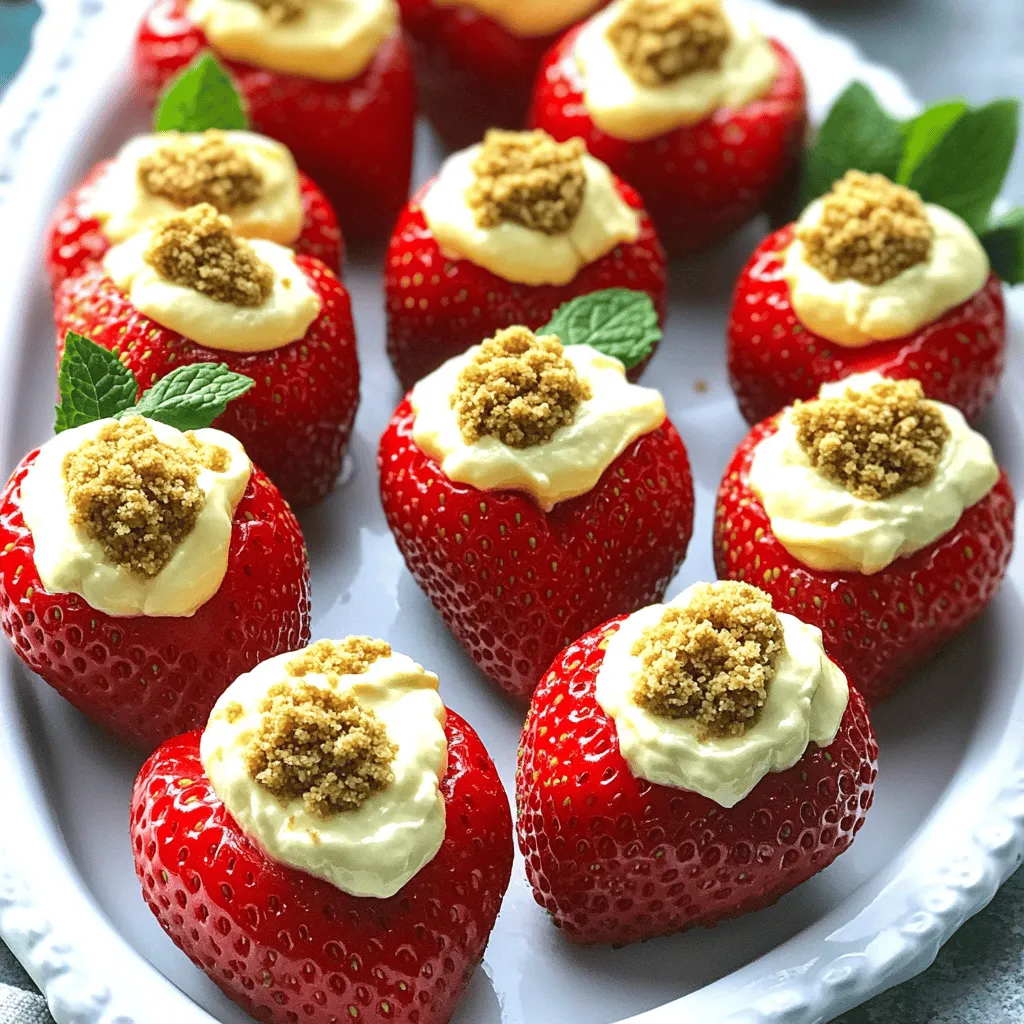
Cheesecake Deviled Strawberries Delightful Dessert Treat
Get ready to wow your taste buds with Cheesecake Deviled Strawberries! This delightful dessert combines sweet strawberries with a creamy cheesecake filling. Each bite is
![To make bomboloni, gather these key ingredients: - 2 cups all-purpose flour - 2 tablespoons granulated sugar - 1 teaspoon instant yeast - 1/2 teaspoon salt - 1/2 cup whole milk, warmed to about 110°F - 2 tablespoons unsalted butter, melted and cooled slightly - 2 large egg yolks - 1 teaspoon pure vanilla extract - Vegetable oil, for frying - Powdered sugar, for dusting These ingredients create the soft, fluffy dough that makes bomboloni a treat. For the creamy custard filling, you will need: - 1 cup whole milk - 1/4 cup granulated sugar - 2 tablespoons cornstarch - 2 large egg yolks - 1 teaspoon pure vanilla extract This custard adds a rich flavor and a smooth texture to each bite. You can enhance your bomboloni with some fun toppings: - Additional powdered sugar - Melted chocolate or Nutella - Fresh berries - Whipped cream These toppings make your bomboloni even more delightful and personal. Enjoy making this recipe! For the complete method, check the Full Recipe. To start, gather your ingredients. In a large bowl, mix together: - 2 cups all-purpose flour - 2 tablespoons granulated sugar - 1 teaspoon instant yeast - 1/2 teaspoon salt Stir these well. In another bowl, whisk together: - 1/2 cup warmed whole milk - 2 tablespoons melted unsalted butter - 2 large egg yolks - 1 teaspoon pure vanilla extract Now, pour the wet mix into the dry mix. Stir until the dough forms. It should be soft and slightly sticky. Place the dough on a floured surface and knead for 5-7 minutes. The dough will become smooth and elastic. Next, grease a large bowl with oil. Put the dough inside and cover it with a towel. Let it rise in a warm spot for about 1 hour. It should double in size. While the dough rises, make the custard filling. In a saucepan, heat 1 cup of whole milk until it simmers. Remove it from heat. In a separate bowl, whisk together: - 1/4 cup granulated sugar - 2 tablespoons cornstarch - 2 large egg yolks Slowly pour the hot milk into the egg mix. Whisk as you pour to avoid cooking the eggs. Return this mix to the saucepan over medium-low heat. Stir until thick, about 2-3 minutes. Once thick, stir in 1 teaspoon pure vanilla extract. Transfer the custard to a bowl, then cover it with plastic wrap. This keeps a skin from forming. Let it cool completely. After the dough has risen, gently punch it down. Roll it out to about 1-inch thick. Cut circles using a cookie cutter, about 3 inches in diameter. Place the circles on a floured surface. Cover them again with the towel to rise for 30 minutes. Now, heat about 2 inches of vegetable oil in a deep pan to 350°F (175°C). Fry the bomboloni in batches. Cook each side for 2-3 minutes until golden brown. Use a slotted spoon to remove them and drain on paper towels. Once slightly cooled, fill a piping bag with the custard. Carefully inject custard into each bomboloni through a small slit. Dust each bomboloni generously with powdered sugar before serving. Enjoy your Italian custard bomboloni! For the complete recipe, check out the [Full Recipe]. To get the right dough for bomboloni, start with fresh ingredients. Make sure you measure the flour correctly. Too much flour can make the dough dry. Mix until the dough is soft and slightly sticky. Knead it well, about 5 to 7 minutes. This helps build gluten, making your bomboloni fluffy. If it feels too sticky, add a little flour. If it's too dry, add a tiny bit of milk. The dough should be smooth and elastic. For a creamy custard, use whole milk. It adds richness and flavor. Heat the milk gently to avoid burning. Whisk the sugar and cornstarch well with the egg yolks. This step helps the custard thicken evenly. Pour hot milk slowly into the egg mix while whisking. This keeps the eggs from cooking too fast. Cook the custard until it thickens, stirring all the time. Let it cool completely before filling your bomboloni. This ensures it stays creamy and doesn’t leak. When frying, use a deep pan and enough oil. Heat the oil to 350°F (175°C) for the best results. Too hot, and the outside will burn. Too cool, and the bomboloni will absorb oil and become greasy. Fry in small batches. This keeps the oil temperature steady. Cook each side for 2 to 3 minutes until golden brown. Use a slotted spoon to lift them out. Drain on paper towels to remove excess oil. These steps lead to a perfect, crispy outer layer with a soft inside. For a complete guide, check the Full Recipe. {{image_4}} Bomboloni can have many delicious fillings. Besides custard, try chocolate ganache, fruit jam, or pastry cream. You can even fill them with whipped cream or Nutella for a fun twist. Each filling gives a new taste and experience. Feel free to mix and match to find your favorite! You can change the dough flavors too! Add a bit of lemon zest or orange zest for a fresh twist. You might also like to mix in spices like cinnamon or nutmeg. For a richer taste, use almond extract instead of vanilla. These small changes bring new life to your bomboloni. How you serve bomboloni can enhance their appeal. Dust them with powdered sugar for a classic look. Serve with fresh berries, whipped cream, or chocolate sauce on the side. You could also create a dessert platter with different fillings for a fun tasting experience. Enjoy the joy of sharing these treats with friends and family! To keep your bomboloni fresh, place them in an airtight container. This will help prevent them from getting dry. Store them at room temperature for up to two days. If you want them to last longer, consider refrigerating them. Just note that refrigeration can change their texture. When it's time to enjoy your bomboloni again, you can reheat them easily. Just pop them in the microwave for about 10-15 seconds. This will warm them up without making them tough. If you prefer a crispy outer layer, you can briefly fry them in a pan with a little oil. This method gives them a delightful crunch. Freezing bomboloni is a great option if you want to save some for later. Allow them to cool completely after frying. Then, place them in a single layer on a baking sheet. Once frozen, transfer them to a freezer-safe bag or container. You can freeze them for up to three months. When you're ready to eat, thaw them in the fridge overnight, then reheat as mentioned above. Enjoy your delicious Italian custard bomboloni any time! To fill bomboloni, use a piping bag fitted with a small tip. After frying, let them cool slightly. Make a small slit on the side of each bomboloni. Insert the piping tip into the slit, and gently squeeze the custard in. Fill until you feel it get heavy. This method ensures even filling without tearing the dough. You can prepare bomboloni dough ahead of time. After mixing, cover it and store it in the fridge overnight. Let it come to room temperature before rolling it out. However, I suggest frying them fresh for the best taste. If you have leftover bomboloni, you can fill and store them in an airtight container for a day. Avoid these common mistakes: - Using hot milk: It can cook the eggs in your custard. Always warm it gently. - Not kneading enough: Kneading develops gluten, making the dough fluffy and light. - Overcrowding the frying pan: Fry in small batches for even cooking. - Not letting the dough rise: This step is crucial for a light texture. Be patient! Each of these tips can help you create the perfect Italian custard bomboloni. Enjoy the journey of making these delightful treats! For a complete guide, refer to the Full Recipe. Bomboloni are tasty treats filled with creamy custard and topped as you like. We covered the key ingredients, easy steps to make them, and helpful tips for success. You can also explore different flavors and storage methods. Remember, practice helps you master the art of making these delightful snacks. Enjoy creating your own bomboloni, and don’t be afraid to get creative with fillings and toppings. Happy frying!](https://tossedflavors.com/wp-content/uploads/2025/05/a674ce25-35da-4a12-bc06-e6610251774e.webp)
Italian Custard Bomboloni Delightful Treat Recipe
Are you ready to treat yourself to the fluffy goodness of Italian custard bomboloni? These delightful filled doughnuts are a sweet highlight in Italian cuisine,
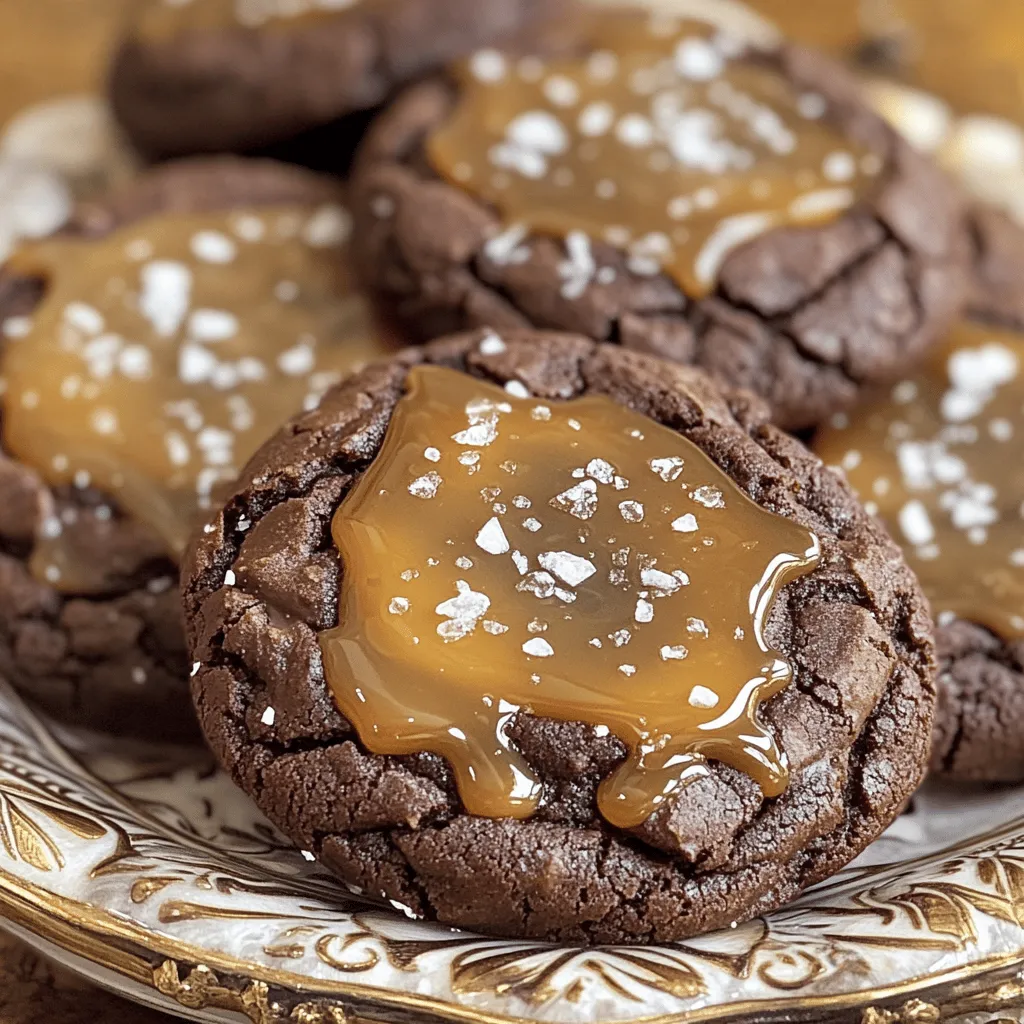
Salted Caramel Chocolate Cookies Irresistible Delight
Are you ready to indulge in a sweet treat that’s both rich and simple to make? These Salted Caramel Chocolate Cookies will be your new
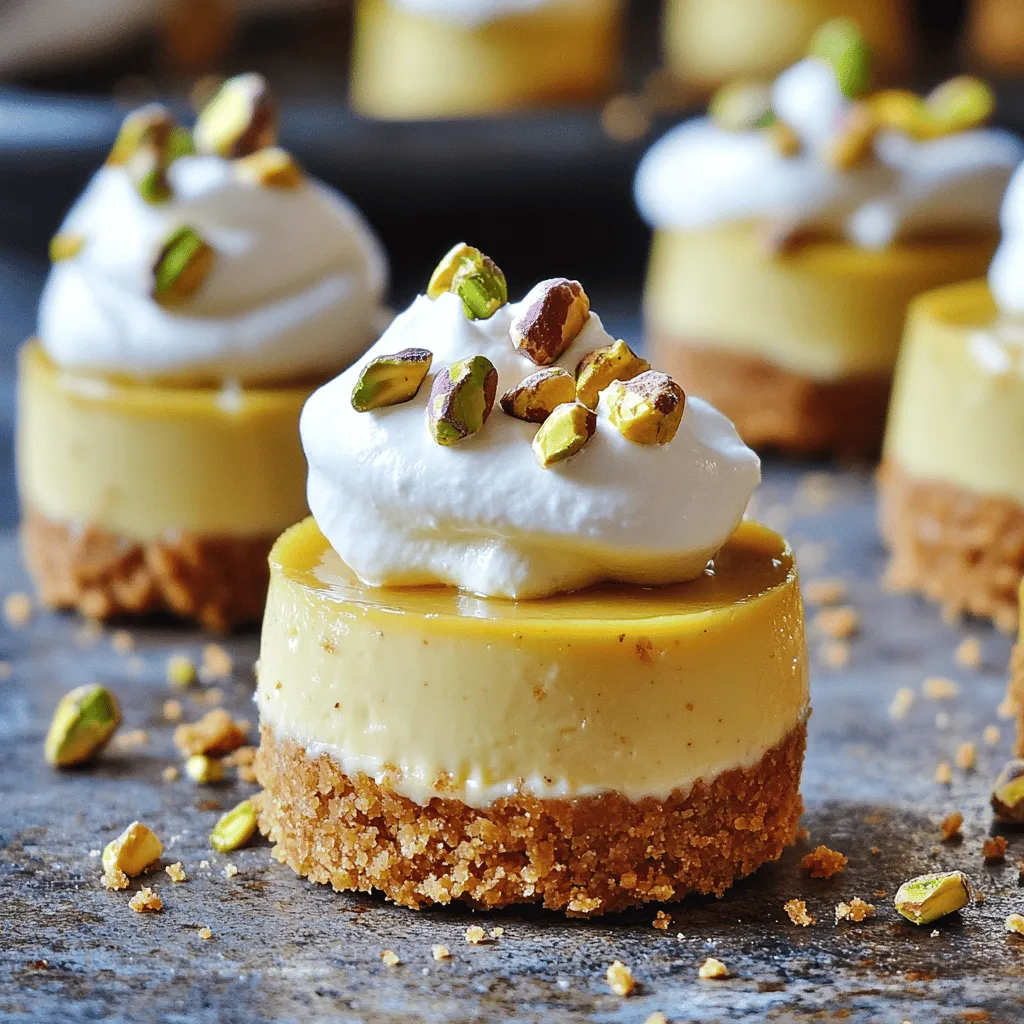
Pistachio and Coffee Mini Cheesecakes Delightful Treat
Craving a sweet treat that combines rich flavors and creamy textures? You’ve come to the right place! These Pistachio and Coffee Mini Cheesecakes are not
![To make Soft and Chewy Cinnamon Roll Sugar Cookies, we need these key ingredients: - 2 ½ cups all-purpose flour - 2 teaspoons baking powder - ½ teaspoon baking soda - ½ teaspoon salt - ¾ cup unsalted butter, softened to room temperature - 1 cup granulated sugar - ½ cup brown sugar, packed firmly - 1 tablespoon pure vanilla extract - 2 large eggs, at room temperature - 2 teaspoons ground cinnamon - ½ cup powdered sugar (for icing) - 2 tablespoons milk (for icing) Each ingredient plays a big part in making these cookies soft and chewy. The flour gives structure, while the butter adds richness. The sugars provide sweetness and help with texture. When you mix in the eggs and vanilla, they create a lovely flavor base. The cinnamon brings that classic roll taste. You can find the full recipe with easy steps to follow. This will guide you through each part of the process. Trust me, you’ll love making these! - Preheat your oven to 350°F (175°C). - Prepare two baking sheets by lining them with parchment paper. This helps with easy cleanup. - In a medium bowl, whisk together the flour, baking powder, baking soda, and salt. Mix until all ingredients blend well. - In a large bowl, cream the softened butter with both sugars until fluffy. This should take about 2-3 minutes. - Add the eggs one at a time, mixing well after each. Then, stir in the vanilla extract. - Gradually mix the dry ingredients into the wet ingredients. Do this until just combined to avoid overworking the dough. - In a small bowl, mix 2 teaspoons of ground cinnamon with 2 tablespoons of granulated sugar to create the cinnamon sugar mixture. - Scoop about 1.5 tablespoons of dough. Roll each scoop into a smooth ball and coat it in the cinnamon sugar mixture. - Place the cookie balls on the prepared sheets, leaving about 2 inches between each one. This allows them to spread while baking. - Bake the cookies in the preheated oven for 10-12 minutes. The edges should be lightly golden, while the centers may look soft. They will firm up as they cool. For more detailed steps and tips, check out the Full Recipe. To get the best texture, keep your ingredients at room temperature. This means butter and eggs should be out for about 30 minutes before you start. Room temperature butter mixes well with sugar, making your cookies soft and chewy. Avoid overmixing the dough. Once you add the dry ingredients, mix just until combined. If you mix too much, the cookies can turn tough. You want them soft, not dense. For the icing, you want it smooth and easy to drizzle. If it seems too thick, add a little more milk. Start with a teaspoon at a time until you reach the right thickness. You can use a spoon for a simple drizzle or a piping bag for a fancy touch. Both methods work well, so choose what fits your style! To make your cookies look great, place them on a colorful platter. You can drizzle some extra icing on top for flair. A light sprinkle of cinnamon adds a nice touch, too. If you want to get creative, try stacking them or using cupcake liners. This makes the cookies easy to grab and adds a fun element to the presentation. {{image_4}} You can change the flavor of your cookies in fun ways. Try adding nuts like walnuts or pecans. Chopping them up and mixing them in gives a nice crunch. If you love chocolate, you can adapt this recipe by adding chocolate chips. Fold in 1 cup of chocolate chips right before you scoop the dough. This twist makes each bite extra sweet and rich. If you need gluten-free cookies, use a gluten-free flour blend. It works well in this recipe. Look for blends that can replace regular flour one-for-one. For a vegan option, swap the butter for coconut oil or vegan butter. You can also replace the eggs with flax eggs. Mix 1 tablespoon of ground flaxseed with 2.5 tablespoons of water. Let it sit for a few minutes to thicken before adding it to the dough. Seasonal flavors can make these cookies special. For fall, add pumpkin spice to your dough. Mix in 1 teaspoon of pumpkin spice with your dry ingredients. This adds a warm, cozy flavor. During the holidays, try using peppermint or ginger. You can mix in crushed peppermint candies or ground ginger. These flavors add a festive touch that everyone will love. For the full recipe, check out the detailed steps to make these delicious cookies. Store your cookies at room temperature. Use an airtight container to keep them soft. Place a slice of bread in the container to maintain moisture. This trick works wonders for keeping your cookies fresh. If they start to dry out, they lose their chewy texture. For added freshness, you can refrigerate them. Wrap each cookie in plastic wrap and place them in a zip-top bag. This method helps maintain their taste and texture. Just remember to let them come back to room temperature before enjoying. Freezing cookies is a great way to save some for later. To freeze the dough, scoop it into balls and place them on a baking sheet. Freeze them for about one hour, then transfer them to a zip-top bag. This way, you can bake fresh cookies anytime you want! If you prefer to freeze baked cookies, let them cool first. Wrap each cookie tightly in plastic wrap. Then, place the wrapped cookies in a freezer-safe bag. When you’re ready to eat, let them thaw at room temperature. You can also microwave them for a few seconds for a soft treat. Your cinnamon roll sugar cookies will last about one week at room temperature. If stored properly, they can stay fresh for up to two weeks in the fridge. Watch for signs of spoilage, like an off smell or a dry texture. If they lose their softness or become hard, it’s time to toss them. Enjoy your cookies while they’re at their best! For the complete recipe, check out the [Full Recipe]. You can use margarine, but there are pros and cons. Margarine can make the cookies softer. It may not give the same rich flavor as butter. If you want a lighter cookie, margarine works well. However, if you love that buttery taste, stick with butter. Look for a few visual cues. The edges should turn a light golden brown. The centers may look soft and puffy. This is okay! They will firm up as they cool on the baking sheet. If they look too dry, they may be overbaked. Yes, you can make the dough ahead. Store it in the fridge for up to three days. Just wrap it well in plastic wrap. If you want to keep it longer, freeze the dough. It can last up to three months in the freezer. Just thaw in the fridge before baking. To reheat cookies, use the oven. Preheat it to 350°F (175°C). Place cookies on a baking sheet for about 5 minutes. This keeps them soft and chewy. You can also use the microwave. Heat them for about 10 seconds. Be careful not to overheat them! You can add different flavors to the cinnamon sugar. Try adding nutmeg or ginger for spice. For a sweet twist, mix in some brown sugar. You can even add a bit of cocoa powder for a chocolatey flavor. Get creative and find what you like best! This blog covered the essential ingredients and steps to bake delicious cookies. You learned mixing, forming, and baking techniques. We also discussed tips for perfect texture and creative icing methods. Variations let you customize recipes for any season or diet. Finally, proper storage ensures your cookies stay fresh. Enjoy baking and sharing these cookies. With practice, you'll create treats everyone loves!](https://tossedflavors.com/wp-content/uploads/2025/05/23e23090-0265-4e2d-9cc7-4b53e0708ff8.webp)
Soft and Chewy Cinnamon Roll Sugar Cookies Delight
If you love the warm, sweet taste of cinnamon rolls, you’ll adore these Soft and Chewy Cinnamon Roll Sugar Cookies. Imagine enjoying the flavors of
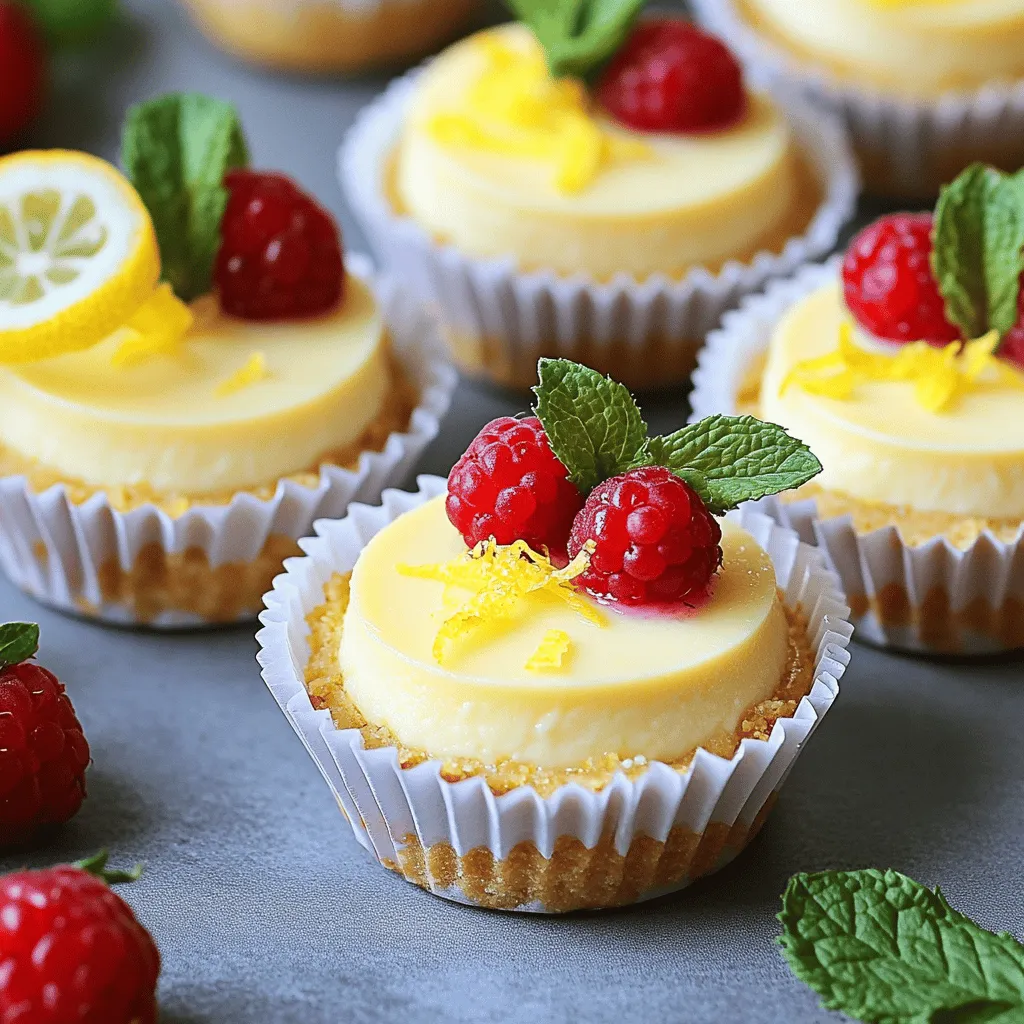
Mini Lemon Cheesecakes Delicious and Easy Recipe
Looking for a sweet treat that’s both light and zesty? These Mini Lemon Cheesecakes are your answer! With a buttery crust and creamy filling, they
![To make these delightful mini cakes, you will need: - 1 cup all-purpose flour - 1/2 cup almond flour - 1 teaspoon baking powder - 1/2 teaspoon baking soda - 1/4 teaspoon salt - 1/2 cup unsalted butter, softened - 3/4 cup granulated sugar - 2 large eggs, at room temperature - 1 tablespoon fresh lemon zest - 1/4 cup freshly squeezed lemon juice - 1 teaspoon pure vanilla extract - 1 cup fresh blueberries - 1/2 cup powdered sugar (for icing) - 1 tablespoon milk (for icing) These ingredients come together to create a moist and flavorful cake. If you need to swap out some ingredients, here are a few ideas: - Almond flour: Use an equal amount of more all-purpose flour if you can't find almond flour. - Unsalted butter: You can use coconut oil or margarine instead. - Granulated sugar: Substitute with brown sugar for a richer flavor. - Fresh blueberries: Frozen blueberries work too, but be careful not to overmix. Each substitution can change the flavor or texture a bit, so keep that in mind. To bake these mini bundt cakes, you will need: - Mini bundt cake pan - Mixing bowls - Electric mixer - Spatula or wooden spoon - Toothpick for testing doneness - Wire rack for cooling Having the right tools makes the baking process smoother and more enjoyable. Using a mini bundt pan gives these cakes their fun shape, making them perfect for any gathering. You can find the full recipe to guide you through each step. Start by preheating your oven to 350°F (175°C). This is key for even baking. Next, prepare your mini bundt pan. Grease it lightly with butter and dust it with flour. This helps the cakes release easily later on. In a medium bowl, combine the all-purpose flour, almond flour, baking powder, baking soda, and salt. Whisk these dry ingredients well. Set the bowl aside for now. In a large bowl, use an electric mixer to cream the softened butter and granulated sugar. Beat until light and fluffy, about 3-4 minutes. This step adds air to the batter, helping your cakes rise nicely. Now, add the eggs one at a time, mixing well after each addition. Follow this with the lemon zest, lemon juice, and vanilla extract. Mix until everything blends smoothly. Gradually add the dry mix into the wet mix. Stir gently until just combined. Don’t over-mix; this keeps your cakes light and fluffy. Gently fold in the fresh blueberries. Do this carefully to avoid mashing them. You want them evenly spread throughout the batter. Pour the batter into the prepared mini bundt pan. Fill each cavity about 3/4 full. This allows them to rise without spilling over. Place the pan in the preheated oven and bake for 20-25 minutes. Check doneness with a toothpick. It should come out clean or with a few crumbs. Once baked, let the cakes cool in the pan for about 10 minutes. Then, transfer them to a wire rack to cool completely. This step is crucial to avoid sogginess. For the icing, mix powdered sugar and milk in a small bowl. Stir until you get a smooth glaze. Drizzle this icing over the cooled cakes. Finish with a sprinkle of extra blueberries for a lovely touch. You can find the full recipe for these delightful mini cakes above. To get the best texture in your mini bundt cakes, focus on your mixing. Start by creaming butter and sugar well. This step adds air, making your cakes fluffy. Mix just until combined when adding dry ingredients. Over-mixing can make cakes dense. Use room-temperature eggs and ingredients for even mixing. To prevent sticking, grease your bundt pans well. Use unsalted butter or a baking spray. After greasing, dust the pans lightly with flour. This creates a barrier for the batter. Let the cakes cool for about ten minutes before removing them from the pan. This helps them firm up slightly, making them easier to release. Decorating your mini bundt cakes is fun and easy. A simple icing made of powdered sugar and milk gives a nice finish. You can also add fresh fruit like blueberries or raspberries for color. Try sprinkling some lemon zest on top for added flavor. Serving them on a pretty plate makes them look special. For more ideas, check the Full Recipe. {{image_4}} You can play with flavors to make mini bundt cakes your own. Chocolate lovers will enjoy chocolate mini bundt cakes. Just swap some flour for cocoa powder. For a spiced twist, try ginger or pumpkin spice. You can add cinnamon and nutmeg to the batter. If you like fruit, consider adding mashed bananas or pureed pumpkin for a moist texture. Almond or coconut extracts can bring in unique flavors too. Mix and match to find your favorite! Using seasonal ingredients can make your mini bundt cakes extra special. In spring, consider using fresh strawberries or rhubarb. For summer, try peaches or cherries. In fall, you can't go wrong with apples or pears. Winter brings citrus fruits like oranges or grapefruits. Each season offers unique flavors that enhance your cakes. You can also use herbs like rosemary or thyme for a fun twist. Making mini bundt cakes gluten-free or dairy-free is easy. For gluten-free, swap all-purpose flour with almond flour or a gluten-free blend. Make sure your baking powder is gluten-free too. If you want dairy-free cakes, use coconut oil or vegan butter instead of regular butter. You can also use non-dairy milk like almond or oat milk. These swaps let everyone enjoy your delicious mini bundt cakes! For a delightful start, check out the Full Recipe for Mini Lemon Blueberry Bundt Cakes. After baking, let your mini bundt cakes cool completely on a wire rack. This step is key to keeping them fresh. Once cool, place them in an airtight container. They can last for about 3 to 4 days at room temperature. If you want to keep them longer, consider refrigerating them. Just be sure to wrap them well to avoid any drying out. To freeze mini bundt cakes, allow them to cool completely first. Then, wrap each cake tightly in plastic wrap. After that, place them in a freezer-safe bag or container. This way, they can stay fresh for up to 3 months. When you are ready to enjoy, simply take them out and let them thaw in the fridge overnight. To reheat your mini bundt cakes, preheat your oven to 350°F (175°C). Place the cakes on a baking sheet and cover them with foil. Heat for about 10-15 minutes, or until warmed through. You can also use a microwave for a quicker option. Just heat on low power for 15 to 20 seconds. Enjoy your cakes warm with a drizzle of icing for that fresh-baked taste! Mini bundt cakes can last up to five days when stored properly. Keep them in an airtight container at room temperature. If you want to keep them longer, place them in the fridge for up to one week. You can also freeze them for up to three months. Just wrap each cake tightly in plastic wrap and then in aluminum foil. Yes, you can make the batter ahead of time. Mix the dry and wet ingredients separately. Store each in the fridge for up to 24 hours. When you are ready to bake, combine them and follow the baking instructions. This makes it easy to whip up fresh mini bundt cakes quickly. Serve mini bundt cakes on individual plates for a nice touch. You can drizzle icing over them and add fresh fruit or mint for garnish. This makes the cakes look pretty and inviting. Generally, you do not need to adjust baking times for different flavors. Most mini bundt cakes bake in the same range of 20 to 25 minutes. However, check for doneness by using a toothpick. If it comes out clean, your cakes are ready. Different flavors may alter the texture slightly, but baking times usually stay the same. For a delightful recipe, try the Mini Lemon Blueberry Bundt Cakes. [Full Recipe] In this blog post, we covered how to make mini lemon blueberry bundt cakes. We detailed the ingredients needed and provided tips for substitutes. Next, I shared step-by-step baking instructions, including cooling and icing secrets. We also explored ways to achieve the perfect texture and avoid sticking. These cakes are versatile, with flavor options and seasonal ingredients. Don’t forget to check our storage tips for keeping them fresh. I hope you feel ready to bake your own mini bundt cakes and enjoy every bite!](https://tossedflavors.com/wp-content/uploads/2025/05/3b7b31fb-5292-448a-9246-6c7c67132982.webp)
Mini Bundt Cake Recipes That Delight Every Palate
Looking for a fun dessert that pleases everyone? Dive into these delightful mini bundt cake recipes! Each recipe packs a burst of flavor, from zesty