Desserts
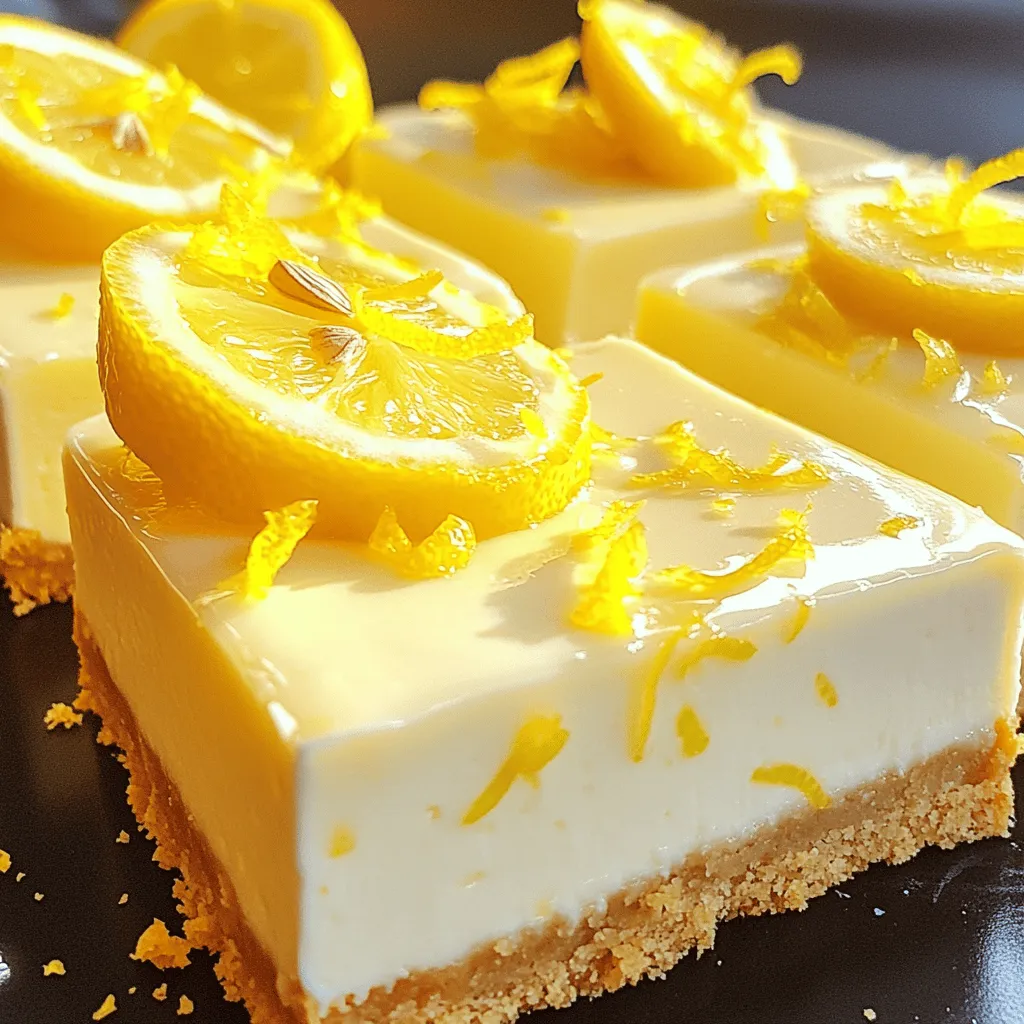
Lemon Cheesecake Squares Delightful and Easy Recipe
Are you craving a sweet treat that’s both zesty and creamy? Look no further! My Lemon Cheesecake Squares recipe combines the tang of fresh lemons
Creamy Mini Lemon Cheesecakes Delightful Dessert Treat
If you’re craving a sweet, tangy treat that’s easy to make, look no further! These Creamy Mini Lemon Cheesecakes are the perfect dessert for any
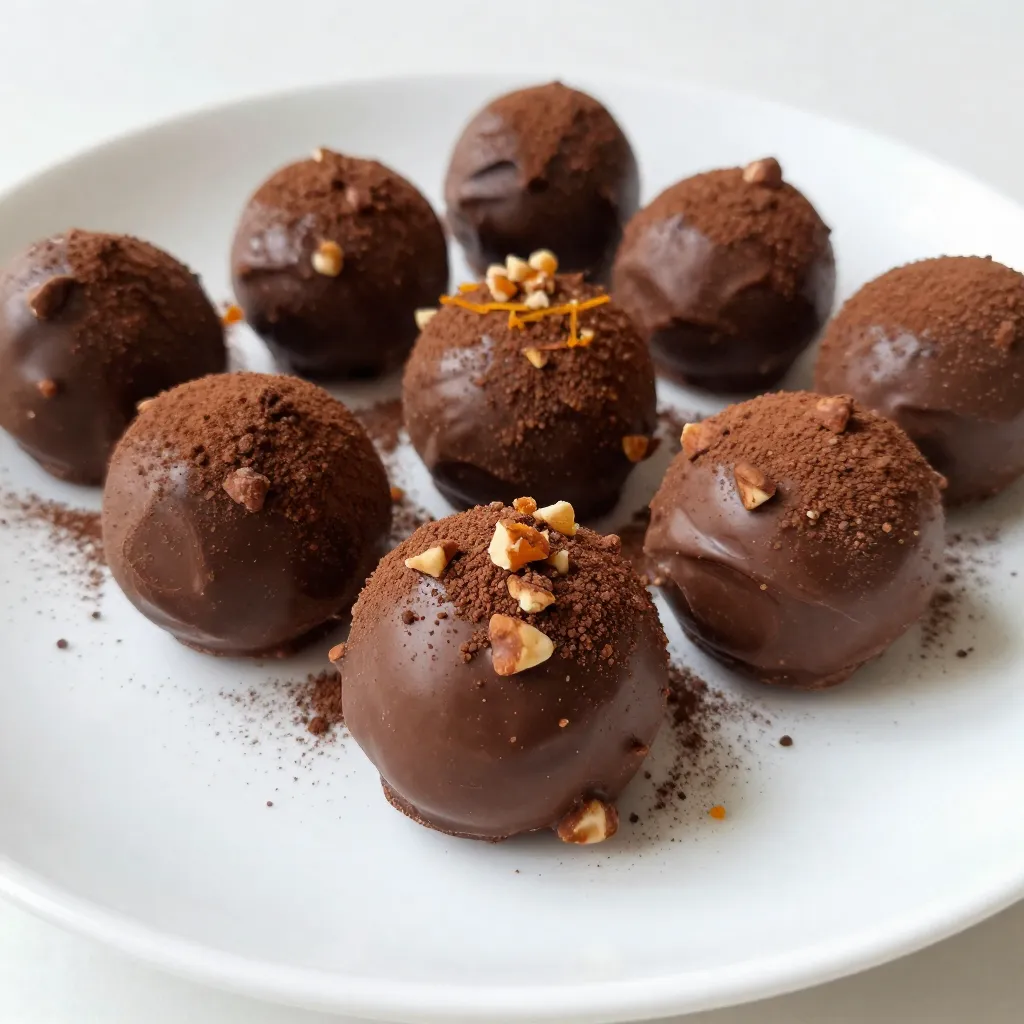
Chocolate Orange Truffles Delightful and Simple Treat
Indulge in the rich, zesty world of Chocolate Orange Truffles with my easy guide. In this post, you’ll discover how simple ingredients combine to create
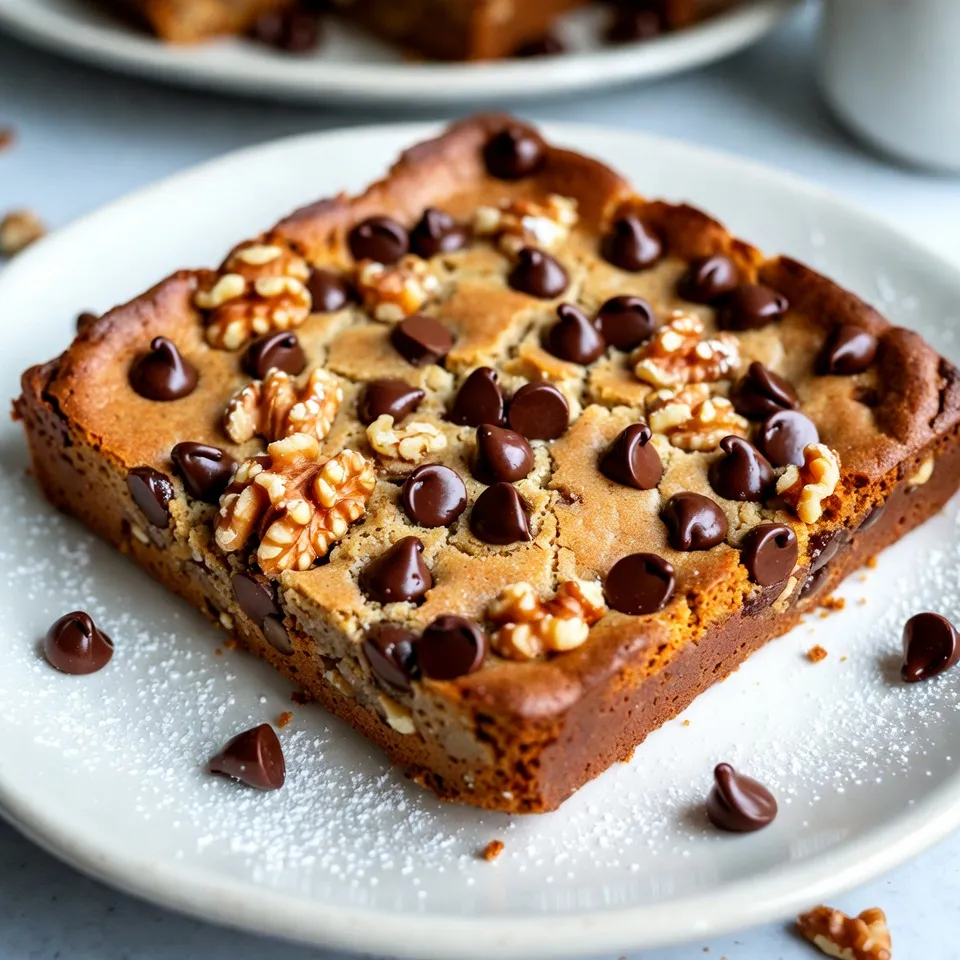
Chocolate Chip Banana Bread Blondies Delightful Treat
Are you ready to make a sweet treat that combines two favorites? Chocolate Chip Banana Bread Blondies are here to delight your taste buds! In
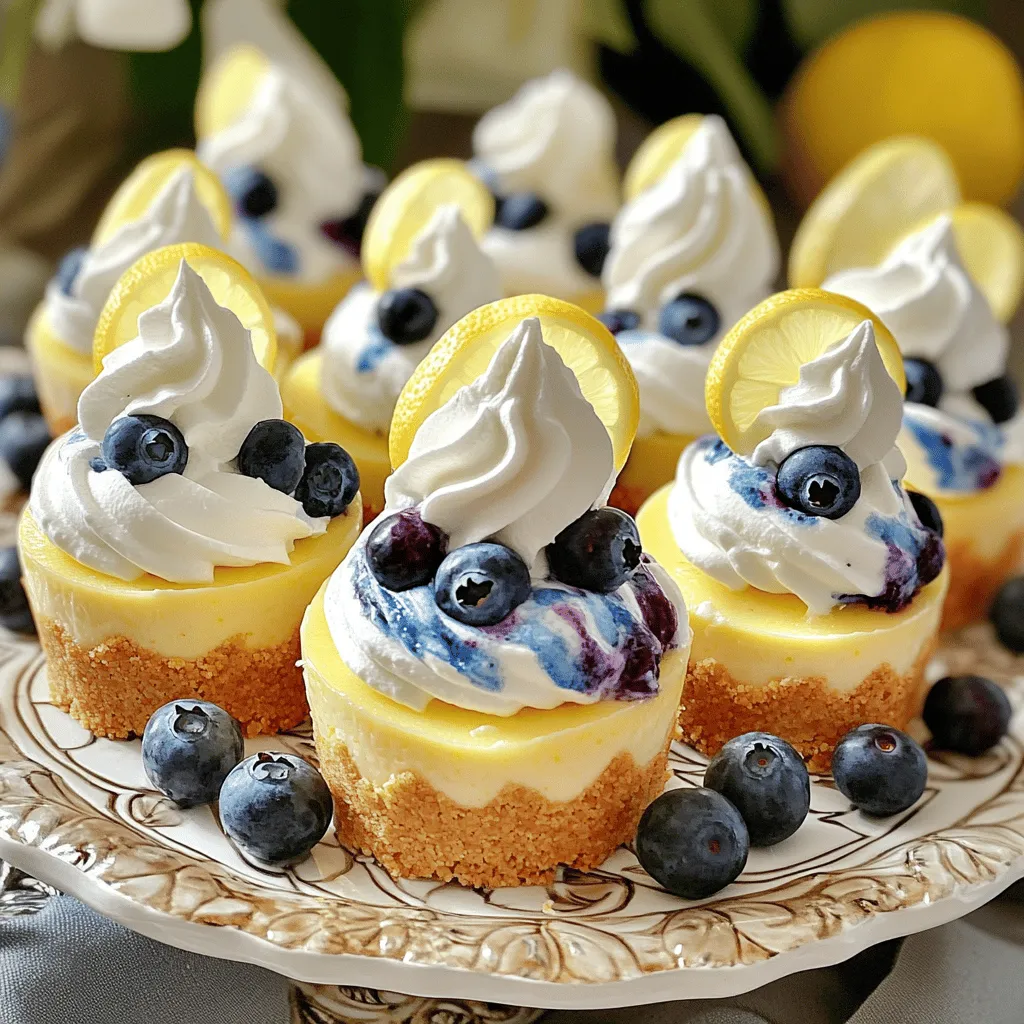
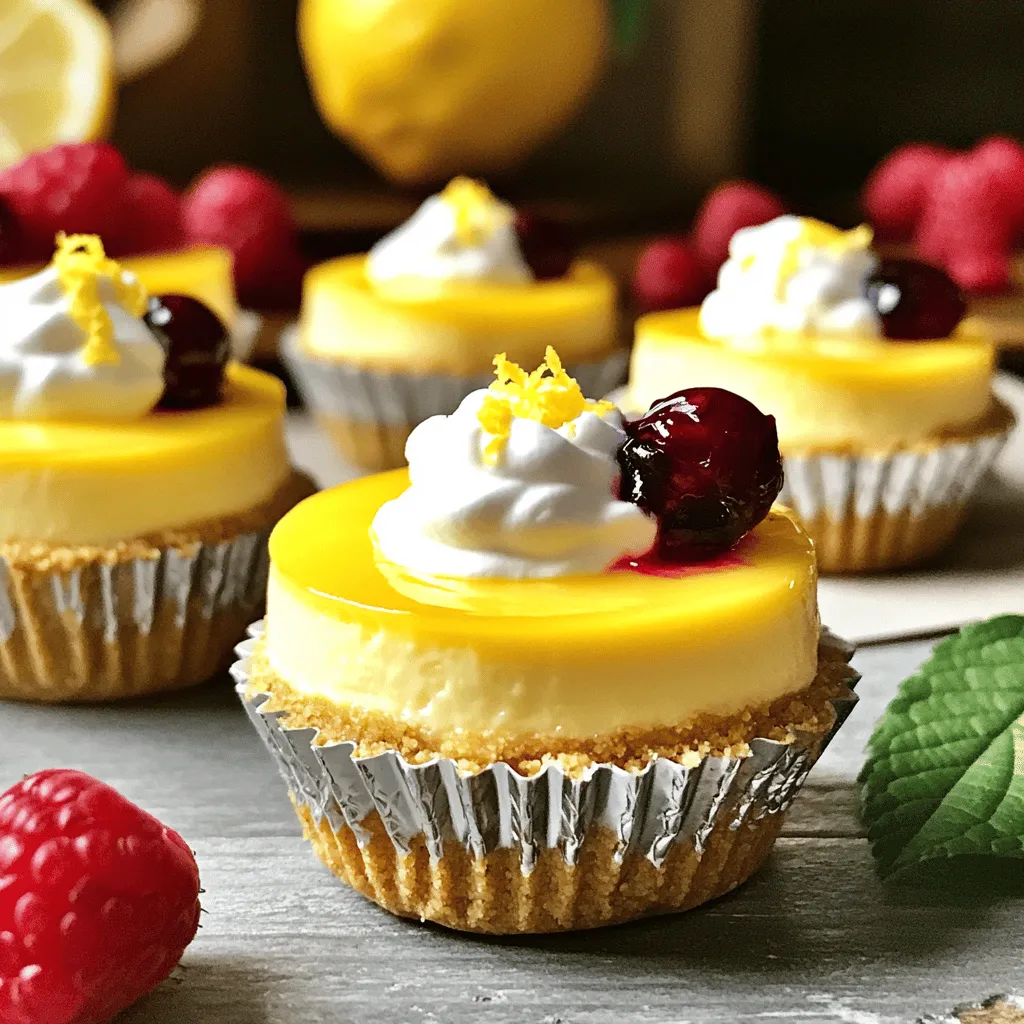
Mini Lemon Blueberry Cheesecakes Delightful and Easy
Are you ready to treat yourself to a sweet, tangy delight? These Mini Lemon Blueberry Cheesecakes are not only easy to make, but they also
![- 1 cup crushed graham crackers - 1/4 cup unsalted butter, melted - 2 tablespoons granulated sugar - 8 oz cream cheese, softened to room temperature - 1/2 cup granulated sugar - 1/4 cup sour cream - 2 large eggs, at room temperature - Zest of 1 lime - 2 tablespoons fresh lime juice - 1 cup cherry pie filling (canned or homemade) - Fresh cherries and lime slices for garnish (optional) When I bake, I trust certain brands for the best taste. For graham crackers, I recommend Honey Maid. They offer a great crunch and flavor. For cream cheese, Philadelphia is my go-to. It blends smoothly and tastes rich. For cherries, I like Libby’s cherry pie filling. It’s sweet and ready to use. If you need swaps, I have options. For a gluten-free version, use gluten-free graham crackers. If you avoid dairy, try a dairy-free cream cheese like Tofutti or Kite Hill. For a lower sugar option, you can use a sugar substitute, like stevia, in place of granulated sugar. Each option keeps the flavor while meeting your needs. For the full recipe, check out the complete instructions above. First, set your oven to 325°F (163°C) to preheat. This step is crucial. A preheated oven helps the cheesecakes bake evenly. In a medium bowl, mix 1 cup of crushed graham crackers, 1/4 cup of melted butter, and 2 tablespoons of sugar. Stir until it looks like wet sand. Next, line a muffin tin with cupcake liners. Take about 1 tablespoon of this mixture. Press it into the bottom of each liner. Make sure it is packed tightly. Bake the crusts for 5-7 minutes, until golden. Let them cool. In a large bowl, beat 8 oz of softened cream cheese with 1/2 cup of sugar. Mix until smooth and creamy. Add in 1/4 cup of sour cream. Beat in 2 large eggs one at a time. After each egg, mix well. Add the zest of 1 lime and 2 tablespoons of fresh lime juice. Mix until fully combined but don’t overmix. Now, pour the cheesecake filling into each cooled crust. Fill them about 3/4 full. This space lets them rise. Place the muffin tin back in the oven. Bake for 18-20 minutes. The edges should look set, while the centers stay slightly jiggly. Once done, remove them and let cool for about 30 minutes at room temperature. Then, transfer them to the refrigerator. Chill for at least 2 hours to set. After chilling, it’s time for the cherry topping. Spoon cherry pie filling generously over each mini cheesecake. For a nice touch, you can add fresh cherries and a slice of lime on top. This makes them look even more inviting. For the full recipe, you can refer to [Full Recipe]. One mistake is overmixing the batter. This can make the cheesecake too dense. Mix just until smooth. Another mistake is not cooling the cheesecakes properly. Let them cool at room temp before chilling. This helps set the texture just right. Finally, fill each crust only three-quarters full. This allows the cheesecakes to rise without spilling over. To get that creamy texture, use room-temperature cream cheese. Cold cream cheese can create lumps. Beat the cream cheese well until smooth before adding other ingredients. Add the eggs one at a time. This helps blend them well without overmixing. When baking, check for slight jiggle in the center. This signals they are done but still soft. For a beautiful display, use a decorative platter. Place the mini cheesecakes neatly, leaving space between them. Top with cherry filling just before serving. Add fresh cherries and lime slices for color. A sprig of mint can add a nice touch too. For extra flair, sprinkle lime zest on top. This makes the dessert look as good as it tastes. For the full recipe, check the section above. {{image_4}} You can switch up the flavor of these mini cheesecakes easily. Try strawberry lime for a fresh twist. Swap the cherry filling for strawberry filling. Use the same amount, and enjoy the fruity taste. Lemon blueberry is another fun option. Replace the lime juice with lemon juice. Add fresh blueberries to the filling for a burst of flavor. If you need a gluten-free treat, it's simple. Use gluten-free graham cracker crumbs for the crust. Check the label to ensure they are certified gluten-free. The rest of the ingredients are naturally gluten-free. So, you can enjoy these mini cheesecakes without worry. For a dairy-free version, use dairy-free cream cheese. Brands like Tofutti or Kite Hill work well. Substitute sour cream with coconut cream for a rich taste. You can use almond milk instead of regular milk in the filling. These swaps keep the flavor while meeting your dietary needs. Try these variations to keep your mini cheesecakes exciting and delicious! For the full recipe, check the details above. To store leftover mini cheesecakes, place them in an airtight container. Keep them in the fridge for up to five days. Make sure each mini cheesecake is covered to prevent drying out. If you have leftovers, enjoy them chilled for a creamy treat. You can freeze these mini cheesecakes for later. First, let them cool completely. Then, wrap each one in plastic wrap. Place them in a freezer-safe bag or container. They can last up to three months in the freezer. When ready to enjoy, thaw them in the fridge overnight. If you prefer warm cheesecake, reheat them gently. Place the cheesecakes on a microwave-safe plate. Heat them for about 10-15 seconds. Check to ensure they do not get too warm. Enjoy them warm, or top with cherry filling for a sweet treat. For the full recipe, refer back to the recipe section. Yes, you can make these mini cheesecakes ahead of time. They hold up well in the fridge. Just bake and chill them a day before your event. This gives the flavors time to meld. When you're ready, add the cherry topping right before serving. It will taste fresh and delicious. If you want to switch things up, you have options! You can use fresh cherries, blueberries, or strawberries. You can also make a quick fruit compote. Just cook your fruit with a bit of sugar and lemon juice until soft. This adds a lovely twist to your mini cheesecakes. Check for a slight jiggle in the middle of the cheesecakes. The edges should look set while the center remains soft. They will continue to firm up as they cool. If you're unsure, you can insert a toothpick into the edge. If it comes out clean, they are ready! For the full recipe, check the details above and enjoy making these Cherry Lime Mini Cheesecakes! In this blog post, we explored how to make delicious mini cheesecakes. We covered the key ingredients and brands to use, plus substitutions for dietary needs. You learned step-by-step instructions, helpful tips, and tasty variations. I shared how to store leftovers and answered common questions. Now you have all the tools to bake perfect mini cheesecakes. Enjoy experimenting with flavors and sharing them with loved ones. Your cheesecake journey starts here, so get baking!](https://tossedflavors.com/wp-content/uploads/2025/05/69dca0a5-9403-454e-a714-33497c7f6e39.webp)
Cherry Lime Mini Cheesecakes Delightful Sweet Treat
If you’re craving a fun dessert that’s as bright as it is tasty, you’ll love these Cherry Lime Mini Cheesecakes. They pack a punch of
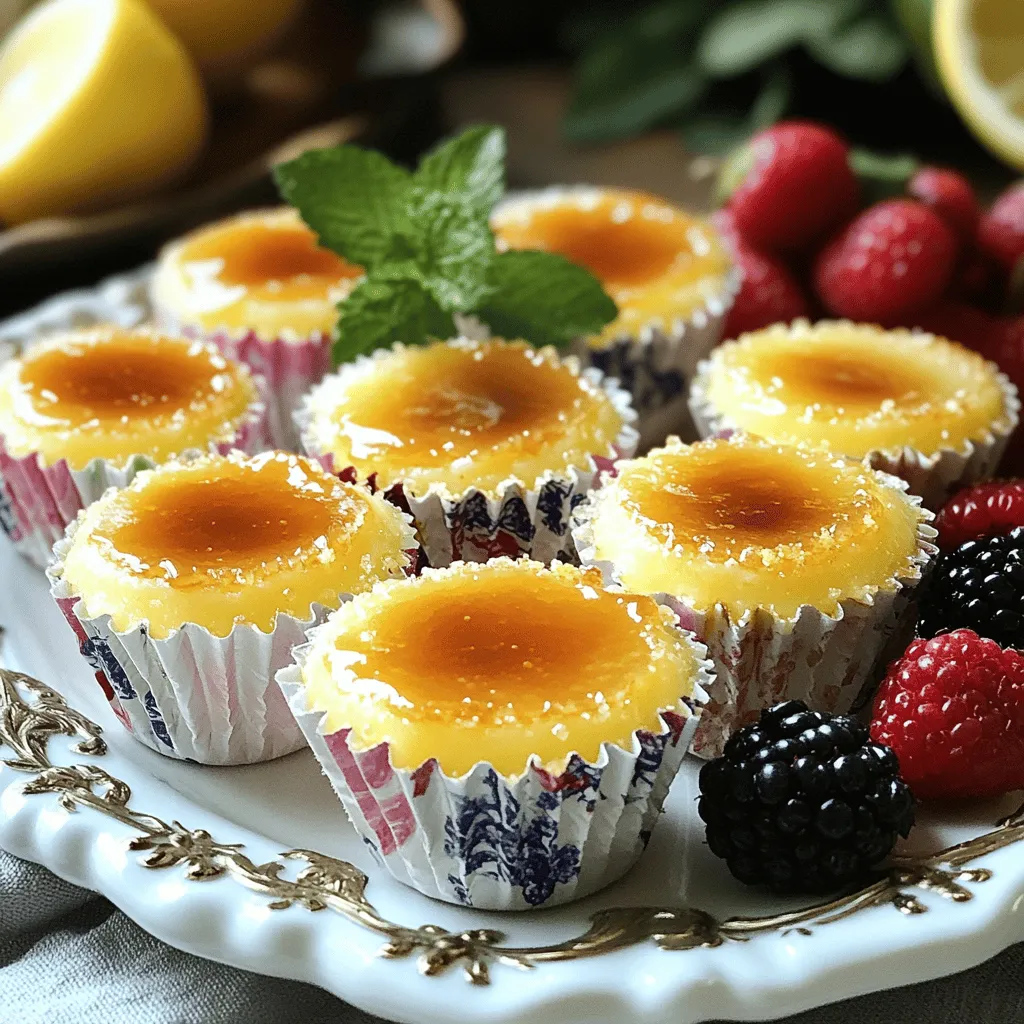
Mini Crème Brûlée Cheesecakes Irresistible Treats
Craving a sweet treat that combines creamy cheesecake and the classic flavor of crème brûlée? Look no further! These Mini Crème Brûlée Cheesecakes are not
![Making Easy No-Bake Peanut Butter Haystacks is quick and fun. You can whip up this treat in about 10 minutes. The chilling time takes about 30 minutes, so the total is around 40 minutes. You can serve 12 to 15 haystacks with this recipe. These are the key ingredients you need for this delight: - 1 cup creamy peanut butter - 1/2 cup honey - 2 cups rolled oats - 1 cup chocolate chips - 1 teaspoon vanilla extract - Pinch of salt These ingredients create a wonderful mix of flavors and textures. The peanut butter provides creaminess, while the oats add a nice chew. The chocolate chips give a sweet touch. You can also add some fun extras to your haystacks: - 1/4 cup mini marshmallows - Dried fruit like raisins or cranberries - Chopped nuts for a crunch These add-ins can give your haystacks a unique twist. You can mix and match to suit your taste. Experimenting with different flavors makes this recipe even more enjoyable. To start, grab a medium saucepan. Place it on low heat. Add 1 cup of creamy peanut butter and 1/2 cup of honey. Stir the mix with a wooden spoon. Keep stirring for about 3 to 5 minutes. You want it to be smooth and blended. Once it's ready, take it off the heat. Add 1 teaspoon of vanilla extract and a pinch of salt. Stir well to mix. In a large mixing bowl, combine 2 cups of rolled oats and 1 cup of chocolate chips. If you like, you can add 1/4 cup of mini marshmallows. They give a fun, sweet touch. Gently fold them in with the oats and chocolate. Make sure everything is evenly mixed. Now, pour the warm peanut butter mixture over the dry ingredients. Stir well until every oat and chocolate chip gets coated. Next, prepare a baking sheet. Line it with parchment paper to stop sticking. Scoop out small mounds of the mixture. Shape them into haystack forms. Place them on the parchment-lined sheet. Once done, put the baking sheet in the refrigerator. Chill for about 30 minutes. This helps the haystacks firm up. After they set, they are ready to enjoy! For more details, check the Full Recipe. To make the best haystacks, follow these tips: - Use smooth peanut butter. It blends well and gives a nice texture. - Heat gently. Low heat helps keep the mix smooth and easy to stir. - Stir well. Make sure the peanut butter and honey mix fully for a tasty treat. - Don’t overheat. Remove from heat as soon as the mix is smooth. Serving haystacks can be fun and creative. Here are some ideas: - Plate them nicely. Arrange your haystacks on a colorful plate for a great look. - Add a garnish. A sprinkle of cocoa powder can make them look fancy. - Pair with fruit. Fresh fruit like berries or bananas adds color and flavor. You can easily make these haystacks your own. Consider trying: - Different nut butters. Swap creamy peanut butter for almond or cashew butter. - Add spices. A dash of cinnamon or nutmeg can enhance flavors. - Mix in extras. Try adding dried fruits, nuts, or seeds for different textures. - Change the chocolate. Use white chocolate or dark chocolate chips for variety. These tips can help you create perfect no-bake peanut butter haystacks every time. For the full recipe, check the recipe section above. {{image_4}} If you love chocolate, try adding more! You can mix in 1/2 cup of cocoa powder to the peanut butter. This gives a rich, chocolatey taste. You can also use dark chocolate chips instead of regular ones for a deeper flavor. For a fun twist, drizzle melted chocolate over the top of the haystacks. Let it set in the fridge for a sweet surprise! Want a nut-free version? Swap out peanut butter for sunflower seed butter. This gives you a similar creamy texture without the nuts. Make sure to check labels for allergen information. You can also try using tahini. It adds a unique taste and keeps the haystacks smooth and tasty. To spice things up, think about adding spices. A sprinkle of cinnamon or nutmeg can create a warm flavor. For a fruity touch, mix in dried fruits like raisins or cranberries. You could also add a splash of almond or coconut extract for a fun twist. These little changes can make your haystacks stand out. Check the [Full Recipe] for more ideas! Store your peanut butter haystacks in an airtight container. This keeps them fresh and tasty. You can use a plastic or glass container. Make sure to separate layers with parchment paper. This prevents sticking. Keep them in a cool, dry place away from sunlight. To freeze haystacks, first, let them cool completely. Then, place them in a single layer on a baking sheet. Freeze them for about an hour. Once firm, transfer them to an airtight freezer bag. Remember to label the bag with the date. You can enjoy them later for a quick treat! In the fridge, these haystacks stay fresh for about one week. If stored well, they might last even longer. Check for any signs of spoilage before eating. If the texture or smell changes, it's best to toss them. Keeping them in the fridge helps maintain their texture and flavor. Yes, you can use crunchy peanut butter. It gives a nice texture. The bites will have little peanut pieces, adding a fun crunch. Just keep in mind, it may change the overall feel of the haystacks. They will still taste amazing! If your mixture is too sticky, add more oats. Start with a small amount. Mix well to see if it helps. If it’s still sticky, keep adding oats slowly. You want the mixture to hold shape but not stick to your hands. Serve haystacks on a nice plate. You can arrange them in a circle or stack them. For extra flair, add a dusting of cocoa powder on top. You can also pair them with fresh fruit like strawberries or bananas for a pop of color. These tips make your treats look even better! This blog post covers everything you need to know about making haystacks. We discussed key ingredients, detailed step-by-step instructions, and handy tips to perfect your treat. You can add your favorite flavors and find the best ways to store them. Remember, haystacks are fun and flexible, perfect for any occasion. I encourage you to experiment, share your creations, and enjoy these tasty snacks with friends and family. Now, it’s time to get cooking and make some delicious treats!](https://tossedflavors.com/wp-content/uploads/2025/05/ef541091-7a62-46d0-9256-9cbf19b8dad3.webp)
Easy No-Bake Peanut Butter Haystacks Quick Delight
Get ready for a treat that’s quick and easy! In this post, I’ll show you how to make delicious No-Bake Peanut Butter Haystacks. With just
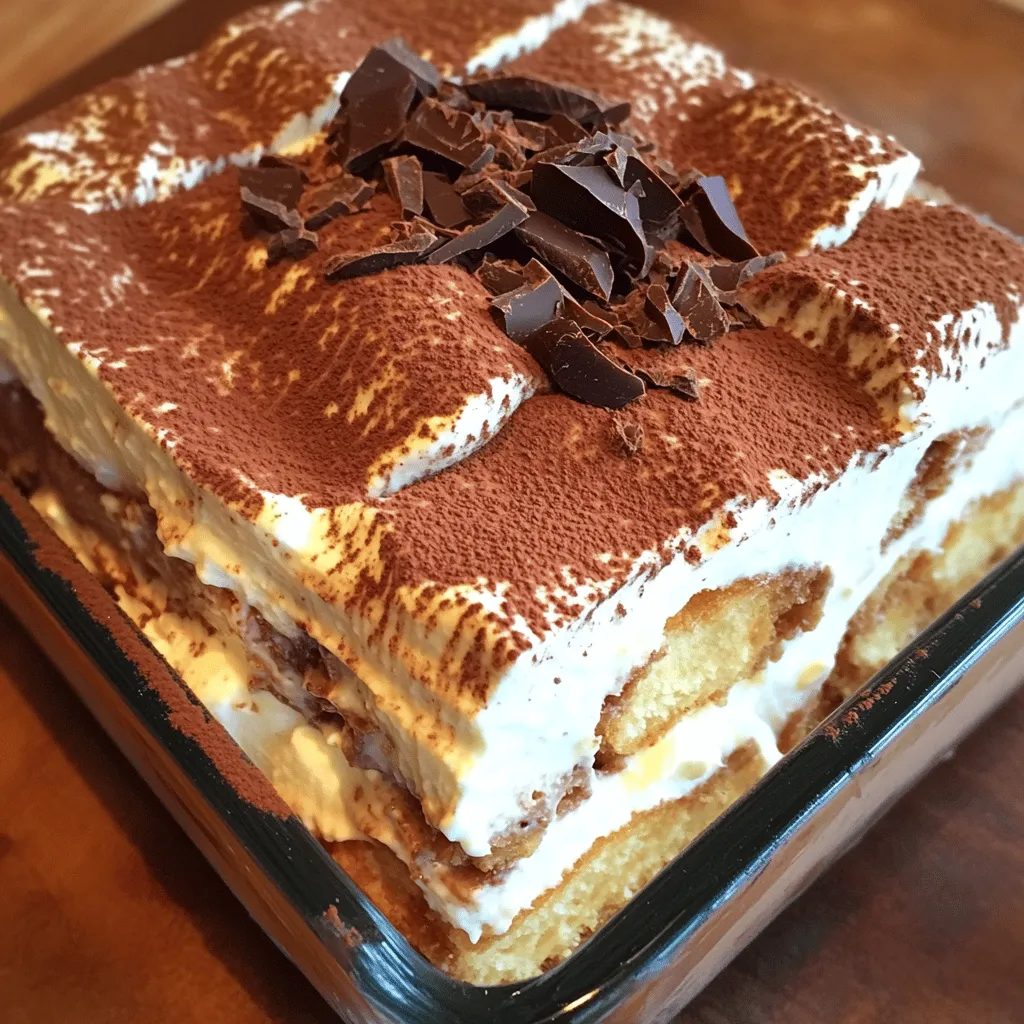
Tiramisu Delight Simple and Delicious Dessert Recipe
Are you craving a dessert that’s both simple and mouthwatering? Tiramisu is the answer! This creamy coffee delight builds flavor with every layer. In this
![- 2 ½ cups all-purpose flour - ¼ cup granulated sugar - 1 packet (2 ¼ teaspoons) active dry yeast - ½ teaspoon salt - ½ cup milk, warmed - 2 tablespoons unsalted butter - 1 large egg - 1 cup fresh blueberries - 8 oz cream cheese - ¼ cup granulated sugar - 1 teaspoon vanilla extract - 1 egg yolk - 1 cup powdered sugar - 2 tablespoons milk - ½ teaspoon vanilla extract Each of these ingredients plays a key role in making the Blueberry Cheesecake Swirl Rolls so special. The flour and sugar form the base of the dough, while yeast helps it rise and become fluffy. The warm milk is crucial too, as it activates the yeast. Don't forget the blueberries! They add a burst of flavor and color. The cheesecake filling is creamy and dreamy. Cream cheese gives it that rich texture, while sugar and vanilla enhance the taste. The egg yolk adds richness and helps it set. Finally, the glaze brings it all together. It adds sweetness and a nice shine to the rolls. You can find the Full Recipe above to guide you through each step. Trust me; these rolls will be an irresistible treat you can't resist! To start, you need to mix warm milk, sugar, and yeast in a small bowl. The milk should be warm, about 110°F (43°C). After you mix these, let the mixture sit for 5-10 minutes. It should become frothy and bubbly. This froth shows that the yeast is active and ready to work. Next, grab a large mixing bowl. Combine the all-purpose flour and salt in this bowl. Make a well in the center. Pour in the frothy yeast mixture, melted butter, and the large egg. Stir until a shaggy dough forms. Then, lightly flour a clean surface and knead the dough for about 5-7 minutes. You want it to become smooth and elastic. Now, place the dough in a greased bowl. Cover it with a damp cloth and let it rise in a warm spot for about 1 hour. It should double in size. While the dough rises, prepare the cheesecake filling. In a medium bowl, beat the softened cream cheese with granulated sugar, vanilla extract, and egg yolk. Mix until the filling is smooth and well combined. Set aside for later. Once the dough has risen, turn it out onto a floured surface. Roll it into a rectangle, about 12x18 inches in size. Spread the cheesecake filling evenly over the dough. Leave about a ½ inch border along the edges. Now sprinkle the fresh blueberries on top of the filling. Starting from one long edge, carefully roll the dough into a tight log. Pinch the seams to seal the roll and cut it into 12 equal pieces. Place the rolls in a greased 9x13 inch baking dish. Cover them with a cloth and let them rise for an additional 30 minutes. Preheat your oven to 350°F (175°C). When the rolls have finished rising, bake them for 25-30 minutes. They should be golden brown on top. While the rolls bake, prepare the glaze. In a bowl, whisk together powdered sugar, milk, and vanilla extract. Mix until the glaze is smooth and creamy. After removing the rolls from the oven, let them cool for a few minutes. Drizzle the glaze generously over the top. This step is key to enhancing the flavor of your rolls. For the complete recipe, refer to the Full Recipe section. Enjoy these delightful blueberry cheesecake swirl rolls! To make the dough perfect, you need active yeast. Start by mixing warm milk, sugar, and yeast. Let it sit until it bubbles. This shows the yeast is alive. Once your yeast is active, combine it with flour and salt. Knead the dough until it feels smooth and elastic. This usually takes about five to seven minutes. The right texture is key for soft rolls. The cheesecake filling needs room temperature cream cheese. This helps it blend smoothly with sugar and vanilla. Keep mixing until it is creamy, but don’t overmix. If you mix too much, the filling may become too runny. Remember, a thick filling keeps the rolls from being soggy. When baking, check for doneness by the color of your rolls. They should be golden brown on top. This means they are cooked through. After baking, let them cool a bit before adding the glaze. Cooling helps the glaze stick better and makes the rolls even tastier. The glaze will soak into the warm rolls, adding extra sweetness. For the full recipe, check out the complete guide on making these delightful Blueberry Cheesecake Swirl Rolls! {{image_4}} You can change the fruit in these rolls for a new twist. Swap blueberries for raspberries or strawberries. Both fruits add a sweet and tart flavor. This gives your rolls a fresh taste. The bright colors also make your dish pop. You can even mix fruits for a fun swirl effect. If you want to change the cheesecake flavor, try adding lemon or chocolate. Lemon brings a zesty touch that pairs well with the sweetness. Chocolate makes the filling rich and creamy. These flavors add excitement to your rolls, making them even more special. For those with dietary needs, you can make some easy swaps. Use gluten-free flour to keep these rolls safe for those avoiding gluten. For a vegan option, replace the cream cheese with a plant-based alternative. You can also use flax eggs instead of regular eggs. These adjustments let everyone enjoy this tasty treat. Check out the Full Recipe to get started on your own delicious Blueberry Cheesecake Swirl Rolls! Store your leftover rolls in a covered container at room temperature. This keeps them soft and fresh. If you want to keep them longer, place them in the fridge. This can extend their freshness for a few days. Just remember, the fridge may dry them out a bit. To reheat your rolls, use an oven or microwave. For the oven, preheat to 350°F (175°C). Wrap the rolls in foil to keep them fluffy. Heat for about 10 minutes. If using a microwave, place a roll on a plate. Heat for about 15-20 seconds. This warms them quickly without making them tough. You can freeze both unbaked and baked rolls. For unbaked rolls, place them in a single layer on a baking sheet. Freeze until firm, then transfer to a freezer bag. For baked rolls, cool completely first. Then wrap them tightly in plastic wrap and foil. They keep well for up to three months. When ready to use, thaw in the fridge overnight and bake at 350°F (175°C) for about 10 minutes. Enjoy your delicious Blueberry Cheesecake Swirl Rolls from the [Full Recipe]. To check if your rolls are done, look for a golden color on top. You can also tap the bottom of a roll; it should sound hollow. If you have a thermometer, the inside should reach about 190°F (88°C). The rolls will be soft and spring back when pressed lightly. Yes, you can prepare these rolls in advance. You can make the dough and fill it, then chill it overnight in the fridge. Just let it sit at room temperature for about 30 minutes before baking. You can also bake them, let them cool, and store them in the fridge for up to 2 days. If you want to swap out cream cheese, you can use mascarpone cheese or Greek yogurt. Ricotta cheese is another great option. Just make sure to adjust the sugar, as some of these options can be sweeter or less creamy. These rolls stay fresh for about 2 days at room temperature. If you store them in the fridge, they can last up to 5 days. Just cover them tightly to keep them moist. Absolutely! You can create plain cheesecake rolls by leaving out the blueberries. You can also add other fruits like raspberries or strawberries. For a twist, try adding chocolate chips or nuts for extra flavor. You can make delicious blueberry cheesecake swirl rolls at home. We covered the important ingredients, step-by-step instructions, and tips for perfecting them. Don't hesitate to try different fruit flavors or adjustments. Storing and reheating are easy too! These rolls are a treat that friends and family will love. Enjoy baking and sharing your sweet creations!](https://tossedflavors.com/wp-content/uploads/2025/05/c07cc5be-9ab5-45bf-82ad-8da04bb62850.webp)
Blueberry Cheesecake Swirl Rolls Irresistible Treat
Craving a sweet treat that combines creamy cheesecake with fresh blueberries? Look no further! These Blueberry Cheesecake Swirl Rolls are your new favorite dessert. With