Desserts
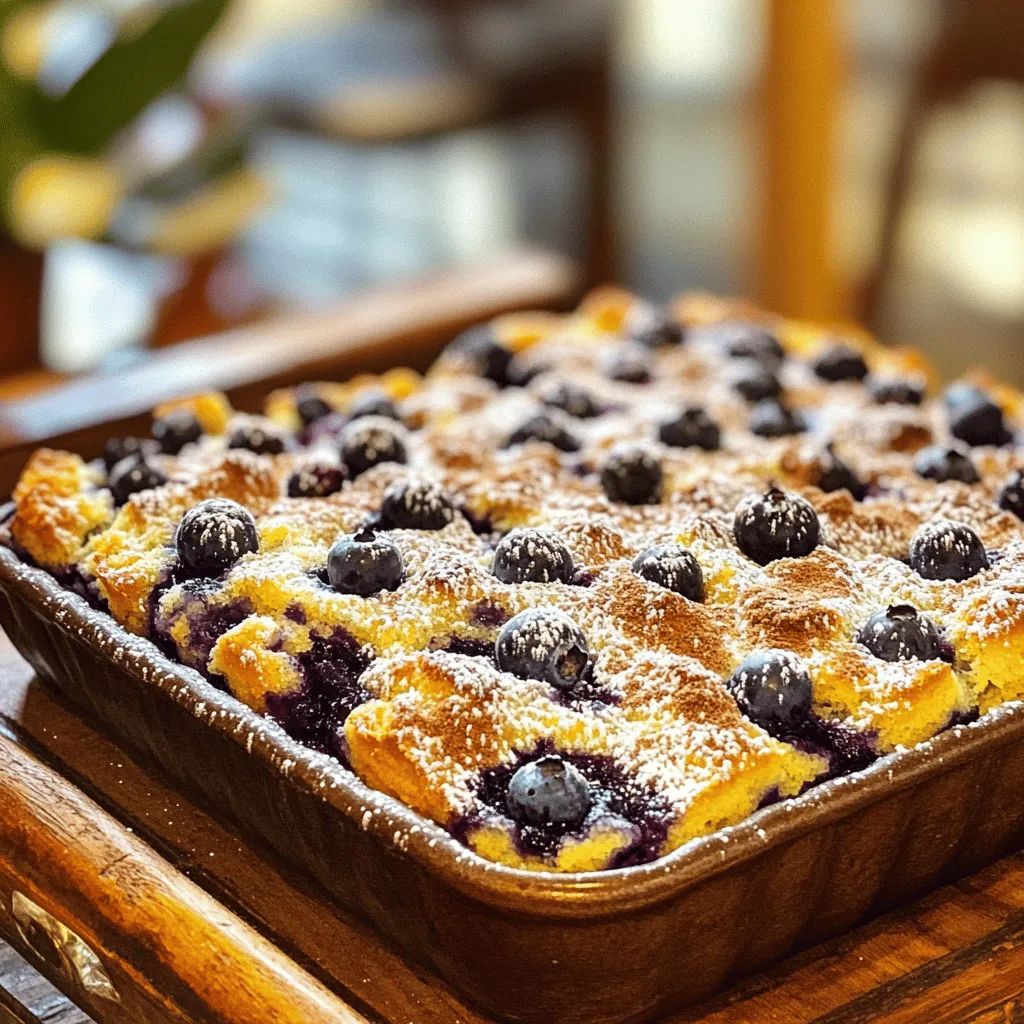
![- 2 cups all-purpose flour - 1 teaspoon baking powder - 1/2 teaspoon baking soda - 1/4 teaspoon salt - 1/2 cup unsalted butter, softened to room temperature - 1 cup granulated sugar - 8 ounces cream cheese, softened - 3 large eggs - 1 tablespoon fresh lemon zest - 1/4 cup freshly squeezed lemon juice - 1 teaspoon pure vanilla extract - 1 cup fresh blueberries (with extra for topping) - Powdered sugar for dusting (optional) Gather these ingredients to create a wonderful Lemon Cream Cheese Blueberry Cake. The all-purpose flour forms the base, while baking powder and baking soda help the cake rise. Salt balances the flavors. Softened unsalted butter and cream cheese make the cake rich and creamy. Granulated sugar adds sweetness, and eggs give structure. Fresh lemon zest and lemon juice provide a zesty kick. Vanilla extract rounds out the flavor profile, while fresh blueberries offer bursts of juiciness. You can add powdered sugar for a lovely finish. With this list ready, you're on the way to baking a delightful treat. For more details on how to combine these ingredients, check out the Full Recipe. 1. Preheat your oven. Set it to 350°F (175°C). 2. Prepare a 9-inch round cake pan. Grease it with butter and dust it with flour. This helps the cake come out easily. 3. In a mixing bowl, whisk together the dry ingredients: - 2 cups all-purpose flour - 1 teaspoon baking powder - 1/2 teaspoon baking soda - 1/4 teaspoon salt Set this mixture aside for later. 4. In a large bowl, cream together: - 1/2 cup unsalted butter, softened - 1 cup granulated sugar - 8 ounces cream cheese, softened Mix on medium speed for about 3-5 minutes until light and fluffy. 5. Add the eggs one at a time, mixing well after each. Then, blend in: - 1 tablespoon fresh lemon zest - 1/4 cup freshly squeezed lemon juice - 1 teaspoon pure vanilla extract Mix until smooth. 6. Gradually add the dry mixture to the wet mixture. Stir until just combined. Don’t over-mix; this keeps the cake light. 7. Carefully fold in: - 1 cup fresh blueberries Use a spatula to ensure they stay whole. 8. Pour the batter into the prepared cake pan. Smooth the top with a spatula. 9. Bake in the preheated oven for 30-35 minutes. Check with a toothpick; it should come out clean. 10. Let the cake cool in the pan for about 10 minutes. Then, transfer it to a wire rack to cool completely. You can find the complete recipe [Full Recipe]. To ensure your Lemon Cream Cheese Blueberry Cake rises perfectly, start with fresh ingredients. Make sure your baking powder and baking soda are not expired. For the best rise, bring your eggs and cream cheese to room temperature before mixing. This helps create a light batter. Avoid over-mixing by stirring gently when combining wet and dry ingredients. Mix just until you no longer see any flour. Over-mixing can lead to a dense cake. Folding in the blueberries should also be done carefully to keep them whole. Using fresh blueberries will give you the best taste. They burst with flavor when baked. Frozen blueberries can work but may make your batter a bit watery. If you use frozen blueberries, do not thaw them first. To adjust sweetness, taste your batter before baking. If it feels too sweet, simply add a bit more lemon juice. This will balance the flavors nicely. For a festive look, serve slices of cake on colorful plates. You can add a few whole blueberries on top for a pop of color. A sprig of fresh mint can also brighten the plate and enhance the flavor. When garnishing, consider dusting the cake with powdered sugar. This adds a lovely touch and makes the cake look more appealing. Just remember to do this right before serving to keep it fresh. {{image_4}} You can make this cake even more fun and tasty. Try adding different berries like raspberries, strawberries, or blackberries. Each berry brings its unique flavor and color. You can also mix in nuts. Chopped walnuts or pecans add a nice crunch. For a warm touch, add spices like cinnamon or nutmeg. These flavors will blend well with the lemon and cream cheese. If you need gluten-free options, you can substitute the all-purpose flour. Use almond flour or a gluten-free flour blend instead. This change keeps the cake light and fluffy. For vegan alternatives, swap the cream cheese with a plant-based version. You can also use flax eggs or applesauce instead of real eggs. These swaps allow everyone to enjoy this treat. If you love lemon and cream cheese, try other recipes too. Lemon bars are a zesty choice. Cream cheese frosting is perfect for decorating cupcakes. You can also make lemon cheesecake for a rich dessert. Each of these recipes highlights the bright flavor of lemon and the creamy texture of cream cheese. For more ideas, check out the Full Recipe for a detailed guide. To store your leftover Lemon Cream Cheese Blueberry Cake, first let it cool completely. Once cool, cover it tightly with plastic wrap or place it in an airtight container. This keeps the cake moist and fresh. If you want to keep it longer, you can freeze it. Wrap the cake in plastic wrap and then in aluminum foil. This double wrapping prevents freezer burn. At room temperature, the cake lasts for about three days. Make sure to keep it in a cool, dry place. If you freeze it, the cake can last up to three months. For the best taste, freeze it within two days of baking. This helps lock in the fresh flavors. To reheat the cake, place a slice on a microwave-safe plate. Heat it for 10-15 seconds at a time until warm. Avoid overheating to keep it moist. You can also serve the cake cold. Cold slices are refreshing, especially on warm days. Enjoy the cake however you like, but warm slices pair well with a scoop of ice cream! Can I make this cake in advance? Yes, you can make this cake a day before you plan to serve it. Let it cool completely and then store it in an airtight container. This keeps it fresh and tasty. What can I substitute for cream cheese? You can use Greek yogurt or mascarpone cheese if you want a different flavor. Both options keep the cake moist and creamy. Why is my cake dense? A dense cake can mean you over-mixed the batter. Mixing too much can trap too much air, making it heavy. Be gentle when combining ingredients. How do I know when my cake is done baking? To check if your cake is ready, insert a toothpick in the center. If it comes out clean, the cake is done. If it has batter on it, bake for a few more minutes. What beverages pair well with this cake? This cake works well with tea, lemonade, or even a light sparkling wine. These drinks enhance the lemon flavor and make each bite even better. Can this cake be served with ice cream or whipped cream? Yes! This cake is great with vanilla ice cream or whipped cream. They add a nice creamy texture and balance the tart lemon flavor. For the full recipe, check out the Lemon Cream Cheese Blueberry Delight! This blog post covers everything you need to create a delicious blueberry lemon cake. We explored key ingredients, step-by-step instructions, and helpful tips to enhance your baking. We also discussed cake variations, storage tips, and answered common questions. Now it's time to bake! Enjoy the process and share your tasty results. Happy baking!](https://tossedflavors.com/wp-content/uploads/2025/05/d710bcd9-87d2-466b-aef3-d8e9ea7d8a64.webp)
Lemon Cream Cheese Blueberry Cake Delightful Treat
If you love sweet treats with a zesty twist, you’re in for a real delight! This Lemon Cream Cheese Blueberry Cake combines bright lemon flavors
Blueberry Buckle Delightful and Easy Recipe
Are you ready to bake something special? Blueberry Buckle is a delightful dessert that’s easy to make and tastes amazing. Bursting with fresh blueberries and
![To make blueberry muffin cookies, you need a mix of simple ingredients. Each one plays an important role. Here’s the full list: - 1 cup fresh or frozen blueberries - 1 ½ cups all-purpose flour - ½ teaspoon baking soda - 1 teaspoon baking powder - ½ teaspoon salt - ½ cup unsalted butter, softened to room temperature - ¾ cup granulated sugar - 1 large egg - 1 teaspoon vanilla extract - ½ teaspoon almond extract - ½ cup buttermilk (or regular milk with 1 teaspoon lemon juice added) - ½ teaspoon ground cinnamon (optional) - ½ cup rolled oats (for added texture) - Colored sugar (for topping, optional) Each ingredient contributes to the flavor and texture of the cookies. Fresh blueberries bring a burst of sweetness. You can also use frozen ones. Just remember to thaw and drain them first. All-purpose flour gives the cookies structure. Baking soda and baking powder help them rise. Unsalted butter adds richness. Granulated sugar sweetens and helps with moisture. The egg binds everything together, while vanilla and almond extracts add depth to the flavor. Buttermilk keeps the cookies soft and moist. Ground cinnamon adds warmth, but it’s optional. Rolled oats give a nice chew. If you want, sprinkle colored sugar on top for a fun touch. This mix creates a lovely balance of flavors. Trust me; you will love these cookies! For the full recipe, check out the [Full Recipe]. - Preheat oven to 350°F (175°C). - Line a baking sheet with parchment paper. Start by getting your oven ready. Preheating it now helps the cookies bake evenly. Next, take a baking sheet and line it with parchment paper. This keeps the cookies from sticking and makes cleanup easy. - Combine flour, baking soda, baking powder, salt, and cinnamon. - Cream butter and sugar, then mix in egg and extracts. In a medium bowl, mix the flour, baking soda, baking powder, salt, and cinnamon. Use a whisk for this. In a larger bowl, cream the softened butter and sugar together. You want it light and fluffy. This takes a few minutes. Then, add the egg, vanilla extract, and almond extract. Mix well until everything is combined. - Alternately add flour mixture and buttermilk. - Fold in blueberries and oats carefully. Now, it's time to combine everything. Gradually add the flour mixture and buttermilk to the wet mix. Do this in parts. Start with a little flour, then some buttermilk, and keep going. Mix until just combined. Be gentle when folding in the blueberries and oats. You want to keep the blueberries intact. - Portion out dough on the baking sheet. - Sprinkle with colored sugar if desired. - Bake for 12-15 minutes and cool. Use a cookie scoop or a spoon to drop dough onto the prepared baking sheet. Space them about 2 inches apart. If you want, sprinkle some colored sugar on top for fun. Bake the cookies for 12 to 15 minutes. They should be lightly golden on the edges. After baking, let the cookies cool on the sheet for a few minutes. Then, transfer them to a wire rack to cool completely. Enjoy your delicious blueberry muffin cookies! - Avoid overmixing to maintain a soft texture. Overmixing can make your cookies tough. Mix just until the ingredients blend. - Use room temperature ingredients for better incorporation. This helps the butter and sugar mix smoothly, giving you a light and fluffy dough. - Bake in batches for even results. If you crowd the pan, the cookies may not bake evenly. Spread them out! - Cool briefly on the baking sheet before transferring to a wire rack. Letting them cool a bit keeps them from breaking apart. These tips ensure you get the best blueberry muffin cookies every time. For the full recipe, check out the details above. Enjoy baking! {{image_4}} You can add lemon zest for a bright, citrusy twist. This small change brings out fresh flavors. You might also try different fruits. Raspberries or cranberries make great substitutes. They add a new taste and color to the cookies. Experimenting with flavors makes baking fun. For a healthier option, use whole wheat flour. This adds fiber and a nutty taste. You can also incorporate nuts or chocolate chips. They give your cookies a nice crunch. Adding these ingredients can make your cookies more exciting. Each bite will surprise you with new textures. To keep your blueberry muffin cookies fresh, store them in an airtight container at room temperature. This method keeps them soft and tasty for several days. If you want to extend their shelf life, pop them in the fridge. The cool air helps maintain their texture and flavor for a longer time. You can freeze these cookies for up to three months. This is a great way to save extras for later. To freeze, place the cookies in a single layer on a baking sheet. Once frozen, transfer them to a freezer bag or container. When you're ready to enjoy them, thaw the cookies on the counter. They will taste just as good as when you first baked them. For the full recipe, check back in the article! You can use regular milk with lemon juice or vinegar. Just add 1 teaspoon of lemon juice or vinegar to ½ cup of milk. Let it sit for about five minutes. This will give you a quick and easy buttermilk substitute. Look for a light golden edge and a firm center. The cookies should not look wet or doughy. If they are slightly golden and hold their shape, they are ready to come out. Yes, you can prepare the dough ahead of time. Just refrigerate it for up to 24 hours before baking. This helps the flavors meld and makes for a quick baking session later. Serve these cookies with a hot cup of tea or coffee. They also pair well with fresh fruit for a delightful snack. You can even enjoy them as a fun breakfast treat! In this blog post, I covered how to make delicious blueberry muffin cookies. You learned about the ingredients you'll need, from fresh blueberries to buttermilk and spices. The step-by-step instructions made baking easy, while tips and tricks helped ensure perfect cookies every time. Don’t forget to try flavor and texture variations to find your favorite. Store these treats well for later or freeze them for a quick snack. Enjoy baking and eating these tasty cookies!](https://tossedflavors.com/wp-content/uploads/2025/05/43a3382f-0e2a-41b3-9b1d-b6b02d72be92.webp)
Blueberry Muffin Cookies Delicious and Easy Recipe
Craving a sweet treat that combines the best of muffins and cookies? Look no further! My easy blueberry muffin cookies are perfect for satisfying your
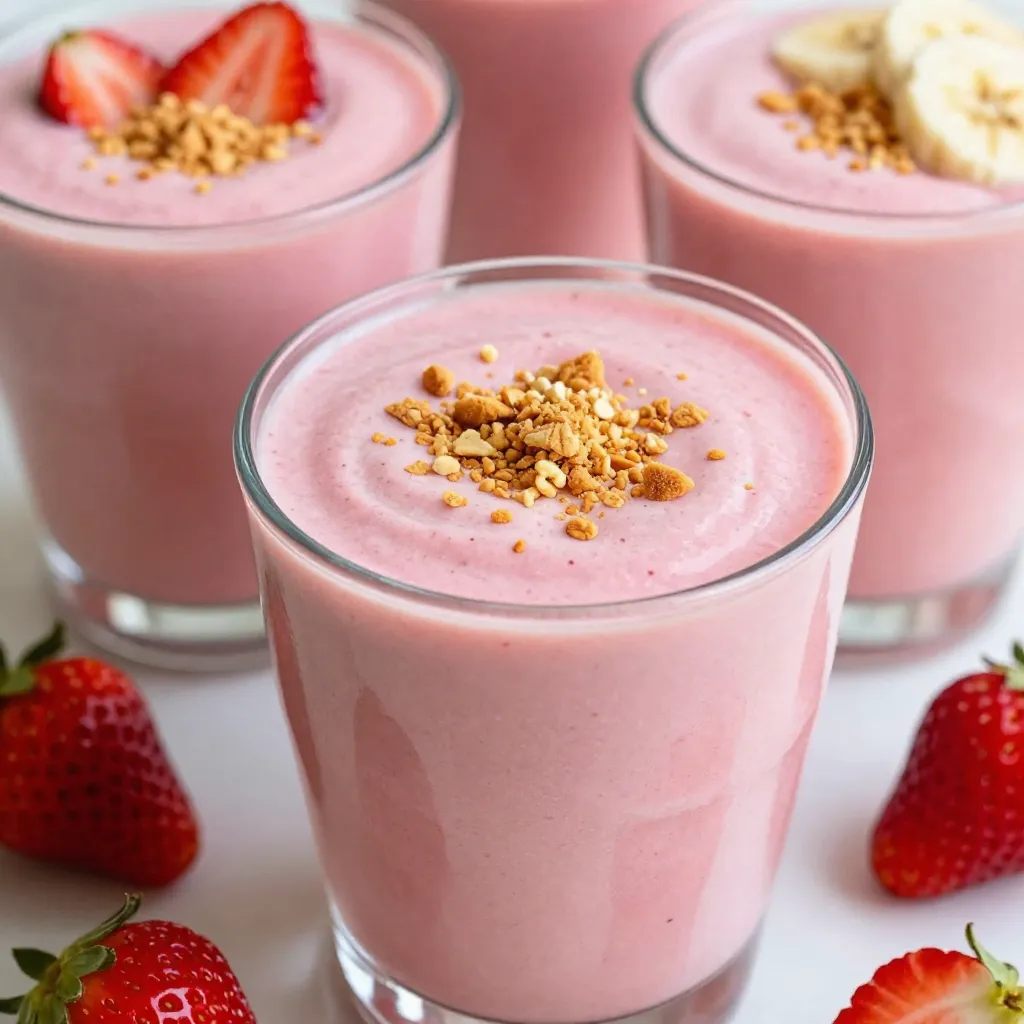
Strawberry Cheesecake Smoothie Fresh and Tasty Blend
Are you ready to enjoy a delicious treat that feels like dessert? This Strawberry Cheesecake Smoothie is a fresh and tasty blend that’s perfect for
![- 1 cup unsweetened shredded coconut - 1/2 cup all-purpose flour - 1/4 teaspoon baking powder - 1/4 teaspoon salt - 1/2 cup unsalted butter, softened - 1/2 cup granulated sugar - 1 large egg - Zest of 1 lemon - 2 tablespoons freshly squeezed lemon juice - 1 teaspoon pure vanilla extract - 1 cup powdered sugar (for icing) - 1-2 tablespoons freshly squeezed lemon juice (for icing) The ingredients for Lemon Coconut Heaven Cookies are simple. You need coconut, flour, baking powder, and salt for the base. This mix forms a chewy, sweet cookie. Next, you will add butter and sugar. Creaming these two together makes the cookies fluffy. The egg, lemon zest, and juice bring tangy flavor. Vanilla adds warmth and depth to the taste. For the icing, mix powdered sugar with lemon juice. This bright icing makes your cookies shine and adds more lemony goodness. Using fresh ingredients makes a big difference. Fresh lemons give a bright taste. The unsweetened coconut adds a nice chew and texture. Gather all these components to create delicious Lemon Coconut Heaven Cookies. You can find the complete recipe in the Full Recipe section. - Preheat your oven to 350°F (175°C). - Line a baking sheet with parchment paper. This helps the cookies not to stick. - In a small bowl, mix together the shredded coconut, flour, baking powder, and salt. Set this aside for later. - In a large bowl, cream the softened butter and granulated sugar. Use an electric mixer on medium speed. Mix for about 3 to 4 minutes. Your mixture should look light and fluffy. - Now, add in the egg, lemon zest, lemon juice, and vanilla extract. Mix until everything is smooth and well combined. - Gradually add the dry coconut mixture to the wet ingredients. Mix gently until just combined. The dough should feel sticky but hold together. - To shape the cookies, dampen your hands with a little water. Scoop tablespoon-sized dough portions and roll them into balls. Place them on your baking sheet, leaving about 2 inches between each ball. - Flatten each ball slightly with your palm to form a thick disc. Bake in the preheated oven for 10 to 12 minutes. Keep an eye on them; the edges should turn a light golden brown. - While the cookies bake, prepare the icing. In a small bowl, mix powdered sugar with 1 to 2 tablespoons of lemon juice. Stir until smooth. Adjust with more sugar or juice if needed. - When the cookies are done, take them out and let them cool on the baking sheet for about 5 minutes. Then, transfer them to a wire rack to cool completely. - Drizzle the lemon icing generously over each cooled cookie. Enjoy the bright flavors! For the complete recipe, check the [Full Recipe]. To make the best Lemon Coconut Heaven Cookies, you need the right dough. First, your dough should be slightly sticky but hold its shape. If it feels too dry, add a splash of lemon juice. If it's too wet, sprinkle in a bit more flour. When forming the cookie balls, keep your hands damp. This helps the dough not to stick. Scoop tablespoon-sized portions and roll them gently. Next, space them about two inches apart on the baking sheet. This allows them to spread as they bake. Now, let’s talk about flattening. Use the palm of your hand to press each dough ball into a thick disc. This helps them bake evenly. Don’t flatten them too much; they need some height! Icing is what makes these cookies shine. For the right icing consistency, mix the powdered sugar with lemon juice. Start with one tablespoon of juice. Stir until smooth. If it’s too thick, add more lemon juice. If it’s too thin, add more powdered sugar. Decide how you want to apply the icing. Drizzling gives a lovely look. Use a spoon to drizzle over the cookies. If you prefer, you can also spread the icing. Just use a small spatula for a nice finish. Make your cookies look amazing when you serve them. Arrange the Lemon Coconut Heaven Cookies on a colorful plate. For an extra touch, sprinkle some shredded coconut on top. Garnish with thin lemon slices or more lemon zest. This not only looks pretty but also adds a bright flavor. Your guests will love the visual and taste combination! For the full recipe, check out the complete guide above. {{image_4}} You can easily change the flavor of your Lemon Coconut Heaven Cookies. Try adding zests from other citrus fruits. Lime or orange zest can give a new twist. You can also use different extracts. Almond or coconut extracts enhance the cookie’s taste. These small changes can make a big difference in flavor. If you need gluten-free cookies, swap the all-purpose flour for a gluten-free mix. Many brands work well without losing flavor. For a vegan option, replace the egg with flaxseed meal or applesauce. You can use coconut oil instead of butter. These swaps let everyone enjoy these sweet treats. You can choose between chewy or crispy cookies. For chewy cookies, bake them for a shorter time. If you prefer crispy cookies, keep them in the oven longer. You can also add fun ingredients. Mix in chocolate chips or nuts for extra texture. These additions make the cookies more exciting and delicious. To keep your Lemon Coconut Heaven Cookies fresh, store them in an airtight container. This will help maintain their soft texture. Use a container that fits the cookies snugly, so they do not move around. You can also add a slice of bread inside. This helps to keep the cookies moist longer. You can freeze these cookies for later enjoyment. First, let the cookies cool completely. Then, place them in a single layer on a baking sheet. Freeze them for about an hour. Once frozen, transfer the cookies to a freezer-safe bag. Squeeze out the air, then seal it tightly. To thaw, simply leave the cookies at room temperature for about 30 minutes. This helps keep them soft and chewy. At room temperature, these cookies last about five days. Make sure to keep them in a cool, dry place. If you freeze them, they can last up to three months. This makes them a great treat to prepare in advance! Enjoy the sweet taste of Lemon Coconut Heaven Cookies anytime. For the full recipe, check out the previous section. Yes, you can make these cookies ahead. Prepare the dough and chill it for up to 24 hours. When ready to bake, scoop and shape the cookies. Bake as normal, and enjoy fresh cookies! Look for a light golden edge. The centers may seem soft, but they will firm up as they cool. If the edges turn brown, they may be overbaked. You can use sweetened shredded coconut if you prefer a sweeter taste. Finely chopped nuts or oats can replace the coconut for a different texture. Just remember to adjust sugar to taste. Yes! This recipe is naturally nut-free. Just ensure any additional ingredients you add, like chocolate, are also nut-free. Absolutely! Simply double or triple the ingredients. Make sure to adjust the baking time if you bake multiple trays at once. Check the cookies often to avoid overbaking. For the complete recipe, check out the Full Recipe. You now know how to make Lemon Coconut Heaven Cookies with ease. We covered the main ingredients, step-by-step instructions, and tips to perfect your cookies. You can even explore variations and storage options. Remember, baking is fun, so feel free to get creative with flavors and textures. Enjoy sharing your delicious cookies with friends and family. Happy baking!](https://tossedflavors.com/wp-content/uploads/2025/05/5cd9a7b8-9504-4624-8d37-bd7cf9066423.webp)
Lemon Coconut Heaven Cookies Irresistible Sweet Treat
If you’re craving a sweet treat that balances zesty lemon and rich coconut, you’ve found it! My Lemon Coconut Heaven Cookies are the perfect mix

Mini Bundt Cakes for Every Occasion Made Simple
If you love cake but want something cute and easy, mini bundt cakes are for you. These little treats are perfect for any event, from
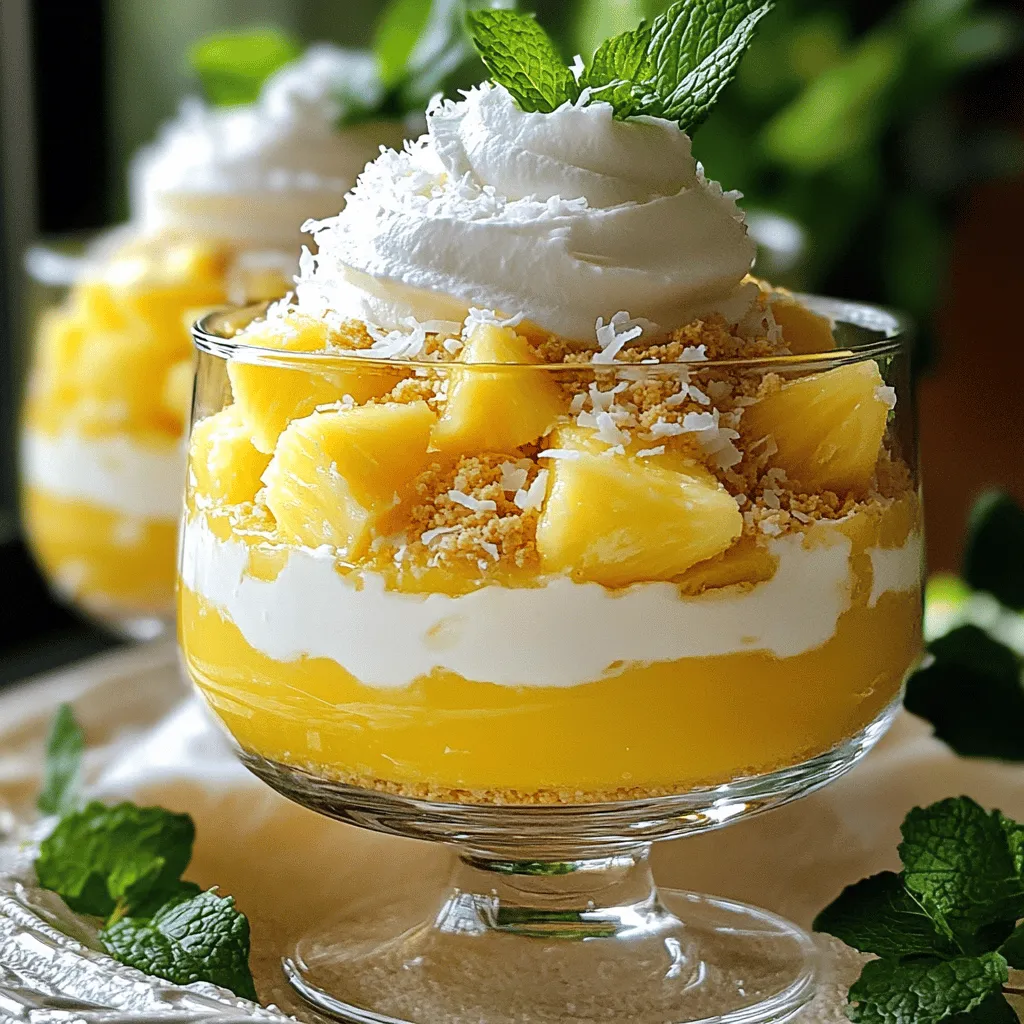
Pineapple Dream Dessert Delightfully Creamy Treat
Looking for a sweet escape to paradise? The Pineapple Dream Dessert is your ticket! This creamy treat combines fresh pineapple, rich cream cheese, and fluffy
![To make delicious mini lemon cheesecakes, gather these key ingredients: - 1 cup graham cracker crumbs - 1/4 cup unsalted butter, melted - 2 tablespoons granulated sugar - 16 oz cream cheese, softened - 1 cup powdered sugar - 2 large eggs - 1 tablespoon fresh lemon zest - 1/4 cup freshly squeezed lemon juice - 1 teaspoon pure vanilla extract These ingredients create a balance of sweet and tart flavors. The cream cheese gives the cheesecake its rich texture, while the lemon adds a bright touch. Remember, using room temperature cream cheese helps blend everything smoothly. You can elevate your mini cheesecakes with these optional garnishes: - Whipped cream - Lemon slices Adding whipped cream gives a light, airy feel. Lemon slices add a fresh look and a hint of extra citrus flavor. Feel free to get creative with toppings! To make your mini cheesecakes, you'll need some basic tools: - Muffin tin - Paper liners - Mixing bowls - Electric mixer - Measuring cups and spoons - Spoon or spatula Having these tools ready will help your cooking process run smoothly. The muffin tin shapes your cheesecakes perfectly, while the electric mixer ensures a creamy filling. Once you have everything, you’re ready to start your baking adventure! First, we need to set the stage for our mini lemon cheesecakes. Preheat your oven to 325°F (160°C). This temperature helps the cheesecakes bake evenly. While the oven warms up, grab a muffin tin and line it with paper liners. The liners stop the cheesecakes from sticking. This step helps make serving easier. Now, let’s create the crust. In a medium mixing bowl, combine: - 1 cup graham cracker crumbs - 1/4 cup unsalted butter, melted - 2 tablespoons granulated sugar Stir the crumbs, butter, and sugar until the crumbs feel moist. Take about 1 tablespoon of this mixture and press it into each muffin liner. Use a spoon or your fingers to pack it tightly. A solid base makes a great foundation for our creamy filling. Next, we’ll prepare the cream cheese filling. In a large mixing bowl, beat: - 16 oz cream cheese, softened Mix it until it’s smooth and creamy. This step is key for a lump-free filling. Gradually add: - 1 cup powdered sugar Blend these until fluffy. Then, add in: - 2 large eggs (one at a time) - 1 tablespoon fresh lemon zest - 1/4 cup freshly squeezed lemon juice - 1 teaspoon pure vanilla extract Mix until all is well combined. The filling should look rich and creamy. Now, let's fill those crusts! Carefully pour the cream cheese mixture over the crusts. Fill each liner about 3/4 full. This space allows the cheesecakes to rise a bit. Place the muffin tin in the preheated oven. Bake for 18-20 minutes. You want the centers to be set but still slightly jiggly. After they bake, take them out and let them cool to room temperature. Once cooled, put them in the fridge for at least 2 hours. This helps them set properly. When ready, feel free to garnish with whipped cream and slices of lemon for a fresh touch. Enjoy your mini lemon cheesecakes! For the complete recipe, check [Full Recipe]. To make the best mini lemon cheesecakes, start with room-temperature cream cheese. Cold cream cheese is hard to mix, and it can lead to lumps. Use an electric mixer to beat the cream cheese until it is smooth and creamy. This step is key. Make sure to scrape the bowl to mix all the cream cheese evenly. The texture of your mini cheesecakes should be light and fluffy. Be careful not to over-mix once you add the eggs. Mix just until combined. If you over-mix, your cheesecakes can become dense. Also, bake your cheesecakes until the centers jiggle slightly. This tells you they are perfectly cooked. One common mistake is not cooling the cheesecakes properly. After baking, let them cool at room temperature first. Chilling right away can cause cracks. Another mistake is filling the crusts too full. Fill them about three-quarters full to allow for rising. Finally, always use fresh lemon juice and zest for the best flavor. Don't skip this step. For the full recipe, check out the details above. {{image_4}} You can switch up the flavor of mini lemon cheesecakes in fun ways. Try using berries, like strawberries or blueberries. Just blend in some berry puree into the cream cheese mix. Chocolate is another great choice. Melt dark chocolate and fold it into the filling for a rich twist. You can even combine flavors, like lemon and raspberry, for a bright treat. Want a lighter version? Consider using Greek yogurt instead of cream cheese. It gives a tangy taste and cuts down on fat. You can swap granulated sugar for honey or maple syrup. This adds sweetness and a unique flavor. For the crust, use almond flour or oats instead of graham crackers. These options are gluten-free and packed with nutrients. Serve your mini cheesecakes with fresh fruit for a vibrant touch. Slices of strawberries, blueberries, or kiwi look beautiful on top. You could also drizzle some berry sauce or chocolate sauce over them. This adds flavor and makes your dessert pop. Try pairing them with a scoop of vanilla ice cream for a creamy contrast. Get the full recipe to make these delicious mini lemon cheesecakes and explore endless variations! To keep your mini lemon cheesecakes fresh, use a sealed container. Place them in the fridge. They will stay good for about five days. Make sure to separate layers with parchment paper. This prevents sticking. If you have toppings, add them right before serving. You can freeze these cheesecakes for later. Wrap each cheesecake in plastic wrap. Then, place them in a freezer bag. This keeps them safe from freezer burn. They will stay fresh for up to three months. When you want to enjoy them, just take them out and thaw in the fridge overnight. These mini cheesecakes taste best cold. However, if you enjoy them warm, you can reheat them gently. Use a microwave and heat for about 10-15 seconds. Avoid overheating, as it can change the texture. Enjoy them fresh from the fridge for a fluffy and tart delight. For the full recipe, refer to the earlier section. You can tell when the mini cheesecakes are done by checking the centers. They should look set but still jiggle slightly when you shake the pan. This slight jiggle means they will firm up as they cool. If they are too wobbly, they need more baking time. Yes, you can use alternative sweeteners like stevia or monk fruit. Keep in mind that these sweeteners can change the taste and texture. Start with half the amount of your chosen sweetener, then adjust to your taste. If you want a dairy-free option, you can use cashew cream or tofu. For a lower-fat choice, try Greek yogurt. Make sure the substitute is thick and creamy to get the right texture. To avoid cracks, do not overmix your batter. Also, bake at a lower temperature and avoid opening the oven during baking. Cooling the cheesecakes slowly in the oven helps too. Yes, you can make these mini cheesecakes a day in advance. Just store them in the fridge after they cool. They taste even better after chilling overnight, as the flavors blend nicely. Check the Full Recipe for more tips! In this blog post, we explored how to make mini cheesecakes from start to finish. We covered key ingredients, step-by-step instructions, and valuable tips for success. We also shared variations to try and essential storage tips. Remember, each cheesecake can be a fun twist on the classic. With practice, you can master this simple yet rewarding dessert. Enjoy the process and happy baking!](https://tossedflavors.com/wp-content/uploads/2025/05/3ac467f2-94b6-4735-b644-3d32d1eb014e.webp)
Mini Lemon Cheesecakes Fluffy and Tart Delight
Ready to impress your friends with a delicious dessert? These Mini Lemon Cheesecakes are a fluffy and tart delight that everyone will love! With a
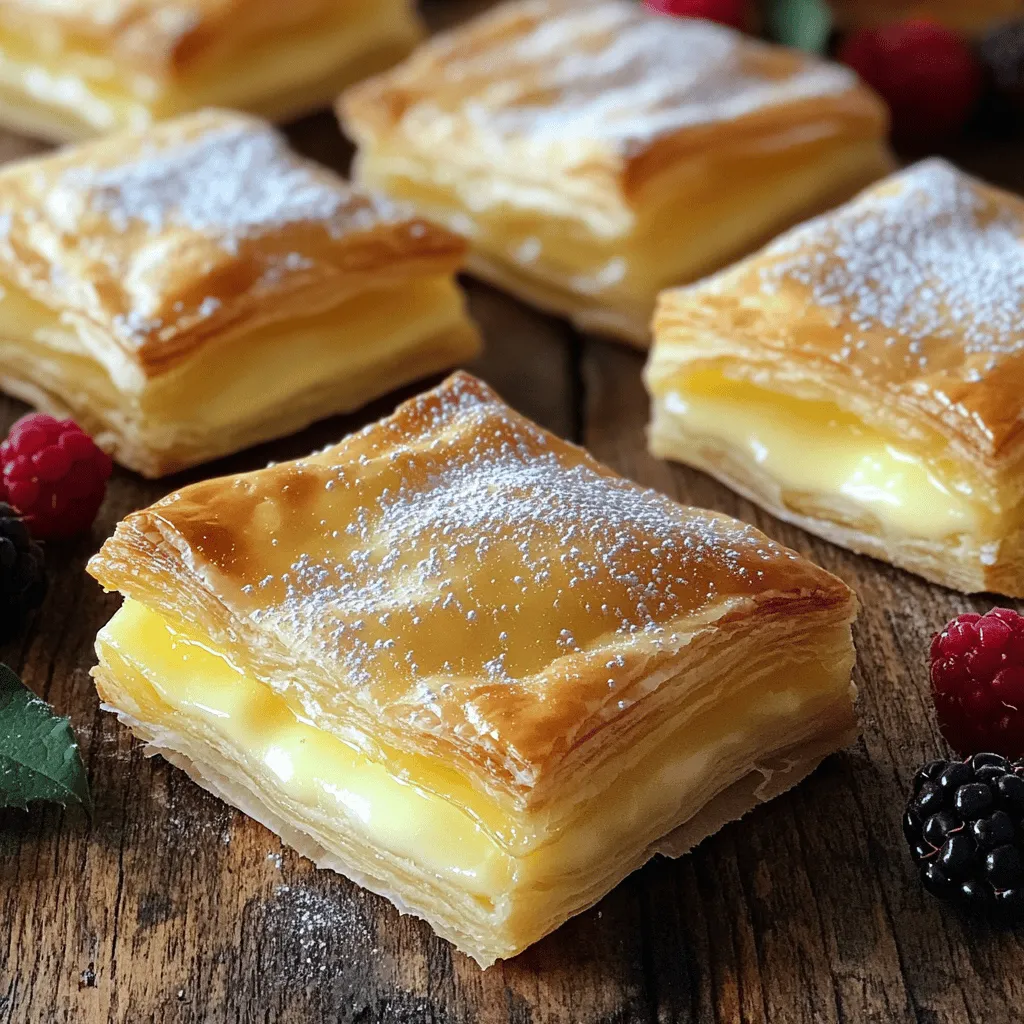
Puff Pastry Vanilla Custard Squares Easy and Delightful
Craving a sweet treat that’s easy to make and oh-so-delightful? Puff Pastry Vanilla Custard Squares are your answer. With just a few simple ingredients, you
![- Puff Pastry: Use one sheet of thawed puff pastry. This will form the base of your Danish. Puff pastry adds layers and a lovely flaky texture. - Fresh Raspberries: You need one cup of fresh raspberries. Choose berries that are firm and vibrant. They should be sweet and juicy for the best flavor. - Cream Cheese and Sugar: Use four ounces of softened cream cheese and a quarter cup of granulated sugar. Cream cheese gives a rich, creamy filling. The sugar balances the tartness of the raspberries. - Lemon Zest: Add zest from one lemon for a bright flavor. This brings a fresh taste to your Danish. It enhances the sweetness of the raspberries. - Egg Wash Components: Use one beaten egg mixed with one tablespoon of milk. This egg wash gives the pastries a golden, shiny finish. It makes them look even more appealing when baked. For the complete recipe, check the [Full Recipe]. First, set your oven to 400°F (200°C). This temperature helps the pastries puff up nicely. While the oven heats, line a baking sheet with parchment paper. This step stops the Danish from sticking. It makes cleanup easy too. Now, take your puff pastry out. Roll it on a floured surface until it forms a 12x12 inch square. Keep it even so it cooks well. Once rolled, cut the pastry into four equal squares, each 6 inches wide. This size is perfect for your delicious filling. In a medium bowl, mix the fresh raspberries with sugar and cornstarch. Gently toss them to avoid crushing. The sugar brings out the raspberry flavor. In another bowl, blend the softened cream cheese with powdered sugar. Mix until it’s smooth. This creamy filling balances the tart berries. On your lined baking sheet, place one pastry square. Spread about one tablespoon of cream cheese in the center, leaving space around the edges. Next, add several spoonfuls of your raspberry mixture on top. To form the Danish, fold the corners of the pastry towards the center. Pinch and seal the edges to create a pretty diamond shape. Repeat this with the other pastry squares. For a golden finish, prepare an egg wash by mixing a beaten egg with milk. Use a pastry brush to coat the tops of each Danish. This step adds shine and color. Bake in your preheated oven for 15-20 minutes. The pastries should puff up and turn golden brown. You’ll know they’re ready when your kitchen smells amazing. After baking, let the Danish cool for a few minutes. This allows them to set. For a nice touch, dust with powdered sugar before serving. Arrange them on a platter and add whole raspberries and mint for a pop of color. Your delightful raspberry Danish will look and taste great! For the complete recipe, check the Full Recipe section. - Overfilling the pastries: This is a common mistake. If you add too much filling, it can leak out during baking. Stick to a tablespoon of cream cheese and a few spoonfuls of raspberries for a perfect balance. - Improper sealing techniques: Make sure to pinch the edges well. If they are not sealed, the filling will escape. A good seal keeps the filling in and the pastry intact. - Using fresh vs. frozen raspberries: Fresh raspberries offer the best flavor and color. They are juicy and bright. Frozen raspberries work, too, but they can be mushy. If you use frozen, drain excess liquid before mixing. - Additional toppings ideas: Try adding a sprinkle of lemon zest or a drizzle of icing. You can also top with sliced almonds or a dusting of powdered sugar for a nice touch. - Tips for flaky texture: Keep your puff pastry cold while you work. If it warms up, it won’t puff up as well. Roll it out gently to avoid pressing out the layers. - Storing unused puff pastry: If you have any leftover pastry, wrap it tightly in plastic. Store it in the fridge for up to two days or freeze it for up to three months. Just thaw it in the fridge before using. These tips will help you create the best Delightful Raspberry Danish. Enjoy the process, and don’t be afraid to experiment with flavors! For more detailed steps, check the Full Recipe. {{image_4}} You can change the fruit in your Danish. Try cherries or blueberries for a new taste. Each fruit brings its own sweetness and tartness. You can also mix fruits for a fun twist. For the cream cheese, consider flavored options. You can add vanilla, almond, or even lemon zest. These flavors can brighten your filling and add depth. Experimenting with these options makes your Danish special. If you need a gluten-free option, look for gluten-free puff pastry. Many brands offer this. You can find it in most grocery stores. Just check the package to ensure it meets your needs. For a vegan version, use substitutes for cream cheese. Look for plant-based cream cheeses. These alternatives can provide a similar taste and texture. You can also blend silken tofu with a bit of lemon juice for a creamy filling. Many cultures have their own take on Danish pastries. For example, in Sweden, you might try a cinnamon bun style. In France, pain aux raisins uses pastry dough with raisins and custard. Each variation offers a different flavor experience. It’s fun to explore these twists and find what you love. After enjoying your Delightful Raspberry Danish, let any leftovers cool completely. Place them in an airtight container. This keeps them fresh and tasty. I recommend using parchment paper between layers to avoid sticking. For best results, store them in the fridge for up to three days. To enjoy your Danish warm again, reheating is key. The oven is the best choice for crispy pastries. Preheat your oven to 350°F (175°C). Place the Danish on a baking sheet and warm them for about 10 minutes. Check if they are heated through. If you choose the microwave, remember it can make pastries soggy. If you must use it, heat for 10-15 seconds. Keep an eye on them to avoid overheating. Enjoy your delightful treat just like fresh! You can tell when the Danish is done by looking for a golden color. The pastry should puff up nicely and feel firm to the touch. A delicious aroma will fill your kitchen, hinting at the treat's readiness. If the edges are beautifully browned, it’s time to take them out. Yes, you can freeze these delicious pastries. Allow them to cool completely before freezing. Wrap each Danish in plastic wrap, then place them in a freezer bag. They can stay fresh for up to three months. When ready to enjoy, thaw them in the fridge overnight. Bake them for a few minutes to restore their crispness. Fresh raspberries work best for this recipe. They add a burst of flavor and texture. If fresh raspberries are out of season, frozen raspberries are a good option. Just make sure to thaw and drain them well to avoid excess liquid. You can prepare the filling and cream cheese mixture a day ahead. Store them in airtight containers in the fridge. You can also cut the puff pastry squares in advance. Just keep them covered with a damp cloth. Assemble the Danish right before baking for the best results. Yes, there are several substitutes for cream cheese. You can use Greek yogurt for a lighter option. For a vegan version, try using a blend of silken tofu and nutritional yeast. This gives a creamy texture and adds flavor without dairy. To keep the Danish crispy, avoid overfilling them. Make sure to seal the edges well to prevent any leaks. Baking them on parchment paper also helps, as it allows hot air to circulate. Lastly, serve them soon after baking for the best texture. For the full recipe, check out the detailed instructions above. Making Delightful Raspberry Danish is simple and fun. You gathered all the required ingredients, learned how to prepare the puff pastry, and crafted a delicious filling. We covered tips to avoid common mistakes and discussed exciting variations to try. Remember to store your leftovers well and reheat them right for that crispy texture. This tasty treat offers a great way to impress friends and family. Enjoy experimenting with different flavors and approaches to make it your own!](https://tossedflavors.com/wp-content/uploads/2025/05/a1573dfe-702a-4619-80c6-914cd6371cc0.webp)
Delightful Raspberry Danish Simple and Tasty Treat
If you’re craving a sweet treat that’s simple and delicious, you’ve found it! This Delightful Raspberry Danish recipe combines flaky puff pastry and fresh raspberries