Desserts

To make these lemon cheesecake squares, you need the following: - 1 ½ cups graham cracker crumbs - ½ cup unsalted butter, melted - 2 tablespoons granulated sugar - 16 oz cream cheese, softened - 1 cup granulated sugar - 3 large eggs, at room temperature - ½ cup fresh lemon juice (about 2-3 large lemons) - Zest from 2 lemons - 1 teaspoon pure vanilla extract - ½ teaspoon baking powder - Powdered sugar for dusting (optional) These ingredients come together to create a creamy, zesty dessert. The graham cracker crust gives a nice crunch, while the filling is smooth and refreshing. You can add some fun twists to your cheesecake! Here are a few ideas: - Fresh berries like blueberries or raspberries on top - Whipped cream for extra creaminess - A bit of lemon curd as a topping - Shredded coconut for a tropical vibe Using these extras can elevate your cheesecake squares and make them even more delightful! If you're missing some items, here are some easy swaps: - Use whole wheat or gluten-free graham crackers for the crust. - Swap cream cheese with ricotta or mascarpone for a different flavor. - Use honey or maple syrup instead of granulated sugar. - Bottled lemon juice can replace fresh lemon juice in a pinch. These substitutions allow you to customize the recipe while still keeping the joy of lemon cheesecake squares. For the full recipe, check out the details above! Start by preheating your oven to 350°F (175°C). In a medium bowl, mix 1 ½ cups of graham cracker crumbs, ½ cup of melted unsalted butter, and 2 tablespoons of granulated sugar. Use a fork or your fingers to blend everything well. You want the crumbs to look moist and crumbly. Next, transfer this mix to a greased 9x9-inch baking dish. Press the mixture down firmly and evenly to form a solid crust. Bake this in the oven for 10 minutes. After baking, let the crust cool for a few minutes before adding the filling. In a large mixing bowl, beat 16 oz of softened cream cheese using an electric mixer. Mix it on medium speed until it’s smooth, about 2-3 minutes. Gradually add in 1 cup of granulated sugar while mixing. Keep blending until there are no lumps. Now, add 3 large eggs one at a time. Make sure each egg blends in fully before adding the next. After the eggs, mix in ½ cup of fresh lemon juice, zest from 2 lemons, 1 teaspoon of pure vanilla extract, and ½ teaspoon of baking powder. Blend until everything is creamy and smooth. Carefully pour this cream cheese mixture over your cooled graham cracker crust in the baking dish. Use a spatula to spread the filling evenly. Bake the cheesecake for 25-30 minutes. The edges should set, but the center should still jiggle a bit. This jiggle is key for a creamy texture. Once baked, let it cool on the counter for about 30 minutes. Cover it with plastic wrap or foil and chill in the fridge for at least 4 hours. For the best flavor, let it chill overnight. When ready to serve, cut it into squares. If you want, dust the tops with powdered sugar for a sweet finish. For the full recipe, check the earlier section. When you make lemon cheesecake squares, avoid common mistakes. First, don’t skip the chilling time. It helps the squares set up well. Second, ensure your cream cheese is soft. Cold cream cheese can lead to lumps. Third, measure your ingredients carefully. Too much sugar or lemon can change the taste. Lastly, don’t open the oven door while baking. This can cause the cheesecake to crack. For a smooth and creamy texture, blend your cream cheese well. Use an electric mixer for best results. Mix until it’s free of lumps. Add eggs one at a time. Make sure each egg is well mixed before adding the next. This helps create a uniform filling. Also, avoid over-baking. The center should jiggle slightly when you take it out. This keeps it creamy and not dry. Serve your lemon cheesecake squares chilled. Cut them into even squares for a neat look. Dust with powdered sugar for a sweet touch. You can also add fresh mint leaves or lemon slices on top. This makes the dish look fancy. Pair with coffee or tea for a delightful treat. For a fun twist, serve with berry sauce or whipped cream on the side. Enjoy this recipe with friends and family! For the full recipe, check the main section. {{image_4}} You can change the flavor of your lemon cheesecake squares. Try adding different fruits. For a berry twist, mix in pureed strawberries or blueberries. This will give your dessert a sweet and tart taste. You can also add chocolate. Use cocoa powder or melted chocolate for a rich flavor. Another option is to mix in herbs like fresh basil or thyme for a unique touch. These changes make each bite exciting. If you need a gluten-free option, swap graham crackers for gluten-free crumbs. You can use almond flour or gluten-free cookies. Just make sure they are finely crushed. The rest of the recipe stays the same. This way, you can enjoy the creamy goodness without worry. Always check labels to ensure all ingredients are gluten-free. You can easily make this dessert vegan. Replace cream cheese with a vegan cream cheese alternative. Use flaxseed meal mixed with water instead of eggs. For every egg, use one tablespoon of flaxseed meal and two and a half tablespoons of water. You can also switch the butter for coconut oil or a vegan butter substitute. These changes keep the cheesecake squares creamy and delicious. You can find many vegan ingredients at your local store. To keep your lemon cheesecake squares fresh, place them in an airtight container. Make sure they are fully cooled before storing. You can layer the squares with parchment paper to avoid sticking. Store them in the fridge, where they will stay fresh for up to five days. If you want to save some squares for later, freezing is a great option. First, let the squares cool completely in the fridge. Then, wrap each square in plastic wrap. Place the wrapped squares in a freezer-safe bag or container. They can freeze for up to three months. When you are ready to enjoy them, thaw in the fridge overnight. Lemon cheesecake squares have a decent shelf life. In the fridge, they last about five days. If you freeze them, they can last up to three months. Always check for any signs of spoilage before serving. Enjoy your delicious squares at their best! For the full recipe, check the recipe section above. To make lemon cheesecake squares, start with the crust. Mix graham cracker crumbs, melted butter, and sugar. Press this mix into a baking dish and bake it. For the filling, beat cream cheese until creamy. Add sugar, then mix in eggs one by one. Stir in lemon juice, zest, vanilla, and baking powder. Pour this mix over the crust and bake again. Chill the squares before serving. For the full recipe, check out the detailed instructions above. Yes, you can use bottled lemon juice. However, fresh lemon juice tastes better. Fresh juice gives a brighter flavor and a more zesty kick. Bottled juice lacks some of the freshness from the real fruit. If you want the best taste, use fresh lemons. To cut cheesecake squares, use a sharp knife. First, dip the knife in warm water. This helps the knife glide smoothly through the cheesecake. Wipe the knife clean after each cut. This keeps the edges neat and pretty. For perfect squares, cut first into strips, then into individual squares. We covered the key ingredients for lemon cheesecake squares and how to make them. I shared tips to avoid common mistakes and options for flavor, dietary needs, and storage. Remember, small changes can lead to big flavors. Try different variations to find your favorite. With these steps, you can enjoy delicious lemon cheesecake squares anytime. Happy baking!
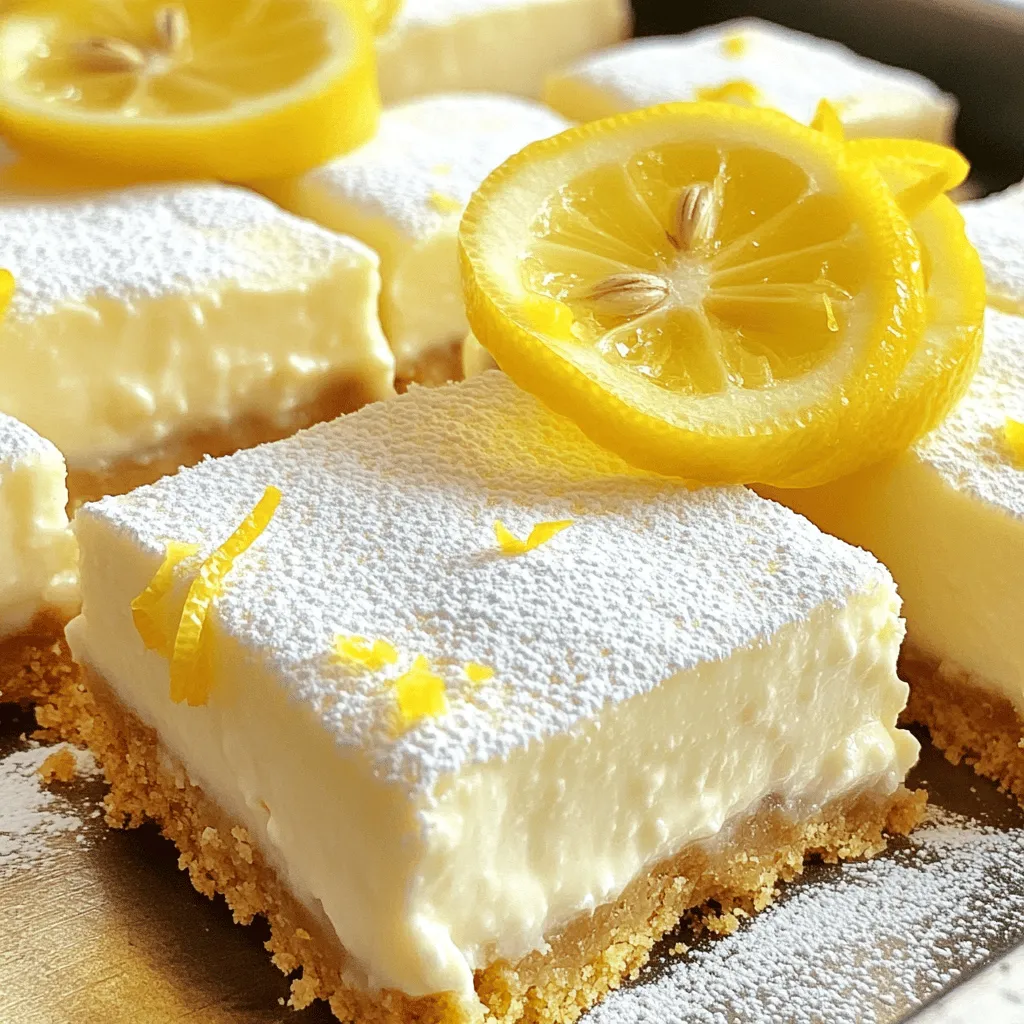
Lemon Cheesecake Squares Delightful and Easy Recipe
If you love fresh flavors and easy desserts, you’ll adore my Lemon Cheesecake Squares. This delightful recipe guarantees a creamy filling, a crumbly crust, and
- 2 ½ cups sweetened shredded coconut - 1 cup sweetened condensed milk - 1 teaspoon vanilla extract - ½ teaspoon almond extract - ¼ teaspoon salt - 1 cup fresh raspberries, roughly chopped - 1 cup dark chocolate chips (for dipping) To make Coconut Raspberry Macaroons, you need some simple and tasty ingredients. The star of the show is sweetened shredded coconut. It gives the macaroons a chewy texture and a rich flavor. Sweetened condensed milk acts as a binder and adds sweetness. You will also want vanilla extract for warmth and almond extract for a nutty hint. A tiny bit of salt balances the flavors well. Fresh raspberries add a fruity twist and a burst of color. Finally, dark chocolate chips are perfect for dipping. They add a rich, sweet finish to each macaroon. Gather these ingredients before you start. It makes the process smoother and more enjoyable. Each item plays a key role in creating these delightful treats. {{ingredient_image_1}} 1. Preheating the oven and preparing the baking sheet Start by preheating your oven to 325°F (163°C). This helps the macaroons bake evenly. Line a baking sheet with parchment paper. This will prevent the macaroons from sticking. 2. Mixing the base ingredients In a large mixing bowl, combine 2 ½ cups of sweetened shredded coconut, 1 cup of sweetened condensed milk, 1 teaspoon of vanilla extract, ½ teaspoon of almond extract, and ¼ teaspoon of salt. Mix until the ingredients are well blended. The mixture should feel sticky and thick. 3. Folding in the raspberries Next, gently fold in 1 cup of roughly chopped fresh raspberries. Take care not to crush the raspberries too much. You want to keep some of their shape for texture and flavor. 1. Shaping the macaroons Using a tablespoon, scoop out portions of the mixture. Shape them into small mounds and place them on the prepared baking sheet. Make sure to space them about 1 inch apart. This allows them to expand as they bake. 2. Baking time and checking doneness Bake the macaroons in the preheated oven for 15-18 minutes. Keep an eye on them. They are done when the edges turn golden brown. Once baked, remove them from the oven and let them cool on the baking sheet for about 5 minutes. Then, transfer them to a wire rack to cool completely. 1. Melting the chocolate While the macaroons cool, melt 1 cup of dark chocolate chips. You can do this in a heatproof bowl over a pot of simmering water or in the microwave. If using the microwave, melt in 30-second intervals, stirring in between until smooth. 2. Dipping and decorating macaroons Once the chocolate is melted, dip the bottom of each macaroon into the chocolate. Allow any excess chocolate to drip off before placing them back on the wire rack. For an extra touch, drizzle any remaining melted chocolate over the tops of the macaroons. Let the chocolate set at room temperature or refrigerate for a faster result. To ensure the perfect macaroon texture, follow these steps: - Use fresh, sweetened shredded coconut. This helps keep your macaroons moist and flavorful. - Mix the ingredients gently. Over-mixing can break down the raspberries, making the mixture too wet. - When shaping the macaroons, use a tablespoon for even sizes. This helps them bake evenly. For timing and temperature, preheat your oven to 325°F (163°C). Bake your macaroons for 15-18 minutes. Watch for golden edges. They should be firm to the touch but still soft inside. The best ways to serve and present macaroons include: - Place them on a decorative platter. A colorful presentation makes them more inviting. - Drizzle melted chocolate on top for an elegant touch. This adds flavor and visual appeal. - Pair them with fresh fruit or whipped cream for a delightful dessert. If you face issues with your macaroons, here are some tips: - Handling broken macaroons: If they break, use a little melted chocolate to stick the pieces back together. This works like glue. - Fixing too-soft or too-dry textures: If they are too soft, bake them a bit longer. For dry macaroons, try adding a little more sweetened condensed milk next time. This keeps them moist. Pro Tips Use Fresh Raspberries: For the best flavor, opt for fresh raspberries instead of frozen. They add a vibrant taste and texture to the macaroons. Chill the Chocolate: After dipping the macaroons in chocolate, place them in the refrigerator for a few minutes to help the chocolate set quickly and create a nice finish. Customize Your Flavors: Feel free to experiment with different extracts like coconut or lemon to give your macaroons a unique twist! Storage Tips: Store any leftover macaroons in an airtight container at room temperature for up to a week, or refrigerate for longer freshness. {{image_2}} You can make your Coconut Raspberry Macaroons even more fun! Try adding different extracts. Instead of vanilla, use coconut extract for a deeper coconut flavor. Orange extract gives a bright twist that pairs well with raspberries. You can also mix in nuts or other fruits. Chopped almonds or pecans add a nice crunch. Dried fruits like apricots or cranberries can give a chewy texture. Experimenting with flavors keeps things exciting! When it comes to chocolate, you have many options. White chocolate gives a sweeter taste and a nice contrast to the tart raspberries. Milk chocolate is another great choice for a creamier flavor. You can also drizzle macaroons with caramel or other sauces. Caramel adds a rich sweetness that complements the coconut. Try a berry sauce for a fruity burst. These variations make your macaroons even more delightful! To keep your coconut raspberry macaroons fresh, store them in an airtight container. Place parchment paper between layers to prevent sticking. They stay best at room temperature for about three days. If you want to keep them longer, store them in the fridge for up to a week. Use a glass or plastic container with a tight lid. Avoid metal, as it can affect the taste. Make sure the container is clean and dry to help keep moisture out. You can freeze your macaroons if you want to save some for later. First, let them cool completely. Then, place them on a baking sheet in a single layer. Freeze them for about an hour. After that, transfer them to a freezer-safe bag or container. They can last for up to three months in the freezer. To defrost, move the macaroons to the fridge overnight. For a quicker method, let them sit at room temperature for about 30 minutes. After freezing, they may lose some texture. To maintain the best bite, eat them within a week after defrosting. What is the best way to prevent macaroons from sticking? To stop macaroons from sticking, always line your baking sheet with parchment paper. This creates a non-stick surface. You can also lightly spray the parchment with cooking spray for extra protection. Once baked, let them cool before moving. Can I use unsweetened coconut instead? You can use unsweetened coconut, but your macaroons may taste less sweet. Sweetened coconut adds flavor and moisture. If you choose unsweetened, add a bit more sugar to the condensed milk. This helps balance the flavors. Each macaroon has about 120 calories. They are rich in carbohydrates, fats, and sugars. Here’s a quick breakdown per serving: - Calories: 120 - Total Fat: 5g - Saturated Fat: 3g - Carbohydrates: 18g - Sugars: 12g - Protein: 1g These numbers can vary based on your chosen ingredients, especially if you change the chocolate used. You can swap ingredients to fit your taste. Here are some ideas: - Condensed milk: Use coconut milk mixed with sugar to replace sweetened condensed milk. - Dark chocolate: Swap dark chocolate for milk or white chocolate for a sweeter taste. - Raspberries: Try other fruits like chopped strawberries or dried cranberries for a twist. These substitutions can bring new flavors to your macaroons while keeping them delicious! In this post, we explored how to make delicious macaroons with sweet coconut and fresh raspberries. You learned about the key ingredients and their roles in the recipe. I walked you through each step, from prepping to baking and chocolate dipping. We also shared tips for perfect results and discussed variations to make them unique. Storing and freezing techniques help keep your treats fresh. Now, you’re ready to enjoy your homemade macaroons with friends and family! Happy baking!
Coconut Raspberry Macaroons Irresistible Sweet Treat
Are you ready to indulge in a delightful treat? These Coconut Raspberry Macaroons are a sweet escape you can make at home. With just a
To make a delicious Apple Crisp Coffee Cake, you'll need a mix of simple ingredients. Here’s what you'll gather: - 2 cups all-purpose flour - 1 cup granulated sugar - 1 tablespoon baking powder - 1/2 teaspoon salt - 1 teaspoon ground cinnamon - 1/2 cup unsalted butter, softened to room temperature - 2 large eggs, at room temperature - 1 cup milk, preferably whole - 2 cups diced apples (Granny Smith or Honeycrisp work best) - 1 tablespoon fresh lemon juice - 1/2 cup packed brown sugar - 1/2 cup rolled oats - 1/4 cup chopped nuts (walnuts or pecans are tasty) - 1 teaspoon pure vanilla extract These ingredients come together to create a cake that is sweet and comforting. The apples add a nice, juicy texture. The oats and nuts in the topping give it that crisp finish. I love using Granny Smith apples for their tartness, which balances the sweetness. You can find the full recipe [here]. - Set oven temperature to 350°F (175°C) - Grease a 9x13-inch baking dish First, we need to get our oven ready. Preheat it to 350°F (175°C). This step is key for even baking. Next, grab a 9x13-inch baking dish. Grease it lightly with butter or non-stick spray. This helps the cake come out easily later. - Whisk together flour, sugar, baking powder, salt, and cinnamon In a large bowl, gather your dry ingredients. Whisk together 2 cups of all-purpose flour, 1 cup of granulated sugar, 1 tablespoon of baking powder, 1/2 teaspoon of salt, and 1 teaspoon of cinnamon. Mix them well until there are no lumps. This ensures a nice, even texture in the cake. - Cream softened butter until fluffy - Add eggs, milk, and vanilla; mix until combined In another bowl, take 1/2 cup of softened butter. Cream it with a mixer until it’s light and fluffy. This should take just a few minutes. Next, add in 2 large eggs, 1 cup of milk, and 1 teaspoon of pure vanilla extract. Mix this together until well combined. The batter should be smooth and creamy. - Gradually add wet mixture to dry ingredients; stir gently Now, it’s time to bring everything together. Gradually add your wet mixture to the dry ingredients. Use a spatula to stir gently. Be careful not to overmix; it's okay if there are a few lumps. This keeps the cake soft and tender. - Toss diced apples with lemon juice - Layer half of the batter, sprinkle topping, and add remaining batter Take 2 cups of diced apples and toss them with 1 tablespoon of fresh lemon juice. This stops the apples from browning. Gently fold the apple mixture into your batter. Now, pour half of the batter into the greased baking dish. Spread it evenly. Next, sprinkle half of your topping. This is made of brown sugar, rolled oats, and chopped nuts. Then, pour the remaining batter over the topping and smooth it out. - Bake for 40-45 minutes and cool before serving Place the baking dish in your preheated oven. Bake for 40-45 minutes. The cake will be ready when a toothpick inserted in the center comes out clean or with a few moist crumbs. Once baked, let it cool in the dish for at least 15 minutes before slicing. This cooling time helps the cake set and makes it easier to cut. For the full recipe, check out the complete instructions. - Avoid overmixing to ensure a tender crumb. - Use fresh, tart apples for the best flavor. When you mix your ingredients, do it gently. Overmixing can make the cake tough. You want a light and fluffy texture. Choose apples that are crisp and tart. Granny Smith and Honeycrisp are my favorites. Their flavor really shines in this cake. - Dust with powdered sugar before serving. - Drizzle with a simple glaze for added sweetness. When you are ready to serve, dust the top with powdered sugar. This adds a nice touch. You can also make a glaze. Just mix powdered sugar with a little milk. Drizzle it over the warm cake for extra sweetness. - Pair with coffee or tea. - Serve alongside vanilla ice cream for dessert. Enjoy this cake with a cup of coffee or tea. The flavors blend perfectly. For a dessert twist, serve it with a scoop of vanilla ice cream. The warm cake and cold ice cream make a great combo. For the complete recipe, check out the [Full Recipe]. {{image_4}} You can make your apple crisp coffee cake even more exciting! Try adding spices like nutmeg or cloves. These spices bring warmth and depth to each bite. You can also switch up the nuts. Instead of walnuts or pecans, use almonds or hazelnuts for a different crunch. If you need a gluten-free option, just substitute gluten-free flour in the recipe. This change keeps the cake tasty while meeting dietary needs. For those who want a dairy-free version, use dairy-free butter and milk. This way, everyone can enjoy a slice of this delightful cake. You can change the flavors with the seasons. In the fall, add pumpkin puree to the batter. This gives a lovely autumn twist that warms the soul. In summer, swap the apples for fresh berries. The berries add a burst of sweetness and color, making it a perfect treat for warm days. For the full recipe, check out the details above! Keep your apple crisp coffee cake in an airtight container. It stays fresh at room temperature for up to 3 days. This way, you can enjoy a slice whenever you want. Just make sure the lid is on tight to keep it soft. Want to save some for later? Freeze slices in a freezer-safe bag. They will last for up to 3 months. Make sure to label the bag with the date. This helps you track how long it has been frozen. When you’re ready to eat, just take out a slice. To enjoy your coffee cake again, reheat it in the oven or microwave. For the best texture, warm it slowly. In the oven, set it to a low temperature, around 300°F (150°C), for about 10-15 minutes. If you use the microwave, heat it in short 15-second bursts. This keeps it moist and tasty. For the best flavor, I recommend using Granny Smith or Honeycrisp apples. Granny Smith apples give a nice tartness, while Honeycrisp adds sweetness. This balance makes every bite tasty. Yes, you can make this coffee cake a day before you serve it. Just bake and let it cool. When you’re ready, slice and serve. It tastes great even after a night in the fridge! You can check if the coffee cake is done by inserting a toothpick in the center. If it comes out clean or with a few moist crumbs, it’s ready to enjoy! Absolutely! You can add berries or peaches for a fruity twist. Mixing fruits can create new flavors and make your coffee cake even more delicious! Coffee cake is usually sweeter and often has a crumb topping. It pairs well with coffee, making it a perfect treat for brunch or an afternoon snack. Enjoy it with your favorite brew! For the complete recipe, check out the Full Recipe. This blog post covered how to make a delicious apple crisp coffee cake step by step. We explored the key ingredients, baking tips, and serving ideas. Don’t forget to try different flavors, like adding nuts or spices, to make it your own. Store leftovers properly so you can enjoy this treat later. This cake is more than a dessert; it's a way to share joy with friends. Bake it, taste it, and make it part of your favorite moments. Enjoy every bite!
Apple Crisp Coffee Cake Simple and Delicious Recipe
Are you ready to delight your taste buds? This Apple Crisp Coffee Cake is a perfect blend of sweet apples, warm spices, and a crumbly
To make the best blueberry yogurt, you need simple and fresh ingredients. Here’s what you will need: - 2 cups fresh blueberries - 2 cups plain Greek yogurt - 2 tablespoons honey (or substitute with maple syrup for a vegan option) - 1 teaspoon vanilla extract - Zest of 1 lemon - 1 tablespoon fresh lemon juice - A pinch of salt - 1/4 cup granola (optional, for topping) Fresh blueberries are key. They provide sweetness and a beautiful color. Choose firm, plump berries with a deep blue hue for the best flavor. Plain Greek yogurt gives a rich and creamy base. It also adds protein and probiotics, which are great for your gut health. Honey or maple syrup sweetens your yogurt. You can adjust the amount to fit your taste. Vanilla extract adds a warm note. Lemon zest and juice brighten the flavor. They balance the sweetness of the blueberries. A pinch of salt enhances all the tastes. Granola on top adds a nice crunch. It gives texture that pairs well with the creamy yogurt. Now you have all the ingredients ready for your delightful blueberry yogurt! Check out the Full Recipe for step-by-step instructions. 1. Blending the ingredients: Start by placing the fresh blueberries in a blender. Add honey or maple syrup, vanilla extract, lemon zest, lemon juice, and a pinch of salt. Blend on high until smooth. If you prefer some texture, pulse the mix until partially combined. This gives a nice balance of creaminess and fruit chunks. 2. Achieving desired texture: The perfect blend is smooth but not runny. You want it to be thick enough to hold its shape when mixed with yogurt. If it seems too thick, add a splash of water to thin it out slightly. 1. Folding the blueberry mixture into yogurt: In a large bowl, add the plain Greek yogurt. Gently fold in the blueberry mixture with a spatula. You want to combine them without over-mixing. This keeps the yogurt light and airy. 2. Tasting and adjusting sweetness: After mixing, taste the yogurt. If it needs more sweetness, add a bit more honey or maple syrup. Remember, the sweetness can vary based on your blueberries. Adjust to your liking for the best flavor. 1. Importance of chilling time: Spoon the blueberry yogurt into bowls or jars. Place them in the fridge for at least 30 minutes. Chilling helps the flavors blend and enhances the overall taste. It also makes the yogurt refreshing when served. 2. Serving suggestions for presentation: Before serving, stir the yogurt gently to keep it creamy. For a delightful crunch, top with granola. This adds texture and makes the dish visually appealing. You can also garnish with fresh blueberries and a sprinkle of lemon zest for a nice touch. When picking blueberries, look for deep blue color. They should feel firm when you hold them. Avoid berries that are wrinkled or have white spots. Fresh blueberries are usually in season from June to August. If you can, buy them from local farms. This gives you the best taste and supports the community. Greek yogurt is thicker and creamier than regular yogurt. It has more protein, which keeps you full. Regular yogurt is lighter and has a smoother texture. I prefer plain yogurt for this recipe. It helps the blueberry flavor shine without added sugar or flavors. Using plain yogurt also keeps it healthy. You can add fun flavors to your yogurt. Try mixing in a little cinnamon or nutmeg for warmth. A splash of almond extract brings a nice twist. Adding nuts or seeds gives your yogurt a satisfying crunch. Chopped almonds or walnuts work great. You can also use granola as a topping. It adds a nice texture and flavor contrast. {{image_4}} You can make this blueberry yogurt dairy-free by using coconut or almond yogurt. Both options provide a creamy base with unique flavors. Coconut yogurt adds a hint of coconut sweetness, while almond yogurt offers a mild taste. For a vegan version, consider alternative sweeteners like agave syrup or date syrup. These sweeteners are plant-based and work well in the recipe. They keep the yogurt sweet while being kind to your diet. Want to mix things up? You can add other fruits like strawberries or mango. These fruits pair well with blueberries and add brightness to the dish. Just chop them into small pieces before mixing in. You can also incorporate spices such as cinnamon or nutmeg. A dash of cinnamon gives warmth, while nutmeg adds a subtle nutty flavor. Both spices bring a new depth to the yogurt. Try making yogurt parfaits for a fun and colorful treat. Layer the blueberry yogurt with granola and fresh fruits in a glass. This not only looks great but also adds texture. Another option is to create smoothie bowls. Pour the yogurt into a bowl and top it with sliced fruits, nuts, and seeds. This makes for a healthy breakfast or snack that is both filling and tasty. To keep your blueberry yogurt fresh, store it in the fridge. Use an airtight container. This way, it stays tasty and safe to eat. Your yogurt will stay fresh for about 3 to 5 days. If you see any change in smell or texture, it’s best to toss it. You can freeze blueberry yogurt for later use. To do this, pour the yogurt into freezer-safe containers or ice cube trays. Leave some space in the container as yogurt expands when frozen. When you want to eat it, take it out and let it thaw in the fridge overnight. This keeps the flavor intact. You can also blend it again for a smooth texture. For the best taste, consume your blueberry yogurt within 5 days of making it. If you freeze it, enjoy it within 2 months. Always check for any signs of spoilage before eating. When in doubt, throw it out! Yes, you can use frozen blueberries. However, frozen blueberries will change the texture. They may make your yogurt a bit more watery. The flavor will still be sweet and fruity, but fresh blueberries offer a better taste. If using frozen, let them thaw a bit before blending. This helps keep the yogurt smooth. Your blueberry yogurt will stay fresh for about 5 days in the fridge. Store it in an airtight container to keep it tasting great. If you notice any changes in smell or color, it’s best to toss it. Always check before eating, just to be safe. You can use regular yogurt or plant-based yogurt. Regular yogurt is thinner, so your yogurt will be lighter. It may not have the same creaminess as Greek yogurt. Plant-based options like coconut yogurt work well too, but they may alter the flavor. Always choose plain varieties for the best taste. In this article, we explored how to create a tasty blueberry yogurt. We covered the key ingredients like fresh blueberries and Greek yogurt, along with clear steps for preparation. You learned tips for selecting the best blueberries and yogurt. We also shared variations to suit your taste. Remember, chilling your mixture is key for the best flavor. This delicious treat is easy to make, and it can fit any diet. Enjoy creating and sharing this healthy snack with others!
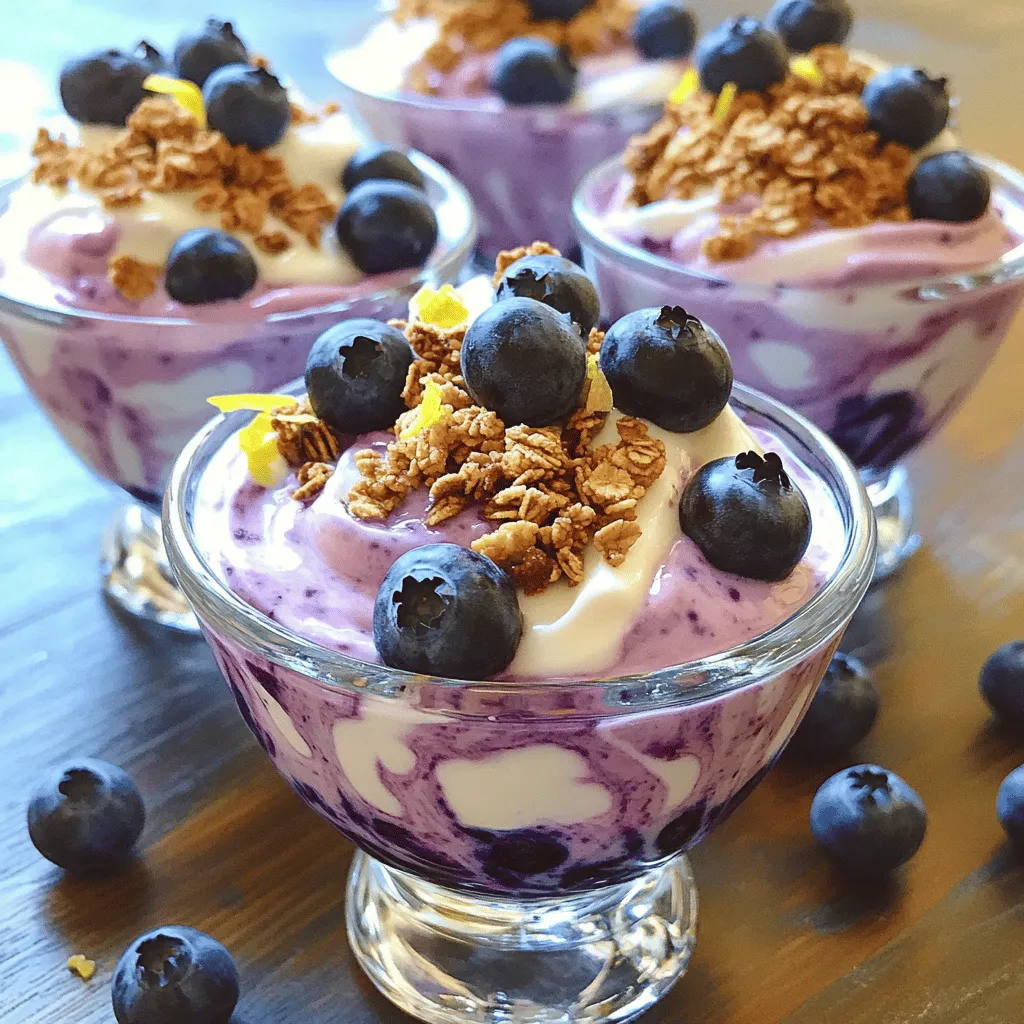
Best Blueberry Yogurt Recipe Fresh and Healthy Treat
Looking for a fresh and healthy treat? You’ve come to the right place! This best blueberry yogurt recipe combines vibrant, juicy blueberries with creamy yogurt,
This Snickers salad is a fun and tasty treat. It combines sweet and crunchy flavors. Here is what you need: - Fun-sized Snickers bars - Granny Smith apples - Mini marshmallows - Whipped cream - Creamy peanut butter - Unsalted peanuts - Fresh lemon juice - Optional pinch of salt Gather these ingredients for a tasty dessert. The Snickers bars bring chocolate and caramel flavors. The Granny Smith apples add a nice tartness. Mini marshmallows give a soft, sweet touch. Whipped cream makes it creamy and light. Creamy peanut butter adds depth and richness. Unsalted peanuts give a great crunch. Fresh lemon juice keeps the apples fresh and bright. A pinch of salt can enhance all the flavors. Once you have all the ingredients ready, you can start making this fun dish. Enjoy the mix of textures and tastes! To make Snickers salad, I start by gathering all my ingredients. You will need 6 fun-sized Snickers bars, 2 cups of diced Granny Smith apples, 1 cup of mini marshmallows, and 1 cup of whipped cream. Also, have creamy peanut butter, unsalted peanuts, fresh lemon juice, and a pinch of salt ready. This easy dessert comes together quickly, so let's dive in! 1. First, I take a large mixing bowl. I add the diced Granny Smith apples, fresh lemon juice, and a pinch of salt. I toss gently to coat the apples. This step helps keep the apples fresh and bright. 2. Next, I chop the Snickers bars into bite-sized pieces. I add them to the bowl, along with the mini marshmallows. I fold these ingredients together carefully. I want to keep everything intact and mixed well. 3. In another bowl, I mix the whipped cream and creamy peanut butter. I use a spatula to fold them together until smooth. This mixture adds a rich, creamy texture to the salad. 4. I drizzle the whipped cream mixture over the apple and Snickers mix. I toss everything gently until it’s well coated. This step is key for flavor and texture. 5. Finally, I sprinkle the chopped unsalted peanuts on top. I can fold them in for a crunch throughout or leave them on top for a nice finish. After mixing, I cover the salad with plastic wrap. I let it chill in the fridge for at least 30 minutes. This chill time lets the flavors blend together beautifully. When ready to serve, I scoop it into a clear glass bowl. This way, everyone can see those colorful layers. For a fun touch, I like to garnish with whole mini marshmallows and scattered peanuts. Enjoy this tasty treat! To make your Snickers salad pop, try adding a splash of vanilla extract. This little touch brings warmth and depth. You can also mix in a sprinkle of cinnamon or nutmeg for a cozy twist. These spices pair well with apples and chocolate. You can even swap regular peanuts for honey-roasted ones for a sweet crunch. The best apples for this salad are Granny Smith. Their tartness balances the sweetness of Snickers. You could also use Honeycrisp for a sweeter taste or Fuji for a juicy bite. Always pick apples that are fresh and firm. This ensures a nice crunch in every bite. If you want a lighter option, consider using Greek yogurt. It gives a nice tang and creaminess. For a vegan choice, try coconut whipped cream. It adds a subtle coconut flavor that works great with the other ingredients. If you prefer a longer-lasting option, use stabilized whipped cream. This keeps your salad fresh and firm for days, which is perfect for gatherings. For the full recipe, check out the earlier section! {{image_4}} You can switch out Snickers bars for other candy bars. Try Milky Way for a caramel twist. Reese’s makes a great peanut butter flavor. Use Twix for a fun crunchy layer. Each candy will change the taste but keep the fun. If you want a lighter salad, use Greek yogurt instead of whipped cream. This option adds protein and cuts calories. You can also swap out apples for pears for a sweeter touch. Use dark chocolate for a richer flavor. These changes make your dessert tasty and healthier. Adding seasonal fruits can brighten the salad. In spring, use strawberries for a fresh taste. Summer peaches add sweetness and juiciness. In the fall, consider using diced pears or even cranberries for tartness. These fruits mix well with the Snickers and add color to your dish. To keep your Snickers salad fresh, always store it in the fridge. Use an airtight container to seal in the flavor and moisture. This helps prevent any unwanted odors from other foods. If you have leftovers, make sure to cover the container tightly with plastic wrap or a lid. This step is key for keeping the salad crisp and tasty. Snickers salad can last in the fridge for about 3 to 5 days. After that, the ingredients may start to lose their texture and flavor. The apples can get mushy, and the whipped cream can separate. If you notice any changes in taste or smell, it's best to toss it out. Always check before serving! Freezing Snickers salad is not recommended. The apples will become mushy, and the whipped cream will not hold its shape. If you really want to save it, you can freeze the Snickers bars and peanuts separately. When you're ready to enjoy, mix fresh apples and whipped cream with the frozen ingredients. This way, you'll have a tasty treat without the texture issues. Snickers salad is a fun and sweet dessert. It mixes diced apples, Snickers bars, and marshmallows. The whipped cream ties everything together. This dish is creamy and crunchy. You get a mix of sweet and salty flavors. It’s perfect for parties or potlucks. Kids and adults both love it! Yes, you can make Snickers salad ahead of time. This dish tastes even better after sitting for a bit. I suggest making it a few hours before serving. Just store it in the fridge. This helps the flavors mix well. However, if you make it too early, the apples might brown. To keep apples fresh, use fresh lemon juice. When you cut the apples, toss them in lemon juice right away. This stops oxidation and keeps the apples crisp. You can also add a pinch of salt to help. I recommend using Granny Smith apples for the best taste. For the full recipe, check the section above! Snickers salad is a fun and tasty treat made with simple ingredients. We covered the recipe, mixing steps, and chilling tips. You can also try different flavors and fruits for a twist. Remember to store it right to keep it fresh. This salad is loved by many and can be made ahead of time. With the right care, you'll enjoy it longer. So go ahead, make this sweet dish and impress your friends or family!
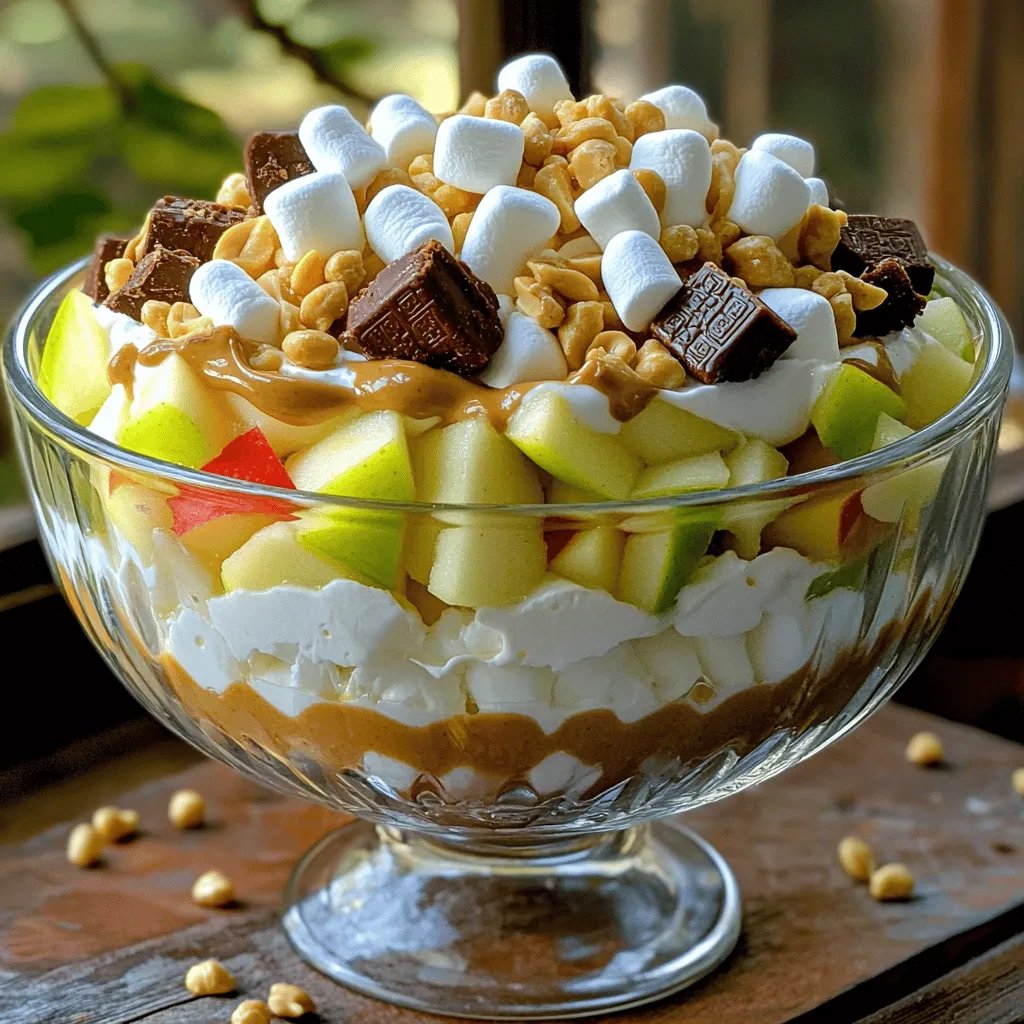
Snickers Salad Easy and Tasty Dessert Recipe
Are you ready to try a dessert that takes no time to prepare and tastes amazing? Snickers Salad is a fun and sweet treat that
To make chocolate covered cheesecake bites, you will need the following ingredients: - 1 cup cream cheese, softened - 1/2 cup powdered sugar - 1 teaspoon vanilla extract - 1/4 cup sour cream - 1/2 cup crushed graham crackers - 1/2 cup semisweet chocolate chips - 1 tablespoon coconut oil - Pinch of salt You can make your cheesecake bites even better with these toppings: - Cocoa powder - Crushed nuts - Sprinkles Get creative! You can mix and match these toppings based on your taste. If you don’t have some ingredients, here are some easy swaps: - Use Greek yogurt instead of sour cream for a tangy flavor. - Swap crushed cookies for graham crackers for a different taste. - Use dark chocolate chips if you prefer a richer flavor. These substitutions keep the recipe fun and flexible! {{ingredient_image_1}} To make the cheesecake mixture, you start with a mixing bowl. Add 1 cup of softened cream cheese. Then, mix in 1/2 cup of powdered sugar. This adds sweetness to the cheesecake. Next, pour in 1 teaspoon of vanilla extract for flavor. Finally, add 1/4 cup of sour cream. This makes the mixture creamy. Beat everything together until smooth and creamy. Once smooth, gently fold in 1/2 cup of crushed graham crackers. This adds crunch and flavor. Make sure the crackers are evenly mixed. This creates a tasty cheesecake base. Next, you form the cheesecake mixture into bites. Use a small cookie scoop or a spoon. Take a scoop of the mixture and roll it into a ball. Aim for about 1 inch in diameter. This size is perfect for popping in your mouth. Place the rolled balls on a baking sheet lined with parchment paper. This keeps them from sticking. Once done, freeze the balls for at least 30 minutes. Freezing helps them firm up and hold their shape. Now, it’s time to melt the chocolate. In a microwave-safe bowl, add 1/2 cup of semisweet chocolate chips and 1 tablespoon of coconut oil. The coconut oil helps the chocolate stay smooth. Microwave the bowl in 20-second intervals. Stir between each interval until smooth. Once melted, dip each cheesecake ball into the chocolate. Use a fork to lift it out, letting excess chocolate drip off. Return each ball to the parchment-lined baking sheet. While the chocolate is still wet, you can add toppings. Sprinkle cocoa powder, crushed nuts, or sprinkles on top. This adds flavor and fun. Finally, refrigerate the bites for at least 15 minutes. This helps the chocolate set. Enjoy these tasty bites chilled! To make a smooth and creamy cheesecake filling, start with softened cream cheese. Cold cream cheese creates lumps. Mix it well with powdered sugar and vanilla until it’s smooth. Use a hand mixer for the best results. I also add sour cream for a nice tang. This makes the mixture rich and creamy. Don’t rush this step. Take your time to blend well. The goal is a lump-free mix that tastes amazing. Melting chocolate can be tricky, but it’s key for a perfect dip. I use semisweet chocolate chips for a sweet flavor. To melt, combine the chips with coconut oil in a microwave-safe bowl. Heat in short bursts, stirring in between. This prevents burning. Once melted, dip each cheesecake ball fully. Use a fork to lift it out and let extra chocolate drip off. This keeps the bites neat and tasty. You can add toppings while the chocolate is still wet. This helps the toppings stick. After you make these bites, let them chill in the fridge for at least 15 minutes. This sets the chocolate and makes them firm. For storage, keep them in an airtight container in the fridge. They stay fresh for about a week. If you want to keep them longer, you can freeze them. Just make sure to separate layers with parchment paper. When serving, these bites are best chilled. They are perfect for parties or a sweet treat anytime! Pro Tips Chill the Mixture: For easier rolling, ensure the cheesecake mixture is well chilled before forming the bites. Quality Chocolate: Use high-quality semisweet chocolate for dipping to enhance the flavor of your bites. Experiment with Flavors: Add different extracts like almond or citrus zest to the cheesecake mixture for unique flavors. Storage Tips: Keep the cheesecake bites in an airtight container in the refrigerator for up to a week or freeze for longer storage. {{image_2}} You can play with the cheesecake filling to make it your own. Instead of plain, try adding different flavors. For a fruity twist, mix in 1/4 cup of fruit puree like strawberry or raspberry. You can also use lemon zest for a fresh, tangy taste. If you love chocolate, add cocoa powder to the cream cheese mixture. About 1/4 cup should work great. Experimenting with flavors can make each batch unique and fun! While semisweet chocolate is classic, you can try other coatings too. Milk chocolate adds a sweet and creamy touch. Dark chocolate will give a rich, bold flavor. If you enjoy white chocolate, it can be a sweet and smooth choice. You can also drizzle melted chocolate over the bites for a fancy look. Each chocolate type will change the taste and feel of your bites. Toppings can add a festive flair to your cheesecake bites. In fall, try crushed nuts like pecans or walnuts. They pair well with the creamy filling. For winter, sprinkle crushed candy canes for a minty crunch. In spring, use pastel sprinkles to brighten up the bites. In summer, fresh fruit pieces can add a nice touch and color. Seasonal toppings can make your treats exciting and appealing! You can freeze chocolate covered cheesecake bites if you want to save some for later. First, place them in a single layer on a baking sheet. Once frozen solid, transfer them to an airtight container. They can stay in the freezer for up to three months. Just remember to label the container with the date. If you plan to eat the bites soon, store them in the fridge. Place them in a covered container to keep them fresh. They will stay good for about a week. Keeping them chilled helps the chocolate hold its shape and remain tasty. Chocolate covered cheesecake bites have a decent shelf life. In the fridge, they last for up to seven days. However, if you freeze them, they can last for about three months. Just ensure you check for any off smells or changes in texture before eating. Always use clean utensils to avoid contamination. You can use blended silken tofu or cashew cream as a substitute. Both provide a creamy texture. For silken tofu, blend until smooth. For cashew cream, soak cashews in water, then blend with a bit of lemon juice. Add powdered sugar and vanilla extract for sweetness. This keeps the cheesecake bites rich and creamy without dairy. Yes, white chocolate works well. It offers a sweet and creamy flavor. Just melt it the same way as semisweet chocolate. Remember, white chocolate lacks cocoa flavor. So, you might want to add some vanilla or almond extract to enhance taste. It creates a unique twist on the classic chocolate-covered cheesecake bites. These cheesecake bites shine at any gathering. They fit well at parties, birthdays, or holidays. Their bite-sized form makes them easy to serve. You can also bring them to potlucks or picnics. Everyone loves a sweet treat that’s easy to grab. Plus, they look great on any dessert table! In this blog post, we covered how to create delicious chocolate-covered cheesecake bites. We started with the ingredients, detailing options and swaps. Then, I shared step-by-step instructions for making the bites, from mixing to dipping in chocolate. I offered tips for a smooth filling and great storage advice. We also explored fun variations and answered common questions. These bites are tasty and fun to make. Enjoy experimenting with flavors and toppings. You’ll impress everyone with your treats!
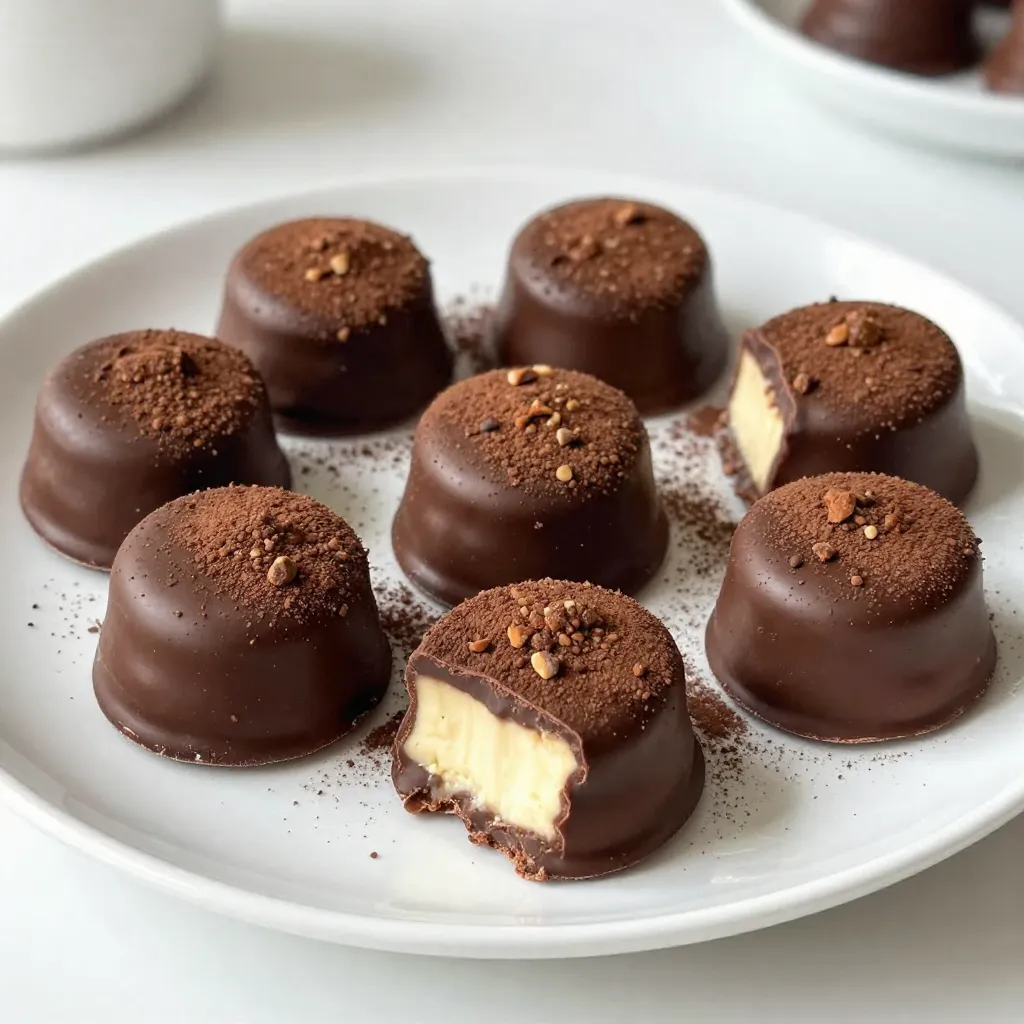
Chocolate Covered Cheesecake Bites Easy and Delicious
Who doesn’t love a sweet treat that’s easy to make? Chocolate covered cheesecake bites combine creamy cheesecake goodness with rich chocolate. In this post, I’ll
Here’s what you need to make these tasty s'mores cookies. - 1 cup unsalted butter, softened - 3/4 cup granulated sugar - 3/4 cup packed brown sugar - 1 large egg, at room temperature - 1 teaspoon pure vanilla extract - 2 cups all-purpose flour, sifted - 1 teaspoon baking soda - 1/2 teaspoon salt - 1 cup mini marshmallows - 1 cup graham cracker crumbs - 1 cup milk chocolate chips - Additional optional garnishes Each ingredient plays a key role in making these cookies a delight. The butter gives a rich flavor and soft texture. The sugars add sweetness and help with browning. The egg binds everything together and keeps the cookies moist. Using mini marshmallows gives you that gooey s'mores feel. The graham cracker crumbs add a nice crunch and flavor. Finally, the milk chocolate chips provide that classic chocolatey taste. Don't forget to check the [Full Recipe] for detailed instructions! Enjoy the process of mixing these ingredients to create a treat everyone loves. 1. Preheat your oven to 350°F (175°C). Line a baking sheet with parchment paper. 2. In a large bowl, cream together 1 cup of softened butter, 3/4 cup of granulated sugar, and 3/4 cup of packed brown sugar. Mix until light and fluffy. 3. Add in 1 large egg and 1 teaspoon of pure vanilla extract. Blend until smooth. 4. In another bowl, mix 2 cups of sifted all-purpose flour, 1 teaspoon of baking soda, and 1/2 teaspoon of salt. This helps ensure no lumps. 5. Gradually add the dry mix to the wet mix. Stir on low speed until just combined. 1. Gently fold in 1 cup of graham cracker crumbs, 1 cup of mini marshmallows, and 1 cup of milk chocolate chips. Make sure everything is evenly mixed. 2. Use a cookie scoop or tablespoon to drop about 2 tablespoons of dough onto the baking sheet. Space them about 2 inches apart. 3. Bake for 10-12 minutes until the edges are golden. The centers should be slightly soft. 1. Allow the cookies to cool on the baking sheet for 5 minutes. This helps them set. 2. Transfer them to a wire rack to cool completely. For the full recipe, check out the detailed instructions above! Enjoy these delicious cookies with a glass of cold milk. To get the best texture in your cookies, do not overmix the dough. When you combine the wet and dry ingredients, mix just until you see no flour. Overmixing can make your cookies tough instead of soft. If you want chewy cookies, bake them a little less. Keep the centers soft. For crisp cookies, bake until the edges are golden brown. Where you place your baking sheet in the oven matters. Put it in the center of the oven for even baking. This helps your cookies rise and bake properly. I suggest using an oven thermometer to check the temperature. This tool ensures your oven is at the right heat. An accurate temperature leads to perfect cookies every time. Want to make your cookies even better? Try drizzling melted chocolate over the top. It adds a touch of luxury. You can also add nuts like pecans or walnuts for crunch. If you like spice, sprinkle in some cinnamon or a pinch of sea salt. These small changes can create new flavors and textures, making each bite amazing. For the full recipe, check out the details above. {{image_4}} - Peanut Butter S'mores Cookies For a twist, add peanut butter. Mix 1/2 cup of creamy peanut butter into the butter and sugars. This makes your cookies rich and nutty. They still have all the classic s'mores taste. - Chocolate Chip S'mores Cookies Want extra chocolate? Use chocolate chips instead of milk chocolate. Mix in 1 cup of semi-sweet or dark chocolate chips. This gives you a deeper chocolate flavor and a chewy texture. - Gluten-free options using alternative flour You can make these cookies gluten-free. Swap all-purpose flour with a gluten-free blend. Just make sure it has xanthan gum for structure. Your cookies will still turn out soft and tasty. - Vegan adaptations for egg and butter substitutions To make these cookies vegan, use 1/4 cup of applesauce instead of the egg. For butter, use 1 cup of coconut oil or vegan butter. This way, you can enjoy s'mores cookies without any animal products! - Holiday-themed variations (e.g., pumpkin spice) Add 1 teaspoon of pumpkin spice to your cookie dough during fall. This adds a warm, cozy flavor that is perfect for the season. Decorate with mini pumpkins for a fun touch! - Summer s'mores cookies using fresh fruits In summer, mix in fresh fruits like strawberries or bananas. They add a juicy burst and make the cookies feel light. This way, you can enjoy the taste of s'mores all year round! For the full recipe, check out the instructions above. To keep your S'mores cookies fresh, use airtight containers. Glass or plastic works well. Layer the cookies with parchment paper to avoid sticking. Store them at room temperature. They will stay good for about a week. You can also put them in the fridge for longer freshness, up to two weeks. Freezing cookie dough is easy. First, scoop the dough into balls. Place them on a baking sheet and freeze until firm. Then, transfer the frozen balls into a zip-top bag. Be sure to label the bag with the date. You can freeze the dough for up to three months. When you're ready to bake, thaw the dough overnight in the fridge. Bake them straight from the fridge for fresh cookies! To enjoy warm cookies again, use your oven or microwave. For the oven, preheat it to 350°F. Place the cookies on a baking sheet for 5-10 minutes. This helps them regain their soft texture. In the microwave, heat one cookie for about 10-15 seconds. This method is quick and will warm the cookie nicely. Enjoy them with a glass of cold milk for the best experience! Can I use different types of chocolate? Yes, you can mix it up! Use dark chocolate or even white chocolate if you like. Each type gives a unique taste. Feel free to experiment with your favorites. How can I make these cookies gluten-free? Use a gluten-free flour blend instead of all-purpose flour. Ensure the graham cracker crumbs are also gluten-free. This way, everyone can enjoy these tasty cookies. What should I do if my dough is too sticky? If your dough feels sticky, chill it in the fridge for about 30 minutes. This makes it easier to work with. You can also add a bit more flour to help with the texture. How long do these cookies last? These cookies stay fresh for about a week if stored in an airtight container. You can also freeze them for later enjoyment. Can I make them into a cookie cake? Yes! Spread the dough in a cake pan instead of scooping cookies. Bake it for about 20-25 minutes. You’ll have a fun cookie cake to share! Why did my cookies spread too much? If your cookies spread too much, your butter might be too warm. Make sure to use softened butter, not melted. Also, check if you measured your flour correctly. How do I know when cookies are done baking? Look for a golden edge and a soft center. The cookies will continue to cook on the tray after taking them out. For chewy cookies, don’t bake them too long. This blog post covered all you need for making delicious S'mores cookies. From ingredient details to baking tips, you learned how to create the right texture. I shared fun variations, dietary changes, and ways to store cookies. Remember, you can get creative with flavors and add extras to suit your taste. Enjoy your baking journey, and may your cookies always turn out perfect! Happy baking!
S’mores Cookies Recipe Irresistible and Easy Treat
If you’re craving a sweet treat that combines nostalgia with ease, you’re in for a treat! My S’mores Cookies Recipe brings together gooey marshmallows, rich
- 3 ripe bananas - 1 tablespoon ground cinnamon - 2 tablespoons brown sugar (or coconut sugar) - 1 teaspoon fresh lemon juice - A pinch of salt - Tips for selecting ripe bananas: Choose bananas that are yellow with a few brown spots. This means they are sweet and ready to use. Avoid bananas that are too green, as they won’t taste as good when cooked. - Alternatives for sugar: If you want a healthier option, use coconut sugar instead of brown sugar. It has a lower glycemic index and adds a unique taste. You can also try honey or maple syrup if you prefer liquid sweeteners. To make the banana chips, start by preparing the bananas. Peel 3 ripe bananas and slice them thinly into rounds. Aim for about 1/8 inch thickness. This thickness helps the chips crisp up nicely. A sharp knife or a mandoline slicer works best for even slices. Consistent thickness allows for even cooking, so take your time with this step. Next, add lemon juice to the banana slices. Toss them gently in a large bowl with 1 teaspoon of fresh lemon juice. This step is key because it prevents the bananas from turning brown and adds a nice flavor to the final snack. Now it’s time to cook the banana chips. First, preheat your air fryer to 350°F (175°C). Allow it to preheat for about 3-5 minutes. This ensures your chips will cook evenly and get that perfect crunch. Once preheated, arrange the banana slices in a single layer in the air fryer basket. If you find your air fryer is small, work in batches. Overcrowding may lead to uneven cooking. Cook the banana slices for 8-10 minutes. Be sure to gently shake the basket halfway through to help them cook evenly. Keep a close eye on them, as air fryer models can vary, and you don’t want them to burn. After cooking, carefully remove the banana chips from the air fryer. They will be golden and crispy. Allow them to cool on a wire rack. As they cool, they will become even crunchier, enhancing that delightful crunch we all love. For serving, arrange the banana chips on a plate. You can enjoy them as is or pair them with a tasty dip. Displaying them nicely makes them even more appealing. For those who want to explore, check out the Full Recipe for more tips and ideas. To get the best results with your banana chips, follow these air fryer tips: - Ideal Settings: Set your air fryer to 350°F (175°C). This temperature cooks the bananas evenly. - Avoid Burning: Keep a close eye on the chips. Shake the basket halfway through to ensure they cook evenly. If they start to darken too much, reduce the time slightly. You can make your banana chips even more fun with these flavor ideas: - Optional Spices: Try adding nutmeg or a dash of vanilla extract to the cinnamon-sugar mix for a unique twist. - Dipping Sauces: Pair your chips with yogurt, chocolate sauce, or nut butter for a tasty dip. Sometimes, you might face issues while making banana chips. Here are common problems and fixes: - Soggy Chips: If your chips are soft, they might need more time in the fryer. Cook them longer while checking frequently. - Uneven Cooking: If some chips are crisp and others are not, slice your bananas to the same thickness. This helps them cook evenly. {{image_4}} You can get creative with your banana chips! Adding cocoa powder gives them a rich, chocolatey flavor. Just mix in about one tablespoon of cocoa powder with your cinnamon-sugar mix. It adds a fun twist! You can also switch up sweeteners. Instead of brown sugar, try honey, maple syrup, or stevia. Each choice will change the taste slightly, so experiment to find your favorite. If you're looking for healthier options, consider using coconut sugar instead of brown sugar. Coconut sugar has a lower glycemic index. It is a great choice for a sweet treat. You can also try other fruits. Apples or pears work well in this recipe. Slice them thinly and follow the same steps. It’s a fun way to mix up your snacks! To keep your banana chips fresh, place them in an airtight container. This method stops air from making them soft. You can also use a zip-top bag, but make sure to squeeze out all the air. Store the chips in a cool, dry place. Avoid direct sunlight, as it can affect their crunch. These banana chips last about a week when stored properly. If you notice any signs of moisture, discard them. The texture is best when they are fresh, so enjoy them quickly! If your banana chips lose their crunch, don’t worry! You can easily revive them. Preheat your air fryer to 350°F (175°C). Place the chips in the basket in a single layer. Heat them for 2-3 minutes. This quick step brings back their crispy texture. Just be careful not to overheat them, as they can burn quickly. To make banana chips in an air fryer, start with ripe bananas. Peel and slice them thinly, about 1/8 inch thick. Toss the slices with lemon juice to prevent browning. In a bowl, mix cinnamon, brown sugar, and salt. Coat the banana slices with this mixture. Preheat your air fryer to 350°F. Place the slices in a single layer in the basket. Cook for 8-10 minutes, shaking halfway through. Let them cool on a wire rack for extra crunch. Using unripe bananas is not ideal for this recipe. They are harder and less sweet. Ripe bananas have more flavor and sweetness. If you only have unripe bananas, you can try them, but the taste will differ. Banana chips offer several nutritional benefits: - They are a good source of potassium. - They provide fiber, which aids digestion. - They contain vitamins B6 and C, important for your health. - Cinnamon adds antioxidants and may improve blood sugar levels. These benefits make banana chips a tasty and healthy snack. After making cinnamon-sugar air fryer banana chips, they can last up to a week. Store them in an airtight container to keep them fresh. If they lose crunch, you can reheat them in the air fryer for a few minutes. Yes, you can make banana chips without sugar! Use coconut sugar, honey, or maple syrup for sweetness. You can also skip the sweetener and focus on the cinnamon flavor. Adjust to your taste, and enjoy a healthier snack! This guide covered everything you need to make delicious banana chips in an air fryer. We discussed the best ingredients, preparation steps, and cooking tips to ensure perfect snacks. Remember to choose ripe bananas and explore flavor variations to suit your taste. With proper storage, your banana chips will stay fresh. Enjoy your homemade treat, knowing you can satisfy cravings while keeping it simple and healthy. Happy cooking!
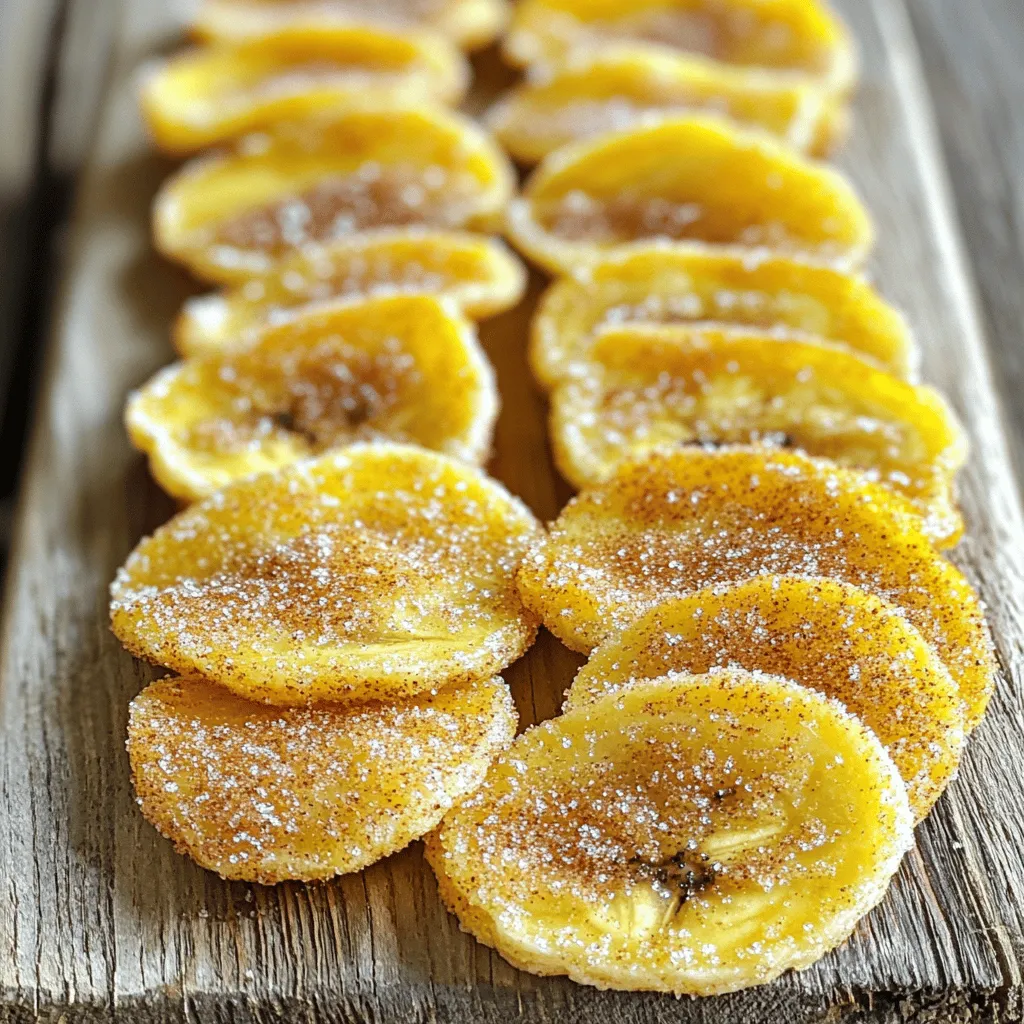
Cinnamon-Sugar Air Fryer Banana Chips Crunchy Snack
If you crave a tasty snack that’s crunchy and sweet, you’ve clicked on the right post! Cinnamon-Sugar Air Fryer Banana Chips are simple to make
- 1 cup fresh strawberries, diced - 1/2 cup unsweetened cocoa powder - 1 cup all-purpose flour - 1 cup granulated sugar - 1/2 cup unsalted butter, melted - 2 large eggs - 1 teaspoon vanilla extract - 1/4 teaspoon salt - 1/2 teaspoon baking powder - 1/2 cup dark chocolate chips - Powdered sugar for dusting (optional) For this strawberry brownies recipe, gather these simple ingredients. Fresh strawberries add a burst of flavor. The cocoa powder and sugar create the rich base. Butter makes them moist, while the eggs bind everything together. Dark chocolate chips bring extra delight in every bite. You can easily find these ingredients at your local store. Fresh strawberries are key, so choose bright red ones. The quality of cocoa powder matters too; pick a brand you trust. This recipe is straightforward, making it perfect for new cooks or busy families. Remember, you can always check out the Full Recipe for more details on how to make these delicious brownies! - Preheat oven to 350°F (175°C) - Grease or line an 8x8 inch baking pan Start by getting your oven ready. Preheating ensures even baking. Greasing or lining the pan helps the brownies come out easily later. - Combine butter and sugar - Incorporate eggs and vanilla extract In a large bowl, mix melted butter and sugar. Whisk them until smooth. Then, add eggs one at a time. Stir in vanilla extract for flavor. - Sift cocoa powder, flour, baking powder, and salt - Gradually mix with wet ingredients In another bowl, sift cocoa powder, flour, baking powder, and salt. This step makes your brownies lighter. Slowly add this to the wet mix, stirring just until combined. - Fold in diced strawberries and dark chocolate chips Now it's time for the fun part! Gently fold in diced strawberries and dark chocolate chips. Make sure they are spread out evenly in the batter. - Pour batter into the prepared pan - Bake for 25-30 minutes and check for doneness Pour your brownie mix into the pan. Spread it out evenly. Bake for 25-30 minutes. To check if they are done, use a toothpick. It should come out with a few moist crumbs. - Allow brownies to cool - Cut into squares and dust with powdered sugar (optional) After baking, let the brownies cool in the pan for 10 minutes. Carefully lift them out and let them cool fully. Once cool, cut them into squares. You can dust with powdered sugar for a nice touch. Enjoy your tasty treat! For the complete details, check the Full Recipe. To make the best strawberry brownies, accurate measurements are key. Use a kitchen scale for the most precise results. This will help you avoid too much flour or sugar, which can ruin your brownies. To check if your brownies are done, insert a toothpick in the center. If it comes out with a few moist crumbs, they are ready. If it’s wet, give them a few more minutes. Remember, they will continue to cook a bit after you take them out. For rich flavor, always use high-quality cocoa powder and chocolate. This small change makes a big difference in taste. If you want a denser brownie, use less flour. For a lighter texture, whip the batter a little longer. You can also play with the mix-ins. Try adding nuts for crunch or different fruits for variety. Each tweak can make the brownies your own. Serving your strawberry brownies can be fun! You can cut them into neat squares or fun shapes with cookie cutters. Arrange them on a colorful plate for a pop of color. Dust the top with powdered sugar for a sweet finish. You can also add a few fresh strawberries on the side for a beautiful touch. For dessert tables, stack the brownies in a tiered display. This makes them look more inviting and delicious. {{image_4}} For those with gluten or dairy issues, you can still enjoy these brownies. Use gluten-free flour instead of all-purpose flour. Almond or coconut flour works well too. For a dairy-free option, substitute unsalted butter with coconut oil or a plant-based butter. Choose dairy-free chocolate chips for the best taste without dairy. Want to mix things up? You can add nuts like walnuts or pecans for crunch. Chopped nuts boost flavor and texture. You can also swap strawberries for other fruits. Raspberries or blueberries add a unique twist. If you want more flavor, try vanilla or almond extract. A pinch of cinnamon can also enhance the taste. Serving these brownies is fun! Pair them with vanilla ice cream or whipped cream for a delightful treat. Fresh fruit like sliced strawberries or a berry sauce makes a lovely topping. You can even drizzle chocolate sauce over the brownies for extra sweetness. These options make your dessert feel special and delicious. To keep your brownies fresh, store them in an airtight container. This helps prevent them from drying out. If you have leftovers, let them cool completely before packing. You can layer them with parchment paper to avoid sticking. A good choice for storage is a glass or plastic container with a tight seal. Freezing brownies is easy and great for long-term storage. First, wrap individual brownies in plastic wrap. Then, place them in a freezer-safe bag or container. Make sure to remove as much air as possible. To thaw, take them out and place them in the fridge overnight. For a warm treat, microwave them for about 10-15 seconds. To reheat brownies, use the microwave or the oven. If using the microwave, heat for 10 seconds at a time. Check often to avoid overcooking. For the oven, preheat to 350°F (175°C). Place brownies on a baking tray and warm for about 5-10 minutes. Serve warm with a scoop of ice cream or fresh strawberries for a delicious treat. Yes, you can use frozen strawberries. When using them, thaw and drain them first. This helps remove excess moisture. If you don’t, your brownies may turn out too wet. Cut the strawberries into small pieces before folding them into the batter. This will help spread their flavor evenly throughout the brownies. To check if your brownies are done, look for a few signs. The edges will start to pull away from the pan. When you insert a toothpick into the center, it should come out with a few moist crumbs attached. If it comes out clean, the brownies may be overbaked. Keep an eye on them after 25 minutes. If you need an egg substitute, there are a few options. You can use unsweetened applesauce, with 1/4 cup for each egg. Mashed bananas also work well, using 1/4 cup per egg. For a more neutral taste, try using flaxseed meal mixed with water. Combine 1 tablespoon of flaxseed meal with 2.5 tablespoons of water for each egg. To cut your brownies neatly, let them cool completely. Use a sharp knife for clean edges. Wipe the knife with a damp cloth between cuts. This helps keep your cuts crisp. For a fun twist, you can use cookie cutters to make fun shapes. Dust with powdered sugar for a beautiful finish. This blog post covered all you need to know to make delicious brownies. We started with the ingredients, including flour, strawberries, and chocolate. Next, I shared step-by-step instructions for mixing, baking, and serving. I provided tips to perfect your brownies and different variations for taste and dietary needs. Finally, we discussed storage options and how to reheat leftovers. Enjoy making these brownies, and remember to experiment with flavors. Happy baking!
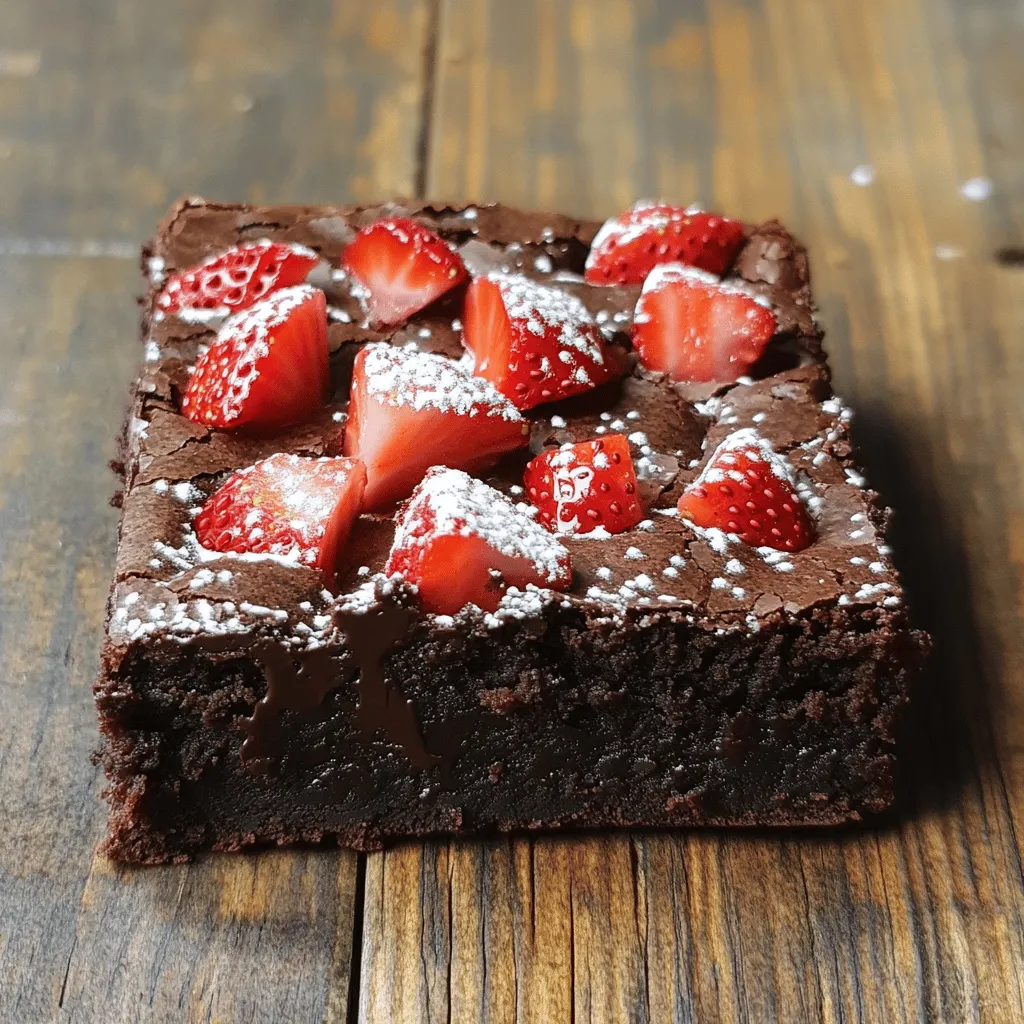
Strawberry Brownies Recipe Deliciously Simple Dessert
Looking for a sweet treat that’s easy to make? You’ve found it! This Strawberry Brownies Recipe offers a fun twist on classic brownies, blending rich
- 1 cup cream cheese, softened at room temperature - 1/2 cup creamy Greek yogurt - 1/4 cup powdered sugar, sifted - 2 cups assorted fresh fruits (such as strawberries, blueberries, kiwi, and pineapple, all diced) In this recipe, cream cheese gives a rich base. Greek yogurt adds a nice tang. The powdered sugar sweetens it just right. Choose fresh fruits you love for a colorful mix. - 1/4 cup crushed graham crackers, plus extra for garnish - Fresh mint leaves for an aromatic garnish Graham crackers add a crunchy element. They also enhance the cheesecake flavor. Fresh mint leaves not only look nice but also smell great. - Mixing bowls - Hand mixer - Spatula and serving bowls You need a mixing bowl for the cheesecake mix. A hand mixer helps blend everything smoothly. Use a spatula to fold in the fruits gently. Finally, have serving bowls ready for a beautiful presentation. Check out the Full Recipe as you gather your ingredients! 1. Start with 1 cup of cream cheese. Place it in a medium bowl. 2. Use a hand mixer to beat the cream cheese. Mix until it is smooth and creamy. This takes about 2-3 minutes. 3. Next, add 1/2 cup of creamy Greek yogurt. 4. Add 1/4 cup of sifted powdered sugar. 5. Pour in 1 tablespoon of pure vanilla extract. 6. Mix all these ingredients on medium speed. Ensure there are no lumps in the mixture. The result should be a rich, creamy texture. 1. Choose your fresh fruits. I like a mix of strawberries, blueberries, kiwi, and pineapple. 2. Dice 2 cups of assorted fruits into small, bite-sized pieces. 3. In a large salad bowl, gently combine the diced fruits. 4. Be careful while folding the fruits together. This keeps their shape and juiciness intact. 1. Drizzle the cheesecake mixture over the fruits in the bowl. 2. Use a spatula to fold the mixture into the fruits. 3. Ensure each piece of fruit gets coated in the cheesecake mix. Be gentle to avoid breaking the fruit. 4. Spoon the cheesecake fruit salad into individual serving bowls or cups. Fill them generously. 5. For a crunchy top, sprinkle 1/4 cup of crushed graham crackers over each serving. 6. Finally, add fresh mint leaves to garnish. This makes each bowl look lovely and adds a nice aroma. You can find the full recipe for this delicious treat above. Enjoy making your cheesecake fruit salad! To get the best creamy texture in your cheesecake fruit salad, first, make sure your cream cheese is softened. Cold cream cheese leads to lumps. Let it sit at room temperature for about an hour. This simple step makes it easy to mix. Next, avoid lumps in the cheesecake mix. When mixing the cream cheese, use a hand mixer on medium speed. Add the Greek yogurt slowly. This helps blend everything smoothly. Mix until it’s completely smooth and creamy. No lumps should remain. Choosing seasonal fruits gives your salad the best flavor and freshness. In summer, berries like strawberries and blueberries shine. In winter, consider citrus fruits like oranges and grapefruits. Their bright flavors can elevate your dish. Combine flavors and textures when selecting fruits. Soft fruits like bananas work well with crunchy apples. Mixing different colors also makes the salad eye-catching. A vibrant mix draws everyone in and makes your dish more appealing. Serve the cheesecake fruit salad chilled for the best taste. This is especially refreshing on hot days. Serve it within a few hours of making it for optimal freshness. Pair this salad with light desserts like sorbet or meringue. It can also work well as a side dish for grilled meats. The creamy, sweet salad complements savory flavors perfectly. For more details, check out the Full Recipe for the Cheesecake Fruit Salad Delight. {{image_4}} You can mix up your cheesecake fruit salad with different fruits. For a tropical vibe, try using mango, papaya, and pineapple. These fruits add a sweet and juicy touch. They bring a sunny flavor that brightens any meal. For a berry blast, combine strawberries, blueberries, and raspberries. This mix gives you a burst of color and flavor. The tangy berries pair well with the creamy cheesecake dressing. Each bite tastes fresh and delicious! If you want a lighter version, consider using lower sugar alternatives. Swap out regular powdered sugar for a sugar substitute. This keeps the sweetness without adding too many calories. You can also use honey or maple syrup for a natural sweetness. For a vegan twist, make a vegan cheesecake dressing. Replace cream cheese with blended silken tofu. Use coconut yogurt instead of Greek yogurt. This way, you can enjoy the same creamy texture without dairy! Enhance the flavor of your cheesecake fruit salad by adding citrus zest. Just a little lemon or lime zest brightens the dish. It adds a fresh, zesty kick that balances the creamy sweetness. Using flavored yogurt can also elevate your salad. Try vanilla, strawberry, or even peach yogurt. This adds an extra layer of flavor and makes your salad even more delightful. Every bite will surprise your taste buds! For the full recipe, check out the Cheesecake Fruit Salad Delight! Store leftover cheesecake fruit salad in an airtight container. Place it in the fridge right away. This keeps it fresh and tasty. It will last about 3 days. After this, the fruit may get mushy. Always check for signs of spoilage before eating. Can you freeze cheesecake fruit salad? Yes, but it’s not ideal. Freezing changes the texture of the fruits. If you want to freeze it, do so in a sealed container. To thaw, move it to the fridge overnight. Avoid thawing at room temperature. This helps keep the flavors intact. Refreshing leftovers is easy! Stir the salad gently to mix the ingredients again. This reintroduces flavor and makes it look nice. For guests, consider re-presenting it. Use clear cups or bowls for a pretty display. Add a few mint leaves on top for a pop of color. Yes, you can make Cheesecake Fruit Salad ahead of time. To do this, prepare the cheesecake mixture first. Store it in the fridge until you are ready to use it. Chop the fruits closer to serving time. This keeps them fresh and bright. If you mix the fruits in too early, they may get soggy. The best fruits for Cheesecake Fruit Salad are fresh and colorful. Try these options: - Strawberries - Blueberries - Kiwi - Pineapple - Peaches - Grapes You can mix and match to create your favorite blend. Each fruit brings its own taste and texture, making the salad fun and exciting. Remember to dice them into bite-sized pieces for easy eating. To make this recipe gluten-free, use gluten-free graham crackers. You can find these at many grocery stores. Alternatively, you can skip the graham crackers altogether. The salad will still be creamy and delicious without them. Just add some crushed nuts for a nice crunch if you like. You can create a delicious Cheesecake Fruit Salad with simple steps. We covered core ingredients like cream cheese and fresh fruits, along with tips for making it creamy and fresh. You can choose different fruits or make healthier versions to suit your taste. Proper storing ensures it stays tasty too. Enjoy sharing this sweet dish at your next gathering. Remember, these mixes are fun and can suit any occasion! Your creativity makes it all the more special!
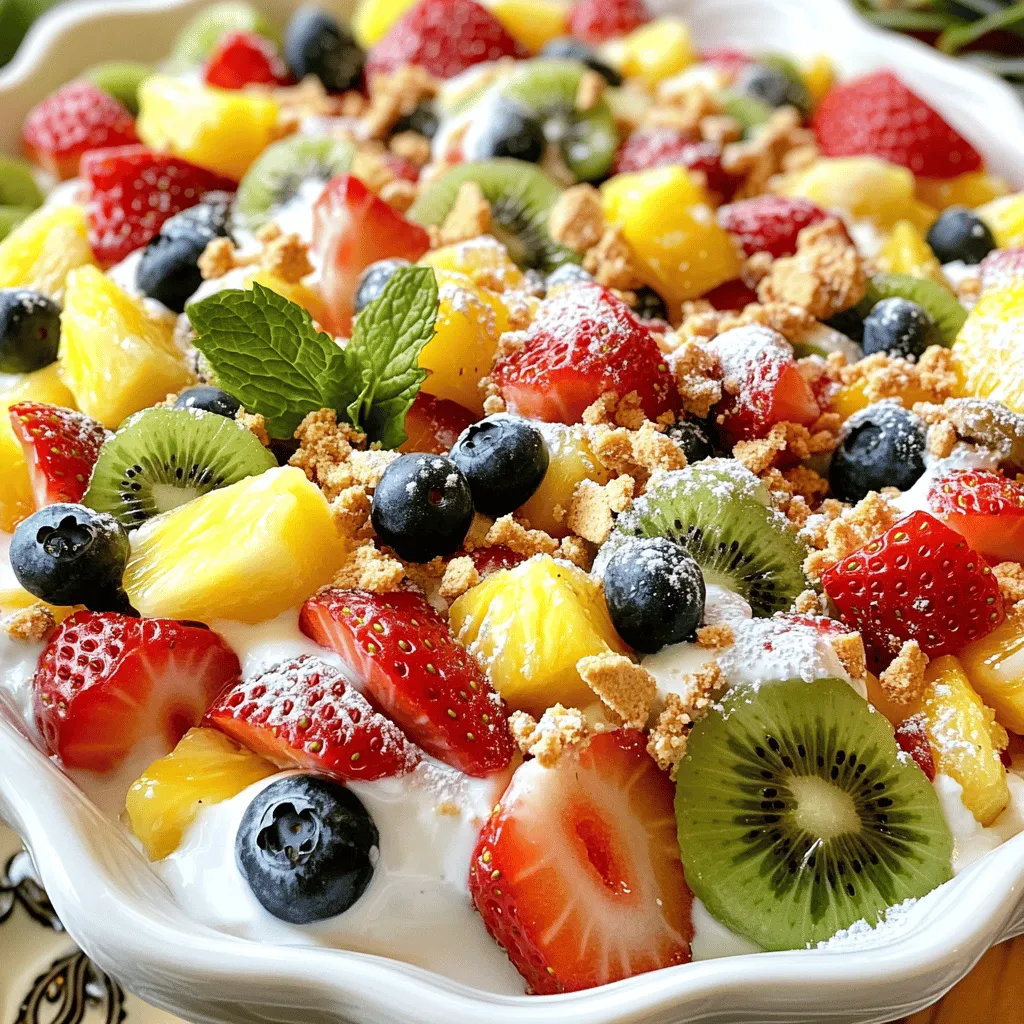
Cheesecake Fruit Salad Fresh and Creamy Delight
Are you ready for a refreshing twist on dessert? My Cheesecake Fruit Salad combines creamy cheesecake flavors with fresh fruits, making it a delightful treat.