Desserts
![To make lemon zucchini bread, you need fresh and simple ingredients. Here’s what you will need: - 1 cup finely grated zucchini - 1 teaspoon salt - 1 cup granulated sugar - 1/2 cup vegetable oil - 2 large eggs - 1 teaspoon vanilla extract - 1 tablespoon lemon zest - 1/4 cup fresh lemon juice - 2 cups all-purpose flour - 1 teaspoon baking powder - 1/2 teaspoon baking soda - 1/2 teaspoon ground cinnamon - 1/4 teaspoon ground nutmeg - 1/2 cup chopped walnuts or pecans (optional) - Powdered sugar for dusting (optional) The zucchini adds moisture and a subtle flavor. The lemon zest and juice bring brightness. This combination gives the bread a fresh taste. If you prefer, you can add nuts for crunch. You can find the full recipe linked above for more details and tips. - Preheat the oven to 350°F (175°C). - Grease or line a 9x5-inch loaf pan. Start by getting your oven ready. This step helps the bread bake evenly. While the oven heats, prepare your loaf pan. Greasing it ensures easy removal later. You can also line it with parchment paper for added convenience. - Mix grated zucchini with salt and let it sit. - Drain excess moisture from zucchini. Next, take your grated zucchini and mix it with salt. Let it rest for about 10 minutes. This draws out extra moisture, making the bread less soggy. After resting, squeeze out any remaining water using a clean towel or paper towels. This step is key for a great texture in your bread. - Whisk together sugars and oils. - Incorporate lemon zest and juice. - Sift and combine dry ingredients. In a large bowl, whisk together the granulated sugar and vegetable oil. Add the eggs and vanilla extract, mixing until smooth. Now, it's time to brighten things up! Stir in the lemon zest and juice. In another bowl, sift together the flour, baking powder, baking soda, cinnamon, and nutmeg. This helps make the bread light and fluffy. - Combine wet and dry ingredients. - Add zucchini and optional nuts. Now, slowly add your dry mix to the wet mixture. Stir gently until just combined. Be careful not to overmix! Fold in your zucchini and nuts if you want. This adds flavor and texture to the bread. - Pour batter into the loaf pan. - Bake for 55-65 minutes. Pour the batter into the prepared loaf pan. Use a spatula to smooth the top. Place it in the oven and bake for 55-65 minutes. Check for doneness by inserting a toothpick into the center. It should come out clean or with a few crumbs. - Cool in pan, then on a wire rack. - Optional: Dust with powdered sugar. Once baked, take the pan out of the oven. Let the bread cool in the pan for about 10 minutes. Then, transfer it to a wire rack to cool completely. If you like, dust it with powdered sugar before serving. This adds a nice touch to the presentation. Enjoy your delicious Lemon Zucchini Bread! For the full recipe, refer back to the provided instructions. When making lemon zucchini bread, you want to avoid overmixing the batter. Overmixing can make the bread dense and tough. Mix until ingredients are just combined. Another key tip is to ensure proper drainage of the zucchini. If the zucchini has too much water, it will make the bread soggy. After grating, let it sit with salt for about 10 minutes. Then, squeeze out the extra moisture with a towel. This step is vital for the best texture in your bread. To make your lemon zucchini bread even tastier, try adding spices. Nutmeg and cardamom can add warmth and depth. Just a pinch can elevate the overall flavor. Using fresh ingredients is crucial for the best flavor. Fresh lemon zest and juice will give your bread a bright, zesty taste. They make a noticeable difference compared to bottled juices. For a lovely presentation, serve the bread with lemon slices or mint leaves as garnish. This adds a pop of color and freshness to the plate. When slicing the bread, aim for even pieces. A neat display not only looks good but also makes it easy for guests to enjoy. A well-presented dish can make your lemon zucchini bread even more inviting. For the [Full Recipe], be sure to follow the steps carefully for the best results. {{image_4}} You can make this lemon zucchini bread gluten-free. Just swap all-purpose flour with a gluten-free flour blend. This change keeps the bread soft and tasty while avoiding gluten. Feel free to get creative with your add-ins! You can add chocolate chips or dried cranberries for a sweet touch. If you like nuts, consider using walnuts, pecans, or even almonds. Each adds a nice crunch and flavor boost. Want to switch things up? Try using oranges instead of lemons for a different zest. This gives the bread a sweet and citrusy twist. You can also add poppy seeds for extra texture and a fun look. These small changes can make your lemon zucchini bread truly unique. Store your lemon zucchini bread at room temperature. Use an airtight container to keep it fresh. This way, it stays moist and tasty for up to three days. If you want to enjoy it longer, consider freezing the bread. You can freeze lemon zucchini bread for up to three months. First, wrap the bread tightly in plastic wrap. Then, place it in a freezer bag or container. When you're ready to enjoy it, thaw the bread in the fridge overnight. You can also reheat slices in a toaster or microwave for a quick treat. If you have leftover bread, don't let it go to waste! You can make French toast by soaking slices in a mix of eggs and milk. Cook them on a skillet until golden brown. Another fun idea is to turn leftover bread into bread pudding. Just cube the bread and mix it with a custard base, then bake it until set. Both options will give you a delicious twist on your lemon zucchini bread! Yes, but make sure to drain excess water before adding. Frozen zucchini can work well. Just thaw it and squeeze out the water. This helps keep your bread from getting too soggy. Use a toothpick; it should come out clean or with a few crumbs. If the toothpick has wet batter, bake it longer. Checking the bread helps get a perfect loaf every time. Use flaxseed meal or applesauce as an egg substitute. For flaxseed, mix one tablespoon with three tablespoons of water. Let it sit for a few minutes to thicken. Applesauce adds moisture and a hint of sweetness. Store in an airtight container at room temperature for up to 3 days. This keeps the bread fresh and moist. You can also wrap it in plastic wrap for extra protection. Yes, increase the lemon juice or zest for a more intense flavor. More zest gives a bright taste, while extra juice adds moisture. Both options make your bread even more tasty. Reheat slices in a toaster or microwave for quick warming. If using a toaster, keep an eye on it so it does not get too crispy. Warm bread tastes great and feels fresh. In this post, we explored how to make Lemon Zucchini Bread from start to finish. You learned about the required ingredients, simple steps to create the batter, and tips for enhanced flavor. We also covered variations, storage options, and answered common questions. Now, you can enjoy this moist and zesty bread anytime! Try different add-ins and flavors to make it your own. Happy baking!](https://tossedflavors.com/wp-content/uploads/2025/06/d133ea0f-6895-407b-820c-f9588ac2c372.webp)
Lemon Zucchini Bread Flavorful and Simple Recipe
If you love baking, you’ll adore this Lemon Zucchini Bread recipe! It combines fresh zucchini and bright lemon for a moist, flavorful treat. Simple ingredients
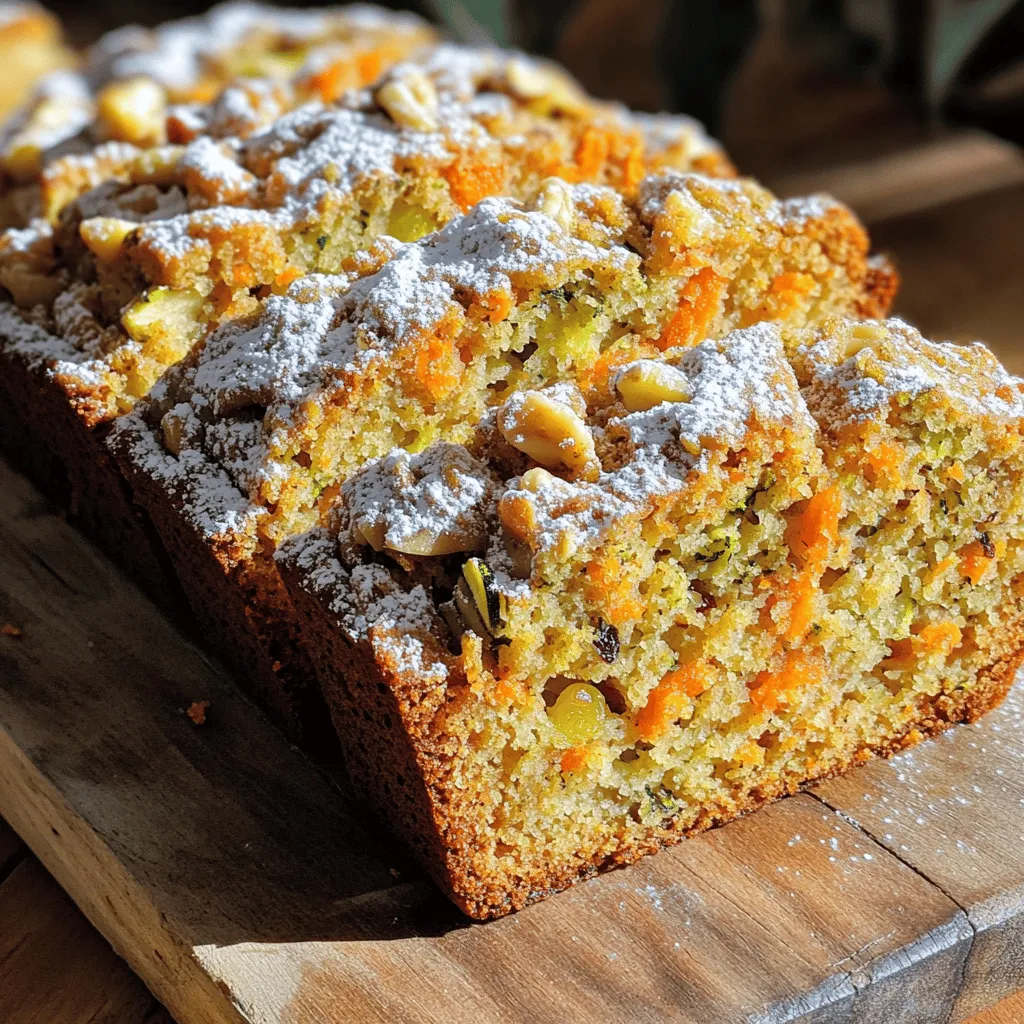
Carrot Apple Zucchini Bread Deliciously Simple Recipe
Are you ready to indulge in a deliciously simple Carrot Apple Zucchini Bread? This recipe blends fresh fruits and veggies into a moist treat that’s
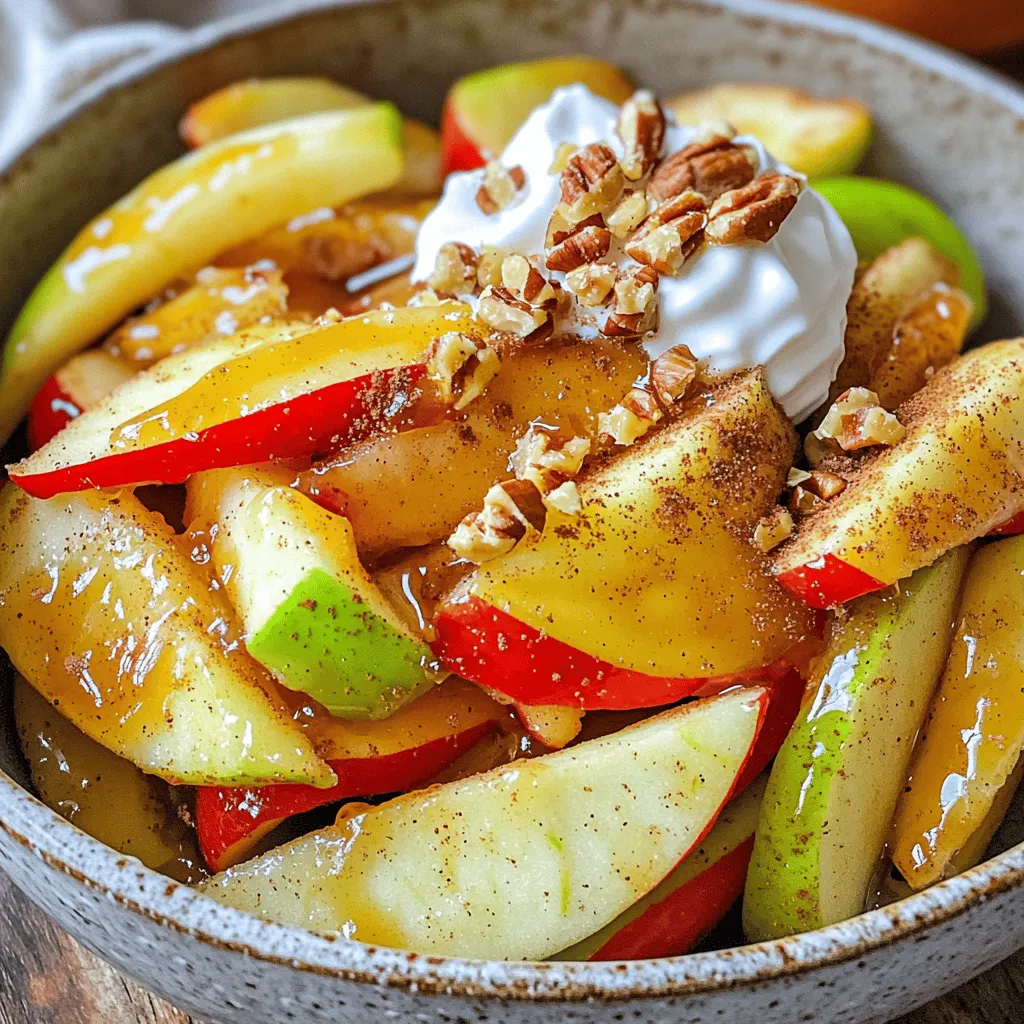
Air Fryer Apples Sweet and Simple Dessert Recipe
Craving a delicious and easy dessert? I have just the thing! Air fryer apples are sweet, simple, and packed with flavor. Using just a few

Easy Baked Peaches with Cinnamon Sugar Delight
Looking for a sweet and easy dessert? Let me show you how to make Easy Baked Peaches with Cinnamon Sugar Delight. This recipe highlights juicy
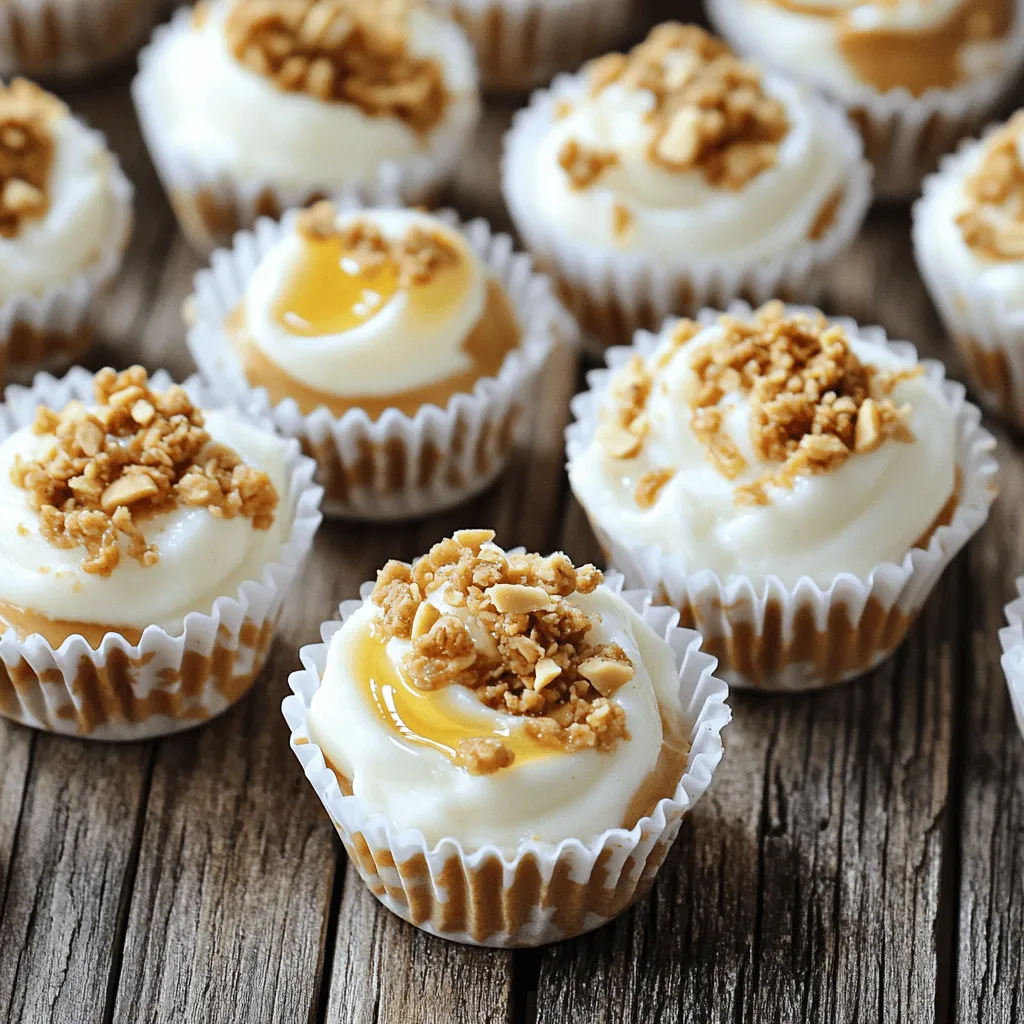
Frozen Greek Yogurt Peanut Butter Bites Delight
Craving a tasty and healthy snack? Try these Frozen Greek Yogurt Peanut Butter Bites! They’re simple to make and perfect for both kids and adults.
![To make 10-Minute Peanut Butter Chocolate Bark, gather these simple ingredients: - 1 cup dark chocolate chips - 1/2 cup creamy peanut butter - 1/4 cup chopped nuts (almonds, walnuts, etc.) - 1/4 cup dried cranberries or raisins - Sea salt flakes - Optional: 1/4 teaspoon vanilla extract or a light sprinkle of cinnamon These ingredients blend perfectly to create a rich, sweet treat. Dark chocolate gives a deep flavor, while creamy peanut butter adds smoothness. The nuts provide crunch, and dried fruit adds a touch of sweetness. You can also use other ingredients to boost the taste. Adding vanilla or cinnamon can elevate the bark nicely. This easy recipe is all about balance. The sea salt flakes finish the bark with a delightful contrast to the sweetness. Each bite offers a mix of flavors and textures that keeps you coming back for more. Check the [Full Recipe] for detailed steps to bring these ingredients together! 1. Start by lining a baking sheet with parchment paper. Let the paper hang over the edges. This will help with easy lifting later. 2. Next, take a microwave-safe bowl and add your dark chocolate chips. Heat them in the microwave on high power. Use 30-second bursts and stir well between each burst. This should take about 1-2 minutes until the chocolate is smooth. 3. After melting, add the creamy peanut butter to the bowl. Stir the two until they blend fully. If you want extra flavor, mix in vanilla extract or cinnamon. 1. Pour the chocolate-peanut butter mixture onto the lined baking sheet. Use a spatula to spread it evenly to your liking. 2. Now, it’s time to add texture! Sprinkle chopped nuts and dried fruit over the chocolate layer. Make sure they are evenly spread to enjoy every bite. 1. Place the baking sheet in the refrigerator. Let it chill for about 10 minutes. This will help it solidify. 2. Once set, lift the bark out using the parchment edges. Break or cut it into bite-sized pieces, and it’s ready to serve! Check out the full recipe to ensure you don’t miss any details. To make the best peanut butter chocolate bark, you need a smooth finish. Start with quality dark chocolate chips. Melt them slowly in the microwave. Use 30-second bursts for even melting. Stir well to avoid burning. Next, when you spread the mixture, aim for even thickness. This gives your bark a nice texture. If it's too thick, it may not set well. If it's too thin, it may break apart easily. Use a spatula to help spread it evenly across the baking sheet. You can change the nuts and dried fruits for your bark. Try almonds, walnuts, or pecans. For fruits, consider dried cranberries or raisins. Each choice adds a unique flavor and crunch. Want to make it vegan or dairy-free? Use dairy-free chocolate chips and a nut butter like almond or cashew. This way, everyone can enjoy this easy treat. Check the [Full Recipe] for more tips! {{image_4}} You can make this bark even more fun by adding flavors. Try mixing in spices like cinnamon. Just a pinch can bring warmth and depth. A splash of vanilla is another great choice. It adds a sweet note and enhances the chocolate taste. You can also play with different types of chocolate. Use milk chocolate for a creamier bark. White chocolate gives a sweet and smooth texture. Dark chocolate offers a rich and slightly bitter flavor. Each choice changes the taste and feel of your treat. If you need gluten-free bark, you are in luck! All the ingredients I list work well for gluten-free diets. Just check that your chocolate chips are gluten-free. For a nut-free option, you can swap the peanut butter with sun butter. This nut-free alternative still gives a creamy texture. You can also skip the nuts altogether or use seeds like pumpkin or sunflower seeds. To make a healthier bark, consider using a lower-sugar chocolate. You can also reduce the amount of peanut butter if you want. This makes the bark lighter but still tasty. You can enjoy this treat without feeling guilty! For the full recipe, check out the instructions above. To keep your peanut butter chocolate bark fresh, store it in an airtight container. Use parchment paper between layers to prevent sticking. This way, every piece stays intact and tasty. The best temperature to store the bark is in a cool place, like a pantry or cupboard. Avoid sunlight and heat, as they can cause the chocolate to melt. A temperature below 75°F (24°C) works well. Peanut butter chocolate bark lasts up to two weeks in the fridge. Just make sure it stays in an airtight container. If you notice any changes in smell or texture, it’s best to toss it. For long-term storage, you can freeze the bark. Wrap each piece in plastic wrap, then put them in a freezer-safe bag. This way, the bark stays fresh for up to three months. To enjoy, simply thaw it in the fridge overnight before serving. If you want the full recipe, check out the details above! Can I use other types of nut butter? Yes, you can use other nut butters. Almond butter or cashew butter works well. Each nut butter adds its own unique flavor to the bark. How long does it take for the bark to set? The bark takes about 10 minutes to set in the fridge. If you want it firmer, leave it longer. Just make sure it is solid before you break it. What can I substitute for chocolate chips? You can use chocolate bars, cocoa powder, or even white chocolate. Each choice changes the taste and look of your bark. How to make the bark crunchy? To make it crunchy, add more chopped nuts. You can also mix in crispy rice cereal for extra texture. Can I add additional toppings? Yes, you can add toppings! Try mini marshmallows, coconut flakes, or even crushed pretzels. Be creative and make it your own! In this post, we explored how to make 10-minute peanut butter chocolate bark. We covered the key ingredients, quick preparation steps, and helpful tips. You now have ideas for flavor swaps and storage advice too. This simple treat is great for anyone. Enjoy customizing it to your taste. Make a batch today and share it with friends! It’s easy, fun, and delicious.](https://tossedflavors.com/wp-content/uploads/2025/06/b48eb1a2-c38a-4394-92d0-255820f7cbda.webp)
10-Minute Peanut Butter Chocolate Bark Easy Treat
Craving a quick and tasty treat? You’ll love this easy 10-Minute Peanut Butter Chocolate Bark! With just a few simple ingredients, you can whip up
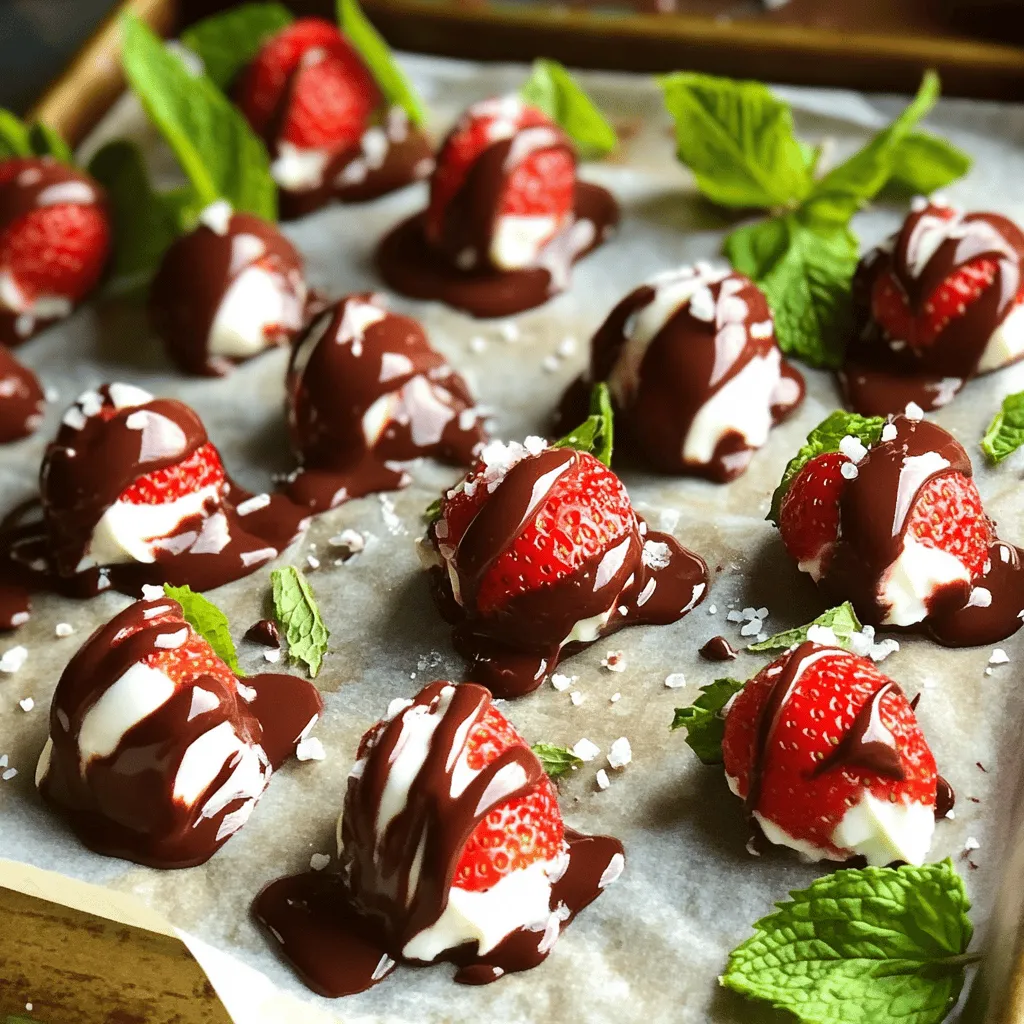
Chocolate Strawberry Yogurt Clusters Healthy Treat Idea
Craving a sweet yet healthy snack? Chocolate Strawberry Yogurt Clusters are your answer! Made with creamy Greek yogurt, fresh strawberries, and rich dark chocolate, these

Easy Strawberry Yogurt Bites Quick and Healthy Snack
Looking for a quick and healthy snack? You’re in the right place! Easy Strawberry Yogurt Bites are the perfect treat for you, packed with fresh
![To make No-Bake Pumpkin Pie Energy Balls, you'll need these simple items: - 1 cup rolled oats - 1/2 cup creamy almond butter - 1/2 cup pure pumpkin puree - 1/4 cup pure maple syrup - 1 teaspoon pumpkin pie spice - 1/4 teaspoon fine sea salt - 1/3 cup ground flaxseed - 1/4 cup mini chocolate chips (optional) - 1/4 cup chopped walnuts (optional) If you don't have almond butter, you can use peanut butter or sunflower seed butter. These options work well and keep the taste great. For a vegan version, ensure your maple syrup is pure. You can also skip the honey and use agave syrup if you prefer. Each energy ball has about 100 calories. They give you a good mix of healthy fats, fiber, and protein. The oats and flaxseed offer fiber, which helps you feel full. The pumpkin adds vitamins and gives a boost of flavor. 1. Mixing dry ingredients: Start with a large mixing bowl. Add 1 cup of rolled oats, 1/3 cup of ground flaxseed, 1/4 teaspoon of fine sea salt, and 1 teaspoon of pumpkin pie spice. Use a wooden spoon or whisk to mix these dry ingredients well. This helps to ensure even flavor in each bite. 2. Combining wet ingredients: In a separate medium bowl, combine 1/2 cup of creamy almond butter, 1/2 cup of pure pumpkin puree, and 1/4 cup of pure maple syrup. Whisk these wet ingredients together until the mixture is smooth and creamy. Make sure there are no lumps for the best texture. 1. Rolling technique tips: Take about 1 tablespoon of the mixture and roll it between your palms to form a ball. Keep your hands slightly damp to help prevent sticking. This step is fun and easy; you’ll enjoy shaping each ball! 2. Consistency check: The mixture should hold together well. If it feels too dry, add a bit more almond butter. If it’s too wet, add a little more ground flaxseed or oats. Adjusting the mixture helps create the perfect energy ball. 1. Refrigeration duration: Once shaped, line a baking sheet with parchment paper. Place the energy balls on the sheet, spaced apart. Refrigerate them for at least 30 minutes. This helps them firm up and makes them easier to eat. 2. Storage tips: After chilling, transfer the energy balls to an airtight container. You can store them in the fridge for up to one week. For longer storage, consider freezing them. They make a delightful, healthy snack anytime. For the complete recipe, check out the Full Recipe. Adjusting sweetness If you want your energy balls sweeter, add more maple syrup. Start with a tablespoon more. Taste the mixture before rolling it into balls. You can also use honey or agave if you prefer. Texture modifications For a chewier texture, add more oats or ground flaxseed. If you like them softer, reduce the oats. You can also add a splash of almond milk to make the mixture easier to blend. Pairing ideas These energy balls pair well with fresh fruit or yogurt. For a fun snack, serve them with a cup of hot tea. They also go great with a trail mix for an added crunch. Presentation tips To make them look special, sprinkle some extra pumpkin pie spice on top. You can also place them in cute cupcake liners. This adds a festive touch, perfect for parties or gatherings. Ingredient misproportions Always measure your ingredients carefully. Too much almond butter makes them too sticky. Too many oats can make them dry. Stick to the recipe for the best results. Over-mixing When mixing, stop as soon as everything is combined. Over-mixing can make the energy balls tough. Gentle folding is key to keeping a nice texture. Enjoy making your No-Bake Pumpkin Pie Energy Balls! For the full recipe, check out the earlier section. {{image_4}} You can change the taste of your No-Bake Pumpkin Pie Energy Balls easily. Try adding different spices to the mix. Cinnamon or nutmeg give it a warm twist. You can also add vanilla extract for a sweet touch. Incorporating dried fruits adds texture and flavor. Raisins or cranberries work great. Chopped dates can also bring natural sweetness. If you have dietary needs, there are options for you. For a gluten-free treat, use certified gluten-free oats. This keeps your energy balls safe and tasty. If you need a nut-free version, swap almond butter for sunflower seed butter. This change keeps the energy balls creamy without nuts. Using seasonal ingredients can enhance your energy balls. Instead of pumpkin puree, try sweet potato puree for a different taste. You can even mix in apple sauce for a fruity flair. Combining with other fall flavors, like maple or pecans, adds depth. These changes make the energy balls festive and fun. For the full recipe, check out the detailed instructions above. Store your No-Bake Pumpkin Pie Energy Balls in an airtight container. This keeps them fresh. Use a container that seals tightly to block out air. A glass jar or plastic tub works well. Keep them in the fridge for the best taste. They stay cool and tasty this way. You can freeze these energy balls for longer storage. To freeze, place them in a single layer on a baking sheet. Put the sheet in the freezer for about an hour. This helps them stay round. After they are firm, transfer them to a zip-top bag. Squeeze out the air before sealing. When you want to eat them, take out a few. Let them thaw in the fridge for a few hours before enjoying. These energy balls last up to one week in the fridge. After that, they may lose flavor and texture. Look for signs of spoilage, like a sour smell or discoloration. If you see any changes, it’s best to toss them. Enjoy your pumpkin pie treats while they are fresh! For the Full Recipe, check earlier sections. These tasty energy balls last about one week in the fridge. Keep them in an airtight container. If you want to save them longer, freeze them. They can stay fresh for about three months in the freezer. Yes, you can swap almond butter for other nut butters. Peanut butter, cashew butter, or sun butter are great options. Each choice gives a unique flavor and texture to your energy balls. Yes, these energy balls are healthy! They are packed with fiber from oats and flaxseed. Pumpkin adds vitamins and minerals. Almond butter gives healthy fats and protein. These bites fuel your body and taste great. To make these energy balls vegan, use maple syrup instead of honey. Almond butter is already vegan, but feel free to try other nut butters. This way, you keep all the flavor while sticking to a vegan diet. Check out the [Full Recipe] for all the details! With these steps, you can make tasty No-Bake Pumpkin Pie Energy Balls easily. We covered the key ingredients and their benefits. You learned tips for shaping, storing, and making the recipe your own. Don't be afraid to try different flavors or swap ingredients. Enjoy these healthy snacks anytime. They’re great for any season! Remember, fun and creativity are key in the kitchen.](https://tossedflavors.com/wp-content/uploads/2025/06/a579be6d-686d-4e9b-84a5-9d5125eef64c.webp)
No-Bake Pumpkin Pie Energy Balls Simple and Tasty Snack
Looking for a quick and healthy snack? No-Bake Pumpkin Pie Energy Balls are your answer! These simple bites pack the flavors of fall into one
![- 1 cup almond butter - 1/2 cup unsweetened cocoa powder - 1/2 cup chocolate-flavored protein powder - 1/2 cup pure maple syrup - 2 large eggs - 1 teaspoon vanilla extract - 1/4 teaspoon sea salt - 1/2 cup dark chocolate chips - Optional: 1/4 cup chopped nuts (such as walnuts or pecans) These ingredients make a delicious and healthy treat. Almond butter adds creaminess and healthy fats. Cocoa powder gives a rich chocolate taste. The chocolate-flavored protein powder boosts nutrition and flavor. Pure maple syrup acts as a natural sweetener. Eggs help bind everything together. Vanilla extract adds warmth, while sea salt enhances all the flavors. Dark chocolate chips make the brownies extra fudgy and tasty. If you like, you can also add nuts for crunch. - Calories per serving: About 150 calories. - Macronutrient breakdown: Each brownie has around 5g of protein, 10g of fat, and 15g of carbs. - Health benefits of ingredients: Almond butter provides good fats and protein. Cocoa is rich in antioxidants. Maple syrup offers minerals like manganese. Eggs are a great source of protein and nutrients. Dark chocolate is known for its heart-healthy properties. These brownies are not just tasty; they also support a healthy diet. You can enjoy a sweet treat without feeling guilty. For the full recipe, check out the detailed instructions! 1. Preheat your oven to 350°F (175°C). 2. Line an 8x8 inch baking dish with parchment paper. This will help lift out the brownies easily. 3. In a large mixing bowl, combine the dry ingredients. Add 1/2 cup unsweetened cocoa powder and 1/2 cup chocolate-flavored protein powder. 4. In another bowl, mix the wet ingredients. Combine 1 cup almond butter, 1/2 cup pure maple syrup, and 2 large eggs. 1. Blend the almond butter and cocoa together. This creates a smooth and rich base. 2. Add the eggs, 1 teaspoon vanilla extract, and 1/4 teaspoon sea salt to the mix. Whisk them together until you have a smooth batter. 1. Pour the brownie batter into the prepared baking dish. Use a spatula to spread it evenly. 2. Bake for 20-25 minutes. To check if they’re done, insert a toothpick into the center. It should come out mostly clean, with a few moist crumbs. Make sure to follow the Full Recipe for more details. Enjoy your baking! To get that rich, fudgy texture, you need to mix just right. Overmixing makes brownies cakey. Stir until all ingredients blend, but don’t go beyond that. Each oven is unique, so baking times may differ. Always check at 20 minutes, then adjust if needed. For a nice look, dust the top with cocoa powder. You can sprinkle flaky sea salt for a flavor boost. Serve these brownies warm with Greek yogurt or a scoop of ice cream. It adds a nice creaminess that matches perfectly with the chocolate. One common mistake is using wrong ingredient amounts. Always measure carefully for the best results. Another mistake is overbaking. Keep an eye on your brownies. They should be soft in the middle when done. Follow the tips in the [Full Recipe] to help you succeed. {{image_4}} You can easily make these fudgy brownies vegan. To replace eggs, use flax eggs. Mix 1 tablespoon of ground flaxseed with 2.5 tablespoons of water. Let it sit for five minutes to thicken. For almond butter, you can swap it with sunflower seed butter or peanut butter. Both options will work well and keep the brownies creamy. If you need a gluten-free treat, try using almond flour or coconut flour instead of regular flour. Almond flour adds a nice nutty flavor. Coconut flour is great for absorbing moisture but use less. About one-third of the amount works well. This keeps the texture fudgy and delicious. Spices and extracts can add fun twists to your brownies. A dash of cinnamon or a splash of espresso can boost chocolate flavors wonderfully. You might also add a teaspoon of peppermint or orange extract for a new taste. For mix-ins, consider adding dried fruits like cherries or apricots. Chopped nuts, like walnuts or pecans, add crunch and richness. You can also toss in some shredded coconut or a swirl of nut butter for extra flavor. For the full recipe and more ideas, refer back to the [Full Recipe]. To keep your fudgy chocolate protein brownies fresh, use an airtight container. Glass or plastic containers work great. You can store them at room temperature for up to four days. If your home is warm, you might want to refrigerate them. Refrigeration can help them last longer, but it may change their texture a bit. If you want to save some brownies for later, freezing is a smart choice. First, let the brownies cool completely. Then, slice them into squares. Wrap each piece tightly in plastic wrap. Place the wrapped brownies in a freezer-safe bag or container. They can stay frozen for up to three months. To enjoy, thaw them in the fridge overnight or at room temperature for a few hours. When stored correctly, brownies can be tasty for a few days. At room temperature, they last about four days. In the fridge, they can last about a week. Frozen brownies, when thawed, should still taste great for up to three months. Always check for any signs of spoilage before eating. For the best flavor, enjoy them fresh! For the full recipe, check the earlier sections. Yes, you can use other nut butters. For example, cashew or peanut butter works well. Each nut butter has a unique taste. Almond butter makes these brownies creamy and rich. Peanut butter adds a strong flavor. Cashew butter is milder. Just remember, the texture may change slightly. You can use honey or agave nectar instead of maple syrup. Both sweeteners add a nice flavor. Honey is sweeter, so you might need less. Agave syrup has a milder taste. Sugar or coconut sugar can work too, but they may change the brownie texture. To check for doneness, insert a toothpick into the center. If it comes out with a few moist crumbs, the brownies are done. If it’s wet with batter, they need more time. Keep an eye on them to avoid overbaking. Yes, you can skip the protein powder. The brownies will still taste great. However, they may be less fudgy and not as packed with protein. You could add an extra 1/4 cup of cocoa powder to help. Absolutely! These brownies are healthy and tasty. They have protein and healthy fats. Plus, kids love chocolate. You can feel good about giving these as a treat. Just make sure they aren’t allergic to any ingredients. To boost the chocolate flavor, add more cocoa powder or chocolate chips. You can increase the cocoa by 1/4 cup. You can also use darker chocolate chips for a richer taste. Try adding a bit of espresso powder for depth. This blog post guided you through making delicious brownies using simple ingredients. We explored nutrition, detailed preparation steps, and provided helpful tips for perfect results. Remember, measuring correctly and not overbaking are key to achieving that fudgy texture. You can easily customize the recipe to fit your needs, whether vegan, gluten-free, or with added flavors. With proper storage, these treats can last a while. Enjoy your baking journey and the tasty outcomes that follow!](https://tossedflavors.com/wp-content/uploads/2025/06/fcca74bc-198f-48e5-803d-479d3da21350.webp)
Fudgy Chocolate Protein Brownies Healthy and Tasty Treat
Craving a chocolatey treat that won’t sabotage your health goals? Meet my Fudgy Chocolate Protein Brownies! These rich, delicious brownies pack a protein punch, making