Desserts
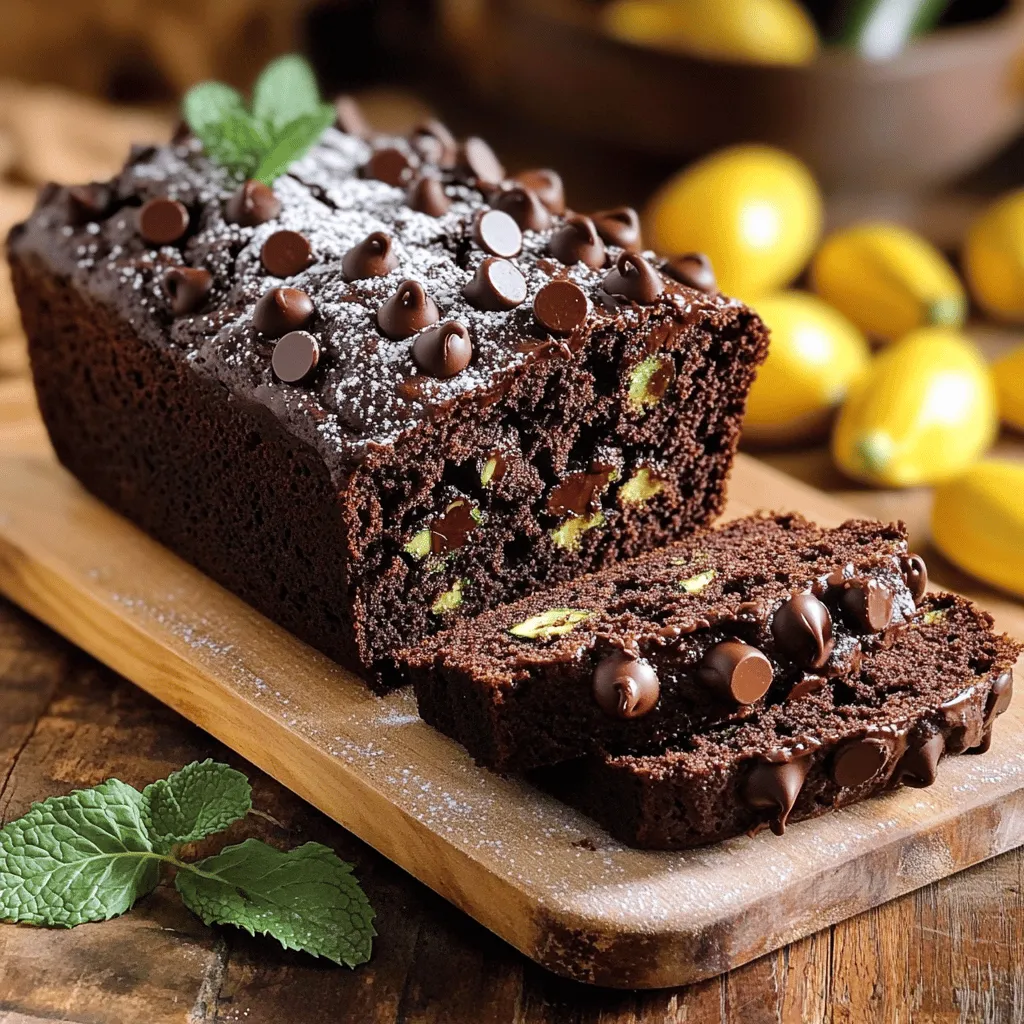
Delicious Double Chocolate Zucchini Bread Recipe
Are you ready to try a twist on classic zucchini bread? My Delicious Double Chocolate Zucchini Bread Recipe packs rich chocolate flavor while cleverly hiding
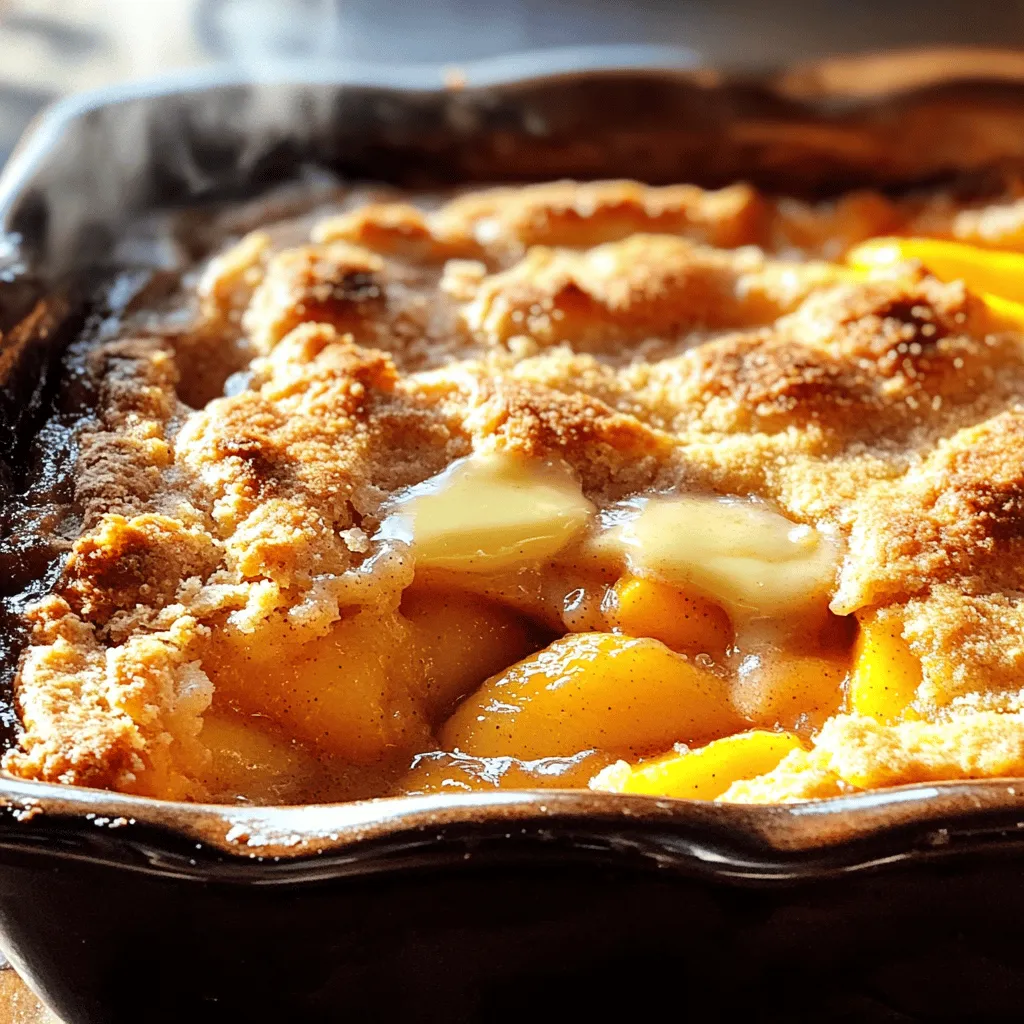
![- 4 cups fresh peaches, sliced (or 2 cans of peaches, drained and rinsed) - 1 cup granulated sugar, divided - 1 tablespoon fresh lemon juice - 1 teaspoon pure vanilla extract - 1 cup all-purpose flour - 1 tablespoon baking powder - ½ teaspoon fine salt - 1 cup milk, preferably whole - ½ cup unsalted butter, melted and slightly cooled - 1 teaspoon ground cinnamon - Whipped cream for serving - Vanilla ice cream for serving You can swap fresh peaches for canned ones in a pinch. Just make sure to drain and rinse the canned peaches. If you want less sugar, reduce the sugar by a third. For a dairy-free option, use almond milk instead of whole milk. You can also use coconut oil instead of butter for a dairy-free fat. Enjoy customizing this peach cobbler to fit your taste! Plus, if you want a fun twist, try adding a splash of almond extract in place of vanilla. Start with fresh peaches. You need four cups of sliced peaches. If fresh peaches are not available, you can use two cans of peaches. Just drain and rinse them well. In a large bowl, mix the peaches with half a cup of sugar, lemon juice, and vanilla extract. Toss gently, ensuring every peach slice is coated. Pour this mixture into a greased 9x13 inch baking dish. In another bowl, whisk together the flour, the rest of the sugar, baking powder, and salt. Slowly add the milk to the dry mix. Stir until just combined; it’s fine if some lumps remain. This is where the magic begins. Pour the batter over the peaches. Do not stir; let the baking do the work. Preheat your oven to 350°F (175°C). This is key for even baking. Once your batter is in the dish, drizzle melted butter evenly over the top. Then, sprinkle ground cinnamon for that warm, cozy flavor. Bake for 35-40 minutes. You’ll know it's ready when the top is golden brown and a toothpick comes out clean from the center. Let the cobbler cool for a few minutes before serving. This helps all the flavors blend well. For a delightful touch, serve it warm in individual bowls. Top with whipped cream or a scoop of vanilla ice cream. The warm cobbler and cold ice cream create a lovely contrast. Garnish with a slice of fresh peach or a sprinkle of cinnamon for extra flair. Enjoy this heavenly dessert! For the complete details, check the Full Recipe. When making peach cobbler, avoid undercooking or overcooking. Check your cobbler often. The top should be golden brown, and the filling should bubble slightly. Another common mistake is mixing the batter too much. A few lumps are okay. They help keep your cobbler light and fluffy. Lastly, don’t forget to grease your baking dish well. This prevents sticking and makes serving easier. Use fresh, ripe peaches for the best flavor. If you can’t find fresh ones, canned peaches work too. Just make sure to drain and rinse them. Always measure your ingredients carefully. This ensures your cobbler turns out as expected. When adding the melted butter, pour it slowly over the batter. This helps create a nice crust. Lastly, allow your cobbler to cool slightly before serving. This helps the flavors blend and makes it easier to scoop. To enhance the flavor of your peach cobbler, try adding spices. A pinch of nutmeg or a splash of almond extract can elevate the taste. Consider mixing in other fruits too. Berries or apples can add great depth. For a fun twist, sprinkle a little brown sugar on top before baking. This gives your cobbler a nice caramelized crust. Serve with a scoop of vanilla ice cream or whipped cream for the perfect touch. You can find the full recipe [here]. {{image_4}} Peach cobbler is a classic dish, but you can mix it up! Here are some fun ways to change your cobbler and keep it exciting. You can swap peaches for other fruits. Try using: - Apples - Blueberries - Cherries - Pears Each choice gives a new taste. For apples, slice them thin. For berries, just wash and toss them in. The fruit should be ripe for the best flavor. Want a gluten-free version? Use a gluten-free flour blend. Many work well as a one-to-one swap. For a vegan cobbler, replace the milk with almond, soy, or coconut milk. Use coconut oil or vegan butter instead of regular butter. These changes keep the flavor while meeting your diet needs. Add some extra flavor with spices or herbs. Try: - Nutmeg for warmth - Ginger for a kick - Lemon zest for brightness You can also add a splash of bourbon or rum for a fun twist. Just remember, small amounts go a long way. Enjoy your unique peach cobbler using these variations! For a detailed recipe, check out the Full Recipe section. To keep your peach cobbler fresh, let it cool first. Cover it tightly with plastic wrap or aluminum foil. You can also transfer it to an airtight container. Store it in the fridge for up to four days. This keeps the flavors intact and the texture nice. When you're ready to enjoy leftovers, preheat your oven to 350°F (175°C). Place the cobbler in an oven-safe dish. Cover it with foil to prevent it from drying out. Heat for about 15-20 minutes. You can also microwave slices for about 30 seconds. Just make sure they are warm all the way through. If you want to save some for later, freezing works great! First, let the cobbler cool completely. Then, cut it into portions. Wrap each piece in plastic wrap, then in foil. Place them in a freezer bag or container. It can last in the freezer for up to three months. When you're ready to eat, thaw it in the fridge overnight before reheating. For best results, enjoy it fresh, but freezing can keep it tasty for a long time! You can tell peach cobbler is done when the top is golden brown. A toothpick should come out clean when you test the center. The peaches will bubble up through the batter, creating a lovely look. If the cobbler looks firm and smells sweet, it’s ready! Yes, you can use frozen peaches! Just thaw them first and drain excess juice. This keeps your cobbler from being too watery. Frozen peaches can be just as tasty as fresh ones, making them a great option. Peach cobbler is delicious on its own but pairs well with many treats. I suggest serving it warm with whipped cream or vanilla ice cream. You can also add a sprinkle of cinnamon for extra flavor. A scoop of ice cream melts perfectly on top, creating a warm and cold delight. Check out the Full Recipe for more ideas! This blog post covers everything you need for the perfect peach cobbler. You learned about required and optional ingredients, as well as substitutions. The step-by-step guide made baking easy, and the tips helped avoid common mistakes. Various options let you personalize your cobbler with fruit, diets, and flavors. Plus, I shared how to store and reheat leftovers. The joy of baking peach cobbler lies in its delicious results. Now, you're ready to create a dessert that will impress everyone!](https://tossedflavors.com/wp-content/uploads/2025/06/c0364465-3ad7-4341-b16a-7b7a68057566.webp)
Best Ever Peach Cobbler Dessert Irresistible Delight
Are you ready to treat yourself to the best peach cobbler ever? This dessert brings the sweet taste of summer right to your table. I’ll
Homemade Zucchini Bread Tasty and Easy Recipe
Are you ready to bake something delicious and healthy? Homemade zucchini bread is the answer! This easy recipe brings out the sweet and subtle flavor
Ultimate Peach Cobbler Recipe Delightful and Easy
If you love warm, sweet desserts, you’re in for a treat! This Ultimate Peach Cobbler Recipe is simple and simply delicious. With fresh peaches and
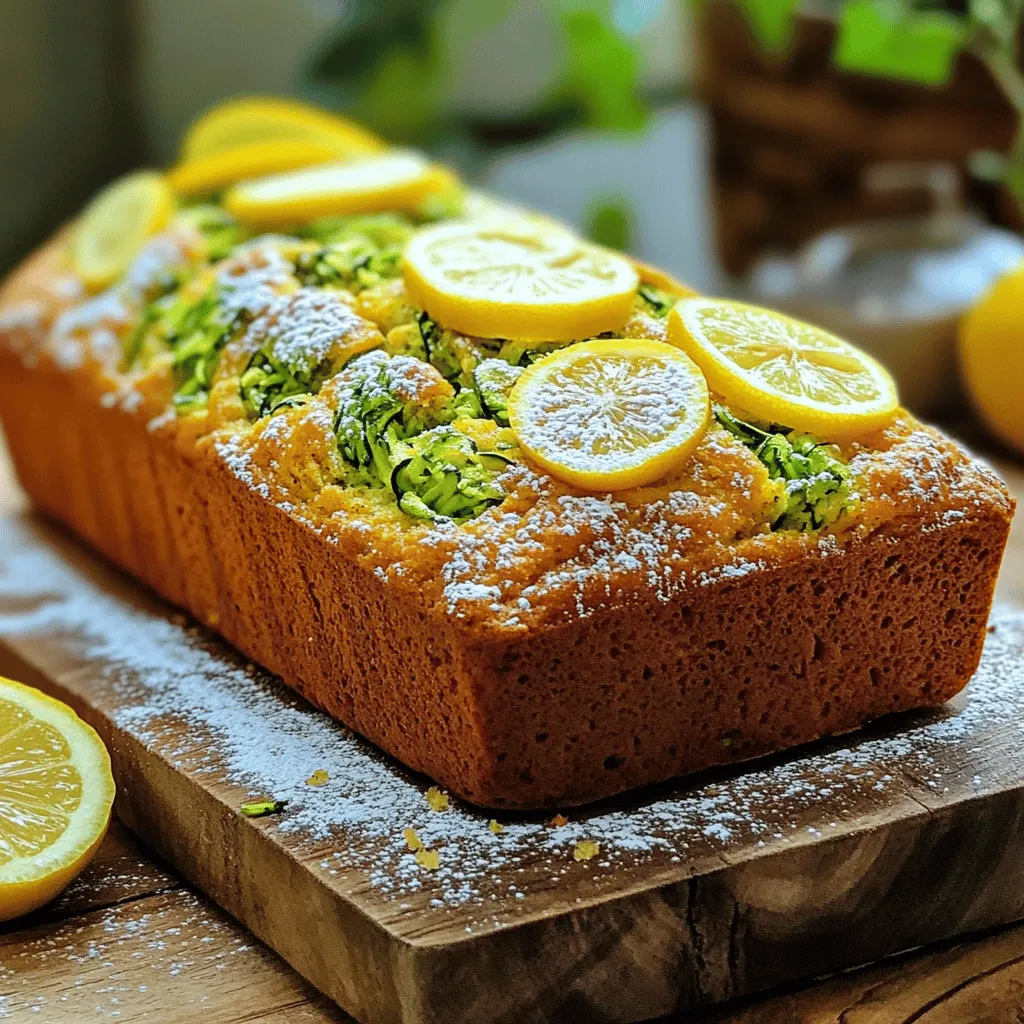
Sensational Zucchini Bread Quick and Easy Recipe
Are you ready to bake something sensational? This quick and easy zucchini bread recipe will delight your taste buds. With simple ingredients like grated zucchini

Homemade Apple Cobbler Fresh and Flavorful Delight
Enjoying a warm slice of homemade apple cobbler is one of life’s simple pleasures. In this guide, I’ll teach you how to whip up this
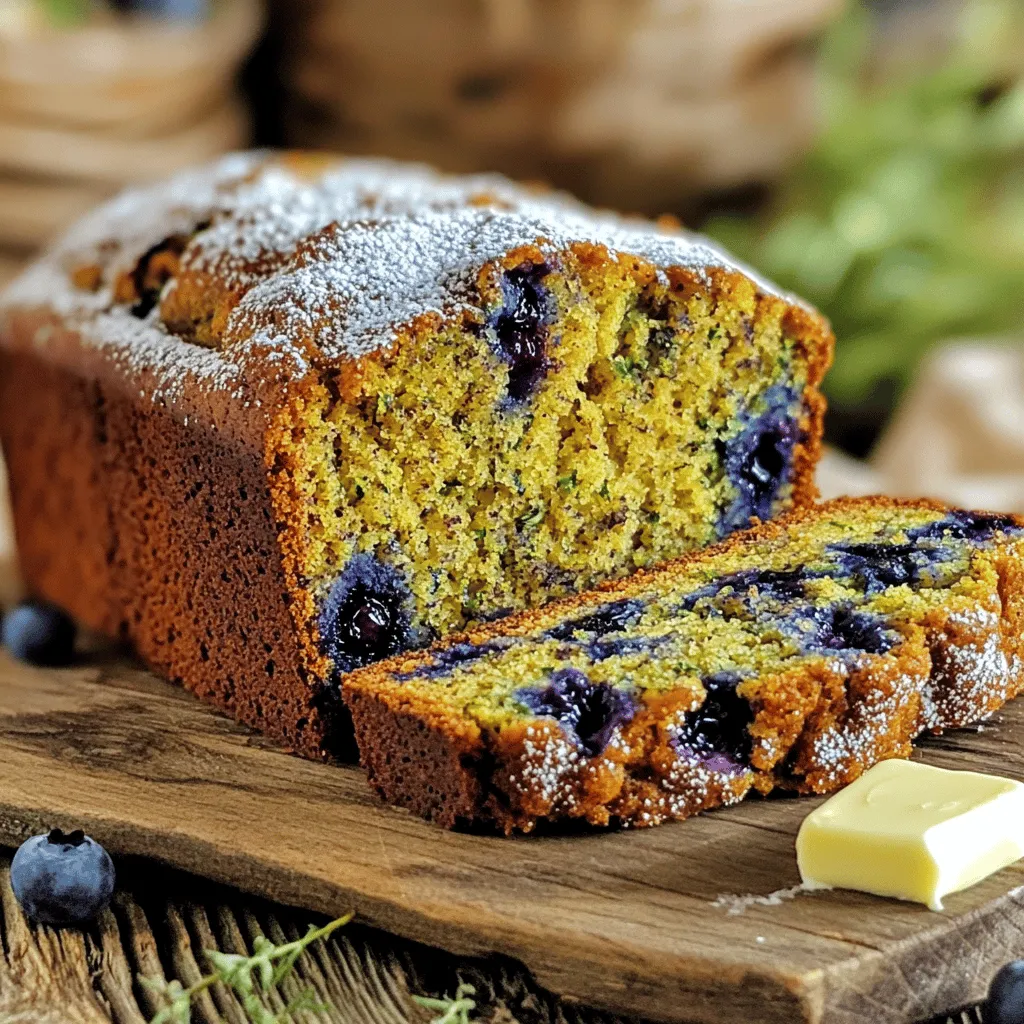
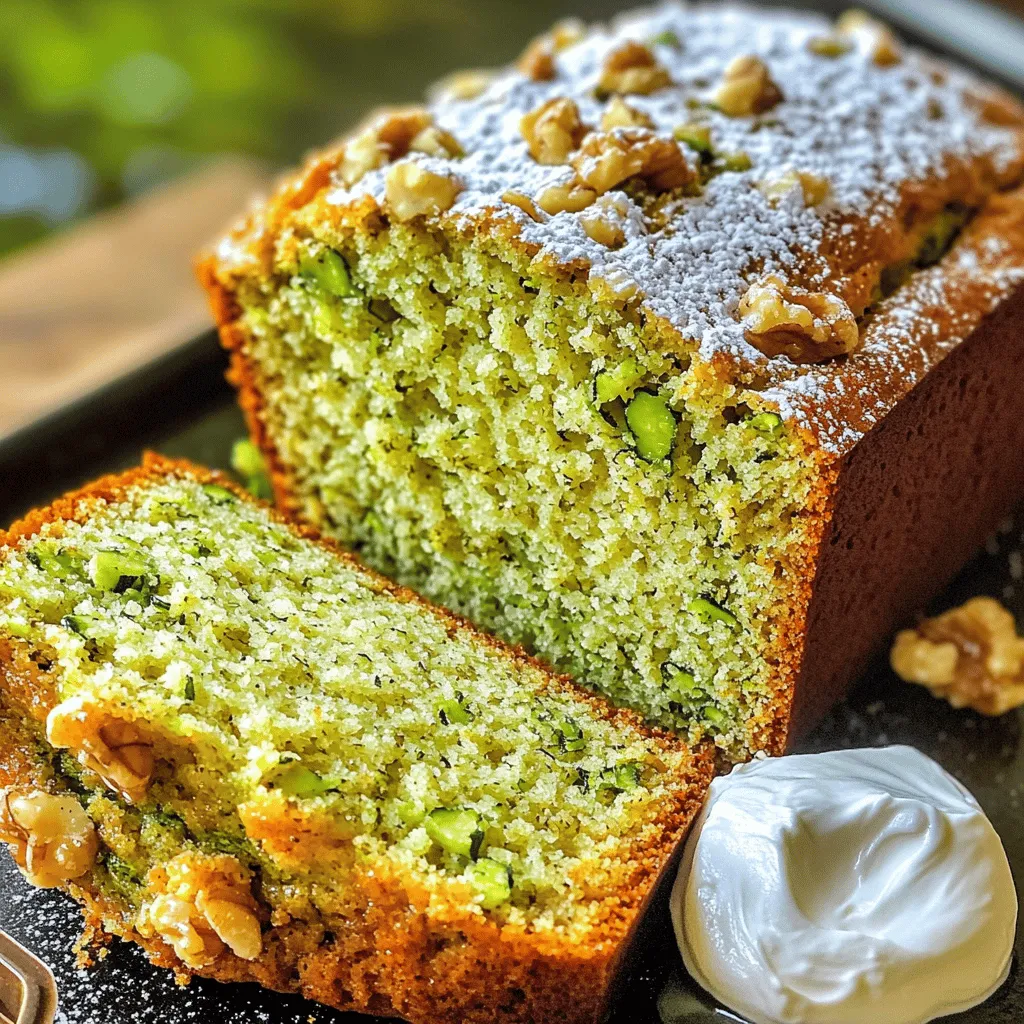
Blueberry Zucchini Bread Flavorful and Easy Recipe
Looking for a delicious way to use up summer zucchini? This Blueberry Zucchini Bread recipe is both tasty and easy to make. With fresh blueberries
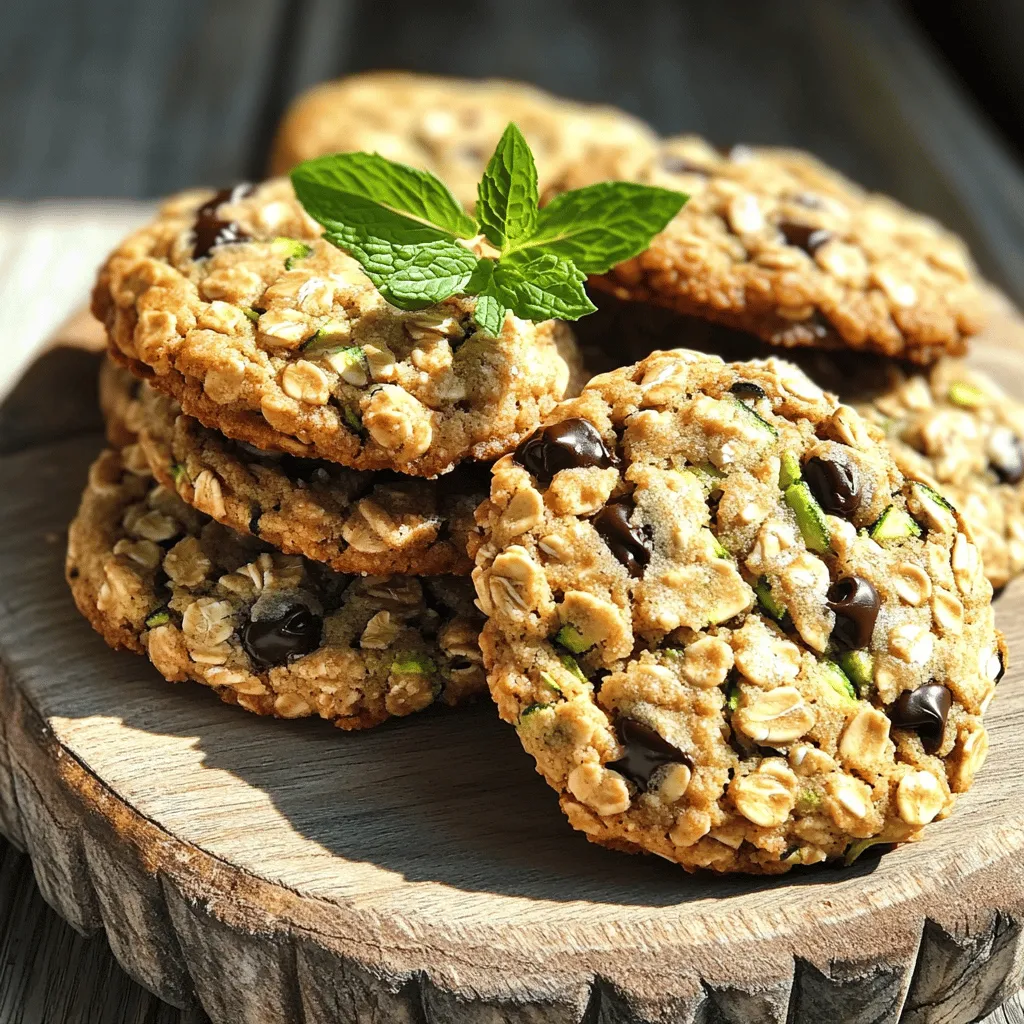
Healthy Zucchini Oatmeal Cookies Tasty and Easy Recipe
Are you ready to try a cookie that’s both tasty and good for you? These Healthy Zucchini Oatmeal Cookies combine flavor and nutrition in a
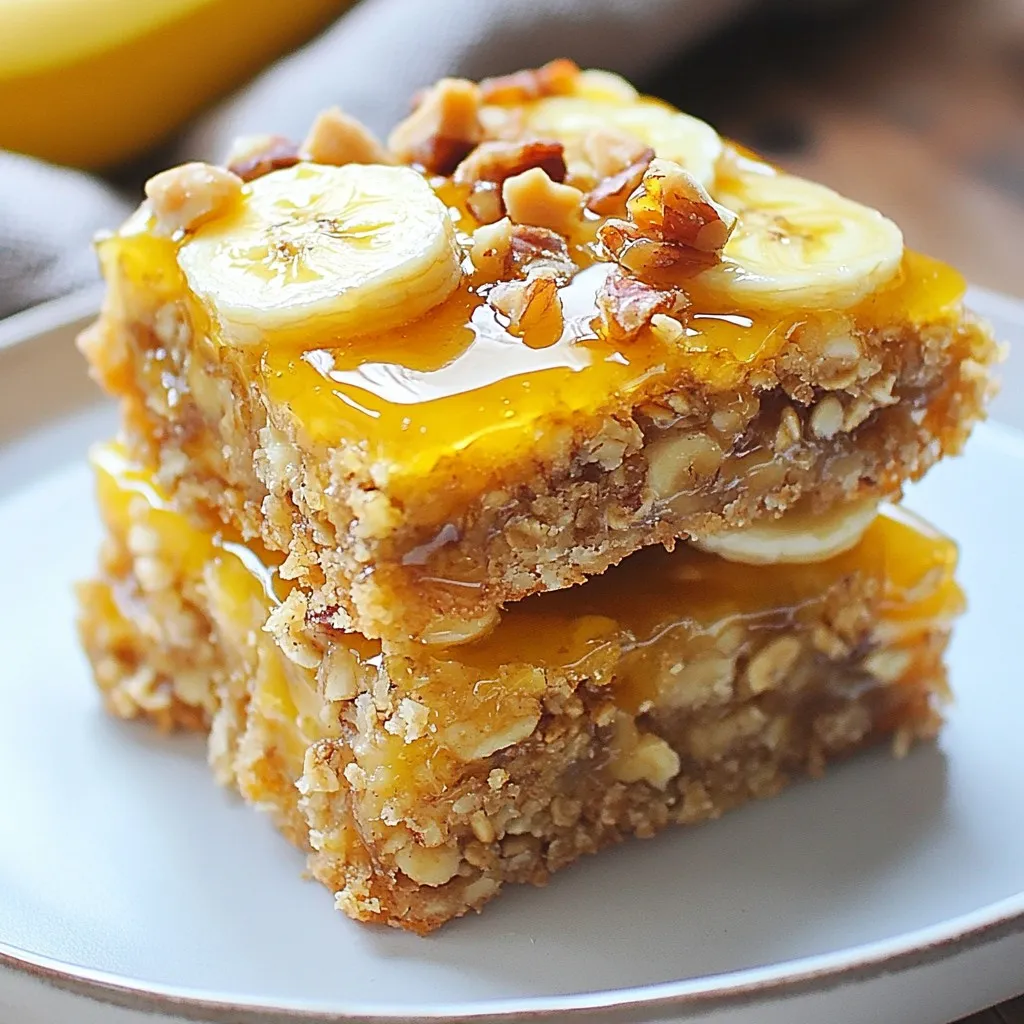
Savory Banana Oatmeal Bars Easy and Healthy Snack
Looking for a tasty and healthy snack? These Savory Banana Oatmeal Bars are just what you need! Packed with easy-to-find ingredients, they’re great for breakfast
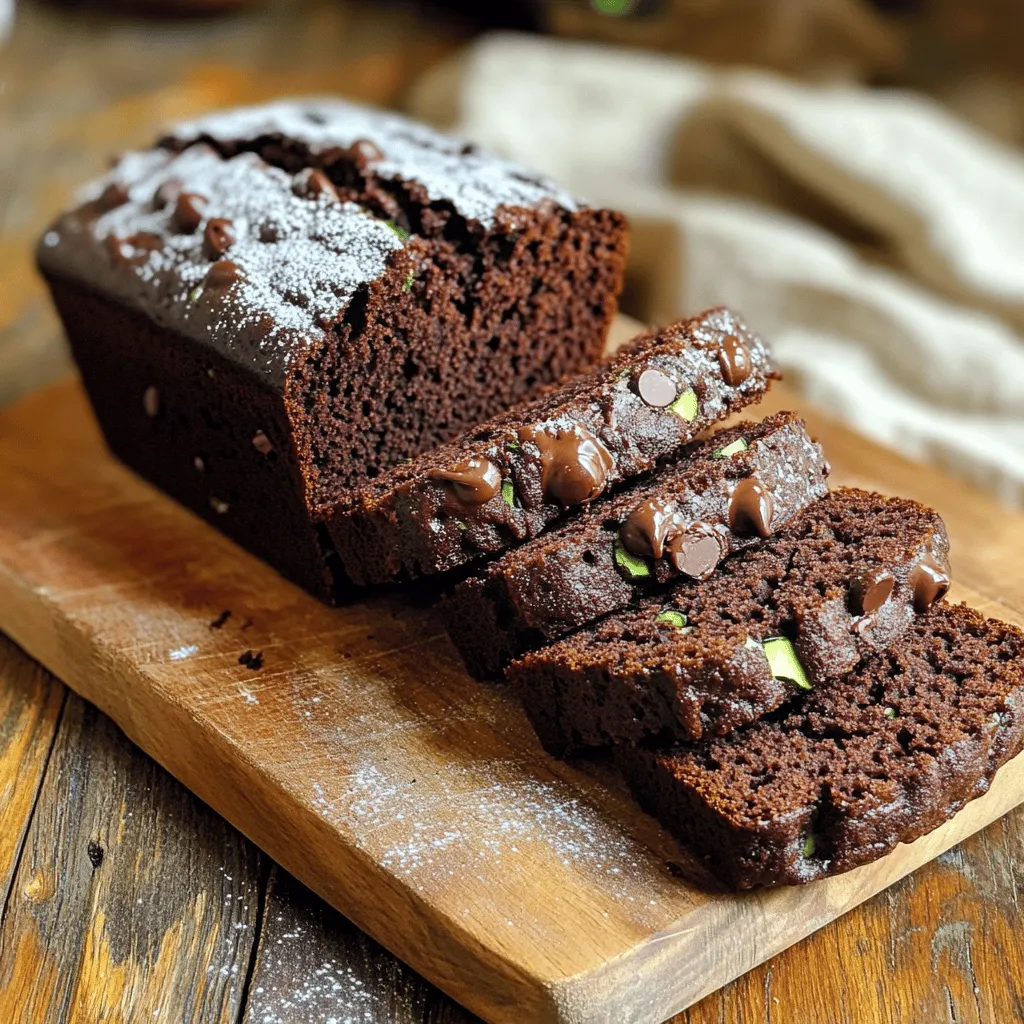
Chocolate Zucchini Bread Tasty and Rich Delight
Are you ready to treat yourself to a sweet, rich delight? Chocolate zucchini bread combines the best of both worlds: delicious chocolate and the hidden