Desserts
. Store your brownies at room temperature. Use an airtight container for best results. Line the container with parchment paper to prevent sticking. They will stay fresh for about three days. After that, they may dry out or lose flavor. If you like them warm, just pop them in the microwave for a few seconds. For long-term storage, freeze your brownies. Cut them into squares first. Wrap each piece tightly in plastic wrap. Then, place them in a freezer-safe bag or container. This way, you can enjoy them later without losing taste or texture. They can last up to three months in the freezer. When you're ready to eat, just take them out. Let them thaw in the fridge overnight. If you're in a hurry, you can thaw them on the counter for about an hour. Reheat them in the microwave for about 10-15 seconds. This warms them up nicely and brings back their moistness. Enjoy your tasty treat! For the complete details on making these delicious brownies, check out the Full Recipe. To make zucchini brownies, follow these steps: 1. Preheat your oven to 350°F (175°C). Grease an 8x8 inch baking dish or line it with parchment paper. 2. In a bowl, mix 1 cup of finely grated zucchini, 1/2 cup of unsweetened applesauce, 1/3 cup of vegetable oil, and 1 teaspoon of pure vanilla extract. 3. Add 1 cup of granulated sugar and 1/2 cup of packed brown sugar. Mix until well blended. 4. In another bowl, whisk together 1 cup of all-purpose flour, 1/2 cup of unsweetened cocoa powder, 1/2 teaspoon of baking powder, 1/2 teaspoon of baking soda, and 1/4 teaspoon of salt. 5. Combine the dry ingredients with the wet mixture. Stir gently until just mixed. 6. Fold in 1/2 cup of semi-sweet chocolate chips and optional nuts. 7. Pour the batter into the prepared dish and spread evenly. 8. Bake for 25-30 minutes. Check doneness with a toothpick. 9. Cool for 10 minutes in the pan, then move to a wire rack. No, you cannot taste the zucchini in these brownies. Zucchini adds moisture and richness. It blends well with cocoa and sugar. The flavors of chocolate dominate, while zucchini remains hidden. This makes brownies rich and moist without a veggie taste. Check for doneness by inserting a toothpick into the center. It should come out with a few moist crumbs, not wet batter. The edges will pull slightly away from the pan. The top should look set with a slight sheen. If the toothpick shows too much wet batter, bake longer. Zucchini is low in calories and high in vitamins. It adds fiber, which is good for digestion. It also provides hydration due to its high water content. Adding zucchini helps make brownies a bit healthier. You get a treat that has some nutrients without losing taste. Enjoy this delicious option! For the full recipe, check [Full Recipe]. Zucchini brownies are delicious and simple to make. We covered key ingredients, mixing, and baking steps. You learned tips for perfect texture and storage options. You can even try fun variations to fit your taste. Remember, these brownies can stay moist and flavorful. They’re a great treat for everyone, even if you’re watching your health. Enjoy experimenting with this recipe, and savor the rewards of your baking adventure!](https://tossedflavors.com/wp-content/uploads/2025/07/21c62910-059e-4724-b7b9-b3caf3c0a253.webp)
Zucchini Brownies Rich and Moist Chocolate Treat
If you’re craving a chocolate treat that surprises you with a healthy twist, look no further! These Zucchini Brownies are rich and moist, making them
![To make the best chocolate chip cake, you'll need the following ingredients: - 2 cups all-purpose flour - 1 ½ teaspoons baking powder - ½ teaspoon baking soda - ½ teaspoon salt - ¾ cup unsalted butter, softened to room temperature - 1 cup granulated sugar - ¾ cup brown sugar, packed firmly - 3 large eggs, at room temperature - 1 teaspoon pure vanilla extract - 1 cup buttermilk, at room temperature - 1 ½ cups semi-sweet chocolate chips - ½ cup chopped walnuts (optional) - Powdered sugar for dusting (optional) If you need different measurements, here are some easy conversions: - 1 cup = 240 ml - 1 tablespoon = 15 ml - 1 teaspoon = 5 ml This helps if you want to adjust your recipe or use different measuring tools. You can make your chocolate chip cake even more special by adding: - Chopped nuts: Walnuts or pecans add a nice crunch. - Dried fruit: Raisins or cranberries provide a sweet twist. - Flavor extracts: Almond or orange extract can change the taste. - Extra chocolate: Use chocolate chunks for a richer flavor. These add-ins let you customize your cake to fit your taste. Feel free to mix and match as you like! First, gather your ingredients. This makes the process smooth and easy. Preheat your oven to 350°F (175°C). Grease two 9-inch round cake pans with butter. You can also use parchment paper for easy removal. In a medium bowl, whisk together the flour, baking powder, baking soda, and salt. Set this aside for later. In a large bowl, cream the softened butter with granulated and brown sugar. Use an electric mixer for about 3-5 minutes. This step is key for a light cake. Next, add the eggs one by one, mixing well after each. Then, stir in the vanilla extract. Now, slowly mix the dry ingredients into the butter mixture. Alternate with the buttermilk. Start and end with the flour mix. This helps to keep your cake light. Finally, fold in the chocolate chips and walnuts if you want them. Divide the batter evenly between the two prepared pans. Smooth the tops with a spatula. Place the pans into the preheated oven. Bake for 25-30 minutes. To check if they are done, insert a toothpick in the center. It should come out clean. After baking, let the cakes cool in the pans for about 10 minutes. Then, gently remove them from the pans. Place the cakes on wire racks to cool completely. Once cooled, you can dust the top with powdered sugar if you like. An optional twist is to layer the cakes with whipped cream and more chocolate chips. This makes the cake even more special. For the full recipe and detailed steps, refer to the Full Recipe section. To make a moist chocolate chip cake, use room temperature ingredients. This helps them blend well. Buttermilk adds extra moisture and richness too. Avoid overmixing the batter. Mix just until the dry ingredients are combined. This keeps your cake fluffy and soft. Fluffiness comes from creaming the butter and sugars well. Mix them for about 3 to 5 minutes until light and fluffy. Adding eggs one at a time also helps create air pockets. Don't forget to fold in the chocolate chips gently. This keeps the batter airy. A few mistakes can ruin your cake. First, don’t skip the baking powder; it helps the cake rise. Second, always measure your flour correctly. Too much flour makes the cake dense. Lastly, avoid opening the oven door while baking. This can cause your cake to sink. For more details, check out the Full Recipe. {{image_4}} You can make a vegan version of this cake with simple swaps. First, replace the eggs with flaxseed meal. Mix 1 tablespoon of flaxseed with 2.5 tablespoons of water for each egg. Use coconut oil instead of butter. For milk, almond milk or soy milk works well. The rest of the ingredients remain the same, so you still get that tasty chocolate chip flavor. For a gluten-free cake, swap all-purpose flour with a 1:1 gluten-free flour blend. Ensure it contains xanthan gum for the right texture. You can use almond flour or coconut flour, but these will change the taste a bit. Check the labels to confirm no gluten is present. The other ingredients can stay the same, ensuring you enjoy a soft, moist cake. You can add fun flavors to your cake. Consider mixing in a teaspoon of espresso powder for a coffee twist. Or, add a splash of orange zest for a citrus kick. Chopped nuts, like pecans or almonds, add crunch and flavor. You can also swap chocolate chips for white chocolate or even caramel bits. Each of these changes can give your cake a new personality. For the complete cake recipe, refer to the [Full Recipe]. To keep your chocolate chip cake fresh, wrap it well. Use plastic wrap or foil to cover the cake. This helps keep moisture in. If you have slices, store them in an airtight container. Place parchment paper between layers for easy access. Keep your cake in a cool, dry place, away from sunlight. This helps maintain its taste and texture. Freezing your chocolate chip cake is simple. First, let the cake cool completely. Then, wrap it tightly in plastic wrap. For extra protection, add a layer of foil. Label it with the date. You can freeze the cake for up to three months. When you are ready to eat it, move it to the fridge overnight. This will help the cake thaw slowly. Chocolate chip cake lasts about four to five days at room temperature. You can extend its life by refrigerating it. If the cake develops a dry texture or an off smell, it's time to toss it. Mold is another sign of spoilage. Always check for these signs before enjoying your cake. Enjoy your chocolate chip cake while it’s fresh for the best taste! To prevent sticking, grease the pan well. Use unsalted butter or cooking spray. Then, dust the pan with flour. You can also line it with parchment paper. This makes it easy to lift the cake out after baking. A well-prepared pan gives you a clean release. Absolutely! You can swap semi-sweet chips for dark or milk chocolate chips. Try white chocolate or butterscotch chips for a fun twist. You can even mix and match different types. Each type adds a unique flavor to your cake. Be creative with your choices! If your cake turns out dense, check your mixing method. Overmixing can create a heavy texture. Ensure your butter is softened, not melted. This helps trap air for a lighter cake. Also, make sure your baking powder and baking soda are fresh. This ensures proper rising. If needed, add a bit more buttermilk for moisture. In this blog post, we explored all you need for a perfect chocolate chip cake. We covered ingredients, preparation steps, and baking tips. You learned how to keep your cake moist and fluffy. We also shared fun recipe variations, storage tips, and answered common questions. Baking is all about fun and creativity. Use these tips to make your cakes better. Enjoy your baking journey!](https://tossedflavors.com/wp-content/uploads/2025/07/9af3ce2b-9acf-4daa-a9d0-a6613ff4df5d.webp)
Chocolate Chip Cake Delightfully Simple Recipe
If you love chocolate chip cookies, wait until you try my Chocolate Chip Cake! This delightfully simple recipe combines soft, fluffy cake with rich chocolate
. - Preheat the oven to 350°F (175°C). - Prepare a 9-inch round cake pan by greasing it. You can also line the bottom with parchment paper. This will help with easy removal later. - In a large bowl, cream together the softened butter and granulated sugar. Use an electric mixer on medium speed. Beat until light and fluffy, about 3-4 minutes. - Add the eggs, one at a time. Beat well after each addition. Mix in the buttermilk, almond extract, and vanilla extract until smooth. - In another bowl, whisk together the all-purpose flour, almond flour, baking powder, baking soda, and salt. Slowly add this dry mix to the wet ingredients. Stir gently. Avoid overmixing to keep the cake soft. - Carefully fold in the halved cherries and sliced almonds into the batter. Make sure they are evenly mixed. Set aside a few cherries and almond slices to decorate the top. - Pour the batter into the prepared cake pan. Use a spatula to smooth the top. Scatter the reserved cherries and almond slices over the batter. Press them down gently. - Place the cake in the preheated oven and bake for 30-35 minutes. You know it’s done when a toothpick in the center comes out clean. - Remove the cake from the oven and let it cool in the pan for about 10 minutes. Carefully transfer it to a wire rack to cool completely. For the full recipe, check out the Cherry Almond Bliss Cake. - Checking doneness: Insert a toothpick into the center of the cake. It should come out clean. If you see wet batter, bake a few more minutes. - Avoid overmixing: Mix the batter until just combined. Overmixing can make the cake tough. - Dusting with powdered sugar: Once the cake cools, sprinkle powdered sugar on top. This adds a lovely touch. - Garnishing with mint and cherries: Add fresh mint leaves and a few cherries to make it pop. This gives a nice color contrast. - Ideal pairings: Serve this cake with whipped cream or a cup of coffee. The flavors blend well together. - Best occasions to serve: This cake shines at birthday parties, tea times, or family gatherings. It suits any celebration. For the detailed recipe, check out the Full Recipe. {{image_4}} You can easily adjust this cake to fit your diet. For a gluten-free option, swap the all-purpose flour for a gluten-free blend. Make sure the blend has a good structure for baking. You can also use almond flour as part of this mix for added flavor. If you need a dairy-free alternative, use coconut milk instead of buttermilk. Replace unsalted butter with coconut oil or a dairy-free butter. These swaps keep the cake moist and tasty, just like the original. Feel free to play with flavors! You can add different fruits to the batter. Blueberries, raspberries, or even diced peaches work well. Each fruit gives a unique taste and color. You can also switch extracts. Instead of almond extract, try vanilla or coconut. Each choice will change the cake’s aroma and flavor profile. Experimenting can lead to your new favorite version! This recipe is not just for a layered cake. You can make cupcakes instead! Simply pour the batter into cupcake liners and bake for about 20-25 minutes. They are perfect for parties or individual treats. You can also adapt this recipe into a sheet cake. Just use a larger pan and adjust the baking time. This style is great for gatherings or potlucks. Each variation allows you to enjoy the delightful cherry almond flavors in more ways. For the full recipe, check out the Cherry Almond Bliss Cake recipe! To keep your Cherry Almond Cake fresh for a few days, store it at room temperature. Place it in an airtight container. This keeps the moisture in and helps prevent it from drying out. If your kitchen is warm or humid, consider refrigerating it. In the fridge, it can last about five days. If you want to save some cake for later, freezing is a great option. Wrap the cake tightly in plastic wrap. Then, place it in a freezer-safe bag or container. This keeps the cake fresh for up to three months. When you’re ready to enjoy it, move the cake to the fridge overnight to thaw. You can also leave it at room temperature for a few hours. Cherry Almond Cake usually lasts about five days at room temperature. In the fridge, it can last up to a week. Keep an eye out for signs of spoilage. If you see mold, or if it has a strange smell, it is best to throw it away. Enjoy your cake while it's fresh for the best flavor! For the full recipe, check out the Cherry Almond Bliss Cake . Yes, you can use frozen cherries. Just thaw them first. Drain any excess juice to avoid a soggy cake. Frozen cherries work well and still taste great! The cake is done when a toothpick inserted in the center comes out clean. It should spring back when lightly pressed. Check around the 30-minute mark to be safe. If you need a substitute, try using all-purpose flour or oat flour. Ground sunflower seeds can also work. Adjust the amount as needed since these flours may change the cake's texture. Yes, you can make this cake a day ahead. Just bake, cool, and store it in an airtight container. It stays fresh and tastes even better the next day! Store leftover cake at room temperature in an airtight container. If you live in a warm area, refrigerate it. Always keep it covered to maintain moisture and flavor. For a nut-free version, use regular flour instead of almond flour. You can skip almond extract and use vanilla extract instead. This keeps the flavor delicious without nuts. For the complete recipe, check out the Full Recipe section. You now have everything you need to bake a delicious cherry almond cake. We discussed key ingredients, from all-purpose flour to optional garnishes. I shared step-by-step instructions to guide you through the process. We even explored tips and variations for a personal touch. As you bake your cake, remember these tips will help you create something special. Enjoy every slice and share it with loved ones. Happy baking!](https://tossedflavors.com/wp-content/uploads/2025/07/63ccb3de-24e9-44cb-a9bb-ed52b4538a34.webp)
Cherry Almond Cake Delightful Flavor for Any Occasion
Are you ready to treat your taste buds? This Cherry Almond Cake combines sweet cherries with nutty almond flavor, making it perfect for any occasion.

Zucchini Chocolate Chip Muffins Irresistible and Easy
If you love easy baking and delicious treats, you’re in for a treat! Today, I’ll show you how to make Zucchini Chocolate Chip Muffins that
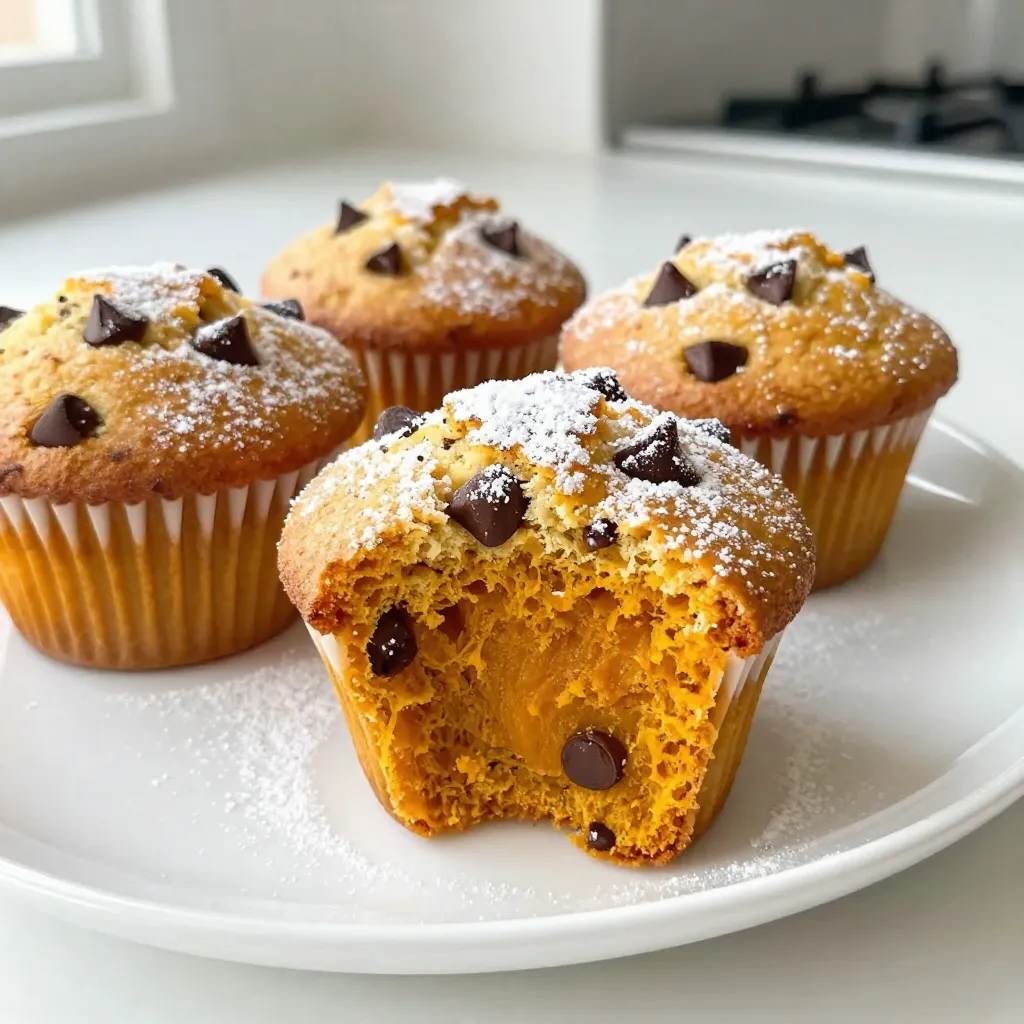
Chocolate Chip Pumpkin Muffins Tasty Fall Treat
Fall is here, and it’s time to savor those cozy flavors with Chocolate Chip Pumpkin Muffins! These muffins combine the warm spice of pumpkin with
![- 1 can (15 oz) black beans - 3 large eggs - 1/2 cup unsweetened cocoa powder - 1/4 cup honey or maple syrup - 1/4 cup coconut oil, melted - 1 teaspoon pure vanilla extract - 1/2 teaspoon baking powder - 1/2 teaspoon baking soda - A pinch of fine salt - Optional: 1/2 cup dark chocolate chips When I make this cake, I love using black beans. They add moisture and protein. The cocoa powder gives a rich, chocolate flavor. You can choose honey or maple syrup for sweetness. Coconut oil adds a lovely texture and taste. - High in fiber and protein - Rich in antioxidants - Low in fat and cholesterol Black beans are a superfood! They are high in fiber, which helps digestion. They also have protein, making them great for energy. Antioxidants help keep our bodies healthy and fight off illness. Plus, they are low in fat and cholesterol, making this cake a smart dessert choice. - Calories per serving: About 150 - Macronutrient breakdown: - Carbs: 20g - Fats: 8g - Proteins: 5g - Micronutrients: - Iron - Magnesium - Folate Each slice packs a punch of nutrition! You'll get a good amount of protein and fiber. Plus, the cake is rich in important vitamins and minerals, keeping it healthy while still tasting delicious. For the full recipe, check out my detailed guide! - Preheat the oven to 350°F (175°C). - Prepare an 8-inch round cake pan by greasing it or lining it with parchment paper. - In a food processor, combine the rinsed black beans, eggs, cocoa powder, honey or maple syrup, melted coconut oil, vanilla extract, baking powder, baking soda, and a pinch of salt. - Blend until the batter is smooth and homogeneous, about 1-2 minutes. Stop to scrape down the sides for an even mix. - Pour the batter into the prepared cake pan, spreading it evenly with a spatula. - Place the pan in the oven and bake for 25-30 minutes. To check if it’s done, insert a toothpick into the center. It should come out clean or with a few moist crumbs. - After baking, let the cake cool in the pan for about 10 minutes. Then, transfer it to a wire rack to cool completely. For the full recipe, check out the detailed steps above. Enjoy baking! To keep your black bean chocolate cake moist, start with room temperature ingredients. Cold eggs or oil can lead to a dry cake. Mix your ingredients well, but don’t overdo it. Blend until smooth but stop to scrape the sides often. This helps create a uniform batter. For a beautiful cake, consider how you serve it. Place it on a nice platter. Garnish with fresh mint leaves or sliced strawberries around the edges. A light dusting of cocoa powder adds an elegant touch. You can also pair the cake with a fruit sauce or a scoop of yogurt for added flavor. If your cake sinks, check your baking powder and baking soda. Ensure they are fresh. A too dense cake can come from over-mixing. If the center is undercooked, bake for a few more minutes. Always test with a toothpick. If it comes out wet, give it more time in the oven. {{image_4}} You can make this cake even healthier with a few smart swaps. - Use alternative sweeteners like stevia or agave syrup. - Try flourless options to keep it gluten-free. This way, everyone can enjoy it. For a taste twist, add some spices. - A bit of cinnamon can warm up the flavor. - Adding espresso boosts the chocolate taste. You can also mix in nuts or different chocolate types for extra crunch and richness. How you serve the cake can make it more fun. - Layer it with whipped cream or yogurt for a creamy touch. - Consider turning it into cupcakes or muffins. They are perfect for parties or snacks. These variations let you personalize the cake to fit your taste. Check out the Full Recipe for more details! To keep your Healthy Black Bean Chocolate Cake fresh, store it in an airtight container. This helps keep moisture in and prevents the cake from drying out. You can also wrap the cake with plastic wrap for extra protection. If you cut the cake, place the slices in a single layer in the container. This prevents them from sticking together. You can freeze individual slices of this cake for later enjoyment. First, wrap each slice tightly in plastic wrap. Then, place the wrapped slices in a freezer-safe bag. Make sure to remove as much air as possible before sealing. To defrost, take out a slice and leave it in the fridge overnight. This keeps the texture nice and moist. At room temperature, this cake lasts about three days if stored properly. For longer freshness, keep it in the fridge, where it can last up to a week. Just remember to bring it back to room temperature before serving for the best flavor and texture. No, you cannot taste the black beans in this cake. They blend in well. They add moisture and texture. The rich chocolate flavor hides any bean taste. Many people are surprised that beans make a cake so yummy. You can enjoy delicious chocolate without knowing the secret ingredient! Yes, this cake fits many diets. It is gluten-free since it has no flour. You can make it vegan by using a substitute for eggs. Try flaxseed or applesauce as a replacement. It is also low in sugar, depending on your sweetener choice. This means you can enjoy it while staying healthy! To make the cake sweeter, you can add more honey or maple syrup. Start with a tablespoon more and mix well. You can also try adding a bit of stevia or agave syrup. Taste the batter before baking. Adjust it to your liking. This way, you create a cake that suits your sweet tooth perfectly! For the complete recipe, check out the [Full Recipe]. This blog shared a fun and simple recipe for a delicious black bean cake. You learned about key ingredients and their health benefits. The baking steps were clear, making it easy to follow. Tip sections helped ensure your cake turns out moist and tasty. You explored variations and smart storage methods. In closing, making this cake can boost your health while satisfying your sweet tooth. Enjoy baking and sharing this unique treat with others!](https://tossedflavors.com/wp-content/uploads/2025/07/91c7c3fb-2fb2-4fb2-96eb-a6d91ec37b10.webp)
Healthy Black Bean Chocolate Cake Delicious Dessert
Looking for a dessert that’s both tasty and healthy? You’ve come to the right place! This Healthy Black Bean Chocolate Cake is a game changer.
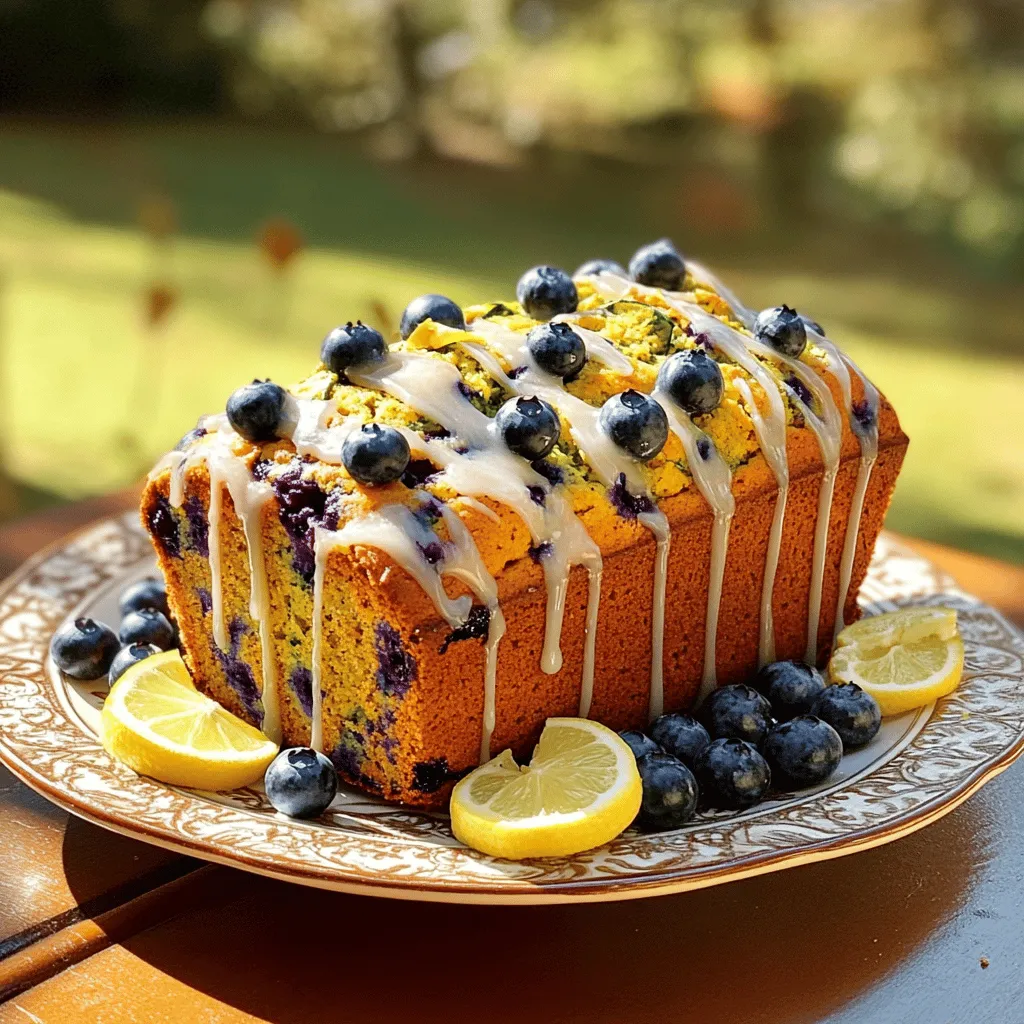
Blueberry Zucchini Bread with Lemon Glaze Delight
Are you ready to awaken your taste buds with a mouthwatering twist on classic banana bread? My Blueberry Zucchini Bread with Lemon Glaze brings together
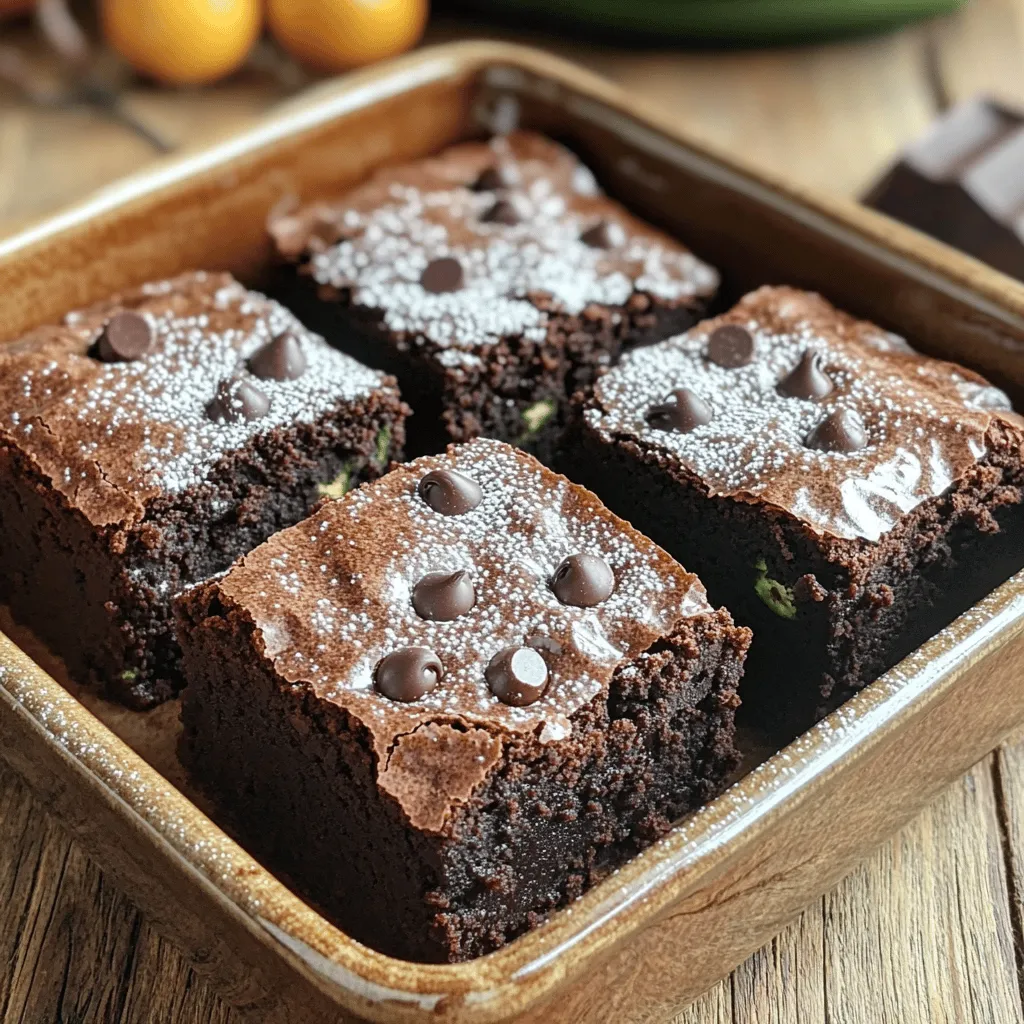
The Best Zucchini Brownies You’ll Ever Eat Delight
Want a delicious treat without the guilt? You’re in for a surprise with these zucchini brownies! I’ll show you how to turn simple ingredients into
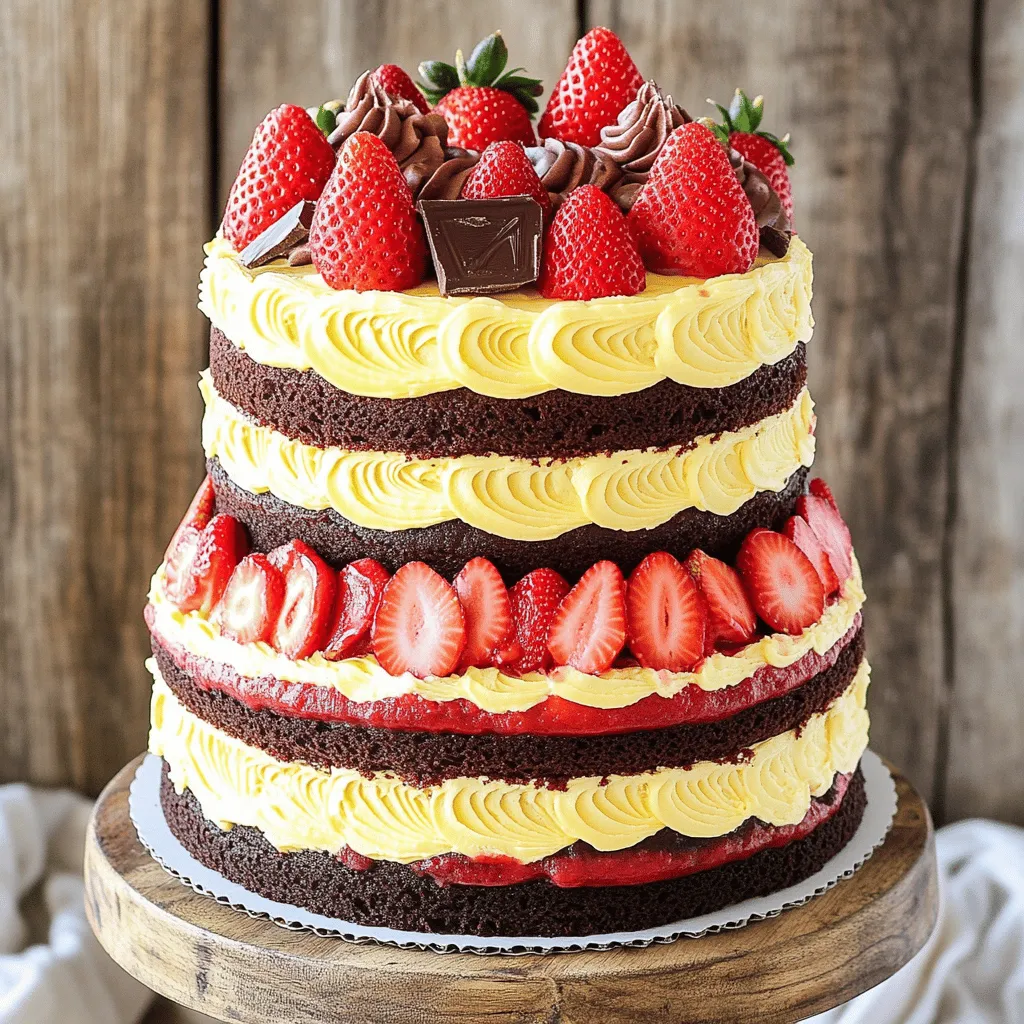
Neapolitan 5-Layer Birthday Cake Delightful Recipe
Do you dream of a cake that’s as vibrant as it is delicious? The Neapolitan 5-Layer Birthday Cake is a showstopper that combines rich chocolate,
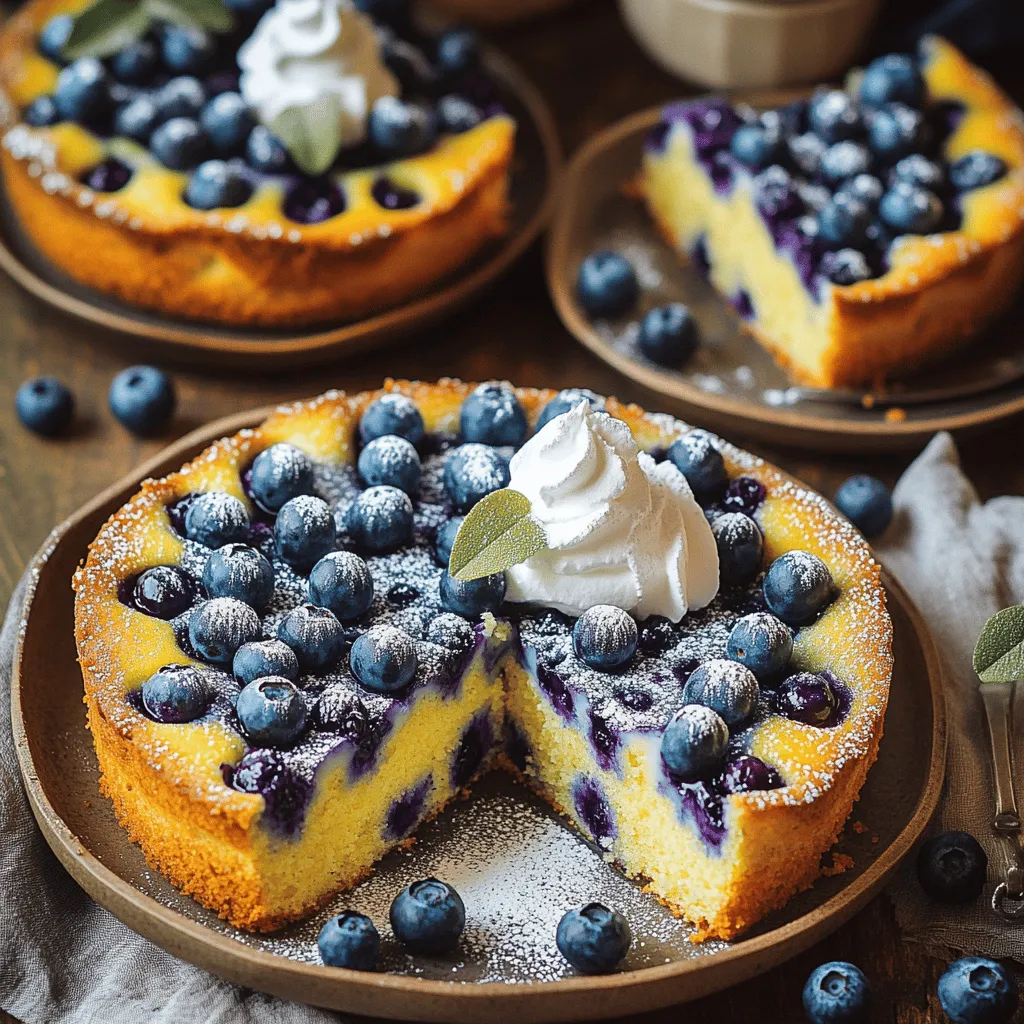
Blueberry Torte Recipe Flavorful and Simple Delight
Are you ready for a treat that’s both sweet and simple? This Blueberry Torte Recipe combines fresh berries with a light, fluffy base, making it