Breakfast
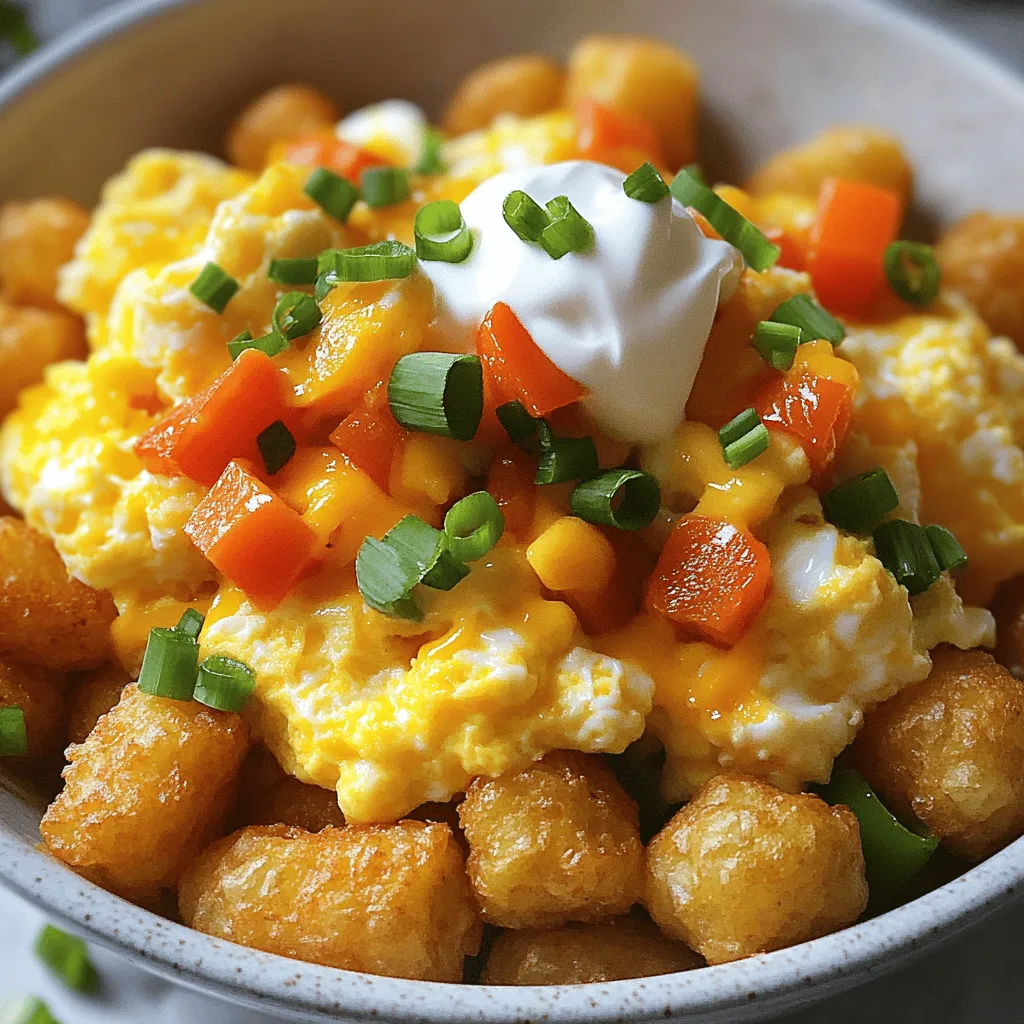
Tater Tot Breakfast Bowl Flavorful and Easy Recipe
If you’re looking for a fun, tasty start to your day, you’ve come to the right place! My Tater Tot Breakfast Bowl is packed with

Easy Sausage and Egg Casserole Simple Family Meal
Looking for a quick and tasty family meal? This Easy Sausage and Egg Casserole is just what you need! Made with simple ingredients like eggs,
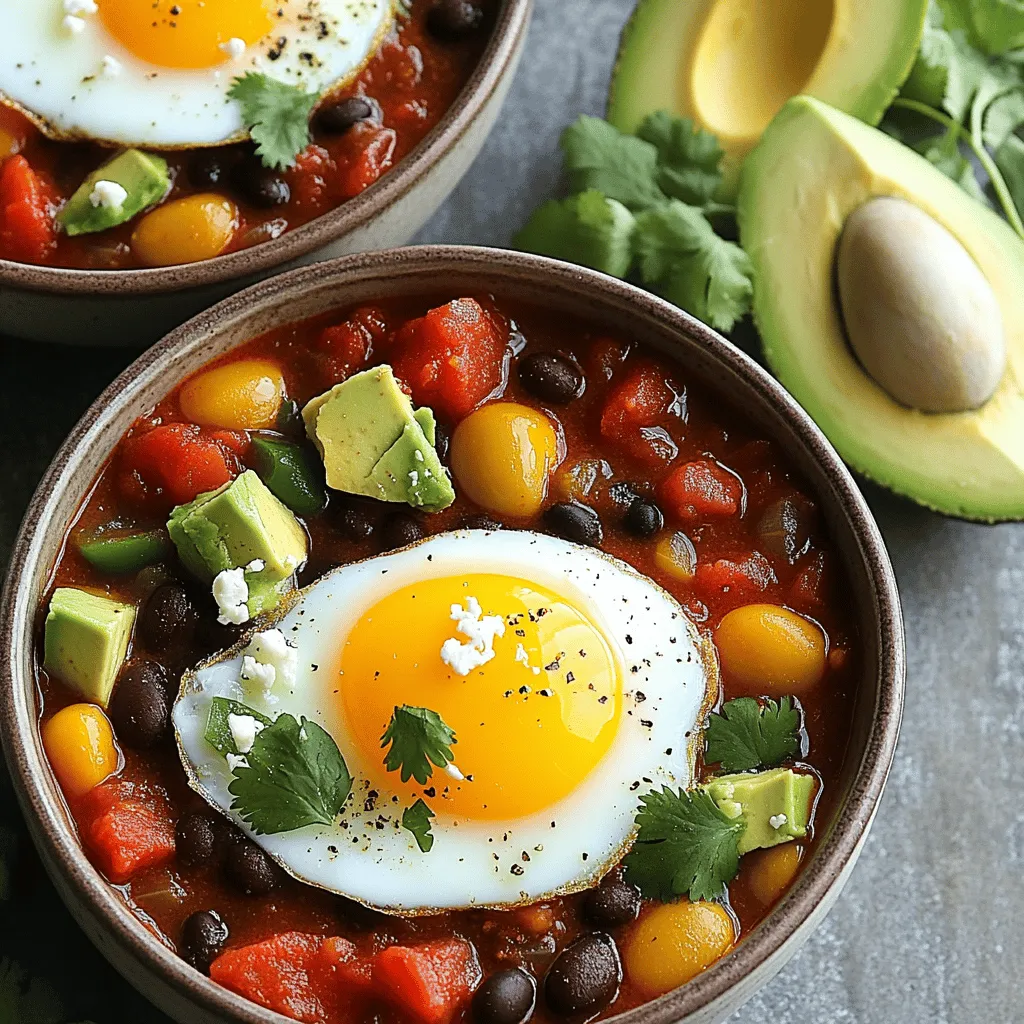
Breakfast Chili and Eggs Flavorful Morning Delight
Are you ready to spice up your mornings? Breakfast Chili and Eggs is the perfect dish to awaken your taste buds and start your day
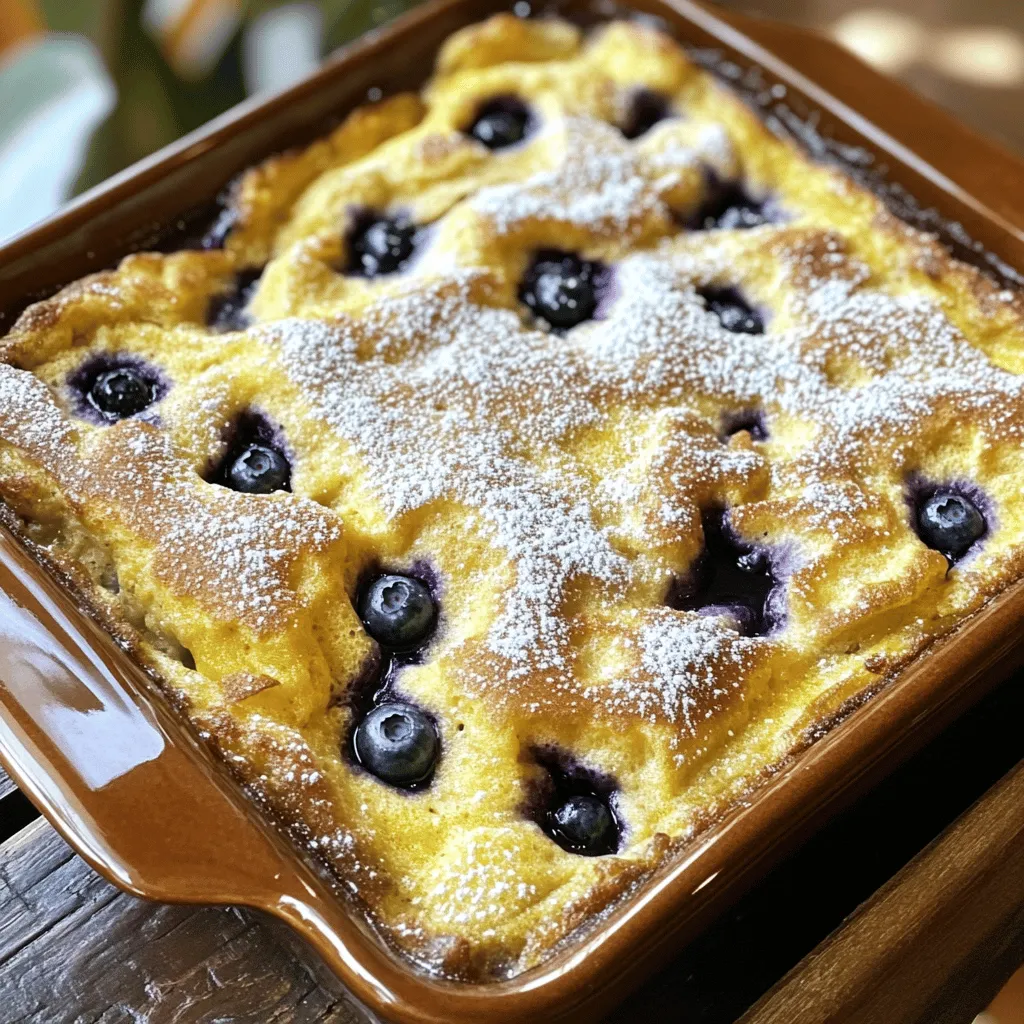
Blueberry Buttermilk Pancake Casserole Delightful Dish
Looking for an easy and delicious breakfast? This Blueberry Buttermilk Pancake Casserole is the perfect solution! Bursting with juicy blueberries and fluffy buttermilk pancake goodness,
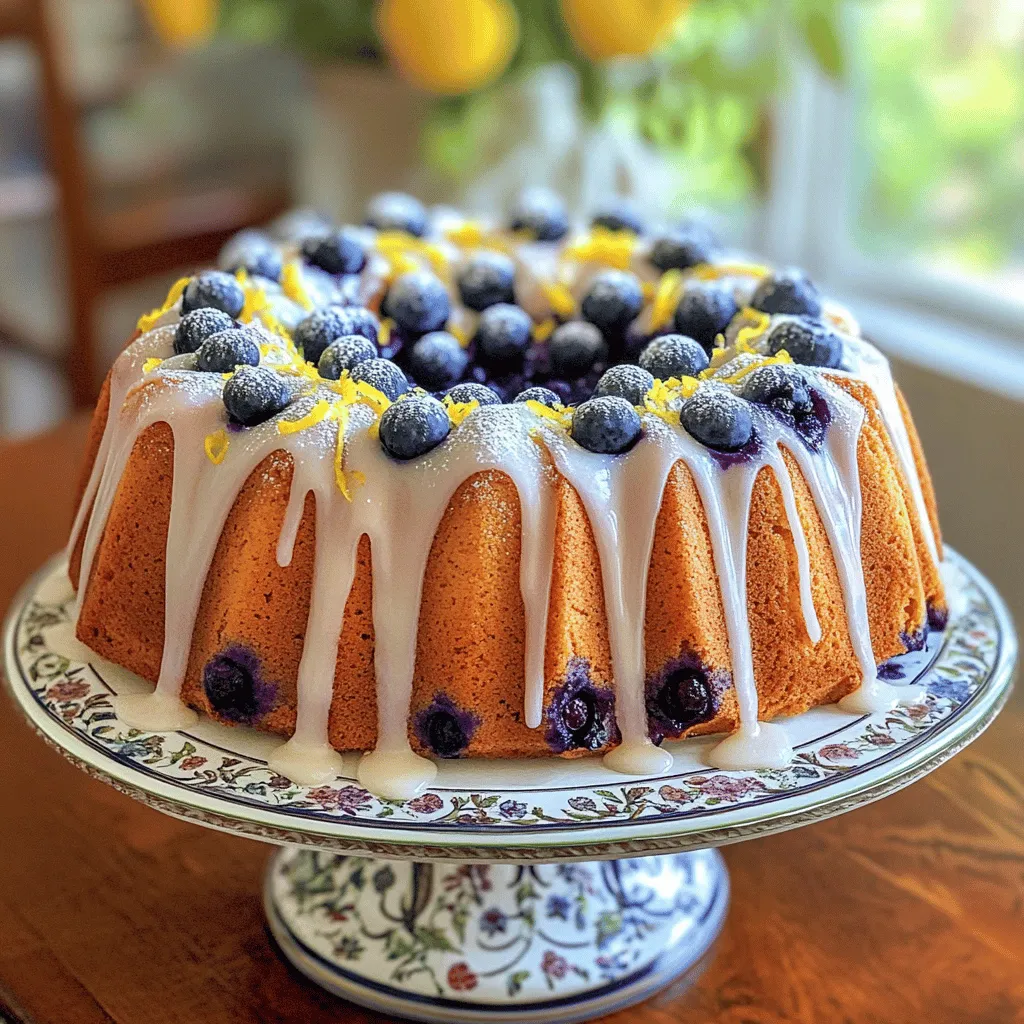
Blueberry Breakfast Bundt Cake Delightful Morning Treat
Start your morning off right with this Blueberry Breakfast Bundt Cake! Bursting with fresh blueberries and a hint of lemon, this cake is both delicious
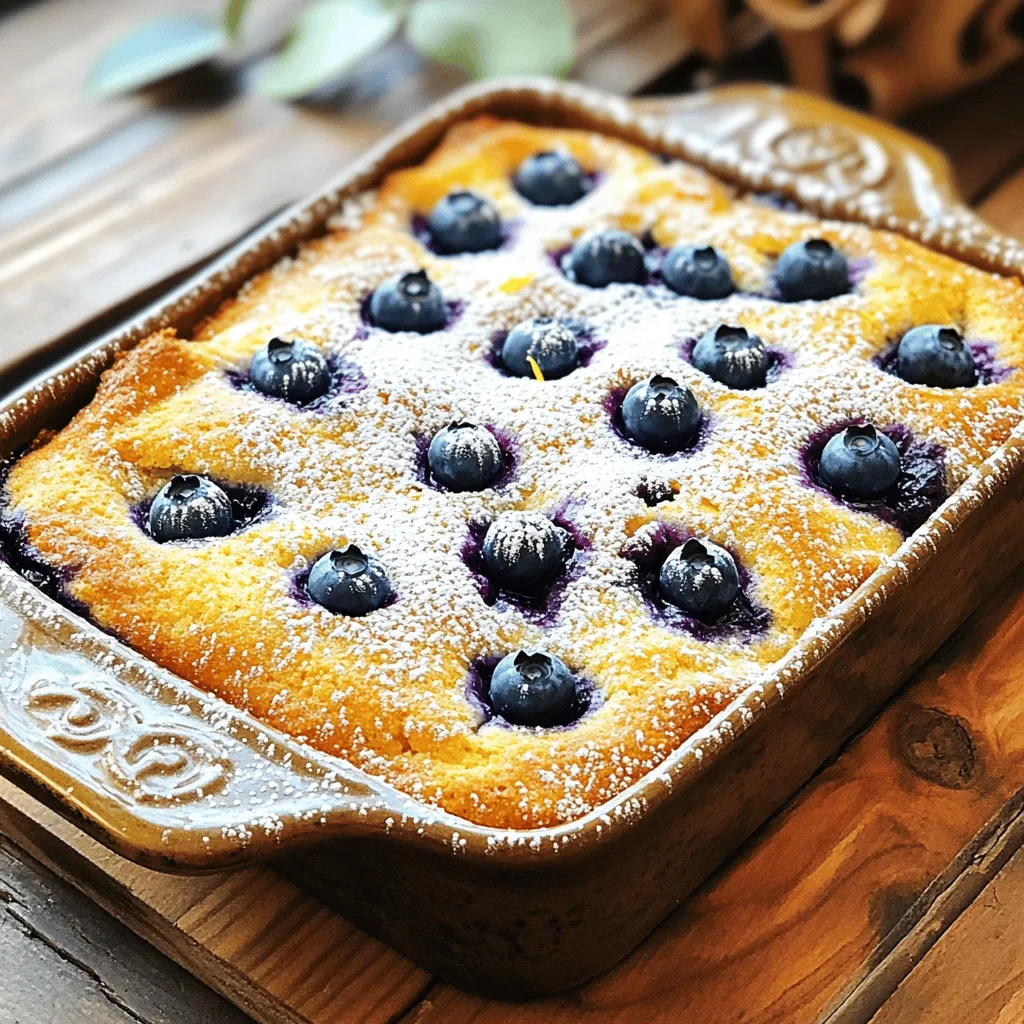
Blueberry Breakfast Cake Delightfully Sweet Start
Start your day on a delicious note with this Blueberry Breakfast Cake! Bursting with fresh berries and a hint of lemon, it’s a treat you
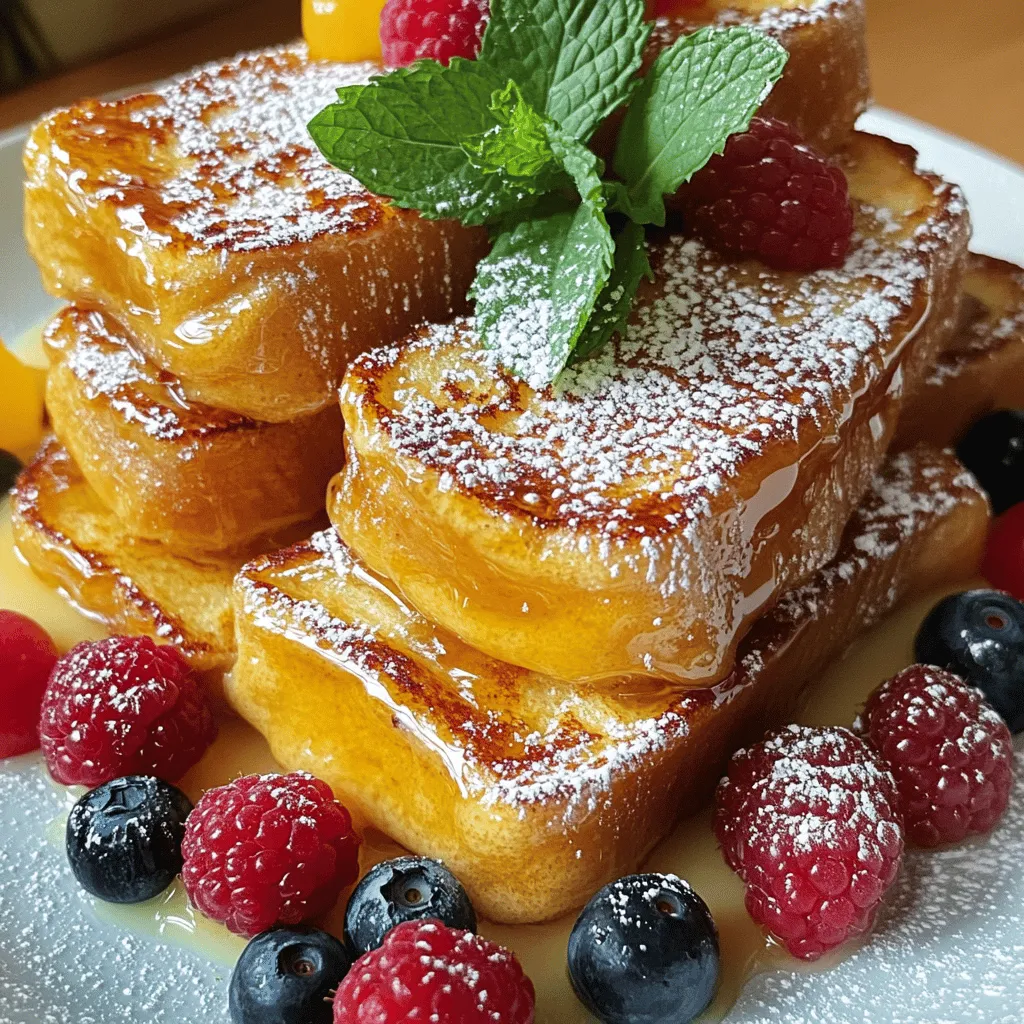
Overnight Crème Brûlée French Toast Delightful Recipe
Are you ready to elevate your breakfast game? This Overnight Crème Brûlée French Toast is a showstopper that combines creamy custard and crispy caramel, all
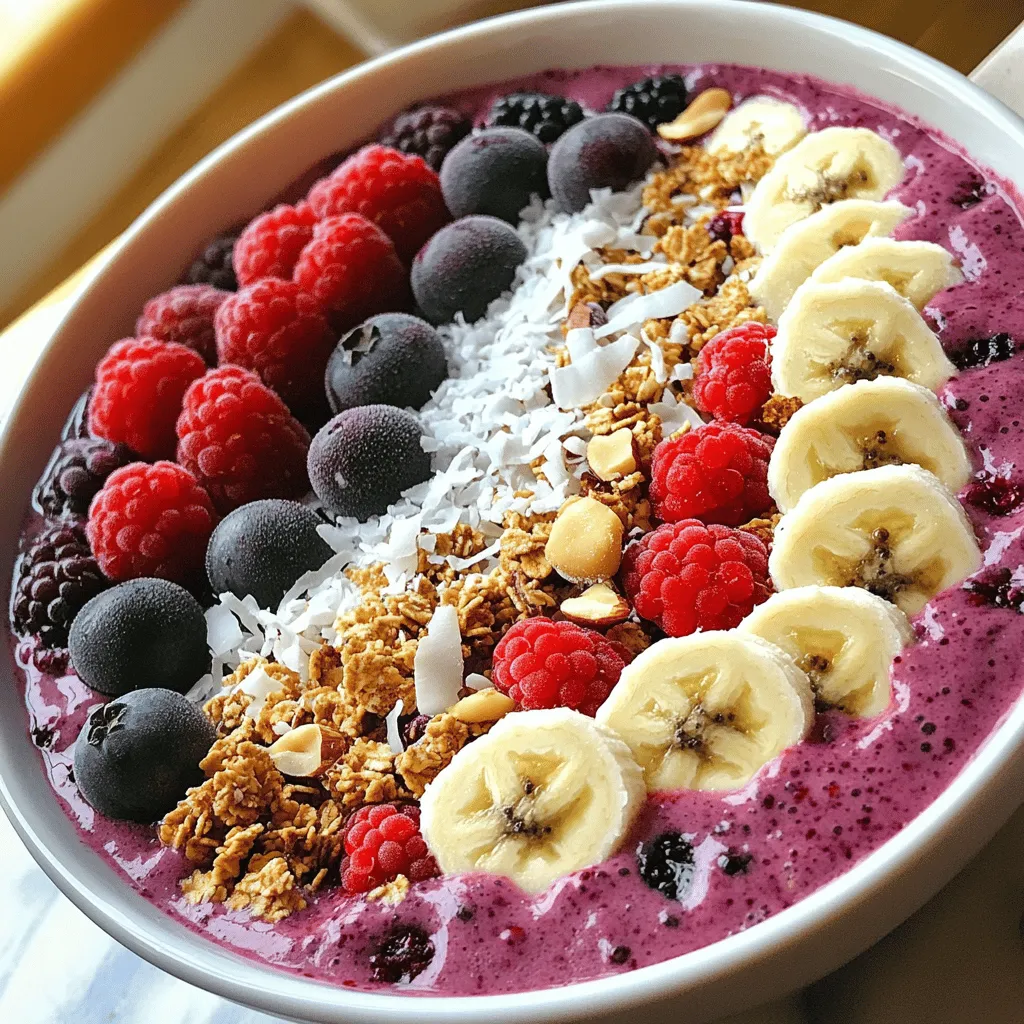
Berry Smoothie Bowl Energizing and Delicious Start
Start your day right with a Berry Smoothie Bowl! Packed with flavors and nutrients, this recipe is quick to whip up. Using frozen mixed berries,

Veggie Packed Egg Muffins Tasty and Easy Recipe
Are you looking for a quick and healthy breakfast option? These Veggie Packed Egg Muffins are easy to make and tasty too! With a mix
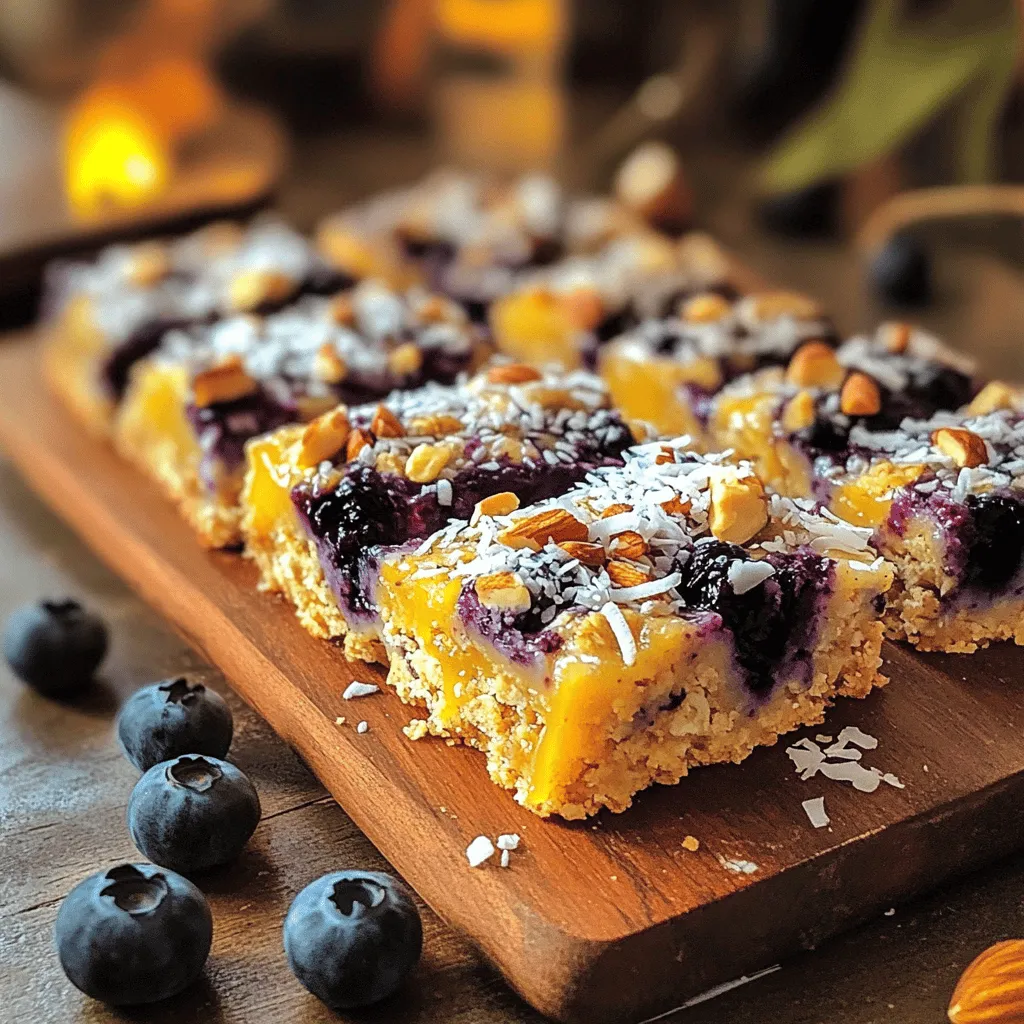
Blueberry Oatmeal Bars Healthy and Tasty Snack Recipe
Are you looking for a healthy and tasty snack that’s easy to make? Blueberry oatmeal bars are your answer! Packed with wholesome ingredients, they make