Breakfast

- 6 slices of thick-cut brioche or challah bread - 8 oz cream cheese, softened - 1/4 cup powdered sugar - 1 tsp vanilla extract - 1 cup fresh strawberries, hulled and sliced - 2 large eggs - 1/2 cup milk - 1/2 tsp ground cinnamon - 1 tbsp butter (for cooking) - Maple syrup (for serving) - Extra sliced strawberries (for garnish) - Whipped cream (optional, for serving) To make Strawberry Cheesecake Stuffed French Toast, gather these ingredients. You want thick-cut brioche or challah bread for the best texture. Cream cheese gives that cheesecake flavor. Mix in powdered sugar and vanilla extract for sweetness and depth. Fresh strawberries add a nice fruity touch. Next, you’ll need eggs, milk, and ground cinnamon. This mixture creates a custard. It helps the bread soak up flavor while cooking. Butter is essential for cooking and flavor. Maple syrup is a must for serving. It adds sweetness and richness. Optional garnishes include more sliced strawberries and whipped cream. They make your dish look beautiful and taste even better. Each ingredient plays a key role in your French toast delight. {{ingredient_image_1}} To make the filling, start by taking a bowl. Combine 8 oz of softened cream cheese, 1/4 cup of powdered sugar, and 1 tsp of vanilla extract. Mix these until smooth and creamy. This step is key for a rich flavor. Next, gently fold in 1 cup of sliced strawberries. Make sure the strawberries are evenly mixed into the cream cheese. This filling is what makes your French toast special. Now it’s time to create the stuffed sandwiches. Take two slices of thick-cut brioche or challah bread. Spread about 2-3 tablespoons of the strawberry cheesecake filling on one slice. Place another slice on top, making a sandwich. Repeat this for the rest of the bread slices. Make sure each sandwich has enough filling. This will ensure every bite is delicious. For cooking, whisk together 2 large eggs, 1/2 cup of milk, and 1/2 tsp of ground cinnamon in a shallow dish. This mixture will coat the sandwiches. Heat a skillet over medium heat and add 1 tbsp of butter. Dip each stuffed sandwich into the egg mixture, coating both sides well. Let any excess drip off before placing it in the skillet. Cook for about 3-4 minutes on each side. You want them golden brown and slightly crispy. Once cooked, remove them from the skillet and keep warm. Repeat this with any remaining sandwiches. Enjoy them warm, drizzled with maple syrup and garnished with extra sliced strawberries! To make the best Strawberry Cheesecake Stuffed French Toast, ensure you mix the filling well. Take your time when blending the cream cheese, powdered sugar, and vanilla. This helps create a smooth filling. If the mixture is lumpy, it won’t spread easily. Next, avoid soaking the bread too long. Dip each sandwich into the egg mixture just enough to coat. Too much soaking makes the bread soggy. You want it to soak up flavor but still hold its shape. When serving, pair this dish with fresh fruit, like a side of berries. This adds color and freshness to your plate. You can also serve it with crispy bacon or sausage for a savory touch. For a beautiful presentation, dust the French toast with powdered sugar. This adds a nice touch and makes it look fancy. Place the stuffed French toast on a pretty plate and drizzle extra maple syrup around the edges. Add a dollop of whipped cream on top for a special treat. Pro Tips Use Day-Old Bread: Using slightly stale brioche or challah helps the bread absorb the egg mixture without becoming too soggy, resulting in a better texture. Customize the Filling: Feel free to experiment with different fruits like blueberries or raspberries, or add a splash of lemon zest for an extra zing in your cheesecake filling. Control the Heat: Cook on medium heat to ensure the outside gets golden brown while allowing the inside to warm through without burning the bread. Presentation is Key: For an impressive presentation, stack the stuffed French toasts, drizzle with syrup, and top with whipped cream and fresh fruit for a colorful finish. {{image_2}} You can change the fruit for fun. Blueberries or bananas work great too. Just swap the strawberries for your favorite fruit. This keeps the taste fresh and exciting. You can also modify the cream. Try using flavored cream cheese. Options like strawberry or vanilla add a nice twist. Mixing in lemon zest brings a bright kick to every bite. You can make this dish fit your needs. Use gluten-free bread if you want to avoid gluten. Many brands offer tasty options that work well. For dairy-free lovers, try alternatives for cream cheese. Brands now make coconut or almond cream cheese. These options keep the flavor rich without the dairy. You’ll still enjoy a delightful stuffed French toast! To keep your Strawberry Cheesecake Stuffed French Toast fresh, store it in the fridge. Use an airtight container to prevent it from drying out. If you have extra filling, keep it in a separate container. This way, you can enjoy the leftovers without losing flavor. When reheating, the best method is to use a skillet. Heat it on low and add a bit of butter. Place the French toast in the skillet for about 2-3 minutes on each side. This keeps the outside crispy while warming the inside. You can also use a microwave, but the texture may not be as nice. If you choose the microwave, heat it in short bursts. Enjoy your delicious French toast warm! Can I make this in advance? Yes, you can prepare the filling the night before. Store it in the fridge. You can also assemble the sandwiches ahead of time. Keep them wrapped in the fridge. Just cook them in the morning for a warm treat. How do I keep French toast warm? To keep your French toast warm, set your oven to a low heat. Place the cooked French toast on a baking sheet. Cover it with foil to keep it warm while you cook the rest. This way, all your French toast stays nice and toasty. What can I serve alongside? You can serve fresh fruit like bananas or more strawberries. A side of crispy bacon adds a savory touch. You might also like to add yogurt or whipped cream for extra flavor. A sprinkle of powdered sugar makes it look fancy, too! This blog post shared how to make delicious strawberry cheesecake stuffed French toast. We covered key ingredients, like brioche and cream cheese, and outlined step-by-step instructions for making the dish. I also shared helpful tips for perfecting the recipe, fun variations, and storage info. As you try this fun recipe, remember that the key is enjoyment. Experiment with flavors and presentation. This dish is perfect for breakfast or brunch with friends and family. Enjoy your cooking adventure!
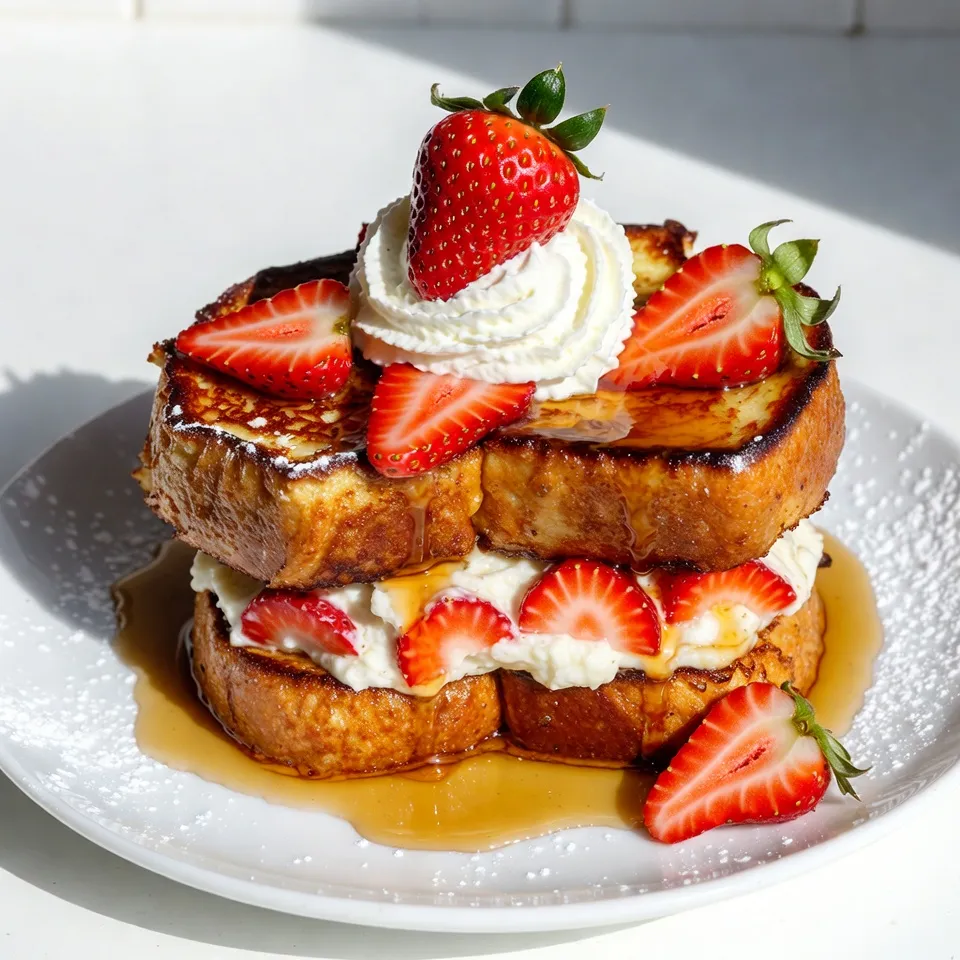
Strawberry Cheesecake Stuffed French Toast Delight
Welcome to a breakfast dream that will delight your taste buds! Today, we’re diving into Strawberry Cheesecake Stuffed French Toast. This sweet twist on a
To make Chocolate Hazelnut Overnight Oats, gather these must-have items: - 1 cup rolled oats - 2 cups milk of choice (almond, oat, or dairy) - 2 tablespoons cocoa powder - 2 tablespoons chocolate hazelnut spread (like Nutella) - 1 tablespoon chia seeds - 1 tablespoon maple syrup or honey - 1/4 teaspoon vanilla extract - Pinch of salt These ingredients work together to create a creamy and chocolatey base that is both filling and flavorful. You can personalize your overnight oats with these tasty additions: - 1/4 cup chopped hazelnuts (for topping) - Sliced banana or berries (for serving) These extras not only add flavor but also provide texture and visual appeal. If you have dietary needs, you can easily swap some ingredients: - Use almond milk or oat milk for a dairy-free option. - Choose agave nectar instead of maple syrup or honey for a vegan option. - Try flaxseeds in place of chia seeds for a different boost. These substitutions help ensure everyone can enjoy this delicious recipe without worry. {{ingredient_image_1}} First, gather your ingredients. You need rolled oats, cocoa powder, chia seeds, and salt. For the wet mix, get your milk, chocolate hazelnut spread, maple syrup or honey, and vanilla extract. This recipe is simple and fun. Start by measuring everything out before you begin. 1. In a medium bowl, mix the rolled oats, cocoa powder, chia seeds, and a pinch of salt. Stir until everything blends well. 2. In another bowl or measuring cup, whisk together your milk and chocolate hazelnut spread. Add maple syrup or honey and vanilla extract. Mix until smooth. 3. Pour this liquid mix over the dry ingredients. Stir until all the oats are coated. You want a good mix. 4. Next, divide the mixture into two jars or containers. Seal them tightly with lids. This keeps the oats fresh. Make sure to use clear jars. This way, you can see the layers. It looks nice and inviting. Refrigerate the jars for at least 4 hours or overnight. This soaking time helps the oats become soft. When you’re ready to eat, stir the oats well. Top with chopped hazelnuts and sliced banana or berries for extra flavor. Enjoy! To boost the taste of your chocolate hazelnut overnight oats, consider adding spices. A pinch of cinnamon or a dash of nutmeg can add warmth. You can also mix in a spoonful of peanut butter for a nutty twist. If you like it sweeter, try adding more maple syrup or honey. For a fruity kick, toss in some fresh berries or sliced bananas right before serving. These small changes can make a big difference. Use high-quality ingredients for the best flavor. Choose rolled oats that are whole and fresh. For milk options, select a variety that suits your taste. Almond or oat milk adds a nice touch. When it comes to the chocolate hazelnut spread, pick one with simple ingredients. Look for one that uses real cocoa and nuts. Fresh hazelnuts are important too. Chopped hazelnuts should be crunchy and aromatic. Presentation can elevate your dish. Serve your oats in clear jars to show the layers. This makes it look appealing and fun. For decoration, drizzle a bit of extra chocolate hazelnut spread on top. Add a sprinkle of chopped hazelnuts for crunch. You can also layer in some sliced banana or fresh berries for a splash of color. These simple steps make the dish feel gourmet and inviting. Pro Tips Use Overnight Soaking: Allow the oats to soak overnight for a creamier texture and deeper flavor absorption. Experiment with Milk: Try different types of milk, like coconut or cashew milk, for a unique twist on flavor. Layering for Presentation: When serving, layer the oats with toppings for a beautiful visual effect, making it more appealing. Nut Variations: Substitute hazelnuts with other nuts or seeds, like almonds or walnuts, to customize the recipe to your taste. {{image_2}} You can easily switch up the flavor of your oats. Try using almond butter instead of chocolate hazelnut spread for a nutty twist. You can also add peanut butter for a classic combo. If you love fruits, mix in some pureed strawberries or raspberries for a fruity touch. Vanilla or caramel extracts can also add a new layer of flavor. If you want a dairy-free option, use almond or oat milk. For a nut-free version, be sure to skip the hazelnuts or use sunflower seeds as a topping. If you're watching sugar intake, you can use a sugar-free chocolate hazelnut spread. You can also adjust the maple syrup or honey to your taste. Change your toppings with the seasons. In spring, fresh strawberries or blueberries work wonders. In fall, add diced apples, cinnamon, or pumpkin puree for a cozy vibe. During winter, try using dried fruits like cranberries or figs and nuts for added texture. Each season can bring a new twist to your overnight oats. To keep your Chocolate Hazelnut Overnight Oats fresh, store them in airtight jars. This helps keep moisture out. If you make multiple servings, use separate containers. Label the jars with the date. This way, you know when to eat them. Always place them in the fridge right after making. You can store the oats in the fridge for up to five days. The longer they sit, the softer they get. If you notice any off smells or colors, it’s best to toss them. For the best taste and texture, enjoy within three days. You can freeze your Chocolate Hazelnut Overnight Oats if you want to keep them longer. Pour them into freezer-safe containers. Leave some space at the top for expansion. They can last up to three months in the freezer. When you're ready to eat, thaw them in the fridge overnight before serving. Yes, you can easily make this recipe vegan. Just use plant-based milk, like almond or oat milk. Replace honey with maple syrup for sweetness. This simple change keeps it tasty and vegan-friendly. To adjust sweetness, you can add more or less maple syrup. If you want it less sweet, start with less syrup. You can also use unsweetened cocoa powder for a richer flavor. Remember, taste as you go! You can use instant oats, but the texture will change. Instant oats will soak up liquid faster and become mushy. If you like a creamier texture, instant oats work well. For a chewier bite, stick with rolled oats. In this blog post, we covered key ingredients, from essentials to optional swaps. You learned step-by-step how to prepare, mix, and store your dish. We offered tricks to boost flavor and serve it beautifully. You can try fun variations and find the best storage tips for freshness. Remember, making a delicious meal can be easy and enjoyable. With the right ingredients and methods, you can create something special every time. Embrace your cooking journey and share your tasty results!
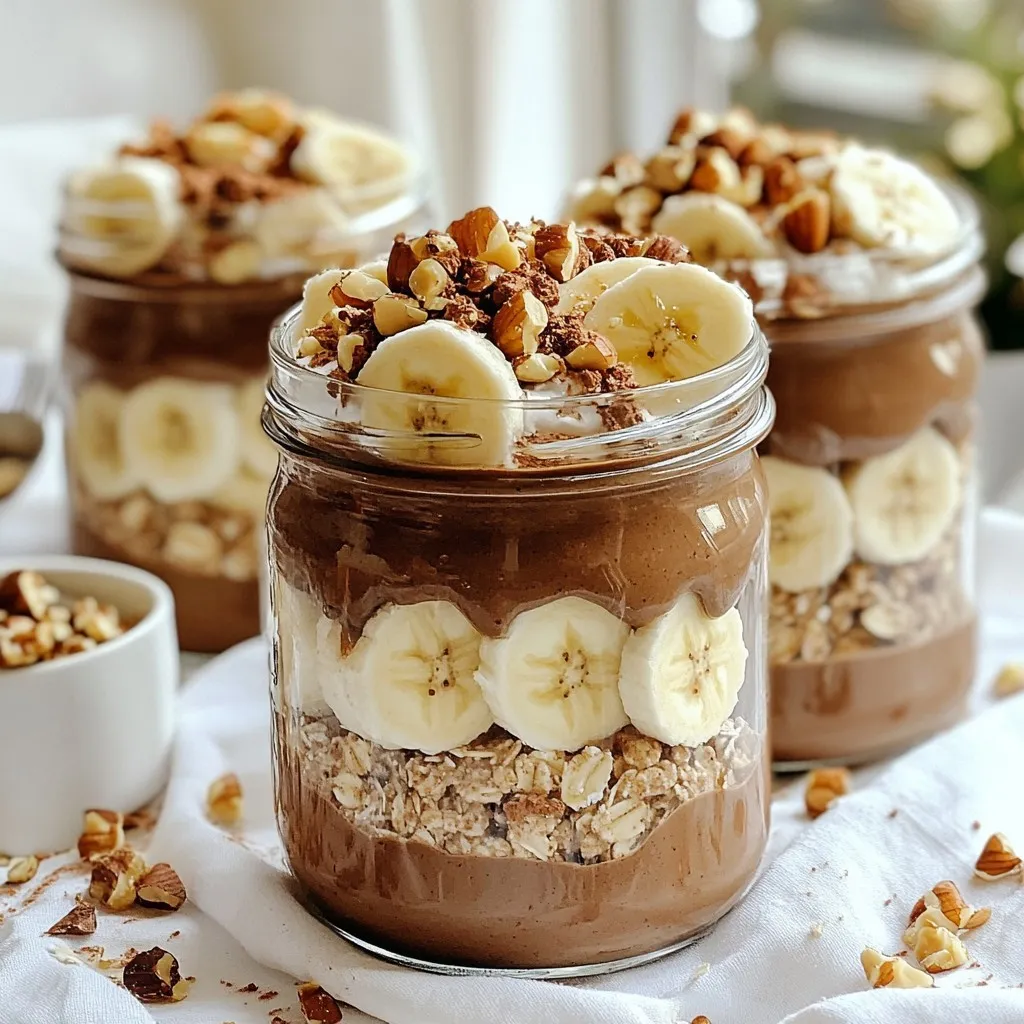
Chocolate Hazelnut Overnight Oats Simple and Tasty
If you love breakfast that tastes like dessert, you’ll enjoy these Chocolate Hazelnut Overnight Oats! This simple recipe lets you wake up to a creamy,
To make Mango Coconut Overnight Oats, you need the following ingredients: - 1 cup rolled oats - 1 cup coconut milk (canned or carton) - 1 ripe mango, diced - 1 tablespoon chia seeds - 2 tablespoons shredded coconut (unsweetened) - 1 tablespoon maple syrup (optional for sweetness) - 1/2 teaspoon vanilla extract - A pinch of salt - Fresh mint leaves for garnish (optional) You can customize your oats with extra toppings like nuts or seeds. Try adding berries or a drizzle of honey for a twist. Mango Coconut Overnight Oats offer a healthy start to your day. Each serving has around 300 calories. You get about 10 grams of protein, 12 grams of fat, and 45 grams of carbs. Key ingredients bring many health benefits: - Mango: Packed with vitamins A and C, mango boosts your immune system. It also has fiber, which helps digestion. - Coconut: This adds healthy fats. It can help keep your heart healthy and provide energy. - Oats: A great source of whole grains, oats can lower cholesterol. They also keep you full longer. These ingredients work together to make a tasty and healthy meal. Enjoy the flavors and the nutrition! {{ingredient_image_1}} To start, gather your ingredients. You need rolled oats, coconut milk, chia seeds, shredded coconut, and a ripe mango. In a mixing bowl, combine the rolled oats, coconut milk, chia seeds, shredded coconut, maple syrup, vanilla extract, and a pinch of salt. Stir well to mix everything evenly. This ensures all the flavors blend nicely together. Next, take your diced mango. Stir in half of the mango into the oat mixture. Set aside the other half for topping later. This adds a burst of fresh flavor! Now, it’s time to store your mixture. Divide the oats evenly into two jars or containers with lids. Seal the containers tightly. This helps keep flavors fresh. Place the jars in the refrigerator overnight or for at least four hours. This soaking time allows the oats to absorb all the delicious coconut milk. In the morning, pull the jars from the fridge. Give the oats a good stir. If you want a creamier texture, add a splash of coconut milk. Top each jar with the remaining diced mango and extra shredded coconut. For a fun touch, garnish with fresh mint leaves. This not only looks pretty but adds a refreshing flavor. Enjoy your tasty and healthy treat! For creaminess, you can adjust the coconut milk. If you want a richer taste, add more milk. If the oats feel too thick, add a splash more coconut milk in the morning. This gives a perfect creamy texture. If your oats turn out too runny, you might have added too much liquid. To fix this, add a bit more oats or chia seeds. They will soak up extra liquid and thicken the mix. To amp up the flavor, try adding spices like cinnamon or nutmeg. Just a pinch can make a big difference. Vanilla extract helps too, but you can explore almond or coconut extract for new tastes. If you like it sweeter, add more maple syrup. You can also use honey or agave syrup if you prefer. Taste the mix before you seal it up. This way, you can adjust to your liking. Pro Tips Choose Ripe Mangoes: For the best flavor, select mangoes that are slightly soft to the touch and have a sweet aroma. This ensures a juicy and flavorful addition to your oats. Customize the Sweetness: Adjust the maple syrup to your taste preference. If your mango is particularly sweet, you might not need any added sweetness at all! Experiment with Toppings: Feel free to add other toppings such as nuts, seeds, or additional fruits like berries or bananas for extra texture and flavor. Make it Vegan: This recipe is naturally vegan, but always check your coconut milk label to ensure it doesn’t contain any animal products if you’re strict about it. {{image_2}} You can make your mango coconut overnight oats even more fun! Try adding tropical fruits like pineapple or banana. These fruits add sweetness and a burst of flavor. You can also swap the coconut milk for almond milk or oat milk. This change gives a new taste while keeping it creamy. If you want a vegan option, this recipe is already perfect! All the ingredients are plant-based. If you need it gluten-free, make sure to use certified gluten-free oats. This way, you can enjoy your oats without worry. Mango coconut overnight oats stay fresh in the fridge for up to five days. Store them in sealed jars or containers. This keeps them tasty and safe. If you want to store them longer, freeze them. They can last for up to three months in the freezer. Make sure to use airtight containers. This prevents freezer burn and keeps flavors intact. You can serve mango coconut overnight oats cold or warm. If you prefer warm oats, heat them gently on the stove or in the microwave. Add a splash of coconut milk to keep them creamy. Stir well to mix in the heat. If you enjoy them cold, just grab a jar from the fridge and enjoy. The choice is yours! What can I substitute for coconut milk? You can use almond milk or oat milk. These options work well. They give a nice flavor too. If you want a thicker texture, try using Greek yogurt instead. Each choice changes the taste slightly but keeps it yummy. Can I use quick oats instead of rolled oats? Yes, you can. Quick oats will cook faster and get softer. They may change the texture a bit. If you like a creamy consistency, quick oats are a good option. However, rolled oats give more chewiness, which some people prefer. How do I make this recipe in larger batches? To make more servings, just double or triple the recipe. Use a larger bowl for mixing. Keep the same ratios for the ingredients. This method makes it easy to feed more people. Just remember to store them in separate jars. How long do overnight oats need to soak? Overnight oats need at least 4 hours to soak. Soaking them overnight gives the best results. This time lets the oats absorb the coconut milk. It also softens them for a creamy texture. Can I add protein powder to the recipe? Yes, you can add protein powder. Just mix it in with the other ingredients. Start with one scoop for a boost. This addition will make your oats more filling and nutritious. Choose a flavor that pairs well, like vanilla or coconut. Mango Coconut Overnight Oats are a tasty and healthy choice. We covered the ingredients, nutrition, and key preparation steps. You learned tips for perfect texture and flavor. Variations and storage details help you customize your oats. Remember, these oats are versatile, fitting different diets and tastes. Enjoy experimenting with flavors and textures. With this guide, you can make delicious oats daily. Start making your own today for a quick, healthy breakfast!
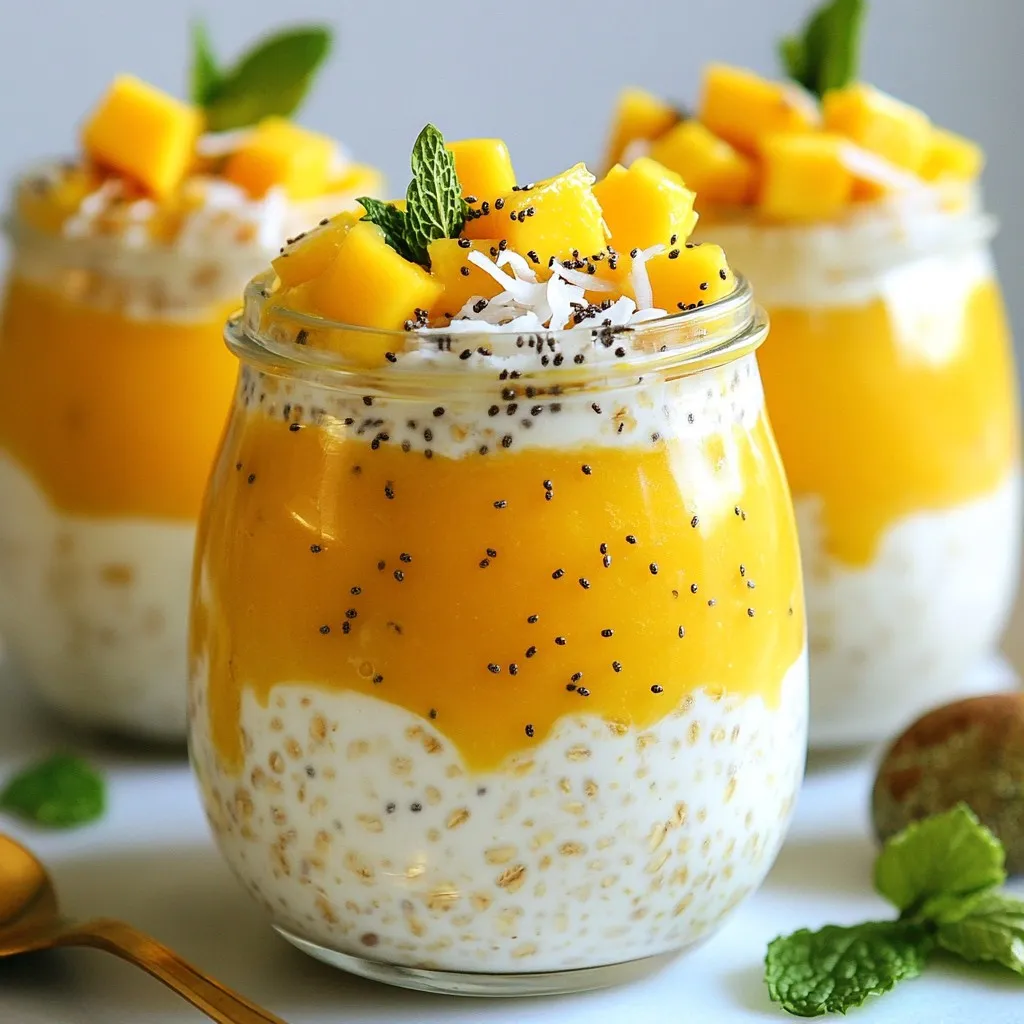
Mango Coconut Overnight Oats Tasty and Healthy Treat
Are you ready for a healthy breakfast that tastes like a vacation? Mango Coconut Overnight Oats are your perfect solution! This easy, no-cook treat combines
To make Lemon Ricotta Pancakes, gather these fresh and simple ingredients: - 1 cup ricotta cheese - 2 large eggs - 1/4 cup milk - 1 tablespoon lemon zest - 2 tablespoons fresh lemon juice - 1/2 teaspoon vanilla extract - 1 cup all-purpose flour - 2 teaspoons baking powder - 1/4 teaspoon baking soda - 1/4 teaspoon salt - 2 tablespoons sugar - Butter or oil, for cooking These ingredients come together to create pancakes that are light, fluffy, and filled with lemon flavor. The ricotta cheese adds creaminess and a rich texture. The fresh lemon juice and zest give the pancakes a bright and tangy taste. This combination makes each bite a delightful treat. Ricotta cheese is key for the fluffy texture. It helps the pancakes rise and stay moist. Eggs bind everything together and add richness, while milk helps to achieve the right batter consistency. Lemon zest and juice bring a fresh, citrus touch. Vanilla extract rounds out the flavors, making these pancakes more delightful. The baking powder and baking soda help the pancakes puff up, giving them that airy quality we all love. Grab these ingredients before you start cooking. They make a difference in the final dish. Enjoy the process of mixing and cooking, and soon you'll have a stack of lemon ricotta pancakes ready to enjoy! Start with a large bowl. Add the ricotta cheese, eggs, milk, lemon zest, lemon juice, and vanilla extract. Whisk everything together until it is smooth. This mixture will give the pancakes a creamy texture and bright flavor. In another bowl, mix together the flour, baking powder, baking soda, salt, and sugar. Make sure to combine these well. This step is key for the pancakes to rise and be fluffy. Heat a non-stick skillet over medium heat. Lightly grease the skillet with butter or oil. Pour about 1/4 cup of the batter onto the skillet for each pancake. Cook for 2-3 minutes until bubbles form on the surface. Flip the pancake and cook for another 2 minutes until golden. Remove from the skillet and keep warm while you cook the rest. Enjoy these pancakes warm with maple syrup or dusted with powdered sugar! To make the best lemon ricotta pancakes, don’t overmix your batter. Overmixing makes pancakes dense and tough. When you combine the dry and wet ingredients, stir gently. It’s okay if there are a few lumps; they help keep the pancakes light. Ricotta cheese is key for fluffiness. It adds moisture and airiness. This cheese gives a creamy texture that makes each bite delightful. The right skillet temperature is crucial. Heat your skillet over medium heat, not high. If it’s too hot, pancakes will burn outside but stay raw inside. You can test the heat by sprinkling a few drops of water. If they dance and sizzle, your skillet is ready. Look for bubbles forming on the surface of the pancake before flipping. This shows they are cooked enough on one side. When golden brown, they are perfect! These pancakes shine with toppings. I love drizzling warm maple syrup over them. A dusting of powdered sugar adds sweetness. For a fresh twist, garnish with extra lemon zest or fresh berries. Blueberries or strawberries work great! You can even add a dollop of whipped cream for extra indulgence. These toppings enhance the pancakes and make your plate look beautiful. {{image_2}} You can easily switch up the flavors of your lemon ricotta pancakes. Adding blueberries or chocolate chips brings a new twist. Blueberries add a burst of sweetness, while chocolate chips give a rich touch. Just fold them into the batter before cooking. You can also try different citrus options. Lime or orange zest can give pancakes a fresh taste. This simple swap keeps things exciting and flavorful. If you need a gluten-free option, you can use almond flour or oat flour instead of all-purpose flour. These flours work well and keep the pancakes fluffy. Just replace the cup of all-purpose flour with the same amount of your chosen gluten-free flour. For a vegan twist, swap the ricotta cheese with silken tofu for a smooth texture. You can use plant-based milk, like almond or oat milk, in place of regular milk. Replace the eggs with flax eggs. To make a flax egg, mix one tablespoon of ground flaxseed with two and a half tablespoons of water. Let it sit for a few minutes until it thickens. These swaps will help you enjoy delicious pancakes while sticking to a plant-based diet. To keep your Lemon Ricotta Pancakes fresh, store them in an airtight container. Layer parchment paper between pancakes to avoid sticking. Place the container in the fridge if you plan to eat them within three days. If you want to save them for longer, freeze the pancakes. Wrap each pancake in plastic wrap and then put them in a freezer bag. They can last up to two months in the freezer. For reheating, the best method is using a skillet. Heat the skillet over medium-low heat. Place the pancakes on the skillet for about one to two minutes on each side. This warms them up nicely and keeps them fluffy. You can also use the microwave. Heat them for about 20 seconds. Be careful not to overheat, or they will get tough. Enjoy your pancakes warm and tasty! Lemon ricotta pancakes are special because they use ricotta cheese. This adds creaminess and moisture. The ricotta makes them fluffier and richer than regular pancakes. The lemon zest and juice provide a fresh, bright flavor. This unique taste sets them apart from the usual pancake recipe. Yes, you can use non-dairy milk. Almond milk, soy milk, or oat milk work well. Just make sure to choose an unsweetened type. This keeps the balance of flavors right. The pancakes will still turn out fluffy and delicious. You can store these pancakes in the fridge for up to three days. Keep them in an airtight container. For longer storage, freeze them for up to two months. Just place parchment paper between each pancake before freezing. This makes it easy to separate them when you want to eat. Many toppings go great with lemon ricotta pancakes. Here are some ideas: - Maple syrup - Fresh berries (like strawberries or blueberries) - Powdered sugar - Whipped cream - Extra lemon zest These toppings enhance the flavor and make the pancakes even more enjoyable. Yes, you can make the batter ahead of time. Store it in the fridge for up to 24 hours. Just cover the bowl with plastic wrap. Before cooking, stir the batter gently. If it thickens, you can add a little milk to loosen it up. This saves time for a quick breakfast or brunch. In this post, we explored how to make delicious Lemon Ricotta Pancakes. You learned about the ingredients you’ll need and how to mix them perfectly. We discussed tips for fluffy pancakes and variations to make them your own. Lastly, we covered storage and reheating to enjoy them later. Enjoy these pancakes for breakfast and impress your family. They’re easy, fun, and tasty!
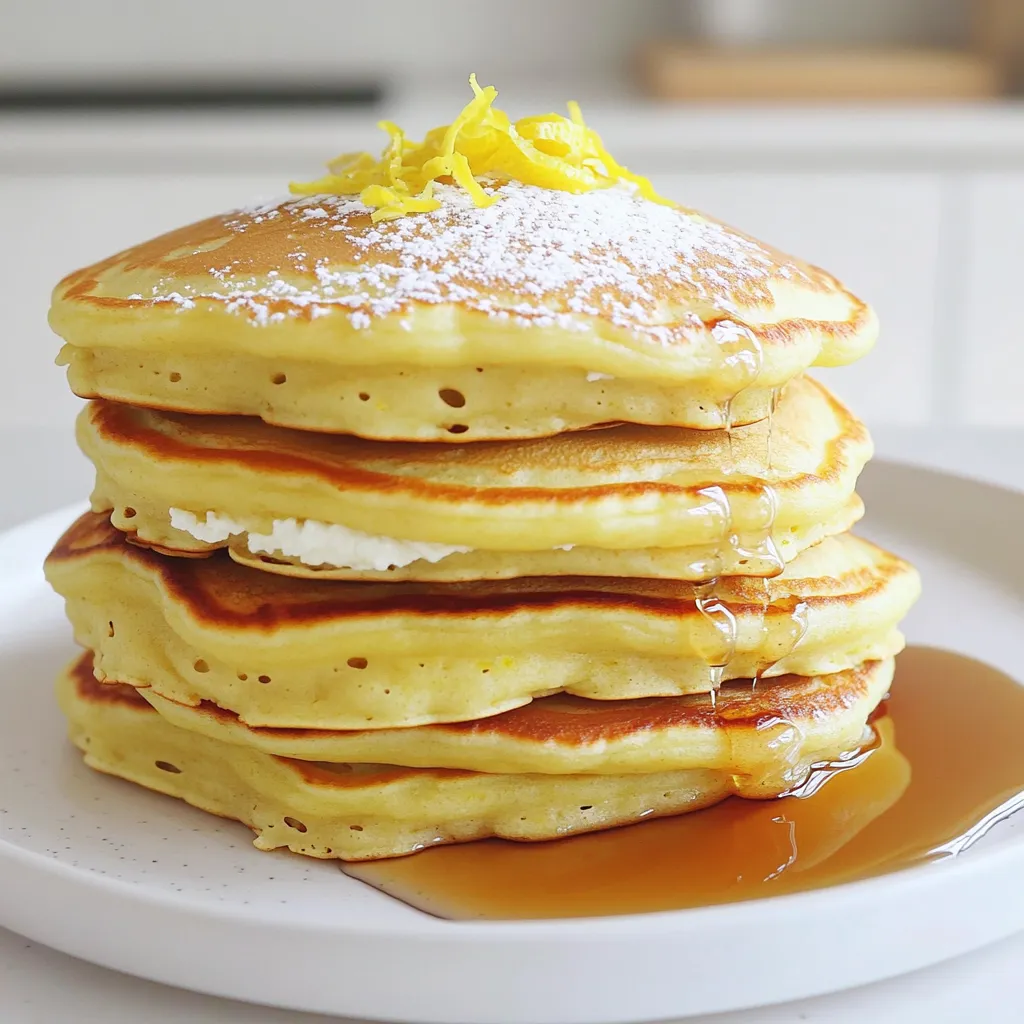
Lemon Ricotta Pancakes Fluffy and Flavorful Delight
Looking for a breakfast that bursts with flavor? These Lemon Ricotta Pancakes are your answer! They’re fluffy, tangy, and a delightful way to kickstart your
To make Pumpkin Cream Cheese Stuffed French Toast, gather these items: - 8 slices of thick-cut bread (like brioche or challah) - 1 cup pumpkin puree - 8 oz cream cheese, softened - 1/4 cup brown sugar - 1 tsp vanilla extract - 1 tsp pumpkin pie spice - 4 large eggs - 1 cup milk - 1 tsp cinnamon - 1/4 tsp nutmeg - 1 tbsp butter for frying - Maple syrup for serving - Powdered sugar for garnish You can customize your French toast with these tasty toppings: - Whipped cream - Chopped nuts (like pecans or walnuts) - Fresh fruit (like banana slices or berries) - A sprinkle of more pumpkin pie spice Choosing the right bread makes a big difference. The best types are: - Brioche: Soft and rich, it absorbs flavors well. - Challah: Slightly sweet and fluffy, perfect for French toast. - French bread: Offers a nice crust and can hold the filling. - Texas toast: Thick and sturdy, great for stuffing. Start by grabbing a large mixing bowl. Add one cup of pumpkin puree. Next, include eight ounces of softened cream cheese. It should be nice and soft for easy mixing. Then, mix in a quarter cup of brown sugar. This adds sweetness to our filling. Don’t forget a teaspoon of vanilla extract for flavor. Finally, add a teaspoon of pumpkin pie spice. This spice brings a warm, cozy flavor. Mix everything until smooth and creamy. Take four slices of thick-cut bread, like brioche or challah. Spread a generous layer of your pumpkin cream cheese mixture on each slice. Make sure to cover the bread well. Now, take the remaining four slices and place them on top. Press down gently to form sandwiches. This step is key to holding all that delicious filling inside. In a bowl, whisk together four large eggs, one cup of milk, one teaspoon of cinnamon, and a quarter teaspoon of nutmeg. This mix will coat our sandwiches. Heat a skillet or griddle over medium heat. Add a tablespoon of butter until it melts. Dip each sandwich into the egg mixture, coating both sides. Let the excess mixture drip off. Place the sandwiches on the skillet and cook for about three to four minutes per side. Look for a golden brown color. Adjust the heat if they start to burn. Once cooked, keep them warm while you finish the rest. Serve warm with maple syrup and a dusting of powdered sugar for a sweet touch. To make your Pumpkin Cream Cheese Stuffed French Toast shine, use fresh ingredients. Choose ripe pumpkin puree for a deep flavor. I love adding a pinch of salt to the cream cheese mixture. It helps balance the sweetness. Also, let the cream cheese soften enough. This makes it easier to blend with the pumpkin. One common mistake is using stale bread. Fresh, thick-cut bread works best. If your bread is too thin, it may fall apart. Another mistake is not cooking over medium heat. Too high heat can burn the outside while the inside stays raw. Also, don’t skip letting excess egg mixture drip off. This helps prevent soggy French toast. You can easily customize this recipe to fit your taste. Try adding chocolate chips to the cream cheese filling for a sweet twist. If you like nuts, mix in some chopped pecans or walnuts. For a spicier kick, add more pumpkin pie spice or a dash of cayenne. You can even swap out the maple syrup for honey or agave syrup. {{image_2}} Pumpkin Cream Cheese Stuffed French Toast shines in the fall. However, you can change it for other seasons. In winter, try adding peppermint extract to the cream cheese mix. For spring, use fresh strawberries instead of pumpkin. In summer, swap pumpkin for ripe bananas or berries. Each change gives a new twist to a classic dish. You can easily adapt this recipe to fit different diets. For gluten-free French toast, use gluten-free bread. Many brands offer tasty options that hold up well. For a dairy-free version, replace cream cheese with vegan cream cheese. You can also use almond milk instead of regular milk. These swaps keep the dish rich and creamy without dairy. While pumpkin pie spice is a star, other spices work well too. Try adding cardamom for a warm flavor. You can also use allspice for a hint of sweetness. If you like heat, a pinch of ginger can add a nice kick. Be bold and experiment with your favorite spices for a unique taste. After making your Pumpkin Cream Cheese Stuffed French Toast, let it cool. Place the leftover slices in an airtight container. Keep it in the fridge for up to three days. This keeps the flavors fresh and tasty. When you're ready to eat, you can enjoy it warm again. To freeze your stuffed French toast, first, let it cool completely. Then, wrap each slice tightly in plastic wrap. Place wrapped slices in a freezer-safe bag. They can last up to two months in the freezer. This is a great way to save leftovers for later. When you want to reheat, you have a few options. For the best results, use the oven. Preheat it to 350°F (175°C). Place the toast on a baking sheet for about 10-15 minutes. If using a microwave, heat each slice for about 30 seconds. Check if it's warm enough. Enjoy your tasty dish just like fresh! Yes, you can prepare the pumpkin cream cheese mix a day before. Store it in the fridge. You can also assemble the sandwiches ahead of time. Just keep them in the fridge until you are ready to cook. This can save you time in the morning. You can serve this dish with many tasty sides. Here are some ideas: - Fresh fruit like bananas, berries, or apples - Crispy bacon or sausage links - Yogurt for a creamy side - Whipped cream for added sweetness - A sprinkle of chopped nuts for crunch These items add flavor and color to your plate. Look for a golden-brown color on each side. You can gently press down on the toast. If it feels firm and springs back, it is ready. If you cut into it, the inside should feel warm and soft. Make sure the cream cheese is heated through, too. In this post, we covered the tasty recipe for Pumpkin Cream Cheese Stuffed French Toast. We discussed the ingredients, cooking methods, and fun variations. Remember to try different toppings and breads for a unique twist. Avoid common mistakes to get the best flavor. Store leftovers properly so they stay fresh. With these tips, you can impress friends and family with a delicious dish they'll love. Enjoy trying out this recipe!
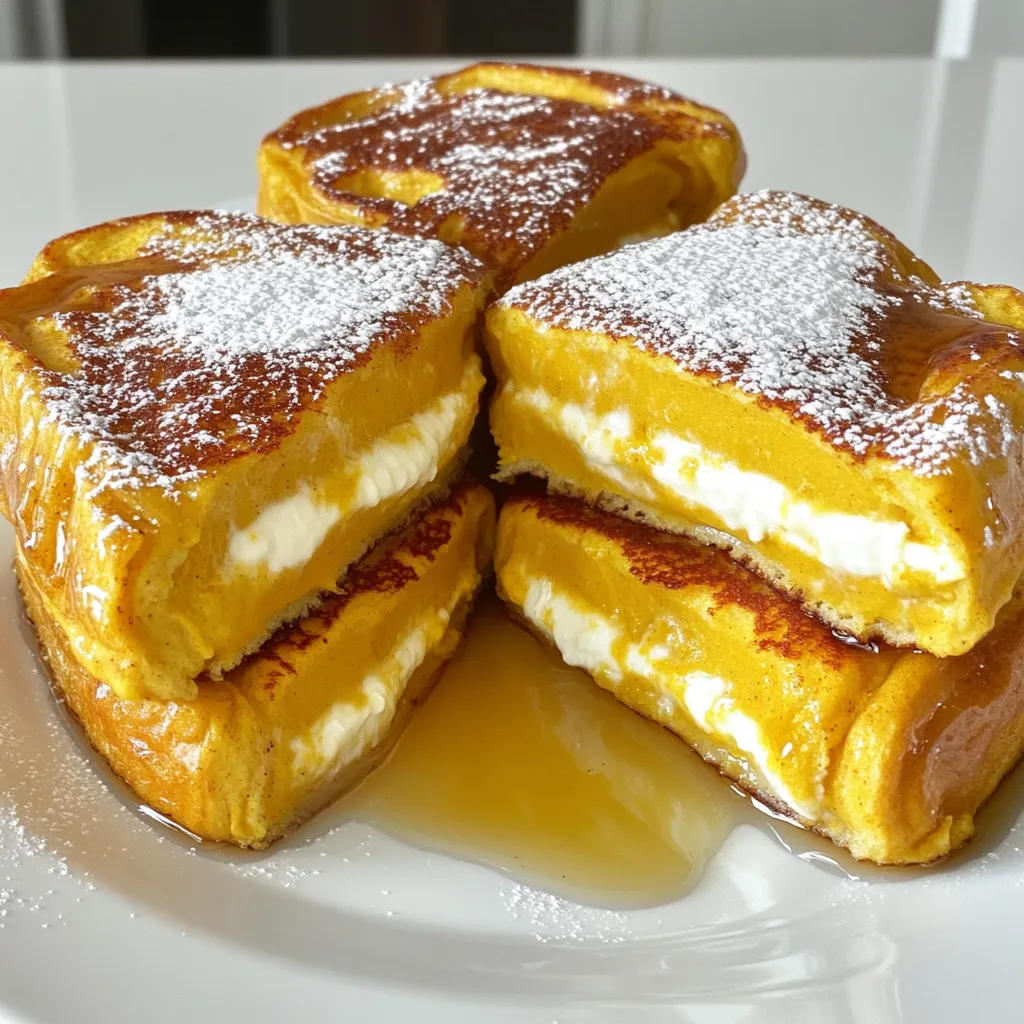
Pumpkin Cream Cheese Stuffed French Toast Delight
Get ready for a delightful breakfast treat! My Pumpkin Cream Cheese Stuffed French Toast combines rich flavors and creamy filling, making any morning special. With
- 1 ripe mango, peeled and diced - 1 cup fresh pineapple chunks - 1 banana, sliced - 1 cup coconut milk (or any milk of choice) - 1 tablespoon honey or maple syrup - 1 tablespoon chia seeds - Ice cubes (about 1 cup) When you make a mango pineapple smoothie, you want the best ingredients. Start with a ripe mango. It should feel soft to the touch. This means it is sweet and juicy. Next, grab a cup of fresh pineapple chunks. Pineapple adds a bright, tropical flavor. A banana gives the smoothie a creamy texture. Use one medium-sized banana, sliced. For the liquid, I recommend coconut milk. It adds a rich taste. You can also use any milk you like. If you want extra sweetness, add honey or maple syrup. Just one tablespoon will do. Chia seeds are great too. They add nutrition and a bit of crunch. If you prefer a cold drink, toss in about a cup of ice cubes. They make the smoothie extra refreshing. These ingredients come together to create a delightful drink. You can mix and match, but these are the best for the classic taste. {{ingredient_image_1}} - Start by peeling and dicing the ripe mango. - Cut fresh pineapple into chunks. - Slice the banana into rounds. - Gather coconut milk, honey or maple syrup, chia seeds, and ice cubes. - Place all prepared fruit into the blender. - Pour in the coconut milk. - Add honey or maple syrup if you want it sweeter. - Sprinkle in chia seeds for extra nutrition. - Toss in the ice cubes for a chilled smoothie. - Blend on high speed until smooth and creamy. - Pour the smoothie into tall glasses. - Garnish with a slice of fresh pineapple or mint for color. - Enjoy your smoothie right away for the best taste and texture. - Choosing ripe fruit for optimal flavor To get the best taste, pick ripe mangoes and pineapples. Look for mangoes that feel soft when you press them gently. They should have a sweet smell. Pineapples should smell sweet at the base and have a slight give when pressed. Fresh and ripe fruit makes a big difference in flavor. - Alternatives for coconut milk If you do not have coconut milk, you can use almond milk, oat milk, or soy milk. Each option gives a different taste, so choose one you like. For a creamier texture, use whole milk or Greek yogurt. These options keep the smoothie rich and tasty. - Perfect blending techniques for a creamy texture Start by adding liquid first, then add the fruit. This helps the blender mix well. Blend on high for at least 30 seconds. Stop and scrape down the sides if needed. Blend until you see no chunks. The smoother, the better! - Adjusting thickness to your preference If the smoothie is too thick, add a little more milk. If you want it thicker, add more frozen fruit or ice. Blend again until you reach your desired thickness. Taste it to make sure the flavors are just right. Pro Tips Use Frozen Fruit: For an extra cold and creamy smoothie, consider using frozen mango or pineapple instead of fresh. This will also give your smoothie a thicker texture. Experiment with Milk Alternatives: While coconut milk adds a tropical flavor, you can try almond milk, oat milk, or yogurt to customize the taste and creaminess of your smoothie. Add Greens: To boost the nutritional value, throw in a handful of spinach or kale. They blend well and won’t alter the delicious tropical flavor. Sweetness Adjustment: Always taste your smoothie before serving. Depending on the ripeness of your fruit, you may need to adjust the sweetness by adding more honey or maple syrup. {{image_2}} You can easily change the flavor of your mango pineapple smoothie. Adding spinach or kale boosts the nutrients without changing the taste much. You can also swap the fruits. Try using a berry mix for a new twist. Strawberries and blueberries add sweetness and a vibrant color. If you want a dairy-free or vegan smoothie, use almond milk or oat milk instead of coconut milk. You can also make a low-sugar version by skipping the honey or maple syrup. If you need extra protein, add protein powder or Greek yogurt. These options help you meet your dietary needs while enjoying this tasty drink. You can store your mango pineapple smoothie in a sealed container. Place it in the refrigerator. It will stay fresh for up to 24 hours. If you want to keep it longer, consider freezing it. Pour the smoothie into an ice cube tray or a freezer-safe container. This way, you can enjoy small portions later. Just remember to leave some space, as liquids expand when frozen. Smoothies are best fresh, but you can still enjoy leftovers. If you freeze your smoothie, allow it to thaw in the fridge overnight. Once thawed, stir it well to mix any separated ingredients. Consume your thawed smoothie within 24 hours for the best taste. Avoid refreezing a thawed smoothie, as this can affect the texture and flavor. Can I use frozen fruits instead of fresh? Yes, you can use frozen fruits. They make the smoothie extra cold and thick. Just blend the frozen mango and pineapple with your other ingredients. Keep in mind that frozen fruit may change the smoothie’s taste slightly. How can I make this smoothie richer in protein? To boost protein, add Greek yogurt or protein powder. Both options blend well and keep the smoothie creamy. You can also include nut butter or seeds, like hemp or flaxseeds, for more protein. What are the health benefits of mango and pineapple? Mango and pineapple are very healthy! They are full of vitamins, minerals, and antioxidants. Mango helps with digestion and boosts your immune system. Pineapple has bromelain, which can help reduce inflammation. Both fruits are also great for your skin and energy levels. This blog post gives you a simple guide to making a mango pineapple smoothie. You learned about the main and optional ingredients, from ripe fruits to coconut milk. I walked you through the steps to prepare and blend, along with tips for creamy texture. You can even explore variations and storage options. In closing, enjoy your smoothie fresh and adjust recipes to fit your taste. Experiment with flavors and ingredients to make it your own. Happy blending!
Mango Pineapple Smoothie Refreshing and Easy Recipe
If you’re looking for a blissfully refreshing drink, this Mango Pineapple Smoothie is for you! It’s packed with flavor and easy to make—perfect for breakfast
To make Strawberry Shortcake Overnight Oats, you will need these simple ingredients: - 1 cup rolled oats - 1 cup milk of choice (dairy or non-dairy) - 1/2 cup Greek yogurt (or plant-based yogurt) - 2 tablespoons maple syrup (or honey) - 1 teaspoon vanilla extract - 1/2 teaspoon almond extract - 1 cup fresh strawberries, hulled and sliced - 1/4 cup chopped pecans or almonds - Whipped cream (for topping, optional) - Fresh mint leaves (for garnish, optional) These ingredients blend together to create a creamy and fruity breakfast. The rolled oats form the base, while the yogurt adds creaminess and protein. The maple syrup gives a touch of sweetness. The almond extract brings out the flavors. Fresh strawberries provide a juicy burst. Nuts add a nice crunch, making each bite delicious. {{ingredient_image_1}} - In a medium bowl, combine 1 cup of rolled oats, 1 cup of milk, and 1/2 cup of Greek yogurt. - Add 2 tablespoons of maple syrup, 1 teaspoon of vanilla extract, and 1/2 teaspoon of almond extract. - Stir until everything mixes well. - Now, fold in half of the sliced strawberries. - Reserve the rest of the strawberries for later. - Divide the mixture into two jars or bowls. - Seal them and place them in the fridge overnight or for 4 to 6 hours. - When ready to eat, take the jars from the fridge. - Stir the oats to mix any settled ingredients. - If the oats are thick, add a splash of milk. - Top each jar with the remaining sliced strawberries. - Sprinkle 1/4 cup of chopped pecans or almonds on top. - For a fun twist, add a dollop of whipped cream and some mint leaves if you like. To make your overnight oats, follow these steps: - Use rolled oats for the best texture. - Combine oats, milk, yogurt, and sweeteners in a bowl. - Stir well to mix all ingredients. - Add half of your sliced strawberries for flavor. - Store in jars or containers for easy access. - Seal the jars tightly to keep them fresh. - Refrigerate overnight or for at least 4-6 hours. - This soaking allows oats to soften and absorb flavors. You can easily change the flavors of your oats. - Swap maple syrup for honey, or use agave nectar. - Add spices like cinnamon for extra warmth. - Use any milk you prefer; almond or oat milk are great. - Try different yogurt types, like coconut or almond-based. - Add a splash of lemon juice for a fresh twist. - Mix in vanilla protein powder for added nutrition. Pro Tips Use Overnight Oats for Meal Prep: Prepare multiple jars at once to enjoy a quick and nutritious breakfast throughout the week. Customize Your Fruits: Feel free to swap strawberries for other berries or fruits like blueberries, peaches, or bananas for different flavor profiles. Add More Crunch: Experiment with different nuts or seeds, such as walnuts, chia seeds, or pumpkin seeds, to enhance the texture and nutritional value. Adjust Sweetness to Taste: Depending on your preference, you can modify the amount of maple syrup or honey to make it sweeter or less sweet. {{image_2}} You can easily change the fruit in this recipe. Try using blueberries, raspberries, or blackberries for a twist. You can also use tropical fruits. Think about adding diced mango or pineapple for a fun flavor. If you want something creamy, try adding banana slices. Just remember to mix them in or place them on top for a yummy look. Each fruit adds a unique taste and color to your oats. Nuts and seeds can make your oats even better. You can try different nuts like walnuts, hazelnuts, or even pistachios for a new crunch. If you want to boost nutrition, add chia seeds or flaxseed. These seeds are great for your body and add a nice texture. Just a tablespoon of either can increase the fiber and omega-3s in your meal. Enjoy mixing and matching to find your perfect combination! How long do they last in the fridge? Strawberry shortcake overnight oats last up to five days in the fridge. This makes them great for meal prep. You can enjoy them all week. Proper seal techniques for jars To keep your oats fresh, use jars with tight lids. Glass jars work best, but any container with a good seal is fine. Make sure to cool the oats to room temperature before sealing. This helps prevent moisture build-up inside the jar. Can you freeze overnight oats? Yes, you can freeze overnight oats! This is a smart way to save time. Just remember to leave some space at the top of the jar. The oats will expand as they freeze. Best practices for thawing and serving To thaw, move the oats from the freezer to the fridge. Let them sit overnight. When you’re ready to eat, give them a good stir. If they seem too thick, add a splash of milk. This will help bring the texture back. Can I use instant oats instead of rolled oats? You can use instant oats, but the texture changes. Instant oats absorb liquid faster. Your overnight oats may turn mushy. Rolled oats give a nice chewy bite. How do I make it vegan-friendly? To make it vegan, swap Greek yogurt for plant-based yogurt. Use almond milk or soy milk instead of dairy milk. Maple syrup works great as a sweetener. Can I skip the yogurt completely? Yes, you can skip yogurt. The oats will still taste good. You can add more milk if needed. This makes the dish lighter and keeps it creamy. Caloric content per serving Each serving has about 350 calories. This includes oats, milk, yogurt, and strawberries. The nuts add healthy fats and protein too. Dietary considerations (gluten-free, nut-free) To make it gluten-free, use certified gluten-free oats. For nut-free, skip the nuts or use seeds. You can substitute with pumpkin or sunflower seeds for crunch. This blog post covered how to make delicious overnight oats with simple steps. You learned the best ingredients to use, like oats, yogurt, and your choice of milk. We also discussed ways to customize your oats with different fruits and nuts. Remember, you can store your overnight oats in the fridge or even freeze them. With these easy tips, you can enjoy a healthy breakfast that suits your taste. Try making your own blend and enjoy the fun of crafting your ideal overnight oats.
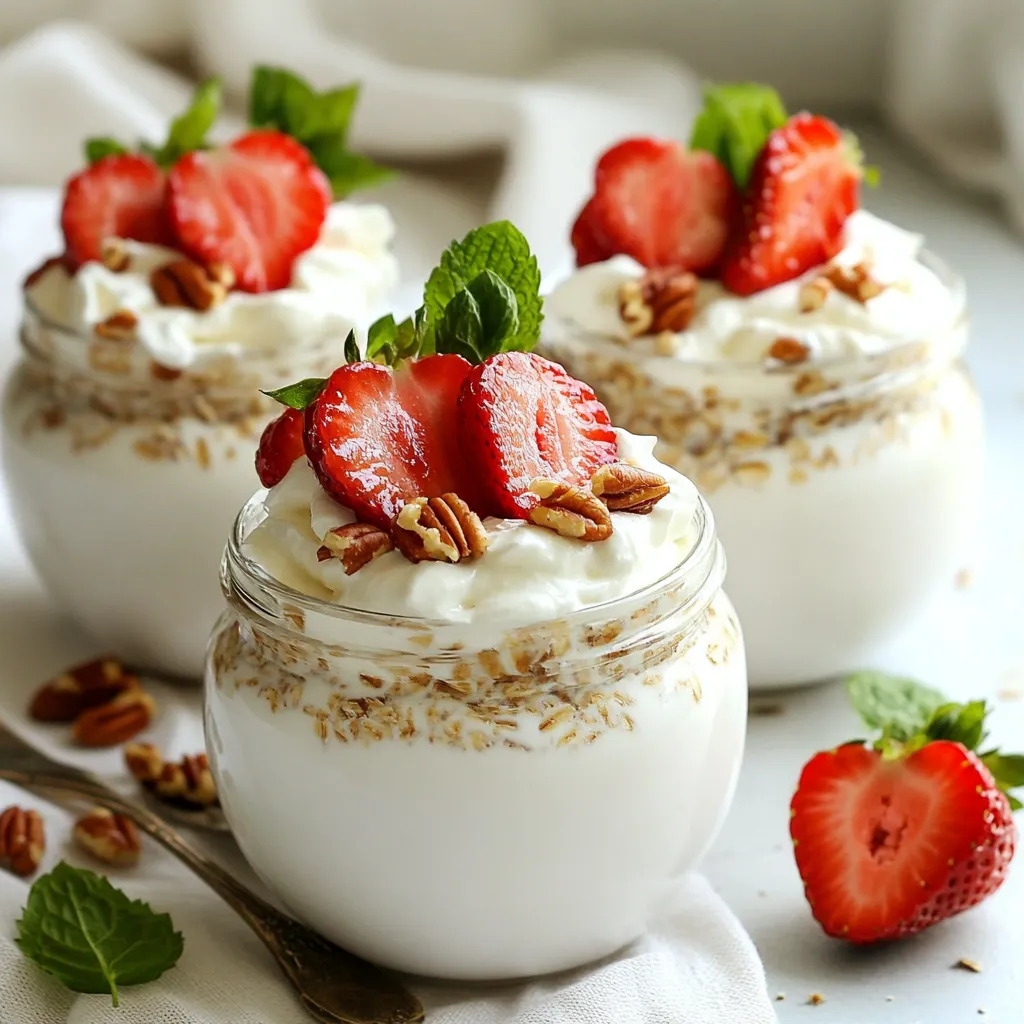
Strawberry Shortcake Overnight Oats Tasty and Easy Recipe
Are you ready to elevate your breakfast routine with a sweet twist? Strawberry Shortcake Overnight Oats are not just easy to make; they taste like
To make these tasty blueberry crumble muffins, you need the following main ingredients: - 1 ½ cups all-purpose flour - ½ cup granulated sugar - ½ teaspoon baking powder - ½ teaspoon baking soda - ¼ teaspoon salt - 1 large egg - ¾ cup buttermilk (or ¾ cup milk + 1 tablespoon vinegar) - ½ cup unsalted butter, melted - 1 cup fresh blueberries These ingredients create a soft and fluffy base for the muffins. The blueberries add a sweet and juicy burst in every bite. You likely have some of these pantry staples at home. Here’s what you need: - ½ cup rolled oats - ½ cup brown sugar - ½ teaspoon ground cinnamon These staples give the muffins a crunchy and sweet topping. The cinnamon adds warmth and flavor that makes these muffins special. Feel free to get creative! Here are some optional add-ins you might enjoy: - Chopped nuts like walnuts or pecans - A sprinkle of lemon zest for brightness - A handful of chocolate chips for sweetness These add-ins can change the flavor profile and make each batch unique. Mix and match to find your perfect muffin! {{ingredient_image_1}} First, gather your ingredients. You will need: - 1 ½ cups all-purpose flour - ½ cup granulated sugar - ½ teaspoon baking powder - ½ teaspoon baking soda - ¼ teaspoon salt - 1 large egg - ¾ cup buttermilk (or ¾ cup milk + 1 tablespoon vinegar) - ½ cup unsalted butter, melted - 1 cup fresh blueberries - ½ cup rolled oats - ½ cup brown sugar - ½ teaspoon ground cinnamon Next, preheat your oven to 375°F (190°C). Line a muffin tin with paper liners or lightly grease it. This step helps your muffins bake evenly and prevents sticking. In a large bowl, mix your dry ingredients. Whisk together flour, granulated sugar, baking powder, baking soda, and salt. This mix sets the base for your muffins. In another bowl, combine the wet ingredients. Whisk the egg, buttermilk, and melted butter until smooth. Pour this mixture into the dry ingredients. Gently fold until just combined. Be careful not to overmix. It’s okay if some flour shows. Now, gently fold in the fresh blueberries. This adds that juicy burst of flavor in every bite. In a small bowl, mix rolled oats, brown sugar, ground cinnamon, and about 2 tablespoons of melted butter. Stir until the mixture looks crumbly. This topping adds a nice crunch and sweetness to your muffins. Spoon the muffin batter into the prepared tin, filling each cup about ¾ full. This gives space for the muffins to rise. Generously sprinkle the crumble topping over each muffin. Bake your muffins for 18-20 minutes. To check for doneness, insert a toothpick into the center. If it comes out clean, they are ready. Once baked, allow the muffins to cool in the tin for about 5 minutes. This helps them set. Then, transfer them to a wire rack to cool completely. Enjoy your warm, delicious blueberry crumble muffins! To bake the best muffins, start with a preheated oven at 375°F (190°C). This helps your muffins rise nicely. Use fresh ingredients for the best flavor. Measure your flour correctly by spooning it into the cup and leveling it off. This method prevents dense muffins. Always line your muffin tin with liners or grease it lightly. This step makes it easy to remove the muffins after baking. Overmixing is a common mistake. When you combine the wet and dry ingredients, mix just until you see no dry flour. Lumps in the batter are okay; they will bake out. Gently fold in the blueberries, too. This preserves their shape and keeps your muffins light and fluffy. Remember, muffins need to be tender, not tough. Serve the muffins warm for the best taste. A dusting of powdered sugar on top adds a nice touch. You can also place a small bowl of fresh blueberries beside the muffins. This looks great and gives guests an option to add more fruit. For a fun twist, pair the muffins with a scoop of ice cream for dessert. Enjoy! Pro Tips Use Fresh Blueberries: Fresh blueberries will provide the best flavor and texture. If using frozen, do not thaw them before adding to the batter as this can cause them to become mushy. Don’t Overmix the Batter: To keep your muffins light and fluffy, mix the wet and dry ingredients until just combined. A few lumps are perfectly fine! Customize the Topping: Feel free to add chopped nuts or shredded coconut to the crumble topping for added texture and flavor. Storage Tips: Store leftover muffins in an airtight container at room temperature for up to 3 days or freeze for longer storage. Thaw at room temperature before enjoying. {{image_2}} To make gluten-free blueberry crumble muffins, swap the all-purpose flour. Use a gluten-free flour blend. Make sure it has xanthan gum for structure. The rest of the recipe stays the same. These muffins will still be tasty and soft! For vegan blueberry muffins, skip the egg. You can use a flax egg instead. Mix one tablespoon of ground flaxseed with two and a half tablespoons of water. Let it sit for five minutes. Replace buttermilk with plant milk and vinegar. Use melted coconut oil in place of butter. These muffins will still be moist and delicious! You can add different flavors to your muffins for fun. Here are some ideas: - Lemon Zest: Add one tablespoon of lemon zest for a fresh taste. - Almond Extract: Use half a teaspoon of almond extract for a nutty flavor. - Chocolate Chips: Fold in half a cup of chocolate chips for a sweet twist. - Nuts: Add chopped walnuts or pecans for crunch. These variations let you make the muffins your own! Enjoy exploring different tastes. To keep your blueberry crumble muffins fresh, place them in an airtight container. This helps maintain their soft texture and flavor. You can store them at room temperature for up to three days. If you live in a humid area, consider placing a paper towel in the container. This absorbs excess moisture and keeps the muffins from getting soggy. Freezing muffins is a great way to save them for later. To freeze, first, let the muffins cool completely. Next, wrap each muffin in plastic wrap. Then, place them in a freezer bag or container. They will stay fresh for up to three months in the freezer. When you're ready to enjoy them, just take out a muffin and let it thaw at room temperature. Reheating your muffins is easy and quick. You can warm them in the microwave for about 15-20 seconds. If you prefer a crispier top, use the oven. Preheat your oven to 350°F (175°C) and place the muffins on a baking sheet. Heat them for about 5-10 minutes. This method brings back that fresh-baked taste and texture. Enjoy your blueberry crumble muffins warm! Yes, you can use frozen blueberries! They work well in muffins. Just toss them in a bit of flour before adding to the batter. This helps them not sink. Keep in mind that frozen blueberries may release more juice. This can make your muffins a bit more moist and colorful. Check the muffins after 18 minutes. Insert a toothpick in the center of a muffin. If it comes out clean, they are done. If it has wet batter, bake for a few more minutes. The tops should look golden brown and spring back when touched lightly. You can easily make your own buttermilk! Just mix ¾ cup of milk with 1 tablespoon of vinegar. Let it sit for about 5 minutes. It will thicken and curdle a bit. You can also use plain yogurt or sour cream, thinned with some milk, as a substitute. Blueberry crumble muffins are simple yet delicious. We covered the main ingredients and pantry staples you need. You learned the step-by-step process, from prepping to baking. I shared tips to improve your baking skills and tasty serving ideas. You can also explore variations like gluten-free and vegan options. Finally, I provided storage tips to keep your muffins fresh. Now, you can enjoy baking and sharing these tasty treats anytime!
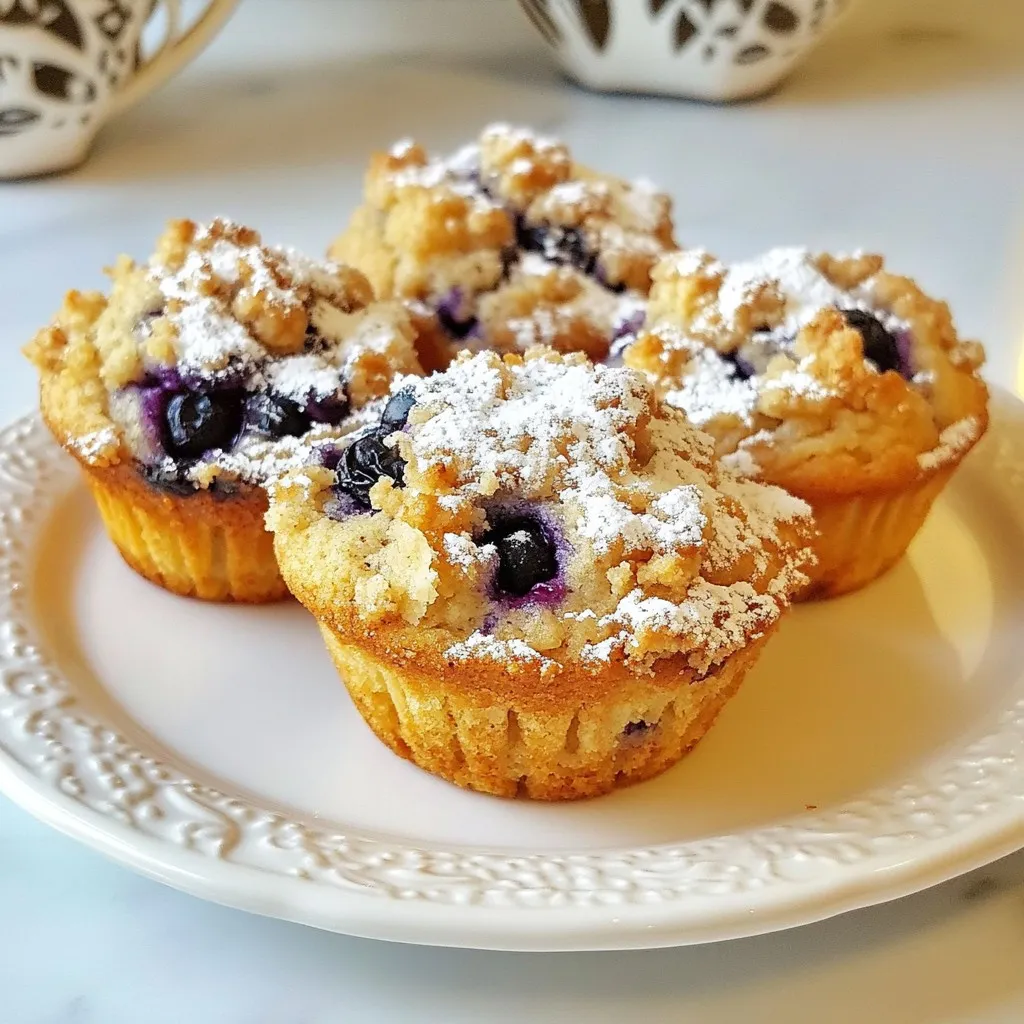
Blueberry Crumble Muffins Irresistible and Simple Recipe
Craving a delicious treat that’s both easy to make and hard to resist? Look no further! My Blueberry Crumble Muffins are the perfect blend of
To make apple pie overnight oats, you need: - 1 cup rolled oats - 1 ¼ cups almond milk (or any milk of your choice) - 1 medium apple, diced (preferably a tart variety) - 1 tablespoon maple syrup (or honey) - 1 teaspoon ground cinnamon - ½ teaspoon nutmeg - 1 tablespoon chia seeds - ¼ cup Greek yogurt (or dairy-free yogurt) These ingredients create a creamy and flavorful base. The rolled oats soak up the milk and flavors overnight. The apple adds sweetness and crunch. Cinnamon and nutmeg give it that classic apple pie taste. You can add more flavor and texture to your oats with: - 2 tablespoons walnuts (chopped, for crunch) - 1 tablespoon raisins (for sweetness) These add-ins enhance the dish. Walnuts give a nice crunch. Raisins add a chewy texture and extra sweetness. You can mix and match based on what you like. If you want to switch the milk, try these options: - Soy milk - Oat milk - Coconut milk Each of these choices brings a unique flavor. Almond milk gives a nutty taste. Soy milk is creamy and rich. Oat milk is smooth and slightly sweet. Choose what you enjoy or what you have at home. {{ingredient_image_1}} Start by gathering your ingredients. You need rolled oats, almond milk, and chia seeds. In a medium bowl, mix together 1 cup of rolled oats and 1 ¼ cups of almond milk. Add 1 tablespoon of maple syrup for sweetness. Sprinkle in 1 teaspoon of ground cinnamon and ½ teaspoon of nutmeg for that warm, cozy flavor. Finally, stir in 1 tablespoon of chia seeds. Make sure everything blends well. Now, it’s time for the apple! Dice 1 medium tart apple into small pieces. Fold these apple pieces into your oat mixture. This step adds fresh flavor and texture. Make sure the apple is evenly spread throughout. Next, divide the mixture into two jars or containers. Fill each jar about three-quarters full. Top each jar with a dollop of Greek yogurt. You can use dairy-free yogurt if you prefer. For a nice crunch, sprinkle 2 tablespoons of chopped walnuts on top. If you like a bit more sweetness, add 1 tablespoon of raisins. Seal the jars with lids and place them in the fridge. Let them sit overnight, or for at least 5 hours. In the morning, your oats will be ready! Stir gently and enjoy them cold, or warm them in the microwave for one minute if you like. To make your Apple Pie Overnight Oats just right, focus on the oats. Use rolled oats for a creamy texture. Steel-cut oats are too chewy for this recipe. The chia seeds help thicken the mixture, adding a nice bite. The key is to let it sit overnight. This gives the oats time to soak up the milk and flavors. Making these oats ahead saves you time. Mix up your base the night before. You can even prep a few jars for the week. Store them in the fridge for up to five days. Just remember to add toppings like yogurt and nuts right before eating. This keeps them fresh and crunchy. Serving is fun with these oats. Use clear jars to show the layers. Top with a sprinkle of cinnamon for a warm touch. You can add a slice of fresh apple for extra flair. Try warming them up in the microwave for a cozy breakfast. Enjoy these oats cold or warm, depending on your mood! Pro Tips Use Tart Apples: Choose tart apple varieties like Granny Smith for a perfect balance of sweetness and acidity in your oats. Chia Seed Benefits: Chia seeds not only help thicken the mixture but also add a boost of fiber and omega-3 fatty acids. Customize Sweetness: Adjust the maple syrup or honey according to your taste preference; you can always add more sweetness in the morning if desired. Prep Ahead: Make several jars at once for a quick breakfast option throughout the week; just keep them sealed in the fridge for freshness. {{image_2}} You can switch up the fruit based on the season. In fall, use pears or cranberries. Both add a unique twist. In summer, try peaches or berries for a fresh taste. Each fruit pairs well with oats. This keeps your breakfast exciting and new. To make this recipe vegan, replace Greek yogurt with dairy-free yogurt. Almond milk works great, but try oat or coconut milk too. Maple syrup is already vegan, so you’re set there. These swaps keep the creamy texture without dairy. Want to boost the flavor? Add ginger for a warm kick. A dash of vanilla extract can make it sweeter. You could also sprinkle in some cardamom for a unique twist. More spices equal more fun in your breakfast! Store your apple pie overnight oats in the fridge. Use a sealed jar or container. They stay fresh for up to five days. This makes them perfect for meal prep. Each morning, just grab a jar and enjoy! You can freeze the overnight oats if you want to save some for later. Use freezer-safe containers. They can last for up to three months. When ready to eat, thaw them in the fridge overnight. Heat them in the microwave, if you like them warm. Keep an eye on the ingredients. Fresh fruit like apples can change flavors over time. Make your oats without apples if you plan to store them longer. Add the apples right before you eat. This keeps the oats tasting fresh and delicious! Yes, you can use steel-cut oats, but they need more time to soak. Steel-cut oats are chewier and heartier than rolled oats. If using them, soak overnight for at least 12 hours. You might need to add more liquid, too, since they absorb more than rolled oats. To make this recipe gluten-free, simply use certified gluten-free oats. Regular oats may contain gluten from cross-contamination. Always read labels to make sure. The other ingredients in this recipe are naturally gluten-free. This recipe has about 300-350 calories per serving. It also provides protein, fiber, and healthy fats. Here’s a rough breakdown per serving: - Calories: 300-350 - Protein: 10-12 grams - Carbohydrates: 50-55 grams - Fiber: 8-10 grams - Fat: 8-10 grams These numbers can vary based on the milk and add-ins you choose. Enjoy this tasty and nutritious breakfast! In this blog post, we explored how to make Apple Pie Overnight Oats. We covered key ingredients, preparation steps, and helpful tips. You learned about optional add-ins and seasonal fruit choices to enhance flavor. We also discussed storage options to keep your oats fresh. Remember, experimenting with spices and different textures can make your oats special. Use these ideas to create your perfect dish. Enjoy your food and the fun of making it!
Apple Pie Overnight Oats Flavorful Breakfast Delight
Ready for a breakfast that tastes like dessert? Apple Pie Overnight Oats are here to delight your mornings. With warm cinnamon, sweet apples, and creamy
To make the best lemon poppy seed pancakes, gather these simple items: - 1 cup all-purpose flour - 1 tablespoon poppy seeds - 2 teaspoons baking powder - 1/4 teaspoon salt - 2 tablespoons granulated sugar - 1 cup milk - 1 large egg - 2 tablespoons melted butter (plus extra for cooking) - Zest of 1 lemon - 2 tablespoons fresh lemon juice - Maple syrup or honey for serving These ingredients blend to create a light and zesty pancake. The poppy seeds add a nice crunch, while the lemon zest and juice give a fresh flavor. You can use regular milk or choose a dairy-free option if you prefer. The sugar adds a hint of sweetness, balancing the tangy lemon. When cooking, the melted butter helps the pancakes brown nicely and adds a wonderful flavor. For the best results, use fresh lemon juice and zest. This will make your pancakes taste vibrant and bright. Enjoy making these pancakes with family or friends. They are perfect for a lazy weekend brunch or a quick weekday breakfast. Don't forget to top them with maple syrup or honey for an extra treat! {{ingredient_image_1}} First, grab a medium bowl. In this bowl, combine 1 cup of all-purpose flour, 1 tablespoon of poppy seeds, 2 teaspoons of baking powder, 1/4 teaspoon of salt, and 2 tablespoons of granulated sugar. Use a whisk to mix these ingredients well. Whisk until everything is fully combined. This step helps the dry ingredients blend together evenly. Next, take another bowl. In this bowl, beat together 1 cup of milk, 1 large egg, 2 tablespoons of melted butter, the zest of 1 lemon, and 2 tablespoons of fresh lemon juice. Make sure to mix until everything is well blended. This mixture gives your pancakes a rich and zesty flavor. Now, it’s time to combine the wet and dry ingredients. Gradually add the wet mixture to the dry ingredients. Stir gently until just combined. It's key to not overmix; a few lumps are okay. Overmixing can make your pancakes tough, and we want them light and fluffy. Before you start cooking, preheat a non-stick skillet over medium heat. Add a small dab of butter to the skillet. Once hot, pour about 1/4 cup of batter into the skillet for each pancake. Cook until bubbles form on the surface, which takes about 2-3 minutes. Check the edges; they should look set. Flip the pancakes carefully and cook for another 2-3 minutes until golden brown. Repeat this process until all the batter is used, adding more butter as needed for cooking. To make the best lemon poppy seed pancakes, lumps in the batter are vital. When you mix the wet and dry ingredients, stop as soon as you see some lumps. This helps keep the pancakes soft and fluffy. Overmixing can lead to tough pancakes. Remember, a few lumps are okay and even encouraged! Next, focus on cooking temperature and timing. Preheat your skillet over medium heat. If it's too hot, the pancakes may burn outside while staying raw inside. Once you pour the batter, cook until bubbles form on top. This usually takes about 2-3 minutes. Flip gently and cook for another 2-3 minutes until golden brown. For the best taste, serve your lemon poppy seed pancakes with sweet toppings. Maple syrup or honey are classic choices. They add a delightful sweetness that pairs well with the bright lemon flavor. You can also pair these pancakes with fresh fruits or yogurt. Sliced strawberries, blueberries, or even a dollop of Greek yogurt enhances the meal. The fruit adds freshness, while the yogurt brings creaminess. Together, they make your breakfast even more enjoyable! Pro Tips Use Fresh Ingredients: For the best flavor in your pancakes, use fresh lemon juice and zest. This will enhance the zesty profile of your dish. Don’t Overmix: When combining wet and dry ingredients, mix just until incorporated. Overmixing can lead to tough pancakes; a few lumps are perfectly fine. Check Heat Level: Ensure your skillet is at the right temperature by doing a test pancake. If it browns too quickly, reduce the heat; if it takes too long, increase the heat. Experiment with Toppings: While maple syrup or honey is delicious, try adding fresh berries, yogurt, or a sprinkle of powdered sugar for a fun twist! {{image_2}} You can make these pancakes gluten-free. Substitute the all-purpose flour with a gluten-free blend. Look for a mix that contains xanthan gum. This helps the pancakes hold together. Follow the same steps in the recipe. You may notice a slightly different texture. But they will still taste great! To make these pancakes vegan, replace the egg with a flaxseed egg. Mix 1 tablespoon of ground flaxseed with 2.5 tablespoons of water. Let it sit for a few minutes to thicken. For the milk, use almond milk or oat milk. Instead of butter, use coconut oil or vegan butter. These swaps keep the pancake moist and tasty. You can add extra flavors to your pancakes. Try folding in fresh blueberries before cooking. They add sweetness and a pop of color. You can also mix in some lemon zest for a stronger lemon flavor. Other citrus zests like orange or lime can work well too. This way, each bite bursts with flavor. Enjoy experimenting with these tasty options! After you make your lemon poppy seed pancakes, you may have extras. To store them, follow these tips: - Refrigeration Tips: Place pancakes in an airtight container. They will stay fresh for up to three days in the fridge. I like to put a piece of wax paper between layers. This keeps them from sticking together. - Freezing Instructions: For longer storage, freeze pancakes. Place them in a single layer on a baking sheet. Once frozen, stack them in a freezer bag. They can last for up to two months. Just remember to label the bag with the date. When it's time to eat your pancakes again, reheating them is key to keeping them tasty. Here are the best methods: - Best Methods to Retain Texture: The best way to reheat pancakes is in the oven. Preheat it to 350°F (175°C). Place pancakes on a baking sheet and cover them with foil. Heat for about 10 minutes. This keeps them warm and soft. - You can also use a microwave. Place a pancake on a plate and cover it with a damp paper towel. Heat for 20-30 seconds. This method is quick but may make them a bit chewy. By following these storage and reheating tips, your lemon poppy seed pancakes will still taste great! Using lemon extract can change the taste. Extract is more concentrated than zest and juice. You may get a strong lemon flavor, but it won't have the same fresh taste. Zest adds oils and aroma, making pancakes bright and lively. Juice brings acidity and moisture. For the best flavor, use both zest and juice. To make your pancakes fluffier, use fresh baking powder. Check the date on the package. Also, do not overmix the batter. Lumps are okay; they help keep air in the mix. Let the batter sit for a few minutes before cooking. This allows the baking powder to start working, making your pancakes rise nicely. Poppy seeds are tiny seeds from the poppy flower. They add a nutty flavor and a slight crunch. These seeds boost nutrition too. They are rich in fiber, calcium, and healthy fats. Poppy seeds can help with digestion and heart health. Their unique taste pairs well with lemon, making your pancakes special. You learned about making tasty lemon poppy seed pancakes from scratch. We covered the key ingredients, mixing methods, and cooking tips. You can even explore variations like gluten-free or vegan options. Don’t forget to try different toppings to enhance your pancakes. With these steps, you can whip up the perfect breakfast treat. Enjoy these delightful pancakes any day. Your family and friends will love them! Happy cooking!
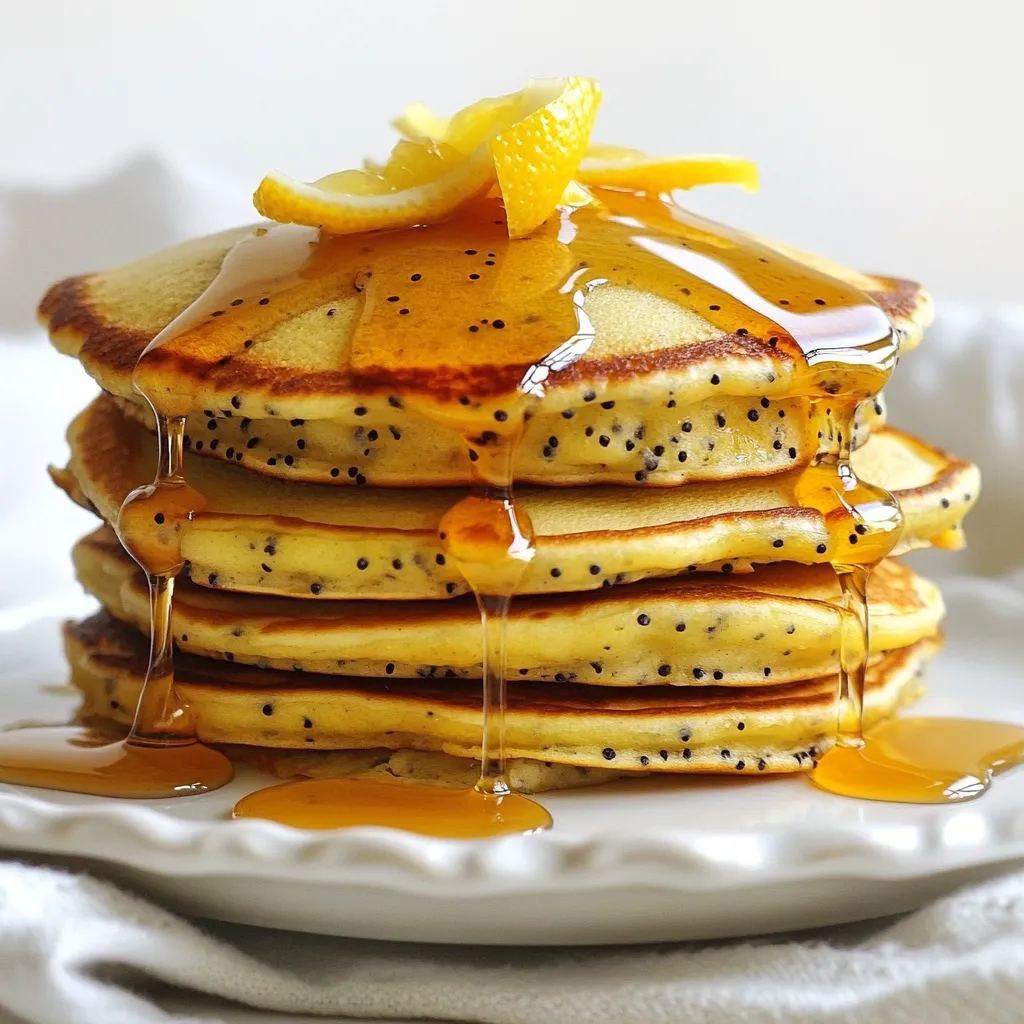
Lemon Poppy Seed Pancakes Flavorful Morning Delight
Start your day with a burst of flavor by making Lemon Poppy Seed Pancakes! These bright and zesty pancakes combine the tartness of lemon with