Appetizers
![- 2 lbs chicken wings or drumsticks - 1 cup all-purpose flour - 1/2 cup cornstarch - 1 teaspoon baking powder - 1 teaspoon garlic powder - 1 teaspoon onion powder - 1 teaspoon black pepper - Salt, to taste - Oil for frying - 1/4 cup gochujang (Korean chili paste) - 1/4 cup honey - 2 tablespoons soy sauce - 2 tablespoons rice vinegar - 1 tablespoon sesame oil - 2 cloves garlic, minced - 1 tablespoon ginger, minced - 1 tablespoon sesame seeds - Chopped green onions for garnish For this recipe, you will need both chicken and sauce ingredients. The chicken gives a crispy base, while the sauce adds flavor. I love using wings or drumsticks since they are juicy and perfect for frying. The coating mix is simple yet effective. Flour and cornstarch create a crunchy crust. Baking powder helps the chicken puff up. Garlic and onion powder give a savory kick. Don’t forget to add salt and pepper to enhance the taste. For the sauce, gochujang is the star. It brings heat and depth. Honey balances the spice with sweetness. Soy sauce adds umami, while rice vinegar gives a tangy touch. Sesame oil adds richness, and garlic and ginger give a fresh burst. Lastly, sesame seeds add a nice crunch. Chopped green onions make a bright garnish. They add color and a fresh taste, making your Sweet & Spicy Korean Fried Chicken truly shine. For more detailed steps, check out the Full Recipe. - Rinse and dry chicken pieces. - Coat chicken with the flour mixture. Start by rinsing your chicken pieces under cold water. This step ensures your chicken is clean and ready to cook. After rinsing, pat the pieces dry with paper towels. It’s important to remove all excess moisture. This helps the chicken get crispy when frying. Next, we’ll make the coating. In a large bowl, mix together the all-purpose flour, cornstarch, baking powder, garlic powder, onion powder, black pepper, and a pinch of salt. Toss the chicken pieces in this mixture. Make sure every piece gets an even coat. This will give you that perfect crunch when frying. - Heat oil to 350°F (175°C). - Fry chicken in batches until golden brown. Now it’s time to heat the oil. Pour enough oil into a deep pot or heavy skillet to fill it about 3 inches deep. Heat the oil over medium-high heat until it reaches 350°F (175°C). You can test the oil by dropping in a small bit of the flour mixture. If it bubbles and rises, the oil is ready. Carefully lower the coated chicken pieces into the hot oil. Do this in small batches to avoid overcrowding. Fry each batch for about 8-10 minutes. You want them to be golden brown and cooked through. Once done, place the chicken on a plate lined with paper towels. This helps drain any excess oil. - Combine sauce ingredients in a saucepan. - Heat and stir until sauce thickens. For the sauce, grab a medium saucepan. Over low heat, combine gochujang, honey, soy sauce, rice vinegar, sesame oil, minced garlic, and ginger. Stir this mixture often as it heats. You want the flavors to blend well and the sauce to thicken. This should take around 5-7 minutes. Just before you finish, add sesame seeds for an extra crunch. - Coat fried chicken with sauce. - Arrange on a serving platter and garnish. Time to coat the chicken! You can dip each piece into the warm sauce. Alternatively, place all the fried chicken in a large bowl and pour the sauce over it. Gently toss to ensure every piece is covered in that sweet and spicy goodness. Finally, arrange your beautifully glazed chicken on a serving platter. For a pop of color, sprinkle chopped green onions on top. Enjoy every bite of your delightful creation! For the full recipe, check [Full Recipe]. - Dry chicken thoroughly before coating - Avoid overcrowding the frying pan To get your chicken nice and crispy, start by drying it well. Use paper towels to remove all moisture. Wet chicken will steam instead of fry, and you want that golden crisp! Next, be careful not to crowd the frying pan. Fry in small batches, so the chicken has room to cook evenly. This keeps the oil hot and gives you that perfect crunch. - Adjust sweetness and spice levels to taste - Allow sauce to cool slightly before coating When making the sauce, taste as you go. If you want more sweetness, add extra honey. For more heat, add a bit more gochujang. It’s all about your taste! After cooking the sauce, let it cool for a few minutes. A warm sauce coats the chicken better. If it’s too hot, it can make your chicken soggy. - Use fresh green onions for garnish - Serve with lettuce for an attractive presentation For a pretty plate, sprinkle fresh green onions on top of the chicken. This adds color and flavor. You can also serve the chicken over a bed of sliced lettuce. This not only looks great but also adds crunch. Your Sweet & Spicy Korean Fried Chicken will impress everyone at the table! {{image_4}} You can switch up the sauce for your chicken if you want. Here are two great ideas: - Honey garlic sauce: This sauce adds a sweet touch with a hint of garlic. Mix honey with minced garlic and a bit of soy sauce. Heat it until it thickens. It makes the chicken sweet and tasty. - Spicy BBQ sauce: A smoky flavor can bring a new twist. Combine your favorite BBQ sauce with some gochujang for that Korean kick. This will make your chicken extra spicy and fun! You don’t have to fry your chicken! Here are some other ways to cook it: - Oven-baking alternative: Preheat your oven to 425°F (220°C). Coat the chicken pieces as usual. Place them on a baking tray lined with parchment paper. Bake for 25-30 minutes until golden and crispy. This method is healthier and less messy. - Air fryer instructions: If you have an air fryer, it’s easy! Set it to 375°F (190°C). Coat the chicken, then place them in the fryer basket. Cook for about 25 minutes, flipping halfway through. The chicken will be crispy and delicious! Need to make some changes? You can easily swap ingredients to suit your needs: - Gluten-free coating options: Use almond flour or rice flour instead of all-purpose flour. You can also use a gluten-free bread crumb blend. This will keep your chicken crispy without gluten! - Chicken alternatives: If you want to try something different, use chicken thighs instead of wings. They stay juicy and tender. For a vegetarian option, use tofu cubes. Coat and fry them the same way for a tasty treat! For the full recipe, you can always refer back to the detailed steps! After enjoying your Sweet & Spicy Korean Fried Chicken, let it cool down. This step helps keep your chicken crispy. Once cooled, place the chicken in airtight containers. Make sure to seal them tight. This keeps your chicken fresh and prevents it from drying out. When it comes to reheating, the oven is your best friend. Set it to 350°F (175°C). Place the chicken on a baking sheet. Heat for about 10-15 minutes. This method keeps the chicken crispy. The microwave, while faster, may make your chicken soggy. If you must use the microwave, try a short time on low power. You can freeze the fried chicken for later. Wrap each piece in plastic wrap. Then, place the wrapped chicken in a freezer bag. This prevents freezer burn. When you’re ready to eat, take the chicken out. Let it thaw in the fridge overnight for the best results. This method helps keep your chicken juicy and tasty. To keep your fried chicken crispy, you must dry it well. After washing the chicken, use paper towels to remove all moisture. Moisture can make the coating soggy. A dry surface helps the flour stick better, leading to crispy chicken. When frying, avoid overcrowding the pot. This helps keep the oil hot, which also adds to the crispiness. Yes, you can make parts of this recipe ahead of time. You can prepare the sauce a day before. Just store it in the fridge. For the chicken, you can coat it and keep it in the fridge until you're ready to fry. This allows the flavors to soak in. Some great side dishes pair well with this chicken. Here are a few ideas: - Steamed rice - Pickled vegetables - Kimchi - Cucumber salad - Garlic bread These sides balance the heat and enhance the meal's flavors. To adjust the spice level, modify the gochujang in the sauce. If you want it milder, use less gochujang. You can also mix in more honey to balance the heat. For a spicier kick, add some chili flakes or extra gochujang. Taste as you go to find your perfect level of spice. If you're looking for authentic Sweet & Spicy Korean Fried Chicken, check out these restaurants: - Ktown BBQ - Seoul Chicken - Bonchon These places are known for their fried chicken and offer a great taste of Korea. Enjoy the full recipe to try making it at home! This blog post shared how to make Sweet & Spicy Korean Fried Chicken. We covered ingredients for the chicken, the sauce, and tips for cooking. I shared steps for frying and coating the chicken for maximum crispiness. You can try different sauces and cooking methods to suit your taste. Remember to store leftovers properly to keep them tasty. Enjoy making this dish, and don't forget to share it with friends and family. Your cooking skills will shine with this tasty recipe!](https://tossedflavors.com/wp-content/uploads/2025/06/e6542b9f-90fa-4145-9886-4710305c9f07.webp)
Sweet & Spicy Korean Fried Chicken Flavorful Delight
Craving a dish that packs a punch and delights your taste buds? Let me introduce you to Sweet & Spicy Korean Fried Chicken! This recipe
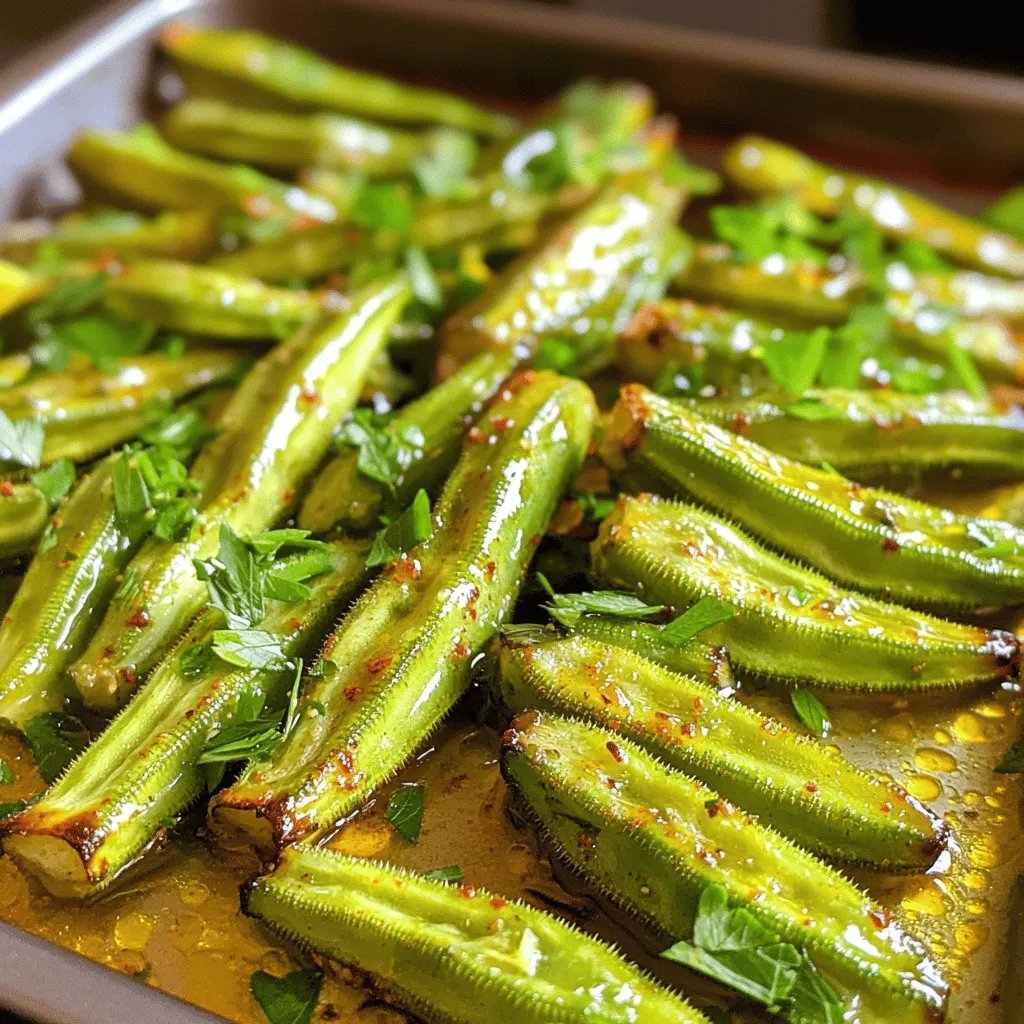
Easy Roasted Okra Crisp and Tasty Side Dish
If you’re looking for an easy and tasty side dish, I’ve got the perfect recipe for you: roasted okra. This simple, healthy treat is not
![- 1 lb ground beef - 1 cup shredded cheddar cheese - 1 cup shredded mozzarella cheese - 1/2 cup grated Parmesan cheese - 1 package (16 oz) refrigerated pizza dough - 1 tsp garlic powder - 1 tsp onion powder - 1/2 tsp salt - 1/4 tsp black pepper - 1 tbsp minced garlic - Fresh parsley for garnish When making Garlic Parmesan Cheeseburger Bombs, the ingredients you choose are key. The ground beef brings rich flavor and juiciness. I prefer using an 80/20 ratio for the best texture and taste. The blend of cheeses adds creaminess and depth. Cheddar gives sharpness, mozzarella adds stretch, and Parmesan brings a nutty finish. For the dough, I always opt for refrigerated pizza dough. It’s easy to work with and puffs up nicely in the oven. The seasonings are simple but powerful. Garlic powder and onion powder infuse great flavor. Salt and black pepper enhance everything and bring balance. If you want an extra punch, add minced garlic. This will elevate the taste even more. Fresh parsley not only adds color but also a fresh note. It’s a nice touch when you serve the bombs warm. For the full recipe, check out the complete guide. This will help you get everything just right and make your cooking experience enjoyable! - Preheat the oven to 375°F (190°C). - Prepare the baking sheet with parchment paper to avoid sticking. - In a large bowl, combine 1 lb of ground beef with cheeses and seasonings. - Mix until everything blends well. This ensures each bite is tasty. - Roll out the pizza dough on a floured surface. Cut it into squares, about 3-4 inches. - Take a dough square and place about 2 tablespoons of filling in the center. - Fold the dough over and pinch the seams to seal it tightly. - Arrange the stuffed bombs on the baking sheet seam side down. - Lightly brush the tops with olive oil to help them brown. - Bake for 15-20 minutes until golden brown. Ensure the filling reaches 160°F (71°C). Follow these steps for a delicious treat! For the complete recipe, check the Full Recipe. To make your Garlic Parmesan Cheeseburger Bombs pop with flavor, use freshly grated cheeses. They melt better and give a creamy texture. I also suggest seasoning your beef mix well. This extra salt and pepper really bring out the taste of the meat. You want every bite to burst with flavor! Roll your pizza dough a bit thinner. This helps the bombs get that nice, crispy outside while keeping the filling juicy. When you seal the dough, make sure to pinch it tightly. This prevents any filling from leaking while baking, keeping all that flavor inside. Watch your bake time closely. You want the dough to turn a lovely golden brown. A food thermometer can be your best friend here. Check that the internal temperature reaches 160°F (71°C) to ensure your beef is fully cooked. This will keep your bombs safe and tasty! {{image_4}} You can easily switch things up with different meats. Try using ground turkey or chicken instead of beef. This swap can make your bombs lighter, yet still delicious. You can also play with cheese combinations. Substitute some cheddar with pepper jack for a spicy kick or use gouda for a rich, smoky taste. To add a twist to your filling, incorporate hot sauce or BBQ sauce. This can elevate the flavor and give your bombs a unique touch. You can also include diced vegetables like bell peppers or onions. These add crunch and extra flavor, making your bombs even tastier. If you want a different texture, consider using biscuit dough or crescent rolls. These options can create a fluffy, buttery experience. For those with dietary needs, use gluten-free pizza dough. This way, everyone can enjoy these savory treats! For the complete recipe, check out the [Full Recipe]. After enjoying your Garlic Parmesan Cheeseburger Bombs, let them cool down. This step keeps them firm and tasty. Once they cool, place them in airtight containers. Keeping them sealed helps maintain their flavor and texture in the fridge. If you want to save some bombs for later, freeze them before baking. Wrap each bomb tightly in plastic wrap. Place them in a freezer-safe bag. When you're ready to bake, you can take them out and cook them straight from the freezer. Just add a few extra minutes to the baking time for best results. To reheat your bombs, the oven works best. It keeps the outside crispy while warming the inside. Preheat the oven to 350°F (175°C). Place the bombs on a baking sheet. Bake for about 10 minutes. If you're in a hurry, you can use the microwave. Just heat them for about 30 seconds to 1 minute. This method is quick but may not keep them as crispy. The total time is about 40 minutes. You spend 20 minutes for prep and about 15-20 minutes baking. This makes it easy to fit into a busy evening. Yes, you can prepare the filling ahead of time. Store it in an airtight container in the fridge for up to two days. When ready to use, just let it sit at room temperature for a bit. Mixing it while cold can make it hard to stuff. These tasty bombs pair well with many sides. Try serving them with: - A fresh salad - Crispy fries - Sweet potato wedges - Marinara or spicy ketchup for dipping You can easily modify this recipe. For a gluten-free option, use gluten-free pizza dough. If you're low-carb, use cauliflower dough. For vegan bombs, swap meat with plant-based ground and use vegan cheese. Yes, you can air fry these bombs! Preheat your air fryer to 375°F (190°C). Place the stuffed bombs in a single layer. Cook for about 10-12 minutes. Check them halfway through and flip if needed for even cooking. Check the internal temperature of the bombs. They should reach at least 160°F (71°C) to be safe. Visually, the dough should be golden brown. If you see this, it’s time to dig in! You now have everything you need to make tasty Garlic Parmesan Cheeseburger Bombs. We covered key ingredients, step-by-step instructions, and helpful tips. You can even customize these bombs with your favorite flavors. Whether you’re baking for a crowd or enjoying a snack, these bombs are sure to impress. Get creative with fillings and enjoy the tasty results. Happy cooking!](https://tossedflavors.com/wp-content/uploads/2025/06/4766eb7b-d2d7-47c2-bb55-b4f21c764bdb.webp)
Garlic Parmesan Cheeseburger Bombs Savory and Tasty Treat
Craving a snack that packs a savory punch? Look no further! These Garlic Parmesan Cheeseburger Bombs are the perfect blend of cheesy goodness and juicy
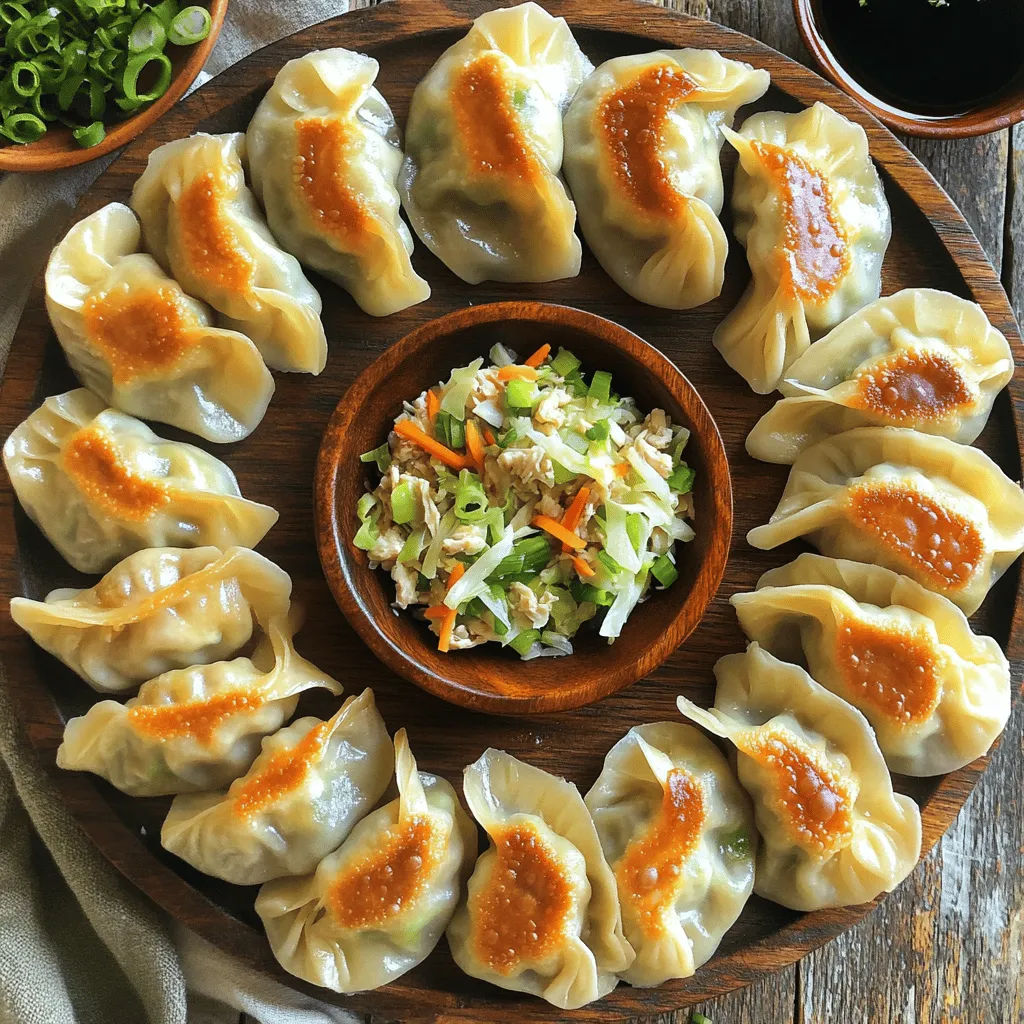
Pan-Fried Chicken Dumplings Easy Step-by-Step Guide
Ready to impress your friends and family? In this easy step-by-step guide, I’ll show you how to make delicious pan-fried chicken dumplings from scratch. With
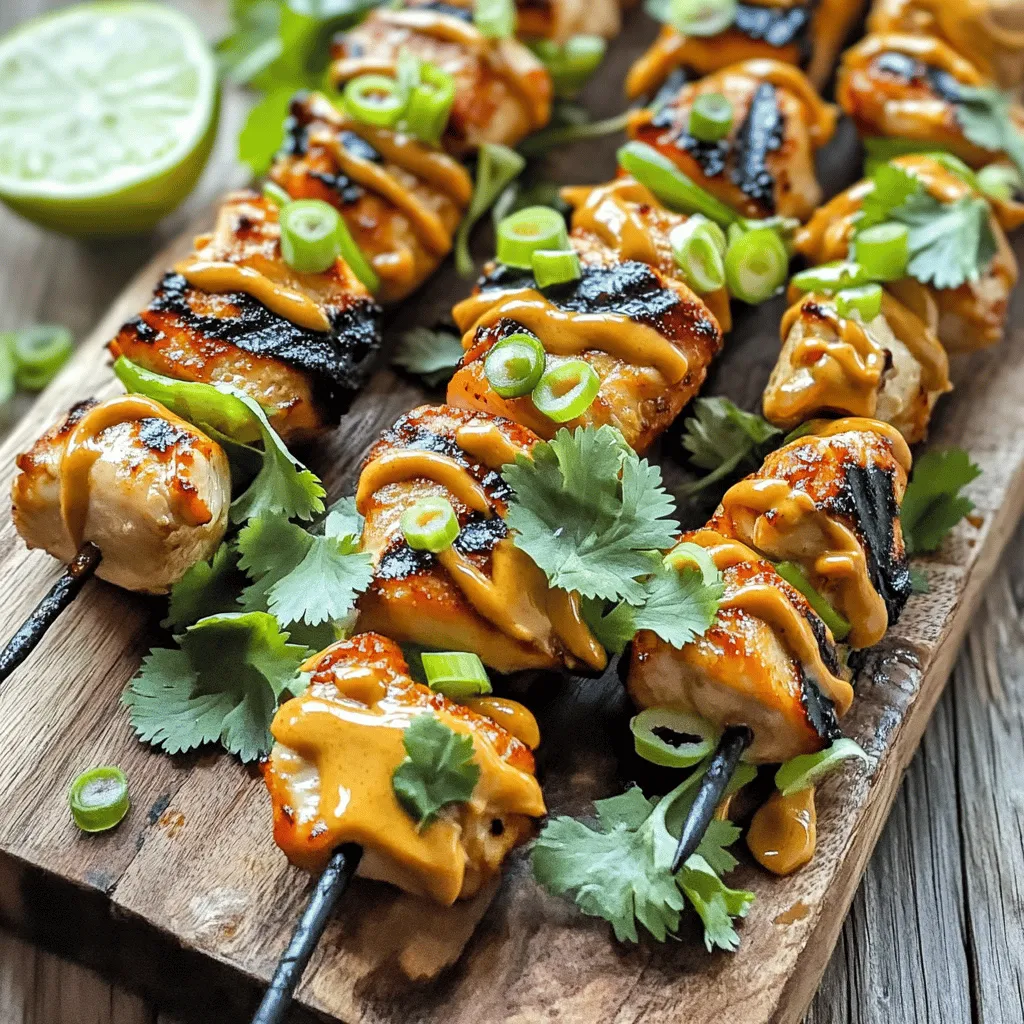
Bang Bang Chicken Skewers Flavorful Grilled Delight
Get ready for a flavor explosion with my Bang Bang Chicken Skewers! This dish combines tender chicken with a rich, spicy sauce that will thrill
![- Chicken breast - Unsalted butter - Garlic - Dried thyme - Smoked paprika - Salt and pepper - Fresh parsley - Lemon wedges The ingredients for garlic butter chicken bites are simple but full of flavor. You can find these items at any grocery store. Fresh chicken breast will give you the best taste. Use unsalted butter to control the salt levels in the dish. Fresh garlic adds a strong, rich flavor, while dried thyme and smoked paprika bring warmth and depth. Don’t forget salt and pepper to enhance all the flavors. Fresh parsley adds a nice touch of color and freshness, and lemon wedges give a zesty kick. - Alternatives for chicken: If you want to try something different, use turkey or firm tofu for a vegan option. - Vegan butter options: You can use olive oil or a plant-based butter if you prefer to avoid dairy. - Variations of herbs and spices: Feel free to mix in other herbs like rosemary or basil. For more heat, add cayenne pepper or chili flakes. These substitutions can change the dish while keeping it delicious. You can still enjoy the garlic butter flavor with these options. For the full recipe, you can refer back to the main article. Preparing the chicken Start with 1 pound of chicken breast. Cut it into bite-sized pieces. Make sure each piece is even. This helps them cook at the same rate. Mince garlic correctly Use fresh garlic for the best flavor. Take 6 cloves and peel them. Then, chop them finely. A sharp knife helps with this. You want the garlic to be small, so it cooks well. Melting butter and sautéing garlic Place a large skillet over medium heat. Add 4 tablespoons of unsalted butter. Let it melt until it bubbles. Once it sizzles, add the minced garlic. Stir it for about 30 seconds. Watch it closely so it doesn’t burn. Cooking chicken to perfection Raise the heat to medium-high. Add the chicken pieces to the skillet. Sprinkle salt, pepper, dried thyme, and smoked paprika over them. Cook the chicken for 6-8 minutes. Stir occasionally to avoid sticking. Checking for doneness The chicken should turn golden brown. Use a meat thermometer to check the temperature. It should reach 165°F (75°C). This means it is safe to eat. Presentation tips Serve your garlic butter chicken bites on a rustic wooden board. Garnish with extra parsley for color. Add lemon wedges around the edge for a pop of freshness. Ideal serving suggestions Pair the chicken bites with a side salad or rice. The lemon adds a nice zing. Enjoy them warm for the best taste. Check the full recipe for more ways to enjoy this dish. To avoid burnt garlic, watch it closely. Garlic cooks fast and can burn in seconds. When you add minced garlic to the hot butter, stir it. This keeps it moving and prevents it from getting too dark. For even cooking, cut your chicken into uniform pieces. This helps each piece cook at the same rate. Use a large skillet so the chicken has space. Crowding the pan can lead to steaming instead of browning. You can add more spices to your garlic butter chicken bites. Try adding cayenne pepper for heat or oregano for depth. These spices mix well with garlic and butter. When using fresh herbs, chop them finely for better flavor. Fresh parsley adds a bright note. Dried herbs are great too, but use less since they are more potent. If you use larger pieces of chicken, adjust your cook time. Larger pieces need more time to reach 165°F (75°C). Always use a meat thermometer for best results. For reheating leftovers, the oven works best. Place the chicken bites on a baking sheet and cover with foil. Heat them at 350°F (175°C) for 10-15 minutes. This keeps them juicy and tasty. You can also microwave them, but they may dry out. {{image_4}} You can easily switch up the flavor of garlic butter chicken bites. Here are two fun ideas: - Spicy garlic butter chicken bites: Add one teaspoon of cayenne pepper or red pepper flakes. This will give the dish a nice kick. The heat balances well with the rich butter and garlic. - Asian-inspired garlic chicken bites: Mix in soy sauce and sesame oil. Add a sprinkle of green onions for a fresh touch. This twist will take your taste buds on an exciting journey. If you have special dietary needs, don't worry! There are options for you: - Gluten-free and keto options: Use gluten-free soy sauce or coconut aminos in place of regular soy sauce. This keeps the dish gluten-free. The chicken and flavors remain keto-friendly, too. - Low-carb alternatives: Serve the chicken bites with zoodles (zucchini noodles) instead of pasta. This keeps your meal light and low in carbs. Pair your garlic butter chicken bites with tasty sides and drinks: - Side dish recommendations: Serve them with a fresh salad or roasted vegetables. These sides complement the rich chicken well and add color to your plate. - Best drinks to complement the meal: A light white wine, like Sauvignon Blanc, works great. If you prefer non-alcoholic, try sparkling water with a slice of lemon. This will enhance the flavors of your meal. For the full recipe, check out the [Full Recipe] section! To keep your garlic butter chicken bites fresh, store them properly. After cooking, let the bites cool to room temperature. Then, place them in an airtight container. Store the container in the fridge for up to four days. If you want to save them longer, consider freezing. Place the chicken bites in a freezer bag. Press out any air before sealing. They can stay in the freezer for up to three months. When you're ready to enjoy your leftovers, reheat them carefully. The best method is to use a skillet. Heat it over medium heat. Add a little butter or oil to the pan. This keeps the chicken juicy and flavorful. Stir the bites for about five minutes until they are warm. You can also use a microwave. Place the chicken on a microwave-safe plate. Cover it with a damp paper towel. Heat in short bursts of 30 seconds to avoid losing moisture. Garlic butter chicken bites last up to four days in the fridge. Keep an eye out for signs of spoilage. If the chicken has a sour smell or changes color, it’s time to toss it. Always check for any mold as well. Proper storage helps you enjoy your garlic butter chicken bites safely and deliciously. For more tips and recipes, check out the Full Recipe for garlic butter chicken bites. Garlic butter chicken bites are small pieces of chicken cooked in garlic and butter. They are juicy and packed with flavor. The main ingredients include: - Chicken breast - Unsalted butter - Garlic - Dried thyme - Smoked paprika - Salt and pepper - Fresh parsley - Lemon wedges These bites are quick to make and perfect for any meal or snack. Yes, you can prepare garlic butter chicken bites in advance. Here’s how: - Cook the chicken bites as per the Full Recipe. - Allow them to cool. - Store them in an air-tight container in the fridge. This meal prep saves time. Just reheat when you are ready to eat! You can pair garlic butter chicken bites with many side dishes. Here are some great options: - Steamed vegetables like broccoli or green beans - Rice or quinoa for a filling meal - A fresh salad for a light touch - Garlic bread to soak up the delicious butter sauce Add lemon wedges for a zesty garnish! To check if your chicken is cooked right, use a meat thermometer. The internal temperature should be 165°F (75°C). Other signs include: - The chicken should be golden brown. - Juices should run clear, not pink. - The texture should be firm but not dry. Following these steps will help you serve safe and tasty chicken bites! In this blog post, we explored how to make delicious Garlic Butter Chicken Bites. We covered key ingredients, smart substitutions, and step-by-step cooking instructions. I shared tips for perfecting your dish and ideas for flavor variations. Storing and reheating methods ensure you enjoy leftovers without losing taste. Now, it’s time to get cooking. With these steps, you can create a tasty meal everyone will love.](https://tossedflavors.com/wp-content/uploads/2025/06/201917fd-c6ba-4ff7-8957-950db0bde7e2.webp)
Garlic Butter Chicken Bites Flavorful and Easy Recipe
Ready for a dish that bursts with flavor and is simple to make? My Garlic Butter Chicken Bites are your next go-to recipe for any

Easy Buffalo Chicken Flatbread Satisfying and Quick Meal
Are you craving a quick and satisfying meal? Look no further than this Easy Buffalo Chicken Flatbread! With just a few ingredients and simple steps,
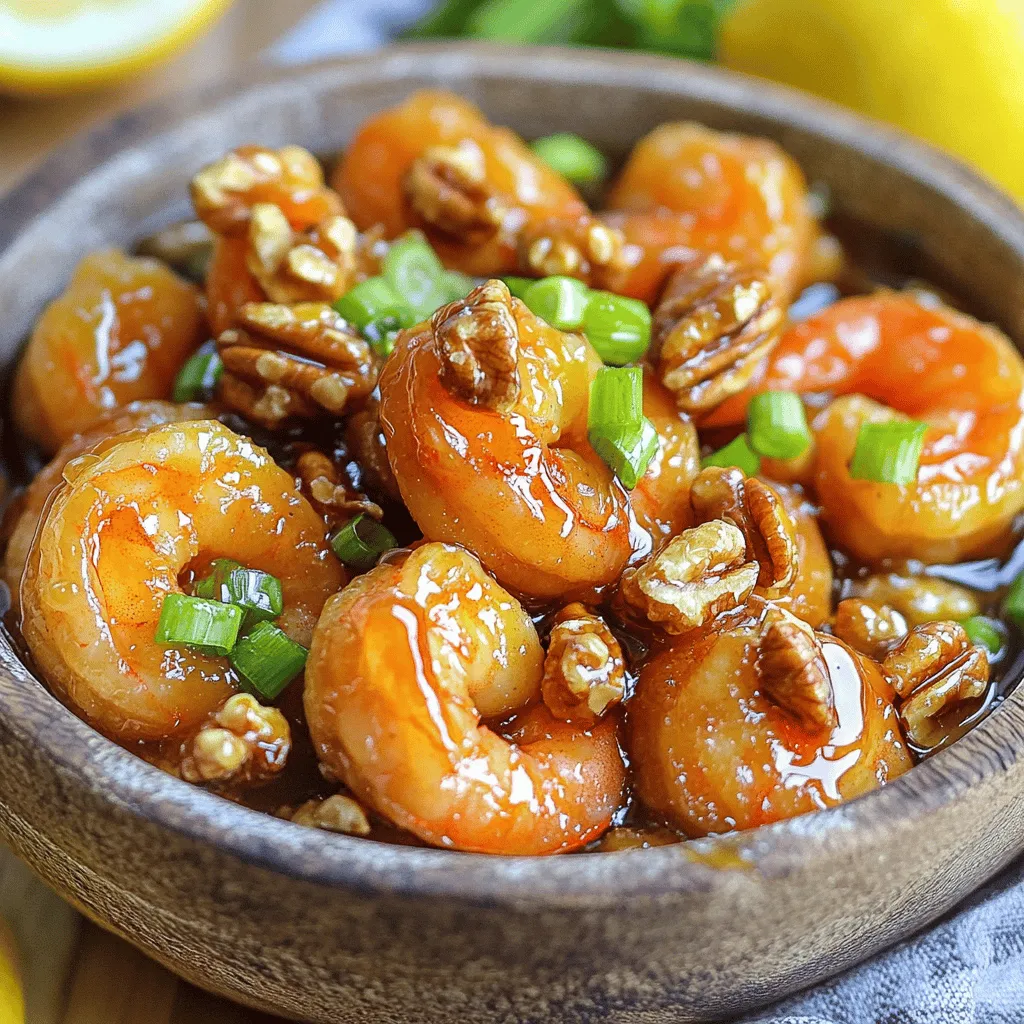
Honey Walnut Shrimp Flavorful and Easy Recipe Guide
Are you ready to whip up a delicious Honey Walnut Shrimp right at home? This dish delights your taste buds with sweet, crispy shrimp and
![- 9 lasagna noodles, cooked and cool - 1 cup ricotta cheese - 1 cup shredded mozzarella cheese - 1/2 cup grated Parmesan cheese - 1 large egg - 1 teaspoon Italian seasoning - Salt and freshly ground pepper, to taste - 1 cup marinara sauce, for dipping - 1 cup seasoned breadcrumbs (gluten-free options available) - Olive oil spray - Lasagna Noodles: Use the regular or gluten-free type. Cook them until al dente for the best texture. - Ricotta Cheese: This creamy cheese adds rich flavor and smooth texture. - Mozzarella Cheese: Shredded mozzarella melts beautifully and gives a stretchy pull. - Parmesan Cheese: Grated Parmesan adds a salty bite that enhances overall taste. - Egg: This binds the cheese mixture together, making it firm and easy to roll. - Italian Seasoning: A blend of herbs that brings classic Italian flavors to the dish. - Breadcrumbs: These create a crunchy crust, making the fritta crispy and delightful. - Olive Oil Spray: A must for achieving a nice golden color on the outside. Each serving of lasagna fritta contains approximately: - Calories: 300 - Protein: 15g - Carbohydrates: 30g - Fat: 15g - Fiber: 2g This dish is a great balance of protein and carbs. Pair it with a salad for more nutrients. For a lighter option, consider using less cheese or whole grain noodles. Enjoy your meal while knowing it’s tasty and filling! For the complete recipe, check the [Full Recipe] above. Start by cooking the lasagna noodles. Follow the package instructions carefully. You want them to be al dente, which means they should be firm but not hard. After cooking, drain the noodles and lay them flat. A clean towel or baking sheet works well to cool them down quickly. Make sure they are completely cool before you add the filling. Take a large mixing bowl and add the ricotta cheese, shredded mozzarella, and grated Parmesan. Then, crack in one large egg. Add one teaspoon of Italian seasoning, along with salt and freshly ground pepper to taste. Mix everything together until you see a smooth and creamy texture. This cheese filling is the heart of your lasagna fritta. Grab one of your cooled lasagna noodles. Place about two tablespoons of the cheese filling in the center of the noodle. Carefully roll the noodle from one end to the other, keeping the filling inside. If you need to, use a toothpick to hold the shape. Repeat this for all the noodles. Now, take your breaded rolls and dip each one into seasoned breadcrumbs. Make sure they are fully coated. Gently press the breadcrumbs onto the rolls to help them stick. Preheat your air fryer to 350°F (175°C). Once it is hot, arrange the rolls in a single layer in the fryer basket. Do not overcrowd them. Lightly spray olive oil on the rolls to make them crispy. Cook the lasagna fritta for about 8 to 10 minutes. Flip them halfway through cooking. They are ready when they are golden brown and crispy. After cooking, let them cool for a minute. Serve warm with marinara sauce for dipping. Enjoy each bite! For the full recipe, check out the details above. When making air fryer lasagna fritta, avoid overcooking the noodles. They should be al dente. If they are too soft, they may break while rolling. Also, do not skip the breadcrumb coating. It adds crunch and flavor. Make sure each roll is coated evenly for the best results. To achieve that perfect crisp, use a light spray of olive oil. This helps the breadcrumbs get golden brown. Arrange the rolls in a single layer in the air fryer. Overcrowding can cause uneven cooking. Flipping the rolls halfway through cooking ensures they crisp on all sides. Serve your crispy lasagna fritta with warm marinara sauce for dipping. This adds a nice touch of flavor. For a special twist, top the fritta with freshly chopped basil and a sprinkle of Parmesan. You can also serve it on a colorful plate for a beautiful presentation. For a complete meal, pair it with a fresh salad. {{image_4}} You can make this dish gluten-free easily. Use gluten-free lasagna noodles instead of regular ones. They cook just as well and still taste great. You can also find gluten-free breadcrumbs at most stores. These will help keep your fritta crispy! To make a vegetarian version, swap the egg for a flax egg. Just mix one tablespoon of ground flaxseed with three tablespoons of water. Let it sit for five minutes to thicken. You can also add more veggies to the cheese mix. Try spinach, mushrooms, or zucchini for added flavor and nutrition. Want to boost the taste? Add some garlic powder or red pepper flakes to the cheese mix. Fresh herbs like basil or parsley also add a nice touch. For a tangy twist, mix in some sun-dried tomatoes or olives. These small changes can make your air fryer lasagna fritta even more exciting! Check out the Full Recipe for all the steps to make this delicious dish. To keep your lasagna fritta fresh, place any leftovers in an airtight container. Make sure to let them cool completely before sealing. Store them in the fridge for up to three days. This way, you can enjoy them later without losing flavor or texture. For the best results, use your air fryer to reheat the fritta. Set it to 350°F (175°C) and heat for about 5-7 minutes. This method keeps them crispy. You can also use a microwave, but the fritta won't be as crunchy. Just heat them for 1-2 minutes, checking to ensure they don't get too soft. If you want to store them longer, you can freeze lasagna fritta. Wrap each fritta in plastic wrap, then place them in a freezer-safe bag. They can stay in the freezer for up to three months. When you're ready to eat, thaw them in the fridge overnight and reheat as mentioned above. Enjoy your homemade treat anytime! Yes, you can use homemade pasta for this recipe. Homemade pasta adds a fresh taste. Just ensure it cooks to the right texture. This will help the rolls hold their shape. Thin noodles work best for rolling. Aim for a thickness that allows for easy wrapping. The best air fryer temperature for lasagna fritta is 350°F (175°C). This temperature allows the rolls to cook evenly. It helps achieve that golden, crispy texture outside. Always preheat your air fryer for best results. This extra step ensures even cooking throughout. Lasagna fritta can last in the fridge for about 3-4 days. Store them in an airtight container. Make sure they are cooled before sealing. This keeps them fresh and tasty. Reheat them in the air fryer for the best texture. You can also enjoy them cold! For the full recipe, check out the crispy air fryer lasagna fritta recipe. This blog post covered how to make lasagna fritta. We talked about key ingredients, their nutrition, and how to prepare the noodles. I gave you step-by-step instructions to make it easy. You learned tips to avoid common mistakes and ensure crispiness. We explored variations, storage options, and answered FAQs. In the end, making lasagna fritta can be fun and rewarding. With these steps, you can impress anyone! Enjoy your cooking journey!](https://tossedflavors.com/wp-content/uploads/2025/06/48388024-b64d-494e-bcbd-ff0c3d119d06.webp)
Easy Air Fryer Lasagna Fritta Tasty and Quick Meal
Craving a quick and tasty meal? Look no further than Easy Air Fryer Lasagna Fritta! This dish offers a fun twist on classic lasagna, all
![- 1 head of cauliflower, cut into bite-sized florets - 1 cup all-purpose flour - 1 teaspoon garlic powder - 1 teaspoon onion powder - 1 teaspoon smoked paprika - 1 teaspoon salt - ½ teaspoon black pepper - 1 cup water (or plant-based milk for a creamier texture) - ½ cup hot sauce (such as Frank’s RedHot) - 2 tablespoons unsalted butter or olive oil, melted The main ingredients create that perfect crunchy and spicy flavor. Cauliflower serves as a great base. The flour and seasonings mix together to coat the florets. The hot sauce and butter bring a fiery kick that makes each bite exciting. For this full recipe, I recommend using fresh cauliflower for the best results. - Fresh parsley or cilantro Garnishing adds color and freshness to your dish. Adding chopped parsley or cilantro on top makes your meal more inviting. It also complements the spicy flavor of the buffalo sauce well. - Plant-based milk options - Gluten-free flour alternatives If you want a creamier batter, use plant-based milk instead of water. This makes the dish richer. For those who need gluten-free options, try almond flour or chickpea flour. Both work well as substitutes and keep the flavor intact. Set your air fryer to 400°F (200°C). This high temperature helps make the cauliflower crispy. Preheating is key. It ensures that the cauliflower cooks evenly. If you skip this step, the florets may turn out soggy. So, let it warm up while you prepare the rest. In a large bowl, mix together the dry ingredients. Combine 1 cup of all-purpose flour, 1 teaspoon of garlic powder, 1 teaspoon of onion powder, 1 teaspoon of smoked paprika, 1 teaspoon of salt, and ½ teaspoon of black pepper. Stir well until everything is mixed together. Next, slowly pour in 1 cup of water or plant-based milk. Keep stirring until the batter is smooth and thick. This helps the batter cling to the cauliflower well. Now, it’s time to coat the cauliflower. Take each floret and dip it into the batter. Make sure every piece is fully covered. Let any extra batter drip off before placing them in the air fryer. Arrange the coated cauliflower in a single layer. Avoid overcrowding; it’s best to fry in batches if needed. Cook the cauliflower for 12-15 minutes. Halfway through, shake the basket to help them crisp up. Once they turn golden-brown, they are ready. While they cook, make the buffalo sauce. In a small bowl, mix together ½ cup of hot sauce and 2 tablespoons of melted butter or olive oil. Stir well until blended. When the cauliflower is done, take it out and toss it in the buffalo sauce. Make sure every piece is coated. For extra crunch, return the cauliflower to the air fryer for another 2-3 minutes. This final step makes them even crispier. Enjoy your crispy and flavorful Air Fryer Buffalo Cauliflower! For the full recipe, check out the details provided. To make your buffalo cauliflower crispy, focus on the batter. Use a thick batter to coat each floret well. This helps form a crunchy layer when air-fried. Overcrowding the air fryer basket can lead to soggy cauliflower. Fry in batches to keep the pieces from touching. This allows hot air to circulate freely around each floret, ensuring even cooking and crispiness. You can boost the flavor of your buffalo cauliflower by adding spices. Mix in some cayenne pepper or smoked paprika for a smoky kick. Fresh herbs like thyme or oregano can also add depth. If you want to adjust the spice level, try different hot sauces. Mild sauces will give flavor without too much heat. For a fiery kick, go for a hotter sauce. You can even mix sauces for a unique taste. For dips, ranch or blue cheese dressing pairs perfectly with buffalo cauliflower. You can also serve it with a yogurt dip for a light option. Presentation matters too! Arrange the cauliflower on a nice platter with celery sticks. Add fresh herbs for color and appeal. This not only looks great but also makes for a fun snack at parties. For the full recipe, check out the complete guide above. {{image_4}} You can change up the heat level by using different hot sauces. Frank’s RedHot is classic, but you can try Sriracha for a sweeter kick. If you want more heat, add cayenne pepper or chili powder to the batter. Mixing in chili flakes will give it an extra punch too. Experiment to find your favorite spicy blend! If you want a healthier option, you can bake the cauliflower instead of air frying. Just place the coated florets on a baking sheet and bake at 425°F for about 20 minutes. This method will cut some calories. You can also make low-calorie swaps, like using less butter or olive oil. A light spray of cooking oil can help keep the flavors without the extra fat. Buffalo cauliflower is not just a snack; it can be a meal! Try making buffalo cauliflower tacos. Use soft tortillas and load them with the crispy cauliflower. Top with fresh veggies and a drizzle of ranch. Another idea is to use the cauliflower as a salad topper. It adds great flavor and texture to any salad. Serve it as an appetizer for your next gathering. It’s sure to impress your guests! For the full recipe, check out the details above. To keep your buffalo cauliflower fresh, store it in an airtight container. Place it in the fridge. Make sure it cools completely before sealing. This helps prevent sogginess. Enjoy your leftovers within three days for the best taste. When reheating, aim to keep that crispy texture. Preheat your air fryer to 350°F (175°C). Place the cauliflower in the basket in a single layer. Heat for about 5-7 minutes. Check it often to avoid overcooking. This method helps regain its crunch. Can you freeze buffalo cauliflower? Yes, you can! First, let it cool completely. Then, spread it out on a baking sheet. Freeze it for about an hour. Once frozen, transfer it to a freezer-safe bag. This keeps it fresh for up to three months. To reheat frozen cauliflower, no need to thaw. Simply air fry it at 400°F (200°C) for about 10-12 minutes. This will help it crisp up nicely again. Enjoy your air fryer buffalo cauliflower any time! For the complete recipe, refer to the [Full Recipe]. To make buffalo cauliflower gluten-free, you can use several flour alternatives. Some of the best options include: - Almond flour - Coconut flour - Gluten-free all-purpose flour - Chickpea flour These options help create a tasty batter without gluten. Just replace the all-purpose flour in the recipe with your choice of gluten-free flour. Yes, you can use frozen cauliflower, but it requires a few steps. First, thaw the cauliflower completely. You can do this by leaving it in the fridge overnight or using the microwave. Once thawed, pat the florets dry with a towel. This helps remove excess moisture, so the batter sticks well. After that, follow the recipe as usual. Buffalo cauliflower tastes great with various dipping sauces. Here are some popular options: - Ranch dressing - Blue cheese dressing - Creamy avocado dip - Garlic aioli These dips add extra flavor and creaminess to the spicy cauliflower bites. You can easily make this recipe vegan with a few simple swaps. For the butter, use olive oil or vegan butter. For the batter, you can replace the milk with any plant-based milk, like almond or soy milk. These swaps keep your buffalo cauliflower tasty and plant-based. Enjoy your vegan snack without missing out on flavor! This article covers how to make buffalo cauliflower, from ingredients to cooking tips. You learned about key ingredients like cauliflower, flour, and hot sauce. We also shared ways to make it vegan or gluten-free. To make it crispy, proper prep and air-fryer techniques are crucial. Explore variations for extra spice or health modifications. Enjoy leftovers by storing correctly and reheating well. Buffalo cauliflower is a tasty option for meals and parties alike. Try it today, and you might just find a new favorite dish!](https://tossedflavors.com/wp-content/uploads/2025/06/95833bb5-97e1-456b-aab2-007c590c3c76.webp)
Air Fryer Buffalo Cauliflower Crispy and Flavorful Snack
Looking for a tasty snack that’s both crispy and flavorful? Dive into my Air Fryer Buffalo Cauliflower recipe! With just a few simple ingredients, you