Appetizers

Garlic Parmesan Air Fryer Wings Crunchy and Flavorful
If you crave something crunchy and flavorful, you’ll love these Garlic Parmesan Air Fryer Wings. These wings are simple to make and pack a ton

Perfect Roasted Brussels Sprouts Healthier Side Dish
Are you ready to transform boring vegetables into a tasty delight? Perfect Roasted Brussels Sprouts are the healthier side dish you need! With a few
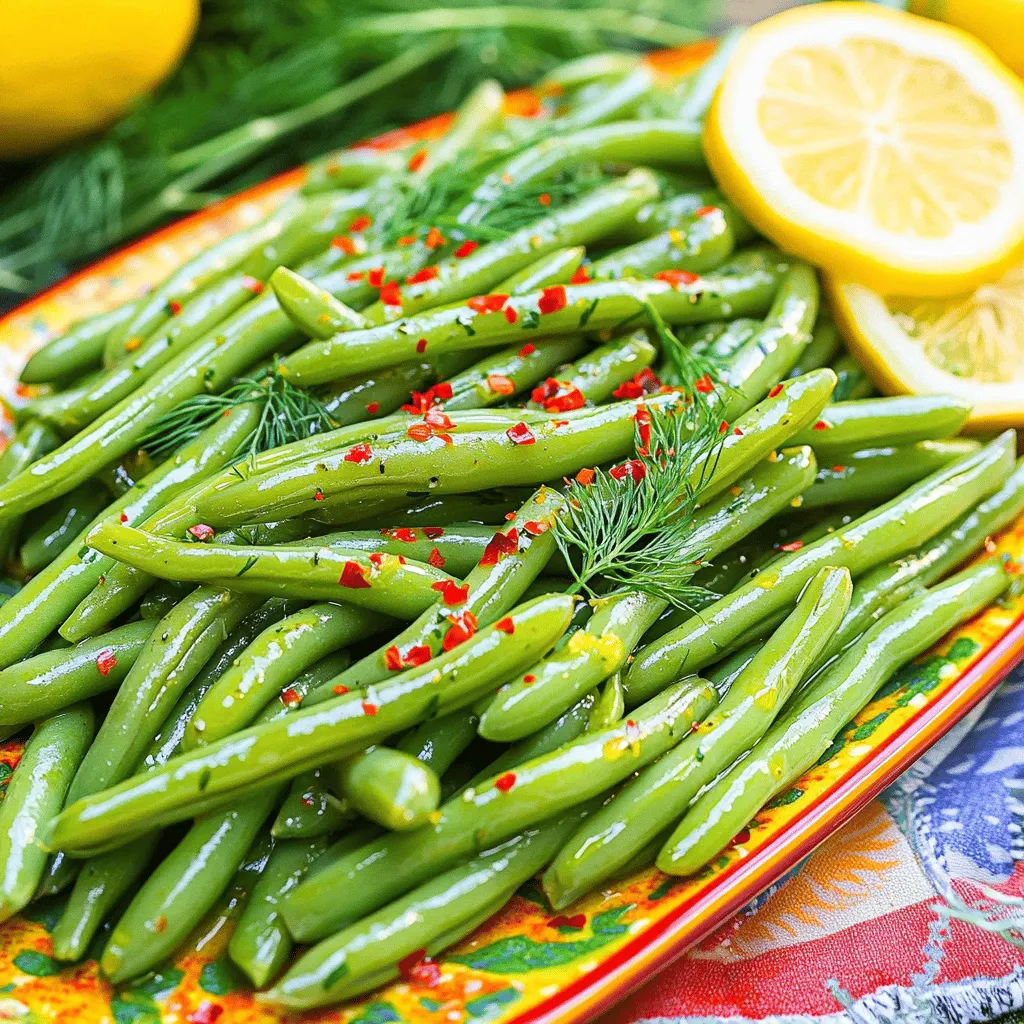
Spicy Dilly Garlic Beans Flavorful and Easy Recipe
If you love bold flavors and easy recipes, you’re in for a treat! My Spicy Dilly Garlic Beans are quick to make and pack a
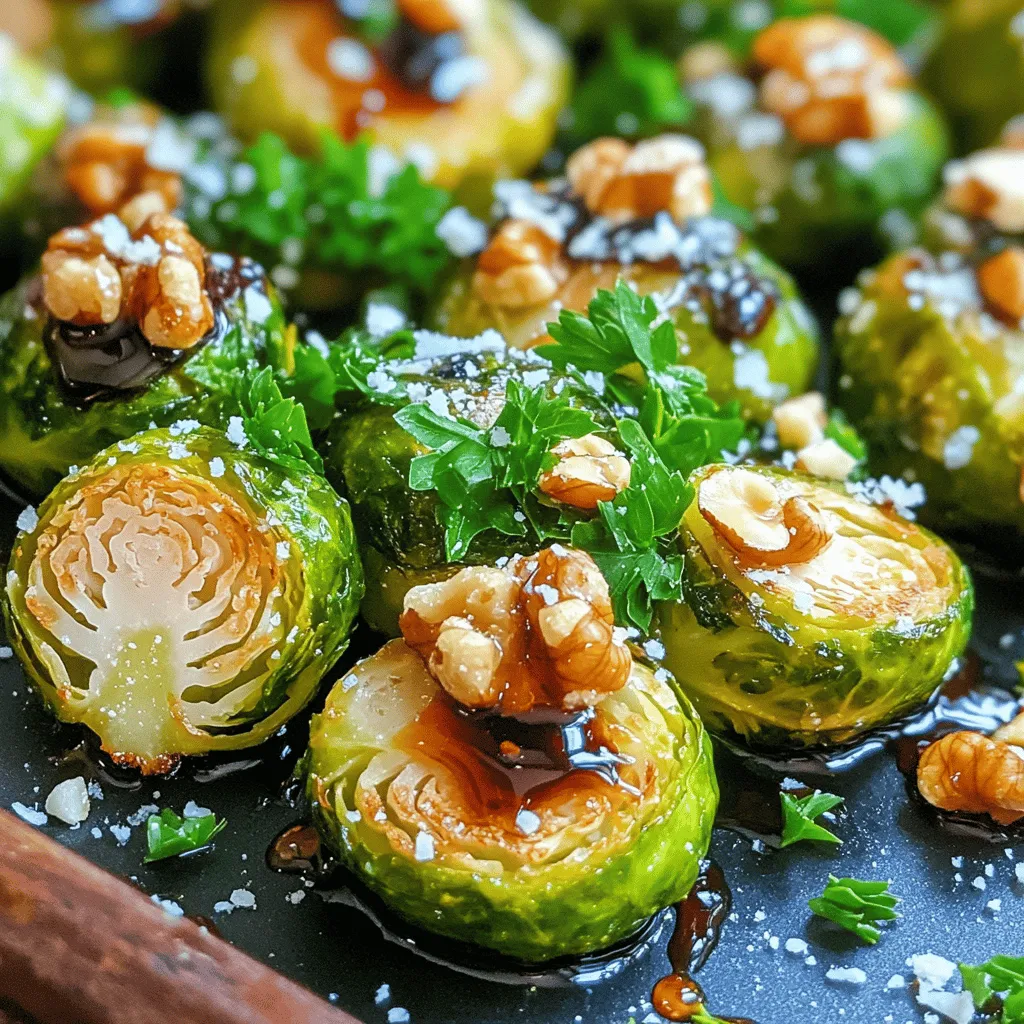
Crispy Brussels Sprouts with Balsamic Glaze Delight
If you’re looking for a mouthwatering side dish, look no further! Crispy Brussels sprouts with balsamic glaze are not just tasty—they’re also super easy to

Bruschetta Delight Flavorful Italian Appetizer Recipe
If you’re craving a burst of Italian flavor, bruschetta is the perfect appetizer. This delightful dish combines fresh ingredients with crispy bread, making it a
![To make delicious zucchini fritters, you need fresh ingredients. Start with two medium zucchinis. Grate them well to release their flavor. You also need half a cup of finely grated Parmesan cheese. This cheese adds a rich, savory taste to the fritters. Next, let's add some seasonings. You need one teaspoon of salt. The salt draws moisture from the zucchini, which is key for crispiness. You will also need half a teaspoon of freshly ground black pepper and half a teaspoon of smoked paprika. These spices bring warmth and depth to your dish. Finally, gather the remaining ingredients. You will need one cup of all-purpose flour to bind everything. Two large eggs help hold the fritters together, while a quarter cup of finely chopped green onions adds freshness. Don't forget one clove of minced garlic for an extra kick. Use olive oil for frying, and serve your fritters with sour cream or Greek yogurt for a creamy finish. For the full recipe, check out the Zesty Zucchini Fritters. Start by grating two medium zucchinis. Place the grated zucchini in a colander. Sprinkle 1 teaspoon of salt over it. This step helps draw out moisture. Let it sit for 10-15 minutes. After that, use a clean kitchen towel to wring out the zucchini. Remove as much liquid as you can. This is key for crispy fritters! In a large bowl, combine the drained zucchini with 1 cup of all-purpose flour. Add 1/2 cup of finely grated Parmesan cheese. Next, pour in two beaten eggs and add 1/4 cup of finely chopped green onions. Don’t forget 1 clove of minced garlic, 1/2 teaspoon of black pepper, and 1/2 teaspoon of smoked paprika. Mix everything well until you have a thick batter. Heat a good amount of olive oil in a non-stick skillet over medium heat. Once the oil shimmers, drop spoonfuls of batter into the skillet. Lightly flatten each spoonful with the back of a spoon. Make sure not to overcrowd the skillet; you may need to cook in batches. Cook the fritters for about 3-4 minutes on each side. Look for a golden brown color. Once done, place them on paper towels to drain excess oil. Serve warm with sour cream or Greek yogurt. Enjoy your crispy zucchini fritters! For the full recipe, check out the earlier sections. To get crispy zucchini fritters, start by removing excess water from the grated zucchini. After grating, sprinkle the zucchini with salt. Let it sit for 10-15 minutes. This step helps draw out moisture. Then, wring out the zucchini using a clean kitchen towel. The less water, the crispier your fritters will be. These fritters pair well with many dips. Try serving them with sour cream or Greek yogurt. You can also add a squeeze of lemon for a fresh kick. Arrange the fritters on a bright plate. A sprinkle of fresh herbs like parsley adds color and flavor. You can even serve them as a side dish or a light main course. One mistake is not draining the zucchini enough. If it’s too watery, the fritters will be soggy. Another common error is overcrowding the skillet. This can steam the fritters instead of frying them. Fry them in batches for the best results. Always adjust the heat as needed to prevent burning. {{image_4}} You can make zucchini fritters even better by adding herbs and spices. Fresh herbs like dill or parsley can brighten up the flavor. Try adding 1 tablespoon of chopped fresh herbs to the batter. For a spicy kick, add a pinch of cayenne pepper or red pepper flakes. Smoked paprika gives a nice depth, but don’t stop there! Experiment with thyme or oregano for an Italian twist. If you need gluten-free fritters, it’s easy to adapt the recipe. Swap the all-purpose flour for almond flour or a gluten-free blend. Make sure the baking powder you use is gluten-free as well. This keeps the fritters light and fluffy while still being crispy. You can also use chickpea flour for a nutty flavor and added protein. To make zucchini fritters vegan, replace the eggs with flax eggs. Mix 1 tablespoon of ground flaxseed with 2.5 tablespoons of water. Let it sit for 5 minutes to thicken. You can also use a plant-based cheese instead of Parmesan. Nutritional yeast gives a cheesy flavor without dairy. Lastly, ensure you use a vegan-friendly oil for frying. For the full recipe, check the link above and start your culinary journey! To keep leftover fritters fresh, place them in an airtight container. Make sure they cool completely first. This helps prevent moisture from making them soggy. Store them in the fridge for up to three days. If you want to eat them later, freezing is a great option. For the best taste, reheat fritters in a skillet. Heat a small amount of olive oil over medium heat. Place the fritters in the skillet and cook for about 2-3 minutes on each side. This method keeps them crispy. You can also use the oven. Preheat it to 350°F (175°C). Place the fritters on a baking sheet and heat for about 10-12 minutes. To freeze fritters, first, let them cool completely. Place them in a single layer on a baking sheet. Freeze for about an hour to firm them up. Then, transfer the fritters to a freezer bag. Remove as much air as possible. They can stay in the freezer for up to three months. When you’re ready to eat, follow the reheating instructions for a quick and tasty meal. Enjoy your crispy zucchini fritters any time you want! For the full recipe, refer to the section above. To make zucchini fritters crispy, you need to remove excess moisture. Start by grating the zucchini and sprinkling it with salt. Let it rest for 10-15 minutes. The salt draws out the water. Then, use a clean towel to squeeze out the liquid. This step is key for achieving that perfect crunch. Yes, you can make zucchini fritters ahead of time. Prepare the batter and refrigerate it. You can also cook the fritters in advance. Just store them in the fridge. When you’re ready to eat, reheat them in a skillet or oven for a tasty snack. Zucchini fritters pair well with many sides. You can serve them with sour cream or Greek yogurt for dipping. A fresh salad adds a nice touch. You might also enjoy them with a tangy sauce, like tzatziki. These options enhance the flavors and make your meal more exciting. For the complete recipe, check out the [Full Recipe]. You learned how to make delicious zucchini fritters. We covered key ingredients, like cheese and spices, and how to prepare them right. I shared tips for great texture and serving ideas. You can try fun variations, including gluten-free or vegan options. Storing and reheating your fritters is easy. These fritters are tasty and simple. Enjoy them at any meal. You now have the skills to impress friends and family. Happy cooking!](https://tossedflavors.com/wp-content/uploads/2025/07/c2cf16bd-363a-439b-abc8-bdaf8d36ec40.webp)
Zucchini Fritters Crisp and Flavorful Delight
If you’re craving a dish that’s easy and bursting with flavor, zucchini fritters are the way to go! These crispy delights are a perfect way

Quick Pickled Vegetables Easy Recipe for Fresh Taste
Are you ready to add a burst of flavor to your meals? My easy recipe for quick pickled vegetables will do just that! With simple
 to guide you through this fun process. To make the best overnight pickles, keep these tips in mind: - Optimal submerged cucumber method: Use a weight or small plate to keep cucumbers under the brine. This helps them soak up the flavor evenly. If they float, the brine won’t work well. - Marinating time for flavor development: Let your pickles sit for at least 24 hours. For better taste, wait 2 to 3 days. The longer they sit, the more flavor they gain. You can easily change the taste of your pickles: - Tips for reducing or increasing spice: If you want milder pickles, cut back on red pepper flakes. For more heat, add extra flakes. You control the spice level! - Suggestions for varying sweetness: To make your pickles sweeter, add more sugar. If you prefer less sweetness, reduce the sugar to fit your taste. You can even try using honey or agave syrup for a different twist. Feel free to explore these ideas and make the pickles your own! For the full recipe and more details, check out the Crispy Sweet & Spicy Overnight Refrigerator Pickles recipe. {{image_4}} You can make your overnight refrigerator pickles even more fun by adding different flavors. One great idea is to use herbs. Herbs like thyme or oregano can bring a fresh taste. Just add a few sprigs when you layer your cucumbers in the jar. These herbs mix well with the brine. You can also add other vegetables for a colorful twist. Carrots and radishes are great choices. Slice them thin and mix them with the cucumbers. This gives you a crunchy and tasty mix. Each bite will surprise you with new flavors. If you want to change the sweetness of your pickles, try different sweeteners. Honey is a natural choice. It adds a nice touch of flavor. You can also use agave syrup. This is a great option for those who want a vegan substitute. You might want to experiment with different sugars too. Brown sugar can add a deeper flavor. It can make your pickles taste richer. Just remember to adjust the amount to keep the balance with the brine. These variations can make your pickles special. Feel free to mix and match flavors and sweeteners. Enjoy creating your own unique recipe! For a full recipe, check out the crispy sweet and spicy overnight refrigerator pickles. For the best results, use glass jars for your overnight refrigerator pickles. They keep the pickles fresh and let you see them. Make sure to pick jars with tight-fitting lids. This will help keep air out. If you don’t have jars, any food-safe plastic container works too. Layer your cucumbers and spices carefully for even flavor. To keep pickles crunchy, store them in the brine. The brine helps seal in the crisp texture. You can also place a weight on top of the cucumbers. This keeps them submerged in the liquid. If they float, they may not absorb all the flavor. Refrigerator pickles can last for about two to three weeks. However, the flavor gets better with time. After about a week, you’ll notice a nice tang. If you see any signs of spoilage, like a strange smell or mold, it’s best to throw them away. Look for these signs of spoilage: - Cloudy brine - Off smell - Soft or mushy cucumbers Storing your pickles properly helps them last longer and taste great. For the full recipe, check out my Crispy Sweet & Spicy Overnight Refrigerator Pickles. To make pickles less salty, you can rinse them. Just take the pickles out of the brine and rinse them under cold water. This will help remove some salt. Another option is to add a little extra sugar to the brine. The sugar will balance the saltiness. You can also add more vinegar or water to the brine. This will dilute the salt flavor. Yes, you can use different cucumbers! Pickling cucumbers work best because they stay crunchy. You can also use English cucumbers or Kirby cucumbers. Both have a firm texture that holds up well in pickling. If you choose larger cucumbers, slice them into smaller pieces for better flavor. If you want to can your pickles, follow safe canning standards. Use sterilized jars to avoid any bacteria. You must heat the brine to a rolling boil before filling the jars. Seal the jars tightly and process them in a water bath for 10 to 15 minutes. This will keep the pickles safe to eat for longer. You should refrigerate the pickles for at least 24 hours. This lets the flavors blend well. For a crunchier pickle, let them sit for up to 3 days. The longer they sit, the more flavor they will have. If you want a quick snack, 24 hours is just fine! For the full recipe, check out the Crispy Sweet & Spicy Overnight Refrigerator Pickles! You learned how to create delicious pickles at home. We covered ingredients, step-by-step instructions, and tips for success. Don't forget to experiment with flavors and storage methods. Every batch can be unique, adding fun to your cooking. With these skills, you can make pickles that suit your taste. Enjoy the process and savor your homemade creations!](https://tossedflavors.com/wp-content/uploads/2025/07/cf0e388a-be39-41ed-a0a3-819a61f93172.webp)
Overnight Refrigerator Pickles Tasty and Crunchy Treat
Are you ready to take your snacking game to the next level? Overnight refrigerator pickles are the perfect crunchy treat that you can whip up

Air Fryer Zucchini Chips Crunchy Snack Delight
Looking for a tasty, healthy snack? Air fryer zucchini chips are your answer! With just a few simple ingredients, you can create a crunchy delight
![- 2 medium yellow squash, sliced into 1/4-inch rounds - 1 cup buttermilk - 1 cup cornmeal - 1/2 cup all-purpose flour - 1 teaspoon garlic powder - 1 teaspoon onion powder - 1/2 teaspoon paprika - Salt and black pepper, to taste - Vegetable oil, for frying Fresh ingredients make a big difference. Choose bright yellow squash for the best taste. Fresh squash ensures a crisp, tender bite. For flour, you can swap in gluten-free options like almond or chickpea flour. These can add unique flavors while keeping the dish gluten-free. Just remember, the texture may change slightly. You want that crunchy outside, so choose what works best for you. Check out the Full Recipe to see how these ingredients come together for a delicious dish! Soaking the Squash in Buttermilk Start by slicing the yellow squash into 1/4-inch rounds. Place these slices into a bowl and pour in 1 cup of buttermilk. Let the squash soak for about 30 minutes. This step helps the squash stay moist and adds flavor. Preparing the Coating Mixture In a shallow dish, mix together the following ingredients: - 1 cup cornmeal - 1/2 cup all-purpose flour - 1 teaspoon garlic powder - 1 teaspoon onion powder - 1/2 teaspoon paprika - Salt and black pepper, to taste Stir well to combine everything. This mixture creates a crispy coating for the squash. Heating the Oil Correctly Pour about 1/4 inch of vegetable oil into a large frying pan. Heat the oil over medium heat. To check if the oil is ready, sprinkle a bit of the cornmeal mixture into it. If it sizzles, the oil is hot enough. Dredging the Squash Take the squash slices from the buttermilk. Let any excess liquid drip off. Dredge each slice in the cornmeal mixture. Press gently to ensure the coating sticks well. Frying Method and Timing When the oil shimmers, carefully lay the coated squash slices in the pan. Make sure not to crowd the pan. Fry for about 2-3 minutes on each side. Look for a golden brown color and a crispy texture. Draining Excess Oil Once fried, use a slotted spoon to remove the squash from the pan. Place them on a plate lined with paper towels. This step helps absorb any extra oil. Seasoning for Extra Flavor While the fried squash is still warm, sprinkle a little extra salt if desired. This adds a nice touch to the flavor. Enjoy your Southern Fried Squash as a side dish or a snack! For the full recipe, check out the earlier section. Ideal Oil Temperature The right oil temperature is key. Aim for 350°F to 375°F. This range ensures a crispy crust without burning. To test the oil, drop in a small piece of the coating. If it sizzles right away, you're set. How to Avoid Soggy Squash To keep your squash crispy, follow these steps: - Soak the squash in buttermilk for 30 minutes. This adds flavor and moisture. - Drain excess buttermilk before dredging in the coating. - Fry in small batches. Too many pieces can cool the oil, leading to soggy squash. Presentation Tips Serve your crispy fried squash in a rustic basket. Line it with parchment paper for a homey touch. Garnish with fresh parsley for color and brightness. This makes your dish look as good as it tastes. Pairing with Dipping Sauces Enhance the flavor by pairing your fried squash with dips. Classic ranch dressing works well. For a kick, try spicy aioli. These dipping sauces will add extra fun to your meal. {{image_4}} You can make Southern fried squash even more exciting with a few simple tweaks. - Adding Spices for Extra Heat: If you like some spice, try adding cayenne pepper or crushed red pepper flakes to your cornmeal mix. Start with a small amount, about 1/4 teaspoon, and adjust to your taste. This small change adds a nice kick to each bite and makes your squash stand out. - Incorporating Cheese: For a cheesy twist, mix grated parmesan or cheddar into your coating. About 1/4 cup works well. The cheese melts and gives a rich flavor and a crispy texture. You’ll love how it elevates the dish! There are ways to adapt this recipe to fit your dietary needs. - Gluten-Free Options: You can easily make this dish gluten-free. Swap the all-purpose flour for a gluten-free blend or almond flour. This keeps the crispy texture while catering to gluten-sensitive eaters. Make sure your cornmeal is also labeled gluten-free. - Vegan Alternatives: To make this dish vegan, skip the buttermilk. Instead, soak the squash in a mix of plant-based milk and a splash of lemon juice for about 30 minutes. This mimics the effect of buttermilk. Use a gluten-free flour blend and adjust the spices to your liking. These variations allow you to enjoy Southern fried squash in new ways while keeping it delicious! For the full recipe, check out the complete cooking process. To store your leftover Southern fried squash, let it cool first. Place the cooled squash in an airtight container. This keeps it fresh for up to three days. If you want to keep it longer, you can freeze it. Just remember to wrap each piece in plastic wrap and then place it in a freezer bag. This helps prevent freezer burn. When it’s time to enjoy your leftovers, you want them crispy again. The best way to reheat is in the oven or an air fryer. Preheat your oven to 400°F (200°C). Lay the squash on a baking sheet in a single layer. Heat for about 10-15 minutes until golden and crispy. If you use an air fryer, set it to 375°F (190°C) and cook for about 5-7 minutes. This keeps the squash crunchy and tasty, just like when you first made it. For more details on making this delicious dish, check the [Full Recipe]. What is the best type of squash to use? I recommend using yellow squash. Its soft texture cooks well. Zucchini is another option but may have a different taste. Yellow squash gives a sweet and mild flavor, perfect for frying. How can I make the coating stick better? To help the coating stick, soak the squash in buttermilk for 30 minutes. This adds moisture and flavor. After soaking, let excess buttermilk drip off before dredging in the cornmeal mix. Press down gently to ensure a good coating. Can I double the recipe efficiently? Yes, you can double the recipe easily. Just use twice as much squash and other ingredients. Fry in batches to avoid overcrowding the pan. This keeps the squash crispy and golden. What should I serve with Southern Fried Squash? Southern fried squash pairs well with dips like ranch or spicy aioli. It also complements burgers, sandwiches, and salads. Serve with a side of coleslaw for a classic Southern meal. Calories and Dietary Considerations Each serving of Southern fried squash has about 150 calories. It is a tasty side dish, but watch the oil used for frying. This can add extra calories. Healthier Cooking Methods and Alternatives If you want to make it healthier, try baking instead of frying. Coat the squash and place it on a baking sheet. Bake at 400°F for about 20-25 minutes until crispy. This method keeps the flavor but cuts down on fat. For a gluten-free option, use almond flour instead of all-purpose flour in the coating. For the full recipe, check out the detailed instructions above. In this blog, we explored how to make Southern Fried Squash, from ingredients to cooking tips. Fresh ingredients are key for the best taste and texture. Remember to soak the squash in buttermilk for great flavor. Use the right oil temp to avoid soggy results. Feel free to try variations like adding cheese or spices. Store leftovers properly to keep them crispy. Enjoy this delicious dish and impress your friends with your cooking skills!](https://tossedflavors.com/wp-content/uploads/2025/07/eca47dd2-ea6a-4e57-b8fb-b8006f69f8a0.webp)
Southern Fried Squash Crispy and Flavorful Delight
Are you ready to treat your taste buds to something special? Southern Fried Squash is a crispy and flavorful delight that will have everyone asking