Appetizers
Hungry Girl’s Turkey Protein Rollups Simple Meal Idea
Looking for a quick and tasty meal? Hungry Girl’s Turkey Protein Rollups are your answer! These easy rollups pack flavor and nutrition into every bite.

Turkish Cheese Crescent Rolls Simple and Tasty Snack
Looking for a quick and tasty snack? These Turkish Cheese Crescent Rolls are perfect! With simple ingredients like turkey, cream cheese, and cheddar, you can
![Sweet potato tots are a fun snack. They are crispy, tasty, and easy to make. You can enjoy them any time. These tots use sweet potatoes, flour, spices, and breadcrumbs for crunch. - Sweet potatoes - 1/2 cup all-purpose flour - 1/4 cup grated Parmesan cheese (optional for extra flavor) - 1 teaspoon garlic powder - 1 teaspoon onion powder - 1/2 teaspoon smoked paprika - 1/4 teaspoon cayenne pepper (optional, if you like a spicy kick) - Salt and pepper to taste - 1/2 cup breadcrumbs (for a crispy coating) - Oil for frying (recommend canola or vegetable oil) Using sweet potatoes gives a sweet and nutty flavor. The spices add warmth and depth. Breadcrumbs on the outside make them crunchy. You can also use grated cheese for a richer taste. First, we need to cook the sweet potatoes. Bring a large pot of salted water to a boil. Add the cubed sweet potatoes once the water is bubbling. Cook them for about 15 to 20 minutes. You want them to be soft enough to mash. After cooking, drain the water and let the sweet potatoes cool for a bit. Next, it's time to mash. Transfer the sweet potatoes to a large mixing bowl. Use a fork or a potato masher to mash them until smooth. The texture should be creamy without lumps. This step is key for the best sweet potato tots. Now, we shape our tots. Add flour, Parmesan cheese, garlic powder, onion powder, smoked paprika, and cayenne pepper to the mashed sweet potatoes. Season with salt and pepper. Mix everything well until combined. Heat oil in a deep pan or fryer to about 350°F (175°C). Shape the sweet potato mixture into small balls, about the size of a tablespoon. Roll each tot in breadcrumbs to coat them fully. This adds that nice crunch. Carefully place the tots in the hot oil in batches. Fry them for 3 to 4 minutes until they turn golden brown. Use a slotted spoon to remove them, and let them drain on a paper towel. Keep frying the remaining tots until you finish all of them. Serve your crispy sweet potato tots warm with your favorite dips. Try garlic aioli or spicy ketchup for extra flavor. Enjoy this tasty snack! To get that perfect crunch, choose the right sweet potatoes. Look for firm ones, as they mash well. Boil them until tender but not mushy. This step is key for great texture. After mashing, let the mixture sit for a bit. This helps it firm up. When shaping the tots, use your hands. Make them about one inch wide for even cooking. You can cook sweet potato tots in two ways: frying or baking. Frying gives a crispy outer layer. Use hot oil at 350°F for best results. Fry in small batches to avoid sogginess. Baking is a healthier option. Preheat the oven to 425°F. Place the tots on a lined baking sheet. Brush them lightly with oil. Bake for 20-25 minutes, flipping halfway through for even browning. Serve sweet potato tots hot for the best taste. Pair them with dips like ranch or spicy ketchup. You can also add toppings for a fun twist. Try cheese or fresh herbs for extra flavor. For a complete meal, serve them alongside grilled chicken or a salad. Enjoy experimenting with different flavors! {{image_4}} Sweet potatoes are packed with good stuff. They are high in vitamins A and C, which help your immune system. These vitamins are great for your skin too. Sweet potatoes also have fiber, which aids digestion and keeps you full longer. They contain antioxidants that may protect against some diseases. Overall, they make a healthy choice! In each serving of sweet potato tots, you enjoy a balance of nutrients. Here’s a quick look at what you get: - Calories: About 200 - Protein: 3g - Carbohydrates: 30g - Fiber: 4g - Fat: 8g This breakdown shows that sweet potato tots offer energy and help keep you satisfied. Sweet potato tots stand out when you compare them to regular potato tots. Traditional tots are often high in carbs and low in nutrients. Sweet potato tots bring more vitamins and fiber. They also have less fat when baked instead of fried. This makes sweet potato tots a better option for a snack or side dish. You can enjoy them guilt-free! For the complete recipe, check out the [Full Recipe]. You can change the flavor of sweet potato tots easily. For a spicy kick, add more cayenne pepper. If you want a cheesy taste, mix in extra Parmesan or even cheddar cheese. You can also try herbs like thyme or rosemary for a fresh twist. Just remember, the more you experiment, the more fun you'll have! Sweet potato tots are great in different cooking methods. In an air fryer, they get crispy with less oil. Set the temperature to 400°F (200°C) and cook for about 15-20 minutes, turning them halfway through. If you prefer baking, preheat your oven to 425°F (220°C) and bake for 25-30 minutes. Just make sure to flip them halfway for even browning. You can make sweet potato tots fit different diets. For gluten-free options, use almond flour or a gluten-free flour blend instead of all-purpose flour. If you want a vegan version, skip the cheese and use a flax egg instead of regular egg. You can also substitute breadcrumbs with crushed gluten-free crackers for a crunchy coating. With these swaps, everyone can enjoy this tasty treat! To make sweet potato tots from scratch, you need just a few steps. Start by boiling sweet potatoes until they are soft. Drain them and let them cool. Then, mash the sweet potatoes in a bowl. Mix in flour, cheese, and spices. Shape the mixture into small balls or tots. Finally, fry them in hot oil until golden brown. For the full recipe, refer to the previous section. Yes, you can make sweet potato tots in advance. Prepare the mixture and shape the tots ahead of time. Place them on a baking sheet and freeze them. Once frozen, store them in a freezer bag. When ready to eat, fry or bake them straight from the freezer. This saves time and gives you a quick snack option. You can find sweet potato tots in many grocery stores. Look in the frozen food aisle. Brands like Alexia or Ore-Ida often have them. You may also find them at health food stores or specialty markets. Check online for local delivery options to save time. Sweet potato tots are fun to make and eat. We covered the ingredients, from sweet potatoes to spices. You learned step-by-step instructions for mashing and frying. Tips for perfect texture and cooking options help you succeed. Nutritional info shows their health benefits, too. Try adding flavors or cooking methods that fit your taste. These tots can be a great snack or side dish. Now, grab your ingredients and get cooking!](https://tossedflavors.com/wp-content/uploads/2025/07/657a104d-35f9-48c5-b5e4-03b265062a00.webp)
Sweet Potato Tots Crispy and Flavorful Snack Idea
Are you ready to enjoy a snack that’s both tasty and healthy? Sweet potato tots are a fun twist on a classic favorite. You get
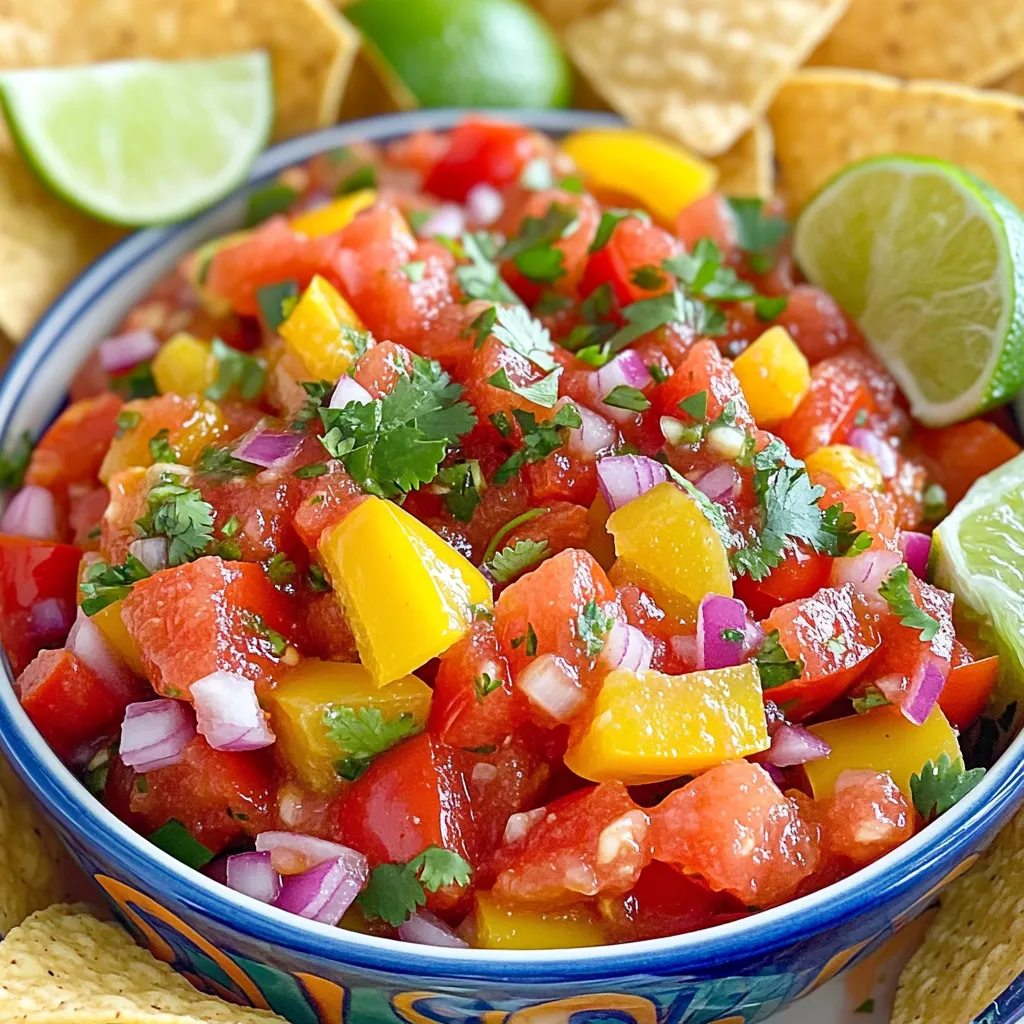
Best Homemade Salsa Ever Flavorful and Fresh Recipe
If you’re craving bold flavors and fresh ingredients, you’ve stumbled upon the right recipe. The “Best Homemade Salsa Ever” combines ripe tomatoes, zesty jalapeños, and

Rice Patties Crunchy Delight Anyone Can Make
Are you ready to impress your family and friends with a simple yet tasty dish? Rice patties are the perfect crunchy delight that anyone can

Hatch Chile Queso Creamy and Flavorful Dip Recipe
Are you ready to spice up your snacking game? My Hatch Chile Queso recipe is a creamy and flavorful dip that will make any gathering
![- Fresh broccoli florets - Sharp cheddar cheese - Cream cheese The main ingredients give these pinwheels their rich flavor and bright color. Fresh broccoli florets add a crunchy texture, making them fun to eat. Sharp cheddar cheese brings a bold, cheesy taste. Cream cheese makes the filling smooth and creamy. Together, these ingredients create a tasty mix that pairs well with the tortilla. - Shredded carrots - Olive oil for brushing You can add shredded carrots for extra crunch and color. They also boost nutrition. Brushing the pinwheels with olive oil before baking gives them a nice, golden finish. This step enhances the flavor and helps them get crispy. - Garlic powder - Salt and pepper Seasoning is key to great taste. Garlic powder adds a savory flavor that lifts the dish. A pinch of salt and freshly ground pepper balances all the ingredients. These simple seasonings let the flavors shine through without overpowering the dish. For the full recipe, check out the [Full Recipe]. 1. Preheat the oven and prepare the baking sheet Start by preheating your oven to 375°F (190°C). This step is key to getting a nice, crispy finish on your pinwheels. Line a baking sheet with parchment paper. This will help the pinwheels not stick and make clean up easy. 2. Steam the broccoli florets Take your fresh broccoli florets and chop them finely. Place them in a steaming pot. Steam the broccoli for about 3-4 minutes until they turn bright green and are just tender. After steaming, let them cool for a bit. 1. Combine cream cheese, cheddar, and Parmesan In a mixing bowl, add softened cream cheese, shredded sharp cheddar, and grated Parmesan cheese. Make sure your cream cheese is at room temperature. This helps in mixing everything smoothly. 2. Mix in steamed broccoli and optional ingredients Gently fold the cooled steamed broccoli into the cheese mixture. If you want extra crunch, add shredded carrots now. Ensure all the broccoli is coated in the cheese blend. 1. Spread the mixture on the tortilla Lay your tortilla flat on a clean surface. Use a spatula to spread the cheesy broccoli mixture evenly across the entire tortilla. Don’t leave any gaps! 2. Roll and slice the tortilla into pinwheels Start rolling the tortilla from one end to the other, keeping it tight. Once rolled, use a sharp knife to slice the tortilla into 1-inch thick pinwheels. Aim for about 12-15 pieces. 1. Arrange pinwheels on the baking sheet Place your pinwheels on the prepared baking sheet. Make sure there is space between each piece. This helps them cook evenly. 2. Bake and cool before serving Brush the tops with a little olive oil for added flavor. Bake in the oven for 10-12 minutes until the cheese melts and the edges are golden. After baking, let them cool for a few minutes. Serve warm for the best taste. For the full recipe, check out the details above. Enjoy your delicious Broccoli Cheese Pinwheels! To make sure your pinwheels cook evenly, use a preheated oven at 375°F. This hot oven helps the cheese melt and the tortilla brown nicely. Place the pinwheels on a baking sheet with parchment paper. This step keeps them from sticking and makes cleanup easy. When rolling the tortillas, start tightly at one end. This keeps the filling inside and helps the pinwheels hold their shape. If they are loose, the filling may spill out while baking. Use a sharp knife to slice them evenly into 1-inch pieces. This size allows each bite to be filled with delicious flavors. For a beautiful presentation, serve your pinwheels on a wide platter. Arrange them in a circle or fan shape for visual appeal. You can also stack them for a fun, layered look. Garnish your pinwheels with a sprinkle of fresh herbs, like parsley or basil. Add a few fresh broccoli florets for color. These small touches make the dish look fresh and inviting. To kick up the flavor, consider adding spices or herbs to the cheese mix. A dash of paprika or crushed red pepper can add a spicy kick. Fresh herbs like dill or chives can also brighten up the taste. You can explore different cheese combinations too. Try using mozzarella for a stretchy texture or feta for a tangy twist. Mixing cheeses can create a unique flavor profile that makes your pinwheels stand out. For the full recipe, check out the Cheesy Broccoli Delight Pinwheels. {{image_4}} You can switch up the veggies in your pinwheels. Try using spinach or bell peppers. Both add nice colors and flavors. Spinach gives a fresh taste, while bell peppers bring sweetness. You can mix them with broccoli for a fun twist. Just chop them small, like the broccoli. This way, they blend well with the cheese. If you need gluten-free choices, use gluten-free tortillas. They come in many flavors and can taste great too. Look for ones made from rice or corn. These will hold your filling just as well. Make sure to read the label to ensure they meet your needs. You won’t lose any flavor by going gluten-free. Different cheeses can change the whole taste of your pinwheels. Try mixing mozzarella for a milder flavor or pepper jack for a spicy kick. You can even use a blend of cheeses. This gives each bite a unique flavor. Mixing cheeses can surprise your taste buds and make this snack even more fun. To keep your broccoli cheese pinwheels fresh, store them in the fridge. Place them in an airtight container. They will stay tasty for 3 to 4 days. Make sure they cool down before sealing the container. This helps prevent moisture build-up. You can freeze pinwheels before or after baking. If freezing before baking, wrap them tightly in plastic wrap. Place them in a freezer-safe bag. They can stay good for up to 3 months. For freezing after baking, let them cool first. Then, wrap them and store in a bag. This way, they will retain their flavor and texture. Reheat your pinwheels for the best taste and texture. The oven works great for this. Preheat the oven to 350°F (175°C). Place the pinwheels on a baking sheet. Heat them for about 10-12 minutes. If you're in a hurry, you can use the microwave. Heat them in short bursts of 15-20 seconds. Just watch to avoid sogginess. Enjoy your delicious snack warm! Yes, you can prepare these pinwheels ahead of time. Simply follow the recipe steps up to slicing the rolled tortilla. Wrap the log tightly in plastic wrap. You can store it in the fridge for up to 24 hours. When you are ready to bake, slice and bake as directed. This saves time on busy days and makes delicious snacks ready to go. These pinwheels can last for about 3 to 4 days in the fridge. Store them in an airtight container to keep them fresh. If you notice any moisture, place a paper towel inside the container. This helps absorb extra moisture and keeps the pinwheels crisp. There are many great dips for these tasty pinwheels. Here are some options: - Ranch dressing adds a creamy, herby flavor. - Marinara sauce gives a nice, tangy contrast. - Garlic aioli offers a rich and savory touch. - Hummus brings a nice, nutty flavor. Feel free to try different dips to find your favorite combination. Enjoy experimenting with flavors! Broccoli cheese pinwheels are a fun and tasty treat. We covered the main ingredients like broccoli, sharp cheddar, and cream cheese. Optional additions like carrots can add extra flavor. I shared a step-by-step guide on preparation, assembly, and baking. You can even customize them with different veggies and cheeses. For storage, I gave tips on refrigerating, freezing, and reheating. Enjoy these pinwheels for any occasion! They are delicious and easy to make.](https://tossedflavors.com/wp-content/uploads/2025/07/021e23ee-904e-41fe-bb84-1f1117c07a01.webp)
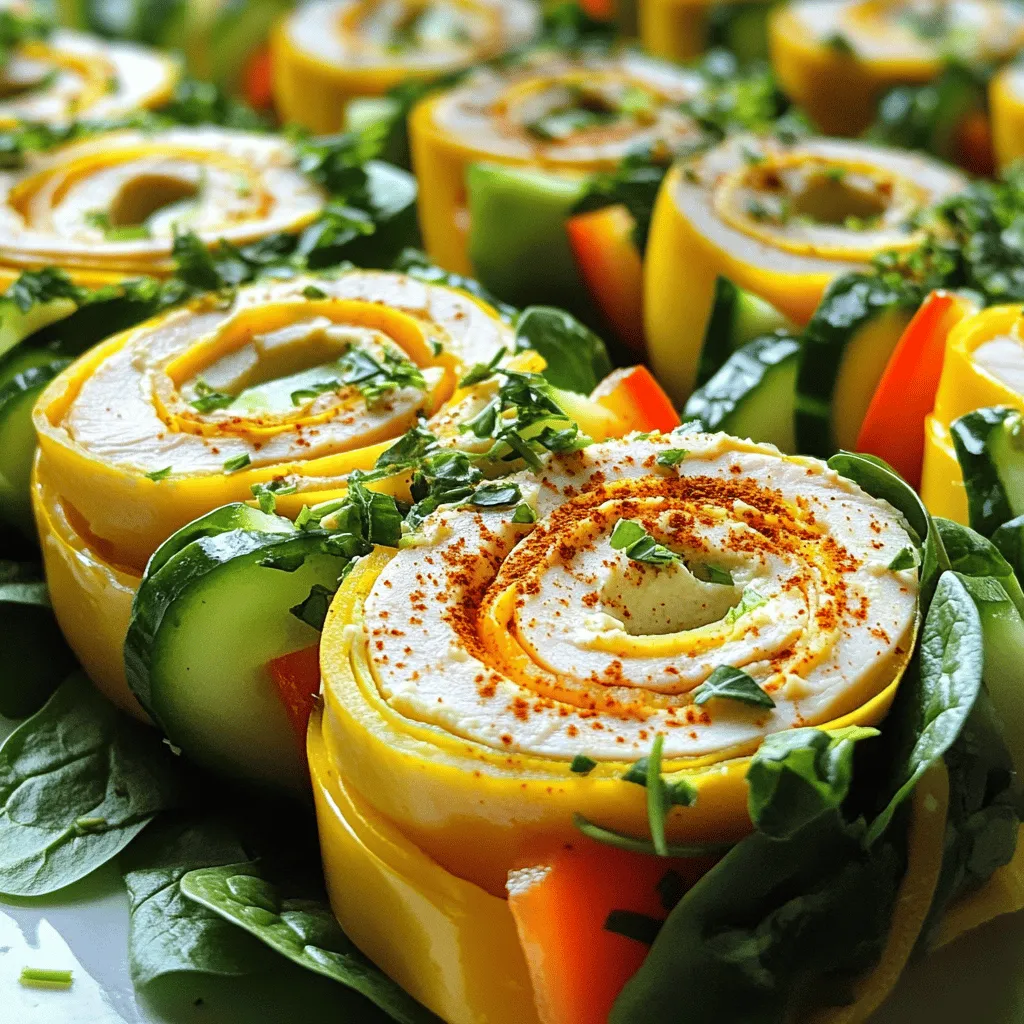
Broccoli Cheese Pinwheels Healthy and Tasty Snack
Looking for a fun and healthy snack? Broccoli Cheese Pinwheels are perfect! These tasty bites blend fresh broccoli, creamy cheese, and simple spices. They are

Garlic Parmesan Pretzel Bites Tasty and Simple Snack
Looking for a snack that’s big on flavor and simple to make? Try my Garlic Parmesan Pretzel Bites! These bites blend warm, soft dough with

Deep Dish Mini Pizzas Flavorful Bite-Sized Treats
If you love pizza but want a fun twist, then you’ll enjoy these Deep Dish Mini Pizzas. They’re packed with flavor and perfectly portioned for
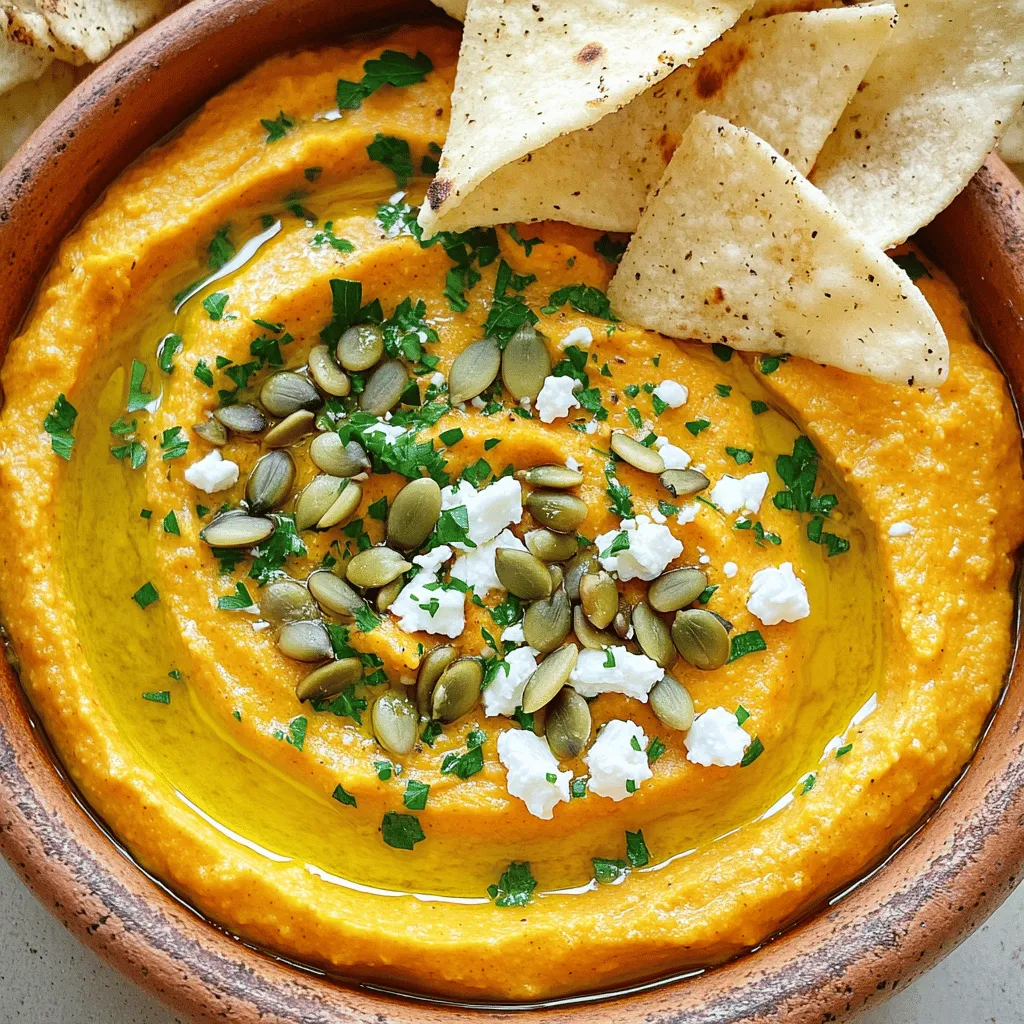
Pumpkin Whipped Feta Dip Flavorful Festive Treat
Get ready to impress your guests with my Pumpkin Whipped Feta Dip! This creamy, tangy treat combines pumpkin and feta for a festive flavor that’s