Appetizers
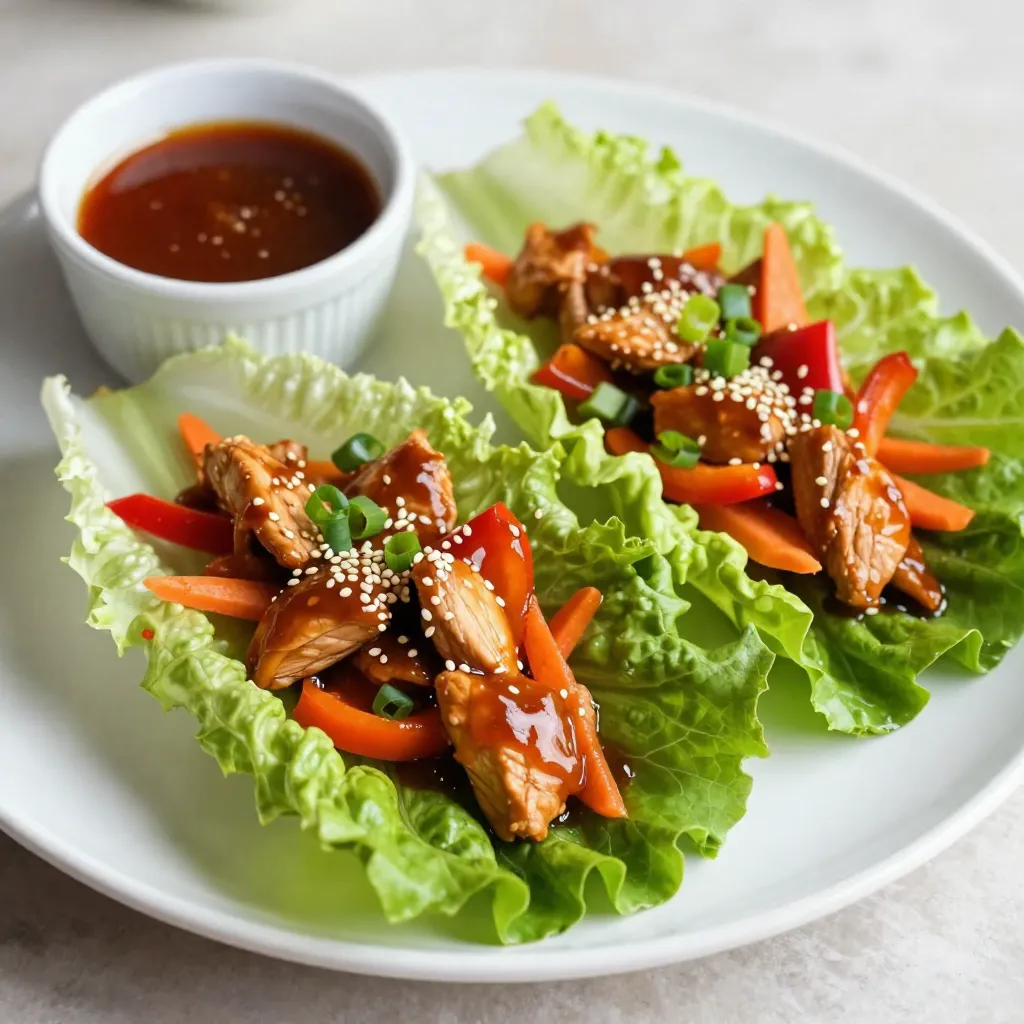
Teriyaki Chicken Lettuce Wraps Fresh and Flavorful Meal
Are you ready to enjoy a fresh and flavorful meal that’s easy to make? Teriyaki Chicken Lettuce Wraps are a perfect choice! With tender chicken,
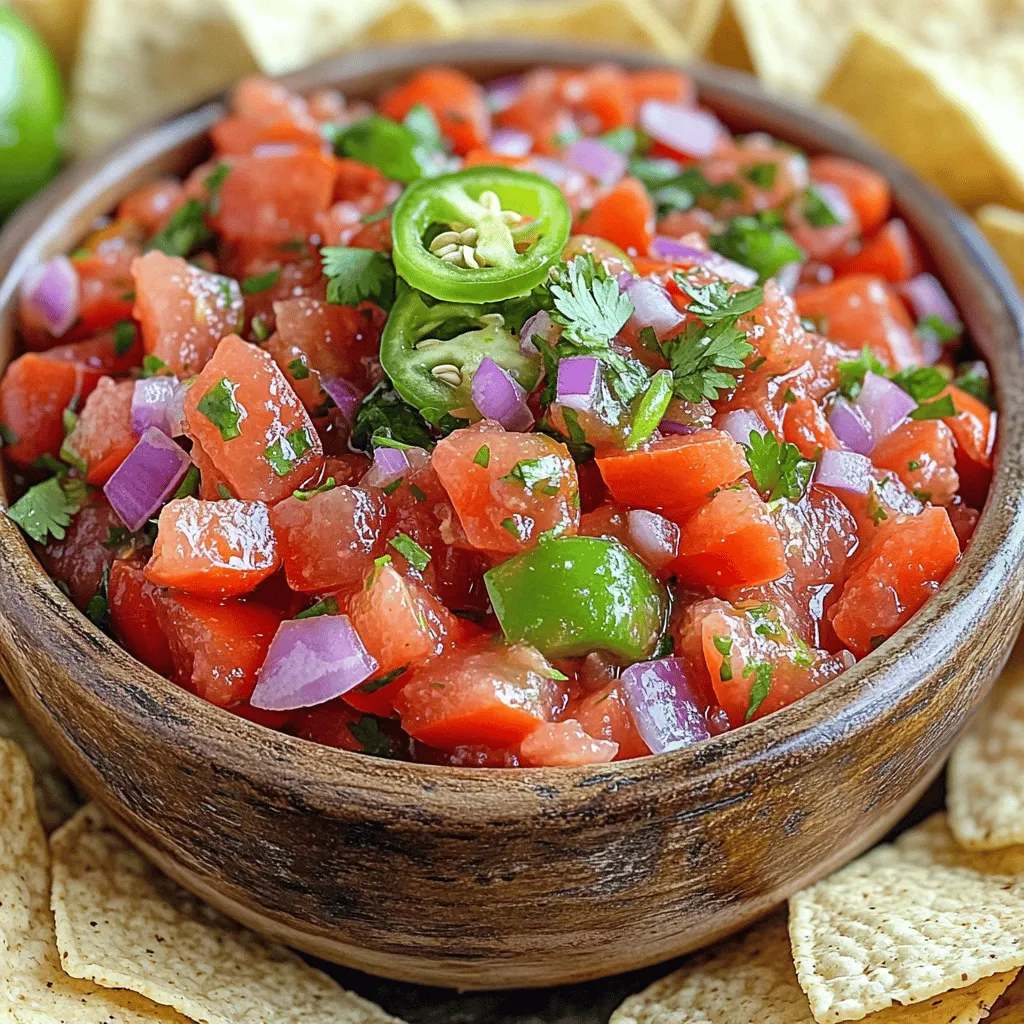
Best Homemade Salsa Fresh and Flavorful Recipe
Ready to elevate your snack game? This Best Homemade Salsa Fresh and Flavorful Recipe will transform your gatherings. With fresh tomatoes, zesty lime, and spicy

Turkey Cheddar Lunch Roll Ups Quick and Tasty Recipe
Looking for a quick and tasty lunch? You’re in the right place! Turkey Cheddar Lunch Roll Ups are easy to make and packed with flavor.
![- 6 ripe tomatoes, diced - 1 medium red onion, finely chopped - 1 bell pepper, diced - 1 jalapeño pepper, minced - 1 bunch fresh cilantro, chopped - 2 cloves garlic, minced These ingredients make a fresh and vibrant salsa. When you pick your tomatoes, choose ones that feel firm. They should smell sweet and fragrant. The onion adds a nice crunch, while the bell pepper gives it a colorful touch. The jalapeño brings heat, but you can adjust it to your liking. Fresh cilantro gives a bright finish, and garlic adds depth. - 1 teaspoon ground cumin - 1 teaspoon fresh lime juice - Salt and pepper, to taste - Optional: 1 cup corn for sweetness These optional ingredients can enhance the flavor. Cumin adds a warm, earthy note. Lime juice brightens the salsa and gives it a zing. Salt and pepper balance the flavors. If you want a hint of sweetness, add corn. It pairs well with the other flavors. Use the [Full Recipe] to get started on making this delicious freezer salsa. 1. Start by washing your tomatoes, bell pepper, and jalapeño. 2. Dice the tomatoes and bell pepper into small pieces. 3. Finely mince the jalapeño, removing seeds if you want less heat. 4. Place all these ingredients in a large mixing bowl. 5. Next, chop the red onion and add it to the bowl. 6. Mince the garlic and toss it in too. 7. If you want a sweet twist, add corn to the bowl now. 1. Stir in the chopped cilantro, ground cumin, and fresh lime juice. 2. Mix everything until it is well combined. 3. Taste your salsa. Add salt and pepper to balance the flavor. Adjust if needed. 1. Carefully transfer the salsa into freezer-safe containers or zip-top bags. 2. Remove excess air to avoid freezer burn. 3. Label each container with the date and contents. 4. Place them in the freezer for future enjoyment. For the full recipe, check out the detailed steps provided above. Enjoy your homemade freezer salsa! To keep your salsa fresh, follow these tips: - Use good containers: Choose freezer-safe bags or hard containers. They help prevent freezer burn. - Remove air: Squeeze out air before sealing bags. This keeps your salsa safe from ice crystals. - Label your salsa: Write the date and contents on the bags. This helps you track how long it stays fresh. For thawing, always place your salsa in the fridge overnight. This method keeps the texture and taste intact. You can also run the bag under cool water if you need it quickly. Adjusting the heat in your salsa is easy. If you want it milder, use less jalapeño or remove the seeds. For a spicier kick, add more jalapeños or try serrano peppers. Before serving, add fresh ingredients for a burst of flavor. A handful of chopped cilantro or diced avocado can brighten your salsa. A squeeze of lime juice can also enhance the taste. Remember, the best salsa is fresh salsa! For the full recipe, check out Freezer Salsa Fiesta. {{image_4}} You can change the taste of your salsa easily. Adding fresh herbs like parsley or basil gives a nice twist. These herbs add freshness and depth. You might also try adding fruit. Diced mango or pineapple can bring sweetness. This makes the salsa more vibrant and fun. Do you like spice? You can play with the heat. Use different peppers to control the spice level. For a milder salsa, try bell peppers or poblano peppers. If you want it hotter, go for serrano or habanero. You can adjust the jalapeño too. Just change how much you add to fit your taste. Texture is key for salsa. If you prefer a smooth salsa, blend the ingredients. This makes it creamy and easy to dip. If you want it chunky, chop the ingredients coarsely. A chunky salsa has more bite and feels fresh. You can mix styles too. Some may like a bit of smoothness with chunks for variety. You can enjoy freezer salsa in many ways. One of my favorites is serving it with crispy tortilla chips. The crunch of the chips and the fresh taste of salsa make a perfect match. You can also use freezer salsa as a topping for tacos and burritos. Just spoon it on top for an added burst of flavor. It's a simple way to elevate your meal. Freezer salsa is not just for chips and tacos. It works great as a topping for grilled meats or seafood. Imagine a juicy grilled chicken breast topped with vibrant salsa. It adds a fresh taste that pairs well with any meat. You can also mix it into salads for an extra pop of flavor. It brightens up greens and adds a zesty twist. Just toss it in and enjoy! You can keep freezer salsa for up to six months. For the best taste, use it within three months. The longer it sits, the more the flavor fades. To keep it fresh, store it in airtight containers or zip-top bags. Always label your containers with the date. This way, you know when it’s best to use. Yes, you can use canned tomatoes in your salsa. However, fresh tomatoes offer a brighter taste. Canned tomatoes may make the salsa a bit more watery. If using canned, choose whole tomatoes and drain excess liquid. This helps keep the texture nice. You may want to add more spices to boost the flavor. The best way to thaw freezer salsa is in the fridge overnight. This keeps it cool and fresh. If you need it fast, you can place the bag in cold water for about an hour. Avoid using the microwave, as it can change the texture. Once thawed, give it a stir before serving. Absolutely! To make it gluten-free, just use fresh ingredients. For a vegan option, the recipe is already plant-based. You can also swap ingredients based on your needs. Use different peppers for heat or add fruits like mango for a sweet twist. Feel free to experiment to match your taste! Freezer salsa is a simple way to enjoy fresh flavors year-round. We explored essential and optional ingredients, along with step-by-step preparation and freezing tips. You can enhance the salsa with various herbs and adjust its heat to suit your taste. Whether you serve it with chips or use it in tacos, this versatile dish adds joy to any meal. Keep experimenting with flavors and textures. Your homemade salsa will elevate every bite!](https://tossedflavors.com/wp-content/uploads/2025/08/bb56892c-ad5c-4696-a190-ed78b55fe54d.webp)
Freezer Salsa Simple and Flavorful Recipe Guide
Looking to add a zesty kick to your meals? Freezer salsa is a simple, tasty way to enhance your dishes, and I’m excited to share
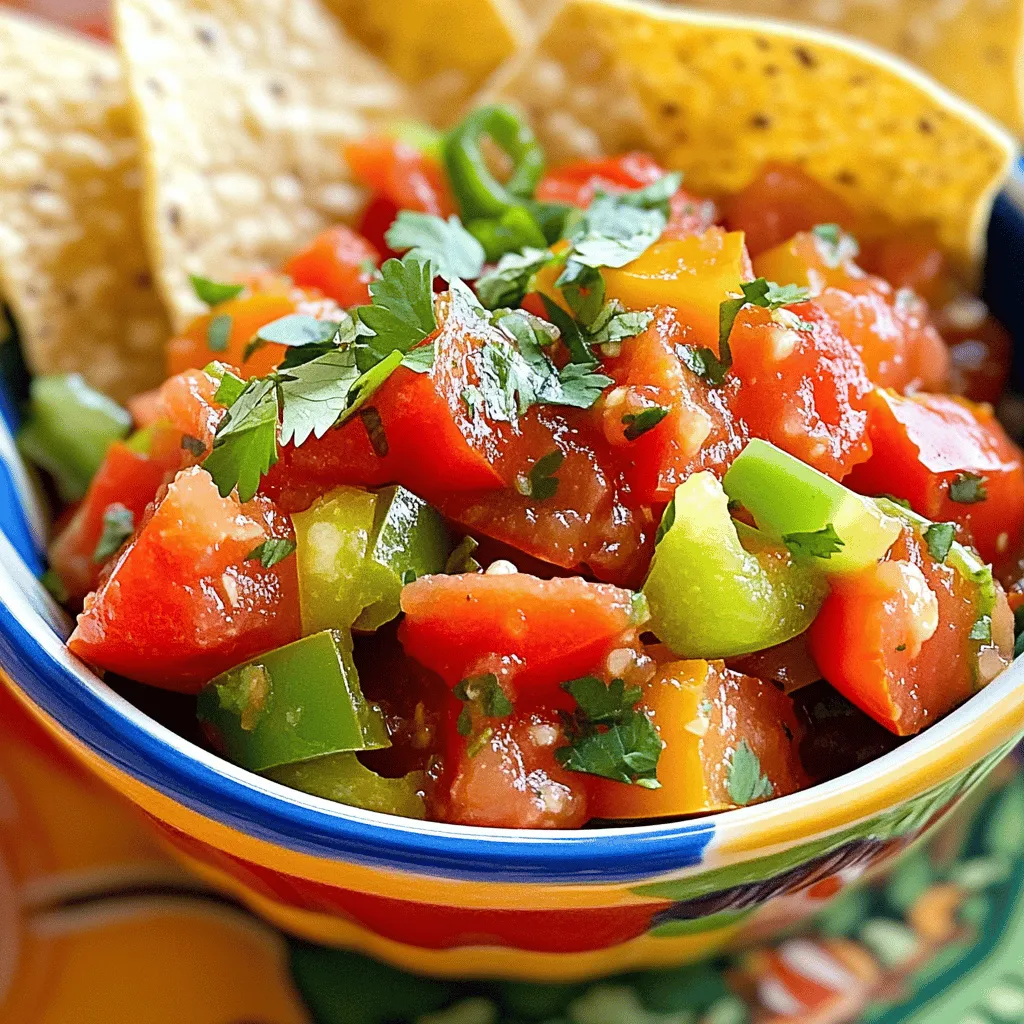
Best Thick Canned Salsa Recipe for Savory Flavor
Are you ready to elevate your snack game? This Best Thick Canned Salsa Recipe delivers bold, savory flavors to delight your taste buds. Packed with
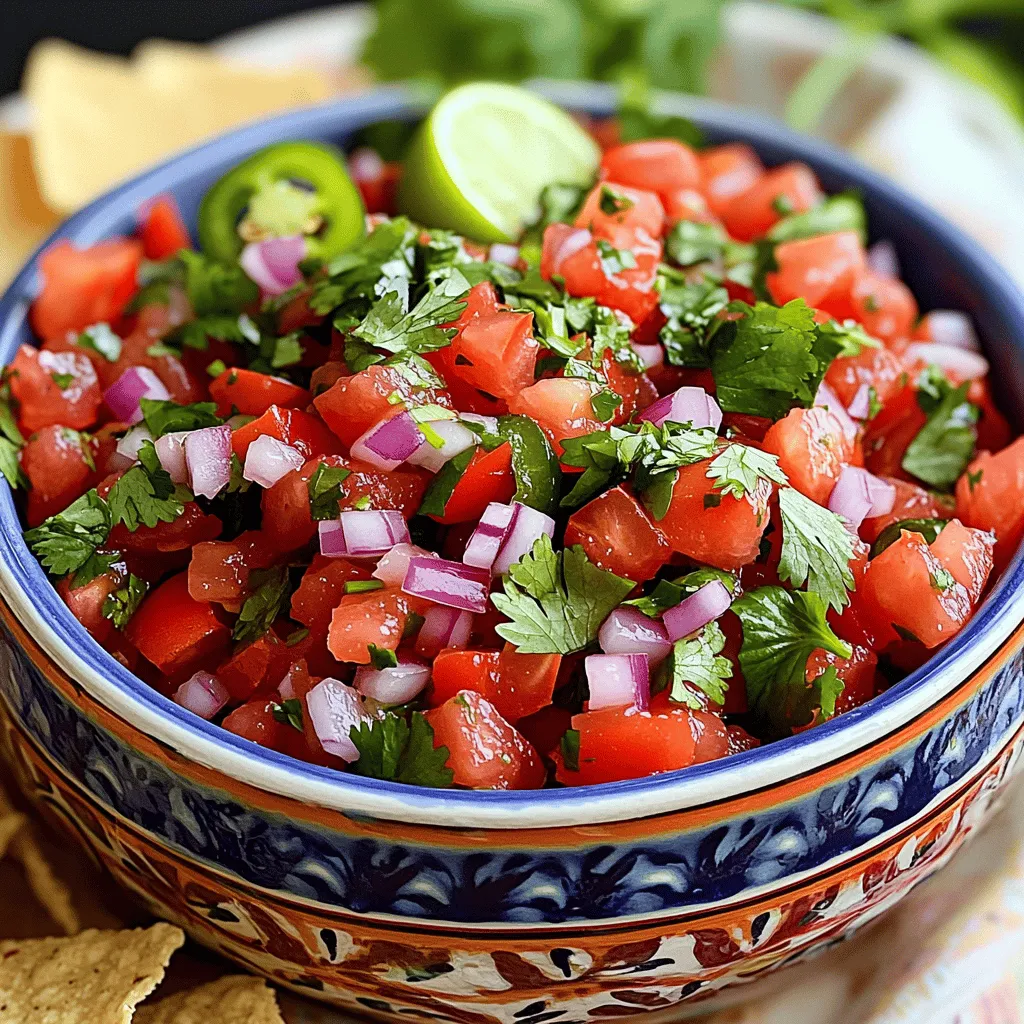
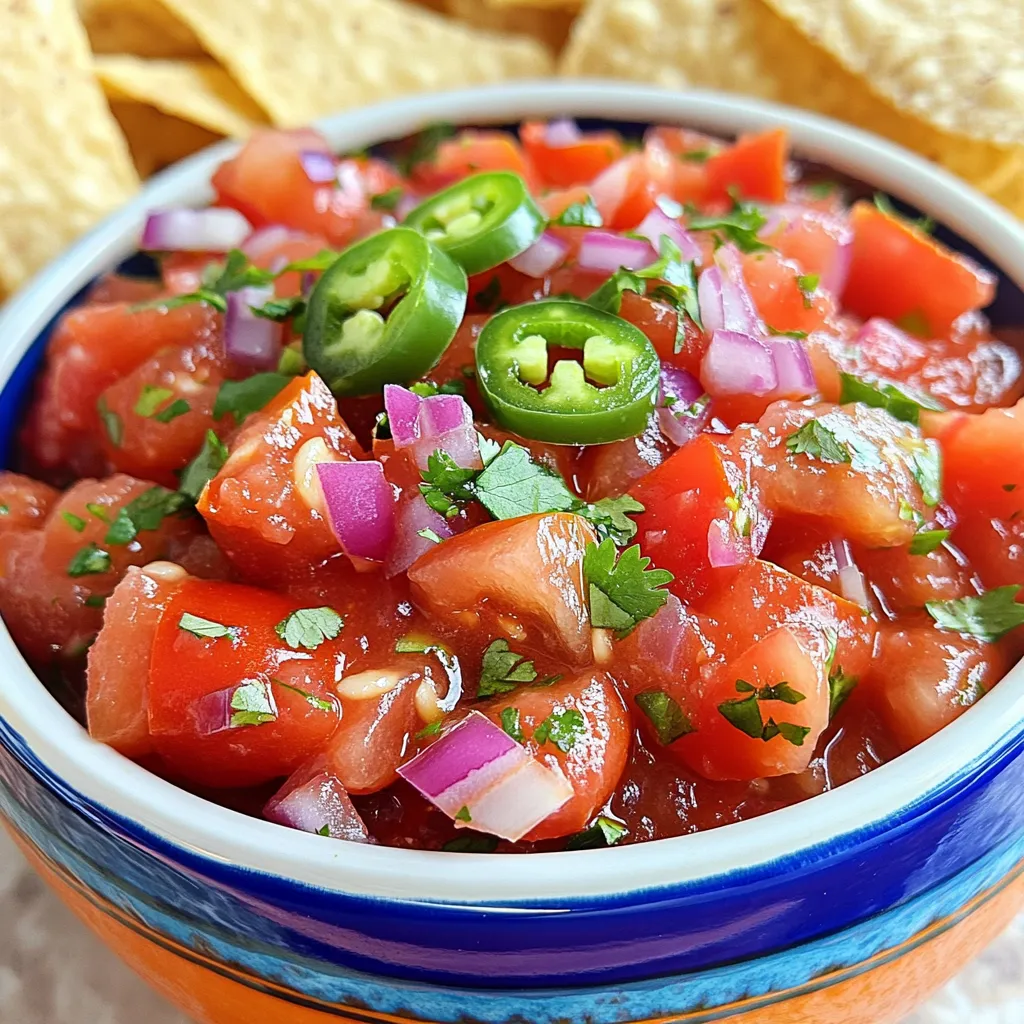
Quick and Easy Pico de Gallo Flavorful and Fresh Dish
If you’re looking for a vibrant and fresh dish, quick and easy pico de gallo is your answer! This classic salsa bursts with flavor and
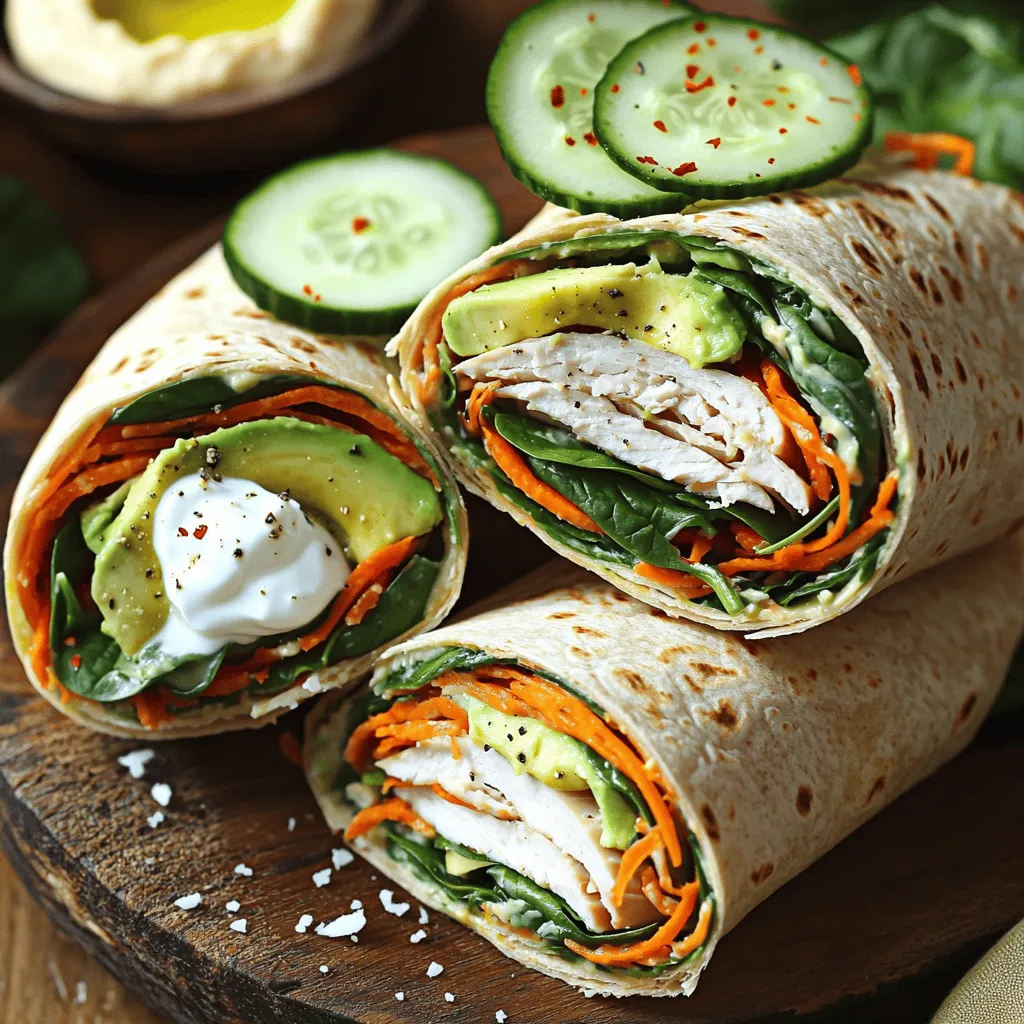
Turkey Wrap – Healthy Lunch Idea for Energy Boost
Looking for a quick and healthy lunch that fuels your day? Look no further than the turkey wrap! Packed with protein and fresh veggies, this

Easy 30-Minute Homemade Soft Pretzels Delight Recipe
Are you ready to enjoy warm, soft pretzels right from your kitchen? In just 30 minutes, you can whip up these delicious snacks using easy
Best Homemade Salsa for Canning Simple Recipe Guide
Ready to elevate your canning game? In this simple recipe guide, I’ll share the best homemade salsa for canning that will leave your taste buds
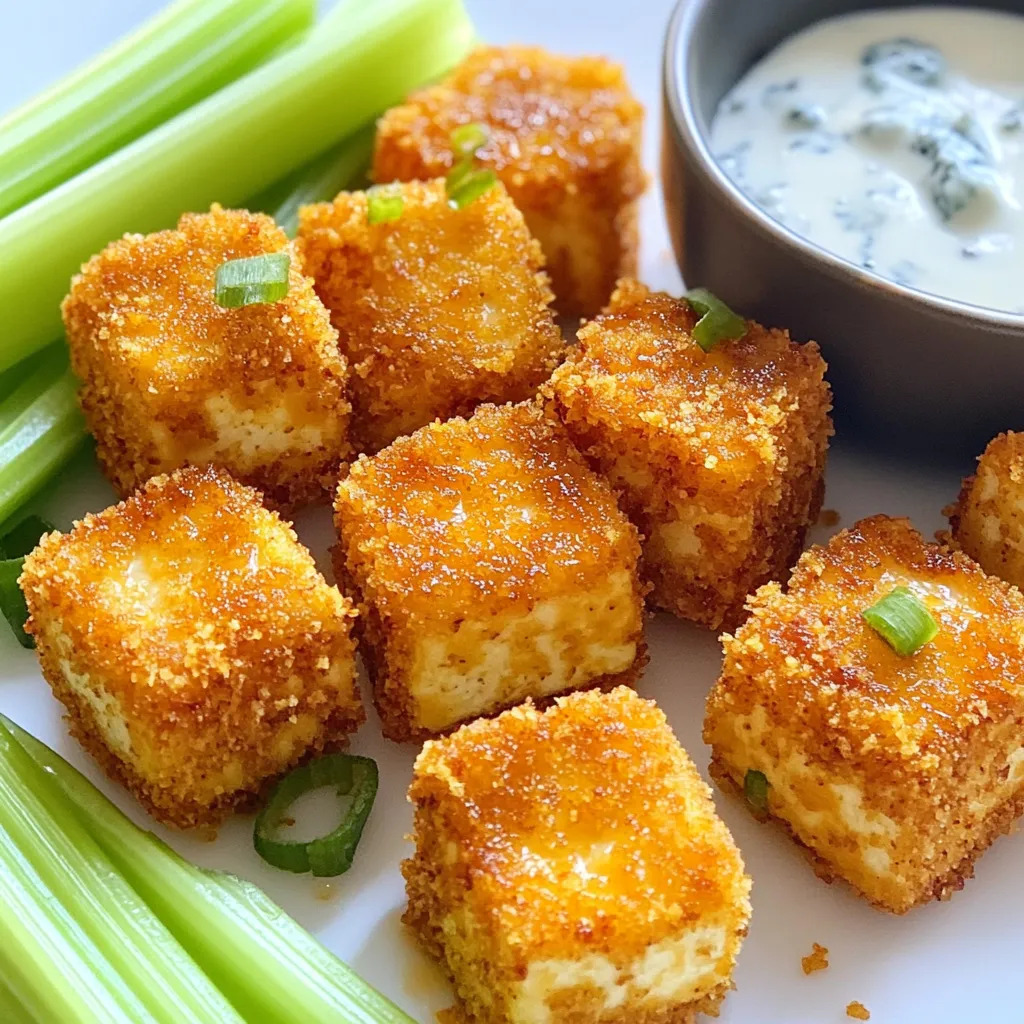
Crispy Buffalo Tofu Bites Flavorful and Easy Recipe
If you’re looking for a fun and tasty snack, you’ve hit the jackpot! My Crispy Buffalo Tofu Bites are packed with flavor and super easy