Appetizers

- 1 cup cooked corned beef, finely chopped - 1 cup sauerkraut, drained and chopped - 1 cup Swiss cheese, shredded - ½ cup cream cheese, softened - 1 teaspoon Dijon mustard - 1 teaspoon garlic powder - ½ teaspoon black pepper - 1 cup breadcrumbs (preferably panko) - ½ cup mayonnaise - ¼ cup ketchup - 1 tablespoon prepared horseradish sauce - 1 teaspoon hot sauce (adjust according to preference) Reuben Balls blend the rich taste of corned beef and cheese. Each bite offers a crunchy outside and a warm, gooey inside. The sauerkraut gives a nice tang that shines through. For the filling, mix the cooked corned beef, sauerkraut, Swiss cheese, and cream cheese in a bowl. Add Dijon mustard, garlic powder, and black pepper to enhance the flavor. Use panko breadcrumbs for the best crunch. They add a light and crispy texture that regular breadcrumbs can't match. For the Spicy Thousand Island Dipping Sauce, combine mayonnaise, ketchup, horseradish, and hot sauce in a bowl. Adjust the hot sauce for your preferred spice level. This sauce pairs perfectly with the Reuben Balls. For the full recipe, you can check the complete details. Enjoy your cooking! In a large mixing bowl, combine the following ingredients: - 1 cup cooked corned beef, finely chopped - 1 cup sauerkraut, drained and chopped - 1 cup Swiss cheese, shredded - ½ cup cream cheese, softened - 1 teaspoon Dijon mustard - 1 teaspoon garlic powder - ½ teaspoon black pepper Mix these ingredients well until fully integrated. You want a smooth and cohesive mixture that holds together. This is the heart of your Reuben Balls. Take about one tablespoon of the filling. Roll it into a compact ball using your hands. This helps maintain the shape during frying. Place each ball on a tray lined with parchment paper. Keep rolling until you use all the filling. This step is fun and gets you ready for the next part! Set up a breading station. Place panko breadcrumbs in one shallow bowl and beaten eggs in another. Dip each ball into the beaten eggs first. Make sure it’s fully coated. Then roll it in the breadcrumbs, pressing gently to stick. Repeat this until all balls are coated. This gives them a nice crunch when fried. Heat oil in a deep fryer or heavy-bottomed pot over medium-high heat. You want the oil to reach about 350°F (175°C). Carefully add the breaded Reuben balls in small batches. Avoid overcrowding the pot. Fry them for about 3-4 minutes until golden brown and crispy. Use a slotted spoon to remove them, and let them drain on paper towels. In a medium bowl, whisk together the following for your spicy dipping sauce: - ½ cup mayonnaise - ¼ cup ketchup - 1 tablespoon prepared horseradish sauce - 1 teaspoon hot sauce (adjust to your spice preference) - Salt and pepper to taste Taste the sauce and adjust the seasonings as needed. You want a good balance of heat and flavor that pairs well with the Reuben Balls. Arrange the crispy Reuben Balls on a large serving platter. Present the spicy Thousand Island dipping sauce in a small bowl alongside. This makes for a delightful treat at parties or family gatherings. Enjoy every bite! For the full recipe, check the details above. To get the right texture for Reuben Balls, you need to mix well. Make sure all the ingredients blend together. This creates a smooth filling. You should also use panko breadcrumbs. They add a super crunchy texture. Regular breadcrumbs can make them soggy. So, stick to panko for the best results. To check if your oil is ready, drop a small piece of bread into it. If it sizzles and bubbles, it’s good to go. Aim for an oil temperature of 350°F (175°C). This helps avoid soggy or overcooked balls. Fry them in small batches. Overcrowding will drop the oil temperature. This can lead to greasy Reuben Balls. For a beautiful platter, add some fresh parsley or dill sprigs. This gives a nice pop of color. You can also use toothpicks for easy serving. They make it fun to grab and dip. Plus, it keeps your hands clean while enjoying these tasty treats. For the full recipe, check out the detailed steps above. {{image_4}} You can make Reuben Balls without meat. Swap the corned beef for plant-based options. Try using tempeh or mushrooms for a hearty bite. You can also add more veggies. Shredded carrots or bell peppers add color and crunch. For cheese, consider using vegan mozzarella or a blend of nut cheeses. This keeps the flavors while making it suitable for vegetarian diets. To boost the taste, add spices or herbs. A pinch of smoked paprika gives a nice kick. Fresh dill or thyme brings a bright flavor. Don’t stop at just one sauce! Try ranch or a spicy aioli as an alternative to the dipping sauce. This way, you can find the flavor you love best. If you prefer baking, you can skip the frying. Preheat your oven to 400°F (200°C). Place the breaded balls on a baking sheet lined with parchment paper. Spray them lightly with oil for a crispy texture. Bake for about 20 minutes, turning halfway through. This method is healthier and still gives you that golden finish. Check for doneness to ensure they are cooked through. For a complete guide on making these tasty bites, refer to the Full Recipe. To keep your Reuben Balls fresh, let them cool completely. Place them in an airtight container. This helps lock in flavor and moisture. Store them in the fridge for up to three days. If you want to keep them longer, consider freezing. When you are ready to enjoy your Reuben Balls again, you need to reheat them properly. The oven is the best choice for crispiness. Preheat your oven to 350°F (175°C). Place the balls on a baking sheet and heat for about 10-15 minutes. This will keep them crunchy. If you use a microwave, heat for about 1-2 minutes. However, they may turn soft. You can freeze Reuben Balls before or after frying. If you freeze them before frying, place the balls on a tray and freeze them until firm. Then transfer them to a freezer bag. If you fry them first, let them cool, then store them in a freezer-safe container. To thaw, leave them in the fridge overnight. Reheat them in the oven for best results. This way, you always have a tasty snack ready! You can prepare Reuben Balls ahead of time. First, mix all the filling ingredients as before. Once the mixture is ready, form the balls and place them on a tray. Cover the tray with plastic wrap and store it in the fridge. You can keep them in the fridge for up to 24 hours. When you’re ready to cook, just coat them with breadcrumbs and fry. Yes, you can switch the Swiss cheese for other types. Here are some great options: - Gouda adds a rich flavor. - Cheddar gives a sharp taste. - Monterey Jack melts well and has a mild flavor. Choose one that you like best! Reuben Balls pair well with many sides. Consider serving them with: - A crisp green salad for freshness. - Potato wedges for a hearty side. - Pickles to add a tangy crunch. These sides enhance the meal and make it more satisfying. The Spicy Thousand Island Dipping Sauce can be adjusted. If you prefer less spice, reduce the hot sauce. For more heat, add more horseradish or hot sauce. Taste as you go to find your ideal level of spice. Yes, you can make Reuben Balls gluten-free. Use gluten-free breadcrumbs instead of panko. Make sure the corned beef and sauces are gluten-free as well. This way, everyone can enjoy this tasty dish! In this blog post, I shared an easy recipe for Reuben Balls. We covered main and additional ingredients, step-by-step instructions, and useful tips for perfect results. I also discussed variations, storage methods, and answered common questions. In conclusion, these tasty bites are fun to make and share. Whether you fry or bake them, Reuben Balls bring joy to any gathering. Experiment with flavors, and enjoy them with your favorite dipping sauce. Happy cooking!
Reuben Balls with Spicy Thousand Island Dipping Sauce
If you love Reuben sandwiches, you’ll adore these Reuben Balls with Spicy Thousand Island Dipping Sauce! Imagine crispy, golden bites packed with corned beef, sauerkraut,
- 2 cups cooked sushi rice - 1/2 teaspoon salt - 1/4 cup freshly grated Parmesan cheese - 1/4 cup green onions, finely chopped - 1/2 cup panko breadcrumbs - 1/2 cup all-purpose flour - 2 large eggs, beaten - Vegetable oil for frying - Soy sauce for dipping You can add ingredients to change the taste. For example: - Spices: A pinch of garlic powder or chili flakes gives a kick. - Herbs: Fresh herbs like basil or cilantro add a fresh taste. - Cheese: Try adding mozzarella or cheddar for a cheesy twist. Using good ingredients matters a lot. Fresh sushi rice makes the best base for these rice balls. The rice should be sticky yet firm, which helps keep the balls together. Also, high-quality Parmesan cheese adds depth of flavor. Fresh green onions bring brightness and crunch. Panko breadcrumbs provide that perfect crispy texture. Choosing good ingredients ensures that your rice balls will taste amazing. Each bite should be a mix of soft rice and crunchy coating. When you use quality ingredients, your dish will shine. Start by gathering your ingredients. In a large mixing bowl, combine: - 2 cups cooked sushi rice - 1/2 teaspoon salt - 1/4 cup freshly grated Parmesan cheese - 1/4 cup green onions, finely chopped Mix these together well. Make sure the cheese and onions are evenly spread. This will give your rice balls a tasty flavor. After mixing, wash your hands and grab about 2 tablespoons of the rice mix. Roll this into a ball shape. Repeat until you have 12 rice balls. Next, set up your breading station. You will need three bowls: 1. One with 1/2 cup all-purpose flour 2. One with 2 large beaten eggs 3. One with 1/2 cup panko breadcrumbs Take each rice ball and roll it in the flour first. This helps the egg stick. Then, dip it into the beaten eggs. Let any extra egg drip off. Finally, roll the ball in the panko breadcrumbs. Make sure it is fully coated. Now, it’s time to fry! In a large frying pan, pour in vegetable oil until it is about 1 inch deep. Heat the oil on medium-high heat. To check if the oil is hot, drop a small piece of breadcrumb in. If it sizzles, it’s ready! Gently add several rice balls to the oil, but don’t overcrowd the pan. Fry them for about 3-4 minutes. You want them to turn golden brown. Remember to flip them occasionally to cook all sides evenly. Once they are golden, use a slotted spoon to lift them out. Place the rice balls on a plate lined with paper towels. This will soak up any extra oil. Serve your crispy rice balls warm with soy sauce for dipping. Each bite will be a tasty treat! To get that perfect crunch, choose high-quality panko breadcrumbs. They are lighter and flakier than regular breadcrumbs. When you fry, use enough oil to cover the rice balls. This helps them cook evenly and get crispy all around. Fry them in batches, so they have space to bubble and brown. To prevent sogginess, avoid overcooking your rice. Cook it just until tender. Let the rice cool down before you shape it into balls. Moisture can make the coating soggy, so it’s best to use dry ingredients. Also, drain the fried rice balls on paper towels to soak up any extra oil. If you want a healthier option, consider air frying or baking. For air frying, preheat the air fryer and set it to 375°F. Spray the rice balls lightly with oil for a better crunch. Cook for about 10-12 minutes, flipping halfway through. For baking, place the rice balls on a baking sheet lined with parchment paper. Bake at 400°F for 20-25 minutes. Turn them halfway to ensure even crisping. Both methods cut down on oil and still yield tasty results. For the full recipe, check out the detailed instructions to enjoy these crispy delights! {{image_4}} You can mix it up with flavors! For a spicy kick, add some chopped jalapeños or sriracha to the rice mixture. If you love cheese, try adding mozzarella for a melty center. For a herbed version, mix in fresh herbs like parsley or basil. Each option brings a unique taste, making the rice balls more fun to eat. You can easily make these rice balls vegetarian. Skip the cheese and use nutritional yeast for a cheesy flavor. For a vegan option, replace the eggs with a mixture of ground flaxseed and water. This will help bind the rice balls together. It’s a great way to enjoy a tasty treat without animal products. Dipping sauces can change the game! Soy sauce is a classic choice, but you can try others too. A sweet chili sauce adds a nice touch of heat and sweetness. For a creamy dip, mix mayonnaise with a bit of sesame oil and lime juice. You can also serve them with a tangy ponzu sauce for a refreshing twist. - Suggestions for side dishes: Pair the rice balls with a fresh salad or some steamed veggies. These sides add color and balance, making your meal complete and delicious. To keep your crispy rice balls fresh, store them in an airtight container. Place parchment paper between layers to avoid sticking. They stay good in the fridge for up to three days. If you have extra rice balls, let them cool first. This helps prevent moisture buildup, which can make them soggy. When you're ready to enjoy your leftover rice balls, reheating is key. For the best results, use an oven. Preheat it to 350°F (175°C). Place the rice balls on a baking sheet and heat for about 10-15 minutes. This method keeps them crispy and warm. If you're in a hurry, you can use a microwave. Just be aware that the texture may not be as crispy. Freezing rice balls is great for meal prep. To freeze, first, let them cool completely. Then, place them on a baking sheet lined with parchment paper. Freeze them for about an hour until firm. After that, transfer the rice balls to a freezer-safe bag. They can last up to three months. When you're ready to eat them, bake directly from frozen. This method keeps them tasty and convenient. For more details, check the Full Recipe. To make rice balls stick, use warm sushi rice. The warmth helps the rice grains bond. Mix in salt, Parmesan, and green onions well. Wet your hands before shaping the balls. This prevents sticking to your hands. Yes, you can use other rice types! Short-grain rice works well for a sticky texture. Medium-grain rice can also work, but avoid long-grain rice. Long-grain rice does not stick together well. To check if the oil is hot, drop in a small piece of breadcrumb. If it sizzles, the oil is ready. You can also use a thermometer; aim for 350°F (175°C). Proper oil temperature ensures crispy rice balls. Crispy rice balls pair well with soy sauce for dipping. You can also serve them with spicy mayo, sweet chili sauce, or a tangy ponzu sauce. For a meal, add a side salad or steamed veggies. For the complete recipe, please refer to the Crispy Delightful Rice Balls section above. In this blog post, you learned how to make delicious crispy rice balls. We covered important ingredients, step-by-step instructions, and tips for achieving the perfect texture. Don't forget that quality ingredients make a big difference. You can also try different flavors and cooking methods, like air frying. Store leftovers carefully and enjoy them later. These rice balls are fun to make and share. Now, gather your ingredients and start cooking!
Easy Crispy Rice Balls Irresistible and Flavorful Treat
Are you ready for a tasty treat that you can easily make at home? These Easy Crispy Rice Balls will become your new favorite snack!
To make Spicy Mexican Corn Bites, you need some simple ingredients. Here’s what you’ll require: - 2 cups corn kernels (fresh or canned, drained) - 1/2 cup all-purpose flour - 1/2 cup cornmeal - 1/4 cup freshly grated Parmesan cheese - 1 jalapeño, finely chopped - 1/4 cup fresh cilantro, chopped - 1 teaspoon baking powder - 1/2 teaspoon ground cumin - 1/2 teaspoon smoked paprika - 1/4 teaspoon cayenne pepper (adjust to taste) - Salt and freshly ground black pepper to taste - 1 large egg, beaten - 1/2 cup milk - Vegetable oil for frying These ingredients come together to create a tasty snack. The corn provides sweetness, while the jalapeño adds heat. The spices bring depth to each bite. Don't forget the cheese! It adds a nice savory touch. For the full recipe, check out the cooking section. It's an easy way to whip up this dish. - Combine corn kernels, flour, cornmeal, cheese, jalapeño, and cilantro in a bowl. - Whisk together baking powder, cumin, paprika, cayenne, salt, and pepper in another bowl. - Beat egg and mix with milk in a separate bowl. First, you need to gather all your ingredients. In a large bowl, mix the corn, flour, cornmeal, cheese, jalapeño, and cilantro. This combination gives your bites a great texture and flavor. In another bowl, whisk together the baking powder, cumin, paprika, cayenne, salt, and pepper until fully blended. This step adds a spicy kick. In a third bowl, beat the egg and combine it with milk until smooth. This mixture helps bind everything together. - Fold the egg mixture into the corn mixture, avoiding overmixing for fluffy bites. Next, carefully fold the egg mixture into the corn mixture. Do this gently to keep the texture fluffy. Overmixing can make the bites dense, which we want to avoid. - Heat vegetable oil and test for readiness. - Drop spoonfuls of the mixture into the oil, frying in batches until golden brown. Now, heat vegetable oil in a deep skillet over medium heat. You want enough oil to cover the bites. To test if the oil is ready, drop a small spoonful of the mixture in; if it sizzles and rises, you are good to go. Then, drop spoonfuls of the corn mixture into the hot oil. Fry them in batches, so they don’t crowd each other. Cook until they are golden brown, usually about 2-3 minutes per side. These Spicy Mexican Corn Bites are simple and fun to make, perfect for any snack time! For the full recipe, check below. To fry Spicy Mexican Corn Bites well, you need the right oil temperature. Aim for about 350°F (175°C). This heat helps them cook evenly and become crispy. To test the oil, drop a small spoonful of the mixture in. It should sizzle and float right away. If it sinks and bubbles slowly, the oil is too cool. Avoid overcrowding the skillet. If you add too many bites at once, they will steam instead of fry. This can lead to soggy bites. Fry them in small batches. This way, each one gets enough heat to become golden and delicious. Avoid overmixing the batter. When combining the egg mixture with the corn mixture, fold gently. If you stir too much, the bites can become tough. A light touch keeps them fluffy and airy. This is key to making them nice and enjoyable. For a light and fluffy texture, let the batter rest for a few minutes after mixing. This allows the baking powder to work its magic. The result will be a better rise and a softer bite. Present your corn bites with flair. Arrange them on a colorful platter. Add lime wedges and a sprinkle of fresh cilantro. This makes the dish look fresh and inviting. For dips, consider options like guacamole or sour cream. A spicy salsa can also bring a nice kick. These pairings enhance the flavors of the bites and make for a fun snack. You can find the full recipe [Full Recipe]. {{image_4}} You can easily change the flavor of your Spicy Mexican Corn Bites. One great swap is cheese. Instead of Parmesan, try feta or cheddar. Both add unique flavors. You can also add more vegetables. Bell peppers work well; they bring sweetness and crunch. Adding zucchini or spinach can boost nutrition and taste. Feel free to mix and match ingredients for your perfect bite. Want more heat? You can adjust the spice in your bites. Add more jalapeño or cayenne for a spicy kick. If you prefer milder bites, use fewer jalapeños and remove the seeds. You can also try different spices. Chili powder adds warmth without too much heat. Chipotle brings a smoky flavor that pairs well with corn. Experiment and find the level of spice you love. If you need gluten-free options, swap all-purpose flour for a gluten-free blend. Many brands work well in this recipe. For vegan versions, use flax eggs instead of real eggs. Combine one tablespoon of ground flax with three tablespoons of water. Let it sit until thick. For milk, use almond or oat milk as great substitutes. These swaps make everyone able to enjoy this tasty treat! For a complete guide on making these bites, refer to the Full Recipe. After making Spicy Mexican Corn Bites, let them cool. Place leftovers in an airtight container. Store them in the fridge. They stay fresh for up to three days. Reheat them in the oven for the best taste. Avoid the microwave for crispiness. To freeze corn bites, let them cool completely. Arrange them in a single layer on a baking sheet. Freeze for about two hours. Once frozen, transfer them to a freezer bag. They can last up to three months in the freezer. For reheating, use an oven preheated to 375°F. Bake for about 15 minutes until warm and crisp. You can also use an air fryer. This method will keep them crunchy. Use leftover bites in a salad for added crunch. Chop them up and mix with greens. They add a tasty twist to any dish. You can also serve them with salsa or guacamole. Pairing bites with a zesty lime crema enhances their flavor. For a fun snack, place them on mini tortillas with toppings. For the full recipe and more ideas, check out the Spicy Mexican Corn Bites section. Spicy Mexican Corn Bites can last for about 3-4 days in the fridge. Store them in an airtight container to keep them fresh. When you want to enjoy them, reheat in the oven for crispiness. Avoid microwaving, as this can make them soggy. Yes, you can use frozen corn kernels. They are a great option when fresh corn isn't available. Just thaw them first and drain any excess water. Fresh corn has a sweeter taste, but frozen corn works well too. Both options will give you tasty corn bites. These corn bites pair well with many sauces. Here are some great choices: - Sour cream: Its coolness balances the heat. - Guacamole: Adds creaminess and flavor. - Salsa: Choose mild or spicy, depending on your taste. - Chipotle mayo: For a smoky kick. - Cilantro lime dressing: Refreshing and zesty. Feel free to mix and match sauces to find your favorite! For the full recipe, refer to the earlier sections. To make Spicy Mexican Corn Bites, you need fresh ingredients, proper mixing, and frying techniques. Remember to maintain the right oil temperature for the best results. You can customize your bites with different cheeses or adjust spiciness based on your taste. Store leftovers in the fridge or freeze them for later. With these tips, you can enjoy a light, crispy snack anytime. Get creative with garnishes and dips, and have fun making this treat your own!
Spicy Mexican Corn Bites Flavorful and Easy Snack
If you’re craving a snack that’s both spicy and satisfying, look no further! These Spicy Mexican Corn Bites are packed with flavor and simple to
- 8 oz cream cheese, softened - 1 cup fresh crab meat, cooked and shredded - 2 green onions, finely chopped The main ingredients create a creamy and rich filling. Cream cheese adds smoothness. Fresh crab meat gives a sweet, briny flavor. Green onions add a mild crunch and fresh taste. Together, they make the heart of the crab rangoon. Wonton wrappers are thin sheets of dough. They are perfect for holding the crab filling. You can find them in most grocery stores. Look for brands like Nasoya or Wei Chuan. These brands offer good quality and are easy to work with. Wonton wrappers are versatile, making them great for many dishes, not just crab rangoon. - 1 teaspoon garlic powder - 1 teaspoon Worcestershire sauce - Vegetable oil for frying - Salt and freshly cracked black pepper Seasoning enhances the flavor of the filling. Garlic powder gives a hint of spice. Worcestershire sauce adds depth and umami. Use vegetable oil for frying. It has a high smoke point, making it ideal for crispy results. Remember to salt and pepper to taste. This balance makes each bite of crab rangoon delightful. Start by mixing the main ingredients in a large bowl. You will need 8 oz of softened cream cheese, 1 cup of fresh crab meat, and 2 green onions. Add 1 teaspoon of garlic powder and 1 teaspoon of Worcestershire sauce. Season with salt and freshly cracked black pepper. Use a spatula to mix these ingredients thoroughly. You want a creamy and smooth consistency. Make sure the crab is evenly distributed throughout the mixture. Now, it’s time to fill the wontons. Lay one wonton wrapper down on a clean, flat surface. Spoon about 1 teaspoon of the crab mixture into the center of the wrapper. Moisten the edges of the wrapper with a bit of water using your finger. Fold the wrapper over to form a triangle shape. Press the edges together firmly to seal. For a tighter seal, fold the two outer corners toward the center and pinch them. Continue filling and sealing each wonton until the crab mixture is all used. Heat vegetable oil in a deep frying pan or pot over medium-high heat. Aim for a temperature of 350°F (175°C). Use a thermometer to check the heat. Once the oil is hot, carefully drop 3-4 crab rangoon into the oil. Fry them for about 2-3 minutes. Watch for a beautiful golden-brown color. Turn them occasionally for even frying. When they are ready, use a slotted spoon to remove them from the oil. Place them on a plate lined with paper towels to drain excess oil. Serve warm with sweet chili sauce for dipping. Enjoy! To fry crab rangoon without too much oil, use the right pot. A deep pot or pan helps keep the oil hot and allows even frying. Heat the oil to 350°F (175°C). If it's too low, the rangoon can soak up oil. This makes them greasy. Fry in small batches. This gives them space to cook well and stay crispy. To get that perfect crunch, do not overcrowd the pan. Frying too many at once cools the oil. This leads to soggy rangoon. Flip them halfway through frying. This helps both sides get brown and crispy. Want to add more flavor? Try adding a bit of lemon zest or fresh herbs. Chives or dill can give your rangoon a nice twist. You can also use a pinch of cayenne for a kick. For dipping sauces, sweet chili sauce is great. Try soy sauce or a spicy mayo for different tastes. You can mix sauces to find your favorite. To make your crab rangoon look great, use a large platter. Arrange the fried rangoon in a circle. Place a small bowl of sweet chili sauce in the center. This makes it easy for guests to dip. Garnishing adds a nice touch. Top with freshly chopped green onions or cilantro. Edible flowers can also make your dish pop. A bright, colorful plate makes the food even more inviting. {{image_4}} You can make a tasty crab rangoon without meat. For a vegetarian option, you can use these fillings: - 8 oz cream cheese, softened - 1 cup artichoke hearts, chopped - 1 cup fresh spinach, wilted and chopped - 2 green onions, finely chopped - 1 teaspoon garlic powder - 1 teaspoon soy sauce Mix these ingredients just like the crab mixture. You get a creamy, rich filling that satisfies. This plant-based crab rangoon offers a fresh twist on the classic. If you prefer a healthier way to enjoy crab rangoon, try baking them. Follow these steps: 1. Preheat your oven to 375°F (190°C). 2. Place filled wontons on a baking sheet lined with parchment paper. 3. Brush each wonton with a little vegetable oil or melted butter. Bake for about 15-20 minutes or until golden brown. Check them often to prevent burning. You will love this crispy, baked version! Different cultures have fun takes on crab rangoon. You can add unique flavors by trying these ideas: - Italian Style: Add pesto to the cream cheese for a herby taste. - Mexican Flavor: Mix in some jalapeños and lime juice for a spicy kick. - Asian Fusion: Incorporate sesame oil and chopped cilantro for a fresh twist. These variations let you explore flavors from around the world. Each bite offers a new taste experience. To keep your crab rangoon fresh, store them in an airtight container. Place wax paper between layers to prevent sticking. Refrigerate them right after they cool down. They will stay good for up to 3 days. After that, they may lose their taste and texture. You can freeze crab rangoon to enjoy later. First, lay them flat on a baking sheet. Make sure they do not touch each other. Freeze until solid for about 1-2 hours. Once frozen, move them to a freezer bag. They can last up to 2 months. When you’re ready to eat, do not thaw them. Just cook them straight from the freezer. To reheat, preheat your oven to 375°F (190°C). Place the crab rangoon on a baking tray. Bake for about 10-12 minutes. This helps keep them crispy. Avoid using the microwave, as it can make them soggy. Always check if they are warm throughout before serving. Crab Rangoon is a tasty treat that many love. It is believed to have started in the United States. Some say it was created in the 1950s by a restaurant in San Francisco. The dish combines flavors from Asian cuisine. It shows how cultures can mix through food. Today, it is a popular appetizer in many places. Yes, you can use imitation crab meat. It can be a cost-effective choice. Imitation crab is made from fish and has a similar taste. However, it lacks the real crab's rich flavor. If you want a true crab taste, use fresh crab meat. For lighter options, imitation crab can work well. You can tell the oil is ready by looking for small bubbles. Heat the oil to about 350°F (175°C). A thermometer works best for this. If you drop a small piece of wonton in the oil, it should sizzle right away. This means the oil is hot enough for frying. Yes, you can prepare Crab Rangoon ahead of time. You can fill and seal the wontons, then freeze them. This way, they stay fresh until you are ready to fry them. Just make sure to thaw them before frying. This helps them cook evenly and stay crispy. For best results, fry them right before serving. For the complete recipe, check out the Full Recipe. This blog post shared how to make delicious Crab Rangoon. We covered key ingredients, like crab meat and cream cheese. You learned how to fill and fry wontons for a crispy treat. I also shared tips for enhancing flavor and creating variations, including vegetarian options. With proper storage and reheating, you can enjoy these snacks later. Now, you’re ready to impress friends and family with this tasty dish. Dive in and enjoy making Crab Rangoon your own!
Crab Rangoon Delightful Recipe for Easy Appetizer
Crab Rangoon is one of the most popular appetizers, and for good reason! Its creamy crab filling and crispy, golden shell are a crowd-pleaser. In
For the Tarte Au Soleil, you need some simple ingredients. This dish combines rich cheese and fresh spinach. It also uses puff pastry, which gives it a nice crunch. You can serve it warm or at room temperature. This recipe is great for parties or family dinners. You can find the full recipe below for all the steps. Here’s what you will need: - 1 sheet of puff pastry, thawed - 200g ricotta cheese - 100g fresh spinach, wilted and finely chopped - 100g feta cheese, crumbled - 1 large egg, beaten - 1 clove of garlic, minced - 1 teaspoon dried oregano - Salt and freshly ground black pepper to taste - 1 egg yolk (for egg wash) - Sesame seeds (for garnish) If you don’t have ricotta cheese, you can use cottage cheese. Feta can be swapped with goat cheese for a tangy taste. If you want a lighter option, use Greek yogurt instead of the egg. For a twist, try adding sun-dried tomatoes or artichoke hearts to the filling. You can also use different herbs, like thyme or basil, to change the flavor. 1. Gather your ingredients: Get your puff pastry, ricotta cheese, spinach, feta cheese, egg, garlic, oregano, salt, pepper, egg yolk, and sesame seeds. 2. Preheat the oven: Set your oven to 200°C (400°F). This helps the pastry bake evenly. 3. Prepare the baking sheet: Line a baking sheet with parchment paper. This keeps the pastry from sticking. 4. Mix the filling: In a bowl, combine ricotta, chopped spinach, feta, beaten egg, garlic, oregano, salt, and pepper. Stir well until smooth. 5. Roll out the pastry: On a floured surface, roll the puff pastry into a 30cm (12 inches) circle. 6. Cut the sunburst design: Use a sharp knife to make cuts from the edge of the pastry to the center, leaving a small circle intact. 7. Add the filling: Spoon your cheese and spinach mix into the center circle. Spread it evenly. 8. Twist the rays: Start at one ray and twist it over the filling. Continue with each ray to create the sunburst look. 9. Add egg wash: Beat the reserved egg yolk. Brush it over the twisted pastry for a golden color. Sprinkle sesame seeds on top. 10. Bake: Place the baking sheet in the oven. Bake for 25-30 minutes until the pastry turns golden brown. 11. Cool and serve: Once baked, let the tarte cool for a few minutes. Then slice it into wedges. Serve the warm Tarte Au Soleil on a wooden board. Add fresh herbs like basil or parsley for color. A light side salad with lemon vinaigrette goes well with it. Enjoy your beautiful creation! To make the best Tarte Au Soleil, use fresh ingredients. Fresh spinach and high-quality ricotta make a big difference. Ensure the puff pastry is fully thawed before rolling. A slightly warm kitchen can help keep the pastry pliable. This helps avoid cracks in the dough. When cutting the pastry, keep the rays even. This ensures a pretty sunburst shape. Brush the pastry with egg wash for a golden finish. Sesame seeds add flavor and crunch. One common error is overfilling the tart. Too much filling can cause it to spill out during baking. Make sure to leave space around the edges. Another mistake is not preheating the oven. A hot oven ensures the pastry rises well. Avoid using wet ingredients, as they can make the pastry soggy. Lastly, don't skip the resting step after baking. Letting it cool slightly makes slicing easier. For this recipe, you need a few essential tools. Use a sharp knife for cutting the pastry. A rolling pin helps flatten the dough evenly. A mixing bowl is necessary for combining the filling. A baking sheet lined with parchment paper prevents sticking. A pastry brush is useful for applying the egg wash. Lastly, have a spatula on hand to help transfer the tart to a serving plate. These tools will help you create a stunning Tarte Au Soleil. {{image_4}} You can change the filling to fit your taste. Try adding cooked mushrooms or sun-dried tomatoes. You may also use different cheeses like goat cheese or mozzarella. For a meat option, add cooked chicken or ham. Mix in herbs like dill or parsley for extra flavor. Each filling brings its own twist to the dish. While puff pastry is classic, you can use other types too. Try phyllo dough for a crispier texture. You can also use shortcrust pastry for a more savory flavor. Each pastry gives a unique taste and feel to your tarte. Experiment with what you like best! Think outside the box when shaping your tarte. Instead of the classic sunburst, create a spiral or a simple round shape. You can also make mini tarts for parties. Serve them warm on a platter with a garnish of fresh herbs. Pair your tarte with a salad for a lovely meal. For the Full Recipe, check the main section about ingredients and instructions. To keep your leftovers fresh, wrap the Tarte Au Soleil in plastic wrap. You can also place it in an airtight container. Store it in the fridge for up to three days. Make sure it cools completely before wrapping. This helps maintain its flaky texture. When you’re ready to enjoy your leftovers, preheat your oven to 180°C (350°F). Place the tarte on a baking sheet. Cover it loosely with foil to prevent over-browning. Heat for about 15-20 minutes, or until warm. This method keeps the pastry crispy and delicious. You can freeze Tarte Au Soleil for later use. Wrap it tightly in plastic wrap, then in aluminum foil. It can stay in the freezer for up to two months. To bake from frozen, preheat the oven to 200°C (400°F). Bake for 30-35 minutes or until golden. Enjoy your homemade treat anytime! Tarte Au Soleil is a beautiful pastry shaped like the sun. It has rich fillings of cheese and spinach. This dish is both tasty and fun to serve. You can impress your guests with its lovely design. It’s a great choice for parties or family meals. The flaky puff pastry adds a nice crunch. The filling is creamy and savory, making each bite delightful. Yes, you can prepare Tarte Au Soleil ahead of time. You can make the filling a day in advance. Just store it in the fridge until you are ready to use it. You can also assemble the tart and keep it in the fridge. Bake it just before serving for the best taste and texture. This way, you’ll have more time to enjoy with your guests! Tarte Au Soleil pairs well with many sides. A light salad is a great choice. You can use mixed greens with a lemon vinaigrette. Fresh herbs like basil or parsley add flavor. A simple tomato soup also makes a nice side. If you want something heartier, try roasted vegetables. These options balance the richness of the tart. Enjoy experimenting with different sides! We covered how to make Tarte Au Soleil, from key ingredients to cooking tips. You learned about ingredient swaps and common mistakes to avoid. Unique variations keep the recipe fresh and fun. Remember to store leftovers properly for later enjoyment. Tarte Au Soleil is a versatile dish perfect for sharing. With these steps and ideas, you can impress anyone who takes a bite. Enjoy your cooking adventure!
Tarte Au Soleil Delightful Recipe for All Occasions
Are you ready to impress your family and friends with a dish that steals the show? Tarte Au Soleil, or “Sun Pie,” is a fun
To make Healthy Energy Balls, you need a few key ingredients. Here is what you will need: - 1 cup rolled oats - 1/2 cup natural almond butter (or your favorite nut butter) - 1/4 cup honey or maple syrup - 1/4 cup chia seeds - 1/4 cup dark chocolate chips (or cacao nibs) - 1/2 teaspoon ground cinnamon - A pinch of sea salt These ingredients come together to create a tasty snack that is both healthy and filling. Rolled oats offer fiber, while almond butter adds protein and healthy fats. Honey or maple syrup gives a touch of sweetness. Chia seeds are a great source of omega-3s, and dark chocolate adds a delicious richness. You can make your energy balls even more exciting by adding a few optional ingredients. Here are some ideas: - 1/2 cup unsweetened shredded coconut - 1/4 cup dried fruit (like raisins or cranberries) - 1/4 cup nuts (like walnuts or pecans) These add-ins can change the flavor and texture of your energy balls. Coconut adds chewiness. Dried fruit brings sweetness, while nuts add crunch. Feel free to mix and match! Each ingredient in Healthy Energy Balls offers unique health benefits: - Rolled oats: Good for your heart and digestion. They keep you full longer. - Almond butter: Packed with protein. It helps build strong muscles. - Chia seeds: Full of fiber and omega-3 fatty acids. They support brain health. - Dark chocolate: Contains antioxidants. It can boost your mood. By using these wholesome ingredients, you can create a snack that not only tastes great but also helps you feel your best. Check out the Full Recipe for step-by-step instructions to make these Nutty Power Bites! Start by gathering all your ingredients. In a large bowl, mix 1 cup of rolled oats, 1/2 cup of almond butter, and 1/4 cup of honey or maple syrup. Stir them well until they form a sticky mixture. This will be your base. Next, add 1/4 cup of chia seeds, 1/4 cup of dark chocolate chips, 1/2 teaspoon of ground cinnamon, and a pinch of sea salt. Mix these in thoroughly so every bite is tasty. If you like, you can fold in 1/2 cup of unsweetened shredded coconut for extra texture. Now it’s time to shape your energy balls. Use your hands to scoop out about a tablespoon of the mixture. Roll it into a small ball. You should get around 12 to 15 balls from this recipe. Place the rolled energy balls on a baking sheet lined with parchment paper. Make sure to leave some space between each ball. This helps them not stick together. To ensure your energy balls hold their shape, refrigerate them for at least 30 minutes. This will help them firm up nicely. If they seem too soft after chilling, you can add a bit more oats or nut butter to the mix. Store your energy balls in an airtight container in the fridge. They can stay fresh for up to a week. Enjoy your healthy snack anytime! For the complete recipe, check the Full Recipe section. To get the best texture, use creamy nut butter. Almond butter works great, but you can pick any nut butter you like. The key is to mix well. This helps bind the oats and other ingredients. If your mixture feels too dry, add a bit more honey or nut butter. If it's too sticky, add some oats. Finding the right balance is crucial for that perfect bite. Mixing is important for even flavor. Start with the dry ingredients first. Combine rolled oats, chia seeds, and cinnamon in one bowl. In another bowl, mix your nut butter and honey. Then, pour the wet into the dry. This method makes it easier to blend. Use a sturdy spatula or your hands to mix. Don’t be afraid to get messy! The more you mix, the better the energy balls will taste. These energy balls are super versatile. You can eat them as a quick snack or a pre-workout boost. They pair nicely with fruit, like banana or apple slices. You can also enjoy them with yogurt for a filling breakfast. For a treat, dip them in melted dark chocolate. This adds sweetness and makes them even more delicious. Pairing these energy balls with your favorite drinks can elevate your snack time. Try them with almond milk or a smoothie for a tasty combo. {{image_4}} You can switch up the nut butter in your energy balls. Almond butter is great, but try peanut butter or cashew butter. Each nut butter gives a unique taste and texture. You can even use sunflower seed butter for a nut-free option. This keeps your snacks safe for kids with nut allergies. Just make sure to adjust the flavor, as some nut butters are sweeter than others. Superfoods can take your energy balls to the next level. Consider adding flaxseeds for extra fiber or protein powder for that extra boost. You can also mix in spirulina for a green twist. Another option is to add hemp seeds, which are rich in omega-3s. Each superfood adds health benefits and makes your snacks even more nutritious. Don't hesitate to experiment with different superfoods to find your favorite combo. Get creative with flavors in your energy balls! Try adding vanilla extract for a sweet touch or matcha powder for a unique flavor. You can also mix in dried fruits like cranberries or apricots for added sweetness. A pinch of sea salt balances the sweet flavors beautifully. For a fun twist, add spices like nutmeg or ginger. These combinations keep your energy balls exciting and new. Explore different flavors to find what makes your taste buds dance! For the full recipe, refer back to the earlier section. To keep your energy balls fresh, follow some simple steps. First, let them cool after making them. Place the energy balls in a single layer. This keeps them from sticking together. You can store them in the fridge or at room temperature. If you choose the fridge, they will stay fresh longer. Choose airtight containers for storage. Glass jars or plastic containers work well. Look for containers that seal tightly. This helps keep moisture out. You can also use freezer bags. Just make sure to squeeze out any air before sealing. These options will help your energy balls stay tasty and fresh. Your energy balls can last a week in the fridge. If you want to keep them longer, freezing is a great choice. Place the energy balls in a single layer on a baking sheet. Freeze them for a couple of hours. Once frozen, transfer them to an airtight container or freezer bag. They will last up to three months in the freezer. When you're ready to eat one, just thaw it in the fridge overnight. Enjoy your Nutty Power Bites whenever you like! Healthy energy balls are made of simple, nutritious ingredients. The main parts include rolled oats, nut butter, and a sweetener. In my recipe, I use almond butter and honey. You can swap honey for maple syrup if you prefer. I also add chia seeds for fiber, dark chocolate chips for a touch of sweetness, and ground cinnamon for flavor. The optional shredded coconut adds great texture. You can find the full recipe for these Nutty Power Bites above. Homemade energy balls stay fresh in the fridge for up to one week. Store them in an airtight container to keep them tasty. After a week, they may start to lose some flavor or texture. If you want them to last longer, consider freezing them. They can stay good in the freezer for about three months. Yes, you can make these energy balls vegan! Just use maple syrup instead of honey. Choose a plant-based nut butter, like almond or peanut butter. This way, you keep all the taste while making them vegan-friendly. You can enjoy them without any animal products and still have a healthy snack. Healthy energy balls are easy to make and fun to eat. We covered essential ingredients and how to prepare them in a few simple steps. You learned tips for texture and some tasty variations. Plus, I shared how to store them for longest freshness. Remember, you can customize these snacks to fit your taste and diet. They are a great energy boost anytime. Enjoy making them your own!
Healthy Energy Balls Nutritious and Simple Recipe
Want a quick, healthy snack that energizes you and tastes great? You’ve come to the right place! In this post, I’ll share my simple recipe
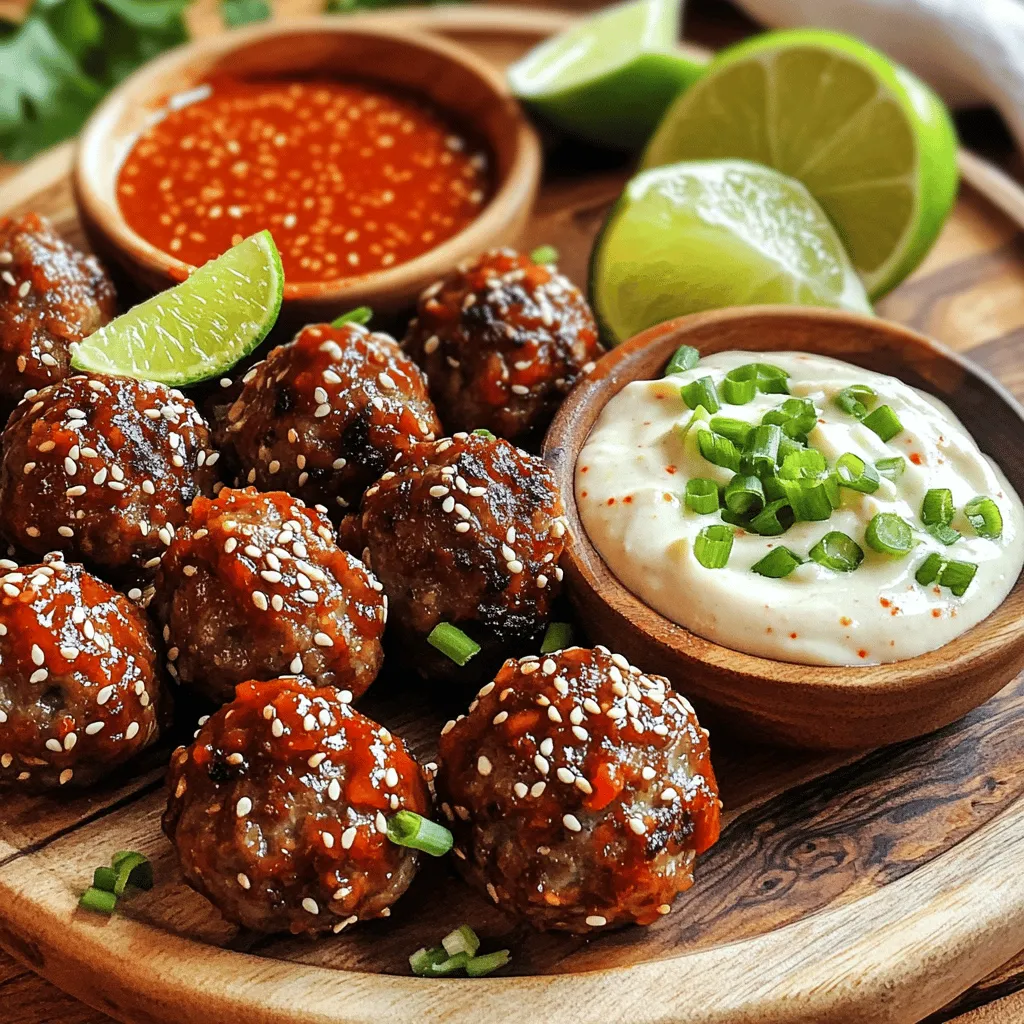
To make Korean BBQ meatballs, you will need: - 1 lb ground beef - 1/2 lb ground pork (optional for added flavor) - 1/4 cup Panko breadcrumbs - 1/4 cup green onions, finely chopped - 2 garlic cloves, minced - 1 large egg - 1 tablespoon sesame oil - 2 tablespoons soy sauce - 1 tablespoon gochujang (Korean chili paste) - 1 teaspoon fresh ginger, grated - Salt and black pepper, to taste These ingredients blend to create juicy meatballs with a rich taste. The mixture of beef and pork gives depth. Panko breadcrumbs keep them light and fluffy. For the spicy mayo dip, gather: - 1/2 cup mayonnaise - 2 tablespoons gochujang - 1 tablespoon fresh lime juice - 1 teaspoon sesame oil - 1 teaspoon honey (adjust to taste) - Optional: extra Sriracha for an additional kick This dip adds a creamy, spicy kick. Gochujang is the star, giving heat and depth. Adjust the honey to balance the spice. You can add more fun with these optional ingredients: - Chopped cilantro for freshness - Chopped bell peppers for crunch - Sesame seeds for garnish These extras boost the flavor and presentation. Feel free to mix and match to suit your taste. For the full recipe, check out [Full Recipe]. Start by gathering your ingredients. You need one pound of ground beef and half a pound of ground pork if you want extra flavor. In a big bowl, mix the ground meats with: - 1/4 cup Panko breadcrumbs - 1/4 cup green onions, finely chopped - 2 garlic cloves, minced - 1 large egg - 1 tablespoon sesame oil - 2 tablespoons soy sauce - 1 tablespoon gochujang - 1 teaspoon fresh ginger, grated - Salt and black pepper to taste Make sure to mix everything well. You can use your hands or a spoon. The goal is to blend the flavors nicely. Next, preheat your oven to 400°F (200°C). While waiting, shape the meat mixture into small balls, about one inch in diameter. This size helps them cook evenly. Place the meatballs on a baking sheet lined with parchment paper. This makes cleanup a breeze. Bake the meatballs for 20 to 25 minutes. They should be cooked through and have a nice golden-brown crust. You can check if they are done by cutting one open to see if it's no longer pink inside. While the meatballs bake, you can prepare the spicy mayo dip. In a small bowl, whisk together: - 1/2 cup mayonnaise - 2 tablespoons gochujang - 1 tablespoon fresh lime juice - 1 teaspoon sesame oil - 1 teaspoon honey Make sure the mixture is smooth. If you like it spicier, add some extra Sriracha. This dip adds a creamy and zesty touch to your meatballs. Once everything is ready, allow the meatballs to cool for a bit. Serve them on a platter and drizzle some spicy mayo over the top. Keep some extra dip on the side for dipping. Enjoy your Korean BBQ meatballs with spicy mayo dip! For the full recipe, refer to the earlier sections. To make the best Korean BBQ meatballs, focus on mixing. Start by combining the ground meats gently. If you mix too hard, the meatballs can become tough. Use your hands or a spoon. Make sure all the ingredients blend well for great flavor. When shaping the meatballs, keep them about 1 inch wide. This size cooks evenly and stays juicy. Baking is key for a crispy outside. Preheat your oven to 400°F (200°C) before you start. This helps the meatballs brown nicely. Arrange them on a lined baking sheet. This makes cleanup easy and helps with even cooking. Bake for 20-25 minutes. Use a meat thermometer to check for doneness; they should reach 160°F (71°C). Presentation matters! Serve your meatballs on a large platter. Drizzle spicy mayo dip over the meatballs before serving. This adds color and flavor. You can also use wooden skewers for easy serving. Sprinkle chopped green onions or sesame seeds on top for a fresh look. For a fun twist, serve the meatballs in lettuce wraps. This makes a great low-carb option. Provide extra spicy mayo on the side for dipping. Your guests can control the heat level. When it comes to drinks, light beers pair well with Korean BBQ flavors. You might also enjoy a fruity white wine or a refreshing iced tea. For sides, consider serving rice or quinoa. These grains soak up the tasty sauce. Kimchi is a classic side dish that adds tang and crunch. You can also serve pickled veggies to balance the rich meatballs. For a heartier meal, try a simple salad with sesame dressing. This gives freshness alongside the savory meatballs. For the complete recipe, check out the Full Recipe section. {{image_4}} You can switch up the meat in your Korean BBQ meatballs. Ground chicken or turkey works great. These meats keep the dish light and juicy. You can also use plant-based meat for a vegan option. It gives you a tasty choice while keeping it healthy. While spicy mayo is a star, you can try other dips. A sweet soy glaze adds a nice flavor. You can also use a peanut sauce for a nutty twist. If you want something creamy, try ranch dressing with a hint of gochujang. Each option brings a fun new taste. Feel free to make your meatballs unique. You can add shredded carrots for crunch. Chopped bell peppers give a sweet touch. For a spicy kick, mix in more gochujang or red pepper flakes. You can even add herbs like cilantro or basil for a fresh flavor. Each of these additions makes the dish more exciting. Explore the Full Recipe to see how these variations can fit into your cooking! After your feast, cool the leftover meatballs to room temperature. Gather a clean, airtight container for storage. Place the meatballs in the container, ensuring they fit snugly. Cover the lid tightly. Store them in the fridge for up to four days. If you want to keep them longer, freezing is a great option. To freeze meatballs, follow a simple process. First, let them cool completely. Then, arrange the meatballs in a single layer on a baking sheet. Place the sheet in the freezer for about an hour. This step helps them firm up. Once frozen, transfer them into a freezer-safe bag. Remove as much air as possible before sealing. Label the bag with the date. You can freeze them for up to three months. Reheating meatballs is easy. For the best taste, use the oven. Preheat your oven to 350°F (175°C). Spread the meatballs on a baking sheet. If they seem dry, drizzle a little broth over them. Bake for about 15 minutes or until hot. You can also reheat meatballs in the microwave. Place them on a microwave-safe plate and cover with a damp paper towel. Heat for 1-2 minutes, checking often. Enjoy your Korean BBQ meatballs with spicy mayo dip again! For the full recipe, see above. Korean BBQ meatballs are bite-sized treats packed with flavor. They mix ground beef and pork, along with fresh herbs and spices. The star ingredient is gochujang, a Korean chili paste that gives them a spicy and sweet kick. These meatballs are often served with a creamy spicy mayo dip for added richness. They are perfect for parties or a fun family meal. Yes, you can prepare these meatballs ahead of time. Mix the meatball ingredients in the morning and shape them into balls. Cover them and store them in the fridge until you are ready to bake. You can also freeze the raw meatballs. Just place them on a baking sheet, freeze until firm, then transfer them to a bag. Bake them straight from the freezer when you're ready. To adjust the spice level of the dip, change the amount of gochujang. Start with less if you prefer a milder flavor. You can also add more honey to balance the heat. For an extra kick, mix in some Sriracha. Taste as you go, and find the heat that suits your palate best. You can find the full recipe in the earlier sections. Korean BBQ meatballs are a fun way to enjoy a classic dish. This post covered key ingredients, easy steps, and helpful tips. You can customize flavors and try different proteins for variety. Storing leftovers and reheating them is simple. In short, making these meatballs is easy and rewarding. Enjoy them with your favorite drinks or sides. You’ll impress your friends and family with this tasty treat. I hope you try this recipe soon!
Korean BBQ Meatballs with Spicy Mayo Dip Delight
Ready for a flavor explosion? You’ll love these Korean BBQ Meatballs with Spicy Mayo Dip! This dish combines sweet, savory meatballs with a kick of
- 2 cups cooked shredded chicken - 1 cup shredded cheese (cheddar or Mexican blend) - 1/2 cup black beans, rinsed and drained - 1/4 cup fresh cilantro, finely chopped - 1 teaspoon ground cumin - 1/2 teaspoon garlic powder - Salt and pepper, to taste For a tasty filling, I love using shredded chicken. It stays moist and flavorful. Cheese brings richness; I often use cheddar or a Mexican blend. Black beans add texture and protein. Fresh cilantro gives a bright taste. Ground cumin and garlic powder enhance these flavors. Don't forget to add salt and pepper to taste! - 12 small corn tortillas - Vegetable oil, for frying Corn tortillas are my go-to choice. They have a lovely flavor and crisp up nicely. You can use flour tortillas, but they may not be as crunchy. Smaller tortillas work better for taquitos. They roll easily and hold the filling well. - Optional toppings: sour cream, guacamole, salsa For toppings, I suggest sour cream for creaminess. Guacamole adds healthy fats and flavor. Salsa brings a zesty kick. You can also serve taquitos with sides like rice, beans, or salads. These help balance the meal and make it hearty. For the full recipe, check out the details I provided above! To start, we need to mix our filling. Grab a large bowl and add: - 2 cups cooked shredded chicken - 1 cup shredded cheese (cheddar or Mexican blend) - 1/2 cup black beans, rinsed and drained - 1/4 cup fresh cilantro, finely chopped - 1 teaspoon ground cumin - 1/2 teaspoon garlic powder - Salt and pepper, to taste Mix all these ingredients well. Make sure the flavors blend together. This helps create a tasty filling for our taquitos. Now it is time to roll our taquitos. First, we need to heat the tortillas. Preheat a dry skillet over medium heat. Warm each corn tortilla for about 30 seconds on each side. This makes them soft and easy to roll without tearing. Next, take a tortilla and lay it flat. Place about 2 tablespoons of the chicken filling near one edge. Roll the tortilla tightly from the filled edge to the other side. If the ends come loose, you can use a toothpick to hold them together. Repeat this with all the tortillas. For frying, we want the oil to be hot. In a deep skillet, heat about an inch of vegetable oil over medium-high heat. Once the oil shimmers, it's ready. Carefully place the rolled taquitos seam-side down into the skillet. Avoid overcrowding the pan. Fry for 3-4 minutes on each side, or until they are golden brown and crispy. You may need to fry them in batches to keep the oil hot. When they are crispy, move the taquitos to a plate lined with paper towels. This helps soak up any extra oil. Serve them hot with your favorite toppings from the Full Recipe! Frying vs. Baking Taquitos I often fry my taquitos for that perfect crunch. Frying gives them a golden, crispy shell. If you want a healthier option, you can bake them. Preheat your oven to 425°F (220°C) and place the taquitos on a baking sheet. Brush them lightly with oil. Bake for about 15-20 minutes until they are crispy. How to Keep Taquitos Crispy To keep your taquitos crispy, place them on a wire rack after frying. This allows air to circulate around them. If you stack them on a plate, they may get soggy. Serve them right away for the best crunch. Adjusting Seasoning Tips Taste your filling before rolling. Add more salt, pepper, or spices as needed. If you love heat, try adding chili powder or jalapeños. A little lime juice can also brighten the flavors. Recommended Cheese Melting Tips For great cheese melt, use a blend of cheeses. Cheddar and Monterey Jack work well. Ensure your cheese is at room temperature before mixing. This helps it melt smoothly when cooked. Plating Options for Serving Arrange the taquitos on a colorful platter. You can lean them against each other for a nice look. Serve small bowls of toppings like sour cream, guacamole, and salsa on the side. Garnishing Suggestions Add some fresh cilantro or chopped green onions on top for color. Lime wedges also add a fresh touch. These small details make a big difference in how your taquitos look and taste. For the full recipe, check out the Crispy Loaded Chicken Taquitos. {{image_4}} You can fill taquitos with many tasty options. For vegetarians, black beans and cheese work great. You can also add fresh veggies like bell peppers or spinach. Try using: - 1 can of black beans, rinsed and drained - 1 cup of shredded cheese (like cheddar or Monterey Jack) - Chopped veggies (like bell peppers or corn) For meat lovers, ground beef, pork, or even tofu are excellent choices. The flavor pairs well with spices. You can use: - 1 pound of ground beef or pork, cooked - 1 cup of crumbled tofu, seasoned Sauces add excitement to your taquitos. Homemade salsa is a must. You can make it fresh with tomatoes, cilantro, and lime juice. Try these easy recipes: - Tomato Salsa: Mix diced tomatoes, onion, cilantro, and lime juice. - Tomatillo Salsa: Blend tomatillos, jalapeños, garlic, and cilantro. Other dipping sauces are also fun. Try a creamy avocado dip or tangy ranch dressing to match your taste. You can get creative with taquitos beyond savory fillings. Dessert taquitos are a fun treat! Fill them with sweet options like: - Cinnamon sugar apples - Nutella and bananas Another twist is making taquito sliders. Use mini tortillas or cut larger ones in half. Fill them with your favorite ingredients. They make great snacks for parties! For a full recipe on making these delicious taquitos, check out the [Full Recipe]. - Refrigeration Guidelines: Place leftover taquitos in an airtight container. They stay fresh for about 3 days in the fridge. Make sure they cool down before sealing them. This keeps them crispy longer. - Freezing Taquitos: You can freeze taquitos too! Wrap them tightly in plastic wrap or foil. Place them in a freezer bag. They last up to 3 months. Thaw them in the fridge overnight when ready to eat. - Best Practices for Maintaining Crispiness: To keep taquitos crispy, use the oven. Preheat it to 400°F (200°C). Place the taquitos on a baking sheet. Bake for about 10-12 minutes until they are hot and crispy again. - Microwave vs. Oven Heating: The microwave is quick but can make them soft. If you need speed, use it. Heat on high for 30-60 seconds. For better texture, go with the oven. - How Long Taquitos Last in the Fridge: Taquitos last about 3 days in the fridge when stored properly. After that, the taste and texture may go downhill. - Signs of Spoilage: Check for any off smell or mold. If they look dry or hard, it's best to toss them. Always trust your senses! For a delightful taquito experience, try the Full Recipe for crispy loaded chicken taquitos! Taquitos are small rolled tortillas filled with meat, cheese, or beans. They are often crisp and golden. The name "taquito" means "little taco" in Spanish. They originated in Mexico, where they are a popular street food. Taquitos have deep roots in Mexican culture. They represent comfort food and family gatherings. People enjoy them at celebrations and parties. Each region has its own take on taquitos, often adding local ingredients and flavors. Yes, you can make taquitos ahead of time. Prepare the filling and roll them up. Store them in the fridge for up to a day. This way, they stay fresh and ready to fry. For freezing, place the rolled taquitos on a baking sheet. Freeze them for a few hours until firm, then transfer them to a freezer bag. They can last up to three months in the freezer. You can bake taquitos for a healthier option. Preheat your oven to 400°F (200°C). Place rolled taquitos on a baking sheet. Brush them lightly with oil for crispiness. Bake for 15-20 minutes or until golden brown. Using an air fryer is another great option. Set your air fryer to 375°F (190°C). Arrange the taquitos in a single layer. Cook them for about 10-12 minutes, flipping halfway through. Yes, taquitos can be gluten-free. Use corn tortillas instead of flour ones. Most corn tortillas are naturally gluten-free. Always check labels to ensure they don’t contain gluten. If you want more options, try using other alternatives. There are gluten-free tortilla brands available. You can also make your own using gluten-free flour. This allows you to enjoy taquitos while staying gluten-free. Taquitos are simple and fun to make. You learned about key ingredients like chicken, cheese, and tortillas. We covered how to prepare, assemble, and cook for the best taste. You now know ways to keep them crispy and tips for perfect flavor. Plus, I shared various filling ideas and storage tips. Whether you choose standard or creative versions, taquitos can fit any meal. Enjoy making them your way!
Taquitos That Wow Deliciously Crunchy Recipe
Get ready to impress your taste buds with taquitos that crunch and wow! This deliciously crunchy recipe will show you how to make taquitos bursting
To make Cheesy Taco Sticks, you will need a few simple ingredients. Here’s the list: - Crescent roll dough - Seasoned ground beef - Shredded cheddar cheese - Taco sauce - Diced tomatoes - Sliced black olives (optional) - Taco seasoning - Egg wash - Cooking spray - Fresh cilantro These ingredients create a tasty treat that is quick to prepare. Each component adds flavor and texture. The crescent roll dough gives a buttery, flaky base. The seasoned ground beef provides protein and a savory taste. Shredded cheese melts beautifully, adding creaminess. Taco sauce and diced tomatoes enhance the flavor with a zesty kick. Black olives add a salty touch if you choose to include them. Taco seasoning gives the dish its signature taco flavor. An egg wash helps achieve a golden-brown crust when baking. Finally, fresh cilantro can brighten the dish with a fresh finish. You can find the full recipe to guide you through the cooking process. - Preheat the oven to 375°F (190°C). - In a bowl, mix the seasoned ground beef, taco sauce, shredded cheddar cheese, diced tomatoes, and sliced black olives. Stir well and set aside. - Unroll the crescent roll dough on a flat surface. Pinch the seams to create a large rectangle. - Use a knife to slice the dough into 1-inch wide strips. - At one end of each strip, add a tablespoon of the taco filling. - Fold the other end over the filling and pinch the edges to seal. - Arrange the filled taco sticks on a baking sheet, leaving space between each. - Brush the tops with beaten egg for a shiny finish. - Bake for 12-15 minutes until golden brown and puffed up. For the full recipe, check the detailed instructions. Enjoy making these tasty snacks! To keep the filling from leaking, seal the edges well. Pinch the dough tightly after filling it. If you use too much filling, it might ooze out. Adjust your spices for flavor by tasting the filling mixture before sealing. You can add more taco seasoning or even a pinch of cayenne for heat. Serve your Cheesy Taco Sticks with sides like salsa or guacamole. A fresh salad adds a nice touch too. For presentation ideas, arrange the sticks on a colorful platter. You can also add a bowl of extra taco sauce for dipping and make it more appealing. You can use different types of cheese to boost flavor. Try pepper jack for a spicy kick or a blend of cheeses for depth. Adding extra toppings like chopped green onions or jalapeños can enhance the taste. Fresh herbs like cilantro can also brighten the flavors, making each bite more exciting. {{image_4}} You can easily make Cheesy Taco Sticks meat-free. Use black beans or lentils as a substitute for meat. They add protein and flavor without meat. You can also add vegetables like bell peppers, corn, or zucchini. These veggies bring freshness and crunch to your filling. Want to change it up? Try zesty chicken taco sticks. Use seasoned shredded chicken instead of beef. Mix in some salsa for a kick. If you like spice, go for spicy beef options. Add jalapeños or hot sauce to the filling. These changes keep the recipe fun and exciting. If you need a gluten-free option, use gluten-free dough. Many stores sell it, or you can make your own. Adjust the filling ingredients to ensure they are gluten-free as well. Always check labels for hidden gluten. These swaps let everyone enjoy Cheesy Taco Sticks. For the full recipe, check out the earlier section. To keep your Cheesy Taco Sticks fresh, store them in the fridge. Use an airtight container. They stay good for about three days. After that, the texture might change, and they may lose flavor. When it's time to enjoy leftovers, reheat them carefully. You can use an oven or air fryer for the best results. Preheat your oven to 350°F (175°C) and bake for about 10 minutes. This keeps them crispy. If you prefer a microwave, heat them in short bursts of 30 seconds. Check often to avoid drying them out. For long-term storage, you can freeze them. Wrap each stick in plastic wrap and place them in a freezer bag. They last up to three months in the freezer. Yes, you can enjoy Cheesy Taco Sticks cold! They still taste great and are perfect for a quick snack. Serve them with a side of salsa or guacamole for added flavor. You can also slice them into bite-sized pieces for a fun party platter. It takes about 15 minutes to prep and 12-15 minutes to bake. In total, you will spend around 30 minutes. This quick snack fits perfectly into busy days or last-minute gatherings. Yes, you can prepare them ahead of time. Simply make the filling and roll the dough sticks. Cover them and store them in the fridge for a few hours. Bake them when you are ready to serve. This way, you save time and still enjoy fresh snacks. Cheesy Taco Sticks pair well with many sides. Here are some great options: - Salsa - Guacamole - Sour cream - Fresh veggies - Rice or beans These additions create a fun, complete meal. To avoid sticking, use cooking spray on your baking sheet and the work surface. Lightly coat the crescent roll dough as you roll it out. This simple step helps ensure your taco sticks pop out easily after baking. Yes, you can freeze Cheesy Taco Sticks. After baking, let them cool completely. Then, wrap each stick tightly in plastic wrap and place them in a freezer bag. To thaw, leave them in the fridge overnight or reheat directly from the freezer. Enjoy these tasty snacks anytime! This blog post shared a fun recipe for Cheesy Taco Sticks. We discussed the essential ingredients and provided easy steps for preparation and baking. I included tips for perfecting your dish and serving suggestions to impress your guests. Whether you prefer vegetarian options, different fillings, or need gluten-free alternatives, there are many ways to enjoy this recipe. Remember to properly store leftovers and reheat them to keep the flavor intact. Enjoy your cooking adventure!
Cheesy Taco Sticks Tasty Snack for Any Occasion
Looking for a fun and tasty snack? Cheesy Taco Sticks are perfect for any occasion! This easy recipe combines cheesy goodness with zesty taco flavors,
To make Fried Sliced Mushrooms with Ranch, you need the right ingredients. Here’s what you will need: - 500g fresh button mushrooms, sliced into 1/4 inch thick pieces - 1 cup all-purpose flour - 1 teaspoon garlic powder - 1 teaspoon onion powder - 1 teaspoon smoked paprika (for added depth) - Salt and freshly ground black pepper to taste - 2 large eggs, beaten until smooth - 1 cup panko bread crumbs (for extra crunch) - Oil for frying (vegetable or canola recommended) - 1/2 cup ranch dressing (store-bought or homemade) - Fresh parsley, chopped (for garnish) These ingredients create a crispy, flavorful dish. Fresh mushrooms are key for texture and taste. The flour and spices add flavor, while panko gives a nice crunch. Eggs help the coating stick, and ranch dressing provides a creamy dip. Enjoy gathering these simple, accessible ingredients. For the full recipe, check out the details provided above. To start, let's get our mushrooms ready. First, clean the fresh button mushrooms with a damp cloth. This gently removes dirt without harming them. Next, slice each mushroom into thick pieces, about 1/4 inch thick. Make sure the slices are even. This helps them cook at the same rate. While you work, set up your frying station. Line up your bowls for coating and have your oil nearby. Now, it’s time for the fun part: the coating! In a medium bowl, mix the all-purpose flour, garlic powder, onion powder, smoked paprika, salt, and pepper. Whisk these ingredients together until they blend well. This mix will be your dry batter. In another bowl, beat the large eggs until smooth. This will help the batter stick. Next, pour the panko bread crumbs into a third bowl. You will use these for that extra crunch. Take a mushroom slice and dredge it in the flour mix first. Make sure it’s fully coated, then tap off any extra flour. After that, dip the mushroom in the beaten eggs. Let any extra egg drip back into the bowl. Finally, press the slice into the panko bread crumbs, ensuring it’s well-covered. Let’s heat things up! Pour a generous amount of oil into a deep frying pan. Aim for about 1/2 inch deep. To check if the oil is hot enough, drop in a small piece of bread. If it sizzles, you are ready to fry. Carefully add the coated mushroom slices to the pan, but don’t overcrowd them. Fry each batch for about 3-4 minutes on one side. You want them to turn golden brown and crispy. Flip the mushrooms, cooking for another 3-4 minutes. Once they are ready, use a slotted spoon to move them to a plate lined with paper towels. This helps drain the excess oil. Serve those crispy fried mushrooms warm with ranch dressing for dipping. Enjoy! For the full recipe, check the earlier section. To get those crispy fried mushrooms just right, the thickness of your slices matters. I recommend slicing your mushrooms to about 1/4 inch thick. This size helps them cook evenly and stay crispy. If they are too thin, they may burn. If they are too thick, they won’t cook well. Next, let’s talk oil temperature. The oil should be hot enough for frying but not smoking. I suggest heating the oil to about 350°F (175°C). A quick way to check is to drop a small piece of bread into the oil. If it sizzles right away, you’re ready to fry! To take your mushrooms to the next level, consider adding spices. Along with the garlic and onion powder in your batter, try a pinch of cayenne for heat or some dried oregano for an herby twist. These tiny changes can turn a simple dish into something special. You can also add fresh herbs to your ranch dressing. Chopped dill or chives can brighten the flavor. Mixing these with the ranch dressing gives it a fresh taste that pairs perfectly with the mushrooms. Fried sliced mushrooms taste amazing with ranch dressing. The creamy texture of the ranch complements the crunch of the mushrooms. You can serve them warm, right after frying, for the best experience. For extra sides, think about simple options. A fresh salad or some crispy potato wedges work well. Both add color and substance to your meal, making it even more delightful. Enjoy your cooking adventure with this recipe! For the complete recipe, check out the Full Recipe section. {{image_4}} You can switch up the breading for fried mushrooms. Instead of panko, try different bread crumbs. Use cornflake crumbs for a crunchier texture. You can also experiment with crushed nuts for a unique twist. If you need gluten-free options, almond flour or gluten-free bread crumbs work great. Both will give a tasty result while keeping it light. Ranch dressing is a classic choice for dipping. If you want to make your own, combine sour cream, buttermilk, garlic powder, and fresh herbs. This gives a fresh taste that pairs well with fried mushrooms. You can also try other dips. A spicy aioli or a tangy barbecue sauce can add new flavors. Keep the options open for your taste buds! While button mushrooms are popular, you can use other types. Cremini mushrooms add a deeper flavor. Shiitake mushrooms give a meaty texture and taste. If you want a more earthy flavor, try portobello mushrooms. Each kind brings its own flair to the dish, so don't be afraid to mix things up. To keep your fried mushrooms fresh, cool them quickly. Place them on a wire rack. This helps air circulate and keeps them crispy. Avoid letting them sit in a pile on a plate. After they cool, store them in a container. Use an airtight container to keep moisture out. When you're ready to enjoy leftovers, you want them crispy again. The best way is to use an oven. Preheat your oven to 375°F (190°C). Spread the mushrooms on a baking sheet. Heat for about 10 minutes or until warm. This method helps maintain their crunch. You can also use an air fryer for great results. You can freeze fried mushrooms, but they lose some crispness. To freeze, let them cool completely. Place them in a single layer on a baking sheet. Freeze for a few hours until solid. Then, transfer them to a freezer bag. When you want to eat them, thaw in the fridge overnight. Reheat them in the oven for the best texture. To make the batter stick well, follow these tips: - Dry the mushrooms: Make sure your mushrooms are dry before coating. Moisture can make the batter slide off. - Use flour first: Dredge the sliced mushrooms in flour first. This helps create a base for the egg to stick. - Let excess flour fall: After coating, gently shake off any extra flour. Too much can make the batter clump. - Egg wash: Dip the floured mushrooms in the egg wash quickly. This helps the crumbs adhere better. - Press the crumbs: After dipping in panko, press gently. This ensures the crumbs stick well before frying. Yes, you can use many types of mushrooms for this recipe. Here are some great options: - Cremini mushrooms: These have a deeper flavor and pair well with ranch. - Portobello mushrooms: Slice them thick for a heartier bite. - Shiitake mushrooms: Their unique taste adds an exciting twist. - Oyster mushrooms: These are delicate and fry up beautifully. Feel free to experiment with different varieties to find your favorite! Pairing is key to a great meal. Here are some simple side dish ideas: - Fresh salad: A crisp garden salad balances the fried mushrooms. - Veggie sticks: Carrots or celery with ranch make a crunchy side. - Potato wedges: Crispy potato wedges complement the mushrooms well. - Garlic bread: This adds a tasty, warm element to your meal. These options will help round out your dinner and make it even more enjoyable. For the Full Recipe, check out the earlier section! In this blog post, we explored how to make delicious fried sliced mushrooms with ranch dressing. We covered the ingredients, step-by-step instructions, and tips for crispy results. You learned about storage options and tasty variations. Now, you have all the tools to create a dish that is both tasty and fun. Enjoy experimenting with different flavors and serving ideas. Your homemade fried mushrooms will impress your friends and family. Happy cooking!
Fried Sliced Mushrooms with Ranch Delightful Dish
Are you ready to whip up a dish that’s crispy, tasty, and finger-licking good? Fried sliced mushrooms with ranch dressing are your new best friend