Appetizers
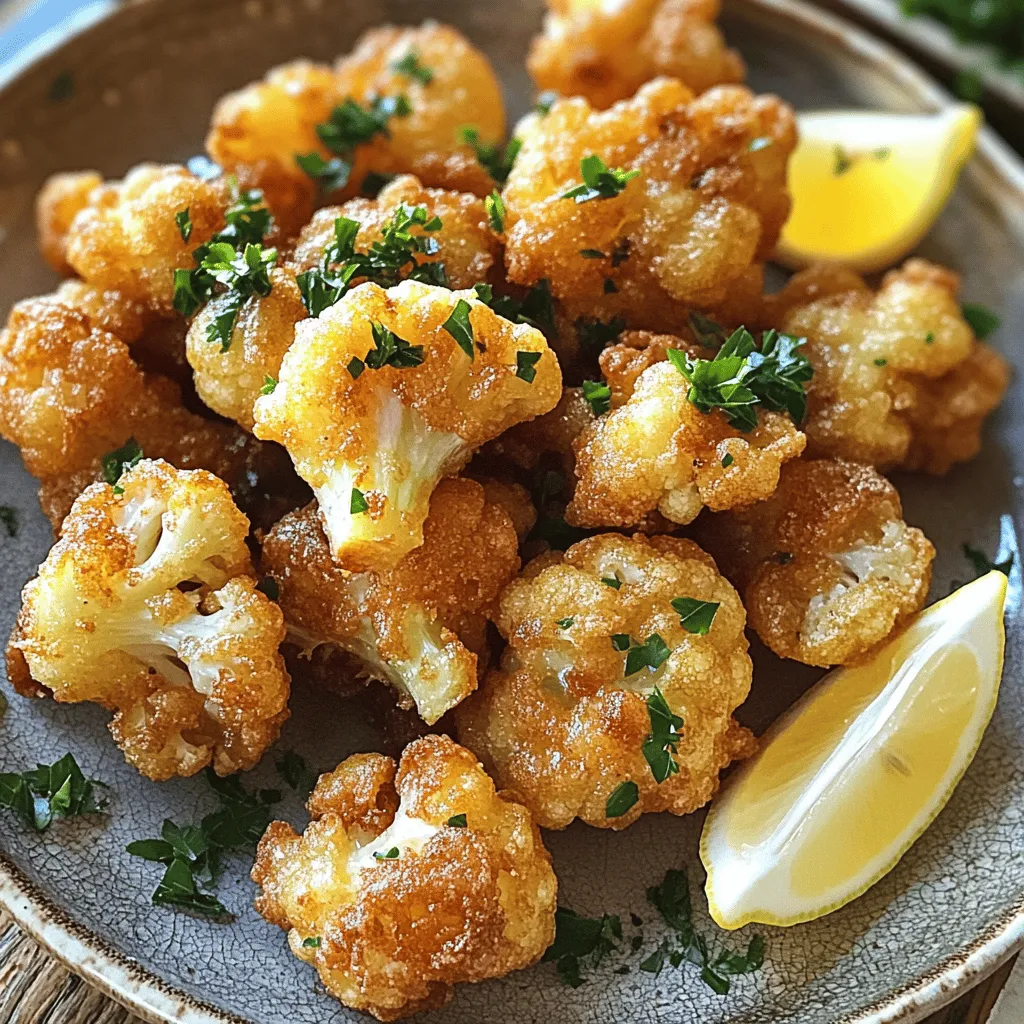
Fried Cauliflower Crispy and Flavorful Delight
Are you ready to take your snacking game to a whole new level? Fried cauliflower is a crispy and flavorful delight that’s easy to make!
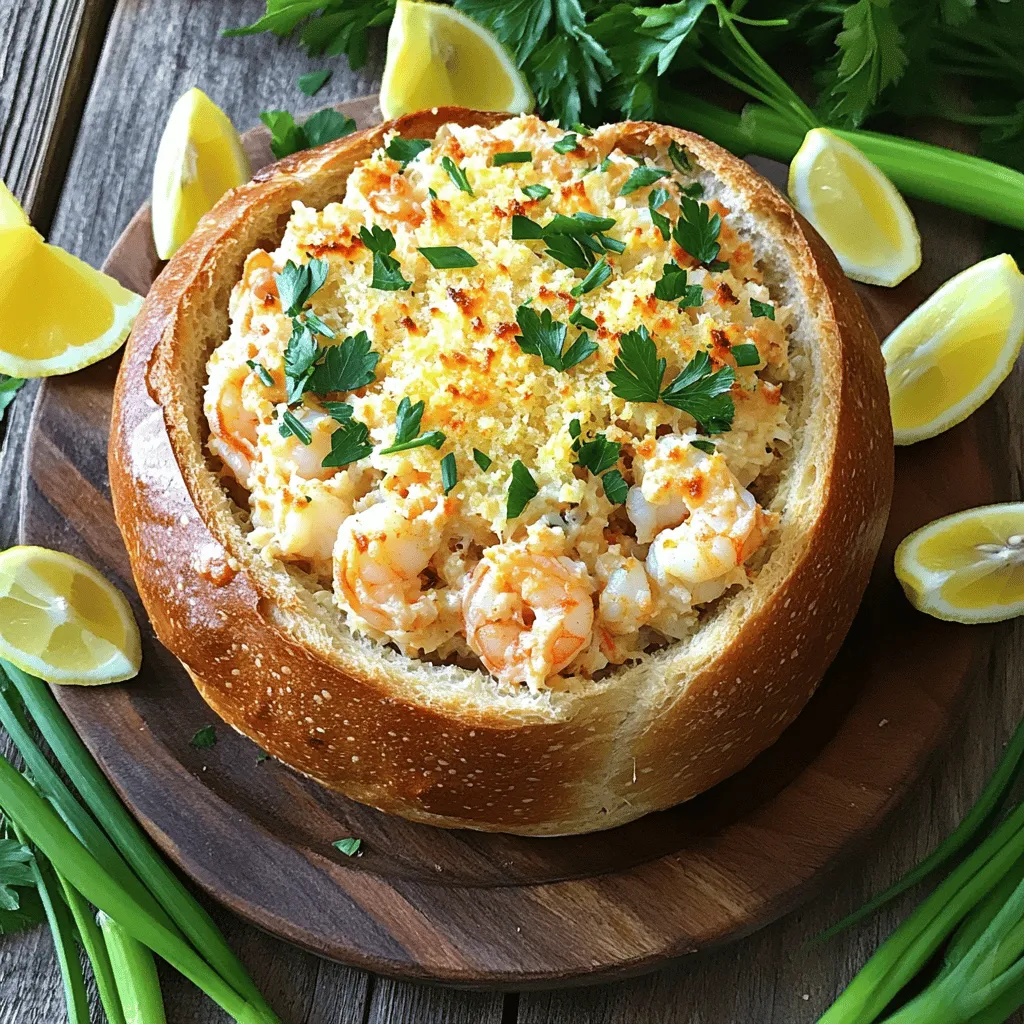
Stuffed Seafood Bread Bowl Delightful and Savory Dish
Are you ready to impress with a stunning dish? The Stuffed Seafood Bread Bowl is both delightful and savory! This amazing recipe combines fresh seafood,

Spicy Mexican Corn Bites Flavorful Snack Recipe
Craving a fun and flavorful snack? You’ve come to the right place! My Spicy Mexican Corn Bites are an exciting blend of fresh corn, zesty
![To make this fresh salad, you need: - 2 cups fresh strawberries, hulled and thinly sliced - 8 ounces fresh mozzarella cheese, sliced into rounds - 1 cup fresh basil leaves, gently washed - 1/4 cup balsamic glaze, for drizzling - 2 tablespoons high-quality extra-virgin olive oil - Salt and freshly cracked black pepper, to taste These ingredients are the stars of the dish. Choose ripe strawberries for the best flavor. Fresh mozzarella should be soft and creamy. Use basil leaves that are vibrant and fragrant. While the dish is great as is, you can add: - Whole basil leaves for decoration - Crushed red pepper flakes for spice - Chopped nuts, like pistachios, for crunch These garnishes can elevate your salad’s look and taste. They add texture and extra flavor, making your Caprese even more enjoyable. You can swap some ingredients if needed: - Use burrata cheese instead of mozzarella for creaminess. - Try a different fruit, like peaches or nectarines, for a twist. - Use flavored balsamic vinegar if you don’t have glaze. These substitutions keep the essence of the dish while letting you experiment. They can help you use what you have on hand, making the recipe flexible and fun. For the full recipe, check out Balsamic Strawberry Caprese Delight. To start, gather all your ingredients. Rinse the strawberries under cold water. Remove the green tops, called hulls. Slice each strawberry into thin, even pieces. This helps with the bite and look of your salad. Next, take your mozzarella cheese and slice it into rounds. Aim for similar thickness as the strawberries. This will help with layering later. Now, wash the basil leaves gently. Grab a large serving platter. Begin layering by placing a slice of mozzarella flat on the platter. On top, add a slice of strawberry. Then, place a fresh basil leaf on the strawberry. Repeat this process, alternating between mozzarella, strawberry, and basil. Keep going until you use all your ingredients. The colors should look bright and fresh. Once you finish layering, it’s time for the balsamic glaze. Drizzle it generously over the arranged salad. This will add sweetness and tang. Next, drizzle the extra-virgin olive oil over the dish. It brings a rich flavor that ties everything together. Now, season with salt and freshly cracked black pepper to taste. This step is key for enhancing the flavors. Let the dish sit at room temperature for about five minutes. This resting time helps the flavors mix. Enjoy your Balsamic Strawberry Caprese! For the full recipe, check out the details above. To boost the taste of your Balsamic Strawberry Caprese, use ripe strawberries. They add sweetness and flavor. Look for strawberries that are bright red with no white spots. Fresh mozzarella is key too. Choose high-quality cheese for a creamy and rich taste. For the balsamic glaze, find a thicker version. A thicker glaze clings to the strawberries and adds more flavor. Finally, sprinkle salt and black pepper right before serving. This step brings all the flavors together. This salad is great for any meal. Serve it as a starter at a dinner party or a light lunch. You can also pair it with grilled chicken or fish for a complete meal. If you want to impress guests, serve it with crusty bread. This adds a nice crunch and makes the meal more filling. You can even make mini versions for a fun appetizer. Just layer smaller pieces on toothpicks for easy eating. Presentation is key for a dish like this. Use a large white platter to make the colors pop. The red strawberries and green basil will look stunning against the white cheese. Arrange the layers in a circular pattern for a beautiful display. You can also add whole basil leaves around the dish for flair. Drizzle the balsamic glaze just before serving for a shiny finish. This meal not only tastes good but also looks amazing on the table. {{image_4}} You can change the fruits in Balsamic Strawberry Caprese. In summer, try peaches or nectarines. They add a sweet and juicy touch. In fall, use figs for a rich flavor. In winter, consider pomegranate seeds for a pop of color and taste. Each season brings fresh options to keep your salad exciting. This recipe is quite flexible for different diets. If you want a vegan version, swap mozzarella for vegan cheese or avocado slices. For a low-carb option, skip the cheese and add more basil and strawberries. You can also use a sugar-free balsamic glaze to cut down on sugar while still enjoying great taste. Mixing flavors can make your salad shine even more. Try adding a sprinkle of crushed red pepper for heat. A drizzle of honey can add sweetness, balancing the tangy balsamic glaze. For a savory note, mix in some chopped olives or sun-dried tomatoes. These changes can help you create a unique dish each time. Store your Balsamic Strawberry Caprese in the fridge. Use an airtight container. It will stay fresh for up to two days. The flavors will blend more over time. Check the strawberries for freshness before serving. Avoid long-term storage. This salad tastes best when fresh. If you must store it longer, keep each ingredient separate. Store strawberries, mozzarella, and basil in their own containers. Combine them just before serving to maintain taste and texture. You do not need to heat this salad. Enjoy it cold for the best flavor. If you want a warm dish, consider a Caprese baked dish instead. That way, you can enjoy the flavors in a different way. For a full recipe, check out the [Full Recipe]. The Balsamic Strawberry Caprese tastes best when fresh. You can store it in the fridge for 1 to 2 days. However, the strawberries may get soft and lose their crunch. To keep the salad fresh, avoid adding balsamic glaze until you are ready to serve. This way, the flavors stay bright and vibrant. You can prep the ingredients ahead of time. Slice the strawberries and mozzarella a few hours before serving. Store them separately in the fridge. Assemble the salad just before you eat. This keeps the salad looking fresh and tasty. If you must prepare it in advance, assemble it up to 4 hours before serving, but add the glaze later. Balsamic Strawberry Caprese pairs well with grilled chicken or fish. It also complements a simple pasta dish. For a light meal, serve it with crusty bread or a fresh green salad. The bright flavors of the salad work well with savory dishes. You can even enjoy it as a side for a summer barbecue. For the full recipe, check out the Full Recipe section. This article covered everything you need for a great Balsamic Strawberry Caprese. We explored the ingredients, steps to make it, and even some tips for serving. You learned about ingredient swaps and tasty variations. Remember, it’s all about balancing flavors and getting creative. Enjoy this dish fresh, or store it for later. With the right prep and care, you can savor it again. Now, go ahead and impress your guests with this delightful recipe!](https://tossedflavors.com/wp-content/uploads/2025/05/b7b08606-8cc5-4fd1-89dc-d72c9a653d9e.webp)
Balsamic Strawberry Caprese Fresh and Flavorful Salad
Looking for a fresh twist on a classic salad? Meet the Balsamic Strawberry Caprese! This vibrant dish combines sweet strawberries, creamy mozzarella, and rich balsamic

Lemon Pepper Corn on the Cob Bold Flavor Recipe
Get ready to take your summer cookouts to the next level with my Lemon Pepper Corn on the Cob recipe! This dish combines sweet, juicy

Savory Salmon Tartine with Dill Pickle Mustard Delight
Get ready to elevate your snack game with my Savory Salmon Tartine with Dill Pickle Mustard Delight. This crisp, flavorful dish combines fresh smoked salmon,

Air Fryer Calzones Crispy and Flavorful Delight
Are you ready to elevate your kitchen game? Air Fryer Calzones are crispy, flavorful, and oh-so-easy to make! With simple ingredients and quick steps, you’ll
![The ingredients for crispy honey garlic salmon bites are simple and easy to find. Here’s what you will need: - 1 pound salmon fillet, skin removed and cut into bite-sized pieces - 1/3 cup honey - 1/4 cup soy sauce (or tamari for gluten-free) - 2 cloves garlic, minced - 1 teaspoon ginger, freshly grated - 1 tablespoon cornstarch - 1/2 teaspoon freshly ground black pepper - 1/4 teaspoon chili flakes (optional for added heat) - 2 tablespoons sesame oil or any cooking oil of your preference - 1 tablespoon finely chopped green onions (for garnish) - Toasted sesame seeds (for garnish) Gather these ingredients before you start cooking. The salmon should be fresh and firm. The honey gives the dish a sweet touch, while soy sauce adds depth. Garlic and ginger bring a nice punch of flavor. The cornstarch is key for that crispy texture. Feel free to adjust the chili flakes based on your spice level. This dish is all about balance. You can find the full recipe in the earlier section, which will guide you through the cooking process. Enjoy creating these tasty bites! First, gather your ingredients. In a medium bowl, mix honey, soy sauce, minced garlic, grated ginger, and black pepper. If you like spice, add chili flakes. Whisk until everything blends well. Next, toss in the salmon pieces. Make sure they are fully coated in the marinade. Cover the bowl and place it in the fridge for 20 minutes. This step helps the salmon soak up all the tasty flavors. After marinating, take the salmon out of the fridge. Drain the salmon pieces and set the marinade aside for later. Now, sprinkle cornstarch over the salmon. Toss them gently to coat each piece evenly. This will give a crispy texture when cooked. Next, heat sesame oil in a skillet over medium-high heat. Wait until the oil shimmers before adding the salmon. Carefully place the salmon bites in the hot skillet. Try not to overcrowd the pan; cook in batches if needed. Fry the salmon for about 3 to 4 minutes on each side. Look for a golden brown color and a crispy surface. Once cooked, take the salmon out and place it on paper towels to absorb excess oil. In the same skillet, pour in the reserved marinade. Bring it to a gentle boil and let it simmer for 2 to 3 minutes. This thickens the sauce, enhancing the flavor. Drizzle the sauce over the crispy salmon bites. Finish with chopped green onions and toasted sesame seeds. Enjoy the deliciousness of your crispy honey garlic salmon bites! For the full recipe, check out the [Full Recipe]. To get that crunchy outside, use cornstarch. It forms a great layer on the salmon. Dust each piece well for the best results. Make sure you don’t overcrowd the pan. When you add too many pieces, they steam instead of fry. This can make them soggy. Cook in batches if needed to keep them crispy. Feel free to change the marinade to suit your taste. If you like it sweeter, add more honey. For a kick, increase the chili flakes. Marinating longer gives deeper flavor. Aim for at least 30 minutes if you can. This extra time helps the salmon absorb all those tasty notes. Serve your crispy honey garlic salmon bites with steamed rice or a light salad. This makes a balanced meal. For a great look, present them on a platter with fresh greens. Drizzle extra sauce on top for flair. Add garnishes like chopped green onions and toasted sesame seeds. They add color and crunch. Check out the Full Recipe for more ideas on how to plate this dish beautifully! {{image_4}} You can swap salmon for other fish or proteins. Try using shrimp, chicken, or tofu for a twist. Each option brings its unique taste and texture. You can also explore different sweeteners in the marinade. Maple syrup or agave can replace honey if you prefer. These choices will still give a sweet flavor while changing the dish. For a fresh twist, add citrus zest to the marinade. Lemon or lime zest brightens the dish and enhances the flavor. You can also incorporate herbs for added aroma and taste. Fresh basil, cilantro, or parsley can give your salmon bites a new depth. These small changes can make a big difference in flavor. Baking or grilling the salmon bites offers a healthier choice. Simply preheat your oven or grill, and cook the salmon until golden. This method cuts down on oil while keeping the bites tasty. You can also use an air fryer for a neater cooking process. It cooks evenly and gives you that crispy texture without much oil. Just set the temperature and time, and enjoy the ease of cooking. For more details, check out the [Full Recipe]. After cooking, let your salmon bites cool. Place them in an airtight container for storage. They last in the fridge for 3 to 4 days. Make sure to keep them covered to avoid drying out. If you want to keep them fresh, eat them quickly. The sooner you enjoy them, the better the taste! To freeze leftovers, first let the salmon bites cool completely. Place them in a freezer-safe bag or container. This way, they will stay fresh for up to 3 months. When you want to eat them, thaw them overnight in the fridge. For reheating, bake or pan-fry them for a few minutes. This will keep them crispy. Storing salmon bites changes their texture. They may lose some of their crispiness over time. The honey garlic flavor remains, but it could taste less fresh. For the best experience, eat them soon after cooking. If you must store them, consider using them in a stir-fry or salad after reheating. This adds new life to your dish! I recommend marinating salmon for at least 20 minutes. This time lets the flavors soak in well. If you can, try to marinate for up to an hour. Longer marinades add deeper flavor, but avoid more than two hours. Too much time can make the salmon mushy. Yes, you can use frozen salmon. Just make sure to thaw it first. The best way is to leave it in the fridge overnight. If you need it faster, you can run it under cold water. Once thawed, follow the same steps as for fresh salmon. This ensures your dish stays tasty. These salmon bites go well with many sides. Here are some great options: - Steamed rice - Quinoa - Fresh salad - Roasted vegetables - Crispy potato wedges These sides balance the sweetness and richness of the salmon. To make this dish gluten-free, swap soy sauce for tamari. Tamari tastes similar but contains no wheat. You can also check that your honey is pure and gluten-free. This way, you can enjoy the same great flavor without gluten. Yes, you can prepare this dish in advance. Marinate the salmon the night before for even better flavor. Cook it just before serving. If you have leftovers, store them in the fridge. They remain good for up to three days. When reheating, do it gently to keep the salmon moist. For the full recipe, check the section above. This blog post shared a simple, tasty recipe for crispy honey garlic salmon bites. You learned how to marinate fish, achieve crispiness, and consider variations. With these tips, you can impress anyone at your table. Keep in mind the storage advice and side dish suggestions for the best experience. Cooking should be fun and rewarding. Now, get in the kitchen and enjoy your meal!](https://tossedflavors.com/wp-content/uploads/2025/05/aa23bcb2-9255-46d9-808b-04e9ad447eb9.webp)
Crispy Honey Garlic Salmon Bites Easy and Flavorful Dish
Are you ready to elevate your dinner game? Crispy Honey Garlic Salmon Bites are a quick, tasty option that will impress anyone at your table.
![- Pizza Dough: Store-bought or Homemade - Cheese: Mozzarella for a cheesy texture - Toppings: Sliced Pepperoni - Seasoning: Garlic Powder, Dried Oregano, Red Pepper Flakes - Garnish: Fresh Basil Leaves (optional) Gathering the right ingredients is key to making the best Cheesy Pepperoni Pizza Roll-Ups. You can choose store-bought pizza dough for speed or make your own for fun. I often opt for fresh mozzarella. Its meltiness adds a great texture to each bite. Sliced pepperoni is a must for that classic pizza flavor. For seasoning, I suggest garlic powder, dried oregano, and red pepper flakes for a little kick. These spices elevate the taste and aroma. Fresh basil leaves make a lovely garnish, bringing color and freshness to your dish. This mix of ingredients creates a tasty, easy snack that everyone will love. You can find the full recipe and instructions to whip these up in no time! 1. First, preheat your oven to 400°F (200°C). This helps the roll-ups bake evenly. 2. Next, prepare a baking sheet. Line it with parchment paper for easy cleanup. 3. On a clean, floured surface, roll out the pizza dough. Aim for a rectangle about 1/4 inch thick. 4. Once rolled out, use a brush to apply olive oil all over the dough. This keeps it moist during baking. 1. Now, evenly spread the shredded mozzarella cheese over the oiled dough. 2. Next, layer the sliced pepperoni on top. Make sure to cover as much surface as you can. 3. In a small bowl, mix garlic powder, dried oregano, and optional red pepper flakes. 4. Sprinkle this mix evenly across the cheese and pepperoni. This adds great flavor. 1. Start rolling the dough tightly. Begin from one end and roll to the other. Keep the filling inside. 2. After rolling, use a sharp knife to cut the log into 1-inch thick pieces. This keeps the filling intact. 1. Arrange the sliced roll-ups on the baking sheet. Place them cut-side up, allowing space between each. 2. Bake in the preheated oven for 15-20 minutes. Look for a golden brown color and bubbling cheese. 3. Once baked, let the roll-ups cool for a few minutes. Serve them warm with pizza sauce for dipping. You can find the full recipe for Cheesy Pepperoni Pizza Roll-Ups [here]. To make the best cheesy pepperoni pizza roll-ups, focus on a few key details. - Ensuring Even Thickness of Dough Roll the dough to about 1/4 inch thick. This helps the roll-ups cook evenly. If your dough is too thick, the inside may remain raw. If it's too thin, it may tear. A good thickness keeps everything just right. - Keeping Fillings Enclosed When you roll the dough, start tight and keep the fillings inside. If the cheese and pepperoni peek out, they can burn or spill during baking. Use your fingers to pinch the ends and seal them well. This step ensures the cheesy goodness stays inside. Serving these roll-ups can be fun and creative! - Pairing with Pizza Sauce A small bowl of pizza sauce makes a great dip. It adds flavor and moisture. You can also try ranch or garlic sauce for a twist. - Creative Presentation Ideas Arrange the roll-ups on a colorful platter. You might add fresh basil leaves around them for color. Place the sauce in the center for easy access. This makes your dish look as good as it tastes! You can take your roll-ups to the next level with some tasty tweaks. - Adding Extra Toppings Feel free to mix in veggies like bell peppers or mushrooms. You can also add more cheese, like cheddar or feta, for a unique flavor. - Adjusting Spiciness with Red Pepper Flakes For those who enjoy heat, sprinkle red pepper flakes over the filling. This simple addition can make your roll-ups kick up a notch! Just remember, not everyone likes spice, so offer plain ones too. For the full recipe and more details, check out the Full Recipe section. {{image_4}} When it comes to Cheesy Pepperoni Pizza Roll-Ups, you can have fun with variations. These roll-ups are easy to customize. Let’s explore some great ideas. - Using Different Cheeses: You can swap mozzarella for cheddar or pepper jack. Cheddar adds a sharp taste, while pepper jack brings a spicy kick. - Alternative Meats: Try using sausage or ham instead of pepperoni. You can even go meatless with veggies like bell peppers or mushrooms. - Different Sauces: Instead of pizza sauce, dip your roll-ups in BBQ or Alfredo sauce. Each sauce gives a new twist to the flavor. - Herbs and Spices: Feel free to add Italian seasoning or crushed garlic to enhance the taste. This adds a nice touch and makes it more exciting. - Gluten-Free Dough Options: If you need gluten-free options, look for gluten-free pizza dough. Many stores sell it ready-made. - Vegan Cheese Alternatives: For a vegan version, use plant-based cheese. It melts well and keeps the cheesy goodness. These variations make your Cheesy Pepperoni Pizza Roll-Ups unique and tasty. You can be creative and find what you like best. For a full recipe, check out the [Full Recipe]. To keep your cheesy pepperoni pizza roll-ups fresh, store them in the fridge. Place them in an airtight container. This helps keep them moist and tasty. If you don't have one, wrap them tightly in plastic wrap. They will stay good for about 3 days. If you want to save them for later, freezing works well. Let the roll-ups cool completely before you freeze them. Wrap each roll securely in plastic wrap. Then, put them in a freezer bag or container. They can last up to 3 months in the freezer. When you're ready to eat them, reheat in the oven. Preheat the oven to 350°F (175°C). Place the frozen roll-ups on a baking sheet. Heat for about 15-20 minutes, or until hot and cheesy again. This way, you enjoy your tasty snack anytime! For the full recipe, check the main article. Bake these roll-ups for 15 to 20 minutes at 400°F (200°C). You want them golden brown. The cheese should be hot and bubbly. Keep an eye on them towards the end to prevent burning. Yes, you can prep these roll-ups ahead. Roll them up, slice them, and then cover with plastic wrap. Store them in the fridge for up to 24 hours. When ready, bake them straight from the fridge. Just check for extra baking time. If you don’t have pizza sauce, try marinara or ranch dressing. You can also use pesto for a fun twist. BBQ sauce adds a nice kick too. Get creative with your favorite sauces for dipping. Absolutely! You can use veggie pepperoni or mushrooms for texture. Try adding bell peppers or spinach for more flavor. Cheese is a must, so keep that for a cheesy bite! In this blog post, we explored how to make delicious Cheesy Pepperoni Pizza Roll-Ups. We covered essential ingredients, preparation steps, and baking tips. I shared creative variations and helpful storage advice. Remember, these roll-ups are perfect for sharing or a quick snack. Have fun experimenting with toppings and flavors. Whether you stick to the classics or get creative, enjoy your tasty creation!](https://tossedflavors.com/wp-content/uploads/2025/05/7caa5662-80e4-4038-b3de-841362e9b0a5.webp)
Cheesy Pepperoni Pizza Roll-Ups Easy and Flavorful Snack
Looking for a fun and tasty snack? Cheesy Pepperoni Pizza Roll-Ups are your answer! These easy-to-make treats combine classic pizza flavors into a delicious, rollable

Cheesy Garlic Chicken Wraps Flavorful and Easy Recipe
If you love bold flavors and easy meals, you’re in for a treat! This Cheesy Garlic Chicken Wraps recipe is packed with cheesy goodness and