Skip to content
tossedflavors.com
  • Home
  • Appetizers
  • Desserts
  • Salads
  • Breakfast
  • Dinner
  • Privacy Policy
  • Contact
  • About

Chef Evan

Creamy Spinach Roll Ups Tasty and Simple Snack

May 16, 2025 by Chef Evan
- 8 large flour tortillas - 2 cups fresh spinach, finely chopped - 1 cup ricotta cheese - 1 cup cream cheese, softened The main ingredients for your Creamy Spinach Roll Ups create a rich flavor. The combination of ricotta and cream cheese provides a creamy, smooth base. Fresh spinach adds a nice crunch and vibrant color. Flour tortillas serve as the perfect wrap, holding all that delicious filling inside. - 1/2 cup grated Parmesan cheese - 1/2 teaspoon garlic powder - 1/4 teaspoon freshly grated nutmeg - Salt and pepper, to taste Flavor enhancers take these roll-ups to the next level. Grated Parmesan adds a salty, nutty taste. Garlic powder gives a warm, savory kick. A hint of nutmeg offers a subtle sweetness. Salt and pepper balance all the flavors, making each bite delightful. - 1 cup marinara sauce (for dipping) - Fresh parsley, chopped (for garnish) Serving accompaniments make your dish even better. Marinara sauce is perfect for dipping. It adds a tangy contrast to the creamy filling. Chopped parsley brightens the dish and adds a touch of freshness. Together, they create a beautiful presentation and enhance the taste of your roll-ups. For the full recipe, check out the details above. 1. First, grab a large bowl. Combine the ricotta cheese, cream cheese, and Parmesan. 2. Mix well until the cheese is smooth. You want it evenly blended. 3. Now, fold in the chopped spinach. Add garlic powder, nutmeg, salt, and pepper. 4. Stir gently so the spinach spreads throughout the cheese mixture. 1. Take a tortilla and lay it flat on your counter. 2. Spread a generous layer of the creamy spinach filling over the tortilla. 3. Be sure to leave a small border around the edges. 4. Starting at one end, roll the tortilla tightly. Keep the filling inside. 5. Repeat this with all the tortillas and filling mixture. 1. Use a sharp knife to slice each roll into bite-sized pieces. Aim for about 1.5 inches thick. 2. Arrange the roll-ups on a platter. 3. Drizzle marinara sauce over the top. 4. For a nice finish, sprinkle with fresh parsley. For the full recipe, you can refer back to the main article. Enjoy your tasty snack! To make the best creamy spinach roll ups, follow these tips: - Refrigerate before slicing for easier handling. This helps the roll ups stay firm. The coolness makes slicing simple and neat. - Use fresh ingredients for the best flavor. Fresh spinach and high-quality cheeses boost taste. Freshness makes a big difference in your dish. When you are ready to serve, consider these ideas: - Serve on a large platter with marinara sauce in the center. This adds a nice touch. Guests can dip the roll-ups easily. - Garnish with additional herbs for a pop of color. Fresh herbs like parsley make your dish look vibrant. They also add a fresh taste. Using the right tools helps your prep go smoothly: - Sharp knife for slicing. A sharp knife gives clean cuts for a nice presentation. - Large mixing bowl for combining ingredients. This keeps everything in one place and makes mixing easy. - Spatula for spreading the filling. A spatula helps you spread the creamy mixture evenly on the tortillas. For the complete process, check the Full Recipe. Enjoy creating these tasty snacks! {{image_4}} You can make Creamy Spinach Roll Ups fit different diets. For gluten-free options, use corn or rice tortillas. These alternatives work well and taste great. For those who avoid dairy, try using vegan cream cheese and nutritional yeast. Both give a nice flavor and creamy texture. To mix things up, add new herbs or spices to your filling. Basil and dill add fresh notes. A pinch of red pepper flakes gives a little heat. You can also fold in cooked chicken or bacon for extra protein. This makes the roll-ups more filling and hearty. You can serve these roll-ups in different ways. They taste great cold as a light appetizer. If you prefer warm snacks, heat them in the oven for a few minutes. Pair them with different sauces for fun flavor twists. Try ranch dressing, tzatziki, or a spicy aioli. Each dip brings its own taste and fun to the meal. To keep your creamy spinach roll-ups fresh, store them in the fridge. Place them in an airtight container. This helps prevent them from drying out or absorbing other smells. Enjoy them within 3 to 4 days for the best taste. If you want to save some for later, freezing works great. Wrap each roll-up in plastic wrap. Then, place them in a freezer bag. This keeps air out and prevents freezer burn. When you're ready to eat them, thaw in the fridge overnight before reheating. To reheat your roll-ups, use the oven for even warmth. Preheat your oven to 350°F (175°C). Place the roll-ups on a baking sheet and cover with foil. Heat for about 10-15 minutes. This keeps them soft and tasty. You can also microwave them on a plate for 1-2 minutes. Just be careful not to overheat, or they may become tough. Yes, you can prep these roll-ups ahead of time. To do this, prepare the filling and assemble the roll-ups. Wrap them tightly in plastic wrap or foil. Store in the fridge for up to 24 hours. This keeps the flavors fresh. If you plan to serve later, wait to slice them until right before serving. This way, they hold their shape better. You can pair these roll-ups with many dishes. A fresh salad adds a nice crunch. Try a simple green salad with a light vinaigrette. You can also serve them with extra marinara sauce for dipping. Garlic bread or a cheese platter complements them well. These options bring variety and balance to your meal. Yes, cheese substitutes are easy to find. If you want a dairy-free option, try using cashew cream or a plant-based cream cheese. For a lighter choice, you can use Greek yogurt. If you need a lower-fat option, use low-fat ricotta or cottage cheese. Each choice will change the flavor, so pick what fits your taste. These roll-ups can last about 3 to 4 days in the fridge. Store them in an airtight container to keep them fresh. Always check for any signs of spoilage before eating. If they look or smell off, it's best to discard them. Enjoy them while they are still tasty and fresh! Creamy Spinach Roll Ups are easy and tasty. We covered the main ingredients, step-by-step instructions, and tips for great rolls. You can add variations to suit your taste or dietary needs. Storing and reheating keep them delicious longer. Try these roll ups at your next gathering or snack time. With fresh flavors and creamy texture, they are sure to impress. Enjoy making and sharing this delightful dish!

Looking for a tasty snack that’s easy to make? Creamy Spinach Roll Ups are perfect for you! These delightful bites feature a rich spinach and cheese filling wrapped in soft …

Read more

Categories Appetizers Leave a comment

Easy Cinnamon Roll Cookies Simple and Tasty Treat

May 16, 2025 by Chef Evan
To make these easy cinnamon roll cookies, gather the following ingredients: - 1 cup unsalted butter, softened to room temperature - 1 cup granulated sugar - 1 cup light brown sugar, packed tightly - 2 large eggs, at room temperature - 2 teaspoons pure vanilla extract - 3 cups all-purpose flour, sifted - 1 teaspoon baking powder - 1 teaspoon baking soda - 1 teaspoon ground cinnamon - ½ teaspoon fine salt - ½ cup chopped pecans or walnuts (optional, for added crunch) - For the Frosting: - ½ cup cream cheese, softened - 1 cup powdered sugar - 1-2 tablespoons milk (adjust for desired consistency) - Pinch of ground cinnamon When measuring ingredients, precision is key. Here are some tips: - Use dry measuring cups for flour and sugar. - Level off the top with a flat edge for accuracy. - For sticky ingredients like brown sugar, pack it tightly into the cup. - Always use room temperature butter and eggs for better mixing. Don't have all the ingredients? No worries! Here are some substitutions you can try: - Swap unsalted butter with coconut oil for a dairy-free option. - Use brown sugar instead of white sugar for a richer flavor. - Replace eggs with flaxseed meal mixed with water for a vegan option. - Use gluten-free flour to make these cookies gluten-free. With these tips, you can make easy cinnamon roll cookies that taste great and fit your needs! For the full recipe, check the previous section. Start by preheating your oven to 350°F (175°C). This step is key for even baking. Next, grab a baking sheet and line it with parchment paper or a silicone mat. This will help the cookies come off easily and keep them from sticking. In a large bowl, add the softened butter, granulated sugar, and brown sugar. Beat this mixture with an electric mixer on medium speed. You want it to be light and fluffy. This should take about 2-3 minutes. Next, add the eggs one at a time. Mix well after each addition. Then, pour in the pure vanilla extract and blend it in thoroughly. In another bowl, whisk together the sifted flour, baking powder, baking soda, ground cinnamon, and fine salt. This helps to mix the dry ingredients well and avoids lumps. Gradually add the dry mix to the wet mix. Stir gently until just combined. If you want, fold in chopped pecans or walnuts for some crunch. Use a cookie scoop or a tablespoon to drop rounded scoops of dough onto your prepared baking sheet. Make sure to leave about 2 inches between each scoop. The cookies will spread a bit while baking. Place the baking sheet in the oven and bake for 10-12 minutes. Look for golden edges and slightly soft centers. This is normal as they will firm up while cooling. While the cookies cool, it's time to make the frosting. In a mixing bowl, combine softened cream cheese, powdered sugar, milk, and a pinch of ground cinnamon. Beat this mixture with an electric mixer until smooth and creamy. Adjust the consistency by adding more milk or sugar if needed. Once the cookies are cool, spread the cream cheese frosting generously on top of each one. Enjoy these sweet treats! You can find the Full Recipe for more details. When baking Easy Cinnamon Roll Cookies, a few mistakes can ruin your efforts. Here are some to watch out for: - Using cold butter: Always soften your butter to room temperature. Cold butter does not mix well with sugars. - Overmixing the dough: Mix just until the ingredients combine. Overmixing can make the cookies tough. - Skipping the parchment paper: This helps cookies bake evenly and prevents sticking. Don’t skip this step! You want your cookies to be soft and chewy. Here are tips to get that texture: - Measure flour correctly: Spoon it into your measuring cup and level it off. Too much flour can make cookies dry. - Chill the dough: If your dough feels too soft, chill it for 30 minutes. This helps keep the cookies from spreading too much. - Bake until edges are golden: Remove cookies when edges are golden brown. The centers will firm up as they cool. To keep your cookies fresh and tasty, follow these tips: - Store in an airtight container: This keeps them soft for up to three days. Use wax paper between layers to prevent sticking. - Reheat gently: For warm cookies, place them in a microwave for 5-10 seconds. This makes them taste fresh again. - Freezing for later: Freeze cookies in an airtight bag. They last up to three months. Thaw them at room temperature when ready to eat. For the Full Recipe, check the previous section! Enjoy baking your Easy Cinnamon Roll Cookies! {{image_4}} You can change up the nuts in the Easy Cinnamon Roll Cookies. I love using chopped pecans or walnuts. They add a nice crunch. If you prefer, try almonds or hazelnuts. Just chop them finely. You can even skip the nuts if you want. Add fun flavors to your cookies! Chocolate chips are a sweet choice. You can mix in dark, milk, or white chocolate chips. Dried fruits like raisins or cranberries also work well. They bring a chewy texture. For a twist, consider adding a splash of maple syrup or almond extract. These flavors make the cookies even more special. Want to make these cookies gluten-free? It’s easy! Use a gluten-free flour blend instead of regular flour. Look for one that works well for baking. Check the blend has xanthan gum. This helps give the cookies a good texture. You can enjoy these tasty treats without worry! For the Full Recipe, refer to the complete guide provided. To keep your Easy Cinnamon Roll Cookies fresh, store them in an airtight container. Use a container with a tight seal to prevent air from making the cookies dry. Layer parchment paper between each cookie to avoid sticking. If you have extra frosting, keep it in a separate container and frost the cookies just before serving. When stored properly, these cookies last about three days at room temperature. If you want to keep them longer, consider freezing them. Just make sure to wrap them well to prevent freezer burn. The frosting can also be kept in the fridge for up to a week. Freezing cookies is easy! Once your cookies cool completely, place them in a single layer on a baking sheet. Freeze them for about an hour, then transfer them to a freezer bag or container. They can stay frozen for up to three months. To enjoy, just thaw them at room temperature or warm them in the oven for a few minutes. This way, you can have fresh-tasting cookies any time! For the full recipe, check out the details above. Easy Cinnamon Roll Cookies are soft, sweet treats that taste like cinnamon rolls. They have a rich, buttery flavor and a warm cinnamon spice. You get all the joy of cinnamon rolls in a cookie form. The cookie dough is easy to make, and they bake quickly. These cookies are topped with a creamy frosting that makes them even better. Yes, you can make these cookies ahead of time! You have a couple of options. You can prepare the dough and chill it in the fridge for up to 24 hours before baking. Just remember to let it sit at room temp for a few minutes before scooping. You can also bake the cookies and store them in an airtight container for up to three days. To tell if the cookies are done, watch the edges closely. They should turn light golden brown. The centers may look soft, which is normal. The cookies will firm up as they cool. You can also use a toothpick to check. If it comes out clean or with just a few crumbs, they are ready! You can skip the frosting if you want! The cookies are still tasty without it. They have a sweet, cinnamon flavor on their own. If you prefer a lighter treat, enjoy them plain. However, the frosting adds a creamy touch that many people love. If you want a quick version, just dust the cookies with powdered sugar instead. This guide covered all steps to make easy cinnamon roll cookies. We explored ingredients, measurements, and substitutions. I walked you through mixing, baking, and frosting. You learned tips to avoid common mistakes and achieve great texture. Variations let you customize cookies to your taste. Remember to store them right for best freshness. Enjoy making these treats! They blend fun and flavor in every bite. Don't hesitate to try different twists and share your results. Happy baking!

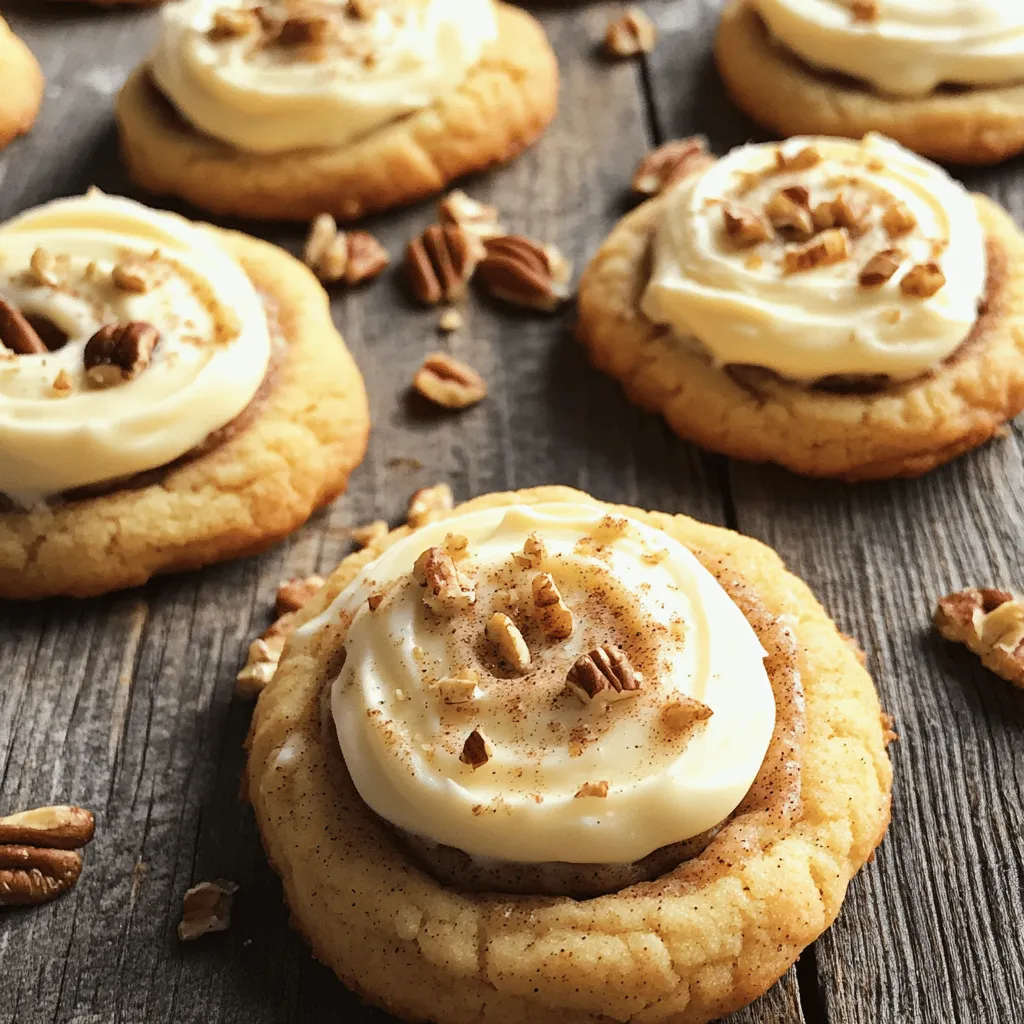
Craving a sweet treat that combines the best of cinnamon rolls and cookies? You’re in the right place! In this guide, I’ll show you how to make Easy Cinnamon Roll …

Read more

Categories Desserts Leave a comment

Peanut Butter Cup Stuffed Cookies Irresistible Treat

May 16, 2025 by Chef Evan
To make these cookies, you need a few key items: - 1 cup creamy peanut butter - 1/2 cup unsalted butter, softened - 1/2 cup granulated sugar - 1/2 cup brown sugar, tightly packed - 1 large egg - 1 teaspoon pure vanilla extract - 1 1/2 cups all-purpose flour - 1/2 teaspoon baking soda - 1/4 teaspoon fine sea salt - 1 cup mini chocolate peanut butter cups, unwrapped These ingredients work together to create a rich and sweet cookie. The peanut butter adds creaminess, while the chocolate cups surprise you with a delicious burst of flavor. For even more deliciousness, consider adding: - Additional sea salt for a sprinkle on top - Chopped nuts for crunch - A drizzle of melted chocolate for extra sweetness Adding these optional ingredients can enhance the taste and texture, making your cookies even more tempting. If you need to change something, here are some easy swaps: - Use almond butter instead of peanut butter for a nut-free option. - Replace unsalted butter with coconut oil for a dairy-free choice. - Use brown sugar only if you prefer a richer flavor. These substitutes still keep the cookies tasty while catering to different dietary needs or preferences. Enjoy crafting your perfect peanut butter cup stuffed cookies! Start by preheating your oven to 350°F (175°C). This heat makes our cookies soft and chewy. Line a baking sheet with parchment paper. The paper stops cookies from sticking and helps with easy cleanup. In a large bowl, mix 1 cup of creamy peanut butter and 1/2 cup of softened unsalted butter. Add 1/2 cup of granulated sugar and 1/2 cup of packed brown sugar. Use an electric mixer on medium speed. Beat for about 2 minutes until the mix is smooth and creamy. In another bowl, whisk together 1 1/2 cups of all-purpose flour, 1/2 teaspoon of baking soda, and 1/4 teaspoon of fine sea salt. Slowly add this dry mix to the wet mix. Stir gently until just combined. Be careful not to overmix; we want soft cookies. Cover the bowl with plastic wrap. Place it in the fridge for 30 minutes. Chilling the dough makes it easier to handle. It also helps the cookies stay thick when baking. After chilling, scoop a tablespoon of dough. Flatten it slightly in your hand. Place one unwrapped mini chocolate peanut butter cup at the center. Wrap the dough around it, rolling it back into a ball. Repeat this for all the dough and cups. Put the cookie balls on the baking sheet, leaving 2 inches of space between each. For extra flavor, sprinkle a bit of sea salt on top. Bake for 10 to 12 minutes. The edges should be golden while the centers stay soft. Let the cookies cool on the baking sheet for about 5 minutes. This step helps set them. Then, move the cookies to a wire rack to cool completely. This cooling time is key for the best texture. Enjoy your Peanut Butter Cup Stuffed Cookies! For the full recipe, check out the earlier section. To keep your cookies soft, mix just until combined. Overmixing can make cookies tough. When you add the dry ingredients, blend gently. Use a spatula to fold the mixture instead of a mixer. This helps to keep the dough light and fluffy. For chewy cookies, bake for about 10 to 12 minutes. The edges should be golden, while the centers stay soft. If you want crunchier cookies, add a minute or two. Watch them closely, as every oven is a bit different. You want to catch them just before they harden. A sprinkle of sea salt on top adds a nice touch. It balances the sweetness of the cookies. For extra flair, drizzle melted chocolate over the cooled cookies. This not only looks great but also adds rich chocolate flavor. Both options make this treat even more enjoyable. For the full recipe, check out the detailed steps above! {{image_4}} If you want to make nut-free cookies, use sun butter instead of peanut butter. Sun butter gives a similar taste without nuts. You can also use soy nut butter for a different flavor. Both options keep the cookies soft and delicious. You can get creative by adding other fillings inside your cookies. Try adding caramel for a gooey surprise. Just place a small piece in the center before wrapping the dough. If you like nuts, chop some and mix them into the dough. This adds crunch and flavor. You can change up the flavors of these cookies. Use chocolate hazelnut spread instead of peanut butter for a rich twist. Or, mix cocoa powder into the dough for a chocolatey cookie. This makes for a fun surprise in every bite. Don't forget to check the Full Recipe for more ideas! To keep your cookies fresh, store them in an airtight container. This helps maintain their softness. You can layer parchment paper between cookies to prevent sticking. If you want to keep them longer, consider placing a slice of bread in the container. This will help keep the cookies moist. You can freeze the cookies to enjoy later. First, let them cool completely. Then, place them in a single layer in a freezer-safe bag. Seal the bag tightly, removing as much air as possible. To reheat, take out the needed cookies and let them thaw at room temperature for a few hours. If you want them warm, pop them in the oven at 350°F (175°C) for about 5 minutes. These cookies can last about one week at room temperature. If stored properly in the fridge, they can stay fresh for up to two weeks. Freezing extends their life to about three months. Just remember, the fresher the cookie, the better the taste! For the full recipe, check out the detailed steps above. To prevent cookies from spreading too much, chill the dough before baking. This helps the butter firm up. You can also use baking sheets lined with parchment paper. This creates a non-stick surface. Lastly, use a cookie scoop to keep the size uniform. Yes, you can make the dough ahead of time. After mixing, cover it and place it in the fridge. It will stay fresh for up to three days. You can also freeze it for up to three months. Just thaw it in the fridge before baking. If you want a nut-free option, use sun butter. This gives a similar taste without nuts. You can also try almond butter or cashew butter. Just keep in mind the flavor will change a bit. These cookies are not safe for people with nut allergies. They contain peanut butter and peanut butter cups. For kids, if they don’t have allergies, these cookies are a fun treat! This recipe makes about 12 cookies. Depending on how big you scoop the dough, you might get a few more or less. Each cookie is packed with flavor and a hidden surprise. You can add melted chocolate drizzle on top for a rich flavor. Sprinkling crushed peanuts adds a nice crunch. Sea salt enhances the sweet taste and gives a gourmet touch. For a fun twist, try mini marshmallows or caramel drizzle. You now have a clear guide to making delicious cookies. From choosing essential ingredients to mastering the mixing and baking process, these steps will help you create tasty treats. Don't forget the tips on texture and flavor that can make a big difference. With options for variations and storage, you can enjoy these cookies anytime. Remember, practice makes perfect, so have fun experimenting. Happy baking!

Get ready to drool over these Peanut Butter Cup Stuffed Cookies! If you love soft, chewy cookies full of chocolate and peanut butter, this recipe is for you. I’ll guide …

Read more

Categories Desserts Leave a comment

Spicy Cajun Cauliflower Bites Bold and Crunchy Snack

November 24, 2025May 16, 2025 by Chef Evan
- Cauliflower florets - Almond flour - Cajun seasoning - Garlic powder - Onion powder - Smoked paprika - Cayenne pepper - Salt - Black pepper - Plant-based milk - Olive oil - Fresh parsley To make Spicy Cajun Cauliflower Bites, you need a few simple ingredients. Start with a large head of cauliflower. Cut it into bite-sized florets. This will give you the perfect base for your crunchy snack. Next, you’ll need almond flour. This flour adds a nutty flavor and helps create that crispy coating. Cajun seasoning gives these bites their bold taste. You can find it at most stores. If you want to make your own, mix paprika, cayenne, garlic, and herbs. You will also use garlic powder and onion powder for extra flavor. Smoked paprika adds a nice touch of smokiness. If you love heat, add cayenne pepper. Adjust the amount to fit your taste. Don't forget salt and black pepper to season everything. For the wet ingredients, pour in some plant-based milk or regular milk. This helps the almond flour stick to the cauliflower. Finally, drizzle olive oil over the bites for extra crispiness. Top it off with fresh parsley for a pop of color. These ingredients work together to create a snack that is bold and crunchy. Enjoy these bites at your next gathering or as a tasty treat anytime! {{ingredient_image_1}} 1. Preheat your oven to 425°F (220°C). 2. Line a baking sheet with parchment paper to prevent sticking. 3. In a large mixing bowl, combine the almond flour, Cajun seasoning, garlic powder, onion powder, smoked paprika, cayenne pepper, salt, and black pepper. Mix until all ingredients are well combined. 4. In another bowl, pour in the unsweetened plant-based milk. 1. Dip each cauliflower floret into the milk. Let the excess milk drip off. 2. Coat the floret in the almond flour mixture. Make sure each piece is fully covered. 3. Place the coated cauliflower bites on the prepared baking sheet. 4. Drizzle the florets with olive oil. This helps them get crispy. 5. Bake in the preheated oven for 25-30 minutes. Flip them halfway through for even cooking. They should be golden brown and crunchy. 1. After baking, remove the cauliflower bites from the oven. Let them cool for a few minutes on the baking sheet. 2. Garnish with chopped fresh parsley for a bright touch. 3. Serve warm for the best taste and texture. To get that crunchy texture, olive oil plays a key role. It helps the cauliflower get golden brown. Drizzle it evenly over the bites before baking. The baking time is also important. Bake at 425°F (220°C) for 25-30 minutes. Flip the florets halfway through. This ensures all sides get that perfect crisp. If you want more heat, add more cayenne pepper. For a milder taste, reduce the cayenne. Cajun seasoning can also be adjusted. Start with one tablespoon and taste. You can always add more if you want more kick. It’s all about finding your perfect balance. For dipping, ranch or creamy garlic sauce works great. You can also try spicy aioli for extra flavor. These bites make great appetizers for parties. Serve them with veggie platters or cheese boards. They will impress everyone at your gathering! Pro Tips Adjust Your Spice Level: If you prefer a milder flavor, reduce the cayenne pepper or omit it entirely. For more heat, feel free to add extra seasoning or a dash of hot sauce before serving. Choose the Right Cauliflower: Look for a fresh head of cauliflower that is firm and has tightly packed florets. This ensures a better texture and flavor in your bites. Let Them Rest: Allow the cauliflower bites to cool for a few minutes after baking. This helps them crisp up even more and enhances the overall flavor. Experiment with Dipping Sauces: Try serving these spicy bites with a variety of dipping sauces like ranch, garlic aioli, or a zesty yogurt sauce for added flavor and variety. {{image_2}} To make these bites vegan, use plant-based milk. Almond flour is already gluten-free. If you need an alternative for almond flour, try oat flour or chickpea flour. Both will work well and keep the flavor tasty. You can boost the flavor by adding extra spices. Consider trying cumin or chili powder for more heat. You can also mix in other vegetables. Bell peppers or zucchini slices coat nicely and add more crunch. You can choose between an air fryer or oven baking. The air fryer gives a crispier texture and cooks faster. If you prefer grilling, that works too! Just place the coated florets on a grill basket and cook until tender and charred. To store your spicy Cajun cauliflower bites, let them cool first. Place them in an airtight container. This helps keep them fresh. You can keep them in the refrigerator for up to 3 days. Use glass or plastic containers with tight lids. These are the best for holding in moisture and flavor. When you want to enjoy your leftovers, reheating is easy. The best method is the oven. Preheat your oven to 375°F (190°C). Place the cauliflower bites on a baking sheet. Bake for about 10-15 minutes or until they are hot and crispy again. You can use a microwave, but they may lose some crispiness. If you use a microwave, heat them in short bursts to avoid sogginess. You can freeze these bites too! If you want to freeze them, do it before cooking. Place the coated florets on a baking sheet and freeze them for a few hours. After that, transfer them to a freezer-safe bag. This way, they will stay fresh for up to 3 months. When ready to cook, no need to thaw. Just bake them straight from the freezer. If you freeze them after cooking, let them cool completely first. To reheat, follow the same oven method as above for the best results. Cajun seasoning has a bold mix of spices. Typical spices include: - Paprika - Garlic powder - Onion powder - Oregano - Thyme - Black pepper - Cayenne pepper This blend packs a punch. It gives your dish a nice kick. You can adjust the amounts to match your taste. Yes, you can swap cauliflower for other veggies. Great choices include: - Broccoli - Brussels sprouts - Zucchini - Eggplant - Sweet potatoes These veggies also take on the Cajun seasoning well. Just cut them into bite-sized pieces. The cooking time might change a bit, so keep an eye on them. To spice up your bites, try these tips: - Add more cayenne pepper. - Use spicy paprika instead of regular. - Mix in crushed red pepper flakes. - Serve with a spicy dipping sauce. These adjustments will bring the heat. Just remember to taste as you go. You want to enjoy the flavor, not just the heat. In this post, we explored tasty cauliflower bites that are easy to make. You learned about the key ingredients, like cauliflower florets and Cajun seasoning. The step-by-step instructions guide you through preparation and baking. I shared tips for achieving a crispy texture and adjusting spice levels. Plus, we discussed different serving ideas and storage methods. These bites are fun to enjoy as snacks or appetizers. You can customize them to fit your taste, making them a great choice for any meal.

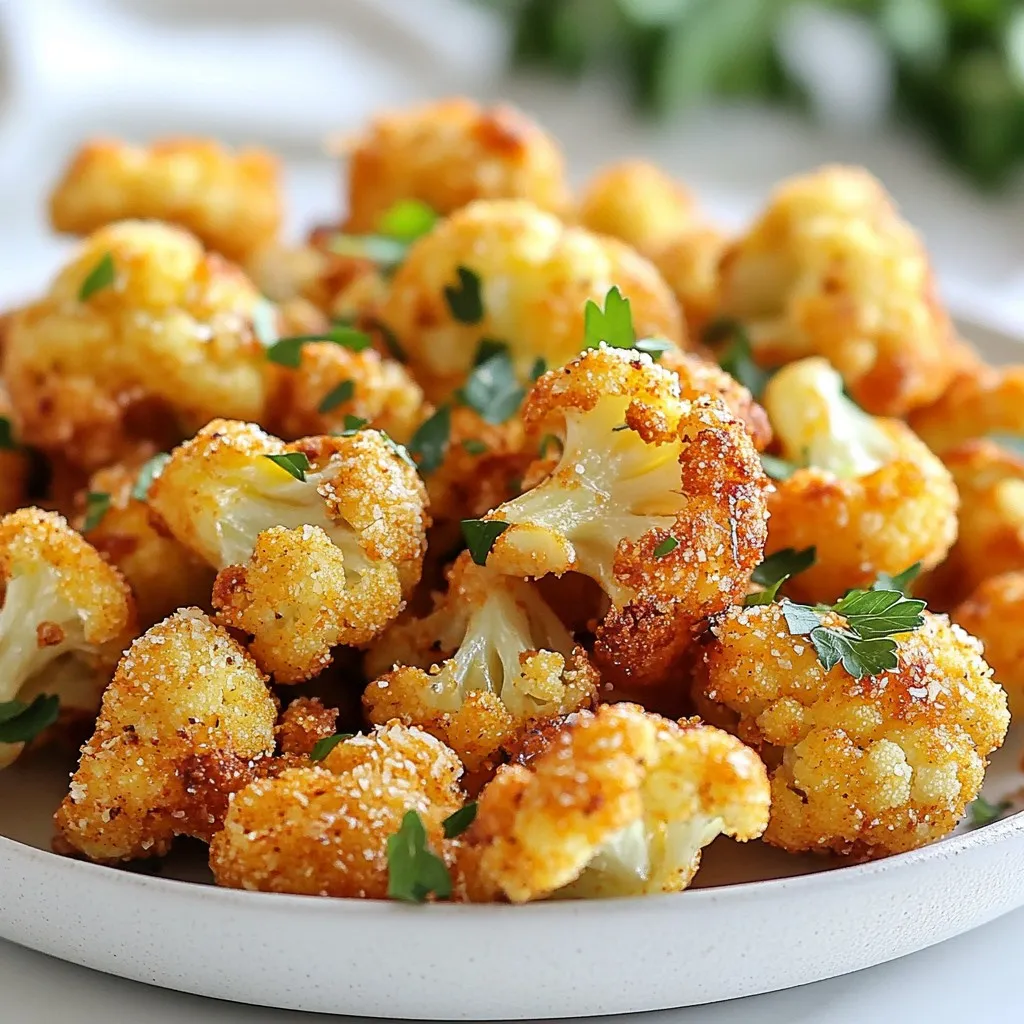
If you’re craving a snack that packs a punch, you’re in the right place! My Spicy Cajun Cauliflower Bites are bold, crunchy, and oh-so-satisfying. These bites bring heat and flavor …

Read more

Categories Appetizers Leave a comment

Mini Caramel Apple Cheesecake Bites Delightful Treat

May 15, 2025 by Chef Evan
To make these tasty treats, gather the following key ingredients: - 1 cup graham cracker crumbs - 2 tablespoons granulated sugar - 1/4 cup unsalted butter, melted - 8 ounces cream cheese, softened - 1/2 cup granulated sugar - 1 teaspoon vanilla extract - 1 large egg - 1 1/2 cups finely diced apples (about 1 large apple) - 1 teaspoon ground cinnamon - 1/2 cup caramel sauce (store-bought or homemade) - Whipped cream, for topping (optional) These ingredients work together to create a rich and creamy cheesecake with a sweet apple twist. You can tweak the recipe to fit your tastes. Here are some optional ingredients: - Chopped nuts (like walnuts or pecans) for added crunch - Extra spices (like nutmeg) for warmth - Different types of apples (like Granny Smith or Honeycrisp) for varied flavor - Flavored extracts (like almond) for a unique twist Feel free to mix and match these options to create your perfect bite. If you need alternatives, here are some helpful substitutions: - Use almond meal instead of graham cracker crumbs for a gluten-free crust. - Swap cream cheese for Greek yogurt for a lighter filling. - Replace caramel sauce with chocolate sauce for a different flavor. These substitutes can help you enjoy this recipe, even if you have dietary needs. Check out the Full Recipe for all the details on how to put these ingredients together! Start by preheating your oven to 325°F (160°C). Grab a mini muffin tin and line each cup with paper liners. In a bowl, mix together 1 cup of graham cracker crumbs, 2 tablespoons of sugar, and 1/4 cup of melted unsalted butter. Stir until the mix feels like wet sand. Take about 1 tablespoon of this mix and press it into the bottom of each muffin cup. Bake these for about 5 minutes, until they turn a light golden brown. Let them cool completely before moving on. In a separate bowl, beat 8 ounces of softened cream cheese with 1/2 cup of sugar and 1 teaspoon of vanilla extract using an electric mixer. Mix until it’s smooth and creamy. Next, add 1 large egg and mix again until everything is well combined. In a small bowl, toss 1 1/2 cups of finely diced apples with 1 teaspoon of ground cinnamon. Gently fold the apples into the cream cheese mixture. Be careful not to overmix; you want those apple pieces to stay intact. Now it’s time to fill the crusts. Use a spoon or small ladle to fill each pre-baked crust with the cheesecake mix. Fill them about three-quarters full. Place the muffin tin back in the oven and bake for 15 to 18 minutes. They should be set in the center but still jiggle a bit. After baking, let them cool at room temperature for about 15 minutes. Then, transfer them to the fridge to chill for at least 1 hour. This will help them firm up. Drizzle with caramel sauce and add whipped cream before serving. For the full recipe, check the details above. To make mini caramel apple cheesecake bites perfect, focus on the cream cheese. Ensure it's soft before mixing. This helps create a smooth filling. Mix until it's creamy, but avoid overmixing. Overmixing traps air, leading to cracks. For the crust, press the crumbs tightly. This keeps the bites from falling apart. For extra flavor, consider using spices. A pinch of nutmeg adds warmth. You can also try different apples. Tart apples like Granny Smith give a nice contrast to the sweet caramel. Another tip is to use high-quality caramel sauce. It enhances the overall taste. A dash of lemon juice on apples can add freshness, too. When it's time to serve, presentation matters. Arrange the bites on a pretty plate. Drizzle extra caramel sauce around them for flair. A sprinkle of chopped nuts adds crunch and looks great. If you want, add whipped cream on top. This makes each bite even more delightful. You can find the Full Recipe for detailed steps. {{image_4}} You can switch up the apples in this recipe. Try pears for a softer texture. Berries, like raspberries or blueberries, add tartness and color. Even peaches can work well, giving a nice summer twist. Each fruit brings its own flavor, making your cheesecake bites unique. Besides caramel and apple, you can explore many flavors. For a chocolate twist, mix cocoa powder into the cream cheese. You could also add pumpkin spice for a cozy fall vibe. Or, mix in some citrus zest for a fresh kick. Each new flavor combination keeps things exciting! If you need gluten-free bites, use gluten-free graham crackers for the crust. For a dairy-free version, choose a plant-based cream cheese. Coconut cream can be a great alternative too. These swaps make the bites friendly for more diets, so everyone can enjoy them without worry. Check out the Full Recipe for all the details! To keep your mini caramel apple cheesecake bites fresh, store them in an airtight container. Place parchment paper between layers to prevent sticking. You can keep them in the fridge for up to five days. The cool temperature helps maintain their creamy texture and flavor. If you want to save some for later, freezing works well. First, let the cheesecake bites cool completely. Then, place them on a baking sheet lined with parchment paper. Flash freeze them for about an hour. Once frozen, transfer them to a freezer-safe container or bag. They can last up to three months in the freezer. To enjoy your frozen bites, thaw them in the fridge overnight. If you want to warm them, place them in the oven at 300°F (150°C) for about 10 minutes. This will bring back their creamy goodness. Drizzle with caramel sauce and add whipped cream just before serving for that extra touch. For the full recipe, check out the earlier section in this article. Yes, you can use store-bought caramel sauce. It saves time and adds rich flavor. Just drizzle it over the cheesecake bites before serving. If you want, you can make your own caramel too. The cheesecake bites are done when they are set but still jiggle slightly in the center. This means they will be creamy and not too firm. Watch them closely in the last few minutes of baking. You can serve these bites with whipped cream, fresh fruit, or extra caramel sauce. A scoop of vanilla ice cream also pairs well. Create a mini dessert platter for a fun treat. These bites last up to five days in the refrigerator. Store them in an airtight container to keep them fresh. Enjoy them cold for a quick snack or dessert. For the full recipe, check out the earlier section. You learned how to make tasty mini caramel apple cheesecake bites. We covered key ingredients, step-by-step instructions, and helpful tips. You can customize your bites with different fruits and flavors too. Plus, I shared the best ways to store and reheat them. These bites are simple, fun, and sure to impress. Enjoy creating delightful treats that everyone will love!

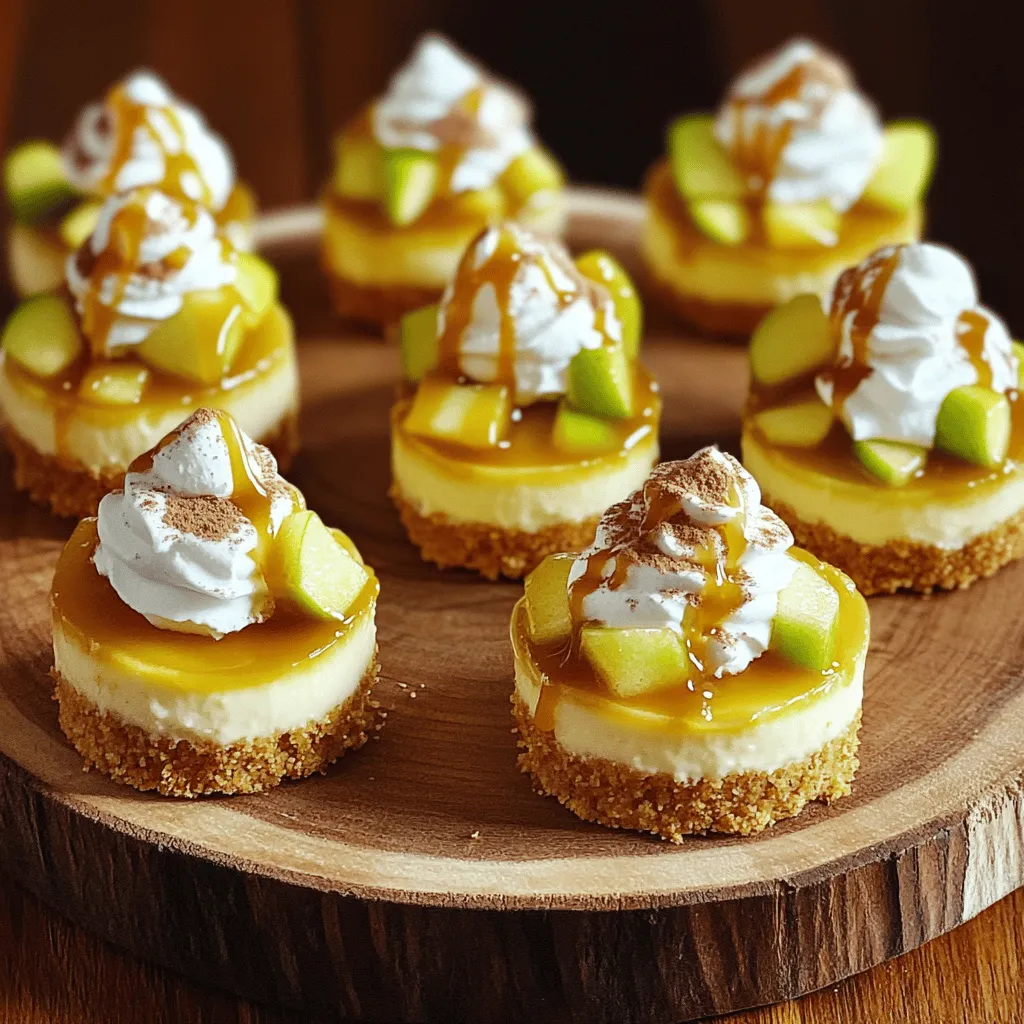
Are you ready to indulge in a sweet treat that combines creamy cheesecake with the timeless flavors of caramel and apple? In this post, I’ll guide you through making Mini …

Read more

Categories Desserts Leave a comment

Baby Lemon Impossible Pies Delightful and Easy Treat

May 15, 2025 by Chef Evan
To make Baby Lemon Impossible Pies, you need: - 1 cup milk (whole or low-fat) - 1/2 cup granulated sugar - 1/2 cup all-purpose flour - 1/4 cup unsalted butter, melted - 3 large eggs - 2 teaspoons freshly grated lemon zest - 1/4 cup freshly squeezed lemon juice - 1 teaspoon baking powder - Pinch of fine sea salt - Powdered sugar, for dusting (optional) - Fresh mint leaves, for garnish (optional) These ingredients combine to create a light and fluffy treat. Each one plays a role in flavor and texture. The eggs help bind the mix together, while the lemon zest and juice bring a bright, tangy flavor. If you or your guests have dietary needs, you can easily modify this recipe. For a dairy-free option, use almond milk or coconut milk. Instead of butter, try coconut oil or a dairy-free butter substitute. If you need a gluten-free option, replace the all-purpose flour with a gluten-free blend. Look for one meant for baking. These swaps keep the pies tasty and suitable for more people. Each Baby Lemon Impossible Pie has about: - Calories: 120 - Protein: 3g - Fat: 5g - Carbohydrates: 17g - Sugar: 8g - Fiber: 0g These mini pies are a great treat that you can enjoy without too much guilt. They are perfect for parties or just a fun dessert at home. For the full recipe, check out the Lemon Bliss Mini Impossible Pies section. Start by heating your oven to 350°F (175°C). This makes sure the pies bake evenly. Next, grab a muffin tin. Grease it with non-stick spray or use paper liners. This helps with easy removal later. In a big bowl, mix together the milk, sugar, flour, and melted butter. Then, add the eggs, lemon zest, lemon juice, baking powder, and a pinch of salt. Whisk it all until the batter is smooth. No lumps allowed! Now, pour the batter into your muffin tin. Fill each cup about 3/4 full. This gives the pies room to puff up. Place the tin in your preheated oven. Bake for 20 to 25 minutes. You'll know they are ready when the edges turn golden brown. Insert a toothpick into the center. If it comes out clean, your pies are done! Once baked, let the mini pies cool in the tin for 10 minutes. This helps them set. Then, move them to a wire rack to cool completely. When cool, dust the tops with powdered sugar if you want a sweet finish. You can also add fresh mint leaves for a pop of color. Arrange these pies on a nice platter. Offer small forks or spoons for each guest. For a special touch, serve them with whipped cream. Enjoy your Baby Lemon Impossible Pies! Check out the Full Recipe for more details. When making Baby Lemon Impossible Pies, keep texture and taste in mind. You want them soft and easy to chew. Use less sugar to keep it healthy. Avoid using lemon zest if your baby is young, as it can be too strong. Ensure all ingredients are fresh and safe for their age. Always consult your pediatrician if unsure about any ingredient. To get that light, fluffy texture, mix the batter well. Whisk your ingredients until no lumps remain. Don’t overmix, as this can make them dense. Fill the muffin tin only three-quarters full. This allows room for the pies to rise. Baking them at the right temperature is also key. Keep an eye on them, and remove them when golden brown. Serve these mini pies warm or at room temperature. Cut them in half for smaller bites. You can add a small scoop of yogurt on the side for dipping. Dust with powdered sugar for a fun touch. Fresh mint leaves can add color but are optional. Make it a family treat by enjoying them together! For the full recipe, visit the link provided. {{image_4}} You can easily change the flavor of these pies. Instead of lemon, try orange or lime. Use the same amount of juice and zest. For a fun twist, mix in some coconut or even chocolate. Each option brings a new taste, making it exciting for everyone. Garnishing can take your pies to the next level. You can top them with fresh berries like strawberries or raspberries. A drizzle of chocolate or caramel sauce adds extra flavor. You can also sprinkle toasted coconut for crunch. These simple touches make your pies look great and taste even better. I love making these pies in mini sizes. They are perfect for parties or snacks. You can also bake them in standard muffin tins. Just adjust the baking time to around 25-30 minutes. Either way, they will be delightful. You can serve them warm or cool, based on your preference. Store your Baby Lemon Impossible Pies in an airtight container. This keeps them fresh. If you have leftovers, let them cool completely first. Then, place them in the fridge. They can last up to three days. You can layer them with parchment paper to avoid sticking. To freeze these mini pies, wrap each one tightly in plastic wrap. Place them in a freezer-safe bag or container. They will stay good for about two months. When you want to enjoy them again, just take out as many as you need. To reheat, use the oven for the best results. Preheat your oven to 350°F (175°C). Place the pies on a baking sheet. Heat them for about 10 minutes, or until warm. This helps keep the texture soft and delightful. You can also use the microwave, but they may get a bit soggy. Enjoy your tasty treats! Yes, you can use alternative sweeteners. Try stevia or monk fruit sweetener. These options can lower calories while keeping sweetness. Adjust the amount to match your taste. Remember, some sweeteners are sweeter than sugar. So, use less than the sugar amount. You can store these pies for up to three days. Keep them in an airtight container at room temperature. They may last longer in the fridge, but the texture might change. If you want to enjoy them later, freezing is a great option. Yes, these pies are great for toddlers. They have a soft texture and a light lemon taste. Always check for allergies to ingredients like eggs and milk. Cut the pies into small pieces for easy handling by little hands. You can serve fresh fruit like berries or slices of kiwi. A scoop of yogurt or a dollop of whipped cream works well too. For a fun twist, add a small glass of lemonade. These sides enhance the flavor and make the meal more fun. In this post, we covered how to make Baby Lemon Impossible Pies. You learned the ingredients, alternatives for allergens, and nutrition facts. We discussed the steps for mixing, baking, and cooling. I shared tips for making these pies baby-friendly and achieving the right texture. You also found variations and storage tips for leftovers. All of this information helps you create tasty pies for your little ones. Enjoy baking and watching them delight in these treats!

Looking for a sweet treat that’s easy to make and perfect for little ones? You’re in for a treat with Baby Lemon Impossible Pies! These delightful mini pies are simple …

Read more

Categories Desserts Leave a comment

Overnight Crème Brûlée French Toast Delightful Recipe

May 15, 2025 by Chef Evan
- 1 loaf of brioche bread, sliced thick - 4 large eggs - 2 cups whole milk - 1 cup heavy cream - 1 cup granulated sugar - 1 tablespoon vanilla extract - 1 teaspoon ground cinnamon - Pinch of salt The main ingredients in this recipe create a rich and creamy base. Brioche bread adds a soft texture, while the eggs, milk, and cream form the custard. Granulated sugar sweetens the mix, and vanilla provides a lovely aroma. Ground cinnamon adds warmth and flavor, while salt brings balance. - 1/4 cup additional granulated sugar (for brûlée topping) - Fresh berries and mint leaves for garnish (optional) The additional ingredients complete this dish. The extra granulated sugar is crucial for the caramelized top. Fresh berries and mint leaves not only make the dish look pretty, but they also add fresh flavors. These garnishes are optional but highly recommended for a beautiful presentation. You can find the full recipe at the end of the article. First, gather your ingredients. In a large mixing bowl, add the eggs, milk, heavy cream, granulated sugar, vanilla extract, ground cinnamon, and a pinch of salt. Whisk them together well. You want a smooth mixture, with no lumps. This custard is the heart of your crème brûlée French toast. Next, take a 9x13 inch baking dish. Grease it with butter or non-stick spray to prevent sticking. Now, layer the thick slices of brioche in the dish. Overlap the slices slightly to fit them all in. Once arranged, pour the custard mixture evenly over the brioche. Use a spatula to press down gently. This helps the bread soak up all that creamy goodness. Cover the baking dish with plastic wrap. Place it in the fridge and let it chill overnight. This allows the bread to fully absorb the custard. When you’re ready to bake, preheat your oven to 350°F (175°C). Take the dish out of the fridge and let it sit for 15 minutes at room temperature. Then, bake it uncovered for 40-45 minutes. Your French toast should be golden and set. This ensures you get that perfect texture. To make the best crème brûlée French toast, use day-old bread. Fresh bread can get too soggy. Day-old bread absorbs the custard better and holds its shape. Adjust the sweetness to your liking. If you want it sweeter, add more sugar to the custard. If you prefer it less sweet, reduce sugar accordingly. Taste as you go for the best results. Make your dish look as good as it tastes. Garnish each serving with fresh berries and mint leaves. This adds color and a fresh touch. A light dusting of powdered sugar on top brings elegance. Use a fine sieve to sprinkle the sugar evenly. Serve the French toast warm for the best flavor and texture. You can cut it into squares or serve it in individual portions for a nice touch. {{image_4}} You can easily change the flavor of your crème brûlée. Try adding chocolate, fruit, or spices. For chocolate, melt some dark chocolate and mix it into the custard. This adds a rich taste. For fruit, mash ripe bananas or blend berries into the mix. This gives your French toast a fruity twist. If you love spices, add nutmeg or cardamom to the custard. These ingredients create unique flavors that make your dish stand out. If you need gluten-free options, use gluten-free bread instead of brioche. It works well and tastes great. For vegan adaptations, swap eggs for flax eggs and use almond milk and coconut cream. This way, everyone can enjoy this dish, no matter their diet. Making these changes allows you to enjoy the same creamy, delicious taste. You can serve your overnight crème brûlée French toast with different syrups or toppings. Maple syrup is a classic choice. But you might also try chocolate syrup or a fruit compote. Fresh berries add a burst of color and flavor. You can also sprinkle nuts for a crunchy texture. Get creative with your toppings to make each serving special! To keep your Overnight Crème Brûlée French Toast fresh, store it properly. Place any leftover portions in an airtight container. This helps maintain its taste and texture. Make sure to refrigerate it right away. It will stay good for about 3 to 4 days. If you want, you can also freeze it. Wrap each piece tightly in plastic wrap, then place them in a freezer bag. It can last up to 2 months in the freezer. Remember to label the bag with the date for easy reference. When you're ready to enjoy your French toast again, you want to reheat it carefully. The best way to do this is in the oven. Preheat your oven to 350°F (175°C). Place the slices on a baking sheet lined with parchment paper. Cover them with foil to keep them moist. Heat for about 10 to 15 minutes. If you prefer the microwave, reheat on low power. Heat in 30-second intervals, checking after each round. This method helps keep the texture nice and soft. Avoid high heat, as it can make the toast tough. Always enjoy your French toast warm for the best flavor! To make the custard less eggy, you can reduce the number of eggs. Try using only three large eggs instead of four. This change helps create a lighter texture. You can also add more milk or cream to balance the flavor. A good ratio is to keep the total liquid around three cups. This way, the taste of eggs will be less strong. Yes, you can prepare this dish in advance. I recommend soaking the brioche overnight. This allows the bread to absorb all the custard flavors. You can also bake it the next day and enjoy it fresh. If you want to prepare it even earlier, you can assemble it up to two days ahead. Just cover it well and store it in the fridge. If you do not have a kitchen torch, do not worry! You can caramelize the sugar using your oven. Simply sprinkle the sugar on top of the baked French toast. Then, place it under the broiler for 2-3 minutes. Keep a close eye on it to avoid burning. The sugar should melt and turn a beautiful golden brown. This method gives you that crispy top without needing a torch. This post covered how to make delicious crème brûlée French toast. We discussed key ingredients like brioche, eggs, and cream, along with helpful tips for perfecting your dish. I shared easy steps for preparing the custard, soaking the bread, and baking. You learned various ways to adjust flavors and offered storage and reheating tips. Finally, I encourage you to get creative and impress your friends with this recipe. Enjoy your cooking journey!

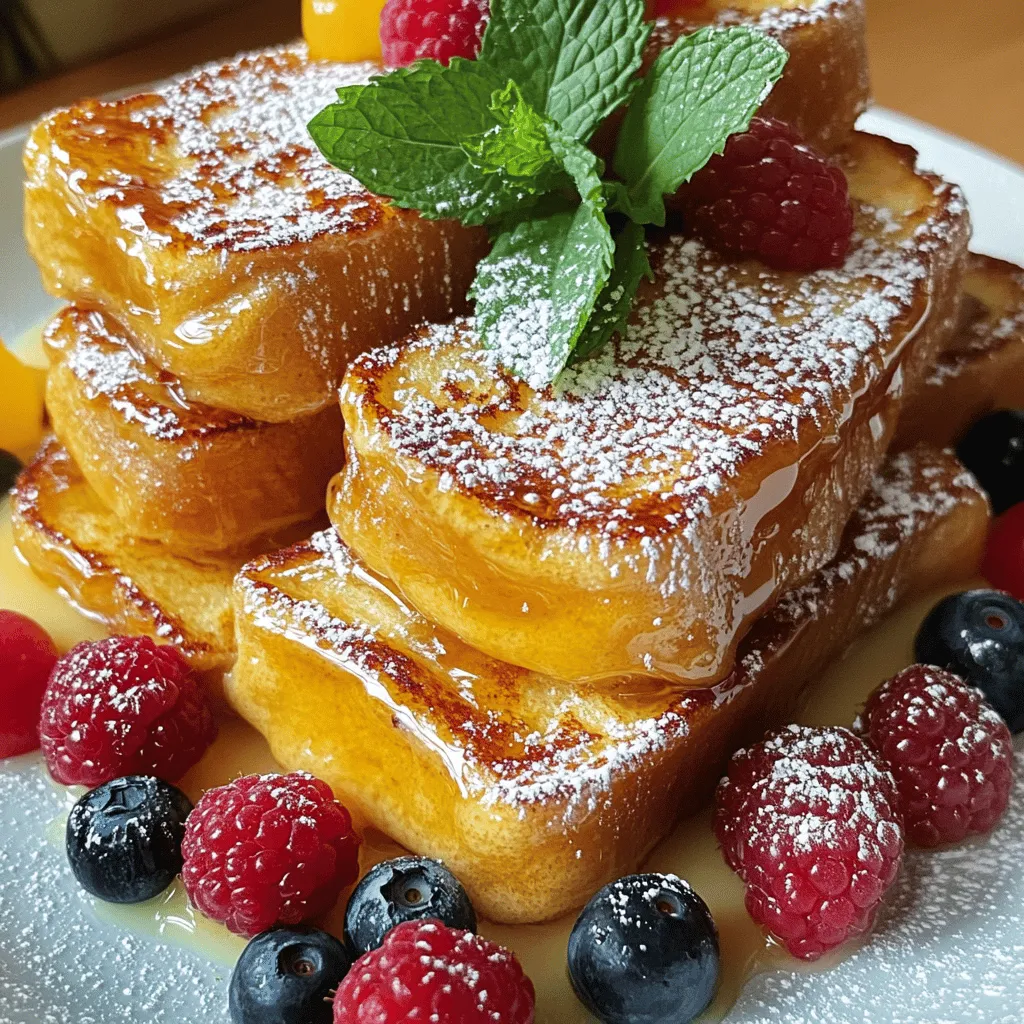
Are you ready to elevate your breakfast game? This Overnight Crème Brûlée French Toast is a showstopper that combines creamy custard and crispy caramel, all in one bite. With minimal …

Read more

Categories Breakfast Leave a comment

Soft & Chewy Cinnamon Roll Cookies Perfectly Baked Treat

May 15, 2025 by Chef Evan
- 2 1/4 cups all-purpose flour - 1/2 teaspoon baking soda - 1 teaspoon baking powder - 1/2 teaspoon salt - 1 teaspoon ground cinnamon - 3/4 cup unsalted butter, softened - 1 cup packed brown sugar - 1/2 cup granulated sugar - 1 large egg - 1 tablespoon vanilla extract - 1/2 cup powdered sugar (for icing) - 1-2 tablespoons milk (for icing) When making soft and chewy cinnamon roll cookies, you need fresh ingredients. Fresh ingredients will make your cookies taste great. I always check the dates on my flour, baking soda, and cinnamon. Freshness matters! - Flour: Choose all-purpose flour that is soft and has no lumps. - Baking Powder & Soda: Check the expiration date. Old baking soda may not rise well. - Cinnamon: Smell it! Fresh cinnamon has a strong aroma. If it smells weak, it may be old. - Butter: Use unsalted butter that is soft but not melted. This will help the cookies blend well. - Sugars: Granulated and brown sugars should be soft, not hard or clumpy. - Flour: You can use gluten-free flour if needed. It works well for this recipe. - Butter: Coconut oil can replace butter for a dairy-free option. Use the same amount. - Egg: For vegan cookies, use a flaxseed egg. Mix 1 tablespoon of flaxseed with 2.5 tablespoons of water. - Milk for Icing: Any plant-based milk works great for the icing. Almond or oat milk are good choices. If you want the full recipe, you can find it above. These tips will help you create delicious cookies that everyone will love! - Preheat your oven to 350°F (175°C). - Line a baking sheet with parchment paper. This helps keep your cookies from sticking. - In a medium bowl, mix together the flour, baking soda, baking powder, salt, and cinnamon. This step helps to evenly blend all the dry ingredients. - In a large bowl, beat the softened butter with the brown and granulated sugars. Use a hand mixer for best results. Mix until it looks light and fluffy. - Add the egg and vanilla extract to the butter mix. Blend until smooth and well combined. - Slowly add the dry ingredients to the wet mix. Stir gently until just combined. Avoid over-mixing, as this can make your cookies tough. - Use a cookie scoop or spoon to drop rounded balls of dough onto the prepared baking sheet. Space them about 2 inches apart. - Bake the cookies for 10-12 minutes until the edges are golden. The centers may seem soft, but they will firm up as they cool. - To make the icing, whisk together powdered sugar and milk in a small bowl. Adjust the milk until you get a smooth, drizzle-able consistency. - Once the cookies cool for a few minutes, drizzle the icing on top. Let them cool completely on the baking sheet before moving them. For the full recipe, you can refer to the details above. To get soft and chewy cookies, avoid over-mixing. When you mix too much, the cookies can turn tough. Mix until just combined. This keeps the dough light and fluffy. Understanding baking times is key, too. Bake your cookies for 10 to 12 minutes. They should be lightly golden on the edges. The centers may look a bit underbaked. This is fine! They will firm as they cool. You can add fun flavors to your cookies. Try mixing in nuts or chocolate chips. Chopped pecans or walnuts give a nice crunch. Dark chocolate chips add richness. For icing, you can switch it up! Instead of just milk and powdered sugar, add a splash of maple syrup. A little cocoa powder creates a chocolate icing. You can even use cream cheese for a tangy twist. Make your cookies shine when you serve them! Arrange them on a colorful platter. Drizzle extra icing over the top for flair. Add a sprinkle of ground cinnamon for color and flavor. For a crunch, consider garnishing with chopped nuts. These small touches make your cookies look and taste gourmet. For the full recipe, check the earlier section. Enjoy baking! {{image_4}} You can make these cookies gluten-free. Use a 1:1 gluten-free flour blend. This swap works well for the all-purpose flour. Ensure your baking soda and baking powder are also gluten-free. Mix the dry ingredients as you normally would. Then, follow the rest of the recipe steps. The cookies will still be soft and chewy. You won't miss the gluten at all. To make these cookies vegan, replace the egg with a flax egg. Combine one tablespoon of flaxseed meal with three tablespoons of water. Let this sit for a few minutes to thicken. For the butter, use vegan margarine. This change keeps the cookies tasty and soft. The rest of the recipe stays the same. Enjoy these cookies without animal products. You can spice up your cookies for the season. Try adding pumpkin spice for a fall treat. Use one tablespoon of pumpkin spice instead of cinnamon. During winter, add peppermint extract for a fresh twist. Just a few drops will give your cookies a holiday vibe. You can also add chopped nuts or chocolate chips. These additions will bring new flavors to your cinnamon roll cookies. For more ideas, check out the Full Recipe for Soft & Chewy Cinnamon Roll Cookies. To keep your cookies fresh, use an airtight container. A glass or plastic container works best. Line the bottom with parchment paper for added softness. This helps absorb moisture and keeps cookies chewy. Place a piece of bread in the container. It adds moisture and keeps the cookies from drying out. Store the container at room temperature, away from direct sunlight. Freezing your cinnamon roll cookies is easy and smart. First, let the cookies cool completely. Then, place them in a single layer on a tray. Freeze them for about an hour. This prevents them from sticking together. Once frozen, transfer the cookies to a freezer-safe bag. Remove as much air as possible. They can last up to three months in the freezer. When you're ready to enjoy your frozen cookies, take them out. Let them thaw at room temperature for about 30 minutes. If you want them warm, preheat your oven to 350°F (175°C). Place the cookies on a baking sheet for about 5 minutes. This will revive their soft, chewy texture. You can also microwave a single cookie for about 10-15 seconds. Enjoy your Soft & Chewy Cinnamon Roll Cookies any time you want! To keep your cookies thick, use cold butter. Softened butter can make cookies spread out too much. Chill the dough for 30 minutes before baking. This helps the cookies hold their shape. Also, make sure to measure your flour correctly. Too little flour can lead to flat cookies. Yes, you can double the recipe! Just make sure to mix everything well. Use two baking sheets if you have them. Keep an eye on the baking time. Larger batches may need a few extra minutes in the oven. To prevent sticking, line your baking sheet with parchment paper. This makes it easy to lift the cookies off. You can also use a silicone baking mat. If you don’t have these, lightly grease the baking sheet with cooking spray or butter. In this blog post, we explored how to make delicious cookies from scratch. We covered the important ingredients, step-by-step instructions, and helpful tips for success. Remember to select fresh ingredients and consider fun variations to enhance your cookies. Storing your leftovers properly keeps them fresh and tasty. With these insights, you can bake perfect cookies every time. Enjoy the process and share your creations with friends and family!

If you crave a sweet treat that combines the warm flavors of cinnamon rolls and the chewy goodness of cookies, then you’re in for a delight! I’ll guide you through …

Read more

Categories Desserts Leave a comment

Homemade Crab Rangoon Crispy and Flavorful Delight

May 15, 2025 by Chef Evan
- 8 oz cream cheese, at room temperature - 6 oz lump crab meat, thoroughly drained and gently shredded - 2 green onions, finely chopped (both white and green parts) - 1 teaspoon garlic powder - 1 teaspoon Worcestershire sauce - Salt and pepper, to taste - 20 wonton wrappers - Vegetable oil, for frying - Sweet and sour sauce, for serving To make perfect crab rangoon, you need exact amounts of each ingredient. Here’s what you’ll need: - Cream cheese: Use 8 ounces. This gives richness to the filling. - Lump crab meat: Use 6 ounces. Drain it well, then shred it gently. - Green onions: Use 2, chopping both the white and green parts finely. They add a nice crunch. - Garlic powder: Just 1 teaspoon gives it a flavorful kick. - Worcestershire sauce: 1 teaspoon adds depth to the taste. - Salt and pepper: Add these to taste. Start with a pinch and mix. - Wonton wrappers: You’ll need 20 of these. They hold your filling. - Vegetable oil: This is for frying. You’ll need enough to cover the rangoons. - Sweet and sour sauce: Use this for dipping. It complements the crab rangoon well. For prep, chop the green onions finely. Mix all the filling ingredients in a bowl. Use a fork to mash the cream cheese. This makes it smooth and easy to blend. Once mixed, set the filling aside until you are ready to wrap. To make the filling, start with a medium bowl. Mix 8 oz of cream cheese, 6 oz of lump crab meat, and 2 chopped green onions. Add 1 teaspoon of garlic powder and 1 teaspoon of Worcestershire sauce. Season with salt and pepper to taste. Mix until creamy and smooth. This filling is the heart of your crab rangoon. Once mixed, set it aside for now. Grab a wonton wrapper and lay it flat on a clean surface. Spoon about one tablespoon of the crab mixture into the center of the wrapper. To seal it, wet the edges with a little water using your fingertip. Fold the wrapper over the filling to form a triangle. Make sure the edges meet neatly. Press down firmly to seal, removing any air. If you want a fancy look, fold the two top corners together and pinch them tightly. Repeat this until all wrappers are filled and sealed. Place the finished rangoons on a plate without stacking them. Now it’s time to fry! In a deep frying pan, pour enough vegetable oil to reach about 2 inches deep. Heat the oil over medium heat until it reaches 350°F (175°C). To test if the oil is ready, drop in a small piece of wonton. It should bubble and sizzle. Carefully add a few crab rangoons to the hot oil, but don’t crowd the pan. Fry them for about 3-4 minutes, flipping occasionally. You want them to turn golden brown and crispy. When they look perfect, use a slotted spoon to take them out. Place them on a paper towel-lined plate to soak up extra oil. Enjoy your crispy crab rangoons hot with sweet and sour sauce! To make the best crab rangoon, focus on the texture and flavor. The filling should be creamy but not runny. Use fresh cream cheese and carefully drain the crab meat. This step keeps your filling from being too watery. Avoid common mistakes like overfilling the wonton wrappers. Use about one tablespoon of filling per wrapper. If you overstuff, they may burst while frying. Seal them well by pinching the edges, ensuring no air pockets are inside. This helps keep the filling intact. Frying can be fun, but safety is key. Always use a deep pot or a heavy skillet for frying. This helps prevent spills. Fill the pot with enough vegetable oil, but do not overfill. Leave some space at the top to avoid splashing. Heat the oil slowly until it reaches about 350°F (175°C). You can test the oil by dropping a small piece of wonton wrapper in. If it bubbles, you’re ready to fry! Always keep a close eye on the oil. Never leave it unattended, as it can catch fire. When frying, add only a few rangoons at a time. This helps keep the oil hot and ensures even cooking. Use a slotted spoon to remove them, letting excess oil drip off. Enjoy your homemade crab rangoon with sweet and sour sauce for a perfect treat! For the detailed recipe, check the Full Recipe. {{image_4}} For those who need gluten-free options, you can use rice paper or gluten-free wonton wrappers. They work well and still give you that crispy bite. If you're aiming for a healthier choice, consider baking instead of frying. Brush the rangoons with a little oil and bake at 375°F until golden brown. If you want to make a vegetarian or vegan version, skip the crab meat. Instead, use a mix of sautéed mushrooms and diced bell peppers for a savory filling. You can blend in some nutritional yeast for that cheesy flavor without dairy. To elevate your crab rangoon, experiment with different seasonings. Adding a hint of Old Bay seasoning brings a nice seafood flavor that pairs well with crab. You can also mix in some sriracha for a spicy kick. For dipping sauces, sweet and sour sauce is a classic choice. But why not try a tangy soy sauce with a splash of lime juice? You could also whip up a creamy garlic aioli for a rich contrast to the crispy rangoons. These simple tweaks can transform your crab rangoon into a dish that suits your taste perfectly. You can find the full recipe for the crispy homemade crab rangoon and explore other variations too! To keep your cooked crab rangoons fresh, place them in an airtight container. You should refrigerate them within two hours of cooking. This helps prevent spoilage and keeps them tasty. They can last in the fridge for about 3 to 4 days. If you store them properly, they will remain flavorful. When reheating, you want to keep that crispy texture. The best way to do this is by using an oven or air fryer. Preheat your oven to 375°F (190°C). Place the rangoons on a baking sheet, and heat them for about 10-15 minutes. If using an air fryer, set it to 350°F (175°C) for around 5-7 minutes. For future meals, you can freeze the un-cooked rangoons. Place them on a baking sheet and freeze until solid. Once frozen, transfer them to a freezer bag. They can stay fresh in the freezer for about 2 months. When ready to cook, fry them straight from the freezer. Just add a couple of extra minutes to the cooking time. Enjoy that crispy homemade crab rangoon! To seal wonton wrappers well, you need to moisten the edges with water. Use your fingertip to lightly wet the edges. This helps the wrapper stick together. After adding filling, fold the wrapper over. Press firmly to seal and remove any air pockets. You can also fold the corners over for a pretty purse shape. Yes, you can bake your Crab Rangoon for a healthier option. Preheat your oven to 375°F (190°C). Lay the filled wontons on a baking sheet lined with parchment paper. Lightly brush them with oil to help with browning. Bake for about 15-20 minutes or until they turn golden brown. Keep an eye on them to avoid burning. To test if your oil is hot, drop a small piece of wonton wrapper into it. If it bubbles and sizzles, you are ready to fry. The oil should be around 350°F (175°C). Using a thermometer can help you get the right temperature. Frying at the correct heat ensures crispy rangoons. Yes, imitation crab meat can work in your Crab Rangoon. It has a different flavor and texture than lump crab meat. While it's less sweet, it still adds a nice taste. If you prefer, you can mix it with some real crab for more depth. Just make sure to drain it well before using. Making Crab Rangoon at home is fun and rewarding. You learned how to mix ingredients for the creamy filling, properly fold wonton wrappers, and fry them to a perfect golden brown. We discussed useful tips to avoid mistakes and how to make adaptations for different diets. Remember to store leftovers well and reheat carefully to keep that crispiness. With these steps and tricks, you can impress your friends and enjoy delicious Crab Rangoon anytime. Dive into your kitchen and get started. Happy cooking!

Craving a crispy and flavorful snack? Homemade Crab Rangoon is your answer! I’ll show you how to mix cream cheese with lump crab meat and seasonings for a delicious filling. …

Read more

Categories Appetizers Leave a comment

Raspberry Lemon Heaven Cupcakes Delightfully Sweet Treat

May 15, 2025 by Chef Evan
To make Raspberry Lemon Heaven Cupcakes, you need the following ingredients: - 1 ½ cups all-purpose flour - 1 cup granulated sugar - ½ cup unsalted butter, softened at room temperature - 2 large eggs, at room temperature - ½ cup buttermilk, at room temperature - 1 tablespoon freshly grated lemon zest - 1 tablespoon freshly squeezed lemon juice - 1 teaspoon baking powder - ½ teaspoon baking soda - ¼ teaspoon fine sea salt - 1 cup fresh raspberries (plus extra for garnish) - Optional: powdered sugar for a delicate dusting Gathering fresh and quality ingredients makes a big difference. I always choose ripe, juicy raspberries for their bright flavor. The lemon zest and juice add a tangy kick that brightens the cupcakes. Remember to use room temperature eggs and butter for the best texture. You can find the full recipe to guide you through each step. Enjoy the process! - Preheat your oven to 350°F (175°C). Prepare a muffin tin with paper cupcake liners. - Beat softened butter with granulated sugar until light and fluffy. This should take about 3-4 minutes. - Add the eggs one at a time. Mix well after each addition to blend them fully. - In a separate bowl, whisk buttermilk, lemon zest, and lemon juice until well combined. - Whisk together flour, baking powder, baking soda, and salt in another bowl until evenly mixed. - Gradually mix dry ingredients with the wet. Alternate with buttermilk. Start with the flour and finish with the buttermilk. - Gently fold fresh raspberries into the batter. Be careful not to break them up too much. - Evenly distribute the batter in the lined muffin tin. Fill each about two-thirds full to allow for rising. - Bake for 18-20 minutes. Cool on a wire rack after baking. - Dust with powdered sugar and garnish with fresh raspberries for a lovely touch. For the full recipe, explore the details and enjoy making these delightful treats! To get the best texture, avoid overmixing when combining ingredients. Overmixing can make your cupcakes tough. Mix just until you see no more dry flour. This keeps your cupcakes soft and fluffy. If you run out of buttermilk, you can use yogurt instead. Yogurt adds moisture and tanginess too. It works great in this recipe and keeps the cupcakes light. Baking time can change based on the size of your cupcakes. If you make mini cupcakes, check them around 12-15 minutes. For larger ones, they may need a minute or two more. Always use a toothpick to check for doneness; it should come out clean. {{image_4}} You can switch the raspberries for fresh blueberries. This change gives the cupcakes a new flavor. Blueberries add a sweet and juicy touch. They pair well with lemon zest. To make this swap, simply replace the cup of raspberries with a cup of blueberries. You will enjoy a fresh burst of flavor in every bite. If you or someone you know is gluten-sensitive, you can make these cupcakes gluten-free. Just use a gluten-free flour blend instead of all-purpose flour. Many brands offer great blends that work well in baking. This change allows everyone to enjoy these tasty treats without worry. The texture may differ slightly, but the flavor remains delicious. To create a vegan version, replace the eggs with flax eggs. To make one flax egg, mix one tablespoon of ground flaxseed with two and a half tablespoons of water. Let it sit for five minutes until it thickens. You should also swap out regular butter and milk for plant-based options. Use vegan butter and almond or oat milk. This way, everyone can enjoy the cupcakes, regardless of their dietary choices. For the full recipe, check the [Full Recipe]. Store cupcakes in an airtight container at room temperature for up to 3 days. This keeps them fresh and soft. I love using a glass container because it seals well and looks nice on the counter. For long-term storage, freeze unfrosted cupcakes for up to 3 months. Just make sure to wrap each cupcake tightly in plastic wrap. Thaw them before serving. This keeps the taste and texture just right. To maintain freshness, keep cupcakes away from direct sunlight and heat sources. A cool, dark spot works best. Avoid placing them near the oven or windows. This way, you can enjoy your Raspberry Lemon Heaven Cupcakes at their best! For the full recipe, check out the earlier section. Yes, you can prepare the batter in advance and store it in the fridge. This helps save time when you're ready to bake. Just remember to let it sit at room temp for a bit before baking. This helps the cupcakes rise better and taste fresh. Insert a toothpick into the center of a cupcake. It should come out clean when the cupcakes are ready. If you see batter on the toothpick, bake them a bit longer. This simple test is quick and easy, ensuring perfect results every time. Consider lemon buttercream or cream cheese frosting for a delightful pairing. Both options add a sweet and tangy flavor that pairs well with the raspberry lemon taste. You can also try a light glaze if you prefer a simpler finish. These cupcakes combine soft batter, fresh raspberries, and bright lemon. You learned how to prep ingredients, bake, and garnish for the best flavor. Remember, you can easily swap ingredients or make them vegan. Keep these tips in mind for perfect results. Enjoy crafting these treats that are sure to impress! Happy baking!

Indulge your sweet tooth with my Raspberry Lemon Heaven Cupcakes! These light and fluffy treats are bursting with zesty lemon and fresh raspberries. Perfect for any occasion, these cupcakes are …

Read more

Categories Desserts Leave a comment
Older posts
Newer posts
← Previous Page1 … Page93 Page94 Page95 … Page124 Next →

TOSSED FLAVORS

Where flavors are fresh, vibrant, and ready to toss! 🥗

PAGES

Home About Contact Privacy Policy Terms & Conditions Cookie Policy GDPR Policy Copyright Policy Disclaimer

CATEGORIES

Appetizers Desserts Salads Breakfast Dinner

Contact

  • Pinterest
  • Mail
Copyright © 2026 Tossed Flavors. All rights reserved.