Easy Spinach Chicken Pasta Simple and Tasty Recipe
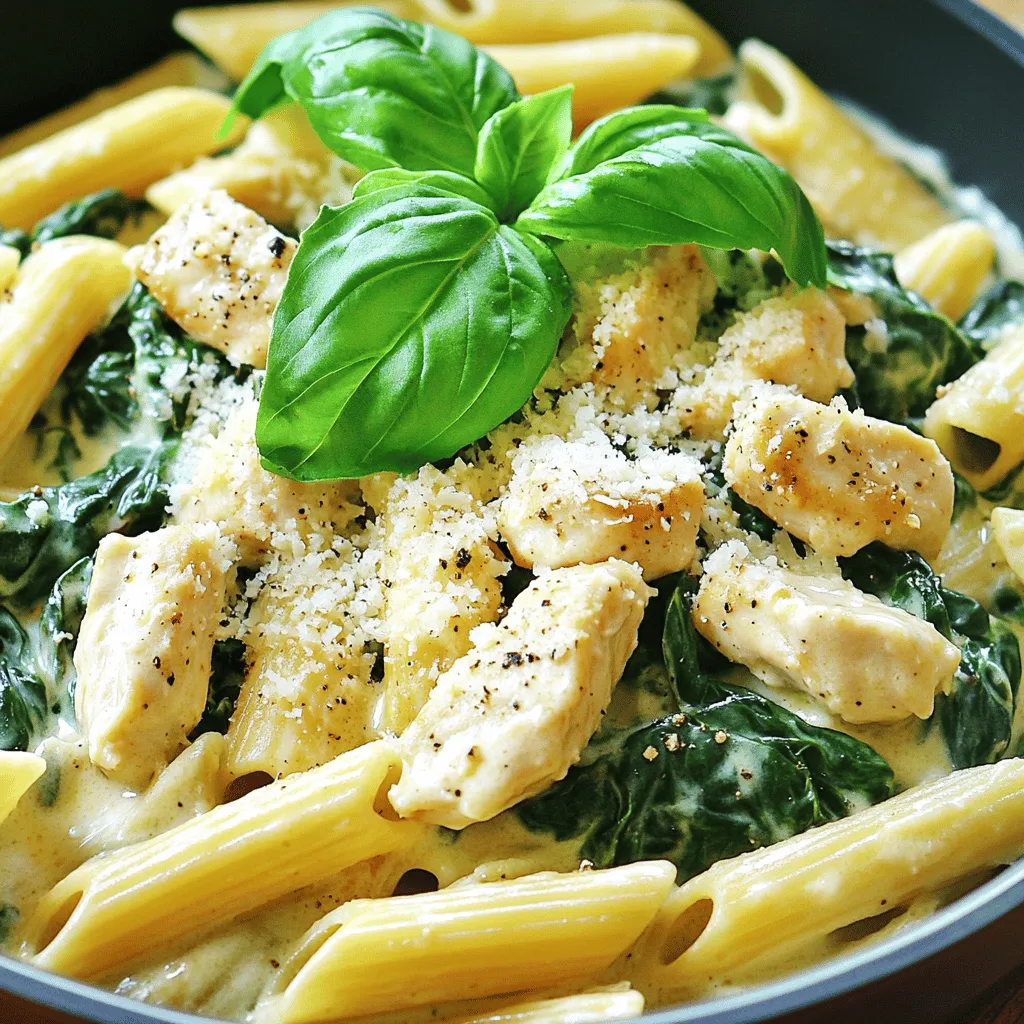
Craving a meal that’s both easy and delicious? My Easy Spinach Chicken Pasta recipe is just what you need! With simple ingredients like penne, fresh spinach, and juicy chicken, you …
Craving a meal that’s both easy and delicious? My Easy Spinach Chicken Pasta recipe is just what you need! With simple ingredients like penne, fresh spinach, and juicy chicken, you …

If you love cake but want something cute and easy, mini bundt cakes are for you. These little treats are perfect for any event, from birthdays to dinner parties. In …
![- 1 cup finely chopped cooked corned beef - 1 cup sauerkraut, thoroughly drained and chopped - 1 cup shredded Swiss cheese - 1/2 cup cream cheese, softened to room temperature - 1 teaspoon garlic powder - 1 teaspoon onion powder - 1/2 teaspoon freshly ground black pepper The main ingredients create a rich and savory flavor. Corned beef adds a hearty touch. Sauerkraut brings tanginess and crunch. Swiss cheese melts perfectly, making everything gooey. Cream cheese binds the mix and adds creaminess. Garlic and onion powders enhance the taste without being overpowering. - 1/2 cup breadcrumbs (preferably panko for extra crunch) - Oil for frying (vegetable or canola oil works well) For the best crunch, I recommend using panko breadcrumbs. They give a light and crispy coating. For frying, vegetable or canola oil works great. Heat the oil until it's hot but not smoking. This ensures a golden-brown crust. - 1/2 cup mayonnaise - 2 tablespoons Dijon mustard - 1 tablespoon Sriracha sauce (adjust quantity based on desired spice level) - 1 teaspoon honey (for a hint of sweetness) - Salt and freshly ground black pepper to taste This spicy dipping sauce really brings the dish together. Mayonnaise creates a creamy base. Dijon mustard adds a sharp bite, while Sriracha gives heat. Honey balances the spice with a sweet touch. Mix it all well to make a smooth sauce. You can adjust the spice level to match your taste. For the full recipe, refer to the detailed preparation instructions. In a large bowl, combine the main ingredients for the Reuben balls. You will need: - 1 cup finely chopped cooked corned beef - 1 cup sauerkraut, drained and chopped - 1 cup shredded Swiss cheese - 1/2 cup softened cream cheese - 1 teaspoon garlic powder - 1 teaspoon onion powder - 1/2 teaspoon freshly ground black pepper Mix these well with a fork or spatula. Make sure everything is evenly blended. This step is key because it ensures each ball has the same flavor. After mixing, it’s time to shape the mixture into balls. Take a small amount, about 1 inch in size, and roll it in your hands. Make sure they are compact, so they hold together well. After forming the balls, coat them in breadcrumbs. Use panko for extra crunch. Now, place the rolled balls on a tray and chill them in the fridge for about 30 minutes. Chilling firms them up, which helps keep them from falling apart while frying. For frying, heat oil in a deep frying pan or Dutch oven. You want about an inch of oil. Heat it to around 350°F (175°C). Use a thermometer if you have one. Carefully add the Reuben balls in batches. Do not overcrowd the pan. Fry them for 3 to 4 minutes. Turn them occasionally. They should turn golden brown and crispy. Once done, take them out with a slotted spoon and let them drain on a paper towel. This frying method gives your Reuben balls a perfect crispy outside while keeping the inside warm and flavorful. Enjoy them fresh with the spicy dipping sauce! For the complete recipe, check out Full Recipe. To make your Reuben balls crunchy, follow these steps: - Use panko breadcrumbs. They add more crispiness than regular breadcrumbs. - Don't overcrowd the pan. Fry in small batches to keep the oil hot. - Keep oil at the right temperature. Aim for 350°F (175°C) to ensure even cooking. Avoid common frying mistakes: - Skip wet balls. Make sure the mixture is dry enough to hold its shape. - Don't skip chilling. Refrigerate the balls before frying to help them firm up. Baking can be a healthier option: - Preheat your oven to 400°F (200°C). - Place on a baking sheet. Spray lightly with oil for some crisp. - Bake for 20-25 minutes. Flip halfway through for even browning. An air fryer is also a great choice: - Set the air fryer to 375°F (190°C). - Arrange the balls in a single layer. Cook for about 10-12 minutes. - Check for a golden brown color. Shake the basket halfway through. Customizing spices can make your Reuben balls unique: - Add cumin or paprika. These spices can enhance the flavor. - Try adding some chopped jalapeños. They will bring heat and flavor. You can also add extra ingredients for variety: - Chopped green onions or fresh herbs can brighten the dish. - Experiment with different cheeses, like cheddar or pepper jack, for a twist. For the full recipe, check the complete details above. {{image_4}} You can switch Swiss cheese for other types. Try cheddar for a sharper taste. Gouda adds a creamy texture and smoky flavor. For a twist, use pepper jack for heat. Each cheese brings its own flair to these Reuben balls. Mixing cheeses can also give you a fun blend of flavors. If you want a plant-based version, replace the corned beef with lentils or mushrooms. You can even use tempeh for a meat-like texture. For the cream cheese, look for dairy-free options made from nuts or tofu. These swaps keep the spirit of the dish while catering to dietary needs. Pair your Reuben balls with a simple salad or coleslaw. This adds a crunchy, fresh element. For a fun twist, serve them with potato wedges or sweet potato fries. Presentation matters too. Use a colorful plate and garnish with fresh herbs. This makes the dish pop and invites everyone to dig in. For the full recipe, click [Full Recipe]. To keep your Reuben balls fresh, first let them cool down. Place them on a plate lined with paper towels. This helps absorb any excess oil. Once cool, use an airtight container. Glass or plastic containers work well. Store them in the fridge for up to three days. To reheat, use an oven for the best texture. Set it to 350°F (175°C). Place the Reuben balls on a baking sheet. Bake for about 10-15 minutes. This keeps them crispy. Avoid the microwave, as it can make them soggy. You can freeze Reuben balls before or after frying. If you freeze them before frying, form the balls and place them on a tray. Freeze until solid, then transfer to a freezer bag. For frying after freezing, cook from frozen. If you fry them first, let them cool completely. Store in a freezer-safe bag. To defrost, place them in the fridge overnight before reheating. To make Reuben Balls gluten-free, use gluten-free breadcrumbs. You can find these in most stores. Almond flour or ground oats also work well. Make sure the corned beef and other ingredients are gluten-free too. You might need to check labels to be safe. Yes, you can prepare the Reuben Balls ahead of time. Mix the ingredients and shape the balls. Then, chill them for 30 minutes. Store them in the fridge for up to 24 hours. When you're ready, fry them right before serving for the best taste. The spicy dipping sauce pairs great with many foods. Try it with veggies, chips, or chicken tenders. You can also use it as a spread on sandwiches or wraps. The sauce adds a kick to any dish! For the full recipe, check out the link. Reuben balls are a fun twist on a classic dish. We covered the main ingredients, like corned beef and Swiss cheese, and detailed the step-by-step process. I shared tips for great texture and offered variations for different diets, too. Remember, chilling the balls before frying can make a big difference. With the right dips and sides, you’ll impress everyone. Enjoy making and sharing these tasty bites at your next gathering!](https://tossedflavors.com/wp-content/uploads/2025/05/3f2832d1-7f7c-4de4-b3df-1082e9069db9.webp)
Who doesn’t love a tasty twist on a classic? Reuben Balls with Spicy Dipping Sauce offer a fun, bite-sized way to enjoy this favorite sandwich flavor. Packed with corned beef, …

Crispy Rice Balls are a fun, easy treat that you can whip up in no time. With just a few simple ingredients, you’ll create tasty snacks that are perfect for …

Looking for a sweet escape to paradise? The Pineapple Dream Dessert is your ticket! This creamy treat combines fresh pineapple, rich cream cheese, and fluffy whipped cream for a tropical …
![- 1 pound fresh asparagus, trimmed and cut into 2-inch pieces - 1 cup cooked quinoa or brown rice - 1 cup sharp cheddar cheese, shredded (divided) - ½ cup cream cheese, softened to room temperature - 1 cup vegetable broth - 1 cup milk (whole or 2%) - 1 teaspoon garlic powder - 1 teaspoon onion powder - 1 tablespoon olive oil - Salt and pepper, to taste - ½ cup breadcrumbs (optional for a crispy topping) - Fresh parsley, finely chopped, for garnish You can swap out the cheese if you need to. Try mozzarella or gouda for a different taste. If you want to avoid quinoa or rice, use cauliflower rice or barley. For a dairy-free version, opt for a plant-based cream cheese and almond milk. These swaps will still keep your casserole creamy and delicious. 1. Preheat the oven: Start by setting your oven to 375°F (190°C). This ensures the oven is ready for your casserole. 2. Mixing the creamy base: In a large bowl, combine softened cream cheese with milk and vegetable broth. Whisk until smooth. Add garlic powder and onion powder. Season with salt and pepper. Stir well to mix everything. 1. Incorporating asparagus and grains: Now, add cooked quinoa or brown rice to the creamy mix. Then, fold in the asparagus pieces gently. Make sure they are well-coated for more flavor. 2. Layering with cheese: Pour the mixture into a greased 9x13 inch baking dish. Spread it out evenly. Sprinkle half of the shredded cheddar cheese on top. This will melt beautifully during baking. 1. Timing and temperature guidelines: Place the dish in your preheated oven. Bake for 25-30 minutes, or until you see the top bubbling. It should be a lovely golden brown. 2. Tips for achieving the perfect crust: If you want a crispy topping, consider adding breadcrumbs before baking. Drizzle a bit of olive oil over them. This helps create a crunchy texture. Now, just wait for the delicious aroma to fill your kitchen! For the full recipe, check out the detailed instructions provided. To ensure even cooking, spread the mixture evenly in the baking dish. Use a 9x13 inch dish for best results. This size helps the heat circulate well. Avoiding sogginess is key. Make sure your asparagus is not overcooked before mixing. If using frozen asparagus, thaw it first and pat it dry. This keeps the casserole firm and tasty. Adding fresh herbs or spices can boost flavor. Try thyme, basil, or even a pinch of red pepper flakes for a kick. Mixing in some garlic adds a nice touch too. Incorporating proteins makes this dish heartier. Cooked chicken or turkey works well. You can also use beans for a vegetarian option. Both add flavor and make the casserole filling. For serving, you can dish it right from the baking dish. This gives a homey feel. If you want a fancier touch, serve individual portions on plates. Garnishing is fun! Fresh parsley adds color and brightness. You can sprinkle some extra cheese on top before serving for a cheesy finish. A side salad pairs great to balance the richness of the casserole. For more tips, check the Full Recipe. {{image_4}} For a low-carb version, swap quinoa with cauliflower rice. This keeps it light but still filling. You can also add more veggies like spinach or bell peppers. They boost nutrition and add color. Mix different cheeses for more depth. Try mozzarella or gouda for a creamy twist. You can also add crispy pancetta or chopped nuts for crunch. These add-ins give your casserole a fun twist. Use seasonal veggies to keep it fresh. In spring, add peas or fresh herbs. In the fall, consider roasted squash or even some caramelized onions. Adjust flavors for holidays, like adding nutmeg or sage for a festive touch. These variations let you customize your Cheesy Asparagus Casserole to fit any taste or occasion. For the complete recipe, check the [Full Recipe]. To keep your cheesy asparagus casserole fresh, store it in an airtight container. Place it in the fridge as soon as it cools down. This helps keep the flavors intact. Leftovers can last about three to four days in the fridge. If you want to save it for longer, consider freezing it. For freezing, wrap the casserole tightly in plastic wrap and then in foil. This helps prevent freezer burn. It can last up to three months in the freezer. When reheating, I recommend using the oven. Preheat the oven to 350°F (175°C). Place the casserole in a baking dish and cover it with foil. This keeps it moist while it heats. Bake for about 20-30 minutes. Check if it's hot all the way through before serving. You can also use the microwave for quicker reheating. Heat it in short intervals, about 1-2 minutes at a time, stirring in between. This method helps keep the texture nice. In the fridge, your casserole stays good for about three to four days. If you see any mold or an off smell, it's best to toss it. Signs of spoilage also include a slimy texture or discoloration. If you freeze it, remember to label the container with the date. This way, you’ll know when to use it. For the best taste, consume frozen leftovers within three months. Can I use frozen asparagus? Yes, you can use frozen asparagus. Just thaw it and drain any excess water. Frozen asparagus cooks quickly, so adjust your baking time slightly. This helps keep the texture nice and firm. How can I make this recipe ahead of time? You can prepare the casserole a day before. Mix all your ingredients and place them in the baking dish. Cover it tightly and store it in the fridge. When you’re ready to bake, just pop it in the oven. You may need to add a few minutes to the baking time if it’s cold. Overview of calorie count and macros Each serving of Cheesy Asparagus Casserole has about 300 calories. It contains 15 grams of protein, 20 grams of carbs, and 18 grams of fat. This dish is a good balance of nutrients, making it great for meals. Healthy modifications To make it healthier, use low-fat cheese or substitute quinoa for brown rice. You can also add more veggies like spinach or bell peppers. This boosts nutrients without losing flavor. How to ensure the cheese melts perfectly? To get smooth, melted cheese, use room temperature cheese. Mix it in with the warm creamy base. This helps it melt evenly throughout the casserole and gives you that gooey texture we all love. Can I substitute quinoa with rice? Yes, you can swap quinoa with brown rice or even white rice. Just make sure to cook it before adding it to the casserole. This ensures it blends well with the cheese and asparagus. This blog post explored crafting a cheesy asparagus casserole from scratch. You learned about key ingredients, swaps, and easy instructions. We covered tips for perfect cooking, ways to add flavor, and how to store leftovers. Whether for a family meal or a gathering, this dish shines. You can adjust it to your taste and health needs. Enjoy making this fun recipe, and don’t hesitate to experiment with seasonal veggies. Happy cooking!](https://tossedflavors.com/wp-content/uploads/2025/05/219b23ea-7656-4f25-a273-5d97d2d98fa8.webp)
Are you ready to whip up a delicious dish that’s both easy and tasty? This Cheesy Asparagus Casserole combines fresh asparagus with creamy cheese and grains, making it a hit …
![To make delicious mini lemon cheesecakes, gather these key ingredients: - 1 cup graham cracker crumbs - 1/4 cup unsalted butter, melted - 2 tablespoons granulated sugar - 16 oz cream cheese, softened - 1 cup powdered sugar - 2 large eggs - 1 tablespoon fresh lemon zest - 1/4 cup freshly squeezed lemon juice - 1 teaspoon pure vanilla extract These ingredients create a balance of sweet and tart flavors. The cream cheese gives the cheesecake its rich texture, while the lemon adds a bright touch. Remember, using room temperature cream cheese helps blend everything smoothly. You can elevate your mini cheesecakes with these optional garnishes: - Whipped cream - Lemon slices Adding whipped cream gives a light, airy feel. Lemon slices add a fresh look and a hint of extra citrus flavor. Feel free to get creative with toppings! To make your mini cheesecakes, you'll need some basic tools: - Muffin tin - Paper liners - Mixing bowls - Electric mixer - Measuring cups and spoons - Spoon or spatula Having these tools ready will help your cooking process run smoothly. The muffin tin shapes your cheesecakes perfectly, while the electric mixer ensures a creamy filling. Once you have everything, you’re ready to start your baking adventure! First, we need to set the stage for our mini lemon cheesecakes. Preheat your oven to 325°F (160°C). This temperature helps the cheesecakes bake evenly. While the oven warms up, grab a muffin tin and line it with paper liners. The liners stop the cheesecakes from sticking. This step helps make serving easier. Now, let’s create the crust. In a medium mixing bowl, combine: - 1 cup graham cracker crumbs - 1/4 cup unsalted butter, melted - 2 tablespoons granulated sugar Stir the crumbs, butter, and sugar until the crumbs feel moist. Take about 1 tablespoon of this mixture and press it into each muffin liner. Use a spoon or your fingers to pack it tightly. A solid base makes a great foundation for our creamy filling. Next, we’ll prepare the cream cheese filling. In a large mixing bowl, beat: - 16 oz cream cheese, softened Mix it until it’s smooth and creamy. This step is key for a lump-free filling. Gradually add: - 1 cup powdered sugar Blend these until fluffy. Then, add in: - 2 large eggs (one at a time) - 1 tablespoon fresh lemon zest - 1/4 cup freshly squeezed lemon juice - 1 teaspoon pure vanilla extract Mix until all is well combined. The filling should look rich and creamy. Now, let's fill those crusts! Carefully pour the cream cheese mixture over the crusts. Fill each liner about 3/4 full. This space allows the cheesecakes to rise a bit. Place the muffin tin in the preheated oven. Bake for 18-20 minutes. You want the centers to be set but still slightly jiggly. After they bake, take them out and let them cool to room temperature. Once cooled, put them in the fridge for at least 2 hours. This helps them set properly. When ready, feel free to garnish with whipped cream and slices of lemon for a fresh touch. Enjoy your mini lemon cheesecakes! For the complete recipe, check [Full Recipe]. To make the best mini lemon cheesecakes, start with room-temperature cream cheese. Cold cream cheese is hard to mix, and it can lead to lumps. Use an electric mixer to beat the cream cheese until it is smooth and creamy. This step is key. Make sure to scrape the bowl to mix all the cream cheese evenly. The texture of your mini cheesecakes should be light and fluffy. Be careful not to over-mix once you add the eggs. Mix just until combined. If you over-mix, your cheesecakes can become dense. Also, bake your cheesecakes until the centers jiggle slightly. This tells you they are perfectly cooked. One common mistake is not cooling the cheesecakes properly. After baking, let them cool at room temperature first. Chilling right away can cause cracks. Another mistake is filling the crusts too full. Fill them about three-quarters full to allow for rising. Finally, always use fresh lemon juice and zest for the best flavor. Don't skip this step. For the full recipe, check out the details above. {{image_4}} You can switch up the flavor of mini lemon cheesecakes in fun ways. Try using berries, like strawberries or blueberries. Just blend in some berry puree into the cream cheese mix. Chocolate is another great choice. Melt dark chocolate and fold it into the filling for a rich twist. You can even combine flavors, like lemon and raspberry, for a bright treat. Want a lighter version? Consider using Greek yogurt instead of cream cheese. It gives a tangy taste and cuts down on fat. You can swap granulated sugar for honey or maple syrup. This adds sweetness and a unique flavor. For the crust, use almond flour or oats instead of graham crackers. These options are gluten-free and packed with nutrients. Serve your mini cheesecakes with fresh fruit for a vibrant touch. Slices of strawberries, blueberries, or kiwi look beautiful on top. You could also drizzle some berry sauce or chocolate sauce over them. This adds flavor and makes your dessert pop. Try pairing them with a scoop of vanilla ice cream for a creamy contrast. Get the full recipe to make these delicious mini lemon cheesecakes and explore endless variations! To keep your mini lemon cheesecakes fresh, use a sealed container. Place them in the fridge. They will stay good for about five days. Make sure to separate layers with parchment paper. This prevents sticking. If you have toppings, add them right before serving. You can freeze these cheesecakes for later. Wrap each cheesecake in plastic wrap. Then, place them in a freezer bag. This keeps them safe from freezer burn. They will stay fresh for up to three months. When you want to enjoy them, just take them out and thaw in the fridge overnight. These mini cheesecakes taste best cold. However, if you enjoy them warm, you can reheat them gently. Use a microwave and heat for about 10-15 seconds. Avoid overheating, as it can change the texture. Enjoy them fresh from the fridge for a fluffy and tart delight. For the full recipe, refer to the earlier section. You can tell when the mini cheesecakes are done by checking the centers. They should look set but still jiggle slightly when you shake the pan. This slight jiggle means they will firm up as they cool. If they are too wobbly, they need more baking time. Yes, you can use alternative sweeteners like stevia or monk fruit. Keep in mind that these sweeteners can change the taste and texture. Start with half the amount of your chosen sweetener, then adjust to your taste. If you want a dairy-free option, you can use cashew cream or tofu. For a lower-fat choice, try Greek yogurt. Make sure the substitute is thick and creamy to get the right texture. To avoid cracks, do not overmix your batter. Also, bake at a lower temperature and avoid opening the oven during baking. Cooling the cheesecakes slowly in the oven helps too. Yes, you can make these mini cheesecakes a day in advance. Just store them in the fridge after they cool. They taste even better after chilling overnight, as the flavors blend nicely. Check the Full Recipe for more tips! In this blog post, we explored how to make mini cheesecakes from start to finish. We covered key ingredients, step-by-step instructions, and valuable tips for success. We also shared variations to try and essential storage tips. Remember, each cheesecake can be a fun twist on the classic. With practice, you can master this simple yet rewarding dessert. Enjoy the process and happy baking!](https://tossedflavors.com/wp-content/uploads/2025/05/3ac467f2-94b6-4735-b644-3d32d1eb014e.webp)
Ready to impress your friends with a delicious dessert? These Mini Lemon Cheesecakes are a fluffy and tart delight that everyone will love! With a simple recipe, you’ll create a …
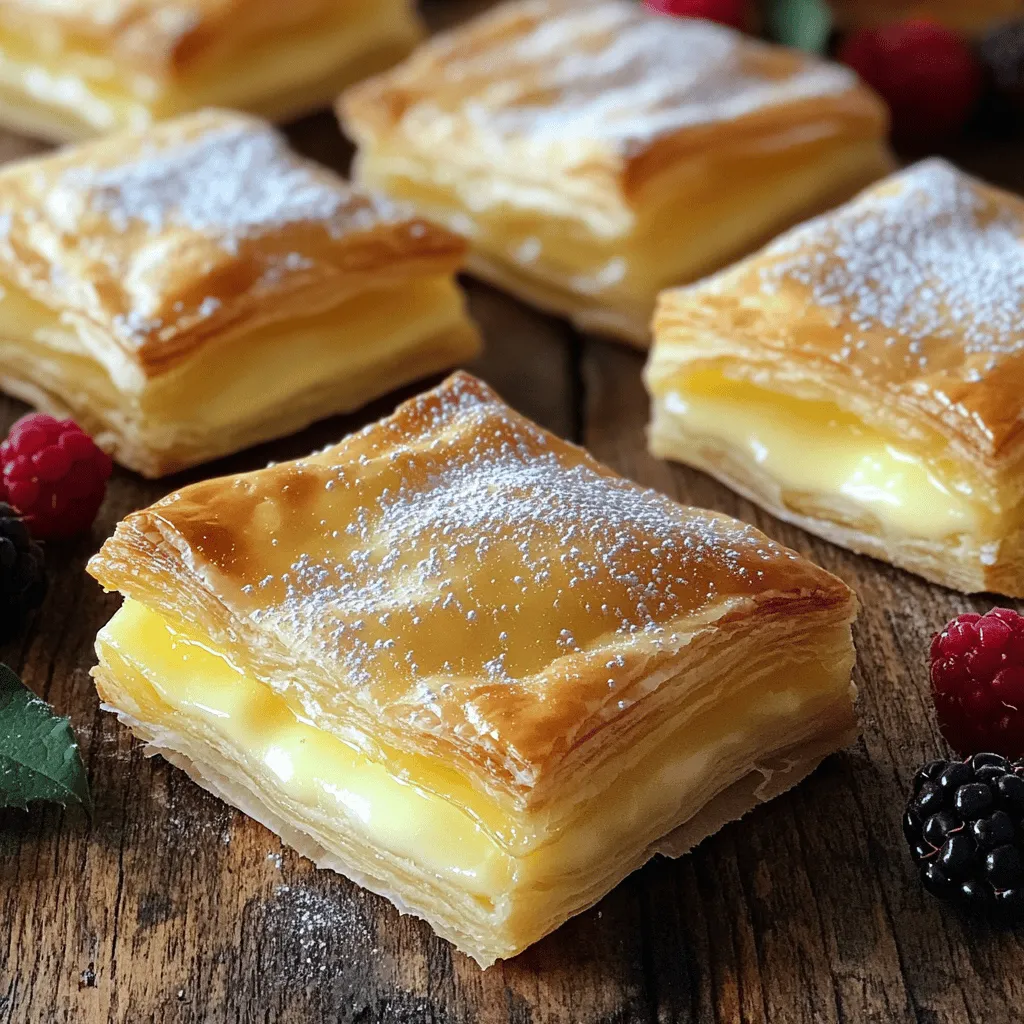
Craving a sweet treat that’s easy to make and oh-so-delightful? Puff Pastry Vanilla Custard Squares are your answer. With just a few simple ingredients, you can whip up layers of …
![- Puff Pastry: Use one sheet of thawed puff pastry. This will form the base of your Danish. Puff pastry adds layers and a lovely flaky texture. - Fresh Raspberries: You need one cup of fresh raspberries. Choose berries that are firm and vibrant. They should be sweet and juicy for the best flavor. - Cream Cheese and Sugar: Use four ounces of softened cream cheese and a quarter cup of granulated sugar. Cream cheese gives a rich, creamy filling. The sugar balances the tartness of the raspberries. - Lemon Zest: Add zest from one lemon for a bright flavor. This brings a fresh taste to your Danish. It enhances the sweetness of the raspberries. - Egg Wash Components: Use one beaten egg mixed with one tablespoon of milk. This egg wash gives the pastries a golden, shiny finish. It makes them look even more appealing when baked. For the complete recipe, check the [Full Recipe]. First, set your oven to 400°F (200°C). This temperature helps the pastries puff up nicely. While the oven heats, line a baking sheet with parchment paper. This step stops the Danish from sticking. It makes cleanup easy too. Now, take your puff pastry out. Roll it on a floured surface until it forms a 12x12 inch square. Keep it even so it cooks well. Once rolled, cut the pastry into four equal squares, each 6 inches wide. This size is perfect for your delicious filling. In a medium bowl, mix the fresh raspberries with sugar and cornstarch. Gently toss them to avoid crushing. The sugar brings out the raspberry flavor. In another bowl, blend the softened cream cheese with powdered sugar. Mix until it’s smooth. This creamy filling balances the tart berries. On your lined baking sheet, place one pastry square. Spread about one tablespoon of cream cheese in the center, leaving space around the edges. Next, add several spoonfuls of your raspberry mixture on top. To form the Danish, fold the corners of the pastry towards the center. Pinch and seal the edges to create a pretty diamond shape. Repeat this with the other pastry squares. For a golden finish, prepare an egg wash by mixing a beaten egg with milk. Use a pastry brush to coat the tops of each Danish. This step adds shine and color. Bake in your preheated oven for 15-20 minutes. The pastries should puff up and turn golden brown. You’ll know they’re ready when your kitchen smells amazing. After baking, let the Danish cool for a few minutes. This allows them to set. For a nice touch, dust with powdered sugar before serving. Arrange them on a platter and add whole raspberries and mint for a pop of color. Your delightful raspberry Danish will look and taste great! For the complete recipe, check the Full Recipe section. - Overfilling the pastries: This is a common mistake. If you add too much filling, it can leak out during baking. Stick to a tablespoon of cream cheese and a few spoonfuls of raspberries for a perfect balance. - Improper sealing techniques: Make sure to pinch the edges well. If they are not sealed, the filling will escape. A good seal keeps the filling in and the pastry intact. - Using fresh vs. frozen raspberries: Fresh raspberries offer the best flavor and color. They are juicy and bright. Frozen raspberries work, too, but they can be mushy. If you use frozen, drain excess liquid before mixing. - Additional toppings ideas: Try adding a sprinkle of lemon zest or a drizzle of icing. You can also top with sliced almonds or a dusting of powdered sugar for a nice touch. - Tips for flaky texture: Keep your puff pastry cold while you work. If it warms up, it won’t puff up as well. Roll it out gently to avoid pressing out the layers. - Storing unused puff pastry: If you have any leftover pastry, wrap it tightly in plastic. Store it in the fridge for up to two days or freeze it for up to three months. Just thaw it in the fridge before using. These tips will help you create the best Delightful Raspberry Danish. Enjoy the process, and don’t be afraid to experiment with flavors! For more detailed steps, check the Full Recipe. {{image_4}} You can change the fruit in your Danish. Try cherries or blueberries for a new taste. Each fruit brings its own sweetness and tartness. You can also mix fruits for a fun twist. For the cream cheese, consider flavored options. You can add vanilla, almond, or even lemon zest. These flavors can brighten your filling and add depth. Experimenting with these options makes your Danish special. If you need a gluten-free option, look for gluten-free puff pastry. Many brands offer this. You can find it in most grocery stores. Just check the package to ensure it meets your needs. For a vegan version, use substitutes for cream cheese. Look for plant-based cream cheeses. These alternatives can provide a similar taste and texture. You can also blend silken tofu with a bit of lemon juice for a creamy filling. Many cultures have their own take on Danish pastries. For example, in Sweden, you might try a cinnamon bun style. In France, pain aux raisins uses pastry dough with raisins and custard. Each variation offers a different flavor experience. It’s fun to explore these twists and find what you love. After enjoying your Delightful Raspberry Danish, let any leftovers cool completely. Place them in an airtight container. This keeps them fresh and tasty. I recommend using parchment paper between layers to avoid sticking. For best results, store them in the fridge for up to three days. To enjoy your Danish warm again, reheating is key. The oven is the best choice for crispy pastries. Preheat your oven to 350°F (175°C). Place the Danish on a baking sheet and warm them for about 10 minutes. Check if they are heated through. If you choose the microwave, remember it can make pastries soggy. If you must use it, heat for 10-15 seconds. Keep an eye on them to avoid overheating. Enjoy your delightful treat just like fresh! You can tell when the Danish is done by looking for a golden color. The pastry should puff up nicely and feel firm to the touch. A delicious aroma will fill your kitchen, hinting at the treat's readiness. If the edges are beautifully browned, it’s time to take them out. Yes, you can freeze these delicious pastries. Allow them to cool completely before freezing. Wrap each Danish in plastic wrap, then place them in a freezer bag. They can stay fresh for up to three months. When ready to enjoy, thaw them in the fridge overnight. Bake them for a few minutes to restore their crispness. Fresh raspberries work best for this recipe. They add a burst of flavor and texture. If fresh raspberries are out of season, frozen raspberries are a good option. Just make sure to thaw and drain them well to avoid excess liquid. You can prepare the filling and cream cheese mixture a day ahead. Store them in airtight containers in the fridge. You can also cut the puff pastry squares in advance. Just keep them covered with a damp cloth. Assemble the Danish right before baking for the best results. Yes, there are several substitutes for cream cheese. You can use Greek yogurt for a lighter option. For a vegan version, try using a blend of silken tofu and nutritional yeast. This gives a creamy texture and adds flavor without dairy. To keep the Danish crispy, avoid overfilling them. Make sure to seal the edges well to prevent any leaks. Baking them on parchment paper also helps, as it allows hot air to circulate. Lastly, serve them soon after baking for the best texture. For the full recipe, check out the detailed instructions above. Making Delightful Raspberry Danish is simple and fun. You gathered all the required ingredients, learned how to prepare the puff pastry, and crafted a delicious filling. We covered tips to avoid common mistakes and discussed exciting variations to try. Remember to store your leftovers well and reheat them right for that crispy texture. This tasty treat offers a great way to impress friends and family. Enjoy experimenting with different flavors and approaches to make it your own!](https://tossedflavors.com/wp-content/uploads/2025/05/a1573dfe-702a-4619-80c6-914cd6371cc0.webp)
If you’re craving a sweet treat that’s simple and delicious, you’ve found it! This Delightful Raspberry Danish recipe combines flaky puff pastry and fresh raspberries for a snack that’s hard …
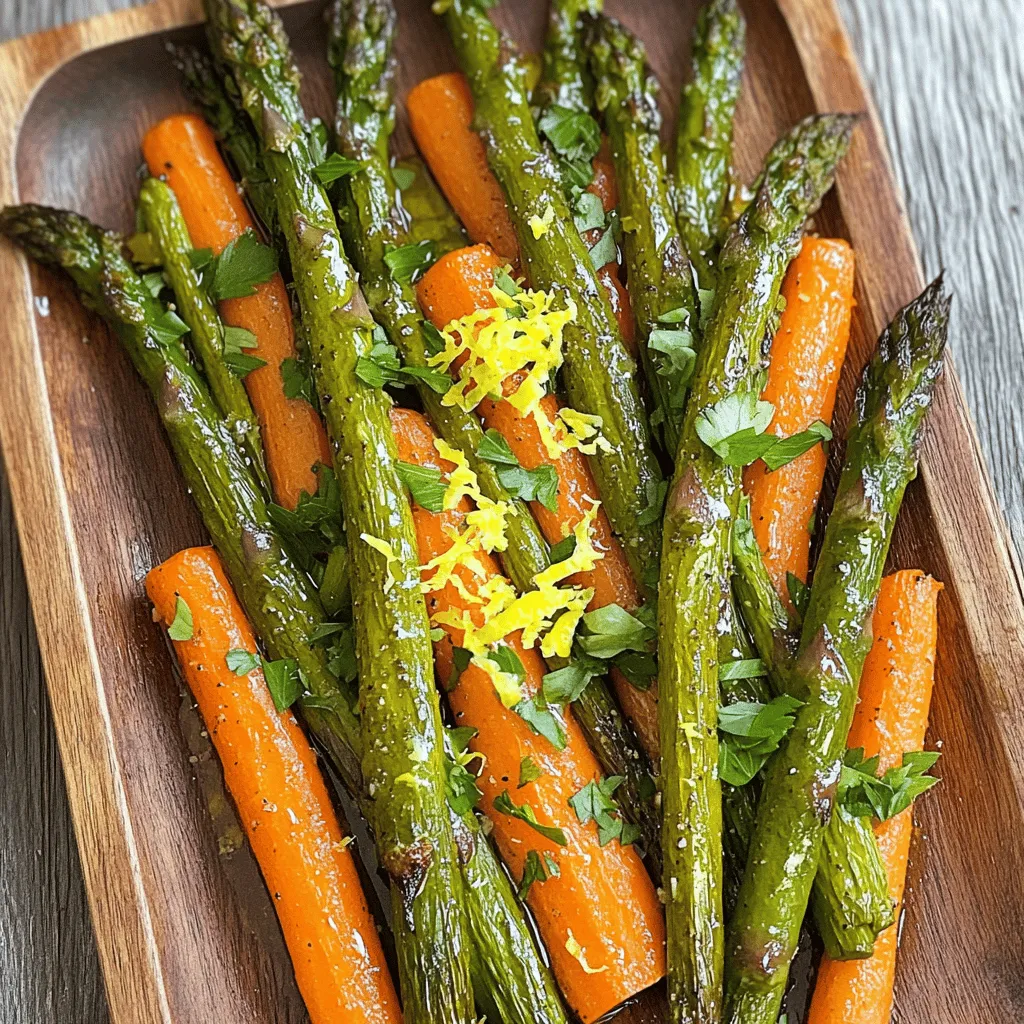
Looking for a tasty side dish that’s easy to prepare? You’ve come to the right place! My Delicious Roasted Asparagus and Carrots Recipe Guide gives you the perfect mix of …