Skip to content
tossedflavors.com
  • Home
  • Appetizers
  • Desserts
  • Salads
  • Breakfast
  • Dinner
  • Privacy Policy
  • Contact
  • About

Chef Evan

Chia Banana Bread Energy Bites Healthy Snack Idea

May 27, 2025 by Chef Evan
- 2 ripe bananas - 1 cup rolled oats - 1/4 cup chia seeds - 1/4 cup almond butter (or peanut butter) - 1/4 cup honey or maple syrup - 1 teaspoon pure vanilla extract - 1/2 teaspoon baking powder - 1/2 teaspoon ground cinnamon - A pinch of salt - 1/2 cup chopped walnuts or pecans (optional) - 1/2 cup dark chocolate chips (optional) To make Chia Banana Bread Energy Bites, you need simple ingredients. Ripe bananas give our bites natural sweetness and moisture. Rolled oats add texture and fiber. Chia seeds bring protein and healthy fats. Almond butter is creamy and rich but feel free to use peanut butter. For sweetening, honey or maple syrup works well. Both add flavor and stickiness. The vanilla extract enhances the taste, while cinnamon brings warmth. A pinch of salt balances the sweetness. You can add walnuts for crunch or dark chocolate chips for a sweet twist. These optional ingredients boost the flavor and texture. You can mix and match to fit your taste. For the full recipe, you can check out [Full Recipe]. 1. Preheat your oven to 350°F (175°C). This step is key for even baking. 2. Line a baking sheet with parchment paper. This helps to avoid sticking later. 3. In a large bowl, mash the ripe bananas well. Then, mix in almond butter and honey. 4. Add one teaspoon of pure vanilla extract for a nice flavor boost. 1. In a separate bowl, combine rolled oats, chia seeds, baking powder, ground cinnamon, and a pinch of salt. This mix brings the energy bites together. 2. Gradually add the dry mix to the wet mix. Stir gently until everything is just combined. Be careful not to over-mix. 3. If you want extra crunch, fold in chopped walnuts or dark chocolate chips. These are optional but add great flavor. 4. Using your hands or a cookie scoop, shape the mixture into small balls, about one inch in diameter. Space them evenly on the baking sheet. 1. Bake the bites in your preheated oven for 12-15 minutes. Look for golden brown edges to know they’re done. 2. Once baked, let them cool on the baking sheet for about 5 minutes. This helps them firm up. 3. Carefully transfer the bites to a wire rack to cool completely. This keeps them from getting soggy. For the full recipe, refer to the section above. To create the best chia banana bread energy bites, focus on texture. Use ripe bananas. They should be soft and sweet. This will help your bites be moist and tasty. When mixing, combine wet and dry ingredients gently. Over-mixing can lead to tough bites. Keep the mixture thick but not dry. Common mistakes include not using enough ripe bananas. This can make your bites dry. Also, be careful with your baking time. If you bake too long, you lose that soft texture. Check your bites at 12 minutes. They should be golden, not brown. For serving, arrange your energy bites in a fun way. Use a rustic bowl and line it with parchment paper. This adds charm and keeps them fresh. You can also sprinkle chia seeds on top for a decorative touch. Want to showcase your energy bites? Create a tiered display. This draws attention and makes them look fancy. You can also pair them with fresh fruit or yogurt. This adds color and flavor to your snack spread. For storage, keep any extras in an airtight container in the fridge. They stay fresh for up to a week. Enjoy your healthy snack! Try the Full Recipe to get started. {{image_4}} You can easily make this recipe fit your needs. For gluten-free options, choose certified gluten-free rolled oats. This keeps your energy bites safe for those with gluten issues. If you want a vegan version, swap honey for maple syrup. This keeps the sweetness but fits a plant-based diet. You can also use almond butter or peanut butter as your base. To change up the taste, try different nut butters. Cashew butter or sunflower seed butter will add new flavors. Each nut butter brings its unique twist. Adding spices can also make a big difference. Try a pinch of nutmeg or ginger for warmth. You can also add extracts like almond or coconut for a fun twist. Want to pack in more nutrition? Add superfoods like hemp seeds or flaxseeds. They boost the protein and omega-3 content. You can customize your bites for specific diets. If you need more protein, add a scoop of protein powder. This makes your energy bites a great post-workout snack. For the full recipe, check out the earlier section. To keep your Chia Banana Bread Energy Bites fresh, use an airtight container. Glass or plastic containers work well. Make sure the lid seals tightly to keep air out. Store them in the fridge for best results. This cool environment helps maintain flavor and texture. Chia Banana Bread Energy Bites last for about one week in the fridge. If you freeze them, they can last up to three months. To check for spoilage, look for changes in color or smell. If they seem dry or hard, it's time to toss them. For best taste, enjoy them fresh! Can I freeze these energy bites? Yes, you can freeze these energy bites. Place them in a single layer on a baking sheet. Once frozen, transfer them to a zip-top bag. They will stay fresh for up to three months. This makes them a great on-the-go snack! How many energy bites should I eat per serving? A good serving size is about three energy bites. This gives you a nice boost of energy without overdoing it. Adjust based on your hunger or activity level. Listen to your body! What are the health benefits of chia seeds and bananas? Chia seeds are rich in fiber, protein, and omega-3 fatty acids. They help with digestion and keep you full. Bananas provide potassium and natural sugars for quick energy. Together, they make a nutritious snack. Can I replace oats with another grain? Yes, you can use other grains like quinoa or buckwheat. Just make sure they are cooked and cooled. This gives you a different texture and taste. What other sweeteners can I use instead of honey or maple syrup? You can use agave nectar, coconut sugar, or stevia. Each sweetener has its unique flavor. Choose one that fits your taste and dietary needs. Can I make these energy bites without an oven? Absolutely! You can make these without an oven. Simply roll the mixture into balls and chill them in the fridge. This helps them firm up nicely. What’s the best method for mashing bananas? To mash bananas, use a fork or a potato masher. Start with ripe bananas for the best flavor. Aim for a smooth consistency with a few small lumps for texture. These Chia Banana Bread Energy Bites are a simple and fun treat. You learned about the best ingredients, preparation steps, and tips for success. We explored variations to fit your needs and preferences. Storing them properly ensures they stay fresh. Remember, you can customize the flavors and textures to your mood. Enjoy these healthy bites as a snack or energy boost. They are perfect for kids and adults alike. Now, get in the kitchen and start creating!

Looking for a healthy snack that’s easy to make and delicious? Try my Chia Banana Bread Energy Bites! These bites pack the goodness of ripe bananas, chia seeds, and oats. …

Read more

Categories Desserts Leave a comment

Reese’s Peanut Butter Banana Bread Irresistible Delight

May 27, 2025 by Chef Evan
- 3 large ripe bananas, mashed - 1/2 cup peanut butter - 1/2 cup granulated sugar - 1/4 cup packed brown sugar - 2 large eggs - 1 teaspoon pure vanilla extract - 1 teaspoon baking soda - 1/4 teaspoon salt - 1 1/2 cups all-purpose flour - 1/2 cup chopped Reese’s peanut butter cups - 1/2 cup chocolate chips (optional) For this recipe, you will need some basic kitchen tools. Here’s what I suggest: - A large mixing bowl - A whisk or fork - A spatula or wooden spoon - A 9x5-inch loaf pan Choosing the right ingredients is key. Use ripe bananas; they add natural sweetness. For peanut butter, creamy or chunky works well, so pick your favorite. If you have allergies, consider using sun butter instead of peanut butter. You can also use egg replacers for a vegan twist. By preparing these ingredients, you set yourself up for success. This banana bread is not just tasty; it’s a fun way to mix flavors. For the full recipe, check out the details above and get ready for an irresistible treat! 1. First, preheat your oven to 350°F (175°C). This ensures even baking. 2. Next, grease a 9x5-inch loaf pan with cooking spray or butter. Coat it well to avoid sticking. 3. In a large bowl, mix the mashed bananas and peanut butter together. Add granulated and brown sugars. Use a fork or whisk for a smooth blend. 4. Crack in the eggs and pour in the vanilla extract. Whisk until the mixture is creamy and well combined. 1. In another bowl, mix baking soda, salt, and flour together. This helps the bread rise. 2. Gradually fold the dry mix into the wet ingredients. Use a spatula or wooden spoon. Mix just until combined. This keeps the bread light. 3. Be careful not to overmix. Overmixing can make the bread dense and heavy. 1. Pour the batter into the greased loaf pan. Smooth the top with a spatula for even baking. 2. Place the pan in the preheated oven. Bake for 50 to 60 minutes. 3. To check if it's done, insert a toothpick into the center. It should come out clean or with a few moist crumbs. 4. Once baked, remove the bread from the oven. Let it cool in the pan for about 10 minutes. 5. Move it to a wire rack to cool completely before slicing. Enjoy this treat warm with melted peanut butter on top! You can find the Full Recipe for more details. To prevent dense banana bread, mix the batter gently. Overmixing can make it tough. Use ripe bananas as they mash easily and add more flavor. Look for bananas with brown spots. They taste sweeter and yield a moister bread. Using flavored peanut butter can elevate this recipe. Try chocolate or honey peanut butter for extra layers of taste. You can also add spices like cinnamon or nutmeg. These spices bring warmth and depth to the bread. Feel free to toss in extras, like chopped nuts or dried fruit, for fun textures. Serve banana bread warm, sliced thick. Top it with melted peanut butter, banana slices, or a sprinkle of chocolate chips. Pair it with coffee, milk, or a scoop of vanilla ice cream for a treat. Each bite is a delight, and it’s great for breakfast or dessert! {{image_4}} You can easily make this banana bread nut-free. Swap peanut butter with sun butter or soy nut butter. These options keep the taste rich and creamy. If you want a healthier version, use Greek yogurt instead of some butter. You can also replace sugar with honey or maple syrup. For a vegan-friendly recipe, use flax eggs instead of real eggs. Mix one tablespoon of ground flaxseed with three tablespoons of water. Let it sit for a few minutes to thicken before adding it to your mix. Feel free to add chopped nuts, like walnuts or pecans, to boost texture. You can also toss in dried fruits, like raisins or cranberries, for added sweetness. Want more chocolate? Use dark chocolate chips or even white chocolate chunks for a twist. You can also swap out Reese's cups for other favorite candies, like Snickers or Milky Way, to create new flavors. Seasonal flavors can make this banana bread even more fun. Try adding pumpkin puree for a cozy fall vibe. Cinnamon or nutmeg can spice it up nicely too. During the holidays, consider mixing in some crushed peppermint candies. This adds a festive touch and a refreshing flavor. You could even create a pumpkin spice version by using pumpkin spice mix instead of regular spices. Each variation gives you a chance to enjoy this recipe all year long! To keep your Reese’s Peanut Butter Banana Bread fresh, wrap it in plastic wrap. Place it in an airtight container or a zip-top bag. This helps keep the bread moist for up to four days at room temperature. If you want to keep it extra soft, add a slice of bread inside the container. This little trick helps retain moisture. For long-term storage, you can freeze the banana bread. First, let it cool completely. Then, wrap it tightly in plastic wrap, followed by aluminum foil. This prevents freezer burn. Your banana bread can last up to three months in the freezer. When you're ready to enjoy it, simply thaw it in the fridge overnight. To reheat, slice off a piece and warm it in the microwave for about 20 seconds. You can also toast it for a crispy outside while keeping the inside soft. How long does it last? When stored properly, banana bread stays good for about four days at room temperature. In the fridge, it can last up to a week. Watch for signs of spoilage. If you see mold or it smells sour, throw it away. The bread should have a pleasant smell and a soft texture. Enjoy your delicious treat while it’s fresh! Can I use frozen bananas? Yes, you can use frozen bananas. Just thaw them first. Drain extra liquid before mashing. This keeps your bread from being too wet. How can I make it gluten-free? To make this recipe gluten-free, swap all-purpose flour with gluten-free flour. Look for a blend that works well in baking. This keeps your bread light and fluffy. What is the best way to ripen bananas quickly? If you need ripe bananas fast, place them in a paper bag. The bag traps ethylene gas, speeding up ripening. You can also bake unripe bananas at 300°F for 15 to 20 minutes. Why did my banana bread sink? Your banana bread may sink if the oven temp is too low. Under-mixing can also cause this. Make sure to mix well but don’t overmix. How can I tell if it’s adequately baked? To check if it's baked, insert a toothpick in the center. If it comes out clean or with a few crumbs, it's done. If it’s wet, give it more time. How to convert this recipe for muffins To make muffins, pour the batter into muffin tins instead of a loaf pan. Bake at the same temp, but check for doneness after 20-25 minutes. Making smaller or larger batches To make a smaller batch, halve the ingredients. For a larger batch, double everything. Adjust baking time if using different pan sizes. This blog post covered how to make delicious banana bread with peanut butter. You learned about the ingredients needed and the best preparation steps to follow. Tips helped you enhance the flavor and achieve the perfect texture. I also shared ways to store your bread for maximum freshness. Lastly, we discussed common questions and baking troubleshooting. You can now bake a tasty version of banana bread that suits your needs. Enjoy your baking and the delightful results!

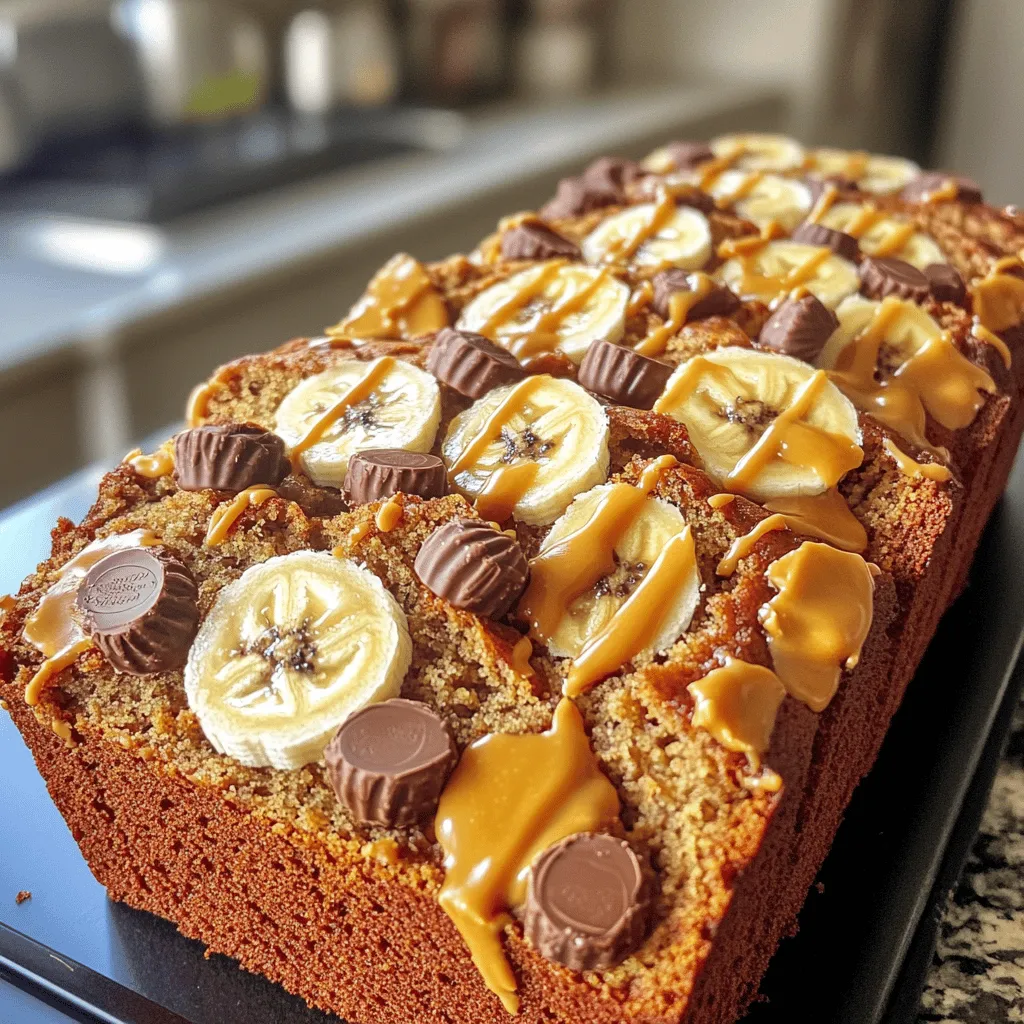
Are you ready to take your banana bread game to the next level? This Reese’s Peanut Butter Banana Bread is an irresistible delight that blends creamy peanut butter with sweet …

Read more

Categories Desserts Leave a comment

BBQ Ranch Chicken Salad Flavorful and Easy Recipe

October 8, 2025May 26, 2025 by Chef Evan
To make BBQ ranch chicken salad, you'll need the following ingredients: - 2 cups cooked chicken, shredded - 4 cups mixed salad greens (like romaine and arugula) - 1 cup cherry tomatoes, halved - 1 cup corn kernels (fresh or canned, drained) - 1 red bell pepper, diced - 1/2 red onion, thinly sliced - 1 cup shredded cheddar cheese - 1/2 cup ranch dressing - 1/2 cup BBQ sauce - 1 avocado, diced - Salt and pepper to taste - Optional: tortilla chips for crunch You can easily switch out some ingredients based on what you have: - Use grilled turkey instead of chicken for a leaner option. - Try spinach or kale in place of salad greens for a different flavor. - Swap cherry tomatoes with diced cucumber for a fresh twist. - Use black beans instead of corn for added protein and fiber. - Substitute Greek yogurt for ranch dressing to cut calories. - Choose a different cheese like pepper jack for a spicy kick. - If you don't have BBQ sauce, try a tangy vinaigrette instead. This salad is not only tasty but also packed with good nutrition. Here’s a quick look at what you get per serving: - Calories: About 400 - Protein: 30 grams - Carbohydrates: 30 grams - Dietary Fiber: 5 grams - Sugars: 5 grams - Fat: 20 grams - Saturated Fat: 8 grams The chicken gives protein, while the veggies add vitamins and fiber. The avocado provides healthy fats. You can adjust the toppings to make it healthier or more indulgent. Enjoy this salad as a meal or a side dish! {{ingredient_image_1}} To start, gather all your ingredients. You will need: - 2 cups cooked chicken, shredded - 4 cups mixed salad greens - 1 cup cherry tomatoes, halved - 1 cup corn kernels - 1 red bell pepper, diced - 1/2 red onion, thinly sliced - 1 cup shredded cheddar cheese - 1/2 cup ranch dressing - 1/2 cup BBQ sauce - 1 avocado, diced - Salt and pepper to taste - Optional: tortilla chips First, shred your cooked chicken. You can use leftover chicken or rotisserie chicken. This saves time. Next, prepare your veggies. Wash and chop the salad greens, cherry tomatoes, corn, bell pepper, and red onion. Set them aside in a large bowl. Now, take a large mixing bowl. Add the shredded chicken, ranch dressing, and BBQ sauce. Mix them well until the chicken is fully coated. This step adds great flavor to your salad. Next, in a large salad bowl, layer the mixed salad greens. Then, pour the cherry tomatoes, corn, diced red bell pepper, and sliced red onion on top. Spoon the BBQ ranch chicken mixture over the vegetables. Finally, sprinkle the shredded cheddar cheese and diced avocado on top. Season with a pinch of salt and pepper. You can mix it all together gently or serve it in layers. If you want a crunchy touch, add crushed tortilla chips just before serving. This gives your salad a nice texture. Serve this salad in bowls or on plates. It makes a great lunch or dinner. Enjoy your BBQ ranch chicken salad with family and friends! To shred chicken easily, use warm, cooked chicken. I like to use two forks. Hold one fork steady. Use the other fork to pull apart the chicken. This method works great for both breasts and thighs. You can also use your hands if the chicken is cool enough. For quick shredding, try a stand mixer. Just mix on low speed for a minute or two. When picking salad greens, look for bright colors. They should feel crisp and firm. Check for any brown spots or wilting. Romaine and arugula work well in this salad. You can also mix in some spinach or kale. If buying pre-washed greens, check the expiration date. Fresh greens make your salad taste better. While ranch and BBQ sauce are great, you can mix it up! Try adding honey for a sweet twist. You can use Greek yogurt instead of ranch for a lighter option. For a kick, add some hot sauce to the BBQ. You can also try a zesty vinaigrette. Mix it with a splash of lime juice for freshness. Don't be afraid to experiment; find what suits your taste! Pro Tips Perfectly Shredded Chicken: For the best texture, use warm chicken and shred it with two forks or your hands; this makes it easier to mix with the dressing. Fresh Ingredients Matter: Always opt for fresh vegetables and herbs to elevate the flavor of your salad; it makes a significant difference. Customize Your Dressing: Feel free to adjust the ratio of ranch to BBQ sauce based on your taste; a little extra BBQ can add a delightful smoky flavor. Make Ahead: You can prepare the chicken and chop the vegetables in advance; just combine everything right before serving to keep the greens crisp. {{image_2}} You can make a tasty vegetarian BBQ ranch salad. Replace the chicken with grilled tofu or tempeh. Both options soak up flavors well. Use the same BBQ sauce and ranch dressing. Add more veggies like grilled zucchini or portobello mushrooms for extra texture. This keeps the salad filling and fun. For a kick, add some heat to your salad. Mix in sliced jalapeños or a dash of hot sauce. You can also swap regular BBQ sauce for a spicy version. This gives the salad a nice zing. Pair it with pepper jack cheese instead of cheddar for added spice. Change the salad based on what’s in season. In spring, add fresh peas and asparagus. For summer, toss in cucumbers and radishes. In fall, roasted sweet potatoes or butternut squash taste great. Winter calls for hearty greens like kale or spinach. These swaps keep your salad fresh and exciting all year long! Store leftover BBQ ranch chicken salad in an airtight container. Keep it in the fridge. If you have mixed greens, store them separately. This way, they stay crisp. To meal prep, make the chicken mixture ahead. Combine chicken, ranch dressing, and BBQ sauce. Store it in a jar. Keep the salad greens and other veggies in another container. This keeps everything fresh for your week. The salad will last about three days in the fridge. After that, the greens may wilt. If you freeze it, the texture may change. So, enjoy it fresh for best taste! Yes, you can use rotisserie chicken. It saves time and adds great flavor. Just shred the chicken and mix it with the dressing and BBQ sauce. This way, you skip cooking chicken from scratch. The salad will still taste amazing! You can use blue cheese dressing or honey mustard dressing. Both options give a tasty twist to the salad. If you want something lighter, try a vinaigrette. Experiment with flavors you love! This salad lasts about three days in the fridge. Make sure to store it in an airtight container. If the salad has crushed tortilla chips, add them just before serving. This keeps them crunchy! This blog post covered everything you need to make a delicious BBQ ranch chicken salad. We explored the ingredients, provided useful substitutions, and shared important nutritional info. I walked you through step-by-step instructions for preparation and serving, plus tips for shredding chicken and choosing fresh greens. You learned about exciting variations, storage tips, and answers to common questions. Now, you can enjoy a tasty, easy-to-make salad any time! Happy cooking!

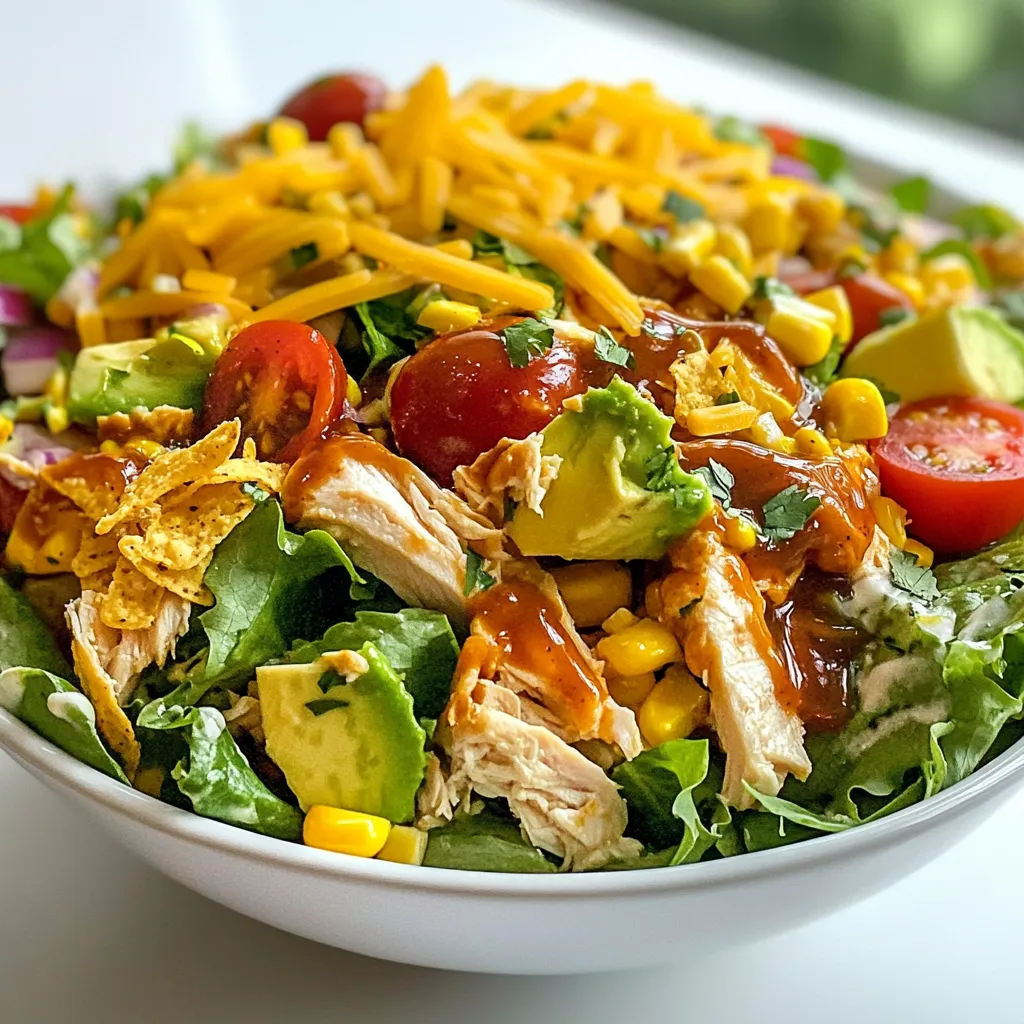
Are you ready for a fresh and tasty dish? My BBQ Ranch Chicken Salad is packed with flavor and super simple to make. This easy recipe is perfect for lunch …

Read more

Categories Salads Leave a comment

Quinoa Stuffed Peppers Flavorful and Nutritious Meal

December 1, 2025May 25, 2025 by Chef Evan
- 4 large bell peppers (any color) - 1 cup quinoa, rinsed - 2 cups vegetable broth - 1 cup black beans, drained and rinsed - 1 cup corn (fresh or frozen) - 1 cup diced tomatoes (canned or fresh) - 1 teaspoon cumin - 1 teaspoon smoked paprika - 1 teaspoon garlic powder - 1 teaspoon onion powder - Salt and pepper to taste - 1 cup shredded cheese (cheddar or mozzarella) - Fresh cilantro for garnish - Lime wedges for serving These ingredients create a balanced dish. The bell peppers bring color and crunch. Quinoa offers protein and texture. Black beans add fiber, while corn gives a sweet pop. Diced tomatoes bring moisture and flavor. Spices like cumin and smoked paprika pack a punch. They enhance the taste without overwhelming it. Garlic powder and onion powder round out the flavor. Salt and pepper allow you to adjust to your taste. Finally, cheese gives a melty finish. Fresh cilantro adds brightness. Lime wedges provide a zesty touch when served. This mix makes for a tasty meal that is good for you. {{ingredient_image_1}} - Preheat the oven to 375°F (190°C). - Slice the tops off the bell peppers. Remove the seeds and membranes. Set these aside. - In a medium saucepan, bring the vegetable broth to a boil. Add the rinsed quinoa. Reduce heat to low. Cover and cook until the liquid is gone, about 15 minutes. The quinoa will be fluffy. - In a large bowl, mix the cooked quinoa with black beans, corn, diced tomatoes, cumin, smoked paprika, garlic powder, onion powder, salt, and pepper. Stir well. - Stuff each bell pepper with the quinoa mix. Press down gently to pack it in. Place the stuffed peppers upright in a baking dish. - Cover the dish with foil. Bake for 25 minutes. - Remove the foil. Sprinkle cheese on top of each pepper. Return to the oven. Bake for another 10 minutes, or until the cheese is melted and bubbly. - When finished, take the peppers out of the oven. Let them cool for about 5 minutes before serving. - Serve with fresh cilantro and lime wedges for a zesty touch. - Ensuring quinoa is properly rinsed Always rinse quinoa before cooking. This step removes the bitter coating called saponin. Rinse it under cold water for about 30 seconds. You will notice a difference in flavor. - How to choose the best bell peppers Pick firm peppers with bright colors. Green, red, yellow, or orange all work well. Look for peppers without blemishes. They should feel heavy for their size. This means they are fresh and juicy. - Adjusting spice levels If you like heat, add some diced jalapeños. You can also use chili powder or cayenne pepper. Start small and taste as you mix. Adjust until it reaches your desired level of spice. - Best sides to accompany quinoa stuffed peppers Serve these peppers with a fresh salad. A simple green salad pairs well. You can also try a side of rice or crusty bread for a hearty meal. - Creative plating ideas Place the stuffed peppers upright on a colorful plate. You can drizzle a bit of sauce around them. This adds color and makes the dish pop. Use fresh herbs for a touch of green. - Suggestions for garnishing Top with fresh cilantro for brightness. A squeeze of lime adds a nice zing. You can also sprinkle some extra cheese on top for a cheesy finish. Pro Tips Choose Colorful Peppers: Using a mix of bell pepper colors not only makes the dish visually appealing but also adds a slight variation in flavor. Rinse Quinoa Thoroughly: Rinsing quinoa before cooking helps remove its natural coating, called saponin, which can make it taste bitter. Customize Your Filling: Feel free to add other ingredients like diced onions, zucchini, or spices to the quinoa mixture for a personal touch. Serve with Avocado: Adding sliced avocado on top or on the side enhances creaminess and complements the flavors of the stuffed peppers. {{image_2}} You can easily change the protein in quinoa stuffed peppers. If you like meat, try adding ground turkey or beef. These options add a rich flavor and protein boost. Simply brown the meat before mixing it with the quinoa and veggies. If you want a plant-based meal, use vegan protein sources. You can add lentils or tofu for a hearty texture. Both options complement the flavors in the peppers well. Just make sure to season them properly for the best taste. Quinoa stuffed peppers are naturally gluten-free. The quinoa and veggies make a great base. If you are gluten-sensitive, this dish is safe for you. Always check labels on any packaged ingredients to ensure they are gluten-free. For those looking to cut carbs, you can use cauliflower rice instead of quinoa. This swap keeps the dish light but still full of flavor. You can also skip the corn for a lower carb count. Spice up your quinoa stuffed peppers with different seasoning blends. You can try Italian herbs like oregano and basil for a different twist. Cajun seasoning offers a spicy kick that many enjoy. Adding fresh herbs or spices can also elevate the flavors. Chopped cilantro or parsley adds freshness. You can also add a squeeze of lime juice to brighten the dish. Mixing in some jalapeños can give it an extra heat. To store leftovers, let the stuffed peppers cool completely. Then, place them in an airtight container. You can keep them in the fridge for up to four days. This helps maintain their flavor and texture. I recommend using glass or plastic containers with tight lids. They keep the peppers fresh and prevent spills. Make sure to label your containers with the date. This way, you won’t forget when you made them. To freeze stuffed peppers, first, let them cool down. Wrap each pepper in plastic wrap or aluminum foil. Then, place them in a freezer-safe bag or container. This keeps them safe from freezer burn. They can last up to three months in the freezer. When you want to eat them, take the peppers out of the freezer. Thaw them overnight in the fridge. For reheating, preheat your oven to 350°F (175°C). Place the peppers in a baking dish and cover with foil. Bake for about 20-25 minutes. If you like, you can add cheese on top and bake until melted. Enjoy your meal! How long to cook quinoa? You cook quinoa for about 15 minutes. Start by boiling vegetable broth, then add rinsed quinoa. Cover it and let it simmer until all the liquid is gone. The quinoa should be fluffy when done. Can I use other grains instead of quinoa? Yes, you can use other grains. Brown rice or farro works well. Make sure to adjust the cooking time based on the grain you choose. Each grain has its own cooking needs. How can I make this dish ahead of time? You can prepare the quinoa and mix it with the veggies a day before. Just store it in the fridge. When ready to serve, stuff the peppers and bake them. This makes it easy for meal prep! What to serve with quinoa stuffed peppers? Quinoa stuffed peppers go well with a fresh salad. You can also serve them with avocado slices or a side of roasted veggies. This adds extra color and flavor to your meal. Can I make stuffed peppers without cheese? Absolutely, you can skip the cheese. For a dairy-free option, try adding avocado or a sprinkle of nutritional yeast. This gives a nice flavor without using cheese. You now have a complete guide to making quinoa stuffed peppers. We covered the ingredients, preparation steps, and tips for success. You can explore variations to fit your taste and dietary needs. Proper storage tips help keep leftovers fresh. Try this recipe to enjoy a healthy, tasty meal. With simple steps and plenty of options, you'll impress friends and family alike. Now, roll up your sleeves and start cooking!

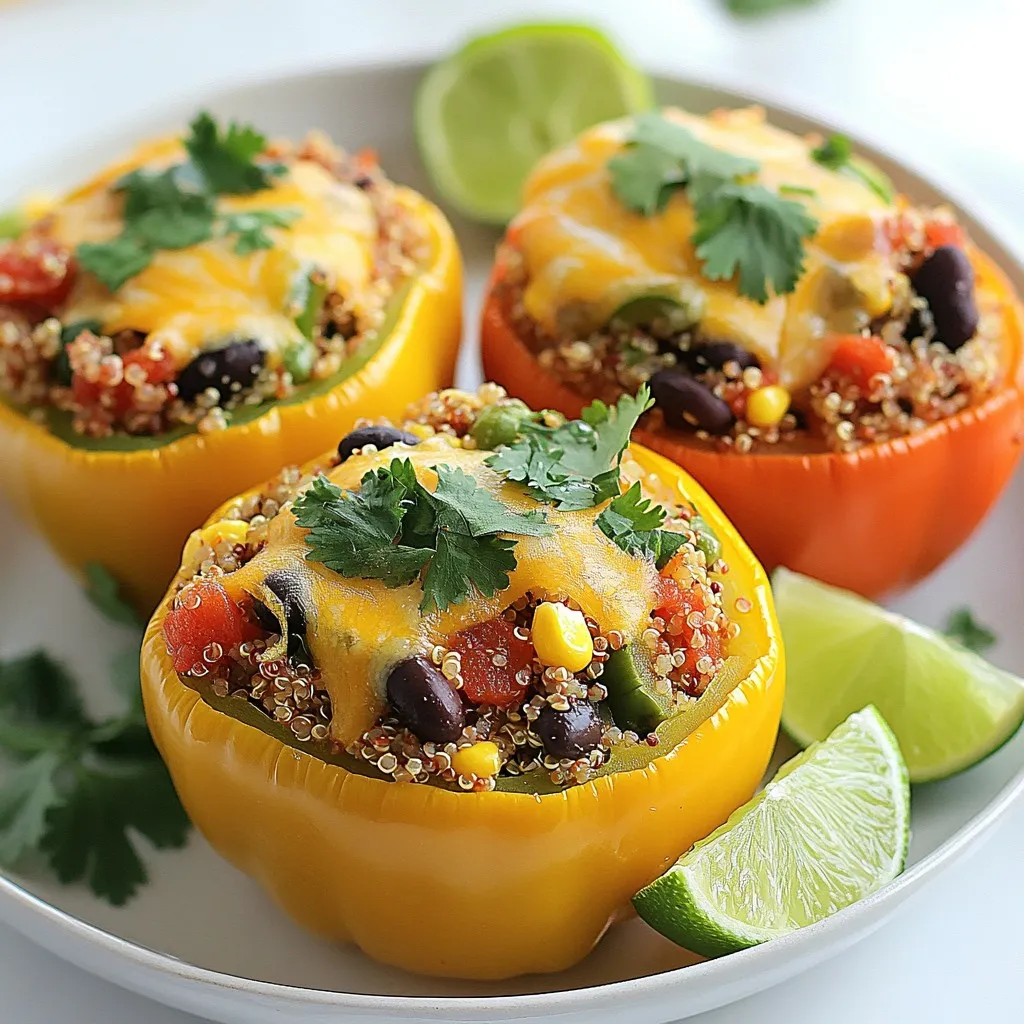
Are you ready to spice up your dinner routine? Quinoa stuffed peppers are a colorful, tasty, and nutritious meal option that everyone will love. With just a few simple ingredients …

Read more

Categories Dinner Leave a comment

Bakery Style Chocolate Chip Cookies Delightful Recipe

November 20, 2025May 24, 2025 by Chef Evan
To make bakery-style chocolate chip cookies, gather these simple ingredients: - 2 1/4 cups all-purpose flour - 1 teaspoon baking soda - 1/2 teaspoon salt - 1 cup unsalted butter, softened - 3/4 cup granulated sugar - 3/4 cup brown sugar, packed - 1 teaspoon vanilla extract - 2 large eggs - 2 cups semi-sweet chocolate chips - 1/2 cup chopped walnuts or pecans (optional) - Flaky sea salt for sprinkling You can swap some ingredients for different flavors or dietary needs: - Use coconut oil instead of butter for a dairy-free version. - Replace all-purpose flour with a gluten-free blend. - Use dark chocolate chips for a richer taste. - Maple syrup can replace granulated sugar for a unique flavor. - Omit nuts if you prefer a nut-free cookie. Using quality ingredients can make a big difference. Here are my top picks: - For flour, I recommend King Arthur Flour or Bob’s Red Mill. - Choose Plugra or Kerrygold for rich, creamy butter. - Ghirardelli or Nestlé Toll House make great chocolate chips. - Use Diamond Crystal for flaky sea salt, as it melts beautifully on cookies. {{ingredient_image_1}} Start by cleaning your kitchen. Gather all your tools and ingredients. You will need: - 2 1/4 cups all-purpose flour - 1 teaspoon baking soda - 1/2 teaspoon salt - 1 cup unsalted butter, softened - 3/4 cup granulated sugar - 3/4 cup brown sugar, packed - 1 teaspoon vanilla extract - 2 large eggs - 2 cups semi-sweet chocolate chips - 1/2 cup chopped walnuts or pecans (optional) - Flaky sea salt for sprinkling Make sure your butter is soft. It helps mix well. Preheat your oven to 350°F (175°C). Line two baking sheets with parchment paper. This makes for easy cleanup. In a small bowl, mix the flour, baking soda, and salt. Set it aside for now. In a larger bowl, cream the softened butter, granulated sugar, and brown sugar. Use a hand mixer or a stand mixer for this. Mix until it looks light and fluffy, about 2-3 minutes. Next, add the vanilla and eggs, one at a time. Mix well after each egg. This makes the batter smooth. Gradually add the dry mix to the wet mix. Use low speed to avoid overmixing. Just mix until you see no flour. Now, stir in the chocolate chips and nuts if you want. Use a spatula or wooden spoon for even mixing. Use a cookie scoop or a tablespoon to drop dough on the baking sheets. Space them at least 2 inches apart. For bakery-style cookies, use a larger scoop. Sprinkle a bit of flaky sea salt on each dough ball. This adds a nice touch. Bake the cookies for 10-12 minutes. Look for golden edges and slightly underbaked centers. They will firm up while cooling. After baking, let them cool on the sheets for about 5 minutes. Then, move them to a wire rack to cool completely. For the perfect cookie, watch the baking time closely. The edges should be golden brown, while the centers remain soft. This gives you that chewy, bakery-style texture. The sprinkle of sea salt enhances the flavor. It balances the sweetness. When done, the cookies should look thick and inviting. Serve them warm or store them in an airtight container. Enjoy your tasty treats! Baking can be tricky, but simple steps help. Always measure your flour properly. Use a spoon to fluff the flour, then spoon it into the measuring cup. This method prevents too much flour in your dough. Mix your ingredients in stages. Cream the butter and sugars well before adding eggs. If you add everything at once, the dough may not mix well. Lastly, don’t overmix once you add the dry ingredients. This keeps your cookies soft. To get the best cookie dough, use softened butter. This helps create a creamy texture. If your butter is cold, your cookies will be hard. Mix the butter and sugars until they are light and fluffy. This step adds air and makes the cookies rise. Chill your dough for at least 30 minutes before baking. Chilling helps the cookies keep their shape. If you skip this step, the cookies may spread too much. For a bakery-style look, use a larger cookie scoop. This gives you thick, chewy cookies. Ingredient temperatures matter a lot. Use room temperature eggs and butter for the best results. Cold ingredients can lead to uneven mixing. Accurate measurements are key. Use a kitchen scale if you have one. It ensures you add the right amounts. For example, too much flour can make your cookies dry. Always check your ingredients before you start baking. This way, you can enjoy perfect cookies every time! Pro Tips Chill the Dough: For even better flavor and texture, chill your cookie dough for at least 30 minutes before baking. This helps the flavors meld together and keeps the cookies thick. Don’t Overbake: Remove the cookies from the oven when the edges are golden brown but the centers are still soft. They will continue to cook as they cool, ensuring a chewy center. Use a Variety of Chocolate: Mix semi-sweet chocolate chips with dark or milk chocolate for a more complex flavor profile. You can also add chocolate chunks for extra texture. Experiment with Mix-ins: Feel free to customize your cookies by adding different nuts, dried fruits, or spices like cinnamon for a unique twist on the classic chocolate chip cookie. {{image_2}} You can easily customize your bakery-style chocolate chip cookies. Adding nuts brings a nice crunch. I love using chopped walnuts or pecans. They add a rich flavor. If you want more chocolate, try mixing different types. You can use dark chocolate or white chocolate chips. This gives your cookies a fun twist. Add in some chocolate chunks for extra gooeyness. To create a unique flavor, consider adding espresso powder. Just a teaspoon can deepen the chocolate taste. You can also try adding spices like cinnamon or nutmeg. These spices give warmth and depth. For a fun twist, mix in a little orange zest. This brightens the flavor and makes it special. If you need gluten-free cookies, use gluten-free flour. It works well in this recipe. Just make sure to check the mix for a good blend. For a vegan version, swap the butter with coconut oil. Use flax eggs instead of regular eggs. Mix one tablespoon of flaxseed meal with three tablespoons of water. Let it sit for five minutes to thicken. These swaps keep the cookies tasty while meeting dietary needs. To keep your bakery-style chocolate chip cookies fresh, store them in an airtight container. This helps to keep them soft and chewy. Place parchment paper between layers if you stack them. This prevents sticking. Keep the container at room temperature for the best taste. Freezing cookies is simple and smart. First, let your cookies cool completely. Then, place them in a single layer on a baking sheet. Freeze for about an hour. Once frozen, transfer them to a freezer-safe bag. Make sure to remove as much air as possible. You can freeze the dough too. Just scoop the dough onto a baking sheet, freeze, and then store in a bag. Bakery-style chocolate chip cookies last about one week at room temperature. For frozen cookies, they can last up to three months. To keep them fresh, avoid heat and moisture. If you see any signs of drying out, enjoy them quickly! For the best taste, eat them warm after warming in the oven for a few minutes. Bakery-style cookies are larger and thicker than regular cookies. They have a soft center and crispy edges. I use a bigger scoop for the dough. This helps create a taller cookie. The flaky sea salt on top adds a great flavor contrast. The mix of brown and white sugar gives them a rich taste. The combination of chocolate chips and optional nuts also makes them special. Yes, you can make the dough ahead of time. Just mix it and store it in the fridge. Wrap it well in plastic wrap or keep it in an airtight container. It can stay fresh for up to three days. You can also freeze the dough. Scoop the dough onto a baking sheet and freeze it until firm. Then, transfer the dough balls to a freezer bag. They can last for up to three months. When you're ready to bake, just add a few extra minutes to the baking time. To check if the cookies are done, look for golden edges. The centers should look slightly underbaked. They will firm up as they cool. Bake them for about 10-12 minutes at 350°F. Keep an eye on them during the last few minutes. If you're unsure, you can always do a quick taste test. Enjoy! We covered the key parts of making great cookies. You learned about ingredients, prep steps, and tips to avoid mistakes. Variations help you add your twist. Plus, I shared how to store cookies to keep them fresh longer. Baking cookies can be fun and rewarding. With these steps, you can create treats that impress. Happy baking!

If you’re craving warm, chewy cookies that taste like they came straight from a bakery, you’re in the right place! In this delightful recipe, I’ll show you how to create …

Read more

Categories Desserts Leave a comment

Oreo Brownie Cookies Deliciously Soft and Chewy Treat

May 23, 2025 by Chef Evan
To make Oreo brownie cookies, gather these simple ingredients: - 1 cup unsalted butter, melted - 1 1/4 cups granulated sugar - 1 cup packed brown sugar - 2 large eggs, at room temperature - 2 teaspoons pure vanilla extract - 1 cup all-purpose flour - 3/4 cup unsweetened cocoa powder - 1 teaspoon baking powder - 1/2 teaspoon fine sea salt - 1 cup semi-sweet chocolate chips - 12 Oreo cookies, crushed (plus extra for garnish) These ingredients create a rich and chewy cookie. The butter and sugars make the base sweet and soft. The cocoa powder gives that deep chocolate flavor, while the Oreos add crunch and fun. To whip up these tasty cookies, you will need: - Mixing bowls - Whisk or electric mixer - Baking sheet - Parchment paper - Spatula - Cookie scoop or spoon - Wire rack Having these tools handy makes the process smooth and easy. If you’re missing an ingredient, don’t worry! Here are some swaps: - Use coconut oil instead of melted butter for a dairy-free option. - For a gluten-free version, replace all-purpose flour with a gluten-free blend. - You can swap brown sugar for coconut sugar for a healthier touch. - If you want less sugar, cut down on granulated sugar and add more cocoa powder. These swaps keep your cookies delicious while meeting your needs! For the full recipe, check the details provided. Start by preheating your oven to 350°F (175°C). This step is key for even baking. While the oven warms up, line a baking sheet with parchment paper. This helps with easy cleanup and keeps your cookies from sticking. In a large mixing bowl, add 1 cup of melted butter, 1 1/4 cups of granulated sugar, and 1 cup of packed brown sugar. Whisk these ingredients together until smooth and creamy. Next, add 2 large eggs, one at a time. Beat well after each egg. Finally, stir in 2 teaspoons of pure vanilla extract. Make sure everything is well mixed. In another bowl, sift together 1 cup of all-purpose flour, 3/4 cup of unsweetened cocoa powder, 1 teaspoon of baking powder, and 1/2 teaspoon of fine sea salt. Gradually add this dry mix to the wet ingredients. Stir gently until just combined. Be careful not to overmix, as this can make the cookies tough. Now, fold in 1 cup of semi-sweet chocolate chips and 12 crushed Oreo cookies. Use a spoon or cookie scoop to drop tablespoons of dough onto the baking sheet. Space them about 2 inches apart. For extra flair, press a few crushed Oreos onto the tops of the cookies before baking. Bake for 10-12 minutes. The edges should be set, while the centers stay soft. Once done, let the cookies rest on the baking sheet for about 5 minutes. Then, transfer them to a wire rack to cool completely. Enjoy your delicious cookies! For the full recipe, check out the section above. To get those soft, chewy Oreo brownie cookies, focus on your baking time. Bake for just 10-12 minutes. You want the edges set but the centers still soft. This underbaking keeps the cookies chewy and moist. Another key is to let the cookies rest on the baking sheet for about 5 minutes after baking. This helps them firm up without losing that gooey center. Keep an eye on your cookies while they bake. Every oven is different. Start checking them at 10 minutes. If they look slightly shiny in the middle, they are ready. Remove them while they still look a bit undercooked. If you bake them too long, they will harden as they cool. To keep your cookies fresh, store them in an airtight container. Place a slice of bread in the container to keep them soft. The bread adds moisture, helping the cookies stay chewy. If you want to save them for later, freeze the cookies. Just wrap them well in plastic wrap and place them in a freezer bag. They will stay fresh for up to three months. {{image_4}} You can make these cookies even better by adding nuts. Chopped walnuts or pecans work well. Add about half a cup to the dough. You can also mix in other treats, like peanut butter chips or caramel bits. These add fun flavors and textures to your cookies. If you need a gluten-free version, swap the all-purpose flour for a gluten-free blend. Look for a blend that contains xanthan gum. This helps with texture. You can also use almond flour, but you may need to adjust the amount. Start with about 3/4 cup and see how the dough feels. To make these cookies vegan, replace the eggs with flax eggs. Mix one tablespoon of ground flaxseed with three tablespoons of water. Let it sit for five minutes to thicken. For butter, use coconut oil or a plant-based butter. These swaps help keep the cookies soft and chewy. Enjoy the rich flavors without eggs or dairy! For the full recipe, check out the [Full Recipe]. You can find pre-made Oreo brownie cookies from several brands. Popular options include: - Oreo - Little Debbie - Entenmann's - Pepperidge Farm These brands offer tasty treats that often mimic homemade flavors. When you want a quick dessert, these options are great. Prices for pre-made Oreo brownie cookies vary based on brand and store. Here are a few price ranges: - Local grocery stores: $3 to $5 per pack - Online retailers: $4 to $8 per pack, depending on shipping costs Quality can also differ. Some brands may use fewer preservatives, resulting in better taste. Always check the ingredient list. Customer reviews can help you decide which pre-made cookies to buy. Many people appreciate the rich flavor of Oreo brownie cookies. They often mention: - Soft texture - Rich chocolate taste - Sweetness balance Look for products with high ratings. Reviews can guide you to the best options. Yes, you can use other cookies. Try chocolate sandwich cookies or your favorite treats. Each type adds a unique taste. Just remember to crush them into small pieces. This helps mix flavors well throughout the dough. Experiment with flavors you enjoy! Store these cookies in an airtight container. This keeps them soft and chewy. You can keep them at room temperature for up to a week. For longer storage, put them in the fridge. You can also freeze them. Just thaw before serving. They taste great even after freezing! Pair these cookies with milk for a classic combo. You can also serve them with ice cream. Try a scoop of vanilla or chocolate. Whipped cream adds a nice touch too. For a fun twist, sprinkle crushed Oreos on top of your ice cream. It’s a treat everyone will love! To make gluten-free Oreo brownie cookies, swap all-purpose flour for gluten-free flour. Many brands work well, so pick your favorite. Ensure the cookies you use are gluten-free. Check the packaging carefully. Follow the same steps in the recipe, and you’ll get delicious cookies without gluten! We covered a lot about making Oreo brownie cookies. You learned about the best ingredients, equipment, and substitutes. Step-by-step, I showed how to mix, bake, and cool your cookies. I shared tips for texture and storage, plus fun variations. You can even find pre-made options with great reviews. Enjoy experimenting with these cookies! Each bite offers a blend of flavors that delights. With practice, your cookies will impress everyone. Baking can be fun and rewarding!

Get ready to indulge in the best of both worlds with Oreo Brownie Cookies! Imagine soft, chewy cookies packed with rich brownie flavor and crunchy Oreo bits. In this post, …

Read more

Categories Desserts Leave a comment

Garlic Butter Honey BBQ Chicken Tacos Easy Recipe

May 23, 2025 by Chef Evan
To make these tasty tacos, gather these main ingredients: - 1 lb boneless, skinless chicken thighs - 4 tablespoons unsalted butter - 4 cloves garlic, minced - 1/4 cup honey - 1/4 cup BBQ sauce (your favorite brand) These chicken thighs are juicy and soak up flavors well. The butter adds richness, while garlic gives a lovely aroma. Honey and BBQ sauce mix for a sweet and tangy taste. You need these seasonings and sauces to enhance the flavor: - 1 teaspoon smoked paprika - 1 teaspoon chili powder - 1 teaspoon salt - 1/2 teaspoon black pepper These spices bring warmth and depth. They balance the sweetness of the honey, making each bite delicious. You can choose from these tortillas for your tacos: - 8 small corn tortillas - 8 small flour tortillas Corn tortillas give a nice texture, while flour tortillas are soft and pliable. Pick what you like best! You can find both in stores, so choose your favorite for wrapping the tasty filling. For the full recipe, check out the [Full Recipe]. Start by melting the unsalted butter in a large skillet over medium heat. Once it melts, add the minced garlic. Sauté it for about 1-2 minutes until it smells great. Be careful not to let it brown. Next, pour in the honey and BBQ sauce. Stir it all together well. Let the mixture simmer gently for a few minutes. This helps the flavors blend nicely. While the sauce simmers, it's time to season the chicken thighs. Sprinkle smoked paprika, chili powder, salt, and black pepper evenly over the chicken. This gives it a nice kick. Now, place the seasoned chicken into the skillet. Make sure each piece gets coated in that tasty sauce. Cook the chicken for about 7-8 minutes on each side. It should reach an internal temperature of 165°F (74°C). Look for the chicken to be no longer pink in the middle. Once it’s done, take it out of the skillet and let it rest for a few minutes. This keeps the juices inside. After resting, slice the chicken into bite-sized pieces. Now, warm the tortillas in a separate skillet or microwave until they are soft. This makes them easy to fold. To assemble the tacos, put a few pieces of the garlic butter honey BBQ chicken on each tortilla. Make sure you have enough filling. Next, top the chicken with shredded cabbage, diced tomatoes, and chopped cilantro. This adds freshness and crunch. Serve the tacos with lime wedges on the side. Squeeze some lime juice over the tacos for a zesty kick. Enjoy your Garlic Butter Honey BBQ Chicken Tacos! For the full recipe, click here. Marinades boost flavor. I love using a honey and BBQ mix. Combine 1/4 cup honey and 1/4 cup BBQ sauce in a bowl. Add salt, pepper, and spices. Let the chicken soak for at least 30 minutes. This makes your chicken juicy and full of taste. Feel free to add lime juice or hot sauce for a kick. To get tender chicken, use boneless, skinless thighs. They stay moist while cooking. Sear the chicken on medium heat for even cooking. Check the internal temperature; it should be 165°F (74°C). Let it rest for a few minutes after cooking. This helps keep the juices inside. Slice it just before you put it in the tacos. Presentation matters! Use a bright platter for a fun look. Arrange the tacos neatly. Add lime wedges around the tacos for color. Sprinkle extra chopped cilantro on top. This not only adds color but also freshness. A good look makes the meal more inviting. Enjoy your beautiful and tasty Garlic Butter Honey BBQ Chicken Tacos! {{image_4}} You can switch chicken for other meats. Try shredded pork or beef. Both have great flavor. You can even use cooked shrimp for a seafood twist. Just adjust the cooking time. Make sure your protein is cooked fully. For a vegetarian twist, use grilled veggies. Bell peppers, zucchini, and mushrooms work well. You can also try black beans or lentils. Both add protein and texture. Toss them in the garlic butter sauce for flavor. Get creative with your taco toppings. Add avocado slices for creaminess. Use jalapeños for heat. Feta cheese or sour cream adds a tangy touch. You can also mix in different herbs like mint or basil. This adds freshness and new flavors to each bite. For more ideas, check out the Full Recipe! To keep your leftover tacos fresh, store them separately. Place the chicken in one container and the toppings in another. This helps keep the tortillas from getting soggy. Use airtight containers to lock in freshness. Store them in the fridge for up to three days. If you want to enjoy them later, you can freeze the chicken as well. When you're ready to eat, reheat the chicken on the stove. Use medium heat and stir occasionally. This keeps the chicken juicy. For tortillas, warm them in a dry skillet for about 30 seconds on each side. You can also use the microwave for a quicker option. Just wrap them in a damp paper towel to keep them soft. Freezing is a great way to save time. To freeze, place the cooked chicken in a freezer-safe bag. Remove as much air as possible before sealing. You can freeze it for up to three months. When you want to use it, thaw the chicken in the fridge overnight. This way, it stays tasty and ready for your tacos. If you're making a big batch, consider freezing individual servings for quick meals later. Remember, you can always grab the Full Recipe when you need it! For these tacos, choose a BBQ sauce you enjoy. I like sweet sauces with a hint of tang. Look for sauces that blend well with honey. This balance adds depth and flavor to the chicken. You can also try a spicy BBQ sauce for a kick! Yes, you can use chicken breasts. They cook faster but may dry out. To avoid this, cook them on lower heat. Check the temperature to ensure they reach 165°F. Thighs stay juicier and add more flavor, but breasts work in a pinch. To spice things up, add chili powder or cayenne pepper. You can also use a hot BBQ sauce. For an extra kick, mix in some diced jalapeños. Toppings like hot sauce or sliced serrano peppers work well, too! Great sides include Mexican rice, black beans, or corn salad. Fresh guacamole and tortilla chips make a tasty combo. For something light, serve with a simple green salad. These sides balance the rich tacos perfectly. Yes, you can prepare the garlic butter ahead of time. Store it in an airtight container in the fridge. Just reheat it gently before mixing with the chicken. This saves time and makes cooking even easier. For the full recipe, check the link! In this post, we explored the key ingredients for Garlic Butter Honey BBQ Chicken Tacos. We walked through step-by-step instructions for preparation and cooking. I shared tips for enhancing flavor and presentation, plus variations to keep things fresh. Remember to store leftovers properly and follow reheating tips for the best taste. These tacos can bring excitement to any meal. Enjoy experimenting with new flavors and sharing them with others! Get ready to impress your friends and family with this tasty dish.

Looking to spice up your taco night? Let me introduce you to the delicious Garlic Butter Honey BBQ Chicken Tacos. This easy recipe combines sweet and savory flavors that will …

Read more

Categories Dinner Leave a comment

Chocolate Drip Cake Recipe for Delicious Perfection

May 23, 2025 by Chef Evan
To make a delicious Chocolate Drip Cake, you need the following ingredients: - 2 cups all-purpose flour - 2 cups granulated sugar - ¾ cup unsweetened cocoa powder - 1 ½ teaspoons baking powder - 1 ½ teaspoons baking soda - 1 teaspoon salt - 2 large eggs - 1 cup whole milk - ½ cup vegetable oil - 2 teaspoons vanilla extract - 1 cup boiling water - 1 cup semi-sweet chocolate chips - 1 cup heavy cream - 2 tablespoons powdered sugar - Chocolate shavings or sprinkles for decorating (optional) Using the right measurements is key. I suggest measuring each ingredient carefully. Too much flour can make your cake dry. If you want to switch things up, you can use cake flour instead of all-purpose flour. For a richer flavor, try dark cocoa powder. You can also swap semi-sweet chocolate chips for milk chocolate chips if you prefer a sweeter treat. Choosing good ingredients makes a big difference. Look for high-quality unsweetened cocoa powder, as it adds deep flavor. When buying eggs, choose large ones; they help in binding the batter. Use whole milk for creaminess and moisture. For the ganache, select fresh heavy cream and good chocolate chips. The better the ingredients, the better your cake will taste. Preheat your oven to 350°F (175°C). This is a key step for great baking. While the oven heats, prepare your pans. Grease two 9-inch round cake pans with butter or cooking spray. Then, lightly dust each pan with flour. This helps the cakes release easily after baking. In a large bowl, sift together your dry ingredients. Combine 2 cups of flour, 2 cups of sugar, ¾ cup of cocoa powder, 1 ½ teaspoons of baking powder, 1 ½ teaspoons of baking soda, and 1 teaspoon of salt. Mixing dry ingredients well helps the cake rise. Next, add in the wet ingredients. Include 2 large eggs, 1 cup of milk, ½ cup of oil, and 2 teaspoons of vanilla. Beat with an electric mixer on medium speed for 2 minutes. The batter should be smooth. Now, add 1 cup of boiling water. The batter will be thin, but that's just right! Divide the batter evenly between your prepared pans. Bake in the oven for 30 to 35 minutes. To check if they're done, insert a toothpick into the center. If it comes out clean, your cakes are ready! Let them cool in the pans for 10 minutes. Then, gently remove the cakes and transfer them to a wire rack to cool completely. In a medium saucepan, heat 1 cup of heavy cream over medium heat. Once it starts to boil, remove it from the heat. Stir in 1 cup of semi-sweet chocolate chips. Let it sit for about 5 minutes. Then, stir until you have a smooth ganache. This will be your delicious topping! Once your cakes are cool, place one layer on a serving plate. Spread a generous amount of ganache on top. Carefully place the second layer on top. Now, chill the cake in the fridge for 30 minutes. This helps the layers firm up. After chilling, pour the remaining ganache over the top. Let it drip down the sides for a lovely look. If you want, use an offset spatula to spread the ganache evenly. Finally, add chocolate shavings or sprinkles to make it special. You can find the Full Recipe in the earlier section for all the details! To keep your cake moist, use fresh ingredients. Make sure your eggs and milk are at room temperature. This helps the batter mix well and trap air for a fluffy cake. Add boiling water to the batter, as it helps dissolve the cocoa and makes the cake soft. Don’t skip the cooling step; let your cakes cool completely before frosting. This ensures the ganache won’t melt and slide off. The key to a perfect ganache is to use a 1:1 ratio of chocolate to cream. For this recipe, use one cup of semi-sweet chocolate chips with one cup of heavy cream. Heat the cream until it just bubbles, then pour it over the chocolate. Let it sit for five minutes. This allows the chocolate to melt evenly. Stir until smooth. If your ganache is too thick, add a little more cream. If it's too thin, let it cool a bit longer. Once your ganache has set, it’s time to decorate! For a fancy look, use a piping bag to add swirls of ganache on top. You can also add chocolate shavings or colorful sprinkles for an extra pop. Remember to work quickly, as ganache can set fast. For a clean finish, run a hot knife around the edges before serving. This gives your cake a beautiful cut and a professional look. For the full details on how to make this cake, check out the Full Recipe. {{image_4}} You can easily change the flavor of your chocolate drip cake. For a mocha twist, add espresso powder to your batter. Just one tablespoon can give it a rich coffee flavor. If you like mint, add mint extract instead. A teaspoon will give you a fresh taste without overpowering the chocolate. You can even mix in orange zest for a citrusy kick. This small change can brighten the cake’s flavor. If you need gluten-free options, use almond flour or a gluten-free blend in place of all-purpose flour. Make sure to check the blend for rising agents like baking powder. For a vegan cake, replace eggs with flax eggs. Use 1 tablespoon of ground flaxseed mixed with 2.5 tablespoons of water for each egg. Swap whole milk with almond or soy milk. Use coconut cream instead of heavy cream for the ganache. These tweaks make the cake friendly for everyone. To add more flavor, consider fillings like raspberry jam or caramel sauce between the layers. You can also layer in whipped cream for a light touch. When it comes to toppings, think beyond sprinkles. Fresh fruits like strawberries or bananas can make the cake pop. Chopped nuts like walnuts or pecans can add crunch. You can even drizzle extra ganache or chocolate syrup on top for a double chocolate treat. Each of these additions can make your cake unique and delicious. For more details on making this tempting dessert, check out the Full Recipe. To keep your leftover chocolate drip cake fresh, wrap it tightly in plastic wrap. This helps lock in moisture. You can also store it in an airtight container. Keep it in the refrigerator for up to five days. If you slice the cake, place parchment paper between the pieces. This prevents them from sticking together. If you want to save some cake for later, freezing is a great option. First, allow the cake to cool completely. Then, wrap it in plastic wrap and aluminum foil. This double wrap keeps out air and prevents freezer burn. You can freeze the cake for up to three months. When ready to enjoy, let it thaw in the fridge overnight before serving. If you want to warm up your cake, preheat your oven to 350°F (175°C). Place a slice on a baking sheet and cover it with foil. Heat for about 10 minutes until warm. You can also use the microwave. Heat a slice for about 10-15 seconds. Be careful not to overheat; you want it warm, not hot. Enjoy your cake just like new! For the full recipe, check the section above. Yes, you can make this cake ahead of time. I often bake the layers a day before. After they cool, wrap them in plastic wrap. This keeps them fresh. You can also make the ganache in advance. Just store it in the fridge. When you are ready, reheat the ganache gently. This makes it smooth again for drizzling. If your ganache leaks, don’t worry. This can happen if the ganache is too thin. You can fix this by chilling the cake. Place it in the fridge for about 20 minutes. This will help the ganache set better. If it still leaks, you may need to thicken your ganache. To do this, add more chocolate and melt it in. Stir until smooth, then let it cool a bit before using. If you don’t have chocolate chips, there are great substitutes. You can use chopped chocolate bars. Dark, milk, or white chocolate works well. If you prefer, try cocoa powder mixed with a bit of butter. This can give a similar flavor. You can also use carob chips for a different taste. Just make sure to adjust the sweetness if needed. You learned how to make a great chocolate drip cake. We covered the key ingredients, baking steps, and useful tips. Selecting quality ingredients is crucial for the best flavor. Remember to check your oven and pans for perfect baking. Don't forget to experiment with flavors and add fun toppings. Store leftovers properly to maintain freshness. With practice, you can perfect your technique. I hope these tips inspire you to create a delicious cake for any occasion. Happy baking!

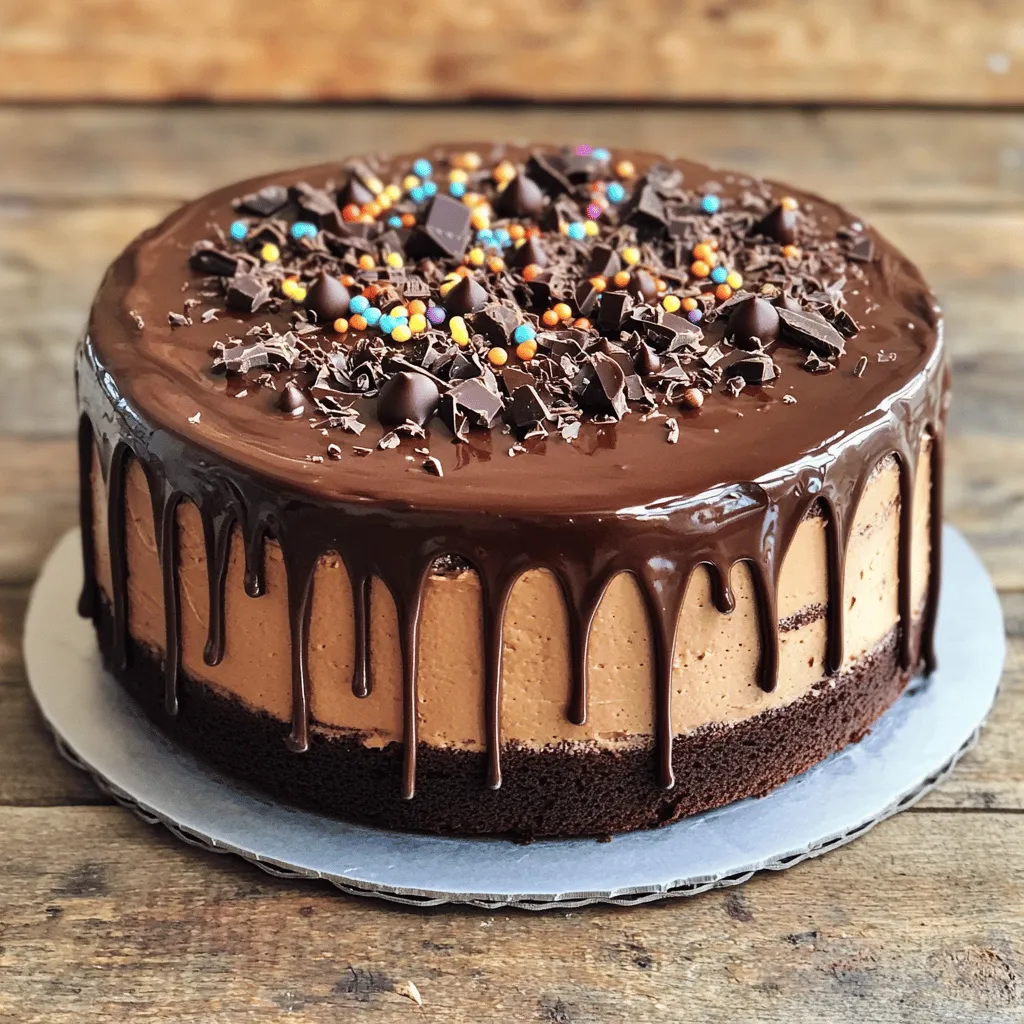
Are you ready to impress your friends and family with a stunning Chocolate Drip Cake? This blog post provides a simple, step-by-step recipe that makes baking easy and fun. I’ll …

Read more

Categories Desserts Leave a comment

Delicious Mozzarella Pepperoni Croissant Rolls Recipe

May 23, 2025 by Chef Evan
- 1 package (8 ounces) refrigerated crescent roll dough - 1 cup shredded mozzarella cheese - 1 cup thinly sliced pepperoni - 1 teaspoon Italian seasoning - 1 large egg, beaten (for egg wash) - Marinara sauce, for dipping To make Mozzarella Pepperoni Croissant Rolls, you need just a few simple ingredients. The main star is the crescent roll dough. It provides a flaky and buttery base. Then, mozzarella cheese adds a creamy, melty texture. Thinly sliced pepperoni gives it that classic pizza flavor. The Italian seasoning brings everything together with a nice herbal touch. Finally, the beaten egg wash helps the rolls turn golden brown in the oven. - Additional cheese varieties (e.g., cheddar) - Fresh herbs (e.g., basil, oregano) - Veggie options (e.g., bell peppers, mushrooms) You can also mix things up with optional ingredients. Adding cheddar cheese can give a sharp flavor. Fresh herbs like basil or oregano can enhance the taste. If you want to make it healthier, try adding veggies like bell peppers or mushrooms. These options let you create a unique twist on the original recipe. For the full recipe, be sure to check the details. - Preheat your oven to 375°F (190°C) and prepare a baking sheet by lining it with parchment paper. This makes cleanup easy. - On a clean surface, unroll the crescent roll dough. Separate it into triangles along the perforations. - At the wide end of each triangle, add about one tablespoon of shredded mozzarella cheese. Place 2-3 slices of pepperoni on top. Sprinkle with a pinch of Italian seasoning for extra flavor. - Now, roll the crescent triangles from the wide end to the pointed tip. Seal the edges tightly to keep the filling inside while baking. - Arrange the rolled croissants on the prepared baking sheet. Leave space between each one for even baking. - Using a pastry brush, apply the beaten egg over the tops of the croissants. This gives them a nice golden finish. - Bake in the preheated oven for about 12-15 minutes. Look for puffed, golden-brown croissants with melted cheese. - Once baked, let the croissants cool for a few minutes before serving. This helps the cheese set. - Serve the warm croissant rolls with a side of marinara sauce for dipping. This adds a fun twist to each bite. Enjoy this delightful snack with friends and family! For the complete process, refer to the Full Recipe. To keep the filling inside during baking, roll the croissants tightly. Start at the wide end and move to the tip. Pinch the edges firmly after rolling to seal them well. This helps keep all that gooey cheese and pepperoni inside. When sealing the edges, use a bit of water or the beaten egg. This acts like glue. Make sure you press down hard enough so they don't pop open while baking. To check for doneness, look for a nice golden brown color. If the croissants are too light, they need more time. Keep an eye on them to avoid burning. Remember, every oven works a bit differently. For that perfect golden brown hue, brush the tops with an egg wash. This helps create a shiny and appealing finish. Bake until they look puffed and golden, about 12 to 15 minutes. For a great presentation, arrange the croissant rolls on a wooden board. Add a small bowl of marinara sauce for dipping. You can sprinkle fresh basil on top for a pop of color and aroma. Pair these croissant rolls with a chilled soda or a light white wine. They also work well with a fresh salad or a bowl of soup. Enjoy them warm for the best taste! {{image_4}} You can switch up the cheese to create fun flavors. Try using cheddar for a sharp bite. Cream cheese adds a nice creaminess. Mixing mozzarella and cheddar gives a gourmet twist. You can also use pepper jack for a spicy kick. Each cheese brings a unique taste, making your rolls exciting. You can add cooked meats like ham or sausage for extra protein. These meats can bring a savory depth to the rolls. If you want a healthier option, add some veggies. Bell peppers or spinach can boost nutrition and flavor. Both options bring new life to your croissant rolls. Spices and herbs can elevate your croissant rolls. Consider adding garlic powder for a savory touch. Fresh herbs like basil or oregano can add a bright flavor. You can also try different dipping sauces. Ranch or garlic sauce can make each bite more fun. Experimenting with flavors keeps the dish fresh. To keep your Mozzarella Pepperoni Croissant Rolls fresh, store them in the fridge. Use an airtight container or wrap them tightly in plastic wrap. This helps maintain their taste and texture. If you want to freeze them, place the rolls in a freezer-safe bag. Remove as much air as possible to prevent freezer burn. When it's time to enjoy your leftovers, preheat your oven to 350°F (175°C). Place the croissant rolls on a baking sheet. Heat them for about 10-12 minutes. This method keeps them warm and crispy. In the fridge, your croissant rolls will last up to three days. After that, check for any signs of spoilage. If they smell off or have a strange texture, it's best to throw them away. Keep an eye out for mold as well. If you see any, discard the rolls immediately. Freshness is key to enjoying this tasty treat! Yes, you can prepare these rolls in advance! You can assemble them the day before. Just cover them tightly and store them in the fridge. When you're ready to bake, let them sit at room temperature for about 10 minutes before placing them in the oven. If you want to meal prep, consider making a larger batch. These rolls freeze well before baking. Just follow the freezing instructions mentioned earlier. When you crave a snack, bake from frozen. Add a few extra minutes to the baking time for best results. Enjoy your delicious Mozzarella Pepperoni Croissant Rolls anytime! For the full recipe, check out the earlier section. Can I use homemade dough instead of crescent roll dough? Yes, you can use homemade dough. It adds a personal touch. Just roll it out thin, like crescent dough. This method gives you more control over the flavors and texture. What can I use as an alternative to pepperoni? You can use turkey pepperoni or salami. For a healthier option, try sliced turkey or chicken. You can also use veggies like bell peppers or mushrooms for a new twist. How can I make this recipe vegetarian? Simply skip the pepperoni. You can add more cheese or use veggies instead. Spinach and artichokes work well for a tasty filling. What temperature should the croissants be baked at? Bake the croissants at 375°F (190°C). This temperature helps them puff up and become golden. How do I achieve a flaky texture? To get that flaky texture, make sure the dough stays cold. Handle it gently, and don’t overwork it when rolling. This keeps the layers intact. What are other ways to enjoy these croissants? You can serve them with different dips like ranch or garlic sauce. They also pair well with salads for a light meal. Can I serve them cold or should they be warm? These croissants taste best warm. The cheese is melty, and the crust is crispy. If you serve them cold, the texture changes. Warm them briefly in the oven for a few minutes if needed. In this post, we explored a fun recipe for Mozzarella Pepperoni Croissant Rolls. You learned about the key ingredients, easy steps for preparation, and baking tips. Variations included adding different cheeses or veggies to suit your taste. Storing leftovers properly ensures you enjoy them later. Remember, these rolls are best served warm with marinara sauce. Get creative with your ingredients and try new flavors. Enjoy making these tasty treats and impress your guests!

Are you ready to treat your taste buds? This Delicious Mozzarella Pepperoni Croissant Rolls Recipe combines flaky dough with melty cheese and savory pepperoni. Perfect for snacks, appetizers, or game …

Read more

Categories Appetizers Leave a comment

Tomato Avocado Corn Salad Fresh and Flavorful Dish

May 23, 2025 by Chef Evan
To make a tasty Tomato Avocado Corn Salad, you need these fresh items: - 2 cups fresh cherry tomatoes, halved - 1 ripe avocado, diced into bite-sized pieces - 1 cup sweet corn kernels (choose fresh, canned, or frozen) - 1/2 medium red onion, finely diced - 1/4 cup fresh cilantro leaves, roughly chopped - 2 tablespoons freshly squeezed lime juice - 1 tablespoon extra-virgin olive oil - 1 teaspoon chili powder (optional, for a hint of spice) - Salt and freshly ground black pepper, to taste You can easily swap some ingredients if needed: - Use regular tomatoes instead of cherry tomatoes. - Replace avocado with diced mango for a fruity twist. - Try green onions instead of red onion for a milder taste. - Use lemon juice instead of lime juice for different flavor notes. - Add black beans for extra protein and fiber. Choosing the best produce makes your salad shine: - Look for cherry tomatoes that are firm and bright in color. - Pick avocados that yield slightly when you press them. - Choose corn that has bright yellow kernels and fresh silk. - Select red onions that feel heavy and have a smooth skin. - Sniff cilantro; it should smell fresh and fragrant. These tips help you create a fresh and flavorful dish with your Tomato Avocado Corn Salad. For the full recipe, check out the details above. First, gather all your fresh ingredients. You need cherry tomatoes, avocado, corn, red onion, and cilantro. Halve the cherry tomatoes with a knife. For the avocado, carefully cut it in half, remove the pit, and dice it into bite-sized pieces. Be gentle; you want the pieces to stay whole. Next, finely chop the red onion. Lastly, roughly chop the cilantro to release its fragrant oils. You have three options for the corn. If you choose fresh corn, husk it first. Boil the cobs in salted water for 3-5 minutes until tender. Then, drain and let them cool. If you prefer canned corn, just rinse and drain it. For frozen corn, microwave it until heated through, then cool. Each option works well, so pick what you have on hand. Now it’s time to mix! In a large bowl, combine the halved tomatoes, diced avocado, cooled corn, and chopped onion. Stir gently to keep the avocado intact. For the dressing, whisk together lime juice, olive oil, chili powder, salt, and pepper in a small bowl. Once smooth, pour this dressing over the salad mix. Gently toss everything to coat evenly. Finally, add the chopped cilantro and give it one last gentle toss. Your salad is now ready to taste! Adjust seasoning as needed and enjoy this fresh and flavorful dish. For the full recipe, check the section above! Choose a ripe avocado for the best flavor. It should yield slightly when pressed. To cut it, slice it in half, remove the pit, and scoop out the flesh. Take care not to mash it. Dicing the avocado into cubes keeps it intact in the salad. To prevent browning, add lime juice right after cutting. This keeps the avocado bright and fresh. You can prepare this salad in advance. Chop all the veggies and store them in a bowl. Mix the dressing separately. When you’re ready to serve, combine everything. This method keeps the salad fresh and crunchy. If you mix it too early, the avocado may brown and get mushy. Aim to assemble the salad no more than a few hours before serving. Serve this salad in a large bowl for a casual meal. For a fancy touch, use small dishes. Garnish each dish with a cilantro sprig or a lime wedge. This adds color and freshness. Pair it with grilled chicken or fish for a complete meal. You can also enjoy it with tortilla chips for a fun snack. For more ideas, check the full recipe. {{image_4}} You can make this salad heartier by adding proteins. Grilled chicken adds a savory touch. Shrimp or tofu are great choices too. Canned beans, like black beans, add fiber and flavor. Just mix in a cup of your chosen protein for a filling meal. To boost flavor, try adding citrus zest. Grated lime or lemon peel brightens the dish. Fresh herbs like basil or mint can also add a unique twist. For a spicy kick, add sliced jalapeños or a dash of hot sauce. Just remember to adjust the salt to balance the new flavors. For a gluten-free option, this salad is naturally safe. If you're vegan, skip the honey or any animal-based protein. You can make it keto-friendly by using less corn and more avocado. Always check labels on canned ingredients for hidden gluten or sugar. Explore the Full Recipe for a detailed guide on making this salad. To store your Tomato Avocado Corn Salad, place it in an airtight container. Make sure the lid fits snugly to keep air out. This helps keep the flavors fresh. If possible, separate the dressing from the salad. This prevents the avocado from getting mushy. If you have leftover dressing, store it in a small jar. The salad is best eaten fresh. If stored properly, it will last about 1 to 2 days in the fridge. The avocado may brown over time, but it still tastes good. Check the salad for any changes in smell or texture before eating. If you notice anything off, it’s best to toss it. This salad is best served cold, so reheating is not necessary. If you prefer a warm dish, you can heat the corn before mixing it into the salad. Just make sure to let it cool before adding it to the other ingredients. For a fresh taste, serve the salad straight from the fridge. For the full recipe, check out the recipe section. Yes, you can use other tomatoes. If you prefer, use diced Roma or vine-ripened tomatoes. Cherry tomatoes add a sweet burst, but others work well too. Just ensure they are ripe for the best flavor in your salad. To add spice, simply mix in more chili powder. You can also chop fresh jalapeños or add a dash of hot sauce. Start with a little, then taste and adjust for heat. This allows you to control the spice level and keep it enjoyable. Yes, you can make a vegan dressing easily. Replace the olive oil with an oil like avocado oil, and the lime juice stays the same. You can also blend in some avocado for creaminess without using dairy. This keeps the dressing fresh and flavorful. To keep avocado fresh, use lime juice right after cutting it. The citric acid helps slow browning. If you have leftover salad, cover it tightly with plastic wrap. This limits air exposure, keeping your salad bright and tasty longer. This blog post covered everything you need to make a great salad. We looked at key ingredients and how to choose fresh produce. I shared step-by-step cooking tips and fun tricks for serving your dish. We also explored yummy variations and storage tips for leftovers. With this knowledge, you can create your own tasty salad. Enjoy fresh flavors, make it your own, and impress your friends!

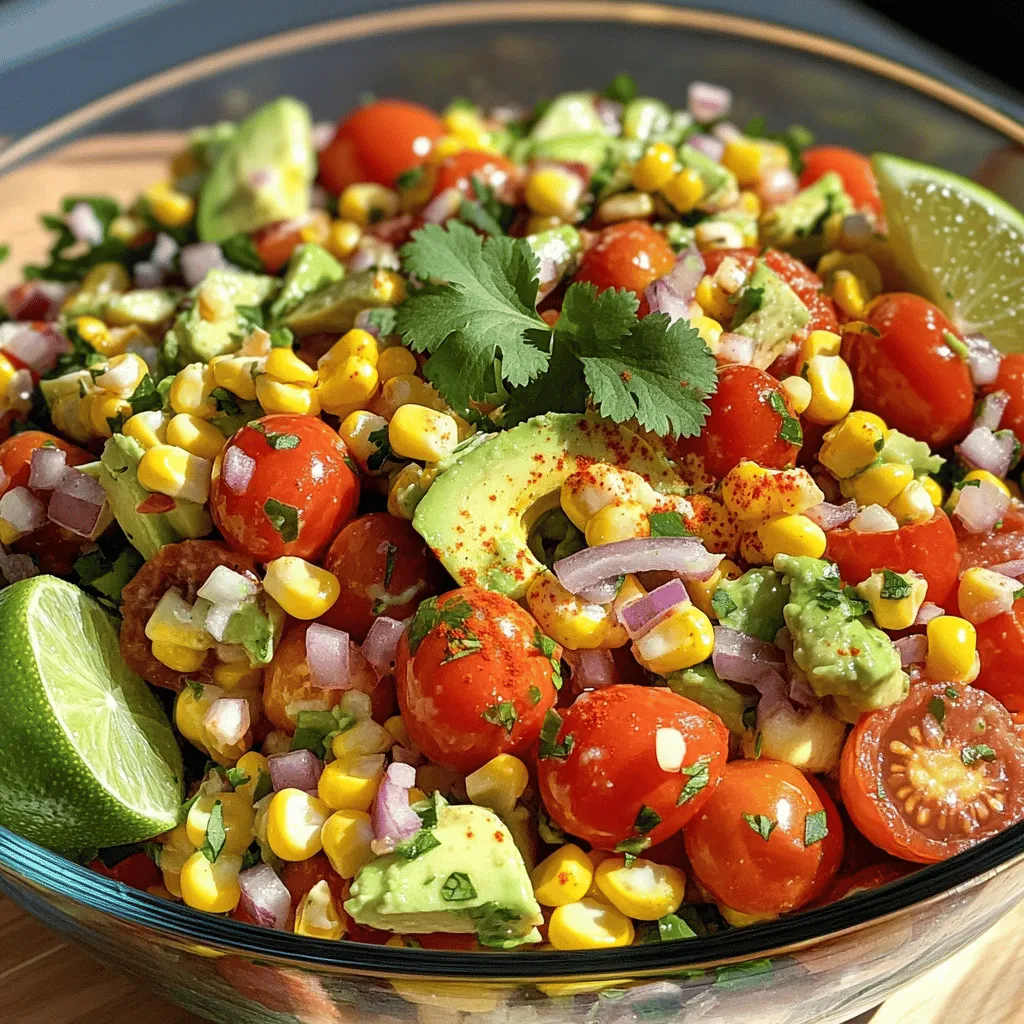
Looking for a fresh and vibrant dish? Look no further than Tomato Avocado Corn Salad! This colorful salad bursts with flavors and is easy to make. I’ll guide you through …

Read more

Categories Salads Leave a comment
Older posts
Newer posts
← Previous Page1 … Page82 Page83 Page84 … Page124 Next →

TOSSED FLAVORS

Where flavors are fresh, vibrant, and ready to toss! 🥗

PAGES

Home About Contact Privacy Policy Terms & Conditions Cookie Policy GDPR Policy Copyright Policy Disclaimer

CATEGORIES

Appetizers Desserts Salads Breakfast Dinner

Contact

  • Pinterest
  • Mail
Copyright © 2026 Tossed Flavors. All rights reserved.