Skip to content
tossedflavors.com
  • Home
  • Appetizers
  • Desserts
  • Salads
  • Breakfast
  • Dinner
  • Privacy Policy
  • Contact
  • About

Chef Evan

Carrot Apple Salad Fresh and Flavorful Recipe

May 29, 2025 by Chef Evan
- 3 medium carrots, finely grated - 2 crisp and juicy apples, cored and diced - 1/2 cup raisins or dried cranberries - 1/4 cup chopped walnuts or pecans - 1/4 cup plain Greek yogurt - 2 tablespoons honey - 1 tablespoon fresh lemon juice - 1/2 teaspoon ground cinnamon - Salt and pepper to taste - Fresh mint leaves for garnish To make a tasty carrot apple salad, you need simple, fresh ingredients. Start with three medium carrots. Grate them finely to add texture. Next, choose two juicy apples. I love using Granny Smith or Honeycrisp apples for their sweetness and crunch. You will also need a half cup of raisins or dried cranberries. These add a nice touch of sweetness. For some crunch, add a quarter cup of chopped walnuts or pecans. Toasted nuts work great here. For creaminess, use a quarter cup of plain Greek yogurt. Two tablespoons of honey will sweeten the salad. A tablespoon of fresh lemon juice adds bright flavor. Use half a teaspoon of ground cinnamon for warmth. Finally, season with salt and pepper to taste. Don’t forget fresh mint leaves for garnish; they add color and a hint of freshness. - Calories per serving: About 150 calories. - Macronutrient breakdown: - Carbs: 25g - Protein: 3g - Fats: 4g Carrots and apples are not just tasty; they are good for you too. Carrots are high in vitamin A, which is great for your eyes. Apples provide fiber, which helps with digestion. This salad is a balanced mix of flavors and nutrients. You can enjoy it as a side dish or even a light meal. For the full recipe, check out the section above! 1. Start by taking a large mixing bowl. Add in the finely grated carrots and diced apples. Mix them well. 2. Next, toss in the raisins or dried cranberries. They add a sweet and chewy bite. 3. Then, add the chopped walnuts or pecans. This gives a nice crunch to the salad. 4. In a separate small bowl, prepare the yogurt dressing. Whisk together the Greek yogurt, honey, lemon juice, cinnamon, and a pinch of salt and pepper. Make sure it is smooth. 5. Drizzle this dressing over the carrot and apple mix. Toss gently to coat everything evenly. 6. Taste the salad. If needed, adjust with more salt, pepper, or honey based on your liking. 7. Cover the bowl with plastic wrap or a lid. Let it rest in the refrigerator for about 15 minutes. This allows the flavors to blend nicely. - Letting the salad sit for 15 minutes enhances the flavors. It allows the ingredients to soak up the dressing. - For a lovely presentation, serve the salad in clear glass bowls. This shows off the colorful layers. Top each bowl with a sprig of fresh mint for a pop of color. To make this salad even better, you can switch out the nuts. Try sunflower seeds or pumpkin seeds if you want a nut-free option. For dried fruits, apricots or figs work well too. They add a nice chew and sweetness. When it comes to sweetness, adjust the honey to your taste. If you love things sweet, add a bit more. You can also use maple syrup or agave nectar instead. For seasoning, taste as you go. A pinch of salt can really make the flavors pop. If you want a kick, add a bit of cayenne pepper. Making the salad ahead can save you time. Prepare the carrots and apples, but wait to mix in the yogurt dressing. This keeps the salad fresh and crunchy. You can store the veggies in a covered bowl in the fridge. To keep the salad fresh, cover it tightly. Use plastic wrap or a lid. If you do add the dressing early, it may get watery. Give it a good stir before serving. Enjoy your fresh and tasty carrot apple salad! {{image_4}} You can change up the nuts in this salad to add different flavors and textures. Try using sliced almonds for a crunchy bite. If you want a sweeter touch, go for candied pecans. Adding protein can make this salad a full meal. Grilled chicken adds heartiness, while cubed tofu makes it plant-based. Both options blend well with the fresh flavors. If you want a vegan version, replace Greek yogurt with a dairy-free option like cashew cream. Use maple syrup instead of honey for sweetness. This salad is naturally gluten-free. Just ensure any added ingredients, like nuts or dressings, are also gluten-free. This way, everyone can enjoy the bright and fresh flavors! To keep your carrot apple salad fresh, store it in an airtight container. This helps maintain its crunch and flavor. If you have leftovers, place the salad in the fridge right away. It will stay good for about 3 days. You might notice some moisture from the apples, but that's normal. Just give it a gentle stir before serving. You can freeze carrot apple salad, but I don’t recommend it. Freezing changes the texture of the apples and carrots. If you do freeze it, use a freezer-safe container. Keep it tightly sealed. When you're ready to eat, thaw it in the fridge overnight. The salad will not be as crisp, but it will still taste good. For best results, enjoy it fresh from the fridge or make it the day you plan to serve it. How long does the carrot apple salad last? The carrot apple salad stays fresh for about 3 days in the fridge. Store it in an airtight container. After a few days, the apples may brown and the salad may lose crunch. Can I use other types of apples in this recipe? Yes, you can use other apple types! Sweet apples like Fuji or tart apples like Granny Smith work well. Choose apples based on your taste. Is it safe to make this salad a day in advance? Yes, making the salad a day ahead is fine. Just add the dressing right before serving. This keeps the salad fresh and crunchy. What can I serve with carrot apple salad? This salad pairs well with grilled chicken, fish, or sandwiches. It adds a refreshing taste to any meal. You can also enjoy it on its own as a snack. Is this salad suitable for meal prep? Absolutely! This salad is great for meal prep. Just store it in portions. You can grab it easily for lunch or a snack during the week. For best results, add the dressing just before eating. For the full recipe, check out the Carrot Apple Crunch Salad 🥕. This blog post covered all you need to know about making a carrot apple salad. We discussed the fresh ingredients and their benefits, along with easy prep steps. You learned how to enhance flavors and store your salad for later. Remember, you can mix things up with different nuts or proteins. This salad is versatile and perfect for any meal. Enjoy creating this healthy dish that brings flavor and nutrition to your table. Your taste buds will thank you!

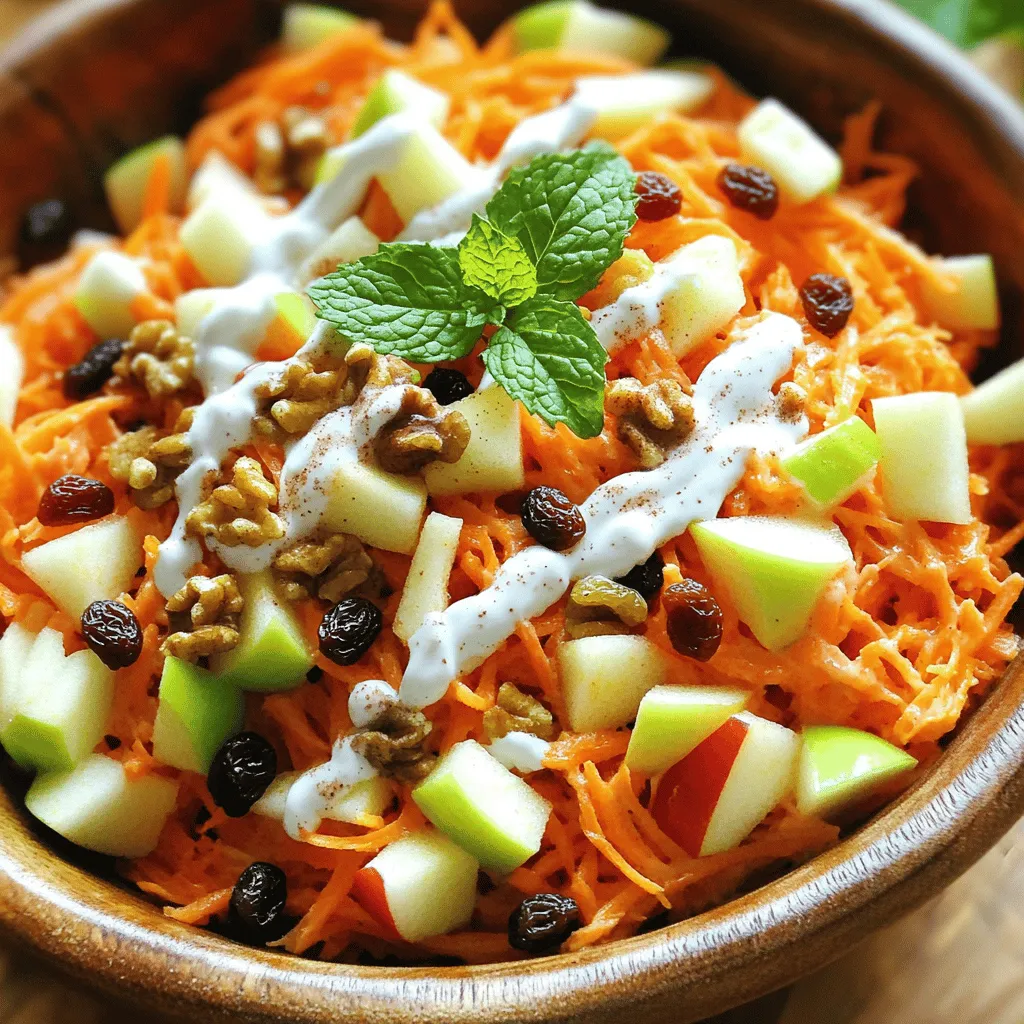
Are you looking for a fresh and flavorful salad that bursts with crunch and sweetness? You’re in the right place! My Carrot Apple Salad combines juicy apples, crisp carrots, and …

Read more

Categories Salads Leave a comment

Easy Egg Roll in a Bowl with Flavorful Ingredients

May 29, 2025 by Chef Evan
For this dish, you'll need a few key items: - 1 pound ground chicken or turkey - 1 tablespoon sesame oil - 2 cloves garlic, finely minced - 1 tablespoon fresh ginger, freshly grated - 4 cups coleslaw mix (or a mix of shredded cabbage and carrots) - 1/4 cup low-sodium soy sauce (or regular if you like) - 2 green onions, finely chopped - 1 teaspoon rice vinegar - 1 teaspoon sriracha (optional, for some heat) - Sesame seeds for a lovely garnish These ingredients come together to create a savory and satisfying meal. The ground meat provides protein, while the coleslaw mix adds crunch and freshness. The garlic and ginger bring depth to the flavor, making every bite enjoyable. Want to jazz up your egg roll in a bowl? Here are some fun add-ins: - Bell peppers, chopped - Mushrooms, sliced - Water chestnuts, diced - Baby corn, chopped - Fresh cilantro, for a burst of freshness Adding these will give your dish more texture and flavor. Feel free to mix and match based on your taste. Serve your egg roll in a bowl hot. Here are some serving ideas: - Top with extra green onions for a pop of color. - Sprinkle sesame seeds on top for crunch. - Pair with steamed rice or quinoa for a complete meal. You can also serve it with a side of soy sauce or hot sauce for dipping. This dish is not only tasty but also fun to customize! For the full recipe, check out the details above. Gather your ingredients first. This makes cooking smooth and fun. You will need: - 1 pound ground chicken or turkey - 1 tablespoon sesame oil - 2 cloves garlic, finely minced - 1 tablespoon fresh ginger, freshly grated - 4 cups coleslaw mix (or a combination of shredded cabbage and carrots) - 1/4 cup low-sodium soy sauce (or regular if preferred) - 2 green onions, finely chopped - 1 teaspoon rice vinegar - 1 teaspoon sriracha (optional, for a spicy kick) - Sesame seeds for a delightful garnish Chop the green onions and mince the garlic and ginger. This will save time later. Start by heating the sesame oil in a large skillet over medium heat. Once hot, add the minced garlic and ginger. Cook them for about one minute. You want them to smell good and turn golden. Next, add the ground chicken (or turkey). Use a spatula to break it into small pieces. Cook it for about 5 to 7 minutes, stirring often. Make sure the meat is browned and cooked through. Now, stir in the coleslaw mix. Cook it gently for another 2 to 3 minutes. The cabbage should be just tender but still crisp. Pour in the soy sauce, rice vinegar, and sriracha if you enjoy heat. Mix well and let it simmer for 2 more minutes. This will combine all those wonderful flavors. Once off the heat, sprinkle the chopped green onions on top. This adds color and freshness. Serve the egg roll mix in individual bowls. For a nice touch, sprinkle sesame seeds over each serving. This adds texture and makes the dish look great. You can also add more green onions for extra flavor. Enjoy your Easy Egg Roll in a Bowl! To make the best egg roll in a bowl, use fresh ingredients. Fresh ginger and garlic add a lot of flavor. Also, don’t skip the sesame oil. It gives a nice nutty taste. Cook the meat until it’s well browned. This step adds depth to the dish. Stir in the coleslaw mix gently. You want it tender but still crunchy. Finally, let it simmer for a couple of minutes. This helps all the flavors blend nicely. You can swap out the ground chicken for ground turkey or pork. If you want a vegetarian twist, try crumbled tofu or tempeh. For the coleslaw mix, use shredded cabbage, carrots, or broccoli slaw. Low-sodium soy sauce can be replaced with coconut aminos for a gluten-free option. If you prefer less spice, skip the sriracha or use a milder sauce. Rice vinegar can be swapped with apple cider vinegar if needed. One common mistake is overcooking the garlic and ginger. They should be fragrant, not burnt. Another mistake is adding too much liquid. This can make your bowl watery. Make sure to measure the soy sauce and vinegar. Also, don't skip the resting phase after cooking. Letting it sit helps the flavors mix. Lastly, don’t forget to garnish with sesame seeds and green onions. This adds flavor and makes your dish look great. For the full recipe, check the section above. {{image_4}} You can easily make this dish vegetarian or vegan. Instead of ground chicken or turkey, use cooked mushrooms or tofu. Mushrooms add a nice umami flavor. Tofu gives you protein and a great texture. Just be sure to press tofu to remove excess water. Use the same spices and sauces to keep the taste strong and enjoyable. If you want more protein, consider adding shrimp or beef. Shrimp cooks quick and gives a nice touch. Beef can add a rich flavor. Simply cook it alongside the garlic and ginger. Break it up as it cooks. You can also mix in cooked beans for a plant-based boost. Adjust the spice level to fit your taste. Add more sriracha for heat or use chili flakes. If you prefer mild, skip the spicy sauces. For a sweet touch, add a splash of honey or maple syrup. This balances the flavors nicely. Try different sauces like teriyaki for a new twist. You can find the full recipe for more ideas. After enjoying your Easy Egg Roll in a Bowl, store leftovers in an airtight container. This keeps the dish fresh and flavorful. Make sure to cool it down first. You can store it in the fridge for up to three days. If you want to keep it longer, consider freezing. When you're ready to eat leftovers, use a microwave or a skillet. For the microwave, place a serving in a bowl and cover it. Heat for about 1-2 minutes. Stir halfway through to ensure even heating. If you prefer a skillet, warm it over medium heat. Stir often until it’s hot throughout. To freeze the Easy Egg Roll in a Bowl, let it cool completely first. Then, portion it into freezer-safe bags or containers. Remove any air before sealing. This prevents freezer burn. You can freeze it for up to three months. When you're ready to eat, thaw it overnight in the fridge before reheating. Enjoy your meal prep with ease! Yes, you can make Easy Egg Roll in a Bowl ahead of time. I often prepare it in the morning or the night before. Just cook it and store it in the fridge. It stays fresh for about 3 days. When you want to eat, just heat it in a pan or microwave. This makes meal prep a breeze! This dish is tasty on its own, but you can pair it with several sides. Here are some great options: - Steamed rice for a filling meal. - Quinoa for a healthy twist. - Egg noodles for a fun texture. - A crisp salad for extra crunch. These sides balance the flavors and make a complete meal. If you want to add more heat, try these options: - Add more sriracha for a spicy kick. - Toss in red pepper flakes for extra warmth. - Include diced jalapeños for fresh heat. You can also mix in a bit of hot sauce before serving. This lets you control the spice level just how you like it. In this blog post, we explored how to make an Easy Egg Roll in a Bowl. We covered essential ingredients, preparation steps, and tips for success. I shared variations to suit different tastes, along with storage and reheating advice. Remember to get creative with add-ins and spices. This dish is easy to customize and perfect for meal prep. Enjoy experimenting to find your favorite combination and serving style. Now, you have the tools to make a tasty meal anytime!

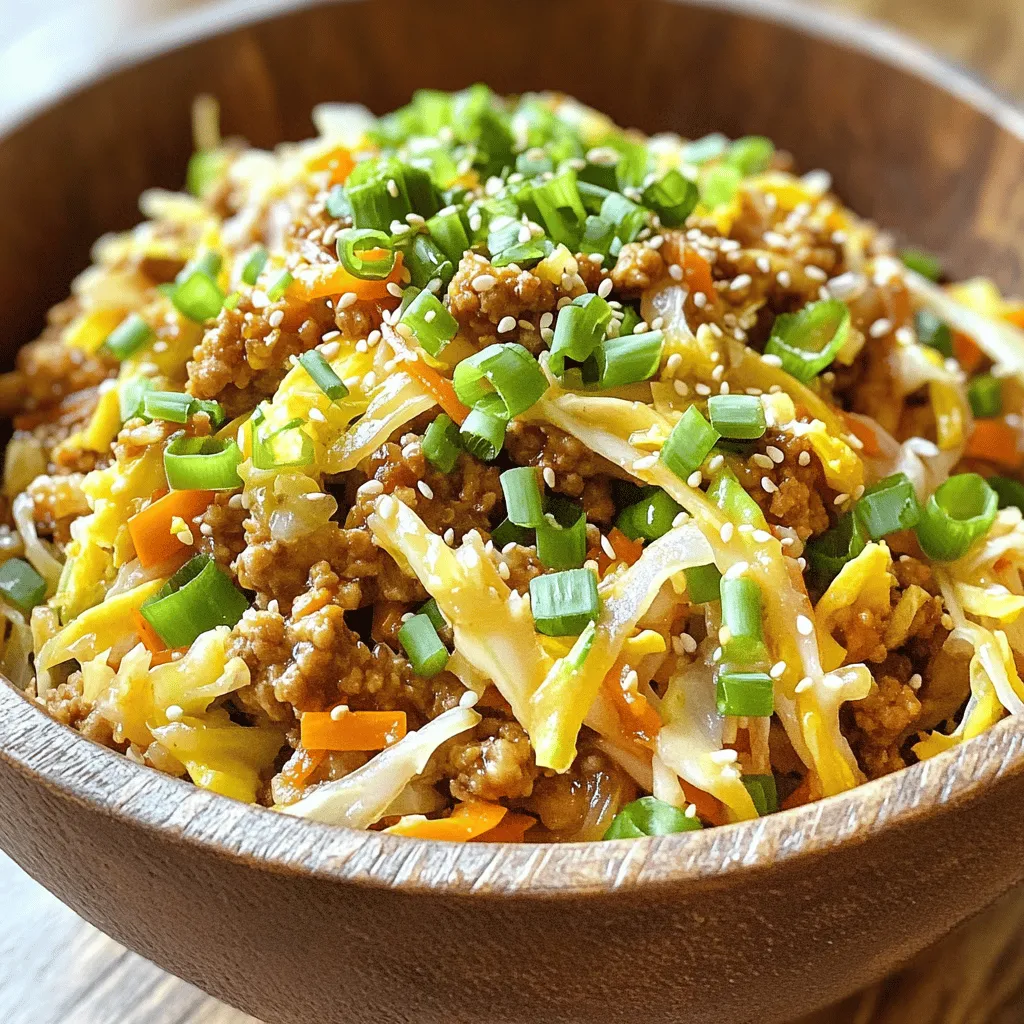
Craving a quick, tasty meal? Let me show you how to make an Easy Egg Roll in a Bowl using simple, flavorful ingredients. This dish combines fresh veggies and savory …

Read more

Categories Dinner Leave a comment

Juicy Air Fryer Chicken Breasts Perfectly Cooked Dish

May 29, 2025 by Chef Evan
- 4 boneless, skinless chicken breasts - 2 tablespoons olive oil - 1 teaspoon garlic powder - 1 teaspoon onion powder - 1 teaspoon smoked paprika - 1 teaspoon dried oregano - 1 teaspoon salt - 1/2 teaspoon freshly ground black pepper - 1/4 teaspoon cayenne pepper (optional, for an extra kick) - Fresh herbs for garnish (such as parsley or cilantro) I love using fresh chicken breasts. They cook evenly and stay juicy. The olive oil helps the spices stick and adds flavor. Each spice brings its own unique taste. Garlic and onion powder give depth, while smoked paprika adds a nice smokiness. Oregano and salt round it out for a balanced profile. - Lemon juice or zest - Fresh herbs like thyme or rosemary - A splash of hot sauce Adding lemon juice brightens up the dish. Fresh herbs add a pop of color and flavor. If you enjoy heat, a splash of hot sauce gives a nice kick. - Air fryer - Meat thermometer - Mixing bowls - Whisk or fork - Measuring spoons An air fryer is key for making this dish. A meat thermometer ensures you cook the chicken perfectly. Mixing bowls help you prepare the spice blend. A whisk or fork mixes the spices well, and measuring spoons keep your amounts accurate. For the full recipe, check out the Full Recipe section. - Preheating the Air Fryer Set your air fryer to 375°F (190°C). Preheat it for about 5 minutes. This step helps the chicken cook evenly and get crispy. - Preparing the Chicken Breasts Take 4 boneless, skinless chicken breasts. Use paper towels to pat them dry. Dry chicken helps keep the meat juicy and tender. - Making the Spice Blend In a bowl, mix 2 tablespoons of olive oil with 1 teaspoon each of garlic powder, onion powder, smoked paprika, dried oregano, salt, and black pepper. If you like heat, add 1/4 teaspoon of cayenne pepper. Whisk until smooth. - Applying the Seasoning Rub the spice blend all over each chicken breast. Make sure each piece is fully coated. This step locks in great flavors. - Arranging the Chicken in the Air Fryer Spray the air fryer basket lightly with cooking spray. Place the seasoned chicken breasts in a single layer. Avoid overlapping to ensure even cooking. - Cooking Time and Temperature Cook the chicken for 18-20 minutes. Flip them halfway for even browning. Check for doneness by using a meat thermometer. The internal temperature should reach 165°F (74°C). To get juicy chicken, start by drying the chicken breasts. Use paper towels to remove any extra moisture. This helps the skin get crispy and keeps the meat moist. After cooking, let the chicken rest for about five minutes. Resting allows the juices to settle in the meat. Cutting too soon will let all those juices run out, leading to dry chicken. You can swap ingredients to boost flavor. For example, use lemon juice instead of vinegar in your marinade. This gives a fresh taste. Try adding honey for a hint of sweetness. Marinating is another great way to enhance flavor. A simple marinade of olive oil, lemon juice, and herbs can work wonders. Let the chicken soak for at least 30 minutes before cooking. The longer, the better the flavor. To avoid dry chicken, don't overcook it. Use a meat thermometer to check the internal temperature. It should be 165°F (74°C). For even cooking, place the chicken in a single layer in the air fryer. Avoid stacking or overlapping pieces. This ensures hot air circulates around each piece, cooking them evenly. Try these tips for juicy, flavorful air fryer chicken breasts. For the full recipe, check out the complete guide. {{image_4}} You can change the flavors of your juicy chicken breasts by trying different spice blends. Here are two fun ways to mix it up: - Adding Citrus Elements: Squeeze fresh lemon or lime juice over the chicken before seasoning. This adds a bright tang and enhances the flavor. You can also use zest for a stronger citrus kick. - Infusing with Fresh Herbs: Try using fresh herbs like rosemary, thyme, or basil. Chop them finely and mix them into your spice blend. This gives the chicken a fresh and vibrant taste. You can use more than just chicken breasts in your air fryer. Here are some great alternatives: - Using Bone-in Chicken Breasts: Bone-in chicken breasts add flavor and moisture. Cook them for a bit longer, about 25-30 minutes, to ensure they are fully done. - Air Frying Chicken Thighs: Chicken thighs are juicy and full of flavor. They cook in about 20-25 minutes. Adjust your seasoning to match their rich taste. Pairing your chicken with the right sides makes a great meal. Here are some ideas: - Pairing with Side Dishes: Serve your chicken with roasted vegetables, mashed potatoes, or a fresh salad. These sides complement the chicken well and add color to your plate. - Recommended Sauces: Drizzle your chicken with sauces like honey mustard, barbecue, or a yogurt-based sauce. These add extra flavor and make each bite special. For more details, check out the Full Recipe for juicy air fryer chicken breasts! - Storing Cooked Chicken Breasts After cooking, let the chicken cool down. Place it in an airtight container. This keeps it fresh and safe. You can store it in the fridge for up to four days. - Freezing Tips for Longevity If you want to keep it longer, freezing is great. Wrap each chicken breast tightly in plastic wrap. Then, place them in a freezer bag. This prevents freezer burn and keeps the chicken tasty. Frozen chicken lasts up to six months. - Best Practices for Reheating in the Air Fryer To reheat, set your air fryer to 350°F (175°C). Place the chicken in the basket. Heat for about 5 to 7 minutes. This method ensures the chicken stays juicy and doesn't dry out. - Other Effective Reheating Techniques You can also use the microwave. Place the chicken on a microwave-safe plate. Add a splash of water to keep it moist. Cover it with a lid or microwave-safe wrap. Heat it in short bursts to avoid overcooking. - How Long It Lasts in the Fridge Cooked chicken lasts about four days in the fridge. Make sure to store it properly to enjoy it safely. - Signs of Spoilage Always check for signs of spoilage before eating. Look for an off smell or any color changes. If it feels slimy or sticky, it's best to throw it away. You should cook chicken breasts for 18 to 20 minutes in an air fryer. This time allows the chicken to become juicy and tender. To get the best results, flip the chicken halfway through. This helps both sides cook evenly and develop a nice crust. Chicken breasts should reach an internal temperature of 165°F (74°C). Use a meat thermometer to check. This temperature ensures the chicken is safe to eat and still juicy. Cooking it to this temperature keeps the meat moist and flavorful. No, avoid stacking chicken breasts in the air fryer. Stacking can block air flow. This can lead to uneven cooking. Each piece needs space for the hot air to circulate. For best results, place the chicken in a single layer. You can serve juicy air fryer chicken breasts with many sides. Here are some great options: - Roasted vegetables - Fresh salad - Garlic mashed potatoes - Quinoa or rice - Steamed broccoli These sides complement the chicken well and make a complete meal. To know if your chicken is fully cooked, check the internal temperature. It should be 165°F (74°C). You can also cut into the thickest part of the chicken. If the juices run clear and there’s no pink meat, it is ready to eat. Always let the chicken rest for a few minutes before slicing. This keeps it juicy. To make juicy air fryer chicken breasts, you need fresh ingredients. Here’s a quick list: - 4 boneless, skinless chicken breasts - 2 tablespoons olive oil - 1 teaspoon garlic powder - 1 teaspoon onion powder - 1 teaspoon smoked paprika - 1 teaspoon dried oregano - 1 teaspoon salt - 1/2 teaspoon freshly ground black pepper - 1/4 teaspoon cayenne pepper (optional) - Fresh herbs for garnish Now, let’s talk about why each step matters. First, preheating the air fryer is crucial. It gets the air circulating and helps to crisp the chicken. Set it to 375°F (190°C) for about 5 minutes. Next, drying the chicken is key. Patting the chicken with paper towels removes moisture. This step helps achieve that crispy skin everyone loves. Then, let’s make the spice blend. Combine olive oil, garlic powder, onion powder, smoked paprika, oregano, salt, black pepper, and cayenne in a bowl. This blend adds flavor. Now, coat the chicken. Rub the spice mix all over each breast. Make sure to cover every inch. This locks in the flavor during cooking. Lightly spray the air fryer basket with cooking spray. This helps prevent sticking. Place the chicken breasts in a single layer. Avoid overlapping them for even cooking. Cook the chicken for 18-20 minutes. Flip them halfway through. This ensures both sides get crispy. Check the internal temperature. It should reach 165°F (74°C). Let the chicken rest for 5 minutes on a plate. This allows the juices to settle. The chicken will be more juicy and tasty. Finally, sprinkle fresh herbs on top before serving. This adds color and a fresh taste. Enjoy your juicy air fryer chicken breasts! For more details, check the Full Recipe. Juicy air fryer chicken breasts are easy to make with the right steps and tips. You learned about key ingredients, cooking methods, and storage tips. This guide can help you create flavorful meals without the fuss. Remember, juicy chicken needs the right prep, seasoning, and care after cooking. Try adjusting flavors or using different proteins for variety. Enjoy your tasty results and impress your family and friends with your cooking skills!

Looking for the ultimate recipe for Juicy Air Fryer Chicken Breasts? You’ve come to the right place! In this post, I’ll share step-by-step instructions and tips to help you achieve …

Read more

Categories Dinner Leave a comment

Mediterranean Chickpea Salad Fresh and Flavorful Meal

May 29, 2025 by Chef Evan
To make a Mediterranean Chickpea Salad, you need the following: - 1 can (15 oz) chickpeas, drained and rinsed thoroughly - 1 cup cherry tomatoes, halved - 1 medium cucumber, diced - 1/2 medium red onion, finely chopped - 1/2 cup kalamata olives, pitted and sliced - 1/4 cup fresh parsley, finely chopped - 1/4 cup feta cheese, crumbled (optional) - 3 tablespoons extra virgin olive oil - 2 tablespoons fresh lemon juice - 1 teaspoon dried oregano - Salt and pepper to taste You can add these for extra flavor and texture: - Avocado for creaminess - Bell peppers for crunch - Fresh mint for a refreshing twist - Chickpea pasta for added heartiness This salad is not just tasty; it is also good for you. Here are some highlights: - Chickpeas provide protein and fiber. - Olive oil offers healthy fats. - Vegetables add vitamins and minerals. - Feta cheese gives calcium and flavor. Each serving has a balance of carbs, protein, and fats, making it a healthy choice for a meal. For more details, check the Full Recipe. Enjoy the fresh and vibrant flavors of this dish! Start with a clean workspace. Gather all your ingredients. You need a large mixing bowl for this. Open one can of chickpeas and drain it well. Rinse the chickpeas under cold water to remove extra salt. Next, cut the cherry tomatoes in half. Dice the cucumber into small pieces. Chop the red onion finely. Slice the kalamata olives and chop the parsley. If you like, you can crumble the feta cheese now. In your large bowl, add the chickpeas, cherry tomatoes, cucumber, red onion, olives, and parsley. Stir gently to mix them all together. If you used feta cheese, sprinkle it on top. This adds a creamy touch to your salad. Make sure everything is well combined. For the dressing, take a small bowl. Whisk together the extra virgin olive oil, fresh lemon juice, oregano, salt, and pepper. Mix until all the ingredients blend well. Drizzle this dressing over your salad. Toss everything together gently. You want every bite to be full of flavor. Let the salad sit for about 15 minutes. This helps the flavors mix better. Serve it chilled or at room temperature. Enjoy the fresh taste of your Mediterranean Chickpea Salad! You can find the full recipe [here]. You can serve this salad on its own or with pita bread. It pairs well with grilled chicken or fish. For a light meal, enjoy it with a glass of chilled white wine. You can also add it to a wrap for a tasty lunch. To enhance the flavors, let the salad rest. This allows the dressing to soak in. Use fresh ingredients when possible. Fresh herbs, like parsley, make a big difference. A sprinkle of lemon zest adds brightness. For extra depth, try marinating the chickpeas in lemon juice before mixing. One mistake is not rinsing the chickpeas. This can make the salad too salty. Another mistake is adding the dressing too soon. This can lead to a soggy salad. Don't skip the resting time—it helps the flavors blend. Lastly, be careful with salt; taste first before adding more. {{image_4}} You can easily change ingredients in the Mediterranean chickpea salad. If you don’t have chickpeas, use black beans or kidney beans. For tomatoes, try diced bell peppers for a sweet crunch. Instead of cucumber, use zucchini for a different texture. If you want a nutty taste, add diced avocado. You can also swap out the feta for goat cheese or leave it out for a dairy-free option. The dressing can change the flavor profile of your dish. If you want a creamier dressing, mix in some tahini or yogurt. For a spicy kick, add a splash of hot sauce or chili flakes to the olive oil and lemon juice. You can also use balsamic vinegar instead of lemon juice for a sweeter taste. Experiment with different herbs like basil or mint to give your salad a fresh twist. If you have dietary restrictions, there are easy ways to adapt this salad. For gluten-free diets, this salad is naturally safe. For vegan diets, skip the feta and use a vegan cheese alternative. If you’re watching your sodium intake, rinse the olives and use low-sodium chickpeas. You can also replace the olive oil with avocado oil for a heart-healthy option. For low-carb diets, skip the tomatoes and cucumbers, and add more leafy greens. For more details, check out the Full Recipe. To keep your Mediterranean Chickpea Salad fresh, place it in an airtight container. This helps maintain flavor and texture. Make sure to seal it well before storing it in the fridge. If you want to keep it for more than a day, add the dressing just before serving. This keeps the salad crisp and tasty. The salad stays good in the fridge for about 3 to 5 days. After that, the veggies may get soggy. Avoid freezing it if you want to keep the best taste. Freezing can change the texture of the chickpeas and veggies. If you do freeze it, store it in a freezer-safe container. Thaw it in the fridge before you eat it. You don't need to reheat Mediterranean Chickpea Salad. It tastes great cold or at room temperature. If you prefer it warm, microwave it for a short time. Use low power to prevent cooking the veggies. Enjoy the full flavors of your salad just the way you like it! For the full recipe, check the section above. To make your salad more filling, add cooked grains. Quinoa or farro works great. You can also mix in diced avocado for healthy fats. If you want protein, add grilled chicken or shrimp. These options keep your meal tasty and satisfying. Yes, you can make this salad ahead of time! Prepare it a few hours or even a day in advance. Store it in the fridge to keep it fresh. The flavors blend better when they sit. Just remember to add the feta cheese right before serving for the best taste. This salad pairs well with many dishes. Serve it with warm pita bread or crusty baguette. It also goes nicely with grilled meats or fish. For a light meal, serve it with a bowl of soup. You can even bring it to a picnic or potluck! Check out the Full Recipe for more ideas. This blog post covered how to make a tasty Mediterranean Chickpea Salad. We looked at key ingredients and optional ones for extra flavor. I shared steps for easy prep and mixing. Helpful tips can boost your meal's flavor and avoid mistakes. Variations let you customize for diet needs. I also discussed storage and reheating to keep leftovers fresh. Enjoy this salad as a meal or side. With a few tweaks, you’ll make it your own. Dive in and taste the difference!

Looking for a fresh and flavorful meal? Mediterranean Chickpea Salad packs a punch with vibrant ingredients that excite your taste buds. This dish is easy to make and full of …

Read more

Categories Salads Leave a comment

Savory Shrimp Boil Foil Packs Easy and Flavorful Dish

May 29, 2025 by Chef Evan
- 1 pound large shrimp, peeled and deveined - 2 ears of corn, husked and cut into quarters - 1 pound baby potatoes, halved - 1 lemon, thinly sliced The main ingredients bring life to your shrimp boil foil packs. The shrimp offers a sweet and juicy bite. Corn adds a pop of color and a crunchy texture. Baby potatoes give the dish heartiness, making it filling and satisfying. Lemon enhances all flavors with its bright, zesty notes. - 5 cloves garlic, finely minced - 1 tablespoon Old Bay seasoning - 2 tablespoons extra virgin olive oil - 1 teaspoon smoked paprika - Salt and freshly cracked black pepper to taste Seasoning is key to a great shrimp boil. Garlic infuses a rich aroma into your meal. Old Bay seasoning adds a classic touch that sings of the sea. Olive oil helps to bind flavors and keep everything moist. Smoked paprika introduces a subtle warmth that balances the dish. Adjust salt and pepper to fit your taste. - Fresh parsley, generously chopped Garnish your shrimp boil foil packs with fresh parsley. This adds a pop of color and a fresh taste. It brightens up the dish and makes it visually appealing. Use it just before serving for the best effect. For the complete recipe, check out the Full Recipe. 1. First, preheat your oven to 400°F (200°C). This will help your shrimp boil cook evenly. 2. In a large bowl, mix together the shrimp, corn, halved baby potatoes, minced garlic, Old Bay seasoning, smoked paprika, and olive oil. Add salt and freshly cracked pepper to taste. Toss everything gently to coat. 1. Next, lay out large sheets of aluminum foil on your counter. Each sheet should be big enough to hold the food. 2. Divide the shrimp and veggie mix evenly among the foil sheets. Place the mix in the center of each sheet. 3. To boost the flavor, add thin slices of lemon on top of each portion. The citrus will brighten the dish as it cooks. 1. Fold the edges of the foil together tightly. This keeps steam inside and helps cook the food. 2. Place the sealed packets on a baking sheet and slide them into the preheated oven. Bake for 20-25 minutes. Check for doneness by making sure the shrimp are pink and opaque, and the potatoes are tender when pierced with a fork. Now you have a tasty dish ready to enjoy! For the full recipe, see above. To make sure your shrimp boil foil packs turn out great, focus on two key points. First, cook your shrimp until they are pink and opaque. This means they are fully cooked and safe to eat. Second, check your potatoes. Use a fork to poke them. If they are tender, they are done. Serving your shrimp boil in foil packs is fun and easy. Just place the packs on the table and let everyone open their own. For a fancier option, move the mix to a big platter. Add extra lemon wedges and fresh parsley for color. This will make the dish look even more inviting. Want to take your dish up a notch? Try adding new spices or herbs. You can also serve spicy dipping sauces on the side. This gives everyone a chance to customize their meal. Use your favorite flavors to make it truly yours. For the full recipe, check out the details above. Enjoy cooking! {{image_4}} You can easily change up your shrimp boil foil packs. Here are some fun ideas: - Substitute shrimp with crab or lobster: Both add rich flavors. They cook similarly to shrimp, so use the same times. - Add additional vegetables like bell peppers or asparagus: These veggies bring great color and taste. They also make your dish more nutritious. You may want to adapt this dish for special diets. Here are some simple swaps: - Create a low-carb version by omitting potatoes: Skip the potatoes if you want a lighter meal. The dish still tastes great without them. - Make it gluten-free by checking seasoning labels: Some seasonings contain gluten. Always read labels to ensure your meal is safe. You can cook these foil packs in different ways. Here are two popular methods: - Cook on the grill instead of the oven: Grilling adds a nice smoky flavor. Just make sure to seal the packs well to keep the steam in. - Use a campfire for outdoor cooking: This method is fun for camping trips. Just wrap the packs tightly in foil and place them near the fire. For more details on the dish, check the Full Recipe. After enjoying your shrimp boil foil packs, store any leftovers in an airtight container. This keeps the shrimp and veggies fresh. You can safely refrigerate them for up to 2 days. Just make sure to let them cool before sealing the container. To reheat your leftovers, use either the oven or the microwave. For the oven, place the food in a baking dish and cover it with foil to keep it moist. If using the microwave, transfer the shrimp and vegetables to a microwave-safe dish. Avoid reheating in the foil packs directly, as this may cause the foil to become unsafe. For future meals, you can freeze the unseasoned shrimp and vegetables. This is a great way to save time later. When you’re ready to cook, thaw them in the fridge overnight. If you’re in a hurry, you can also run cold water over the sealed bag. Cook from frozen, but remember to adjust your cooking time. Yes, but ensure to thaw and pat dry before cooking. Frozen shrimp may have extra moisture. This can lead to a watery dish. To thaw, place shrimp in the fridge overnight or run under cold water. Pat them dry with a paper towel before mixing into your foil pack. Absolutely, just adjust cooking time accordingly. Grilling gives a nice smoky flavor. Preheat your grill to medium heat and place the foil packs on it. Check for doneness after about 15-20 minutes. The shrimp should be pink, and the potatoes should be tender. Look for a pink and opaque appearance; it should also be firm to touch. Undercooked shrimp appear gray and translucent. Always check the largest shrimp in the pack. If they look perfect, your meal is ready! Shrimp boil foil packs are simple and fun. You learned the key ingredients, seasonings, and steps to make them. Remember to choose fresh shrimp and veggies for the best flavor. With these tips, you can easily customize your dish to suit your taste. Whether grilling or baking, this dish is perfect for any occasion. Enjoy your cooking and share your delicious shrimp boil with family and friends!

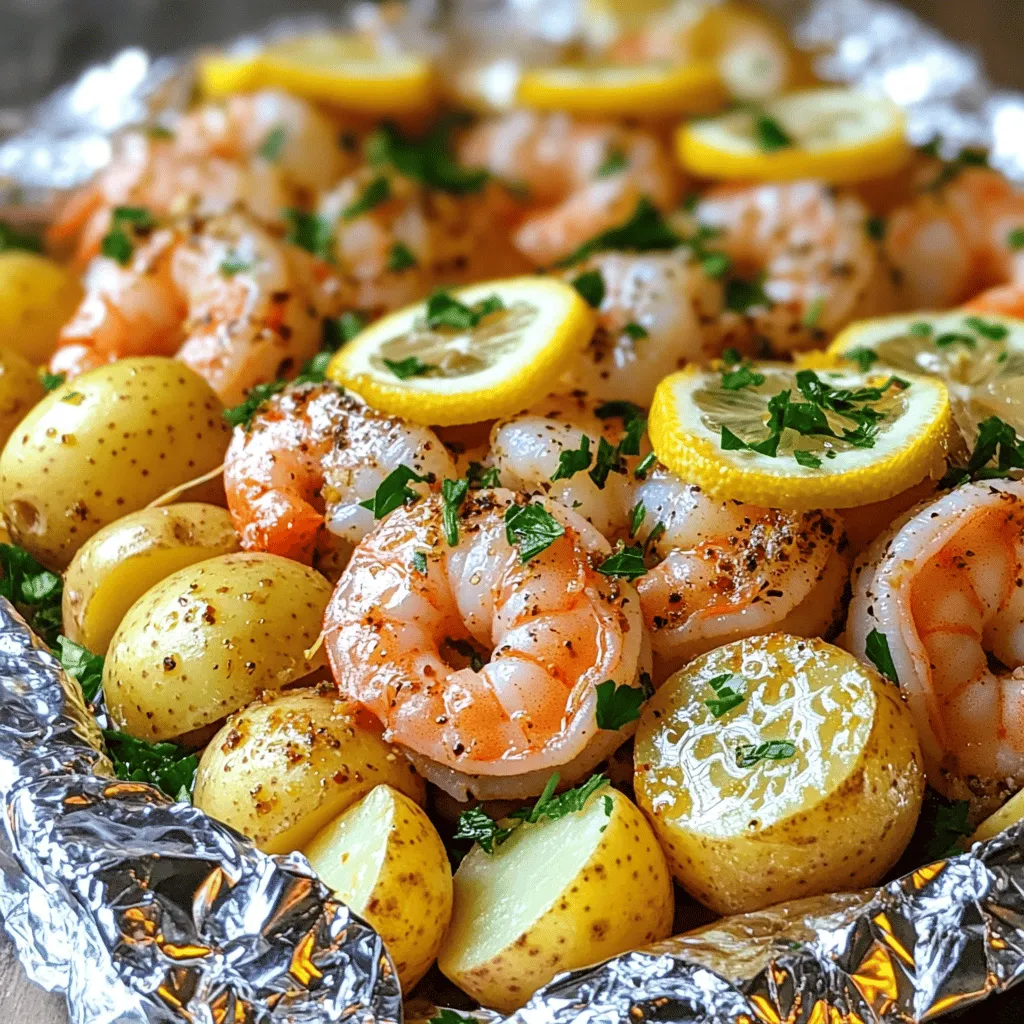
Looking for a simple yet tasty meal? Try these savory shrimp boil foil packs! Packed with fresh shrimp, corn, and baby potatoes, this dish is bursting with flavor. It’s an …

Read more

Categories Dinner Leave a comment

Cheesy Pepperoni Pizza Roll-Ups Easy and Flavorful Snack

May 28, 2025 by Chef Evan
- Pizza Dough: Store-bought or Homemade - Cheese: Mozzarella for a cheesy texture - Toppings: Sliced Pepperoni - Seasoning: Garlic Powder, Dried Oregano, Red Pepper Flakes - Garnish: Fresh Basil Leaves (optional) Gathering the right ingredients is key to making the best Cheesy Pepperoni Pizza Roll-Ups. You can choose store-bought pizza dough for speed or make your own for fun. I often opt for fresh mozzarella. Its meltiness adds a great texture to each bite. Sliced pepperoni is a must for that classic pizza flavor. For seasoning, I suggest garlic powder, dried oregano, and red pepper flakes for a little kick. These spices elevate the taste and aroma. Fresh basil leaves make a lovely garnish, bringing color and freshness to your dish. This mix of ingredients creates a tasty, easy snack that everyone will love. You can find the full recipe and instructions to whip these up in no time! 1. First, preheat your oven to 400°F (200°C). This helps the roll-ups bake evenly. 2. Next, prepare a baking sheet. Line it with parchment paper for easy cleanup. 3. On a clean, floured surface, roll out the pizza dough. Aim for a rectangle about 1/4 inch thick. 4. Once rolled out, use a brush to apply olive oil all over the dough. This keeps it moist during baking. 1. Now, evenly spread the shredded mozzarella cheese over the oiled dough. 2. Next, layer the sliced pepperoni on top. Make sure to cover as much surface as you can. 3. In a small bowl, mix garlic powder, dried oregano, and optional red pepper flakes. 4. Sprinkle this mix evenly across the cheese and pepperoni. This adds great flavor. 1. Start rolling the dough tightly. Begin from one end and roll to the other. Keep the filling inside. 2. After rolling, use a sharp knife to cut the log into 1-inch thick pieces. This keeps the filling intact. 1. Arrange the sliced roll-ups on the baking sheet. Place them cut-side up, allowing space between each. 2. Bake in the preheated oven for 15-20 minutes. Look for a golden brown color and bubbling cheese. 3. Once baked, let the roll-ups cool for a few minutes. Serve them warm with pizza sauce for dipping. You can find the full recipe for Cheesy Pepperoni Pizza Roll-Ups [here]. To make the best cheesy pepperoni pizza roll-ups, focus on a few key details. - Ensuring Even Thickness of Dough Roll the dough to about 1/4 inch thick. This helps the roll-ups cook evenly. If your dough is too thick, the inside may remain raw. If it's too thin, it may tear. A good thickness keeps everything just right. - Keeping Fillings Enclosed When you roll the dough, start tight and keep the fillings inside. If the cheese and pepperoni peek out, they can burn or spill during baking. Use your fingers to pinch the ends and seal them well. This step ensures the cheesy goodness stays inside. Serving these roll-ups can be fun and creative! - Pairing with Pizza Sauce A small bowl of pizza sauce makes a great dip. It adds flavor and moisture. You can also try ranch or garlic sauce for a twist. - Creative Presentation Ideas Arrange the roll-ups on a colorful platter. You might add fresh basil leaves around them for color. Place the sauce in the center for easy access. This makes your dish look as good as it tastes! You can take your roll-ups to the next level with some tasty tweaks. - Adding Extra Toppings Feel free to mix in veggies like bell peppers or mushrooms. You can also add more cheese, like cheddar or feta, for a unique flavor. - Adjusting Spiciness with Red Pepper Flakes For those who enjoy heat, sprinkle red pepper flakes over the filling. This simple addition can make your roll-ups kick up a notch! Just remember, not everyone likes spice, so offer plain ones too. For the full recipe and more details, check out the Full Recipe section. {{image_4}} When it comes to Cheesy Pepperoni Pizza Roll-Ups, you can have fun with variations. These roll-ups are easy to customize. Let’s explore some great ideas. - Using Different Cheeses: You can swap mozzarella for cheddar or pepper jack. Cheddar adds a sharp taste, while pepper jack brings a spicy kick. - Alternative Meats: Try using sausage or ham instead of pepperoni. You can even go meatless with veggies like bell peppers or mushrooms. - Different Sauces: Instead of pizza sauce, dip your roll-ups in BBQ or Alfredo sauce. Each sauce gives a new twist to the flavor. - Herbs and Spices: Feel free to add Italian seasoning or crushed garlic to enhance the taste. This adds a nice touch and makes it more exciting. - Gluten-Free Dough Options: If you need gluten-free options, look for gluten-free pizza dough. Many stores sell it ready-made. - Vegan Cheese Alternatives: For a vegan version, use plant-based cheese. It melts well and keeps the cheesy goodness. These variations make your Cheesy Pepperoni Pizza Roll-Ups unique and tasty. You can be creative and find what you like best. For a full recipe, check out the [Full Recipe]. To keep your cheesy pepperoni pizza roll-ups fresh, store them in the fridge. Place them in an airtight container. This helps keep them moist and tasty. If you don't have one, wrap them tightly in plastic wrap. They will stay good for about 3 days. If you want to save them for later, freezing works well. Let the roll-ups cool completely before you freeze them. Wrap each roll securely in plastic wrap. Then, put them in a freezer bag or container. They can last up to 3 months in the freezer. When you're ready to eat them, reheat in the oven. Preheat the oven to 350°F (175°C). Place the frozen roll-ups on a baking sheet. Heat for about 15-20 minutes, or until hot and cheesy again. This way, you enjoy your tasty snack anytime! For the full recipe, check the main article. Bake these roll-ups for 15 to 20 minutes at 400°F (200°C). You want them golden brown. The cheese should be hot and bubbly. Keep an eye on them towards the end to prevent burning. Yes, you can prep these roll-ups ahead. Roll them up, slice them, and then cover with plastic wrap. Store them in the fridge for up to 24 hours. When ready, bake them straight from the fridge. Just check for extra baking time. If you don’t have pizza sauce, try marinara or ranch dressing. You can also use pesto for a fun twist. BBQ sauce adds a nice kick too. Get creative with your favorite sauces for dipping. Absolutely! You can use veggie pepperoni or mushrooms for texture. Try adding bell peppers or spinach for more flavor. Cheese is a must, so keep that for a cheesy bite! In this blog post, we explored how to make delicious Cheesy Pepperoni Pizza Roll-Ups. We covered essential ingredients, preparation steps, and baking tips. I shared creative variations and helpful storage advice. Remember, these roll-ups are perfect for sharing or a quick snack. Have fun experimenting with toppings and flavors. Whether you stick to the classics or get creative, enjoy your tasty creation!

Looking for a fun and tasty snack? Cheesy Pepperoni Pizza Roll-Ups are your answer! These easy-to-make treats combine classic pizza flavors into a delicious, rollable form. Whether you’re hosting a …

Read more

Categories Appetizers Leave a comment

Crispy Parmesan Chicken with Garlic Sauce Delight

May 28, 2025 by Chef Evan
- 2 boneless, skinless chicken breasts - 1 cup breadcrumbs (panko preferred) - 1/2 cup freshly grated Parmesan cheese - 1 teaspoon garlic powder - 1 teaspoon Italian seasoning - 1/2 teaspoon salt - 1/2 teaspoon freshly ground black pepper - 3 cloves garlic, finely minced - 1/2 cup heavy cream - Fresh parsley, for garnish For this crispy Parmesan chicken, I use simple yet tasty ingredients. The star of the dish is, of course, the chicken. I like to use boneless and skinless chicken breasts. They cook evenly and get so tender. For the coating, I prefer panko breadcrumbs. They add a light crunch that makes each bite delightful. Mixing them with freshly grated Parmesan cheese gives the chicken a rich flavor. Next, I add some seasoning to make the chicken pop. Garlic powder and Italian seasoning bring warmth and depth. The salt and pepper round out the taste perfectly. Now, let’s talk about the garlic sauce. Fresh garlic is a must for a strong flavor. I finely mince it to release its oils. Heavy cream makes the sauce rich and creamy. Finally, I top it with fresh parsley for a pop of color and flavor. You can find the full recipe to make this dish at home. Get ready to impress your family and friends with this delicious meal! - Preheat your oven to 400°F (200°C). Line a baking sheet with parchment paper. - Set up your dredging station. Place all-purpose flour in one bowl. In another bowl, crack two eggs and beat them well. - In a shallow dish, mix the breadcrumbs, grated Parmesan cheese, garlic powder, Italian seasoning, salt, and pepper. Stir until well combined. - Take each chicken breast. Coat it in flour first, shaking off the extra. Then, dip it in the beaten eggs. Finally, press it into the breadcrumb mix to coat evenly. - Heat two tablespoons of olive oil in an oven-safe skillet over medium heat. - Once the oil is hot, add the breaded chicken. Cook it for about 3-4 minutes on each side until golden brown. - Transfer the skillet to the preheated oven. Bake the chicken for 15-20 minutes until it reaches 165°F (75°C) inside. This ensures it is fully cooked. These steps will help you create Crispy Parmesan Chicken with Garlic Sauce that is both easy and delicious. For the complete recipe, check the [Full Recipe]. Enjoy every bite! To get the best crunch, use panko breadcrumbs. They create a light, airy texture. When you coat the chicken, make sure to cover every inch. Press the breadcrumbs firmly to help them stick. This ensures a uniform crunch that is simply delightful. Timing is key for the garlic sauce. Start making it when the chicken is baking. This way, it stays fresh and hot. To adjust the flavor, taste and season as needed. A pinch of salt or pepper can really enhance the sauce. Drizzle the garlic sauce over the chicken just before serving. This adds a nice touch and keeps the chicken looking fresh. Add some fresh parsley as a garnish. It brightens the dish and makes it visually appealing. Serve on warm plates to keep everything at the perfect temperature. Enjoy your meal! {{image_4}} You can make this dish even better with some fun tweaks. Try different cheeses like mozzarella or gouda for a new taste. Each cheese adds its own twist. You can also mix in herbs or spices. Basil, thyme, or even a pinch of cayenne pepper can change the flavor profile. Experimenting will keep your meals exciting! Looking for a lighter option? Baking instead of frying works great. It cuts down on oil and keeps the chicken crispy. You can also use whole wheat breadcrumbs. They add more fiber and nutrients, making your meal healthier without losing taste. These small swaps can make a big difference in your cooking. What’s the best way to enjoy your Crispy Parmesan Chicken? Pair it with sides like roasted vegetables or a fresh salad. The crunch of the chicken goes well with the freshness of the veggies. A lemon wedge on the side adds a zesty kick. Squeeze it over the chicken for a burst of flavor. It elevates the dish and makes it feel special. To keep your Crispy Parmesan Chicken fresh, store leftovers in an airtight container. This helps lock in flavor and moisture. In the fridge, the chicken stays good for about three to four days. Make sure it cools down before packing it away. This ensures it stays crispy. Freezing is a great way to save leftover chicken for later. First, let the chicken cool completely. Then, wrap it tightly in plastic wrap. Place it in a freezer-safe bag or container. This helps prevent freezer burn. You can freeze the chicken for up to three months. When you’re ready to enjoy it, thaw it in the fridge overnight for the best taste. To reheat your chicken without losing its lovely crunch, use the oven. Preheat it to 350°F (175°C). Place the chicken on a baking sheet and heat for about 10-15 minutes. This method helps keep the crust crispy. Avoid reheating in the microwave, as it can make the coating soggy. If you must use the microwave, try a short burst on low power. It takes about 15 minutes to prep and 25 minutes to cook. The total time is around 40 minutes. You will have a delicious meal ready to enjoy in no time. Yes, you can make the garlic sauce ahead. Simply prepare the sauce and store it in the fridge. When ready to serve, just reheat it gently on the stove. This saves time when you want to enjoy your chicken. If your chicken isn’t crispy, check your coating. Make sure you use enough breadcrumbs. Panko breadcrumbs add the best crunch. Also, ensure you heat your oil well before adding the chicken. If the oil isn’t hot enough, the chicken will not crisp up. Another tip is to avoid overcrowding the pan; this keeps the heat steady and helps each piece cook evenly. This blog covered all you need for making Crispy Parmesan Chicken. You learned about key ingredients, step-by-step instructions, and tips for success. I shared ideas for variations, storage, and answers to common questions. Cooking can be fun and simple with these methods. Enjoy trying new flavors and techniques in your kitchen. Mix and match ideas for your perfect dish. With practice, you'll impress everyone with your crispy chicken. Happy cooking!

Are you ready to impress your family with a delicious dinner? Let’s dive into making Crispy Parmesan Chicken with Garlic Sauce! This dish features golden, crunchy chicken breasts topped with …

Read more

Categories Dinner Leave a comment

Chocolate Sugar Cookies Delightful and Simple Recipe

May 28, 2025 by Chef Evan
To make these chocolate sugar cookies, you need a few key items: - 2 cups all-purpose flour - 1 cup unsweetened cocoa powder - 1 teaspoon baking soda - 1/2 teaspoon salt These ingredients form the base of your cookies. The all-purpose flour gives structure, while cocoa powder adds that rich chocolate flavor. Baking soda helps your cookies rise, and salt enhances the overall taste. Next, you will need ingredients for sweetness and texture: - 1/2 cup unsalted butter, softened to room temperature - 1 cup granulated sugar - 1/2 cup brown sugar, packed firmly The butter gives the cookies that melt-in-your-mouth feel. Granulated sugar sweetens the dough, while brown sugar adds moisture and a hint of caramel flavor. Together, they create a lovely balance. Finally, add these flavor boosters: - 1 large egg - 2 teaspoons pure vanilla extract - 1/2 cup semi-sweet chocolate chips (optional for extra richness) The egg binds everything together and helps with texture. Pure vanilla extract adds a warm, sweet note. If you want an extra chocolate kick, toss in some chocolate chips. These choices make your cookies more delightful! For the complete steps and instructions, check out the Full Recipe. Start by preheating your oven to 350°F (175°C). This step is crucial for even baking. While the oven heats, line two baking sheets with parchment paper. This helps cookies bake evenly and makes cleanup easy. In a medium bowl, combine 2 cups of all-purpose flour, 1 cup of unsweetened cocoa powder, 1 teaspoon of baking soda, and 1/2 teaspoon of salt. Use a whisk to blend these dry ingredients well. Set this bowl aside for later. In a large mixing bowl, add 1/2 cup of softened unsalted butter, 1 cup of granulated sugar, and 1/2 cup of packed brown sugar. Use a hand mixer or stand mixer. Beat this mixture for 2-3 minutes. You want it to be light and fluffy. Next, add 1 large egg and 2 teaspoons of pure vanilla extract to the butter-sugar mix. Beat until everything is well combined. It is key to ensure the egg is fully mixed in. This gives the right texture. Slowly add the dry mixture to the wet ingredients. Mix on low speed. Do this just until combined. Be careful not to over-mix. The dough should come together nicely without any dry bits left. Use a tablespoon to scoop out the dough. Roll the dough into balls. Place the balls on the lined baking sheets, spacing them 2 inches apart. This spacing allows the cookies to spread while baking. Lightly press each dough ball down to flatten them a bit. Put the baking sheets in your preheated oven. Bake for 10-12 minutes. The cookies are ready when the edges are firm. The centers should still look soft. Allow the cookies to cool on the sheets for 5 minutes before transferring them to a wire rack. This step helps set their shape. For the complete recipe, check out Choco-Licious Sugar Cookies. The texture of your cookies matters a lot. I always use soft butter. Soft butter mixes well, giving cookies a nice, fluffy feel. If you forget to soften it, just microwave it for a few seconds. Also, watch the baking time closely. Bake them for 10-12 minutes. If they are too firm, they may be overbaked. The edges should be firm, but the centers must stay soft for that perfect bite. Want to make your cookies even better? Try adding a cup of nuts or using milk chocolate chips instead of semi-sweet. For a twist, mix in a teaspoon of espresso powder. It enhances the chocolate flavor without being too strong. You can also swap out vanilla extract for almond extract for a unique taste. These small changes can create big flavor. Presentation is key! Place your warm cookies on a bright plate. A multi-tiered stand adds charm. For fun, dust them with powdered sugar before serving. This makes them look fancy and sweet. You can also sprinkle some flaky sea salt on top for a flavor boost. Pairing them with cold milk is a classic choice that everyone loves. Enjoy serving your delightful cookies! {{image_4}} You can add nuts or other chips for fun flavors and textures. Try chopped walnuts or pecans for a crunchy bite. You can also mix in white chocolate or peanut butter chips. Each option adds a new twist. Just fold them into the dough before you scoop it out. This way, each cookie has a surprise inside! If you need a gluten-free option, substitute the all-purpose flour with a gluten-free blend. Many blends work well in cookies. Look for ones that include almond flour or coconut flour. These options keep the cookies soft and tasty. You may need to add a little extra liquid to the dough. This helps keep the right texture. For a vegan version, replace the butter with coconut oil or a plant-based butter. Use a flax egg instead of a regular egg. To make a flax egg, mix one tablespoon of ground flaxseed with three tablespoons of water. Let it sit for five minutes. This mix helps bind the cookies. You can also use dairy-free chocolate chips. These swaps keep the cookies delicious while being plant-based! For more details, check out the Full Recipe. Store your chocolate sugar cookies at room temperature. Use an airtight container to keep them fresh. If you want to keep them longer, you can refrigerate them. This will keep them safe but may change their texture. The cookies might become a bit firmer. Freezing cookies is simple! Here’s how to do it: 1. For Unbaked Cookies: - Scoop the cookie dough into balls. - Place them on a baking sheet lined with parchment paper. - Freeze the dough balls for about 1-2 hours until firm. - Once firm, transfer them to a freezer bag. Label the bag with the date. 2. For Baked Cookies: - Let the cookies cool completely. - Layer them in a freezer-safe container with parchment paper between layers. - Seal tightly and label. They can last up to three months. Chocolate sugar cookies stay fresh for about one week at room temperature. If refrigerated, they can last up to two weeks. When frozen, they can maintain quality for three months. Always check for signs of spoilage before consuming. Enjoy your cookies anytime! For the full recipe, check out the Choco-Licious Sugar Cookies. Yes, you can use milk chocolate. It adds a creamier taste. However, milk chocolate is sweeter. Dark chocolate provides a richer, deeper flavor. It also contrasts well with the cookie's sweetness. If you choose milk chocolate, reduce your sugar slightly. You have several options for butter. Coconut oil works well and gives a slight coconut flavor. Vegetable shortening is another choice, making cookies softer. For a dairy-free option, use vegan butter. Each substitute can change the cookie's texture and taste. To get chewy cookies, use more brown sugar than white sugar. Brown sugar adds moisture. Also, avoid over-baking the cookies. They should be soft in the center when you take them out. Let them cool on the sheet for a few minutes. This helps keep them chewy. Yes, you can use honey or agave syrup. These sweeteners can replace granulated sugar. Use about 3/4 cup of honey for 1 cup of sugar. Reduce the liquid in the recipe a bit. This helps maintain the cookie's texture. You can easily double the recipe. Just multiply each ingredient by two. Make sure you have enough space on your baking sheets. Bake the cookies in batches if needed. Keep an eye on the baking time, as it may need slight adjustments. You can find the Full Recipe for these cookies in the "Choco-Licious Sugar Cookies" section. This recipe provides all the details for making these delightful treats. Creating delicious chocolate sugar cookies is easy with the right ingredients. You need flour, cocoa powder, sugar, butter, and a few extras like eggs and vanilla. Don't forget to preheat your oven and follow the mixing steps closely for the best results. As you try different variations and techniques, remember that baking is a fun journey. Play around with flavors, and enjoy the process. Whether you’re a beginner or a pro, these cookies can be a crowd-pleaser. Get baking and savor each bite!

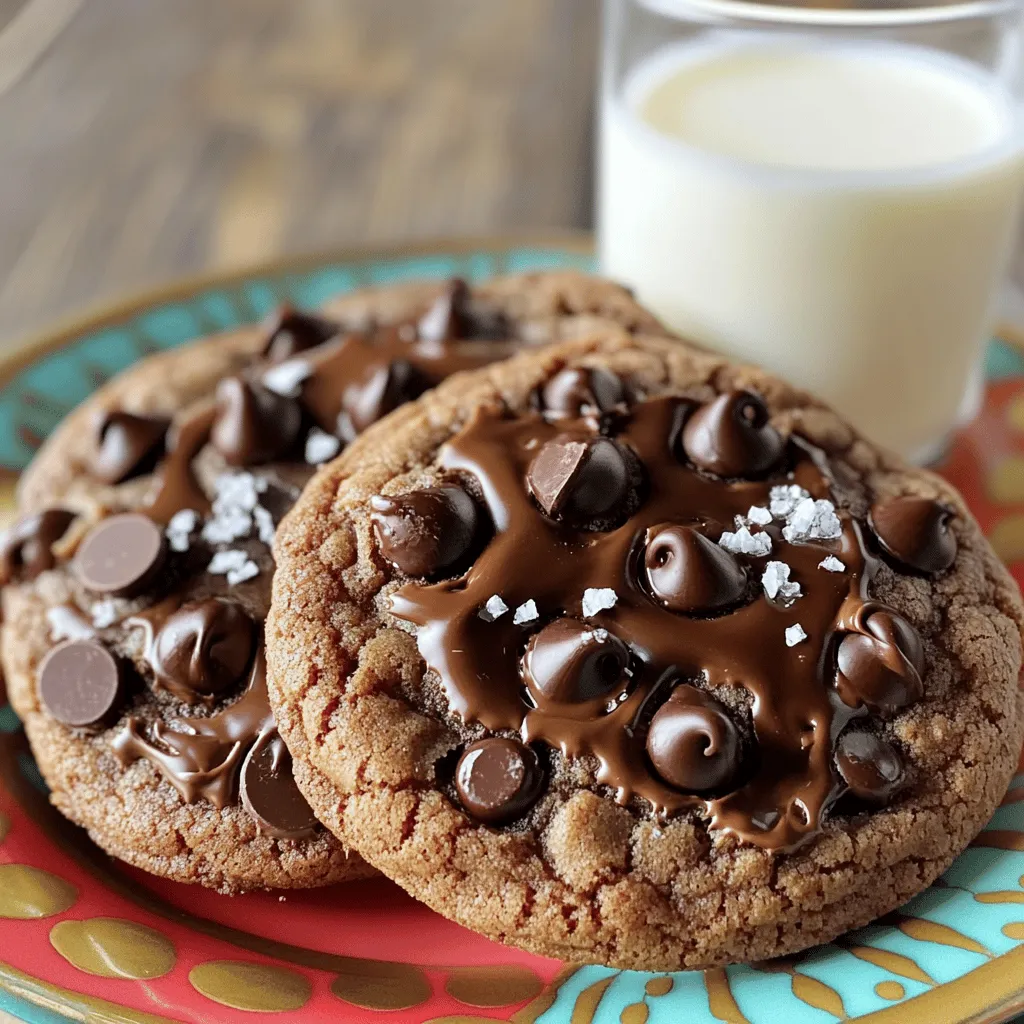
Looking for a sweet treat that’s both easy and delicious? You’ve come to the right place! In this post, I’ll share my simple recipe for Chocolate Sugar Cookies that will …

Read more

Categories Desserts Leave a comment

Raspberry Cookies Delightful Treat for Sweet Lovers

May 28, 2025 by Chef Evan
- 1 cup unsalted butter, softened to room temperature - 1 cup granulated sugar - 1 large egg, at room temperature - 1 teaspoon pure vanilla extract - 2 cups all-purpose flour - 1/2 teaspoon baking soda - 1/4 teaspoon fine sea salt - 1 cup fresh raspberries, gently mashed - 1/2 cup white chocolate chips - 1/4 cup powdered sugar (for dusting) The main ingredients in raspberry cookies create great flavor and texture. The butter gives a rich taste and helps cookies stay soft. Sugar adds sweetness, while the egg binds everything together. Vanilla gives a nice aroma that makes these cookies special. Flour provides structure, and baking soda helps them rise. The fine sea salt balances the sweetness, making each bite perfect. Fresh raspberries are the star here. They add a tart burst that contrasts with the sweet chocolate chips. - Almond extract or lemon zest - Dark chocolate chips instead of white - Nuts or seeds for added texture These optional ingredients let you customize your cookies. Almond extract or lemon zest can give a bright twist. Dark chocolate chips offer a deeper chocolate flavor than white ones. Adding nuts or seeds gives a nice crunch. You can really make these cookies your own! Don't forget to check the Full Recipe for more details. - Preheat oven to 350°F (175°C) - Line baking sheet with parchment paper Start by creaming the butter and sugar in a large bowl. Use a hand mixer or stand mixer on medium speed. Mix until it looks light and fluffy. This will take about 3-4 minutes. Next, add in the egg and vanilla extract. Beat until mixed well. Scrape down the bowl to ensure everything is combined. In another bowl, whisk together the flour, baking soda, and salt. Slowly add this dry mix into the wet mix. Stir on low speed until it just comes together. Be careful not to overmix. Now, gently fold in the raspberries and white chocolate chips. Use a spatula for this. Try to keep the raspberries whole for bursts of flavor. After mixing, use a cookie scoop or tablespoon to drop portions of dough onto the lined baking sheet. Leave about 2 inches of space between each dough ball. Bake the cookies in your preheated oven for 12-15 minutes. Look for lightly golden edges and firm centers. Once done, remove the cookies from the oven. Let them cool on the baking sheet for about 5 minutes. After that, transfer them to a wire rack to cool completely. Enjoy the sweet aroma as they cool! You can find the complete instructions in the Full Recipe. - Avoid overmixing the dough: Mix just until combined. Overmixing can make cookies tough. - Ensure raspberries are roughly the same size: This helps them cook evenly, giving each bite a sweet burst. - Sift powdered sugar before serving: This makes a lovely dusting on top of your cookies. It adds a nice touch. - Use decorative plates or tiered stands: This elevates your cookie display and makes it look fancy. - Not letting the butter soften enough: Soft butter blends better and makes cookies light and fluffy. - Overbaking or underbaking the cookies: Keep an eye on them. They should be golden on the edges and soft in the middle. By following these tips, you can create beautiful and tasty raspberry cookies that everyone will love! For the full recipe, check the section above. {{image_4}} You can switch raspberries with other berries. Try blueberries or strawberries for a new taste. They all bring unique flavors. Adding citrus zest, like lemon or orange, makes the cookies bright. This simple change adds a fresh zing. For a gluten-free treat, use almond or oat flour. Both options work well in this recipe. If you want to make vegan cookies, replace butter with coconut oil. You can also swap the egg for a flaxseed meal mix. These options keep the cookies delicious. During the holidays, add spices like cinnamon or nutmeg. These flavors match the festive spirit. In summer, try adding lemon or mint. They give a refreshing twist, perfect for warm days. Each variation keeps the cookies fun and exciting! Store your raspberry cookies in airtight containers at room temperature. This keeps them soft and fresh. They will stay tasty for several days. If you want them to last longer, you can refrigerate them. Just remember to let them come back to room temp before enjoying. To freeze baked cookies, place them in a single layer on a baking sheet. Freeze them for about an hour until they are solid. After that, put them in a freezer-safe bag or container. When you want to eat them, take out the cookies and let them thaw at room temperature. This keeps their taste and texture just right. Raspberry cookies last about 5 to 7 days at room temperature. If you see any signs of dryness or hardening, they might be stale. A good way to check is by looking at the texture. If they feel hard or crumbly, it’s time to toss them. Enjoy your cookies fresh for the best flavor! For the full recipe, click here. Yes, you can use frozen raspberries. They work well in this recipe. Just thaw them first. Gently squeeze out extra juice to avoid soggy cookies. Fold them into the dough carefully. This keeps the raspberries whole for bursts of flavor. Look for a few signs of perfect cookies. The edges should be lightly golden brown. The centers should feel firm to the touch. If they seem too soft, they might need a bit more time. Keep an eye on them during the last few minutes. You can prepare the dough ahead of time. It stores well in the fridge for up to three days. Just wrap it tightly in plastic wrap. When you're ready, bake them fresh for a warm treat. You can also freeze the dough. Use it within three months for best quality. These cookies pair well with several drinks. Try serving them with a cup of tea or coffee. A glass of milk complements their sweetness too. For a fruity touch, serve them with raspberry lemonade. Fresh raspberries on the side add a nice pop of color. Raspberry cookies are delicious and easy to make. You learned about the main and optional ingredients, clear steps for baking, and tips to perfect your cookies. You can try fun variations, store them correctly, and avoid common mistakes. With these insights, you can enjoy tasty cookies anytime. Baking should be fun and rewarding. Happy baking!

If you love sweet treats, raspberry cookies will be your new favorite! These cookies mix tart, juicy raspberries with creamy white chocolate for a delightful bite. In this post, I’ll …

Read more

Categories Desserts Leave a comment

Honey Chipotle Chicken Bowls Flavorful Meal Idea

May 28, 2025 by Chef Evan
- 1 lb boneless, skinless chicken thighs - 2 tablespoons honey - 2 tablespoons chipotle in adobo sauce - 1 tablespoon olive oil - Spices and seasonings: - 1 teaspoon garlic powder - 1 teaspoon onion powder - 1 teaspoon ground cumin - 1 teaspoon smoked paprika - Salt and pepper to taste The chicken thighs are juicy and full of flavor. Using thighs instead of breasts gives a richer taste. Honey adds sweetness, while chipotle brings a smoky heat. Olive oil helps the marinade stick to the chicken, enhancing the flavor. - 1 cup cooked quinoa or rice - 1 cup black beans, drained and rinsed - 1 cup corn, fresh or canned, drained - 1 red bell pepper, diced - Fresh cilantro, chopped, for garnish - Lime wedges for serving Quinoa or rice forms a hearty base for the bowl. Black beans add protein and fiber, which makes the meal filling. Corn adds sweetness and texture, while the red bell pepper gives a nice crunch. Fresh cilantro brightens the dish, and lime wedges add a zesty kick when squeezed over the top. Make sure to check out the Full Recipe for step-by-step details on creating this tasty meal! To start, you need to create a tasty marinade. Combine honey, chipotle in adobo sauce, olive oil, garlic powder, onion powder, ground cumin, smoked paprika, salt, and pepper in a bowl. Whisk them together until smooth. Next, take your chicken thighs and place them in a ziplock bag or a shallow dish. Pour the marinade over the chicken and coat each piece well. Seal the bag or cover your dish. Refrigerate for at least 30 minutes. For best results, marinate for two hours. When you're ready to cook, preheat your grill or skillet to medium-high heat. Remove the chicken from the marinade, letting the extra drip off. Grill or sear the chicken for 5-6 minutes on each side. You want a nice char and an internal temperature of 165°F (75°C). After cooking, let the chicken rest on a plate for about five minutes. This makes it tender and juicy. Finally, slice the chicken into strips. In a large bowl, mix your cooked quinoa or rice, black beans, corn, and diced red bell pepper. Toss them gently to combine. This creates a flavorful base for your chicken bowls. Next, arrange the sliced grilled chicken on top of this mixture. Add sliced avocado on the side and sprinkle fresh cilantro for a vibrant touch. Serve with lime wedges to squeeze fresh juice over the dish. Enjoy your delicious Honey Chipotle Chicken Bowls! For the complete recipe, check the Full Recipe. For great flavor, marinate the chicken for at least 30 minutes. If you have time, aim for 2 hours. This lets the spices soak in well. If you want a milder taste, use less chipotle. For more heat, add extra chipotle in adobo sauce. Adjusting the spice level makes the dish your own. To get perfect grill marks, preheat your grill or skillet. Cook the chicken on medium-high heat. This helps to sear the outside and keep it juicy inside. Grill each side for about 5-6 minutes. Always check that the chicken is cooked through. The internal temperature should hit 165°F (75°C) for safety. Layering your ingredients makes for a beautiful bowl. Start with the quinoa or rice at the bottom. Then add the beans and corn. Place the grilled chicken on top. For a pop of color, add diced red bell pepper and avocado. Finish with fresh cilantro and lime wedges. This not only looks good but also adds freshness. {{image_4}} You can swap out chicken for turkey or tofu. Turkey gives a lean option, while tofu offers a plant-based choice. Both can soak up the honey chipotle marinade well. For grains, consider using brown rice or farro. Brown rice adds a nutty taste, while farro gives a chewy texture. Each grain brings a unique flavor that pairs nicely with this dish. Add spices like cumin or smoked paprika to deepen the flavor. Fresh herbs like cilantro or parsley can also boost the taste. You can mix in vegetables too. Try bell peppers, zucchini, or even sweet potatoes. These additions not only enhance taste but also add color and nutrition. Pair your bowls with fresh salads or zesty salsas. A bright corn salsa or avocado salad can lighten the meal. Serve with lime wedges for an extra zing. This makes for a well-rounded meal that is both tasty and satisfying. If you want to elevate your dining experience, consider pairing with a light drink, like iced tea or sparkling water. For the full recipe, check out the detailed instructions I’ve shared earlier. To keep your Honey Chipotle Chicken Bowls fresh, store them properly. Place leftovers in airtight containers. This helps prevent moisture loss and keeps flavors intact. You can store them in the fridge for up to three days. Always check for any signs of spoilage before eating. If you want to enjoy them later, avoid mixing all the ingredients together. Keep the chicken separate from the base and toppings. This way, everything stays fresh and tasty. Freezing is a great option if you want to prepare meals ahead. You can freeze the chicken and the quinoa mixture separately. For freezing, let the meals cool completely before placing them in freezer-safe bags. This prevents ice crystals from forming. When you are ready to eat, thaw the chicken in the fridge overnight. For quick reheating, you can microwave the quinoa or rice. Ensure the chicken reaches 165°F when reheating. This keeps it safe to eat and delicious. Yes, you can use chicken breasts. Chicken thighs are juicier and more flavorful. Breasts cook faster and can dry out if overcooked. If you use breasts, reduce the cooking time. Aim for about 4-5 minutes per side. Always check that the internal temperature hits 165°F (75°C). To make it spicier, add more chipotle sauce. You can also mix in cayenne pepper or jalapeños. For a milder dish, reduce the chipotle sauce. Use less honey for a sweeter flavor without heat. Adding sour cream can also cool the spice. These bowls pair well with many sides. Try serving with a fresh salad or guacamole. Chips and salsa are great for crunch. A cold drink like lemonade or iced tea balances the heat. You can also add a side of grilled vegetables for extra nutrition. The Honey Chipotle Chicken Bowls combine bold flavors with simple steps. We discussed essential ingredients, marinating, and cooking techniques. You can customize your bowl with various toppings and sides. Remember to store leftovers properly for the best taste later. Incorporating variations allows you to keep the dish exciting. Enjoy making this meal and sharing it with others. You can easily impress your family and friends with this tasty recipe!

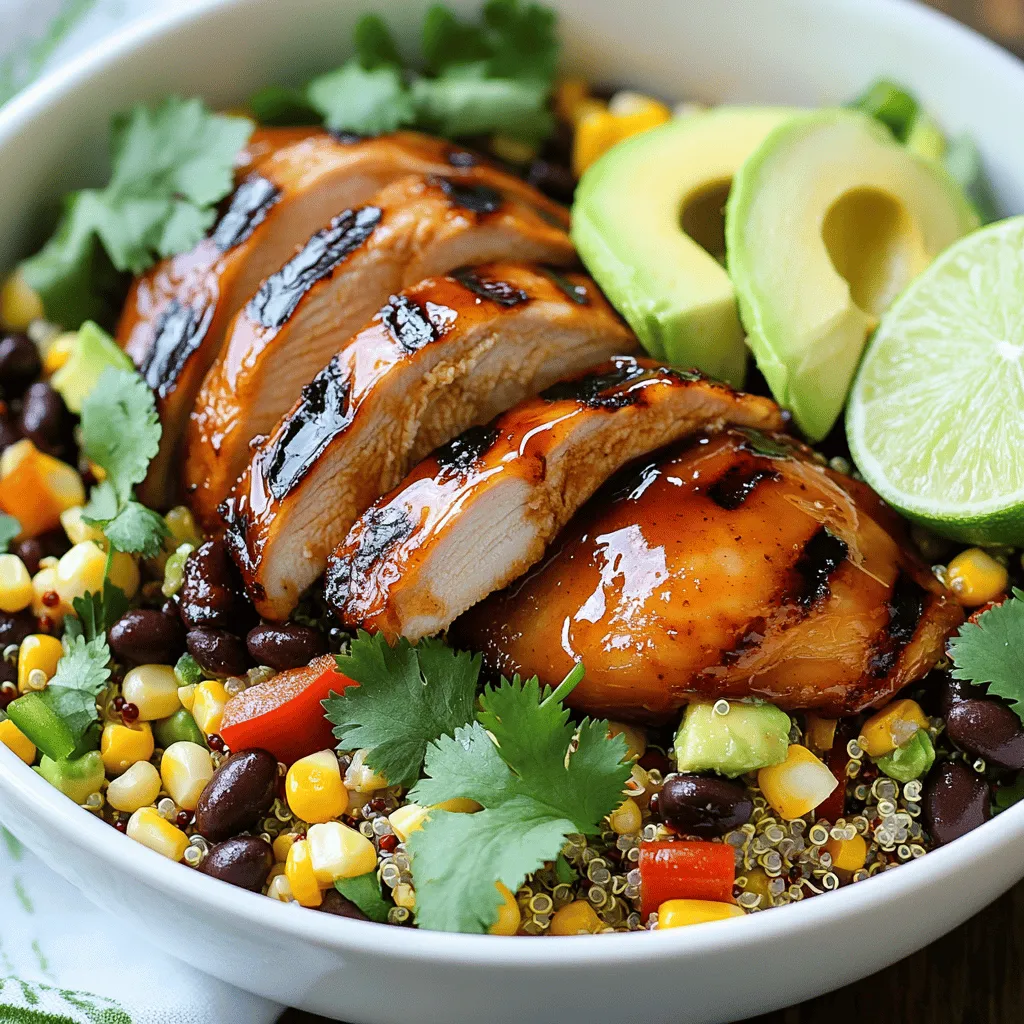
Are you ready to spice up your dinner routine? Honey Chipotle Chicken Bowls are the perfect blend of sweet and smoky flavors that will make your taste buds dance! You …

Read more

Categories Dinner Leave a comment
Older posts
Newer posts
← Previous Page1 … Page78 Page79 Page80 … Page124 Next →

TOSSED FLAVORS

Where flavors are fresh, vibrant, and ready to toss! 🥗

PAGES

Home About Contact Privacy Policy Terms & Conditions Cookie Policy GDPR Policy Copyright Policy Disclaimer

CATEGORIES

Appetizers Desserts Salads Breakfast Dinner

Contact

  • Pinterest
  • Mail
Copyright © 2026 Tossed Flavors. All rights reserved.