Buttery Cinnamon Roll Doughnuts Irresistible Delight

If you love the warm, sweet smell of cinnamon rolls, get ready for a treat! Buttery Cinnamon Roll Doughnuts combine the best of both worlds into one delicious bite. In …
If you love the warm, sweet smell of cinnamon rolls, get ready for a treat! Buttery Cinnamon Roll Doughnuts combine the best of both worlds into one delicious bite. In …
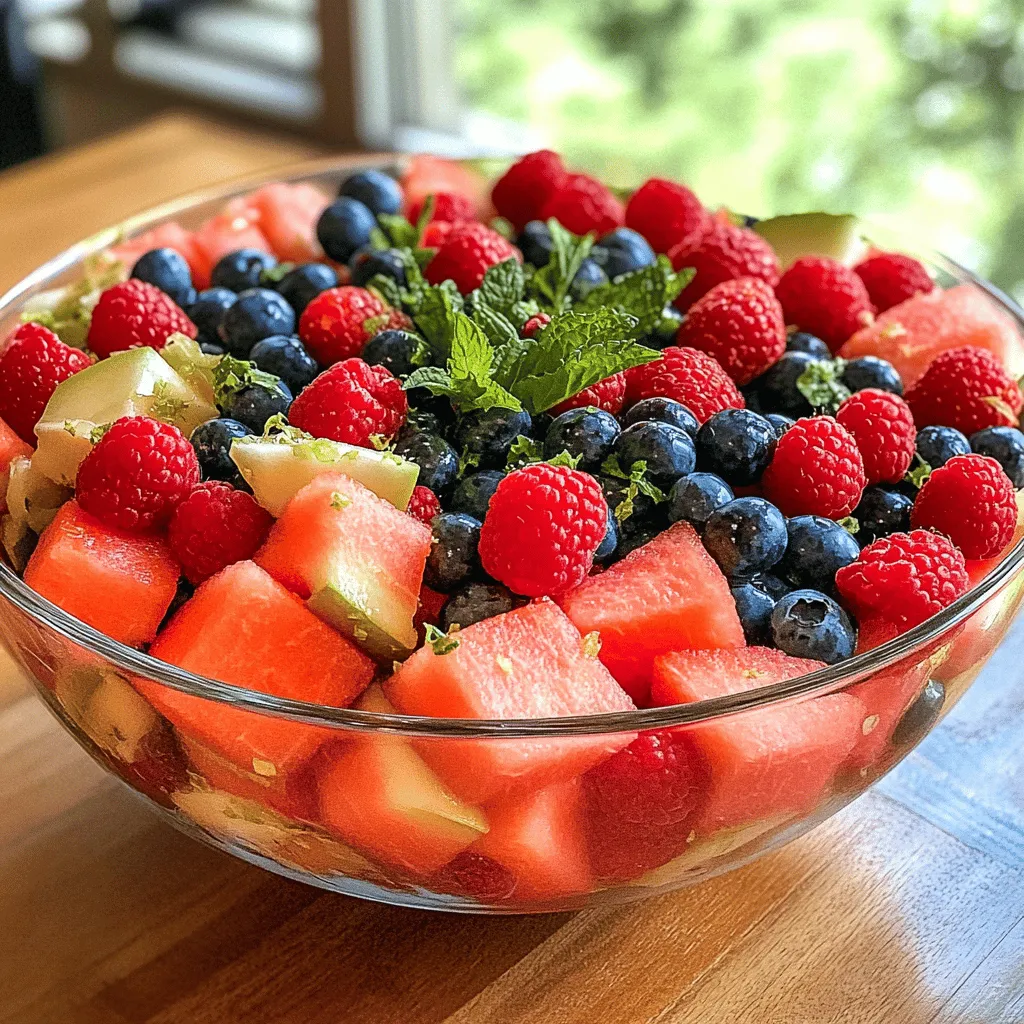
Looking for a cool, refreshing treat this summer? This Berry Watermelon Fruit Salad is your answer! With juicy watermelon, sweet strawberries, and tangy blueberries, this salad bursts with flavor. Plus, …

Get ready to take your summer cookouts to the next level with my Lemon Pepper Corn on the Cob recipe! This dish combines sweet, juicy corn with tangy lemon and …
. After baking the blueberry buttermilk pancake casserole, let it cool. Cut it into squares. Store them in an airtight container. You can keep it in the fridge for up to three days. Just make sure it is well sealed to avoid drying out. If you want to save some for later, freezing works great. First, let the casserole cool completely. Cut it into squares and wrap each piece tightly in plastic wrap. Place the wrapped squares in a freezer bag or container. This way, they stay fresh for up to two months. To reheat, take a piece out and let it thaw in the fridge overnight. You can warm it in the oven at 350°F (175°C) for about 10-15 minutes. This keeps the texture nice and fluffy! If you prefer, you can also microwave it for quick heat. Enjoy your delicious treat anytime! Can I use frozen blueberries? Yes, you can use frozen blueberries. Just remember to thaw and drain them first. This keeps the batter from getting too watery. How do I make mini pancake casseroles? To make mini casseroles, use a muffin tin instead of a baking dish. Fill each cup halfway with batter and bake for about 15-20 minutes. This creates perfect single servings. Can I prepare the batter in advance? You can prepare the batter ahead of time. Store it in the fridge for up to 24 hours. Just give it a gentle stir before baking. What's the best way to serve this dish? Serve warm, drizzled with maple syrup. Add whipped cream or fresh fruit on the side for extra fun. It looks great and tastes even better! Can it be made the night before? Yes, you can make it the night before. Bake it, let it cool, and store it in the fridge. Reheat it in the morning for a quick breakfast. Why didn't my casserole rise? If your casserole didn't rise, check your baking powder and baking soda. They need to be fresh to help the batter rise well. What if my casserole is dry? If your casserole turns out dry, try reducing the bake time next time. Adding a bit more buttermilk can also help keep it moist. This blog post covers how to make a delicious blueberry pancake casserole. You learned the key ingredients and got easy steps for preparation. I shared tips for perfect texture and ways to enhance flavors. You also found options for dietary needs and storage tips. In closing, enjoy experimenting with this recipe. Make it your own and share it with friends. It’s a great dish for breakfast or brunch, and it will impress everyone. Remember to have fun in the kitchen and enjoy the process!](https://tossedflavors.com/wp-content/uploads/2025/05/8b760795-bd8d-4bdd-ab51-ad19254a5396.webp)
Start your mornings with a warm hug in the form of Blueberry Buttermilk Pancake Casserole! This delightful dish blends fluffy pancakes and sweet blueberries into one easy-to-make casserole. Not only …
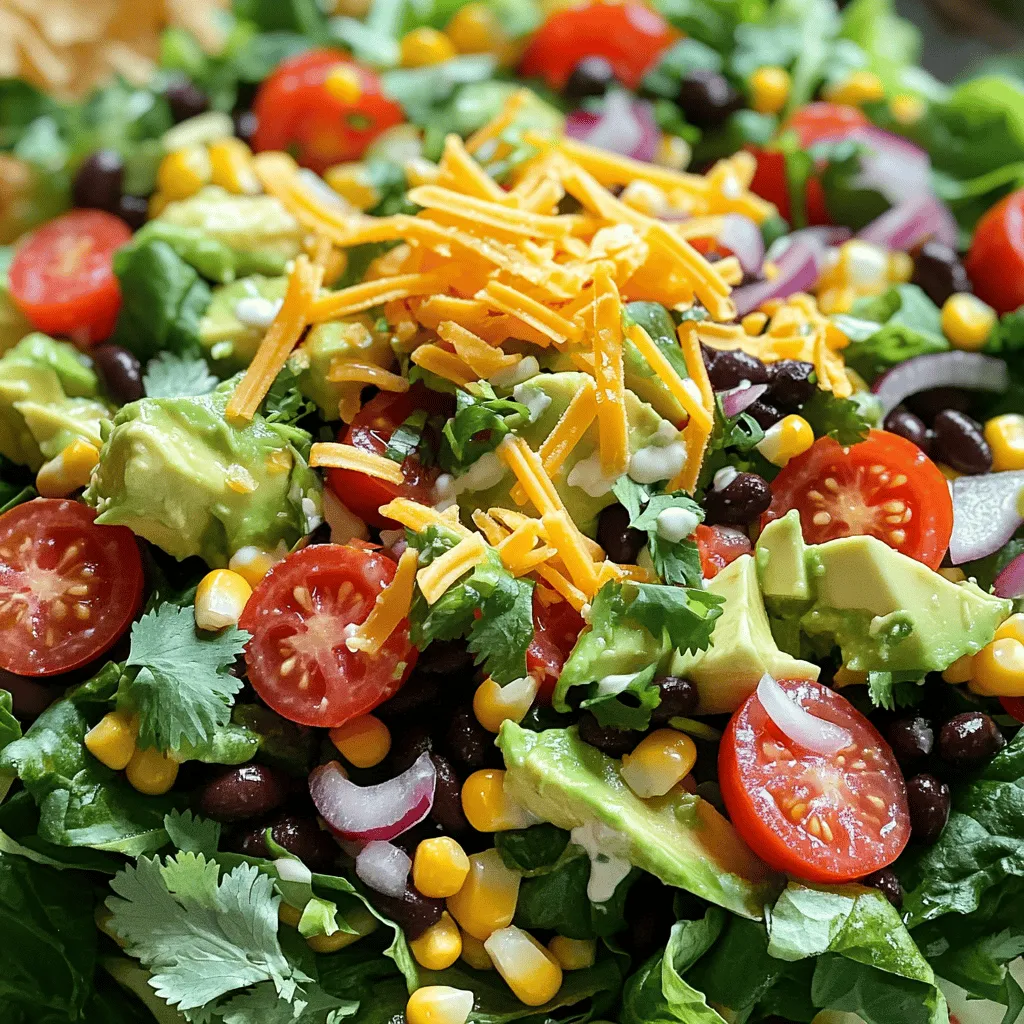
Are you ready to spice up your meal routine? Cowboy salad is a fun, tasty, and healthy option you’ll love! Packed with fresh ingredients, it’s not just a salad; it’s …
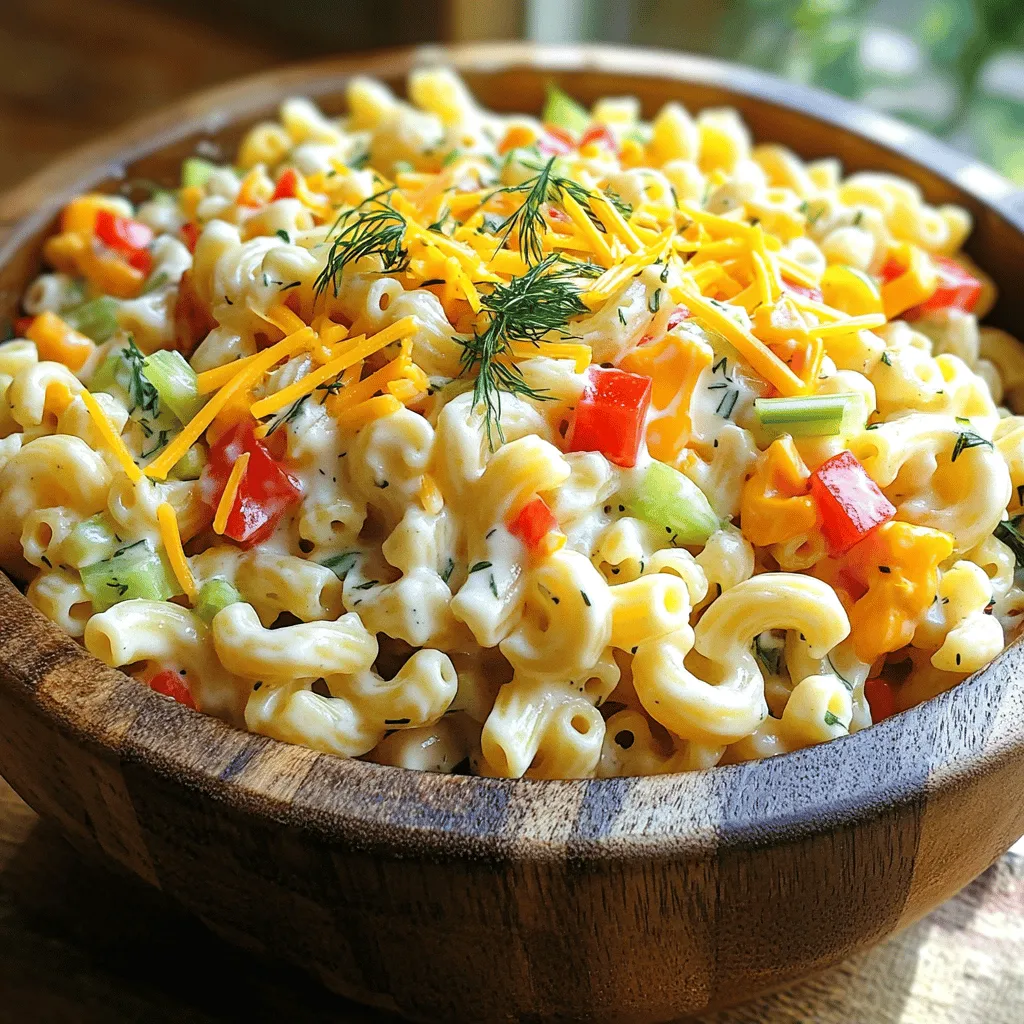
Are you ready to jazz up your lunch with Guy Fieri’s Macaroni Salad? This simple and tasty recipe will make your taste buds dance. With easy steps and fresh ingredients, …
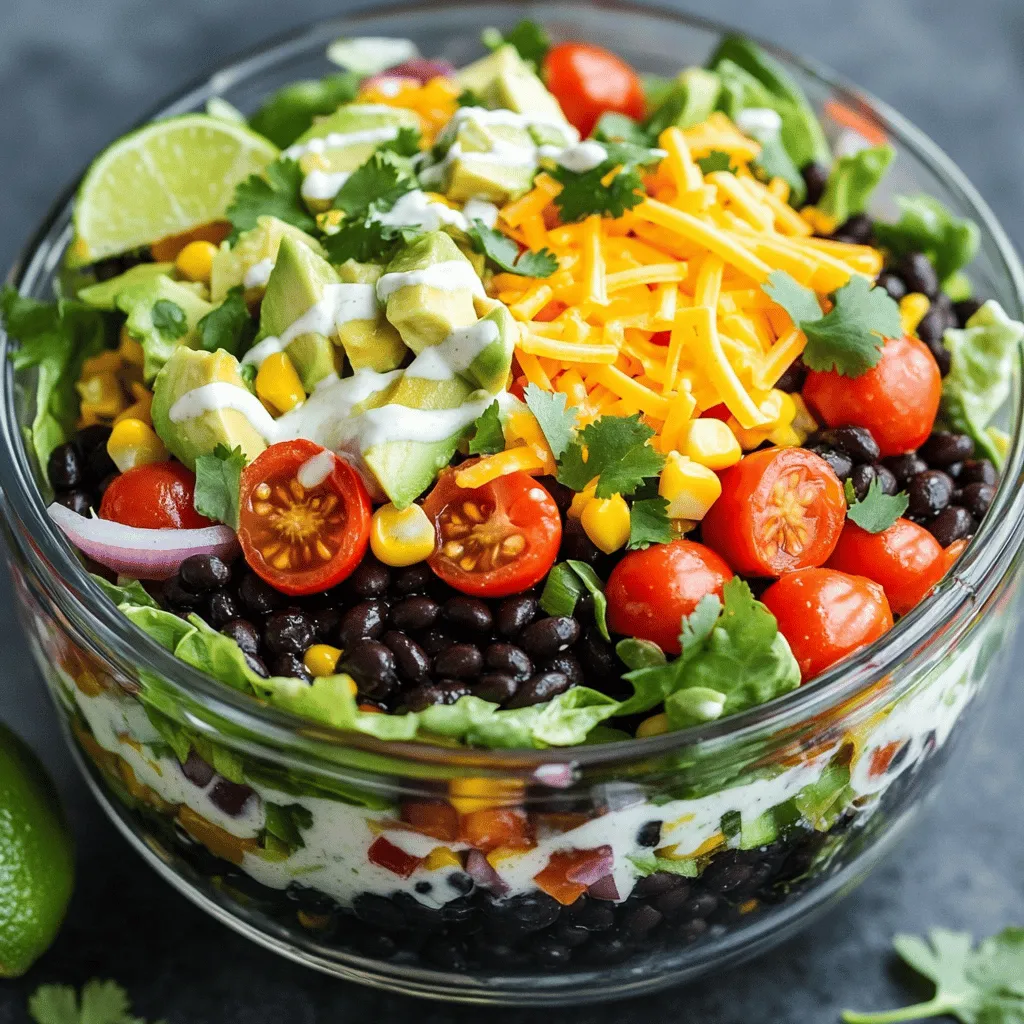
Get ready for a flavor explosion with my Black Bean Taco Salad with Creamy Salsa Dressing! This quick and healthy dish combines fresh ingredients like black beans, juicy tomatoes, and …

Get ready to elevate your snack game with my Savory Salmon Tartine with Dill Pickle Mustard Delight. This crisp, flavorful dish combines fresh smoked salmon, creamy cheese, and a splash …

Are you ready to elevate your kitchen game? Air Fryer Calzones are crispy, flavorful, and oh-so-easy to make! With simple ingredients and quick steps, you’ll impress family and friends with …
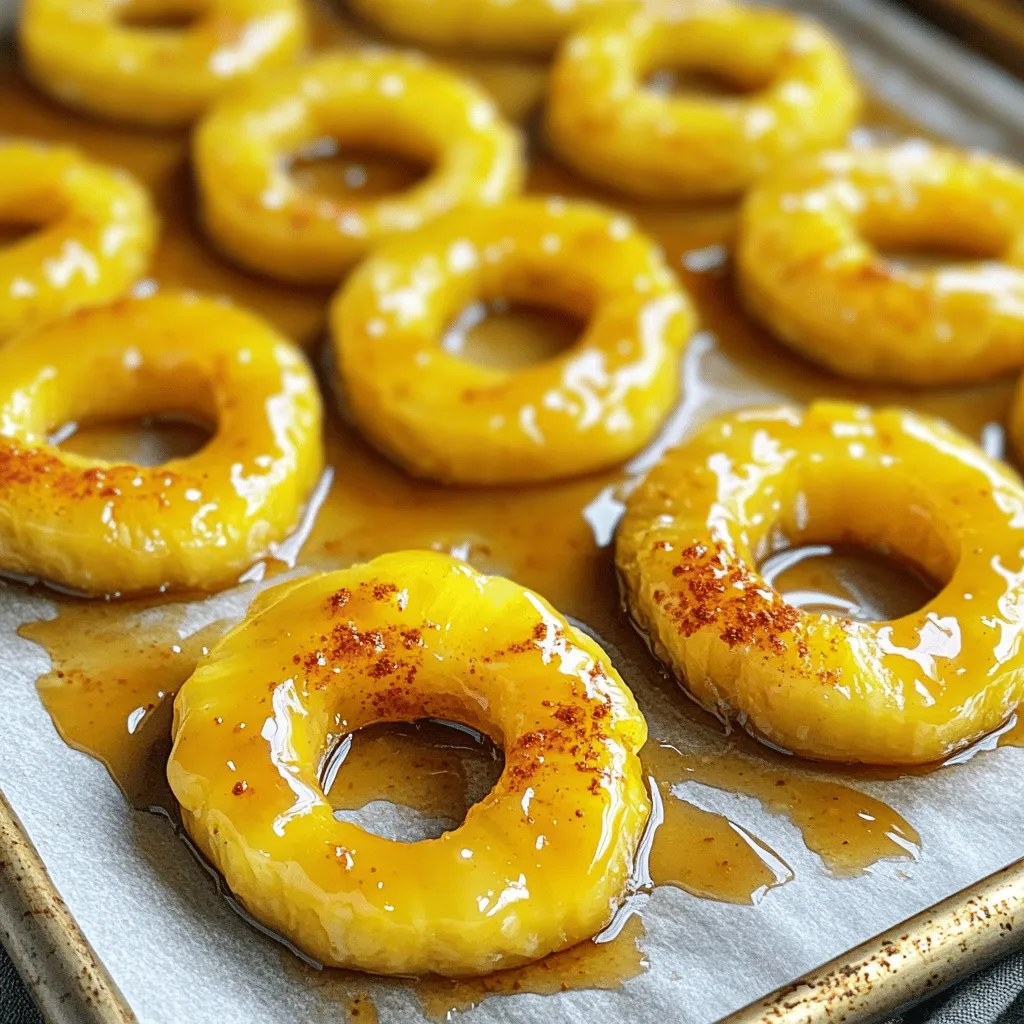
Are you ready to transform your kitchen into a candy wonderland? Pineapple Cowboy Candy is a sweet and spicy treat that’s easy to make at home. Whether you choose fresh …