Beef Flautas or Taquitos Crispy and Flavorful Treat
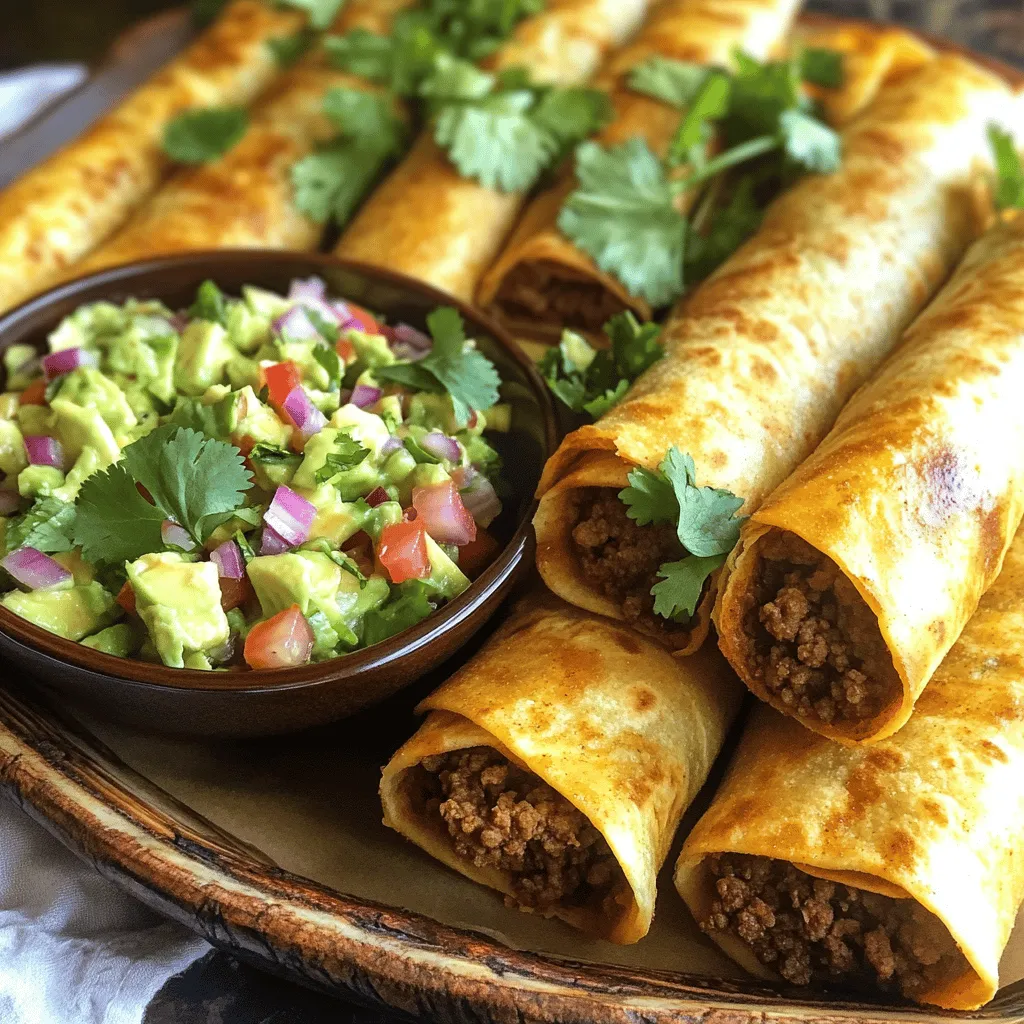
Are you ready to indulge in a crispy and flavorful treat? Beef flautas, or taquitos, offer the perfect crunch with every bite. Made with seasoned ground beef and warm corn …
Are you ready to indulge in a crispy and flavorful treat? Beef flautas, or taquitos, offer the perfect crunch with every bite. Made with seasoned ground beef and warm corn …

If you love the rich flavors of a Philly cheesesteak, you’ll adore this twist: Philly Cheesesteak Sloppy Joes! This easy meal combines ground beef, fresh veggies, and gooey cheese, all …
. In this recipe, the dry ingredients create the dough's structure, while the wet ingredients add moisture and flavor. The combination of spices brings the chai flavor to life. The warm milk activates the yeast, allowing the rolls to rise beautifully. Using the right balance of dry and wet ingredients ensures fluffy rolls. Measure accurately for the best results! Enjoy mixing these delightful ingredients together. They form the base for an unforgettable treat. To get started, combine warm milk, granulated sugar, and active dry yeast in a small bowl. Make sure the milk is warm, about 110°F (43°C). Let this mixture sit for 5-7 minutes. You want to see it get frothy and bubbly. This shows that the yeast is alive and ready to work. Next, whisk together the dry ingredients in a mixing bowl. This includes 2 ¼ cups of flour, salt, ground cinnamon, ground ginger, ground cardamom, and ground cloves. Once mixed, pour the activated yeast mixture into the bowl. Then, add melted butter and one large egg. Stir everything together with a wooden spoon until you have a shaggy dough. Now, it’s time to knead the dough. Gradually add the remaining flour as you knead on a lightly floured surface. You should knead the dough for about 5-7 minutes. It should become smooth and elastic. If the dough is too sticky, add a little more flour. After kneading, transfer the dough to a greased bowl. Cover it with a clean kitchen towel or plastic wrap. Place it in a warm area and let it rise for about 1 hour. The dough should double in size. This is an important step for fluffy chai cinnamon rolls. For the full recipe, check the reference section. To make fluffy chai cinnamon rolls, start with yeast. Proper yeast activation is key. Mix warm milk, sugar, and active dry yeast. Wait 5-7 minutes. You want a frothy mixture. This shows the yeast is alive and ready. Next, focus on the dough. Aim for a soft, elastic consistency. Knead the dough for about 5-7 minutes. If it feels sticky, add a bit more flour. The dough should spring back when you poke it. This ensures your rolls will rise well. For icing, consistency matters. Start with powdered sugar. Add 2-3 tablespoons of milk. Mix until smooth. If it’s too thick, add more milk slowly. You want it to drizzle nicely over the rolls. Adding spices can boost the flavor. Consider a pinch of ground cinnamon or nutmeg. A little extra spice can make your icing pop. Feel free to experiment with what you like. Pair your chai cinnamon rolls with a warm cup of chai tea. The flavors match perfectly. The spiciness of the chai enhances the rolls' sweetness. For special occasions, present your rolls on a nice platter. Drizzle icing generously and dust with cinnamon. Add fresh herbs or edible flowers for color. This makes your dish eye-catching and festive. For the full recipe, check out the [Full Recipe] for step-by-step instructions. Enjoy your delicious chai cinnamon rolls! {{image_4}} You can change the chai spices to fit your tastes. If you like more heat, add extra ginger or cardamom. For a sweeter roll, mix in more cinnamon. You can also add nuts like walnuts or pecans, or even dried fruits like raisins. This adds texture and flavor to your rolls. Try different combinations each time you bake! The icing can change the flavor of your rolls. A cream cheese icing gives a rich taste that pairs well with the spices. Just mix cream cheese, powdered sugar, and a bit of milk. You can also try flavored syrups, like maple or caramel. This gives your rolls a fun twist. Experiment with what you like best! If you need gluten-free rolls, you can swap out all-purpose flour. Use a gluten-free flour blend instead. Make sure the blend has a good balance of flours and starches. This helps keep the rolls fluffy. You might need to adjust the liquid a bit, so keep an eye on the dough. Enjoy making these rolls for everyone! To keep your chai cinnamon rolls fresh, wrap them in plastic wrap. You can also place them in an airtight container. This method locks in moisture and flavor. Store them in your fridge. They will stay fresh for up to three days. You can freeze unbaked rolls. After shaping them, place the rolls in a single layer on a baking sheet. Freeze them for about an hour, then transfer to a freezer-safe bag. This keeps them from sticking together. When you are ready to bake, let them thaw overnight in the fridge. Then, let them rise before baking. To reheat baked rolls, you can use the oven or the microwave. For the oven, preheat to 350°F (175°C) and warm the rolls for about 10-15 minutes. For the microwave, heat them for 15-20 seconds. This will keep them fluffy and warm. Chai cinnamon rolls last for about three days in the fridge. If you freeze them, they can last up to three months. Just make sure to wrap them well to avoid freezer burn. Enjoy the delightful taste of these rolls anytime! Yes, you can use instant yeast. It works well in most recipes. The main difference is how you use them. Active dry yeast needs to be dissolved in warm liquid first. Instant yeast can mix right into dry ingredients. If you use instant yeast, skip the proofing step. Just mix it in with the flour and other dry ingredients. You can use several options for milk. Almond milk, soy milk, or oat milk are great choices. These non-dairy options work well without changing the dough too much. The flavor may change slightly, but it will still be tasty. Just make sure to use a version that is unsweetened. Look for a golden brown color on top. The edges should be firm, but the center may still look soft. You can also use a toothpick. Insert it into the center of a roll; it should come out clean. If it has dough on it, bake longer. Trust your eyes and the toothpick test for perfect rolls. Making chai cinnamon rolls is fun and rewarding. You learned about the key ingredients, from spices to yeast. We discussed step-by-step instructions for preparing and baking them perfectly. Don't forget the helpful tips for fluffy rolls and delicious icing. In summary, enjoy the flexibility of variations, storage tips, and answers to common questions. With these insights, you can craft amazing rolls that impress anyone. So, roll up your sleeves and get baking!](https://tossedflavors.com/wp-content/uploads/2025/06/7028fbd7-d730-4544-91f0-67ed19d91ef8.webp)
Are you ready to treat yourself? This Chai Cinnamon Rolls recipe brings together warm spices and soft, fluffy dough to create a delightful experience. Each roll wraps you in comfort, …
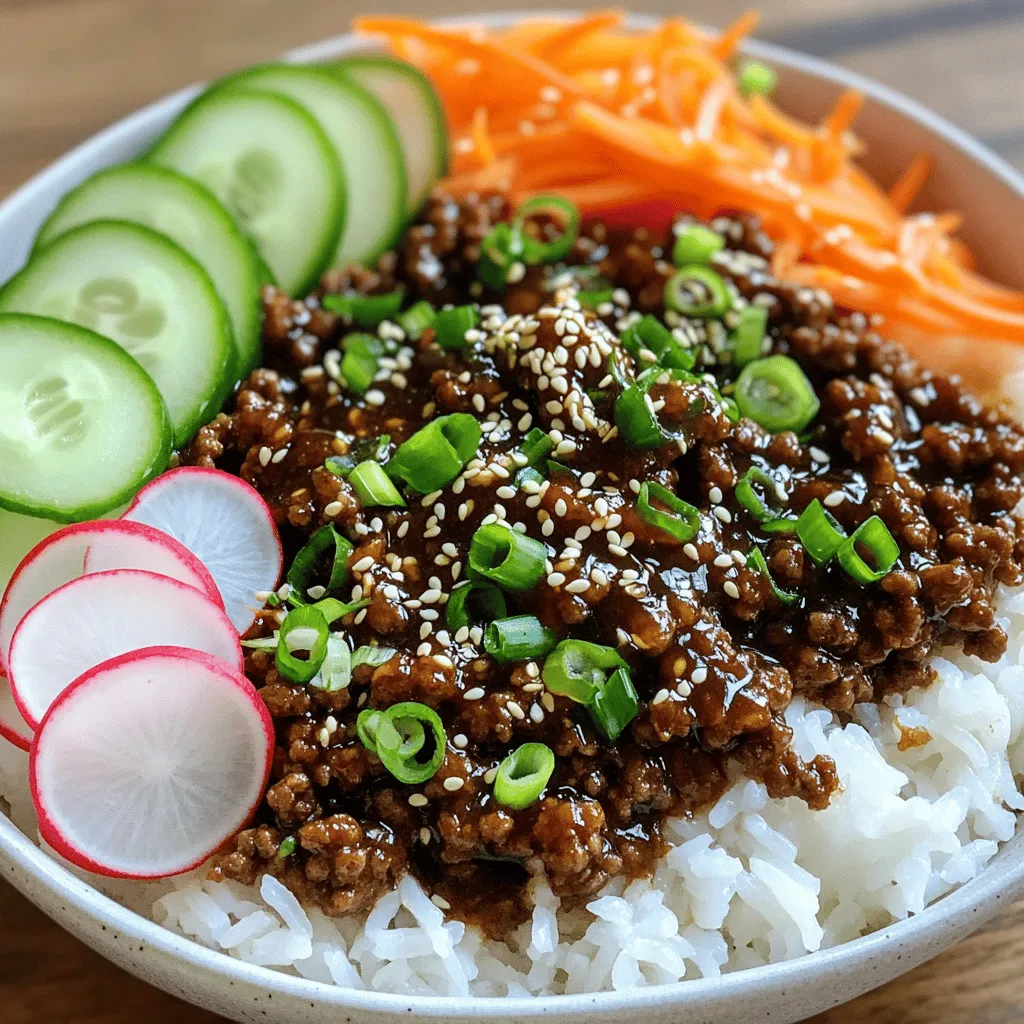
If you’re looking for a quick and tasty dinner idea, you’re in the right place! The Korean Ground Beef Bowl is not only flavorful but also easy to make. In …
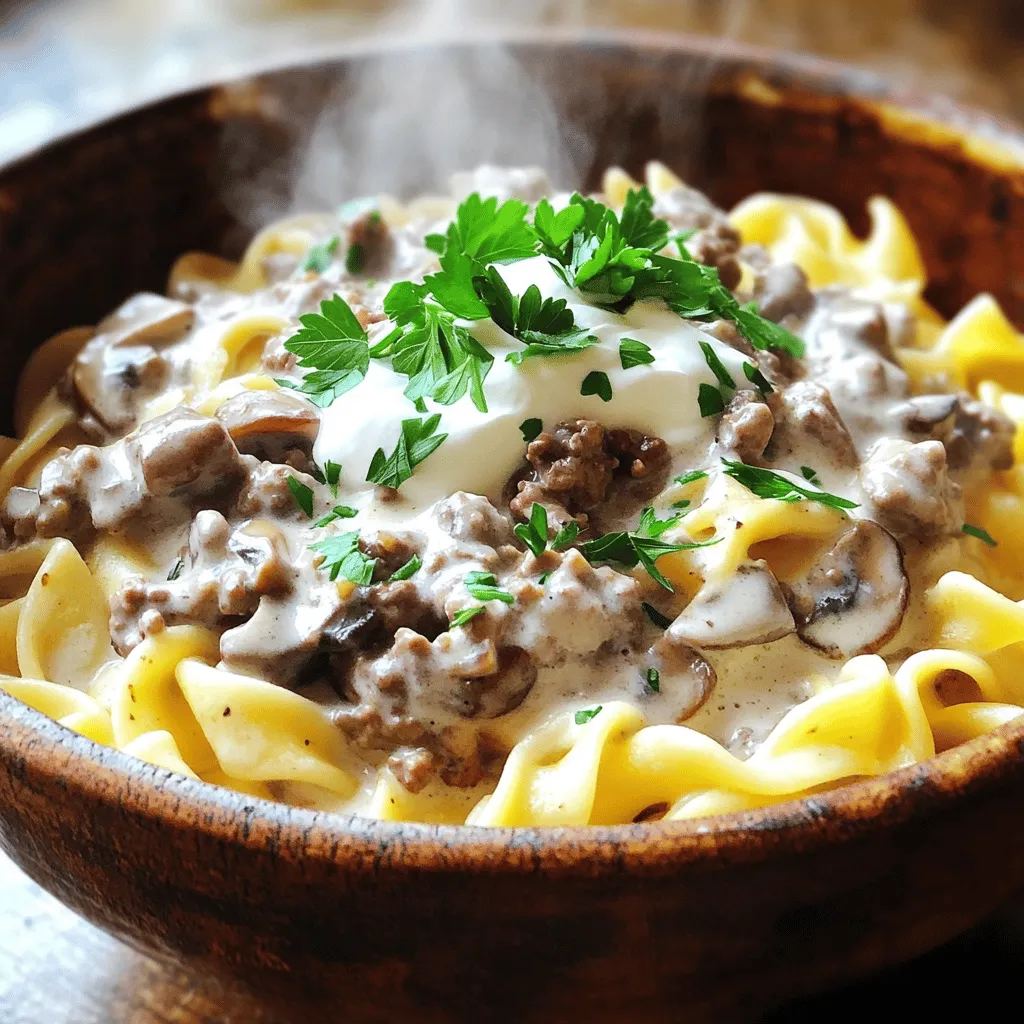
Are you ready to whip up a meal that’s both easy and packed with flavor? Ground Beef Stroganoff is the perfect dish for busy days or cozy nights. With just …
. It has all the details you need to make these tasty burritos right at home! You learned how to make a tasty burrito with simple steps. First, cook the beef, then layer your favorite ingredients in a tortilla. Don’t forget the tips for perfecting your rolls and adding flavors. You can also try vegetarian options or different cheeses. For storage, remember to refrigerate or freeze properly to enjoy later. Try customizing each burrito to fit your taste. Have fun making this dish, and enjoy every bite!](https://tossedflavors.com/wp-content/uploads/2025/06/6ca22f8a-0d5f-46bf-8459-ca7fa3d7b08c.webp)
Are you craving a meal that’s both tasty and satisfying? The Taco Bell Beefy Melt Burrito hits the spot with layers of seasoned beef, cheese, and your choice of toppings. …

Get ready to elevate your dinner game with Sweet Chili Lime Grilled Chicken! This dish combines the perfect mix of sweet and tangy flavors, making each bite explode with taste. …

Get ready to elevate your breakfast game with my Overnight Crème Brûlée French Toast! This luxurious dish combines rich custard, soft brioche, and a crispy brown sugar topping. You can …
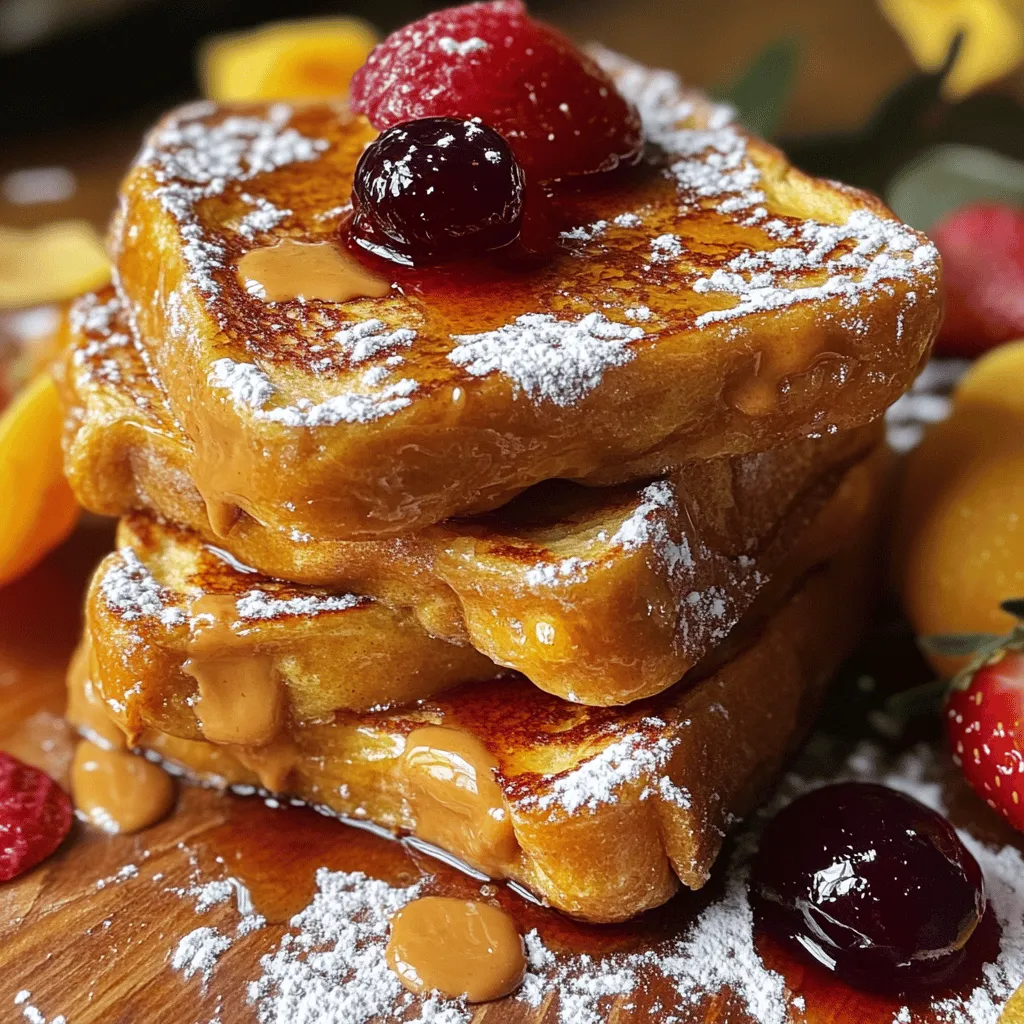
Get ready to transform your breakfast with Easy Peanut Butter & Jelly French Toast Delight! This fun twist on the classic dish combines the creamy goodness of peanut butter with …

Are you craving the bold flavors of a Chipotle burrito but want to whip it up at home? You’re in the right place! In this guide, I’ll share my Copycat …