Best Fish Tacos Delightful Recipe for Everyone
![- 1 lb white fish fillets (such as tilapia or cod) - 1 cup all-purpose flour - 1 teaspoon smoked paprika - 1 teaspoon garlic powder - 1 teaspoon ground cumin - ½ teaspoon freshly cracked black pepper - ½ teaspoon fine sea salt - 1 cup buttermilk (or use plain yogurt as a substitute) - Vegetable oil (for frying) - 8 small corn tortillas - 1 cup red cabbage, finely shredded - 1 ripe avocado, sliced - ½ cup fresh cilantro, roughly chopped - 1 lime, cut into wedges - ¼ cup spicy crema (sour cream mixed with your favorite hot sauce) Fresh, high-quality fish is key. It gives your tacos great flavor. Look for fish that smells clean and ocean-like. If you can't find fresh fish, frozen works too. Just make sure to thaw it properly. For dietary needs, you can swap ingredients. Use gluten-free flour for a gluten-free batter. If you're vegan, try tofu or jackfruit instead of fish. Both options yield tasty results! You can find the Full Recipe to guide you through the cooking process. Each ingredient plays a role in making your fish tacos delightful. Enjoy experimenting and finding what fits your taste best! First, rinse your fish fillets under cold water. This step cleans the fish and removes any unwanted particles. Next, pat the fillets dry using paper towels. Drying the fish ensures the batter sticks well. Now, cut the fish into bite-sized pieces. This makes the fish easy to eat. Season the pieces lightly with fine sea salt and freshly cracked black pepper. Simple seasoning enhances the fish's natural flavor. For the batter, grab a medium bowl. In it, whisk together the following dry ingredients: - 1 cup all-purpose flour - 1 teaspoon smoked paprika - 1 teaspoon garlic powder - 1 teaspoon ground cumin - ½ teaspoon freshly cracked black pepper - ½ teaspoon fine sea salt Mix these ingredients well. A well-combined batter gives a consistent coating. This helps the fish fry evenly and adds great taste. Now, heat some vegetable oil in a large skillet. Pour in about ½ inch of oil and set the burner to medium-high heat. To check if the oil is hot enough, drop a small pinch of the flour mixture into the oil. If it sizzles right away, you’re ready to fry. Carefully add the coated fish pieces to the skillet. Avoid overcrowding the pan, as this causes the temperature to drop. Fry each side for 3-4 minutes until golden brown and crispy. Once cooked, transfer the fish to a plate lined with paper towels to soak up excess oil. To warm the tortillas, use a separate dry skillet. Heat each corn tortilla over medium heat for about 30 seconds on each side. This makes them soft and easy to fold. Now, it’s time to assemble your tacos. Place a few pieces of crispy fried fish on each warmed tortilla. Top with shredded red cabbage, avocado slices, and freshly chopped cilantro. Drizzle with spicy crema for a kick. Finish with a squeeze of fresh lime juice for extra zing. Enjoy your tasty fish tacos hot from the skillet! For the full recipe, check out the [Full Recipe]. For fish tacos, I recommend using white fish like tilapia or cod. Both have a mild taste and cook well. If you can, look for fresh, sustainable options. Local fish markets often have great choices. Ask about the catch of the day. Supporting local fishermen helps the environment and tastes better too. When frying fish, avoid overcrowding the pan. If you add too much fish at once, it lowers the oil temperature. This can make the fish soggy instead of crispy. Fry in batches if needed. To keep the oil hot, use a thermometer. Aim for 350°F to 375°F. If you don't have a thermometer, drop a small piece of batter into the oil. If it bubbles and sizzles, the oil is ready. For toppings, I suggest shredded red cabbage, ripe avocado, and fresh cilantro. These add crunch and creaminess. You can also try mango salsa or pickled onions for a twist. If spicy crema is too hot for you, mix plain yogurt with lime juice and salt. This gives a nice tang without the heat. Enjoy experimenting with different toppings to find your favorite! {{image_4}} Fish tacos can change in style and flavor. Let's explore some fun ways to switch things up! Grilled fish taco recipe Grilling fish gives it a smoky taste. To make grilled fish tacos, marinate the fish fillets in lime juice, olive oil, and spices. Grill them on medium heat for about 3-4 minutes on each side. This method keeps the fish moist and adds great flavor. Baking fish for a healthier option Baking is a great way to enjoy fish tacos with less oil. Simply season the fish fillets and place them on a baking tray. Bake at 400°F for 15-20 minutes. This method reduces fat but keeps the taste delicious. Ideas for unique accompaniments Adding special toppings can take your tacos to the next level. Try mango salsa for a sweet twist. You can also use pickled onions for a tangy crunch. Both of these toppings add bright colors and flavors. Elevating flavors with fresh herbs and spices Fresh herbs like cilantro or mint can make your tacos pop. You can also sprinkle some chili flakes or cumin for extra warmth. These small touches can greatly enhance the taste of your tacos. Gluten-free batter alternatives If you need a gluten-free option, use rice flour or chickpea flour. These alternatives work well for the batter. They also give the fish a nice crunch without gluten. Vegan fish taco options with tofu or jackfruit For a vegan twist, switch fish with tofu or jackfruit. Tofu can be marinated and grilled or fried. Jackfruit can be shredded and seasoned to mimic pulled fish. Both options can create a tasty and satisfying meal for everyone. Explore the full recipe to see how you can make these delicious fish tacos at home! To keep your fish tacos fresh, store them properly. Place leftovers in an airtight container. Refrigerate them within two hours of cooking. This helps prevent bacteria growth. Use the tacos within two days for the best taste. When reheating, avoid using the microwave. Instead, heat the tacos in a skillet over medium heat. This method keeps the fish crispy. Warm for about three minutes on each side. If you prefer, you can reheat them in an oven set to 350°F for about 10 minutes. You can freeze fish tacos for later use. However, it's best to freeze the components separately. Freeze the fish and tortillas in airtight bags. Keep them frozen for up to three months. When you want to enjoy them, thaw the fish in the fridge overnight. For tortillas, use the microwave or a skillet. Just heat them until they're warm and soft. After thawing, reheat the fish in a skillet until hot. This keeps your meal safe and tasty. You can tell fish is cooked when it turns opaque and flakes easily with a fork. The inside should reach 145°F (63°C). I like to check the thickest part of the fish. If it looks shiny and firm, it’s ready. Overcooked fish can become dry, so keep an eye on it. Yes, frozen fish works well! Thaw it in the fridge overnight for the best results. If you’re short on time, place the fish in a sealed bag and soak it in cold water for about an hour. Pat it dry before you season and coat it. This helps the batter stick better. You can serve fish tacos in many fun ways. I love using warm corn tortillas as a base. Top them with shredded cabbage, sliced avocado, and fresh cilantro. A squeeze of lime juice adds brightness. Serve with salsa or hot sauce on the side for extra flavor. To add heat, you can use spicy crema made with sour cream and your favorite hot sauce. You can also sprinkle cayenne pepper or add sliced jalapeños. Another option is to mix some diced chili peppers into your toppings. Adjust the spice level to your taste! For the full recipe, check out the Crispy Delight Fish Tacos. This blog post covered the best fish taco recipe, from fresh fish to tasty toppings. I shared how to prepare and fry fish for a crispy delight. You learned about cooking methods, storage tips, and common questions. Making fish tacos is fun and easy. Enjoying them with friends and family brings joy. Dive into this tasty adventure and make your own flavorful fish tacos today!](https://tossedflavors.com/wp-content/uploads/2025/06/d1abb92b-3068-4ac0-acc5-ee1dfd36993d.webp)
Are you ready to take your taco game to a whole new level? My Best Fish Tacos” recipe promises delight in every bite! With fresh, high-quality fish and tasty toppings, …
Are you ready to take your taco game to a whole new level? My Best Fish Tacos” recipe promises delight in every bite! With fresh, high-quality fish and tasty toppings, …

Are you ready to impress your family with a dish that’s both easy and packed with flavor? This Lemon Butter Baked Tilapia recipe uses simple ingredients like fresh lemon juice …

If you want a quick yet impressive dinner, let me introduce you to Marry Me Salmon. This dish will win over your taste buds with its rich flavor and stunning …
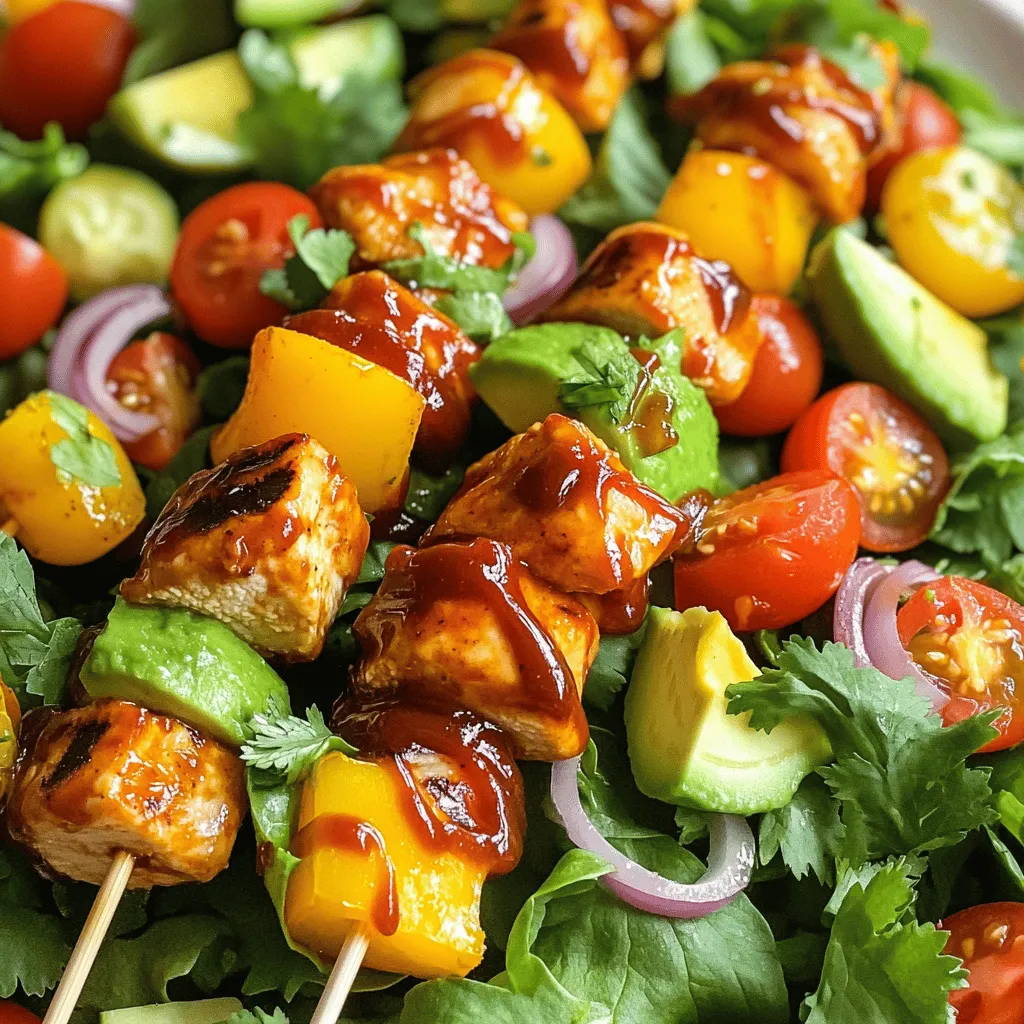
If you’re craving a meal that’s both tasty and healthy, look no further! The BBQ Chicken Skewer Salad is a perfect mix of flavors and nutrition. With juicy chicken skewers, …
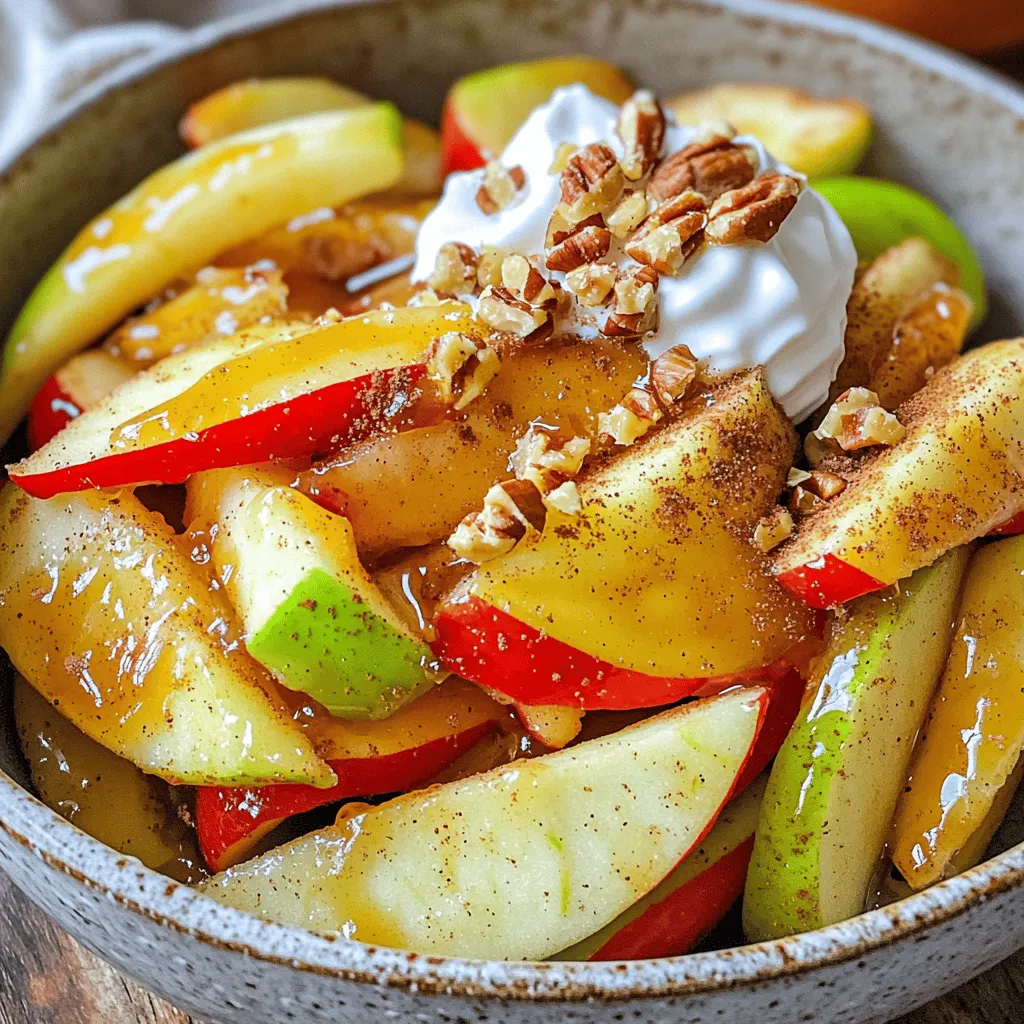
Craving a delicious and easy dessert? I have just the thing! Air fryer apples are sweet, simple, and packed with flavor. Using just a few fresh ingredients, you can create …

Looking for a simple yet delicious family meal? You’ll love these ricotta stuffed shells. They’re easy to make and packed with cheesy goodness that everyone will enjoy! With a dose …

Are you ready to spice up your meal routine? Hot Honey Chicken Biscuits are a mouthwatering blend of sweet and heat that you need to try! This easy recipe is …

Looking for a sweet and easy dessert? Let me show you how to make Easy Baked Peaches with Cinnamon Sugar Delight. This recipe highlights juicy peaches, warm spices, and a …

Craving a tasty and healthy snack? Try these Frozen Greek Yogurt Peanut Butter Bites! They’re simple to make and perfect for both kids and adults. With creamy Greek yogurt, rich …

Get ready for a flavor explosion with my Bang Bang Chicken Skewers! This dish combines tender chicken with a rich, spicy sauce that will thrill your taste buds. Not only …